Insights from Zee Palm's Team
We talk about products, app development, and next-generation apps.

10 Tips for Accessible Color Palettes in Mobile App Design
Creating an accessible color palette for your mobile app is crucial for ensuring a great user experience for everyone, including those with visual impairments. Here are the key points to keep in mind:
Understand and Apply Contrast Ratios
- Ensure a minimum contrast ratio of 4.5:1 for normal text and 3:1 for large text
- Use tools like WebAIM Contrast Checker or ColorZilla to test your color palette
Test Color Contrast for All Themes
- Check that your color palette works well across different themes and backgrounds
- Use tools like WebAIM Contrast Checker or ColorZilla for testing
Avoid Using Color Alone to Convey Information
- Don't rely solely on color to share information, as some users may have color vision deficiencies
- Provide alternative visual cues like patterns, icons, or text labels
Use Accessible Color Combinations
- Choose color combinations that meet WCAG guidelines for contrast ratios
- Test your combinations with tools like WebAIM Color Contrast Checker or WCAG Color Contrast Analyzer
Leverage Accessibility Tools and Resources
- Utilize tools like WebAIM Color Contrast Checker, WCAG Color Contrast Analyzer, and Accessibility Developer Tools to identify and resolve accessibility issues
Plan for Accessibility from the Start
- Incorporate accessibility principles into your design process from the beginning
- Involve users with disabilities in the design and testing phases
Regularly Test Your App with Real Users
- Conduct usability testing with a diverse group of users, including those with visual impairments
- Gather feedback and make improvements based on user testing results
Consider Cultural and Contextual Color Meanings
- Research the cultural associations and meanings of colors in your target audience
- Ensure your color choices are appropriate and respectful for your target market
Use Color to Create a Visual Hierarchy
- Leverage color to establish a clear visual hierarchy and guide users' attention
- Use contrasting colors for important elements, and group related items with the same color
Incorporate Feedback and Continuously Improve
- Gather user feedback, conduct regular testing, and refine your color palette accordingly
- Leverage accessibility tools to identify areas for improvement in your color scheme
By following these tips, you can create a mobile app with an accessible color palette that provides a great user experience for everyone, regardless of their visual abilities.
Quick Comparison: Accessible Color Palette Tools
ToolPurposeWebAIM Color Contrast CheckerTests color contrast ratiosColorZillaChecks color values and contrastWCAG Color Contrast AnalyzerAnalyzes color contrast for accessibilityAccessibility Developer ToolsAnalyzes color contrast and provides recommendations
Related video from YouTube
1. Understand and Apply Contrast Ratios
Accessibility
When designing a mobile app, it's important to make sure everyone can use it easily. One key part of this is color contrast. Good contrast helps users with visual impairments, like color blindness or low vision, to navigate the app.
Visual Appeal
A color palette with proper contrast ratios looks better and makes the app more engaging.
Usability
Correct contrast ratios make the app easier to use. When text and background colors contrast well, users can read and understand the content quickly, reducing eye strain.
Compliance with WCAG
The Web Content Accessibility Guidelines (WCAG) suggest a contrast ratio of at least 4.5:1 for normal text and 3:1 for large text. This helps users with visual impairments access the content.
To check contrast ratios, you can use online tools like the WebAIM Contrast Checker or ColorZilla. These tools help you test your color palette to ensure it meets WCAG guidelines.
ToolPurposeWebAIM Contrast CheckerTests color contrast ratiosColorZillaChecks color values and contrast
2. Test Color Contrast for All Themes
Accessibility
Ensure your app's color palette works for everyone, including those with visual impairments. Testing color contrast for all themes helps you spot issues and make adjustments so everyone can use your app.
Visual Appeal
Good color contrast makes your app look modern and clean. This improves the user experience and keeps users engaged.
Usability
Proper color contrast makes text easy to read and reduces eye strain. This helps users navigate your app more easily.
To test color contrast for all themes, use tools like the WebAIM Contrast Checker or ColorZilla. These tools help you check your color palette against different themes and find any issues.
ToolPurposeWebAIM Contrast CheckerTests color contrast ratiosColorZillaChecks color values and contrast
3. Avoid Using Color Alone to Convey Information
Accessibility
Don't rely only on color to share information in your mobile app. Some users can't see certain colors, which can make your app hard to use. About 300 million people worldwide have color vision deficiencies.
Compliance with WCAG
The Web Content Accessibility Guidelines (WCAG) 2.1 Success Criterion (SC) 1.4.1, "Use of Color," states: "Color is not used as the only visual means of conveying information, indicating an action, prompting a response, or distinguishing a visual element." Always provide other visual cues like patterns, icons, or text to support the use of color.
Alternative Visual CuesExamplesPatternsStripes, dotsIconsCheckmarks, crossesTextLabels, instructions
4. Use Accessible Color Combinations
Accessibility
When designing a mobile app, it's important to choose colors that everyone can see, including users with visual impairments. Using accessible color combinations helps achieve this goal.
Visual Appeal
Accessible color combinations can still look good. High-contrast color schemes, for example, make your app more readable and easier to navigate.
Usability
Accessible colors reduce the cognitive load on users, making it easier for them to focus on your app's content. This is especially helpful for users with visual impairments.
Compliance with WCAG
The Web Content Accessibility Guidelines (WCAG) 2.1 recommend a contrast ratio of at least 4.5:1 for normal text and 3:1 for large text. Following these guidelines ensures your app is accessible and compliant.
To check your color combinations, use tools like the WebAIM Color Contrast Checker or the WCAG Color Contrast Analyzer.
ToolPurposeWebAIM Color Contrast CheckerTests color contrast ratiosWCAG Color Contrast AnalyzerAnalyzes color contrast for accessibility
5. Leverage Accessibility Tools and Resources
Accessibility
Use accessibility tools to spot issues and ensure your app meets WCAG guidelines. These tools help make your app usable for everyone.
Visual Appeal
Accessibility tools can help you create a color scheme that looks good and meets your brand's style. They check color contrast ratios to ensure your app's colors are both accessible and attractive.
Usability
These tools can improve your app's usability by identifying where color is used to convey information. Tools that simulate color blindness can help you test your app and ensure all users can understand the content.
Compliance with WCAG
To meet WCAG guidelines, use tools that analyze color contrast ratios and suggest improvements. Here are some popular tools:
ToolPurposeWebAIM Color Contrast CheckerTests color contrast ratiosWCAG Color Contrast AnalyzerAnalyzes color contrast for accessibilityAccessibility Developer ToolsAnalyzes color contrast and provides recommendations
6. Plan for Accessibility from the Start
When designing a mobile app, think about accessibility from the beginning. This means including accessibility principles in your design process right away, rather than adding them later. By planning early, you can make sure your app is usable by everyone.
Accessibility
Accessibility is about making sure everyone can use your app, not just meeting guidelines. By designing with accessibility in mind, you create an app that is easier and more enjoyable for everyone.
Visual Appeal
An accessible design can also look good. Use high-contrast colors, clear fonts, and easy navigation to make your app both accessible and attractive.
Usability
Planning for accessibility from the start can improve your app's overall usability. By addressing potential issues early, you create a better experience for all users.
To make sure your app meets accessibility standards, involve users with disabilities in the design and testing process. This helps you find and fix potential issues, ensuring your app is usable by everyone.
sbb-itb-8abf120
7. Regularly Test Your App with Real Users
Accessibility
Testing with real users ensures your app works for everyone, including those with visual impairments. It's not just about checking color contrast or using tools; it's about seeing how users with disabilities interact with your app and finding areas to improve.
Usability
Testing with real users helps you find usability issues you might miss otherwise. For example, you might learn that your app's navigation is confusing or that some features are hard to use. By involving users with disabilities, you get useful feedback to make your app better.
Tips for Effective User Testing
TipDescriptionRecruit diverse participantsInclude users with different abilities and disabilities.Use various testing methodsCombine in-person testing, remote testing, and surveys.Test on different devicesEnsure your app works well on various devices and platforms.Analyze feedbackUse the feedback to make informed design decisions.
8. Consider Cultural and Contextual Color Meanings
When designing a mobile app, think about how colors are perceived in different cultures. Colors can evoke various emotions and associations, and what works in one culture might not in another.
Accessibility
Understanding color meanings is important for accessibility. For example, in some Asian cultures, white is linked to mourning, while in Western cultures, it represents purity. Using white as a main color in an app for an Asian audience might be seen as insensitive.
Visual Appeal
Colors that are attractive in one culture might not be in another. Knowing these differences helps you design an app that looks good to your target audience.
Usability
Colors can guide users and convey information. If the colors aren't relevant to the user's culture, they might not understand the intended message, leading to confusion.
To make sure your app is respectful and easy to use, research the color associations in your target audience's culture. Use this knowledge to design an app that is user-friendly and visually appealing.
AspectExampleAccessibilityWhite for mourning in Asia, purity in the WestVisual AppealColors attractive in one culture may not be in anotherUsabilityColors guiding users might not work if culturally irrelevant
9. Use Color to Create a Visual Hierarchy
Creating a visual hierarchy in your mobile app helps guide users' attention and makes navigation easier. Color is key in setting this hierarchy, as it can highlight important elements and organize content.
Accessibility
A clear visual hierarchy helps users with visual impairments navigate your app. Using color to create contrast and highlight key elements makes your app more accessible.
Visual Appeal
A visual hierarchy using color can also make your app look better. By using a consistent color scheme and balancing contrast, you can create an engaging design.
Tips for Creating a Visual Hierarchy
TipDescriptionUse contrasting colorsDraw attention to important elements like buttons.Balance contrastMix light and dark colors to create interest.Group related elementsUse the same color for similar items, like navigation links.Avoid too many colorsToo many colors can confuse users.
10. Incorporate Feedback and Continuously Improve
Gathering feedback and making regular updates to your app's color palette is key to keeping it accessible and user-friendly. This involves collecting user feedback, testing, and refining your color scheme.
Accessibility
Get feedback from users with visual impairments to find areas for improvement. Use usability testing, surveys, and focus groups to gather this information. By listening to users, you can make better decisions about your color scheme.
Usability
Regular testing with real users helps you spot issues with color contrast. Use usability testing sessions, A/B testing, and user feedback to refine your color palette. This will improve the overall user experience.
Tips for Continuous Improvement
TipDescriptionGather user feedbackCollect feedback from users with visual impairments through usability testing, surveys, and focus groups.Test and refineRegularly test your app with real users and adjust your color palette based on feedback.Use accessibility toolsLeverage tools to identify areas of improvement in your color palette.Continuously iterateKeep updating your color palette based on user feedback and testing results.
Color Contrast Examples
When designing a color palette for your mobile app, consider the contrast ratio between different color combinations. Here are some examples:
Color CombinationContrast RatioAccessibility GuidelineBlack text on white background21:1WCAG 2.2 AA compliantRed text on green background3.5:1Not WCAG 2.2 AA compliantWhite text on dark blue background15:1WCAG 2.2 AA compliantYellow text on light blue background1.5:1Not WCAG 2.2 AA compliant
The table shows that some color combinations meet the WCAG 2.2 AA guidelines, while others do not. Use tools like the WebAIM Color Contrast Checker or the Accessibility Scanner by Google to test your color palette.
Tips for Designing Your Color Palette
- Use a minimum contrast ratio of 4.5:1 for normal text and 3:1 for large text and icons.
- Avoid using color alone to convey information, as this can be hard for users with color vision deficiencies.
- Test your color palette with real users to gather feedback and find areas for improvement.
Final Thoughts
As we wrap up our 10 tips for accessible color palettes in mobile app design, remember that color accessibility is essential. By using these tips, you can create a more user-friendly experience for everyone.
Color accessibility is not a one-time task. It requires regular testing, feedback, and updates. Start by prioritizing accessibility and involving users with disabilities in your design process. This way, you can ensure your app works well for everyone.
It's not just about meeting guidelines; it's about making everyone feel included. By focusing on color accessibility, you can positively impact many people's lives.
Take the first step today and start designing a more accessible mobile app that everyone can enjoy.
FAQs
How do I make my color palette accessible?
- Use high-contrast color combinations.
- Choose dark text on a light background or light text on a dark background.
- Avoid red and green combinations, as about 5% of people can't distinguish between these colors.
What is ADA compliant color?
- For normal text, use color combinations with a contrast ratio of at least 4.5:1.
- For large text and graphics, use a contrast ratio of at least 3:1.
- These ratios help ensure that your content is accessible to people with visual impairments.
Related posts

Unity Responsive UI Layout Guide
Creating responsive UI layouts in Unity is crucial for ensuring your app or game provides an optimal user experience across different devices and screen sizes. This guide covers the essential techniques for building UIs that dynamically adapt to various resolutions, orientations, and aspect ratios.
Related video from YouTube
Key Takeaways
- Set up the Canvas and configure the Canvas Scaler component to handle different screen sizes
- Use anchors and anchor presets to position UI elements relative to their parent
- Leverage layout groups (horizontal, vertical, grid) for automatic element arrangement
- Implement Content Size Fitters to dynamically resize elements based on content
- Combine anchoring, layout groups, and Content Size Fitters for advanced responsive design
- Optimize performance by minimizing draw calls, using batching and atlasing
- Test your UI on different devices and resolutions, debug layout issues
Quick Comparison: Layout Groups
Layout GroupPurposeAdvantagesHorizontalArrange child elements horizontallySimplifies horizontal arrangements, supports dynamic resizing, automatic alignmentVerticalArrange child elements verticallySimplifies vertical arrangements, supports dynamic resizing, automatic alignmentGridArrange child elements in a gridSupports complex grid layouts, automatic alignment, ideal for tables or matrices
By following the techniques outlined in this guide, you can create user interfaces that adapt seamlessly to any device, ensuring a consistent and engaging experience for your users.
Getting Started
To create responsive UI layouts in Unity, you need to understand Unity's UI components and layout system. This guide assumes you have basic knowledge of Unity and C# scripting.
Understanding Unity UI

Unity's UI system revolves around the Canvas, which is the area where all UI elements reside. The Canvas scales to fit all screen sizes, ensuring your UI looks consistent across different devices. To start building your UI:
- Create a Canvas: Go to
GameObject>UI>Canvas. This will be the parent object for all your UI elements. - Add UI elements: Go to
GameObject>UIand select the element you need, such asButton,Text,Image, etc.
C# Scripting Basics
Understanding C# scripting is crucial for advanced techniques in Unity's UI system. You'll need to know how to:
- Write scripts to manipulate UI elements
- Respond to user input
- Adjust to different screen sizes and orientations
If you're new to C# scripting, start by learning the basics of C# programming and Unity's scripting API.
Setting Up the Canvas
Setting up a responsive UI layout in Unity starts with creating a new Canvas and configuring the Canvas Scaler component. This section will guide you through the initial setup process.
Creating a New Canvas
To create a new Canvas:
- Go to
GameObject>UI>Canvas. - This will create a new Canvas game object in your scene. The Canvas is the root object for all your UI elements.
Canvas Scaler Component
The Canvas Scaler component controls how UI elements scale with different screen sizes. To add the Canvas Scaler component:
- Select the Canvas game object.
- Go to
Add Component>UI>Canvas Scaler.
Configuring Canvas Scaler
The Canvas Scaler component has several properties that need to be configured:
PropertyFunctionUI Scale ModeDetermines how the UI elements scale with different screen sizes.Reference ResolutionThe resolution that the UI is designed for.Screen Match ModeControls how the UI adjusts to different screen sizes and orientations.MatchA value between 0 and 1 that determines how the UI scales with different screen sizes.
To configure the Canvas Scaler:
- Set
UI Scale ModetoScale With Screen Size. This allows the UI elements to scale with different screen sizes. - Set
Reference Resolutionto the resolution that your UI is designed for, such as 1080p or 4K. - Set
Screen Match ModetoMatch Width or Height. This allows the UI to adjust to different screen sizes and orientations.
Anchoring UI Elements
Anchoring UI elements is key to making responsive UI layouts in Unity. Anchors set the position and scaling of UI elements relative to their parent, helping them fit different screen sizes and resolutions.
What are Anchors?
Anchors are points that define how a UI element is positioned and scaled within its parent. In Unity, anchors are shown as four triangles forming an X. When you select a UI element, you can see its anchors in the Scene view.
Using Anchor Presets
Unity offers several anchor presets for common anchoring scenarios. To use an anchor preset:
- Select the UI element you want to anchor.
- In the Rect Transform component, click on the anchor preset button.
- Choose the desired preset (e.g., top-left, center, bottom-right).
For example, to anchor a button to the lower-right corner of the screen, choose the bottom-right preset. This keeps the button in the same position relative to its parent, even when the screen size or resolution changes.
sbb-itb-8abf120
Layout Groups
Learn how layout groups can automate the positioning and sizing of UI elements.
Types of Layout Groups
Unity offers three types of layout groups: Horizontal, Vertical, and Grid. Each type helps in arranging UI elements in a specific way.
Layout GroupPurposeAdvantagesHorizontalArrange child elements in a horizontal lineSimplifies horizontal arrangements, supports dynamic resizing, and offers automatic alignmentVerticalArrange child elements in a vertical lineSimplifies vertical arrangements, supports dynamic resizing, and offers automatic alignmentGridArrange child elements in a gridSupports complex grid layouts, offers automatic alignment, and is ideal for tables or matrices
Configuring Layout Groups
To set up a layout group:
- Select the UI element you want to group.
- Add the corresponding layout group component (e.g., Horizontal Layout Group, Vertical Layout Group, or Grid Layout Group).
- Adjust the properties to achieve the desired behavior.
For example, to create a horizontal layout group:
- Add the Horizontal Layout Group component to the parent element.
- Set the
Child Alignmentproperty toMiddle Centerto center the child elements horizontally.
Pros and Cons
AdvantagesDisadvantagesAutomates UI element positioning and sizingLimited control over advanced positioning and layout customizationSupports responsive design and dynamic resizingCan be complex to set up and configureSimplifies UI layout creation and managementMay not be suitable for complex, custom layouts
Content Size Fitters
Content Size Fitters help automatically adjust the size of UI elements based on their content. This is useful for dynamic text, images, or other elements that change size during runtime.
What are Content Size Fitters?
A Content Size Fitter is a Layout Controller that adjusts the size of the Rect Transform based on the content. It can be added to any UI element, like Text, Image, or Layout Group, to resize it dynamically.
The Content Size Fitter has two main properties: Horizontal Fit and Vertical Fit. These properties control how the UI element resizes to fit its content. You can set these properties to Unconstrained, Min Size, or Preferred Size.
Setting Up Content Size Fitters
To set up a Content Size Fitter:
- Select the UI element you want to resize.
- Add a Content Size Fitter component to the element.
- Configure the Horizontal Fit and Vertical Fit properties.
For example, to make a Text component resize to fit its content, set both Horizontal Fit and Vertical Fit to Preferred Size. This ensures the Text component resizes to fit the text without clipping or leaving extra space.
Advanced Techniques
Combining Techniques
To create responsive UI layouts, you need to use multiple methods together. This ensures your UI works well on different screen sizes and orientations. For example, you can use Content Size Fitters to adjust the size of UI elements and Anchors to position them correctly.
Steps to combine techniques:
- Identify UI elements that need dynamic resizing.
- Add a Content Size Fitter to each element to adjust its size based on content.
- Use Anchors to position the resized elements correctly.
- Test your UI layout on different devices and screen sizes.
Scripting UI Layout Changes
Sometimes, you need to adjust your UI layout using C# scripts. This is useful for responding to events or changes in your game or app. For example, you can:
- Adjust the UI layout based on user settings.
- Add or remove UI elements based on game state or user input.
- Animate UI elements for a better user experience.
Steps to script UI layout changes:
- Create a new C# script in Unity and attach it to the relevant UI element or game object.
- Use Unity's UI API to access and manipulate the UI elements.
- Write code to adjust the UI layout based on your needs.
- Test your script to ensure it works correctly and doesn't cause performance issues.
Handling Orientation and Aspect Ratio
It's important to design your UI to work in different orientations and aspect ratios, especially for mobile devices.
Tips for handling orientation and aspect ratio changes:
- Use Unity's built-in support for screen orientation and aspect ratio changes.
- Design your UI layout to work in both portrait and landscape modes.
- Use Anchors and Content Size Fitters to adjust the size and position of UI elements.
- Test your UI layout on different devices and screen sizes.
Optimizing Performance
Optimizing performance is key to ensuring your responsive UI layout runs smoothly. A well-optimized UI layout can improve the user experience and increase engagement.
Optimizing UI Layouts
Follow these best practices to optimize your UI layout:
- Use a single Canvas: Multiple Canvases can cause performance issues. Use one Canvas and organize your UI elements within it.
- Remove unnecessary elements: Get rid of UI elements that are not visible or used. This reduces draw calls and improves performance.
- Use caching: Cache frequently used UI elements to reduce GPU load.
- Optimize font rendering: Use font atlasing and batching to optimize font rendering and reduce draw calls.
Batching and Atlasing
Batching and atlasing help reduce draw calls and improve performance.
TechniqueDescriptionBatchingCombines multiple UI elements into a single draw call.AtlasingCombines multiple textures into a single atlas.
To implement these techniques:
- Batching strategy: Combine multiple UI elements into a single draw call.
- Texture atlas: Combine multiple textures into a single atlas.
- Sprite atlasing: Combine multiple sprites into a single atlas.
Avoiding Layout Rebuilds
Layout rebuilds can be costly and impact performance. To avoid them:
TipDescriptionStable layoutDesign a layout that doesn't need frequent rebuilds.Avoid dynamic contentMinimize the use of dynamic content that causes rebuilds.Layout cachingCache layout information to reduce rebuilds.
Testing and Debugging
Testing and debugging are key steps to ensure your responsive UI layout works well on different devices and resolutions. This section covers guidelines and tools for testing and fixing common issues.
Testing Techniques
To test your responsive UI layout, simulate different devices, resolutions, and aspect ratios. Here are some techniques:
- Unity's built-in tools: Use the Game View to test your UI on various devices and resolutions.
- Physical devices: Test on real devices to ensure your UI works as expected.
- Online tools: Use tools like BrowserStack or CrossBrowserTesting to test your UI on different devices and browsers.
Using Game View
Unity's Game View is a powerful tool for testing your UI layout. Here's how to use it:
- Select a device: Choose a device from the Game View toolbar.
- Adjust the resolution: Change the resolution to test different screen sizes.
- Test orientation and aspect ratio: Check your UI in different orientations and aspect ratios.
Debugging Layout Issues
Common pitfalls in UI design can lead to layout issues. Here are some common problems and solutions:
IssueSolutionElement not resizingCheck the anchor settings and ensure the element resizes with its parent.Element not positioning correctlyVerify the anchor settings and ensure the element is positioned correctly within its parent.Layout not responding to screen size changesCheck the Canvas Scaler settings and ensure the layout responds to screen size changes.
Wrapping Up
Responsive UI Recap
In this guide, we've covered how to create responsive UI layouts in Unity. From the basics of Unity UI to advanced performance tips, we've shown how to design UIs that work well on different screens. By following these steps, you can make UIs that look good and work well on any device.
Summary of Techniques
Here's a quick recap of the techniques we've discussed:
- Unity UI Basics: Understanding Unity UI and its components
- Canvas Setup: Setting up the canvas and configuring the Canvas Scaler
- Anchoring Elements: Anchoring UI elements and using anchor presets
- Layout Groups: Working with layout groups and content size fitters
- Advanced Design: Combining techniques for advanced responsive design
- Performance Tips: Optimizing performance using batching, atlasing, and avoiding layout rebuilds
Further Learning
To keep improving your skills in responsive UI design, check out these resources:
- Unity's Official Documentation: Learn more about Unity UI and responsive design.
- Online Tutorials: Find tutorials that cover specific topics in Unity UI.
- Community Forums: Join forums like the Unity subreddit to get tips and feedback from other developers.
Related posts

Unity Multiplayer Setup for Mobile: Step-by-Step Guide
Setting up multiplayer for mobile games in Unity can seem daunting, but this guide will walk you through the entire process step-by-step. By the end, you'll have a fully functional multiplayer game ready for deployment on Android and iOS.
Key Steps:
- Create a new Unity project for your mobile multiplayer game
- Import required assets and packages, including the Unity Multiplayer package
- Configure project settings for Android and iOS platforms
- Enable Unity Multiplayer Services and create a new multiplayer configuration
- Integrate multiplayer using the Multiplayer HUD, Networking API, or Transport Layer API
- Manage player connections, including joining/creating games and authentication
- Implement gameplay logic like spawning objects, synchronizing state, and handling input
- Test and debug your multiplayer functionality locally
- Build and deploy your game for Android and iOS app stores
Quick Comparison of Multiplayer Integration Methods:
Integration MethodDescriptionComplexityMultiplayer HUDSimple UI for matchmaking and session managementLowNetworking APIMore control over networking with high-level APIMediumTransport Layer APILow-level API for custom networking solutionsHigh
By following this guide, you'll gain a solid understanding of setting up multiplayer for mobile games in Unity, from project configuration to deployment. Let's get started!
Related video from YouTube
Setting Up the Project
Setting up a Unity project for mobile multiplayer games involves creating a new project, importing necessary assets, and configuring settings for Android and iOS.
Creating a New Project
Follow these steps to create a new Unity project:
- Open Unity Hub: Click "New" to start a new project.
- Project Details: Enter a project name and location. Choose the "3D" or "2D" template based on your game type.
- Select Platform: Choose "Mobile" and select target devices (Android and/or iOS).
- Create Project: Click "Create" to set up the new project.
Importing Assets and Packages
To enable multiplayer features, import the Unity Multiplayer package:
- Open Package Manager: Go to Window > Package Manager.
- Search for Unity Multiplayer: Find the package and select it.
- Install Package: Click "Install" to add it to your project.
Configuring for Mobile
Set up your project for mobile development by configuring settings for Android and iOS:
- Open Project Settings: Go to Edit > Project Settings > Player.
- Select Platform: Choose "Android" or "iOS" and adjust platform-specific settings.
- Configure Settings: Set up graphics, audio, and input settings according to your game needs.
Enabling Multiplayer Services
Setting up Unity Multiplayer Services is key for online multiplayer in your mobile game. This section will guide you through accessing the Unity Services window, enabling the Multiplayer Service, and creating a new Multiplayer configuration.
Accessing Services Window
To open the Unity Services window:
- Open your Unity project.
- Go to Window > Services.
Enabling Multiplayer
In the Services window:
- Select Multiplayer.
- If prompted, set up a new Multiplayer configuration.
Creating Multiplayer Config
To create a new Multiplayer configuration:
- Enter the number of players per room.
- Click Save.
Your Multiplayer Services Dashboard will now show your project settings. You can now integrate Multiplayer into your game.
Integrating Multiplayer
Integrating Multiplayer is a key step in setting up Unity Multiplayer for mobile. This section covers different ways to integrate the Multiplayer Service, focusing on the Multiplayer HUD, Networking High-Level API, and the Transport Layer API for advanced users.
Using Multiplayer HUD
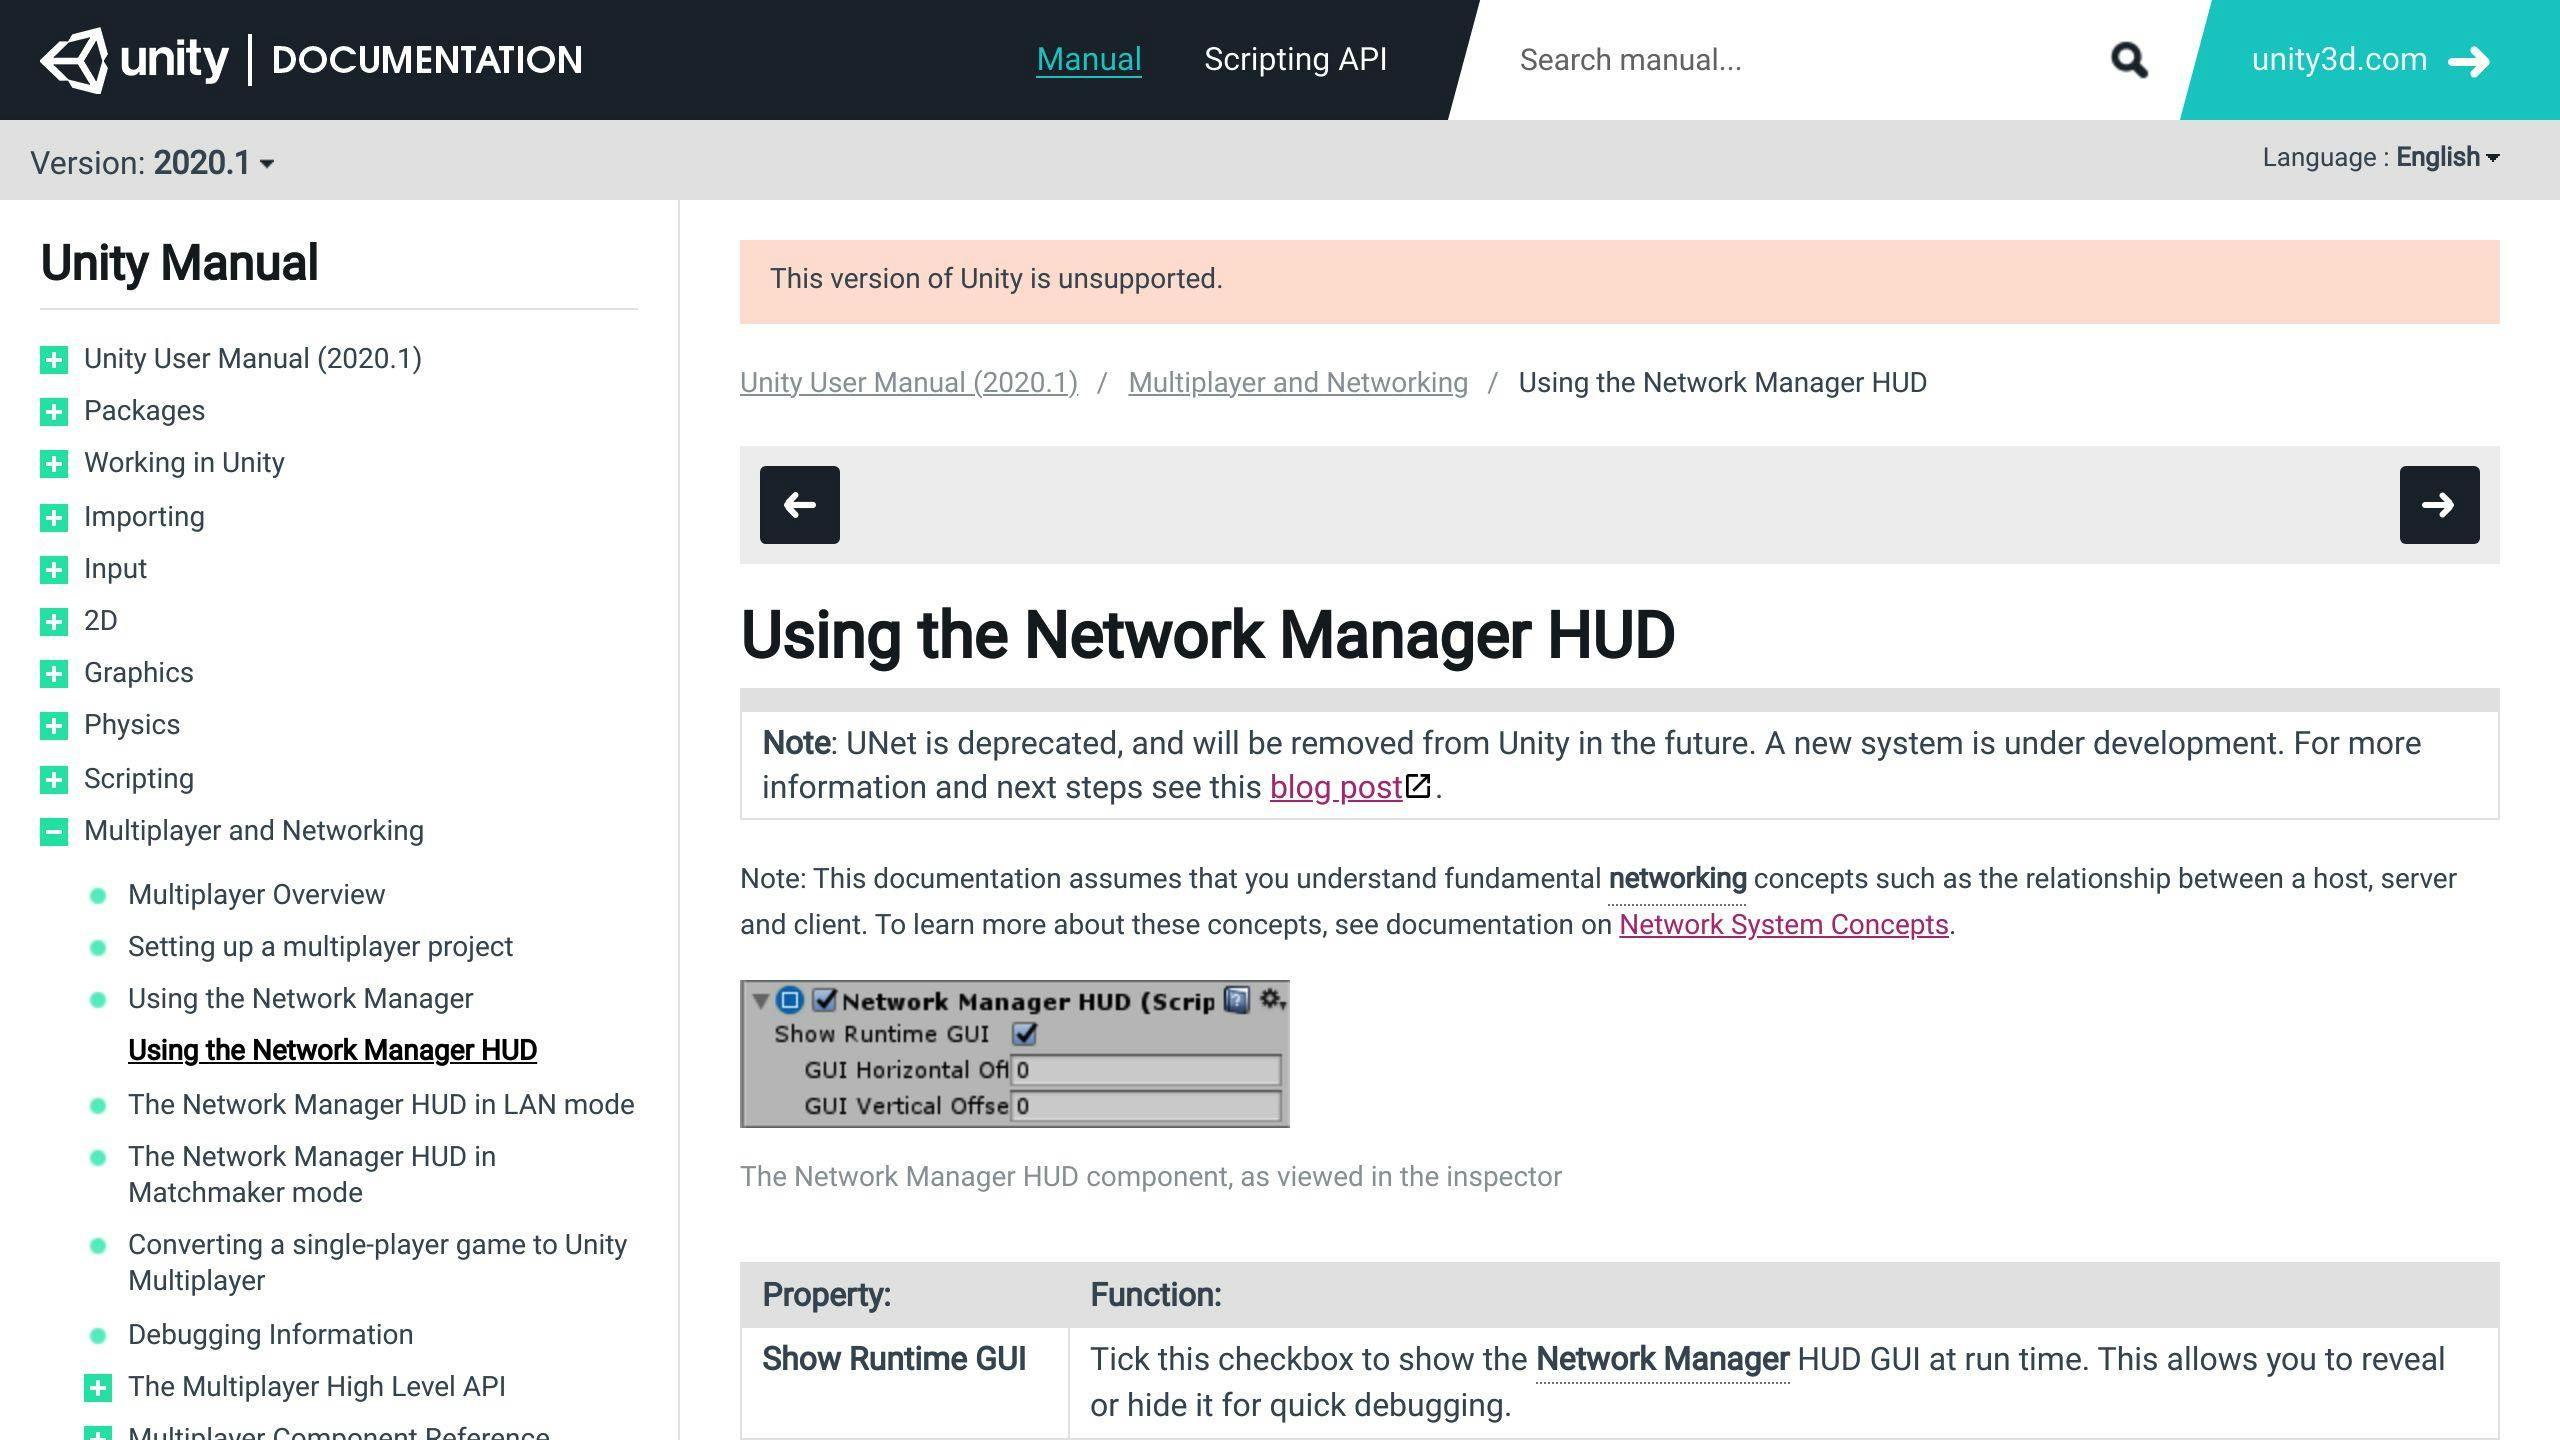
The Multiplayer HUD is a simple interface to manage multiplayer sessions. To add the Multiplayer HUD to your project:
- Import the Multiplayer HUD package from the Unity Asset Store.
- Create a new scene and add the Multiplayer HUD prefab.
- Adjust the HUD settings to fit your game.
The Multiplayer HUD makes it easy to handle matchmaking, session management, and real-time player tracking. However, it may not be ideal for complex multiplayer setups or games needing custom networking.
Using Networking API
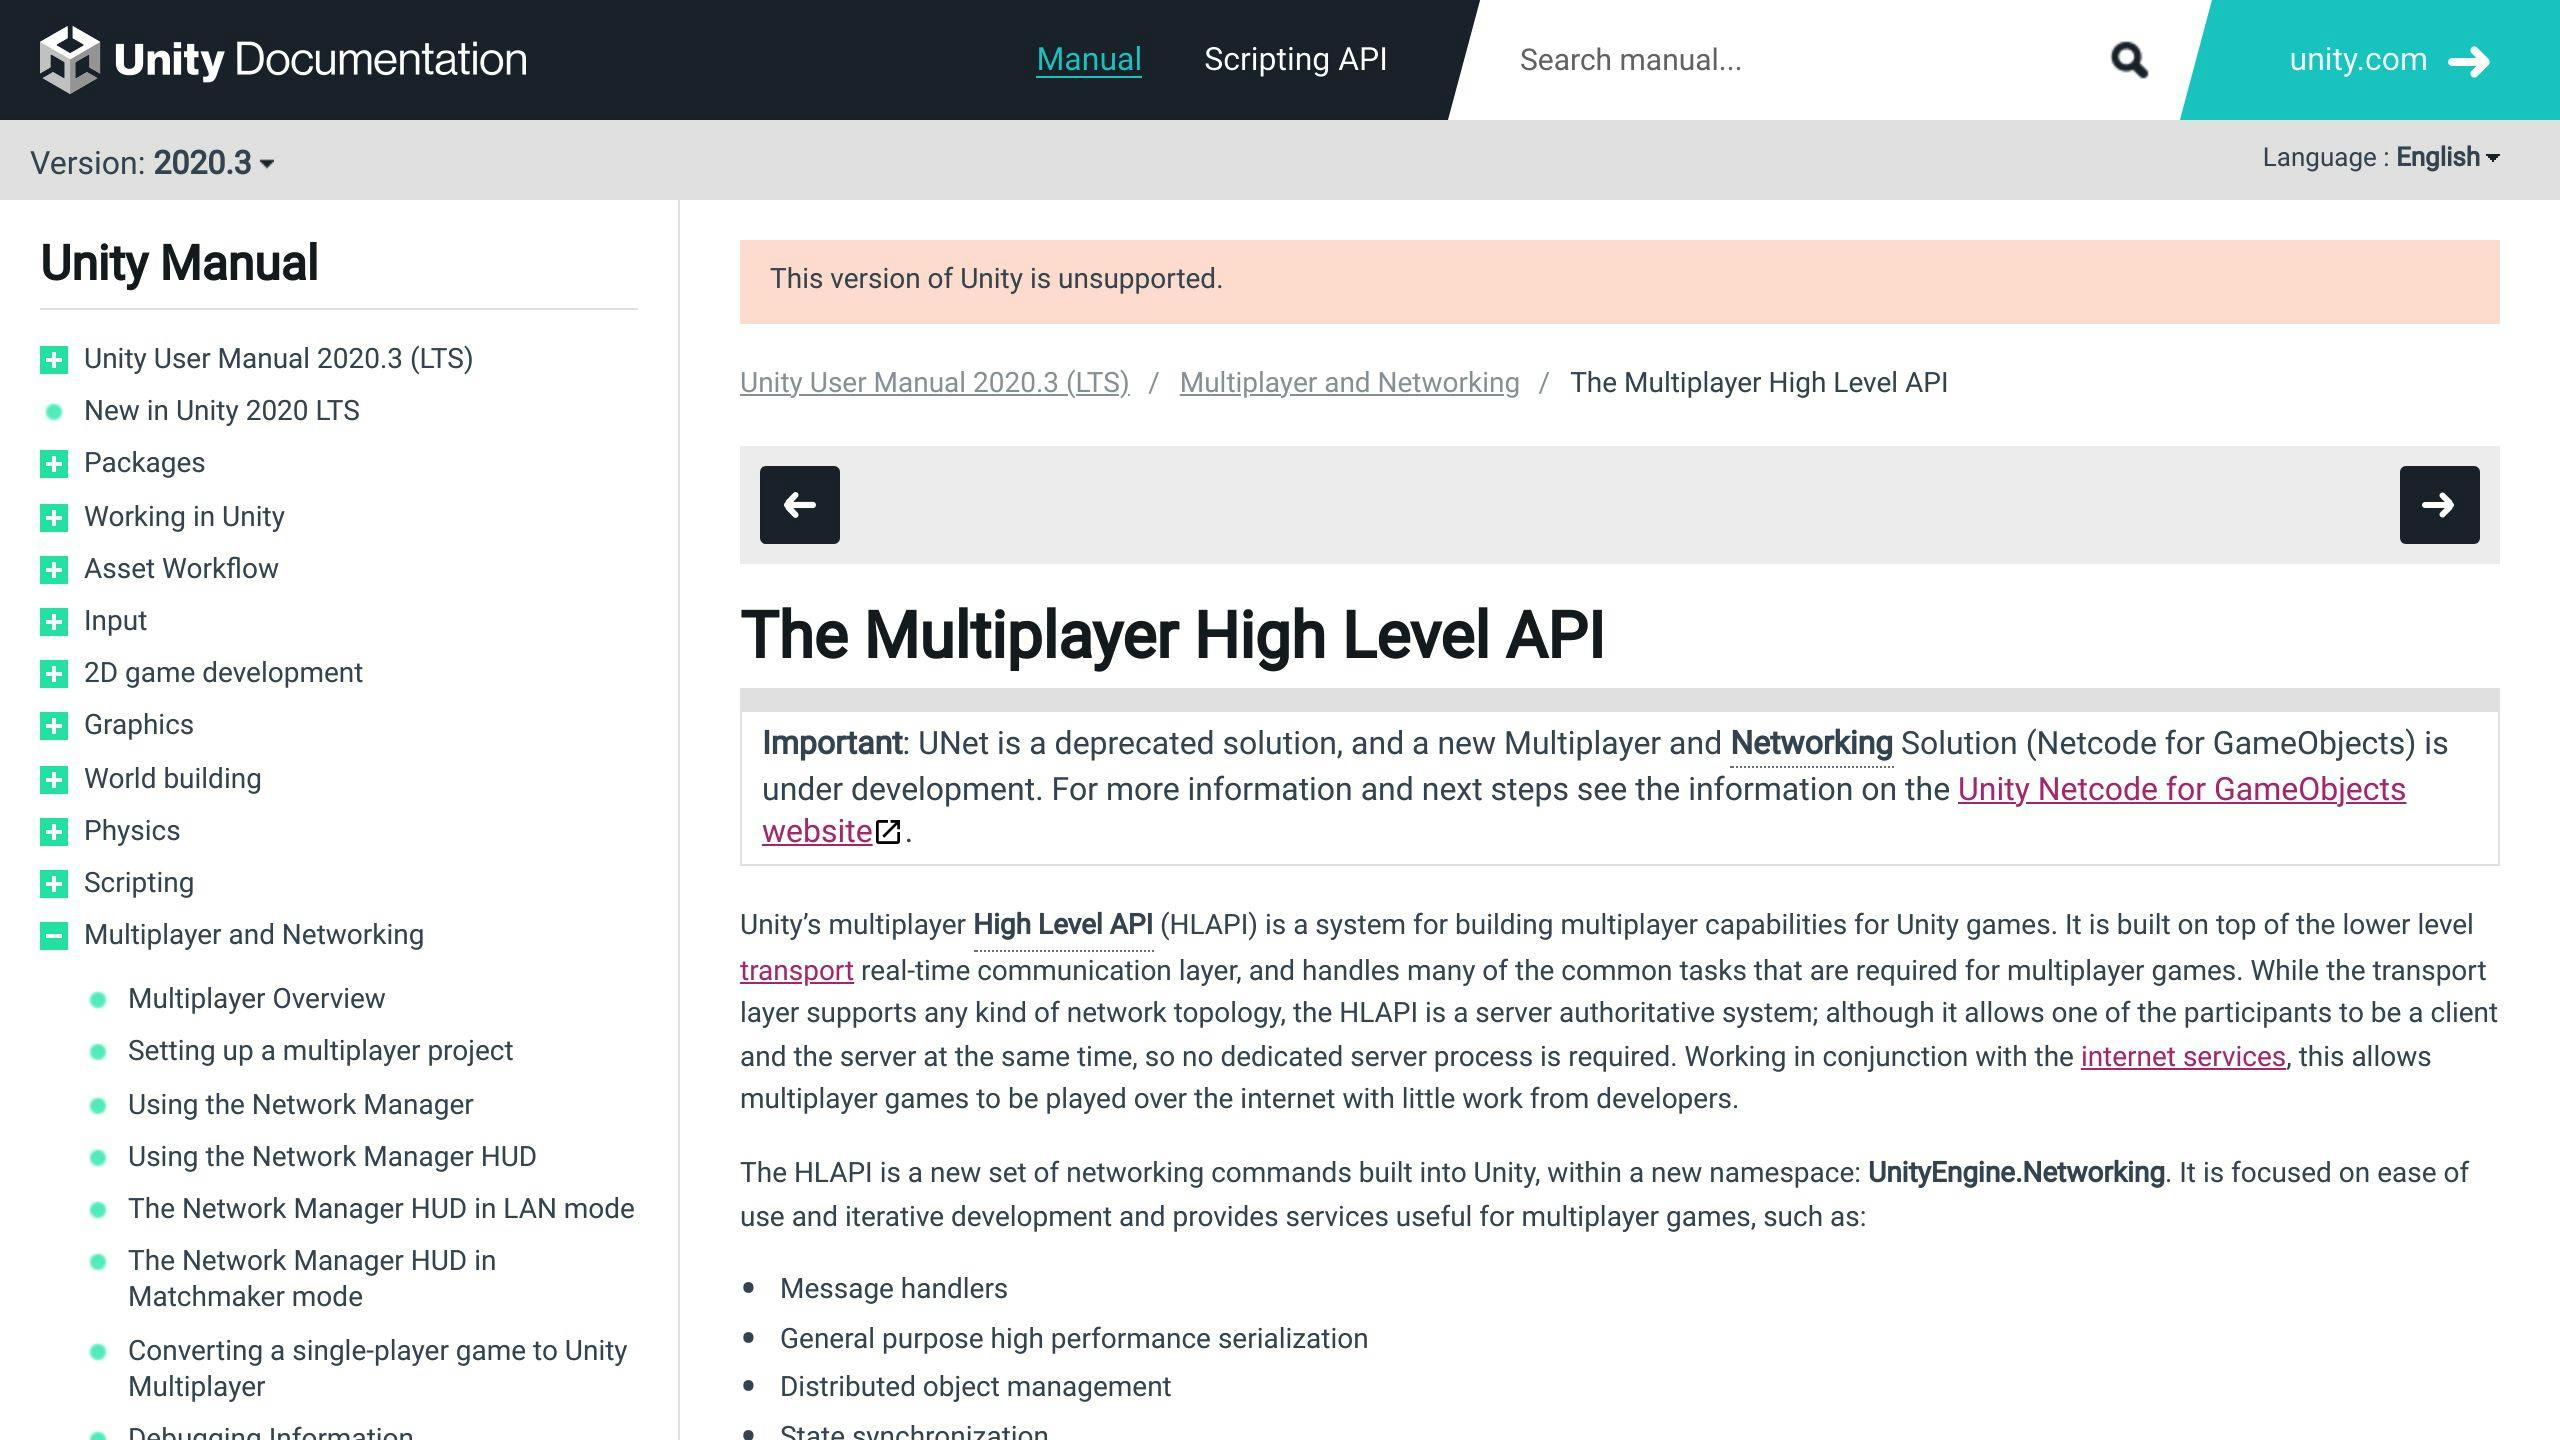
The Networking High-Level API offers more control over multiplayer features. To set up the Networking API:
- Create a new Network Manager in your scene.
- Register player prefabs and set up networked player movement and actions.
- Implement networked gameplay logic using the Networking API.
The Networking API provides more flexibility but requires a good understanding of networking concepts and Unity's multiplayer system.
Using Transport Layer API
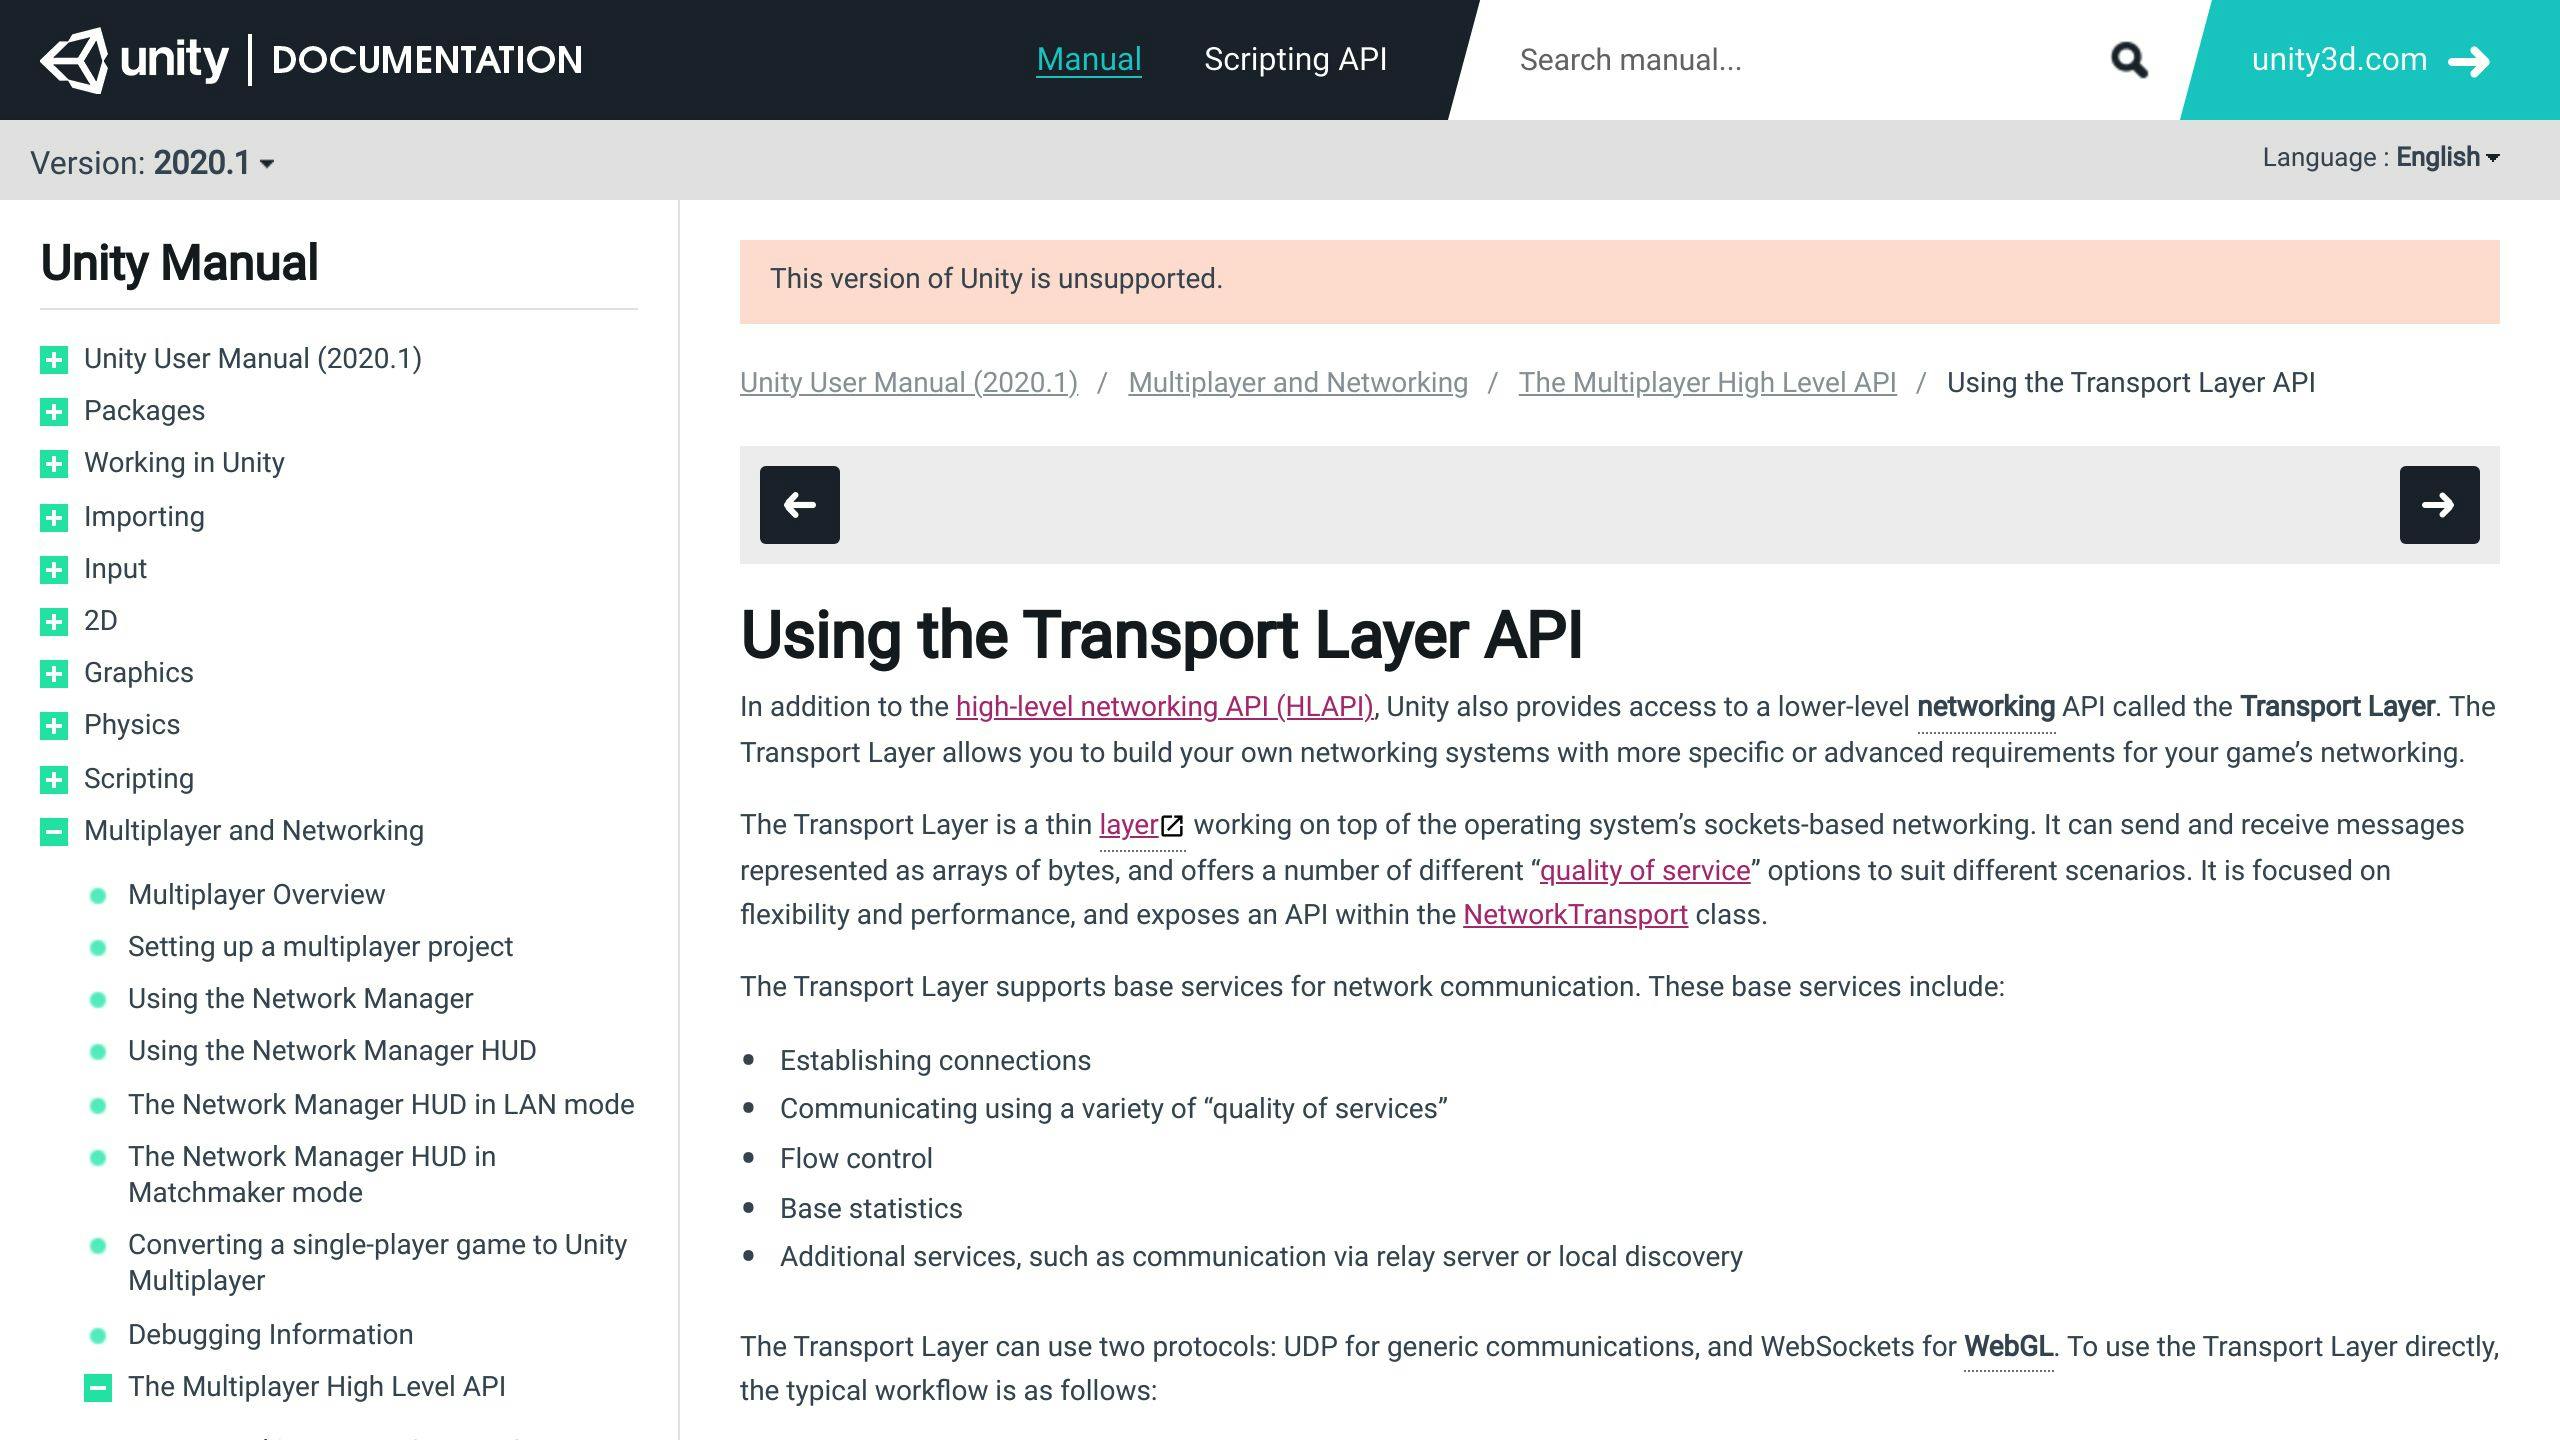
The Transport Layer API is a low-level networking API for advanced users. It gives detailed control over network transport and connection types. To use the Transport Layer API:
- Set up the NetworkTransport component in your scene.
- Configure network transport and connection types to fit your game.
- Implement custom networking logic using the Transport Layer API.
The Transport Layer API is best for complex multiplayer scenarios or games needing custom networking solutions. It requires a deep understanding of networking concepts and Unity's multiplayer system.
sbb-itb-8abf120
Managing Player Connections
Managing player connections is a key part of Unity multiplayer setup for mobile. This section covers how to manage player connections and disconnections, including player authentication and data synchronization.
Connecting to the Server
To connect to the server, use the PhotonNetwork.ConnectUsingSettings method. This method connects to load-balanced servers and takes a string parameter to distinguish between versions or group clients.
Joining a Game
To join an existing game, use the PhotonNetwork.JoinRandomRoom method. This method allows players to join any available game (room). You can also set filters for the maximum number of players and game-specific criteria.
Creating a Game
To create a new game, use the PhotonNetwork.CreateRoom method. This method sets up a new room with the specified name, visibility, and maximum player count. You can also specify whether the room is open for others to join.
Handling Player Disconnections
When a player disconnects, handle the disconnection event to update the game state. Use the PhotonNetwork.OnDisconnected method to manage player disconnections.
Implementing Player Authentication
If your game requires player authentication, use the PhotonNetwork.Authenticate method. This method takes a username and password as parameters and authenticates the player with the server.
Implementing Gameplay
Implementing gameplay is a key part of Unity multiplayer setup for mobile. This section covers creating and spawning networked game objects, synchronizing game state, handling player input, and implementing game rules and scoring systems.
Creating and Spawning Networked Game Objects
To create networked game objects, use the PhotonNetwork.Instantiate method. This method creates a new instance of a prefab on the server and synchronizes it across all connected clients. You can also specify a parent object and a position for the instantiated object.
Synchronizing Game State Across Clients
To synchronize game state across clients, use the PhotonView component. This component allows you to observe and control the state of game objects on the server and clients. You can use the PhotonView.OnSerialize method to serialize and deserialize game state data.
Handling Player Input and Actions
To handle player input and actions, use the PhotonNetwork.RaiseEvent method. This method sends an event to the server, which can then be processed and broadcast to all connected clients. You can use this method to implement player actions, such as movement, shooting, or chatting.
Implementing Game Rules and Scoring Systems
To implement game rules and scoring systems, use a combination of server-side scripting and client-side validation. On the server, use scripts to enforce game rules and update the game state accordingly. On the client, use scripts to validate user input and display the game state to the player.
Testing and Debugging
Testing and debugging are key steps to ensure your Unity multiplayer game for mobile works as expected. This section covers tips for testing multiplayer locally, debugging issues, and using Unity's profiling tools for performance.
Testing Multiplayer Functionality Locally
Testing multiplayer locally can be tricky, but here are some methods to help:
- ParrelSync: Use ParrelSync to manage multiple project versions easily.
- WiFi Hotspot Network: Test your game on multiple Android devices by following these steps:
- Install your game on two Android devices.
- Open Hotspot on one device and connect the other device to the same network.
- On the first device, click on "Lan Host(H)" in Network Manager HUD.
- On the second device, enter the IP address of the first device in the LAN CLIENT option.
Debugging Multiplayer-Specific Issues
Debugging multiplayer issues can be complex. Use these tools and techniques:
- Unity Debugger: Identify and fix issues using Unity's built-in debugging tools.
- Logging and Error Reporting: Track down issues with logging and error reporting tools.
Using Unity's Profiling Tools for Performance Optimization
Optimize your game's performance using Unity's profiling tools:
- Profiler: Get detailed information on CPU usage, memory usage, and rendering performance.
- Identify Bottlenecks: Use the Profiler to find and fix performance bottlenecks.
Building and Deploying
Building and deploying a Unity multiplayer game for mobile devices involves several steps. This section covers the essential instructions for building the project for mobile platforms (Android and iOS), deploying the game to app stores or distribution platforms, and considerations for online multiplayer such as dedicated servers and matchmaking.
Building for Mobile Platforms
To build your Unity project for mobile platforms, follow these steps:
- Open the Unity Editor and go to File > Build Settings.
- Select the target platform (Android or iOS) and configure the build settings accordingly.
- Ensure that the Multiplayer Service is enabled and configured correctly.
- Build the project for the selected platform.
Deploying to App Stores or Distribution Platforms
Once the build is complete, you can deploy your game to app stores or distribution platforms. For Android, you can publish your game on the Google Play Store, while for iOS, you can publish on the App Store. You can also consider alternative distribution platforms like Amazon Appstore or Samsung Galaxy Store.
Dedicated Servers and Matchmaking
For online multiplayer games, dedicated servers and matchmaking are important components. Dedicated servers provide a reliable and scalable infrastructure for hosting game sessions, while matchmaking ensures that players are matched with suitable opponents. Consider using cloud-based services like Google Cloud or Amazon Web Services for dedicated servers, and implement matchmaking algorithms that cater to your game's specific requirements.
Conclusion
Congratulations on completing the Unity Multiplayer Setup for Mobile: Step-by-Step Guide! By following this guide, you have successfully set up a Unity multiplayer game for mobile devices. You have learned how to:
- Create a new project
- Import assets and packages
- Configure for mobile
- Enable multiplayer services
- Integrate multiplayer
- Manage player connections
- Implement gameplay
- Test and debug
- Build and deploy your game
Related posts

Unity iOS App Submission to App Store: Step-by-Step Guide
To publish your Unity iOS app on the App Store:
- Join the Apple Developer Program ($99/year)
- Have a Mac with Xcode and a valid Apple ID
- Prepare your Unity project for iOS:
- Configure player settings (bundle ID, signing team, icons)
- Optimize for iOS (reduce asset size, use occlusion culling, minimize garbage collection)
- Add iOS-specific features (in-app purchases, Game Center)
- Create App Store assets (app icon, screenshots, preview video)
- Set up App Store Connect (create app entry, upload assets, provide info)
- Get distribution certificates and provisioning profiles
- Build and sign your iOS app in Xcode
- Submit the app for review on App Store Connect
- Handle any rejections and submit updates as needed
By following these steps and Apple's guidelines, you can successfully publish your Unity game on the iOS App Store.
Related video from YouTube
Things You Need
Before submitting your Unity iOS app to the Apple App Store, make sure you have the following:
Apple Developer Program Membership
You need to join the Apple Developer Program, which costs $99/year. This gives you access to tools like certificates, identifiers, and provisioning profiles.
Apple ID
A valid Apple ID is required to access Apple's developer resources, including the Apple Developer website and App Store Connect.
Mac with Xcode
Xcode is necessary for building and submitting iOS apps. You need a Mac with Xcode installed to create an archive of your app and upload it to the App Store.
Unity Project for iOS
Ensure your Unity project is set up for iOS as the target build platform. This includes configuring player settings, optimizing for iOS, and adding iOS-specific features.
1. Prepare Unity Project
Getting your Unity project ready for iOS submission involves setting up player settings, optimizing for iOS, and adding iOS-specific features. This ensures your game runs well and meets Apple's guidelines.
Configure Player Settings
- Set Target Platform: In Unity Editor, go to File > Build Settings and select iOS.
- Open Player Settings: Click on Player Settings to open the window.
- Fill Out Details: Enter your company and product names, and set up your default and allowed orientations.
- Set Icons and Images: Configure your game's icon and cursor image.
- Bundle Identifier: Set your Bundle Identifier in reverse domain-name format. This must be unique.
- Signing Team ID: Find your Signing Team ID on your Apple Developer membership page.
Optimize for iOS
- Reduce Asset Size: Minimize the size of your asset files.
- Use Occlusion Culling: Implement occlusion culling to improve performance.
- Minimize Garbage Collection: Reduce garbage collection to enhance performance.
- Use Unity Profiler: Identify performance bottlenecks with Unity's built-in profiler.
- Choose Scripting Backend: Use IL2CPP instead of Mono for better performance and security.
- Use Addressables: Reduce game package size and improve loading times with Addressables.
Add iOS-Specific Features
Depending on your game's needs, you may need to add features like:
- In-App Purchases
- Game Center
- Advertising SDKs
Follow Apple's guidelines and Unity's iOS-specific features documentation for smooth integration.
2. Create App Store Assets
When submitting your Unity iOS app to the App Store, you'll need to create assets that showcase your app's features and functionality. These assets help attract users and increase your app's visibility.
App Icon
Your app icon is the first thing users will see. Design an icon that is eye-catching, simple, and scalable. Follow Apple's guidelines:
RequirementDetailsSize1024 x 1024 pixelsFormatPNGColor SchemeMatch your app's brandContentAvoid clutter, keep it simple
Use tools like Adobe Photoshop or Sketch to design your app icon. Ensure it looks good in various sizes and resolutions.
Screenshots
Screenshots show your app's features and user interface. Capture screenshots for different devices and orientations. Follow these guidelines:
RequirementDetailsDevicesiPhone, iPad, iPod touchOrientationsPortrait and landscapeContentHighlight key featuresFormatPNG or JPEG
Use tools like Adobe Photoshop or Skitch to edit and optimize your screenshots. Ensure they are clear and visually appealing.
Preview Video (Optional)
A preview video can showcase your app's features and gameplay. It's optional but can attract more users. Follow these guidelines:
RequirementDetailsLength15-30 secondsFormatM4V, MP4, or MOVContentHighlight key featuresAudioInclude music or sound effects
Use tools like Adobe Premiere Pro or iMovie to create and edit your preview video. Ensure it is engaging and visually appealing.
Description and Keywords
Your app description and keywords are crucial for discoverability. Follow these guidelines:
RequirementDetailsDescriptionDescribe your app's features and benefitsKeywordsChoose relevant keywordsFormatFollow Apple's guidelines
Use tools like App Store Connect or a keyword research tool to optimize your app description and keywords. Ensure they are concise and relevant to your target audience.
3. Set Up App Store Connect
Create New App Entry
To set up App Store Connect, you need to create a new app entry. Follow these steps:
- Sign in to App Store Connect with your Apple ID and password.
- Click the "+" icon in the top-right corner to create a new app.
- Enter the required information:
- App name
- Description
- Keywords
- Select the primary language and bundle ID for your app.
- Click "Create" to finalize the new app record.
Upload Visual Assets
After creating a new app entry, upload the required visual assets:
Asset TypeRequirementsApp Icon1024 x 1024 pixels, PNG or JPEGScreenshotsPNG or JPEG images showcasing your app's features and user interfacePreview Video(Optional) 15-30 seconds, M4V, MP4, or MOV, demonstrating your app's features
Ensure you follow Apple's guidelines for each asset type to avoid issues during the review process.
Provide Required Information
You also need to provide the following information:
Information TypeDetailsPrivacy PolicyURL linking to your app's privacy policyContent RightsInformation about the ownership and rights of your app's contentOther InfoApp categories, keywords, and release notes
Fill out all required fields accurately to avoid delays in the review process.
sbb-itb-8abf120
4. Get Distribution Certificates and Profiles
Create Distribution Certificate
Follow these steps to create a distribution certificate:
- Go to the Apple Developer Portal and sign in with your Apple ID.
- Select Certificates, IDs & Profiles from the left menu.
- Click the “+” button under Certificates.
- Choose iOS Distribution and click Continue.
- Upload the CSR file you generated earlier and click Continue.
- Download the generated iOS Distribution Certificate.
- Double-click the downloaded certificate to add it to your Keychain.
Create App ID and Provisioning Profile
To create an App ID and provisioning profile:
- In Certificates, Identifiers & Profiles, click Profiles in the sidebar, then click the add button (+).
- Under Distribution, select an App Store distribution profile and click Continue.
- Choose the App ID for this profile and click Continue.
- Name your provisioning profile, generate it, and download the profile.
- Double-click the downloaded profile to add it to Xcode.
Download and Install Certificates/Profiles
After creating the distribution certificate and provisioning profile:
- Download the distribution certificate and provisioning profile from the Apple Developer Portal.
- Double-click the downloaded certificate to add it to your Keychain.
- Double-click the downloaded profile to add it to Xcode.
5. Build and Sign iOS App
Build Xcode Project from Unity
To build an Xcode project from Unity, follow these steps:
- Open your Unity project and go to File > Build Settings.
- Select iOS as the target platform and click Switch Platform.
- In the Build Settings window, click Player Settings to open the Player Settings in the Inspector.
- Configure the settings as needed, including setting the Bundle Identifier and Version.
- In the Build Settings window, click Build to create an Xcode project.
Sign the App
To sign the app with the distribution certificate and provisioning profile:
- Open the Xcode project generated by Unity.
- In the Xcode project, go to Project Navigator and select the project.
- In the General tab, select the Signing (Release) option.
- Select the distribution certificate and provisioning profile created earlier.
- Ensure the Bundle Identifier matches the one in the Unity Player Settings.
Create Archive for Submission
To create an archive for submission to App Store Connect:
- In Xcode, go to Product > Archive to create an archive of your app.
- Once the archiving process is complete, the Organizer window will open.
- Select the archive and click Distribute App to upload it to App Store Connect.
6. Submit App for Review
Upload to App Store Connect
To upload your app to App Store Connect:
1. Open the Organizer window in Xcode. 2. Select the archive you created. 3. Click Distribute App. 4. Choose App Store Connect as the destination. 5. Click Next to start the upload.
Provide Additional Details
You will need to provide more information about your app:
Information TypeDetailsApp DescriptionA brief summary of your app and its featuresKeywordsRelevant keywords to help users find your appScreenshotsImages of your app in actionPreview Video(Optional) A video showcasing your app's features
Submit for Review
To submit your app for review:
1. Review all the information to ensure accuracy. 2. Click Submit for Review. 3. Wait for Apple to review your app. This usually takes 24-48 hours but can take longer.
7. Handle Rejections and Updates
Common Rejection Reasons
Understanding why apps get rejected can help you avoid mistakes. Here are some common reasons:
ReasonDescriptionCopycat AppsApps that are duplicates or very similar to othersLimited User ExperienceApps that feel like a mobile websitePlaceholder ContentUnfinished content still in the appInaccurate DescriptionMisleading app descriptionsPoor UI/UXBad user interface or user experienceMentioning Other PlatformsReferences to platforms like AndroidIncomplete InformationMissing metadata or broken links
Submit an Update
If your app is rejected, you can fix the issues and resubmit. Here's how:
- Fix the issues mentioned in the rejection notice.
- Update your app's metadata, including description, screenshots, and keywords.
- Resubmit your app for review.
Manage App Updates and Releases
Keeping your app updated is important. Here are some tips:
- Regularly update your app to fix bugs and add new features.
- Use TestFlight to test your app with beta testers before submitting to the App Store.
- Ensure your app's metadata is up-to-date and accurate.
- Plan your app's release strategy, including scheduling updates and promotions.
Summary
This guide has walked you through the steps to publish your Unity iOS app to the App Store. From preparing your Unity project to submitting your app for review, we've highlighted the importance of following Apple's guidelines and thorough testing before submission. By following these steps, you'll be ready to publish your app and make it available to millions of iOS users.
FAQs
How do I publish Unity games on iOS App Store?
To publish your Unity game on the iOS App Store:
- Open your game project in Unity.
- Go to File > Build Settings and select iOS as the build target.
- Click on Player Settings and fill out Company Name, Product Name, and Version.
- Set the app icon, which users will see on their phones when they install the app.
How do I publish my Unity game?
To publish your Unity game, follow these steps:
- Sign up to the store: Create an account on the App Store Connect platform.
- Register your game with the store: Provide required information about your game, such as its name, description, and screenshots.
- Select the Target Step: Choose the countries and regions where you want to distribute your game.
- Countries and Advanced settings: Configure additional settings, such as pricing, availability, and release date.
- Publish: Submit your game for review and wait for approval.
Related posts
![Event-Driven Architecture: Complete Guide [2024]](https://cdn.prod.website-files.com/6398f0e8fa9fd060d0c39626/693ab82d6c51c48db7b85cf1_6645e31c9ff708476413bd2b_6645ce6c347466e370295ef7-9099b4e46117d77c50a5acc3ff27fda0.jpeg)
Event-Driven Architecture: Complete Guide [2024]
Event-Driven Architecture (EDA) is a software design pattern where services communicate through events. In EDA, services publish and subscribe to events, allowing them to respond to changes or updates in real-time. This architecture supports scalability, flexibility, and real-time processing, making it ideal for modern applications.
Key Benefits of EDA:
- Scalability: Services can be scaled independently to meet demand.
- Fault Tolerance: A failure in one service does not directly affect others, reducing cascading failures.
- Flexibility: Services can be modified or added without disrupting the entire system.
- Real-Time Processing: Events are processed as they occur, enabling immediate responses.
Core Patterns in EDA:
PatternDescriptionEvent SourcingThe state of an application is determined by replaying a sequence of immutable events.CQRSSeparates read and write operations into distinct models for optimized performance and scalability.Publish-SubscribeDecouples event producers from consumers using an intermediary message broker.Event StreamingContinuously delivers a stream of events to consumers for real-time processing.Event AggregationCombines multiple related events into a single, higher-level event for efficient processing.
Real-World Use Cases:
- IoT Applications: Processes sensor data in real-time for automation and better user experience.
- E-Commerce: Manages order processing and inventory updates, keeping systems responsive.
- Financial Services: Handles transaction processing and fraud detection, ensuring quick and secure operations.
By understanding EDA's key concepts, benefits, and challenges, developers and architects can build systems that meet today's fast-paced demands and adapt to changing business needs.
Related video from YouTube
Understanding Event-Driven Architecture
Definition
Event-Driven Architecture (EDA) is a software design pattern where services communicate through events. Services publish and subscribe to events, allowing them to respond to changes or updates. This setup supports scalability, flexibility, and real-time processing in modern applications.
Key Components
EDA consists of three main components:
ComponentDescriptionEvent ProducersSources of events, generating notifications of state changes or updates.Event ConsumersServices or components that react to the events, processing them as needed.Event BrokersAlso known as event routers or buses, these filter and direct events from producers to the appropriate consumers.
Event Types
Events can be categorized into three types:
Event TypeDescriptionVolatile EventsNot persisted and are lost if the system fails.Durable EventsPersisted and can be replayed in case of system failure.Replayable EventsCan be replayed to re-create the current state of the system.
Benefits of Event-Driven Architecture
Event-driven architecture (EDA) offers many advantages for modern applications. By allowing services to communicate through events, EDA supports scalability, fault tolerance, flexibility, and real-time processing.
Scalability
EDA supports horizontal scaling, meaning services can be scaled independently to meet demand. This ensures the system can handle more users, requests, or data without losing performance. This makes EDA ideal for applications needing high availability and scalability.
Fault Tolerance
Decoupling components in EDA improves fault tolerance. A failure in one service does not directly affect others. This means the system can continue to function even if one service fails, reducing the risk of cascading failures. EDA helps create more resilient systems.
Flexibility
EDA allows services to be modified, replaced, or added without affecting the overall system. This modularity lets developers quickly respond to changing requirements, try new technologies, or integrate third-party services without disrupting the existing system.
Real-Time Processing
EDA enables real-time data processing, which is crucial for applications needing immediate responses to events. By processing events as they occur, EDA allows systems to react quickly to changes, updates, or user interactions, providing a more dynamic user experience.
Challenges and Considerations
Event-driven architecture (EDA) offers many benefits, but it also presents several challenges and considerations that developers and architects must address.
System Complexity
EDA systems can be complex and difficult to design and manage. With multiple components interacting with each other through events, it can be challenging to ensure that the system functions correctly. This complexity can lead to increased development time, higher maintenance costs, and a greater likelihood of errors.
Data Consistency
Maintaining data consistency is a significant challenge in EDA systems. Since events are processed asynchronously, it can be difficult to ensure that data is consistent across all components. This can lead to issues with data integrity and accuracy.
Event Ordering
Ensuring the correct order of events is critical in EDA systems. If events are processed out of order, it can lead to errors and inconsistencies. This can be particularly challenging in systems with multiple event sources and sinks.
Troubleshooting
Troubleshooting and handling errors in EDA systems can be complex and time-consuming. With multiple components and events involved, it can be difficult to identify the root cause of an issue. This can lead to increased downtime and reduced system reliability.
Core Patterns in Event-Driven Architecture
Event Sourcing

Event sourcing is a pattern where the state of an application is determined by replaying a sequence of immutable events. Instead of storing just the current state, all changes are saved as events. This provides a complete history and allows the application state to be rebuilt at any point by replaying the events.
In event sourcing, events represent state changes to data entities. For example, in an e-commerce system, events could include "OrderCreated," "ItemAddedToCart," and "PaymentProcessed." These events are stored in an event store, acting as the system of record. The current state is then derived by replaying these events.
Key benefits of event sourcing:
- Auditing and Traceability: All changes are saved as events, allowing a full history of an entity.
- Temporal Query: You can query the state of an entity at any given moment by replaying events up to a specific point in time.
- Consistency: Events are immutable, reducing the need for complex locking and concurrency control.
CQRS (Command Query Responsibility Segregation)
CQRS separates the read and write operations of an application into distinct models. The write model handles commands (like creating or updating data), while the read model is optimized for queries and retrieving data.
In a CQRS architecture, commands are processed asynchronously and generate events, which are then consumed to update the read model. This separation allows for independent scaling and optimization of the read and write paths.
Key benefits of CQRS:
- Scalability: Read and write workloads can be scaled independently.
- Optimized Data Models: The read and write models can be designed for their specific use cases.
- Separation of Concerns: The logic for handling commands and queries is decoupled, simplifying development and maintenance.
Publish-Subscribe
The publish-subscribe pattern decouples event producers (publishers) from event consumers (subscribers) using an intermediary message broker or event bus. Publishers send events to the broker without knowing the subscribers, and subscribers register their interest in specific event types with the broker.
Key benefits of the publish-subscribe pattern:
- Loose Coupling: Publishers and subscribers are decoupled, promoting modularity.
- Scalability: Components can be scaled independently.
- Asynchronous Communication: Publishers and subscribers communicate asynchronously, improving responsiveness.
Event Streaming
Event streaming involves continuously delivering a stream of events to interested consumers for real-time processing. Events are generated and consumed as they occur, enabling near-real-time analysis and decision-making.
In event streaming architectures, events are typically saved in a distributed log or stream, allowing for fault tolerance and enabling consumers to process events at their own pace.
Key benefits of event streaming:
- Real-Time Processing: Events are processed as they occur, enabling near-real-time analysis.
- Fault Tolerance: Events are saved in a distributed log, ensuring durability.
- Scalability: Consumers can be added or removed dynamically, and processing can be distributed across multiple nodes.
Event Aggregation

Event aggregation involves combining multiple related events into a single, higher-level event for more efficient processing. This pattern is useful when dealing with high volumes of low-level events that need to be correlated or processed together.
Key benefits of event aggregation:
- Improved Performance: Reducing the number of events that need to be processed can improve overall system performance.
- Simplified Processing: Aggregated events can provide a higher-level view of the data, simplifying processing logic.
- Reduced Overhead: Fewer events need to be transmitted and processed, reducing network and processing overhead.
Best Practices for Implementing EDA
Component Decoupling
Ensure components are loosely coupled to allow for flexibility, scalability, and easier maintenance. Here are some strategies:
- Define clear interfaces: Establish well-defined interfaces between components to minimize dependencies.
- Use abstraction: Abstract away implementation details to reduce coupling.
- Decouple data storage: Store data in a separate layer or service to reduce dependencies on specific storage solutions.
Event Modeling
Design events to be meaningful, concise, and consistent. Here are some techniques:
- Use a consistent naming convention: Establish a consistent naming convention for events to improve readability and understanding.
- Define a clear event structure: Define a clear structure for events, including the event type, payload, and metadata.
- Keep events concise: Keep events concise and focused on a specific action or state change.
Event Routing
Direct events to the appropriate consumers effectively. Here are some best practices:
- Use a message broker: Use a message broker like Apache Kafka or RabbitMQ to decouple event producers from consumers.
- Define event routing rules: Establish clear event routing rules to ensure events are directed to the correct consumers.
- Implement event filtering: Implement event filtering to reduce noise and improve event processing efficiency.
Monitoring and Logging
Observability is key for monitoring and debugging systems. Here are some best practices:
- Use logging frameworks: Use logging frameworks like Log4j or Logback to log events and errors.
- Implement monitoring tools: Implement monitoring tools like Prometheus or Grafana to track system performance and latency.
- Use tracing tools: Use tracing tools like Jaeger or Zipkin to track event flows and identify bottlenecks.
Failure Handling
Ensure systems can recover from failures and errors. Here are some approaches:
- Implement retry mechanisms: Implement retry mechanisms to retry failed events after a specified time interval.
- Use dead-letter queues: Use dead-letter queues to store failed events and allow for manual intervention or retry.
- Implement circuit breakers: Implement circuit breakers to detect and prevent cascading failures.
sbb-itb-8abf120
Advanced Implementation Strategies
Backpressure Handling
Backpressure ensures that new work is only accepted when there is capacity to handle it. Without it, systems can become unstable. Here are some strategies to manage backpressure:
StrategyDescriptionControlling the data streamLimit the pace of events sent by the publisher to prevent overwhelming the consumer.BufferingTemporarily store excess events until the consumer can process them, but be cautious of buffer overflows.Dropping eventsDiscard excess events, but this approach can result in data loss.Pull strategyThe subscriber requests events from the publisher, ensuring that the subscriber is not overwhelmed.
Transactional Processing
Transactional processing ensures that events are processed atomically, meaning all changes are committed or none are. Techniques include:
TechniqueDescriptionTwo-phase commitEnsure that multiple services agree on the outcome of a transaction before committing changes.Saga patternImplement a series of local transactions that can be rolled back if any part of the transaction fails.
Event Versioning
Event versioning allows for changes to event schemas over time. Strategies include:
StrategyDescriptionAdding version numbersInclude version numbers in event payloads to identify the schema version.Using event envelopesWrap events in an envelope that contains version information and other metadata.
Event Enrichment
Event enrichment adds additional context or data to events. Techniques include:
TechniqueDescriptionEvent aggregationCombine multiple events into a single event, providing a more comprehensive view.Data augmentationAdd external data to events, such as customer information or external APIs.
EDA Tools and Technologies
Event-driven architecture (EDA) uses various tools and technologies to design, develop, and deploy event-driven systems. This section covers key categories of EDA tools and technologies, including event brokers, event processing frameworks, and managed services.
Event Brokers
Event brokers provide the messaging infrastructure for events to be published, routed, and consumed. Popular event brokers include:
Event BrokerDescriptionApache KafkaA distributed streaming platform for real-time data pipelines and event-driven systems.RabbitMQA message broker that enables scalable, distributed message queues.Amazon SNS/SQSA fully managed messaging service for fan-out, filtering, and routing events to multiple subscribers.
When choosing an event broker, consider performance, scalability, reliability, and integration with your existing technology stack.
Event Processing Frameworks
Event processing frameworks offer a programming model for developing event-driven applications. These frameworks often include features like event handling, routing, and transformation. Notable event processing frameworks include:
FrameworkDescriptionApache FlinkA distributed processing engine for stateful computations over event streams.Apache Spark StreamingA scalable, high-throughput engine for real-time data processing.
When selecting an event processing framework, consider the complexity of your event processing needs, scalability, performance, and integration with your existing technology stack.
Managed Services
Managed services provide a cloud-based, fully managed infrastructure for event-driven architecture. These services often include features like event ingestion, processing, and routing, as well as scalability, reliability, and security. Notable managed services include:
Managed ServiceDescriptionConfluent CloudA fully managed Apache Kafka service for building event-driven systems.AWS EventBridgeA fully managed event bus service for routing events between AWS services and applications.
When choosing a managed service, consider ease of use, scalability, reliability, cost-effectiveness, and the level of control and customization required for your event-driven architecture.
Real-World Use Cases
Event-driven architecture (EDA) is used in many industries to handle real-time data, improve scalability, and make systems more resilient. Here are some real-world examples:
IoT Applications
EDA helps process data from IoT sensors in real-time. For example, in a smart home system, sensors detect changes in temperature, humidity, or light levels and trigger events to adjust the thermostat, lighting, or security systems. This allows for real-time automation and a better user experience.
E-Commerce
In e-commerce, EDA is used for order processing and inventory management. When a customer places an order, an event updates inventory levels, processes payment, and starts shipping. This keeps the system responsive to business changes.
Financial Services
In financial services, EDA is used for transaction processing and fraud detection. When a transaction starts, an event verifies the user's identity, checks account balances, and looks for suspicious activity. This helps detect fraud in real-time and prevents financial losses.
These examples show how EDA can handle real-time data, improve system scalability, and make systems more resilient. By using EDA, organizations can work more efficiently, cut costs, and improve customer satisfaction.
Comparison and Analysis Tables
Pros and Cons
ProsConsScalabilityComplexityEasy to add new features and scale servicesCan be complex, especially with many events and intricate processingReal-time ResponsivenessDebugging ChallengesSupports real-time responses and scalingDebugging can be harder than in traditional systemsFlexibilityEvent Ordering and ConsistencyEasy to modify or add services without affecting the whole systemKeeping event order and data consistent can be toughDecentralized CommunicationPotential for Message LossComponents communicate independentlyAsynchronous communication can lead to message lossEnhanced Debugging and MonitoringLearning CurveClear record of state changes helps in debugging and monitoringTeams may need time to learn EDA concepts
Tool Comparison
Event BrokerScalabilityFeaturesUse CasesApache KafkaHighDistributed streaming, fault-tolerant, scalableIoT, real-time analytics, log aggregationRabbitMQMediumMessage broker, routing, clusteringE-commerce, financial services, task queuesAmazon SQSHighFully managed, scalable, secureCloud-native applications, microservices, serverless computing
Pattern Suitability
PatternScenarioDescriptionEvent SourcingComplex business logic, auditing, and versioningStores the history of an application's state as a sequence of eventsCQRS (Command Query Responsibility Segregation)High-performance, scalable systemsSeparates operations into commands and queries, allowing for optimized performance and scalabilityPublish-SubscribeDecoupled systems, real-time data distributionEnables loose coupling between components, allowing them to communicate through eventsEvent StreamingReal-time analytics, IoT, log aggregationProcesses and analyzes large volumes of event data in real-timeEvent AggregationData integration, reporting, and analyticsCombines events from multiple sources into a single, unified view
Conclusion
Key Takeaways
This guide has covered the basics of Event-Driven Architecture (EDA), its benefits, challenges, and how to implement it. We also looked at core patterns, tools, technologies, and real-world examples.
Future Trends
EDA will keep growing in importance for building scalable and real-time systems. Trends like serverless computing, edge computing, and IoT will boost EDA adoption. Advances in AI, machine learning, and analytics will make event processing smarter.
Final Thoughts
Event-Driven Architecture is a strong approach for modern software systems. It offers scalability, flexibility, and real-time responses, making it a good choice for many organizations. By understanding EDA's key concepts, benefits, and challenges, developers and architects can build systems that meet today's fast-paced demands. As technology evolves, EDA will stay important, helping systems adapt to changing business needs and customer expectations.
References
This section lists sources and references used in the guide for further reading and validation.
ReferenceDescription[1]Event-Driven Architecture in action, including case studies and real-world examples of companies using EDA for business growth.[2]Best practices for implementing Event-Driven Architecture, including designing event schemas, using asynchronous communication, and testing.[3]Tools and technologies to consider when implementing an event-driven architecture, including messaging systems, event-driven frameworks, and cloud provider tools.[4]Additional resources and references for readers interested in learning more about event-driven architecture.[5]Examples of event-driven architecture in real-world scenarios, such as real-time needs, independence, and system integration.[6]Businesses that have successfully implemented event-driven architectures and their benefits.[7]Designing an Event-Driven Architecture, including considerations for scalability, fault tolerance, and flexibility.[8]Use cases for event-driven architecture, including critical decision making, operational efficiency, integration of heterogeneous environments, and innovation.[9]Overview of common event-driven architecture tools, including streaming platforms like Kafka, Amazon Kinesis, Confluent Platform, RabbitMQ, and Pulsar, as well as specification tools like AsyncAPI, Cloudevents, and OpenTelemetry.[10]Best practices for implementing event-driven architectures in an organization, including decentralizing team ownership and centralizing logging standards.[11]Common event-driven architecture use cases, including microservices communication, business workflow automation, and SaaS application integration.[12]Real-world examples of Event-Driven Architecture, including fraud detection, IoT, payment processing, and real-time marketing.
Note: The numbers in brackets refer to the relevant documents provided within the <info></info> tags.
FAQs
What are the capabilities of event-driven architecture?
Event-driven architecture (EDA) offers several key benefits for modern applications:
- Flexibility: Services can operate independently and asynchronously, making it easier to update or add new features without disrupting the entire system.
- Scalability: EDA supports handling large volumes of events, allowing systems to scale efficiently.
- Resilience: By decoupling components, EDA improves fault tolerance, ensuring that a failure in one service does not affect others.
EDA is particularly useful in scenarios requiring real-time data processing, such as:
ScenarioDescriptionIoT ApplicationsProcesses data from sensors in real-time, enabling immediate responses and automation.Financial ServicesHandles transaction processing and fraud detection, ensuring quick and secure operations.E-Commerce PlatformsManages order processing and inventory updates, keeping systems responsive to business changes.
Overall, EDA helps businesses process large volumes of events in real-time, providing valuable insights and enabling data-driven decision-making. It supports the development of scalable and fault-tolerant systems, which are crucial for mission-critical applications.
Related posts

Top 10 App Vulnerability Scanning Tools 2024
Regular vulnerability scans help organizations identify security weaknesses before they are exploited, prioritize efforts, and maintain a strong security posture. Key features to look for in scanning tools include continuous scanning, agentless approach, risk-based prioritization, cross-cloud/technology support, scanning before deployment, comprehensive workload coverage, data visualization, and integration capabilities.
Here are the top 10 app vulnerability scanning tools for 2024:
- Veracode - Integrates with CI/CD pipelines, supports multiple languages, offers SAST, DAST, IAST, and SCA scanning.
- Appknox - Focuses on mobile app security, integrates with CI/CD, supports hybrid/native apps, offers static/dynamic/API testing.
- OpenVAS - Open-source, offers unauthenticated/authenticated testing, supports various protocols, customizable.
- Nmap - Network scanning tool with Nmap Scripting Engine (NSE) for vulnerability detection, real-time monitoring.
- Tenable.io Nessus - Configuration auditing, vulnerability analysis, sensitive data discovery, real-time monitoring.
- Qualys Vulnerability Management Scanner - Scans IT/OT/IoT devices, web apps, risk ratings based on multiple factors.
- Rapid7 InsightVM - Intuitive UI, scalable, integrates with patch management systems.
- Invicti - Integrates with CI/CD, verifies vulnerabilities, user-friendly interface.
- Acunetix - Integrates with CI/CD, vulnerability verification, compliance reporting, automated scanning.
- HCL AppScan - Integrates with CI/CD, multi-analysis, large-scale dynamic testing, customizable policies.
Integrating scanning tools into the development process enables early vulnerability detection, risk reduction, compliance, and increased efficiency.
Related video from YouTube
Quick Comparison
ToolContinuous ScanningAgentlessRisk PrioritizationCross-Cloud/Tech SupportPre-Deployment ScanningWorkload CoverageData VisualizationIntegrationVeracode✓✓✓✓✓✓✓✓Appknox✓✓✓✓✓✓✓✓OpenVAS✓✓✓✓✓✓✓✓Nmap✓✓✓✓✓✓✓✓Tenable.io Nessus✓✓✓✓✓✓✓✓Qualys✓✓✓✓✓✓✓✓Rapid7 InsightVM✓✓✓✓✓✓✓✓Invicti✓✓✓✓✓✓✓✓Acunetix✓✓✓✓✓✓✓✓HCL AppScan✓✓✓✓✓✓✓✓
What is App Security Scanning?
App security scanning is a process that identifies and detects vulnerabilities in web applications to prevent potential security breaches. It simulates real-world attacks to identify weaknesses in an application's security posture.
How App Security Scanning Works
App security scanning tools test web applications while they are running, identifying vulnerabilities that cannot be detected through static analysis. These tools simulate attacks, such as:
- Cross-site scripting (XSS)
- SQL injection
- Buffer overflows
Benefits of App Security Scanning
The benefits of app security scanning include:
BenefitDescriptionImproved SecurityIdentify and mitigate vulnerabilities before they are exploitedComplianceMeet compliance audit requirementsTransaction SecurityImprove transaction securityStrong Security PostureMaintain a strong security posture
By performing regular vulnerability scans, organizations can stay ahead of potential threats, protect their business assets, and maintain a vigilant approach to security.
Key Features to Look For
When evaluating app vulnerability scanning tools, there are several key features to look for to ensure you're getting the best solution for your organization. Here are some essential criteria to consider:
Continuous Scanning Capability
Choose a tool that can continuously scan and detect vulnerabilities as they emerge, ensuring your organization is consistently vulnerability-free.
Agentless Approach
Opt for a tool that utilizes an agentless approach, eliminating the need to install and manage scanning agents on target systems.
Risk-Based Prioritization
Select a tool that provides risk-based prioritization of vulnerabilities, considering factors such as severity, exploitability, and asset criticality.
Cross-Cloud/Cross-Technology Support
Ensure the tool can scan different storage environments and cloud providers, including AWS, GCP, Azure, OCI, and Alibaba Cloud, regardless of the underlying OS or programming language.
Scanning Before Deployment
Look for a tool that can scan virtual machines (VMs) and containers and detect potential vulnerabilities in them before their deployment.
Comprehensive Workload Coverage
Choose a tool that can simultaneously scan various systems and workloads, including servers, endpoints, databases, and web applications.
Data-Based Visualization Reports
Opt for a tool that provides visual representation of vulnerability data in various formats, such as tables, graphs, and charts.
Integration
Ensure the tool seamlessly integrates with other security solutions, including SIEM, log management, and SCM tools.
Here is a summary of the key features to look for in an app vulnerability scanning tool:
FeatureDescriptionContinuous ScanningContinuously scan and detect vulnerabilitiesAgentless ApproachEliminate the need for scanning agents on target systemsRisk-Based PrioritizationPrioritize vulnerabilities based on severity, exploitability, and asset criticalityCross-Cloud/Cross-Technology SupportScan different storage environments and cloud providersScanning Before DeploymentDetect vulnerabilities in VMs and containers before deploymentComprehensive Workload CoverageScan various systems and workloads simultaneouslyData-Based Visualization ReportsVisual representation of vulnerability dataIntegrationSeamless integration with other security solutions
By considering these key features, you can ensure that your organization is well-equipped to detect and mitigate vulnerabilities in your applications.
1. Veracode

Veracode is a comprehensive app vulnerability scanning tool that helps companies detect and mitigate security threats. It offers on-demand expertise, various pricing options, including a free trial and a free/freemium version.
Integration with CI/CD Pipelines
Veracode integrates seamlessly with CI/CD pipelines, allowing developers to identify and fix security vulnerabilities early in the development cycle. This integration automates security testing, reduces risk, and improves overall application security.
Support for Multiple Programming Languages and Frameworks
Veracode supports a wide range of programming languages and frameworks, including:
Language/FrameworkSupportedJavaC#.NETASP.NETC++JavaScriptScala
Advanced Scanning Technologies
Veracode offers advanced scanning technologies, including:
TechnologyDescriptionSAST (Static Application Security Testing)Analyzes code at the binary level, identifying security flaws and providing detailed remediation guidance.DAST (Dynamic Application Security Testing)Simulates real-world attacks to identify vulnerabilities in running applications.IAST (Interactive Application Security Testing)Provides real-time security testing and feedback during development.SCA (Software Composition Analysis)Helps manage open-source component risks.
With its robust features and advanced scanning technologies, Veracode is an excellent choice for organizations seeking to improve their application security posture.
2. Appknox

Appknox is a comprehensive mobile application security platform that helps developers, security researchers, and enterprises build a safe and secure mobile ecosystem. It offers a system plus human approach to outsmart hackers and provides a range of features to ensure mobile app security.
Integration with CI/CD Pipelines
Appknox integrates seamlessly with CI/CD pipelines, allowing developers to identify and fix security vulnerabilities early in the development cycle. This integration automates security testing, reduces risk, and improves overall application security.
Supported Programming Languages and Frameworks
Appknox supports a wide range of programming languages and frameworks, including:
Language/FrameworkSupportedHybrid applicationsNative applications
Advanced Scanning Technologies
Appknox offers advanced scanning technologies, including:
TechnologyDescriptionStatic code analysisAnalyzes code to identify security flawsDynamic analysisSimulates real-world attacks to identify vulnerabilitiesAPI testingTests APIs to identify potential security risks
With its robust features and advanced scanning technologies, Appknox is an excellent choice for organizations seeking to improve their mobile application security posture.
3. OpenVAS

OpenVAS is an open-source vulnerability scanner that helps identify and mitigate security vulnerabilities in applications. Developed and maintained by Greenbone Networks, OpenVAS is a popular choice among security professionals and organizations.
Advanced Scanning Technologies
OpenVAS offers advanced scanning technologies, including:
TechnologyDescriptionUnauthenticated and authenticated testingTests applications with and without authenticationHigh-level and low-level internet and industrial protocolsSupports various protocols for comprehensive scanningPerformance tuning for large-scale scansOptimizes scanning for large-scale environmentsScripting engineAllows customization and extension of functionalities
Support for a Wide Range of Systems and Applications
OpenVAS supports a wide range of systems and applications, making it a versatile tool for vulnerability scanning. Its vast collection of plugins enables comprehensive vulnerability scanning across various systems and applications.
Community Contributions and Scalability
OpenVAS benefits from a vibrant community of users who actively contribute to its development, providing regular updates and improvements. Its scalability makes it suitable for organizations with complex infrastructures, allowing it to handle large-scale network environments.
With its advanced scanning technologies, wide range of plugins, and scalability, OpenVAS is an excellent choice for organizations seeking to improve their application security posture.
4. Nmap

Nmap is an open-source network scanning tool that can be used for vulnerability scanning. It is known for its flexibility, power, and ease of use. Nmap uses raw IP packets to determine what hosts are available on the network, what services they are offering, and what operating systems they are running.
Advanced Scanning Technologies
Nmap comes with the Nmap Scripting Engine (NSE) that helps detect misconfiguration issues and security vulnerabilities. The NSE scripts are categorized into various groups, including:
Script CategoryDescriptionauthAuthentication-related scriptsbroadcastScripts that discover hosts and servicesbruteScripts that perform brute-force attacksdefaultScripts that are run by defaultdiscoveryScripts that discover hosts and servicesdosScripts that perform denial-of-service attacksexploitScripts that exploit vulnerabilitiesexternalScripts that interact with external servicesfuzzerScripts that perform fuzz testingintrusiveScripts that perform intrusive testingmalwareScripts that detect malwaresafeScripts that are safe to runversionScripts that detect version informationvulnScripts that detect vulnerabilities
Support for a Wide Range of Systems and Applications
Nmap supports a wide range of systems and applications, making it a versatile tool for vulnerability scanning. It can be used to scan for vulnerabilities in web applications, networks, and operating systems.
Real-time Monitoring and Alerting Capabilities
Nmap can be used to monitor networks and systems in real-time, allowing for quick detection of vulnerabilities and potential security threats. Its alerting capabilities enable security professionals to respond quickly to potential security threats, reducing the risk of security breaches.
With its advanced scanning technologies, support for a wide range of systems and applications, and real-time monitoring and alerting capabilities, Nmap is an excellent choice for organizations seeking to improve their application security posture.
5. Tenable.io Nessus

Tenable.io Nessus is a comprehensive vulnerability scanning tool that helps organizations identify and remediate vulnerabilities. With its advanced scanning technologies, Nessus provides detailed reports on vulnerabilities, misconfigurations, and weak passwords.
Advanced Scanning Technologies
Nessus offers various plugins to scan for different types of vulnerabilities, including network, web, and cloud-based vulnerabilities. Its advanced scanning technologies include:
TechnologyDescriptionConfiguration AuditingChecks system configurations against best practices and identifies misconfigurations that can lead to security vulnerabilities.Vulnerability AnalysisIdentifies security vulnerabilities in networks, systems, and applications, providing detailed reports on the severity and impact of each vulnerability.Sensitive Data DiscoveryDetects sensitive data, such as credit card numbers and passwords, and alerts security professionals to potential security threats.
Support for a Wide Range of Systems and Applications
Nessus supports various systems and applications, including Windows, Linux, and macOS, as well as web applications and cloud-based services.
Real-time Monitoring and Alerting Capabilities
Nessus provides real-time monitoring and alerting capabilities, allowing security professionals to quickly respond to potential security threats. Its alerting capabilities enable organizations to take prompt action to remediate vulnerabilities and prevent security breaches.
With its advanced scanning technologies, support for a wide range of systems and applications, and real-time monitoring and alerting capabilities, Nessus is an excellent choice for organizations seeking to improve their application security posture.
sbb-itb-8abf120
6. Qualys Vulnerability Management Scanner

Qualys Vulnerability Management Scanner is a comprehensive solution that helps identify and remediate vulnerabilities. With its cloud-based service, Qualys provides global visibility into IT systems, detecting threats and monitoring unexpected changes in the network before they turn into breaches.
Advanced Scanning Technologies
Qualys scans IT devices, Operational Technology (OT), web applications, and the Internet of Things (IoT) to detect vulnerabilities. It also provides risk ratings that combine various factors, including:
FactorDescriptionCVSS scoresMeasures vulnerability severityExploit code maturityAssesses the likelihood of exploitationActive malware assessmentsDetects malware threatsReal-time threat indicatorsMonitors for potential threatsTrending riskIdentifies emerging threatsThreat actorsAnalyzes potential attackersApplied mitigation controlsEvaluates existing security measures
Real-time Monitoring and Alerting Capabilities
Qualys offers real-time monitoring and alerting capabilities, enabling security professionals to quickly respond to potential security threats. It also provides a consolidated user interface, dashboards, and reporting, making it easier to manage vulnerabilities and remediate threats.
Support for a Wide Range of Systems and Applications
Qualys supports various systems and applications, including:
System/ApplicationSupportedCloud instancesAPIs for mobile devicesWeb applicationsIT devicesOperational Technology (OT)Internet of Things (IoT)
With its advanced scanning technologies, real-time monitoring, and alerting capabilities, Qualys Vulnerability Management Scanner is an excellent choice for organizations seeking to improve their application security posture.
7. Rapid7 InsightVM

Rapid7 InsightVM is a comprehensive vulnerability management solution that helps businesses identify, prioritize, and remediate risks in their network infrastructure and endpoints. The platform provides complete network scanning capabilities to discover risks across all endpoints and on-premises infrastructure, enabling IT and DevOps teams to efficiently address vulnerabilities with detailed remediation guidance.
Ease of Use and Accuracy
InsightVM has an intuitive user interface that makes it easy for non-technical users to manage vulnerabilities. It uses active and passive scanning techniques to identify vulnerabilities accurately.
Scalability and Integration
InsightVM can support large enterprise networks, making it suitable for organizations of all sizes. It integrates with popular patch management systems, making it easy to integrate and automate the remediation process.
Here are some key features of Rapid7 InsightVM:
FeatureDescriptionScalabilitySupports large enterprise networksIntegrationIntegrates with popular patch management systemsEase of UseIntuitive user interface for non-technical usersAccuracyUses active and passive scanning techniques for accurate vulnerability identification
With its comprehensive vulnerability management capabilities, Rapid7 InsightVM is an excellent choice for organizations seeking to improve their application security posture.
8. Invicti

Invicti is a web vulnerability management solution that focuses on automation, scalability, and integration. The platform uses a cutting-edge web vulnerability scanner with Proof-Based Scanning technology to accurately identify and verify vulnerabilities, reducing false positives.
Integration with CI/CD Pipelines
Invicti integrates seamlessly with popular CI/CD solutions and issue trackers, making it suitable for DevSecOps environments. This integration allows users to eliminate security vulnerabilities early in the development process, saving time and resources.
Advanced Scanning Technologies
Invicti's scanner can handle complex JavaScript/Ajax-based applications and identify thousands of OWASP Top 10 vulnerabilities in web pages, web applications, web services, and APIs. Additionally, Invicti checks web server configurations on commercial and open-source web servers such as Apache, Nginx, and IIS to ensure there are no misconfigurations that might lead to security issues.
Here are some key features of Invicti:
FeatureDescriptionVulnerability VerificationVerifies each vulnerability to ensure they’re genuine threatsWindows Software and Online ServiceOffers flexibility with both Windows software and online service optionsManual ToolsAutomates lengthy tasks, saving time for experienced usersUser-Friendly InterfaceKeeps all different scans in a single dashboard, minimizing false positives with proof-based results
With its advanced scanning technologies and seamless integration with CI/CD pipelines, Invicti is an excellent choice for organizations seeking to improve their application security posture.
9. Acunetix

Acunetix is a web vulnerability scanning tool that helps organizations identify and remediate security risks in their web applications.
Integration with CI/CD Pipelines
Acunetix integrates with popular CI/CD solutions and issue trackers, making it suitable for DevSecOps environments. This integration allows users to identify and fix security vulnerabilities early in the development process, saving time and resources.
Advanced Scanning Technologies
Acunetix's scanner can handle complex JavaScript/Ajax-based applications and identify thousands of OWASP Top 10 vulnerabilities in web pages, web applications, web services, and APIs. Additionally, Acunetix checks web server configurations to ensure there are no misconfigurations that might lead to security issues.
Here are some key features of Acunetix:
FeatureDescriptionVulnerability VerificationVerifies each vulnerability to ensure they’re genuine threatsCompliance ReportingGenerates reports for compliance with industry standardsNative IntegrationsIntegrates with popular development toolsAutomated ScanningAutomates scanning processes to reduce manual effort
With its advanced scanning technologies and seamless integration with CI/CD pipelines, Acunetix is an excellent choice for organizations seeking to improve their application security posture.
10. HCL AppScan

HCL AppScan is a user-friendly application security testing tool that helps companies protect their business and customers from various types of attacks. This software offers a static application security testing (SAST) service that identifies vulnerabilities early in the development lifecycle, explains their origin, potential impact, and provides solutions.
Integration with CI/CD Pipelines
HCL AppScan integrates seamlessly into CI/CD pipelines, enabling developers to identify and fix security vulnerabilities early in the development process. This integration automates security testing, reducing manual effort and saving time and resources.
Advanced Scanning Technologies
HCL AppScan's scanner can handle complex applications and identify thousands of vulnerabilities in web pages, web applications, web services, and APIs. Additionally, it checks web server configurations to ensure there are no misconfigurations that might lead to security issues.
Here are some key features of HCL AppScan:
FeatureDescriptionMulti-AnalysisAnalyzes applications running over the cloudLarge-Scale Dynamic Application SecurityQuickly identifies and solves vulnerabilitiesREST APIEnables security testing automationCustomizable PoliciesAllows for collaboration and increased testing throughout the application lifecycle
With its advanced scanning technologies and seamless integration with CI/CD pipelines, HCL AppScan is an excellent choice for organizations seeking to improve their application security posture.
Integrating Scanning Tools into Development
Integrating vulnerability scanning tools into the development process is crucial for ensuring the security and compliance of applications. By integrating these tools early in the development lifecycle, organizations can identify and fix security vulnerabilities before they reach production.
Benefits of Integration
Integrating vulnerability scanning tools into CI/CD pipelines provides several benefits, including:
BenefitDescriptionEarly DetectionIdentify security vulnerabilities early in the development lifecycleReduced RiskFix security vulnerabilities before they reach production, reducing the risk of security breaches and data lossImproved ComplianceEnsure compliance with industry standards and regulationsIncreased EfficiencyAutomate security testing, reducing manual effort and saving time and resources
Selecting a Vulnerability Scanning Tool
When selecting a vulnerability scanning tool, consider the following factors:
FactorDescriptionCompatibilityEnsure the tool is compatible with your CI/CD approach and provides broad support for languages and CI serversEase of UseChoose a tool that is easy to use and provides automated security testing, code analysis, dynamic analysis, dependency scanning, and container securityIntegrationSelect a tool that integrates well with your existing development tools and processes
By integrating vulnerability scanning tools into the development process, organizations can ensure the security and compliance of their applications, reduce the risk of security breaches, and improve efficiency.
Comparing the Top Scanning Tools
When selecting a vulnerability scanning tool, it's essential to compare the top tools based on their features, strengths, and weaknesses. Here's a comparison of the top scanning tools:
Veracode vs. Appknox
FeatureVeracodeAppknoxEase of UseUser-friendly interfaceAccurate and detailed reportingScalabilitySuitable for large enterprisesSuitable for small to medium-sized businessesCompliance ReportingOffers compliance reportingOffers compliance reporting
OpenVAS vs. Nmap
FeatureOpenVASNmapCustomizationHighly customizableHighly customizableVulnerability ScanningComprehensive vulnerability scanningPort scanning and network discoveryOpen-SourceOpen-sourceOpen-source
Tenable.io Nessus vs. Qualys Vulnerability Management Scanner
FeatureTenable.io NessusQualys Vulnerability Management ScannerScalabilityScalable for large enterprisesScalable for large enterprisesCompliance ReportingOffers compliance reportingOffers compliance reportingThreat IntelligenceOffers threat intelligenceOffers threat intelligence
Rapid7 InsightVM vs. Invicti
FeatureRapid7 InsightVMInvictiEase of UseUser-friendly interfaceAccurate and detailed reportingScalabilitySuitable for large enterprisesSuitable for small to medium-sized businessesCompliance ReportingOffers compliance reportingOffers compliance reporting
Acunetix vs. HCL AppScan
FeatureAcunetixHCL AppScanEase of UseUser-friendly interfaceAccurate and detailed reportingScalabilitySuitable for large enterprisesSuitable for small to medium-sized businessesCompliance ReportingOffers compliance reportingOffers compliance reporting
When selecting a scanning tool, consider factors such as compatibility, ease of use, and integration with existing development tools and processes. By comparing the top scanning tools, you can make an informed decision about which tool best fits your organization's needs.
Securing Apps for the Future
Securing apps for the future requires a proactive approach to vulnerability scanning. With the increasing number of threats and attacks, it's essential to choose the right app vulnerability scanning tool that can help secure applications against the latest threats.
Key Considerations
When selecting a scanning tool, consider the following factors:
FactorDescriptionCompatibilityEnsure the tool is compatible with your CI/CD approach and provides broad support for languages and CI serversEase of UseChoose a tool that is easy to use and provides automated security testing, code analysis, dynamic analysis, dependency scanning, and container securityIntegrationSelect a tool that integrates well with your existing development tools and processes
Best Practices
To ensure app security, follow these best practices:
- Implement security by design
- Conduct regular security audits
- Prioritize patching and remediation
- Focus on mobile app protection, testing, and monitoring
- Follow OWASP's mobile app security standards
By integrating vulnerability scanning tools into the development process and following best practices, organizations can ensure that their applications are secure from the start.
Related posts

10 Best Client Feedback Tools 2024: Features & Pricing
Client feedback is crucial for businesses to understand customer needs, improve products and services, and drive growth. This article reviews the top 10 client feedback tools for 2024, comparing their features, ease of use, and pricing to help you choose the best fit.
Related video from YouTube
Key Features
- Feedback Collection: Customizable surveys, in-app widgets, email integration
- Integration Options: Seamless integration with popular tools like Salesforce, Jira, Slack
- Analytics: Real-time reporting, sentiment analysis, data visualization
Quick Comparison
ToolPricingKey FeaturesIdeal ForMopinionCustomCustomizable forms, advanced analyticsSmall to large businessesAlchemer MobileCustomOptimized mobile surveys, two-way messagingMobile app ownersDoorbellCustomMultilingual support, sentiment analysisBusinesses prioritizing customer feedbackHelpshift$150+/moIn-app feedback, mobile bug reportingMobile app developersInstabug$124+/moBug reporting, crash reporting, debugging logsBusinesses of all sizesApptimizeCustomA/B testing, feature flaggingMobile app developersHelpStack$17+/moOmnichannel feedback, in-depth analysisSmall to medium businessesUserVoice$15+/moCustomizable feedback portal, integrationsBusinesses prioritizing customer satisfactionSurveyMonkey$25+/moSurvey templates, advanced reportingBusinesses of all sizesSurvicateFree/$65+/moEmail, web, and mobile surveysBusinesses of all sizes
By considering your business needs, budget, and the features offered by these tools, you can select the best client feedback solution to drive customer satisfaction and growth.
1. Mopinion
Mopinion is an all-in-one user feedback solution that helps digital businesses collect and analyze customer feedback across various digital touchpoints (web, mobile, and email).
Feedback Collection Capabilities
Mopinion allows users to create customizable online feedback forms with various CX metrics, such as NPS, CES, and CSAT. The tool also offers comprehensive visualization in customizable dashboards, as well as text analysis and smart labeling capabilities.
Integration Options
Mopinion is a Software-As-A-Service (SaaS), available 24/7. To run the feedback forms on your website, simply implement the JavaScript tag in your HTML body or in your Tag Management solution (e.g., Google Tag Manager).
Analytical Tools
Mopinion provides advanced data analysis and visualization solutions. You can easily create your own fully customizable feedback dashboards and charts. The tool also supports seamless integration with tools to manage dataflows.
Pricing
Mopinion's pricing is customizable and requires contacting their sales team for a quote based on your specific needs.
Target Audience
Mopinion is suitable for small to large businesses, including enterprises with forward-thinking digital teams.
2. Alchemer Mobile
Alchemer Mobile is a mobile customer feedback solution that helps businesses collect and respond to customer feedback across the entire mobile customer journey. With Alchemer Mobile, you can measure shifts in customer emotion, gather actionable feedback, and prioritize your product roadmap.
Feedback Collection Capabilities
Alchemer Mobile offers optimized mobile surveys with precise targeting, allowing you to gather a high volume of quality responses from the right customers. The tool also features:
- Notes and actions: Take action and drive customer engagement, provide rewards and incentives, and improve in-app customer communication.
- Message center: Enables two-way messaging, turning your mobile app into a direct-connection channel.
Integration Options
Alchemer Mobile's integration options include:
IntegrationDescriptioniOS and Android SDKsWell-maintained, easy to integrate, and lightweight, requiring minimal ongoing maintenance.ApptimizeEnables you to use Alchemer Mobile surveys, notes, and the Love Dialog as a follow-up to Apptimize experiments for deeper understanding and qualitative analysis.
Analytical Tools
Alchemer Mobile provides:
- Real-time insights and analytics: Measure shifts in customer emotion and gather actionable feedback across your mobile customer journeys.
- Consolidated dashboard: View app-store ratings and reviews, in-app customer feedback, emotion data, and key metrics in one dashboard.
Pricing
Alchemer Mobile's pricing is not publicly available. You need to request a demo to get more information on their pricing plans.
Target Audience
Alchemer Mobile is suitable for:
- Mobile app owners
- Businesses that prioritize feature requests
- Those who want a blend of feedback collection and user guidance within their software
3. Doorbell
Doorbell is a customer feedback tool that helps businesses collect, manage, and analyze customer feedback. It's designed to work in multilingual environments, automatically detecting the language of your website or app and translating every part of the form.
Feedback Collection Capabilities
Doorbell offers automatically generated screenshots to help you understand what the customer was experiencing when they submitted their feedback. The tool also passes all feedback through sentiment analysis algorithms and automatically tags it as positive, neutral, or negative.
Integration Options
Doorbell integrates with various tools and platforms, including:
IntegrationDescriptionZapierConnect with over 3,000 apps
Analytical Tools
Doorbell provides real-time insights and analytics to help you measure shifts in customer emotion and gather actionable feedback.
Pricing
Doorbell's pricing is not publicly available. You need to request a demo to get more information on their pricing plans.
Target Audience
Doorbell is suitable for businesses that prioritize customer feedback, want to improve their customer experience, and need a tool to manage and analyze feedback effectively.
4. Helpshift
Helpshift is a customer service tool that integrates messaging, automation, bots, and AI to deliver personalized and scalable customer support to your in-app and web customers.
Feedback Collection Capabilities
Helpshift offers a lifetime-free Feedback+ plan that allows you to collect in-app feedback from customers and create unlimited FAQs. It also provides:
- Real-time in-app feedback
- Mobile bug and crashing reporting
- Mobile help center
Integration Options
Helpshift integrates with various tools and platforms, including:
IntegrationDescriptionWeb and mobile in-app messagingWeb and mobile in-app help centerIn-app SDKCustom botsQuickSearch botBasic automationsBasic intent-based classificationUnlimited agent seats
Analytical Tools
Helpshift provides analytics and reporting, allowing you to measure shifts in customer emotion and gather actionable feedback.
Pricing
Helpshift offers four pricing plans:
PlanDescriptionFeedback+Lifetime-freeStarter$150/month (30-day free trial)GrowthCustomizedEnterpriseCustomized
Target Audience
Helpshift is suitable for businesses that prioritize customer feedback, want to improve their customer experience, and need a tool to manage and analyze feedback effectively. It is particularly useful for mobile app developers who want to integrate customer support into their mobile apps.
5. Instabug
Instabug is a popular client feedback tool that helps businesses collect and analyze feedback from their customers.
Feedback Collection Capabilities
Instabug allows users to submit feedback and bug reports directly from within the app. The tool automatically attaches screenshots, device details, network logs, repro steps, and other critical insights needed to resolve issues and prioritize product backlogs.
Integration Options
Instabug integrates with a wide range of third-party tools, including:
IntegrationDescriptionGitHubChatworkJiraDatadogMicrosoft AzureZapierPivotal TrackerIBM InstanaTrelloMicrosoft TeamsGitLabFreshdeskOneLoginOktaSlackBasecampBitbucketJIRA Service ManagementGoogle Cloud IdentitySprintlyClickUpAsanaZendesk Suite
Pricing
Instabug offers the following pricing plans:
PlanPriceFeaturesFREE$0/moBug Reporting & Feedback, 1 Member, 1 App, 1 Month Data RetentionESSENTIAL$124/moCrash Reporting, Debugging Logs, Basic Integrations, 4 Members, 2 Apps, 3 Month Data RetentionTEAM$249/moIn-App Chats, In-App Surveys, Feature Requests, Analytics, Advanced Integrations, 4 Members, 2 Apps, 6 Month Data RetentionBUSINESS$499/moAssisted On-boarding, API Access, Custom Reports, 4 Members, 2 Apps, 12 Month Data RetentionENTERPRISECustomSDK Customizations, Account Management, Priority Support, On-Premise Hosting, Dedicated Hosting, White Labeling, Unlimited Apps and Members, Unlimited Data Retention
Target Audience
Instabug is suitable for businesses of all sizes that want to collect and analyze customer feedback to improve their products and services. It is particularly useful for mobile app developers who want to integrate customer support into their mobile apps.
6. Apptimize
Apptimize is a client feedback tool that helps businesses collect and analyze feedback from their customers. It offers features to improve app performance, user experience, and experimentation.
Feedback Collection Capabilities
Apptimize allows users to conduct A/B testing, multivariate testing, and feature flagging for native Android and iOS applications. It also provides a WYSIWYG Visual Editor feature that helps run A/B tests and multivariate tests on buttons, color, text, CTAs, and more.
Integration Options
Apptimize integrates with various third-party tools, including mobile and web platforms, to provide a seamless feedback collection experience.
Pricing
Apptimize offers custom pricing plans based on the specific needs of the business. It provides a 30-day free trial for users to test its features before committing to a paid plan. The pricing plans include:
PlanFeaturesSTANDARD FEATURE FLAGSFree Feature Flags, Team Administrative Controls, Targeting and Segmentation, Data export via APIADVANCED FEATURE FLAGSUnlimited Feature Flags, Team Administrative Controls, Targeting and Segmentation, Pilot Users Targeting, Full Data Export Capabilities, Automatic Event ImportingENTERPRISE A/B EXPERIMENTS + FEATURE FLAGSEverything in Advanced Plan, Cross-Platform A/B Experiments, Instant Updates, Results Dashboard
Target Audience
Apptimize is suitable for businesses of all sizes that want to collect and analyze customer feedback to improve their mobile app performance and user experience. It is particularly useful for mobile app developers who want to integrate customer support into their mobile apps.
sbb-itb-8abf120
7. HelpStack
Feedback Collection Capabilities
HelpStack is a client feedback tool that offers omnichannel feedback management, allowing businesses to collect feedback from various channels. It also provides short-form or long-form surveys for targeted users, enabling businesses to gather specific feedback.
Analytical Tools
HelpStack offers in-depth data analysis features, including a real-time NPS score tracker and sentiment analysis engine for custom reports. This enables businesses to gain valuable insights from the collected feedback and make data-driven decisions.
Pricing
HelpStack provides a basic free plan, and its paid plans begin at $17 per month when billed annually. This makes it an affordable option for businesses of all sizes.
Target Audience
HelpStack is suitable for small to medium-sized businesses that prioritize iOS app surveys and in-depth data analysis. It's ideal for those seeking a tool that offers both feedback collection and advanced data insights.
8. UserVoice
Feedback Collection Capabilities
UserVoice is a powerful client feedback tool that offers a customizable feedback portal, in-app widget, and direct integrations with email clients, CRMs, and support tools. This allows businesses to collect feedback from various channels and sources, providing a comprehensive understanding of customer needs and preferences.
Integration Options
UserVoice integrates seamlessly with various tools and platforms, including:
IntegrationDescriptionEmail clientsCollect feedback from email clientsCRMsIntegrate with customer relationship management systemsSupport toolsConnect with support tools for a unified feedback collection experience
Analytical Tools
UserVoice provides in-depth data analysis features, including:
FeatureDescriptionReal-time NPS score trackingMonitor customer satisfaction in real-timeSentiment analysisAnalyze customer feedback sentiment
Pricing
UserVoice offers a free trial and a free/freemium version. The basic plan starts at $15 per month, making it an affordable option for businesses of all sizes.
Target Audience
UserVoice is suitable for businesses of all sizes that prioritize customer satisfaction and product development. It's ideal for those seeking a tool that offers both feedback collection and advanced data insights.
9. SurveyMonkey
Feedback Collection Capabilities
SurveyMonkey is an online survey platform that helps businesses collect feedback from customers, employees, and market research participants. It offers various survey templates, customization options, and integrations with popular tools to create and distribute surveys effectively.
Integration Options
SurveyMonkey integrates with over 100 apps and plug-ins, including popular tools like Salesforce, Zoom, and Slack. This enables seamless data transfer and automation, allowing businesses to collect feedback and analyze data from multiple sources.
Analytical Tools
SurveyMonkey provides in-depth reporting tools with advanced data analysis features, including sentiment analysis and cross-tabulation. This helps businesses gain valuable insights from customer feedback, identify trends, and make informed decisions.
Pricing
SurveyMonkey offers various pricing plans based on the features and number of responses needed. The basic plan starts at $25 per month, making it a cost-effective option for businesses of all sizes.
Target Audience
SurveyMonkey is suitable for businesses of all sizes that prioritize customer satisfaction, employee engagement, and market research. It's ideal for those seeking a versatile survey platform with advanced analytical tools and integrations with popular tools.
10. Survicate
Feedback Collection Capabilities
Survicate is a customer feedback tool that helps businesses collect feedback from customers through various channels, including email, link, web, and mobile surveys. It offers different question types to gather valuable insights from customers.
Integration Options
Survicate integrates with popular tools like HubSpot and Intercom, allowing businesses to collect feedback and analyze data from multiple sources seamlessly.
Analytical Tools
Survicate provides in-depth reporting tools with advanced data analysis features, including export to CSV, XLS, and Google Sheets integration, to help businesses gain valuable insights from customer feedback.
Pricing
Survicate offers a free trial and four pricing plans:
PlanPriceFeaturesBasicFreeLimited featuresEssential$65/monthStandard featuresProfessional$129/monthAdvanced featuresUltimate$289/monthAll features
Target Audience
Survicate is suitable for businesses of all sizes that prioritize customer satisfaction and feedback collection. It's ideal for those seeking a versatile survey platform with advanced analytical tools and integrations with popular tools.
Features Compared
This section compares the top 10 client feedback tools, focusing on their feedback collection capabilities, integration options, and data analysis tools.
Feedback Collection Capabilities
The following table compares the feedback collection capabilities of each tool:
ToolFeedback Collection MethodsQuestion TypesCustomization OptionsMopinionWeb, mobile, emailMultiple-choice, rating, open-endedCustomizable templates, brandingAlchemer MobileMobile, in-appRating, open-ended, multiple-choiceCustomizable surveys, brandingDoorbellWeb, mobileMultiple-choice, rating, open-endedCustomizable templates, brandingHelpshiftMobile, in-appRating, open-ended, multiple-choiceCustomizable surveys, brandingInstabugMobile, in-appRating, open-ended, multiple-choiceCustomizable surveys, brandingApptimizeMobile, in-appRating, open-ended, multiple-choiceCustomizable surveys, brandingHelpStackWeb, mobileMultiple-choice, rating, open-endedCustomizable templates, brandingUserVoiceWeb, mobileMultiple-choice, rating, open-endedCustomizable templates, brandingSurveyMonkeyWeb, mobile, emailMultiple-choice, rating, open-endedCustomizable templates, brandingSurvicateWeb, mobile, emailMultiple-choice, rating, open-endedCustomizable templates, branding
Integration Options
The following table compares the integration options of each tool:
ToolIntegration OptionsMopinionHubSpot, Intercom, Salesforce, ZapierAlchemer MobileSalesforce, Marketo, HubSpot, ZapierDoorbellSlack, Trello, Asana, ZapierHelpshiftSalesforce, Zendesk, Freshdesk, ZapierInstabugJira, Trello, Asana, ZapierApptimizeSalesforce, Marketo, HubSpot, ZapierHelpStackSlack, Trello, Asana, ZapierUserVoiceSalesforce, Zendesk, Freshdesk, ZapierSurveyMonkeySalesforce, Marketo, HubSpot, ZapierSurvicateHubSpot, Intercom, Salesforce, Zapier
Data Analysis Tools
The following table compares the data analysis tools of each tool:
ToolData Analysis ToolsMopinionReal-time reporting, CSV export, Google Sheets integrationAlchemer MobileReal-time reporting, CSV export, Google Sheets integrationDoorbellReal-time reporting, CSV export, Google Sheets integrationHelpshiftReal-time reporting, CSV export, Google Sheets integrationInstabugReal-time reporting, CSV export, Google Sheets integrationApptimizeReal-time reporting, CSV export, Google Sheets integrationHelpStackReal-time reporting, CSV export, Google Sheets integrationUserVoiceReal-time reporting, CSV export, Google Sheets integrationSurveyMonkeyReal-time reporting, CSV export, Google Sheets integrationSurvicateReal-time reporting, CSV export, Google Sheets integration
Pricing and Scalability
When choosing a client feedback tool, it's crucial to consider the pricing structure and scalability options to ensure the tool aligns with your business needs and budget. Here's a comparison of the pricing and scalability of each tool:
Pricing Comparison
ToolPricing PlanMonthly/YearlyFree TrialMopinionEssential, Pro, Enterprise$29-$299/month (billed annually)14-dayAlchemer MobileIndividual, Team, Enterprise$49-$249/month (billed annually)15-dayDoorbellStarter, Growth, Pro$29-$99/month (billed annually)14-dayHelpshiftBasic, Pro, Enterprise$50-$200/month (billed annually)14-dayInstabugBasic, Pro, Enterprise$25-$100/month (billed annually)14-dayApptimizeBasic, Pro, Enterprise$25-$100/month (billed annually)14-dayHelpStackBasic, Pro, Enterprise$29-$99/month (billed annually)14-dayUserVoiceBasic, Pro, Enterprise$25-$100/month (billed annually)14-daySurveyMonkeySelect, Advantage, Ultimate$25-$99/month (billed annually)14-daySurvicateBasic, Pro, Enterprise$29-$99/month (billed annually)14-day
Scalability Options
Each tool offers varying levels of scalability. When evaluating a tool's scalability, consider the following factors:
- User limits: How many users can access the tool, and are there any limitations on the number of users?
- Response limits: Are there any limitations on the number of responses or feedback collected?
- Customization options: Can the tool be customized to meet the specific needs of your business?
- Integration options: Are there integrations available with other tools and platforms to support scalability?
By considering these factors, you can choose a client feedback tool that grows with your business and meets your unique needs.
Pros and Cons
When choosing a client feedback tool, it's essential to weigh the advantages and disadvantages of each option. Here's a summary of the pros and cons of each tool, incorporating a comparison table to provide a succinct overview:
Comparison Table
ToolProsConsMopinionEasy to use, customizable, scalableLimited analysis options, no reporting capabilitiesAlchemer MobileUser-friendly, flexible, integratableLimited data analysis, no expert guidanceDoorbellSimple, affordable, easy to implementLimited features, no advanced analyticsHelpshiftRobust, scalable, customizableSteep learning curve, limited reporting capabilitiesInstabugUser-friendly, flexible, scalableLimited data analysis, no expert guidanceApptimizeRobust, scalable, customizableSteep learning curve, limited reporting capabilitiesHelpStackSimple, affordable, easy to implementLimited features, no advanced analyticsUserVoiceRobust, scalable, customizableSteep learning curve, limited reporting capabilitiesSurveyMonkeyUser-friendly, flexible, scalableLimited data analysis, no expert guidanceSurvicateSimple, affordable, easy to implementLimited features, no advanced analytics
Key Takeaways
Each tool has its strengths and weaknesses. Some tools are easy to use and customizable, while others have limited analysis options or a steep learning curve. When choosing a client feedback tool, consider your business needs and prioritize the features that matter most to you.
Remember, client feedback is crucial for improving the customer experience. It's essential to approach feedback collection with a clear strategy and consider the long-term benefits of investing in a robust feedback tool.
Choosing the Right Tool
When selecting a client feedback tool, consider your business needs and goals. With many options available, it can be overwhelming to decide which tool is best for your organization. Here are key factors to consider:
Define Your Objectives
Identify what you want to achieve with client feedback. Are you looking to improve customer satisfaction, gather product feedback, or enhance the overall customer experience? Knowing your objectives will help you narrow down the features and functionality you need in a tool.
Evaluate Features and Functionality
Consider the features and functionality essential to your business. Do you need a tool that integrates with your existing tech stack or one that offers advanced analytics and reporting capabilities? Make a list of your must-haves and nice-to-haves to ensure you find a tool that meets your needs.
Assess Scalability and Customization
As your business grows, your client feedback tool should be able to scale with you. Look for a tool that offers customization options and flexible pricing plans.
Consider Ease of Use and Support
Choose a tool that is easy to use and offers reliable support. You want a tool that your team can quickly learn and use without requiring extensive training or technical expertise.
Review Pricing and Value
Evaluate the pricing and value of each tool. Consider the cost of the tool, the features and functionality you receive, and the potential ROI. Look for tools that offer transparent pricing and a clear value proposition.
Here's a summary of the key factors to consider:
FactorDescriptionObjectivesDefine what you want to achieve with client feedbackFeatures and FunctionalityEvaluate the features and functionality essential to your businessScalability and CustomizationAssess the tool's ability to scale with your business and offer customization optionsEase of Use and SupportConsider the tool's ease of use and supportPricing and ValueReview the pricing and value of each tool
By considering these factors, you can choose a client feedback tool that meets your business needs and helps you achieve your goals.
FAQs
What is the best feedback tool?
The best feedback tool depends on your specific needs and goals. Some popular options include Typeform, Hotjar, Userbrain, UserReport, Sprinklr, Canny, Qualtrics, and Intercom. Each tool has its unique features, pricing, and scalability, so it's essential to research and compare them to find the best fit for your business.
What are feedback tools?
Feedback tools are software solutions designed to collect and analyze customer feedback, helping businesses understand their customers' needs, preferences, and pain points. These tools provide insights into customer satisfaction, product development, and overall customer experience.
What tools are used to get feedback from customers?
Several tools are used to collect feedback from customers, including:
ToolDescriptionSurvey toolsQuestionPro, Sogo Survey, Qualaroo, and SurveyMonkeyOther toolsTypeform, Hotjar, Userbrain, UserReport, Sprinklr, Canny, Qualtrics, and Intercom
These tools offer various features, such as customizable surveys, question types, and analytics, to help businesses gather valuable feedback from their customers.
Related posts

Android Voice Access: Setup Guide 2024
Voice Access is an Android feature that allows you to control your phone using voice commands, making it easier for those with mobility or vision challenges. With Voice Access, you can navigate your phone, open apps, make calls, and dictate text messages hands-free.
Related video from YouTube
Key Features
- Basic Navigation: Move around your phone using voice commands
- Text Editing: Edit text using voice commands
- Dictation: Send messages and emails using voice commands
Requirements
RequirementDescriptionAndroid VersionAndroid 5.0 or laterGoogle AppLatest version of Google app installedRecommended Settings"OK Google" Voice Detection enabled, Pixel Launcher installed
Setup Steps
StepAction1Install the Voice Access app from Google Play Store2Enable Voice Access in Settings > Accessibility3Grant necessary permissions
Common Voice Commands
CommandActionOpen [app]Opens the specified appGo backGoes to the previous screenGo homeGoes to the home screenShow notificationsShows your notificationsTap [number]Taps the element with the specified numberShow numbersShows numbers on the screenShow gridShows a grid on the screen
Voice Access can be customized with various settings and activation options, and support is available through tutorials, command lists, and feedback channels.
sbb-itb-8abf120
Requirements for Using Voice Access

To use Voice Access, your Android device must meet certain requirements. These requirements ensure that Voice Access works smoothly and efficiently, providing you with a convenient hands-free experience.
Device Requirements
RequirementDescriptionAndroid VersionYour device must be running Android 5.0 or later.Google AppYou need to have the latest version of the Google app installed on your device.
Recommended Settings
SettingDescription"OK Google" Voice DetectionEnable this feature to activate Voice Access from any screen.Pixel LauncherInstalling the Pixel Launcher app enhances the overall Voice Access experience.
By meeting these requirements and enabling the recommended settings, you can ensure that Voice Access works flawlessly on your Android device, providing you with a convenient and accessible way to control your phone using voice commands.
Setting Up Voice Access Step-by-Step
To set up Voice Access on your Android device, follow these simple steps:
Installing Voice Access App
Download and install the Voice Access app from the Google Play Store:
StepAction1Open the Google Play Store app on your Android device.2Search for "Voice Access" in the search bar.3Select the Voice Access app from the search results.4Tap the "Install" button to download and install the app.
Enabling Voice Access in Settings
Enable Voice Access on your device:
StepAction1Go to your device's Settings app.2Scroll down and select Accessibility.3Tap Voice Access from the list of options.4Toggle the switch to On to enable Voice Access.5You may be prompted to grant additional permissions to Voice Access. Tap Allow to proceed.
By following these steps, you'll be able to use voice commands to control your device. Remember to review the requirements and recommended settings for using Voice Access, as outlined in the previous section, to ensure a smooth and efficient experience.
Using Voice Commands
Using Voice Commands is a powerful feature in Android Voice Access that lets you control your device with voice commands. This section will guide you on how to effectively use Voice Access after activation, discussing how to control devices with voice commands for app navigation, typing, and other tasks.
Starting Voice Access
To start using Voice Access, you can activate it using voice commands or manual options. You can say "OK Google, start Voice Access" or "Turn on Voice Access" to activate it. Alternatively, you can go to your device's Settings app, select Accessibility, and toggle the switch to On to enable Voice Access.
Common Voice Commands
Here are some common voice commands that you can use with Voice Access:
CommandActionOpen [app]Opens the specified appGo backGoes back to the previous screenGo homeGoes back to the home screenShow notificationsShows your notificationsShow Quick SettingsDisplays the quick settings menuShow recent appsShows your recent appsTap [number]Taps the element with the specified numberLong press [number]Long presses the element with the specified numberShow numbersShows numbers on the screenHide numbersHides numbers on the screenShow gridShows a grid on the screenHide gridHides the grid on the screen
These are just a few examples of the many voice commands available in Voice Access. You can use these commands to navigate your device, open apps, and perform various tasks.
Remember to explore the full range of voice commands available in Voice Access to get the most out of this feature.
Customizing Voice Access
Customizing Voice Access allows you to personalize your experience, making it more efficient and convenient for your needs.
Adjusting Command Settings
You can adjust Voice Access settings to suit your preferences. For example, you can:
SettingDescriptionRequire verbsChoose whether to use verbs like "tap" or "open" to select onscreen objects or areas.Timeout durationSet the time Voice Access waits for your speech before turning off.Auto-turn offTell Voice Access to turn off after 30 seconds of inactivity to conserve battery life.
Activation Options
Voice Access offers various ways to activate the feature, providing flexibility and convenience. You can:
OptionDescriptionDisplay Activation buttonShow or hide the Activation button.Listen on wake-upTell Voice Access to listen when your phone wakes up.Activate on phone callActivate Voice Access when you receive a phone call.Keep active during callKeep Voice Access active during a phone call.Stop on screen touchStop Voice Access when you touch the screen.Show keyboard on text fieldShow the keyboard when a text field is selected.Activation keyEstablish an activation key to turn Voice Access on and off.
By customizing Voice Access, you can optimize your experience with the feature, making it more efficient and enjoyable to use.
Troubleshooting Voice Access
If you're having trouble with Voice Access or need help with specific voice commands, this section provides resources to assist you.
Finding Help and Commands
To get help with Voice Access, you can:
- Access the Voice Access tutorial, which provides a step-by-step guide on how to use the feature effectively.
- View a list of all available voice commands, found in the Voice Access settings.
To access the tutorial:
StepAction1Open the Settings app on your Android device.2Scroll down and select Accessibility.3Tap on Voice Access.4Select Open tutorial.
Getting Support and Feedback
If you encounter any issues or have suggestions for improving Voice Access, you can:
- Visit the Google Support page for Voice Access, which provides answers to frequently asked questions, troubleshooting guides, and contact information for further assistance.
- Report bugs or provide feedback to the development team.
To report bugs or provide feedback:
StepAction1Open the Google Support page.2Search for Voice Access.3Click on Send feedback.4Fill out the feedback form, including a detailed description of the issue or suggestion.
By using these resources, you can troubleshoot common issues with Voice Access and provide valuable feedback to improve the feature.
Voice Access for Accessibility
Voice Access is a vital feature for creating accessible apps, making it easier for people with mobility or vision challenges to use their devices. By incorporating voice commands into app designs, developers can ensure their products are more inclusive and user-friendly.
Benefits of Voice Access
BenefitDescriptionIncreased IndependenceUsers can control their devices using only their voiceImproved AccessibilityVoice Access makes apps more usable for people with mobility or vision challengesEnhanced User ExperienceVoice commands provide a convenient way to interact with devices
By prioritizing Voice Access and other accessibility features, app developers can make their products more accessible to a wider range of users, contributing to a more inclusive digital landscape.
Related posts

Service Worker Lifecycle: Update Process
Updating service workers is crucial for delivering the latest features, bug fixes, and performance improvements to users of Progressive Web Apps (PWAs). Here's a concise overview of the key points:
Why Update Service Workers
ReasonDescriptionDeliver Latest Features & Bug FixesPush new features, improvements, and fixes to usersAvoid Outdated AssetsEnsure all assets are up-to-date and compatibleRespect User Bandwidth & StorageCache only necessary assets, delete obsolete ones
Triggers for Service Worker Updates
TriggerDescriptionContent ChangesChanges in HTML, CSS, JavaScript files, or other assetsBug Fixes & Performance ImprovementsUpdate to fix issues or enhance performancePrevent Operational DuplicationUnregister old worker, register new one for seamless transition
Checklist for Updating Service Workers
StepDescriptionCheck Update RequirementsVerify conditions for an update are metUse the Update MethodReplace current worker with a new oneEnsure Users Get the UpdateUse caching, versioning, and notification mechanismsMonitor Update EventsListen for updatefound and statechange eventsNotify Users of New VersionUse APIs like Badging and Web NotificationsHandle Update ErrorsImplement error handling and feedback mechanismsRemove Old Service WorkersRemove old caches and outdated service workersTest the Updated Service WorkerConfirm successful installation and operation
By following this structured approach, you can ensure a smooth transition to the new service worker version, providing a better experience for your users and maintaining a competitive edge in the digital landscape.
Related video from YouTube
Triggers for Service Worker Updates
When it comes to updating a service worker, there are several triggers that can initiate the process. These triggers are crucial to ensure that your Progressive Web App (PWA) remains current and functional.
Changes in Content
TriggerDescriptionChanges in HTML, CSS, JavaScript files, or other assetsThe browser detects changes in the content and triggers an update to the service worker.
Fixing Bugs and Improving Performance
TriggerDescriptionBug fixesUpdate the service worker to fix issues and ensure a seamless user experience.Performance improvementsTrigger an update to ensure users can take advantage of performance enhancements.
Preventing Operational Duplication
To prevent operational duplication, unregister the old service worker and register the new one, ensuring a seamless transition.
By understanding these triggers, you can ensure that your PWA remains up-to-date and functional. In the next section, we will explore the checklist for updating service workers, providing a step-by-step guide to ensure a smooth update process.
sbb-itb-8abf120
Checklist for Updating Service Workers
When updating a service worker, follow a structured approach to ensure a smooth transition. This checklist outlines the key steps to take when updating a service worker, providing specific advice and actions to avoid common pitfalls.
Check Update Requirements
Before updating a service worker, verify that all conditions for an update are met. Check for changes in content, bug fixes, or performance improvements that require an update.
Use the Update Method
Use the update() method from the ServiceWorkerRegistration interface to replace the current worker with a new one if changes are detected. This method returns a promise that resolves with a new ServiceWorkerRegistration object if the update is successful.
Ensure Users Get the Update
To ensure all users receive the updated service worker version as soon as possible without necessitating an application restart, use strategies like caching, versioning, and notification mechanisms.
Monitor Update Events
Listen for updatefound and statechange events as indicators of a new service worker installation and readiness for activation. Use the skipWaiting() method to force activation if necessary.
Notify Users of New Version
Notify users about available updates using APIs like Badging and Web Notifications. Provide user-friendly methods for notifying users.
Handle Update Errors
Implement error handling and feedback mechanisms during the update process to catch and address any issues promptly. Inform users about any errors and provide corrective action.
Remove Old Service Workers
Remove old caches and outdated service workers using methods like caches.delete(). Implement cache management strategies to stay within browser storage limits and ensure a smooth update process.
Test the Updated Service Worker
Test the updated service worker in different scenarios to confirm successful installation and operation. Ensure the latest version is active and functioning correctly.
By following this checklist, you can ensure a smooth and successful update process for your service worker, providing a better experience for your users.
StepDescriptionCheck Update RequirementsVerify conditions for an update are metUse the Update MethodReplace the current worker with a new oneEnsure Users Get the UpdateUse caching, versioning, and notification mechanismsMonitor Update EventsListen for updatefound and statechange eventsNotify Users of New VersionUse APIs like Badging and Web NotificationsHandle Update ErrorsImplement error handling and feedback mechanismsRemove Old Service WorkersRemove old caches and outdated service workersTest the Updated Service WorkerConfirm successful installation and operation
Summary: Smooth Service Worker Updates
To ensure a seamless service worker update process, follow a structured approach. This involves:
Key Steps
StepDescriptionCheck Update RequirementsVerify conditions for an update are metUse the Update MethodReplace the current worker with a new oneEnsure Users Get the UpdateUse caching, versioning, and notification mechanismsMonitor Update EventsListen for updatefound and statechange eventsNotify Users of New VersionUse APIs like Badging and Web NotificationsHandle Update ErrorsImplement error handling and feedback mechanismsRemove Old Service WorkersRemove old caches and outdated service workersTest the Updated Service WorkerConfirm successful installation and operation
By following this checklist, you can guarantee a smooth transition to the new service worker version, providing a better experience for your users.
Benefits of a Smooth Update Process
A well-managed update cycle benefits both users and the business. It allows you to:
- Deliver the latest features and bug fixes promptly
- Ensure your application remains competitive and secure
- Build trust with your users by demonstrating your commitment to providing a high-quality experience
By prioritizing the update process, you can minimize downtime, reduce errors, and ensure that your application remains available to users at all times. This, in turn, can lead to increased user satisfaction, loyalty, and ultimately, business success.
Remember, a smooth service worker update process is critical to maintaining a competitive edge in today's fast-paced digital landscape. By following the guidelines outlined in this article, you can ensure that your application remains up-to-date, secure, and user-friendly, ultimately driving business growth and success.
FAQs
How does a service worker detect a new version?
A service worker detects a new version by comparing the cached files with the resources coming from the network. This process is triggered when:
TriggerDescriptionNavigation to an in-scope pageThe browser checks for updates when a user navigates to a page within the service worker's scope.Functional events (push and sync)The browser checks for updates when functional events like push and sync occur.Calling register() with a different service worker URLThe browser checks for updates when the register() method is called with a different service worker URL.
The browser performs a byte-by-byte comparison to determine if the service worker has changed, and if so, installs the new version in the background.
Related posts

Custom API Development Costs 2024
Building a custom API can cost anywhere from $10,000 to over $50,000 depending on the complexity. Here are some key points:
- Simple APIs: $10,000 - $20,000
- Medium Complexity APIs: $20,000 - $40,000
- Complex APIs: $40,000 - $60,000+
Cost FactorDescriptionComplexityMore endpoints, data volume, and security needs increase costsScalabilityLoad balancing, auto-scaling, and handling traffic spikesSecurityEncryption, access control, audits, and penetration testingQuality AssuranceUnit testing, integration testing, and performance optimizationDeploymentCloud infrastructure, hosting, API gateway setupMaintenanceOngoing support, bug fixes, updates, and monitoring
While initial development is a major expense, the majority of API costs come from ongoing maintenance to ensure security, performance, and stability over time.
Related video from YouTube
Cost Breakdown for Custom APIs
When budgeting for custom API development, it's essential to understand the various cost elements involved. This helps businesses make informed decisions about their API projects and allocate resources effectively.
Ongoing Maintenance Costs
After deployment, the majority of API costs are for ongoing maintenance. This includes:
- Regular security audits and penetration testing: to identify and address potential security vulnerabilities
- API performance monitoring and optimization: to ensure the API can handle increasing traffic and data volumes
- Bug fixing and issue resolution: to maintain the API's stability and reliability
Maintenance TaskFrequencyCost RangeSecurity auditsQuarterly$1,000 - $5,000Performance monitoringMonthly$500 - $2,000Bug fixingAd-hoc$1,000 - $5,000
Complexity, Time, and Cost
The complexity of an API project directly impacts the development time and overall cost. APIs with multiple endpoints, high data volume, and advanced security requirements are more complex and time-consuming to develop, resulting in higher costs.
API ComplexityTime RequiredCost RangeSimple API2-4 weeks$10,000 - $20,000Medium-complexity API4-8 weeks$20,000 - $40,000Complex API8-12 weeks$40,000 - $60,000
Security and Infrastructure Costs
Implementing robust security measures and a solid infrastructure for API deployment is crucial to ensure the API's integrity and protect sensitive data. Security and infrastructure costs can include:
- API gateway and load balancer costs: to manage API traffic and ensure scalability
- Encryption and access control costs: to protect data in transit and at rest
- Cloud infrastructure costs: to host the API and ensure high availability and scalability
Security and Infrastructure ComponentCost RangeAPI gateway and load balancer$5,000 - $20,000Encryption and access control$3,000 - $10,000Cloud infrastructure$2,000 - $5,000
By understanding these cost elements, businesses can make informed decisions about their API development projects and allocate resources effectively.
Factors Affecting API Costs
When developing a custom API, several factors can significantly impact the overall cost of the project. Understanding these factors is crucial to budgeting effectively and making informed decisions about your API development project.
Scalability and Security Costs
Designing an API with scalability and security in mind can increase the initial development cost. However, this investment can pay off in the long run by reducing the risk of security breaches and ensuring the API can handle increasing traffic and data volumes.
Scalability and Security ComponentCost RangeLoad balancing and auto-scaling$5,000 - $20,000Encryption and access control$3,000 - $10,000Regular security audits and penetration testing$1,000 - $5,000
Coding and Quality Assurance Costs
The complexity of the API's coding requirements and the rigor of quality assurance testing can also impact the overall cost. APIs with complex logic, multiple integrations, or high-performance requirements may require more development time and resources, increasing costs.
Quality Assurance ComponentCost RangeUnit testing and integration testing$2,000 - $5,000Performance testing and optimization$3,000 - $10,000Code review and refactoring$1,000 - $3,000
Deployment and Support Costs
After development, the API needs to be deployed and supported. Deployment costs can include hosting, infrastructure, and setup fees, while support costs can include ongoing maintenance, monitoring, and updates.
Deployment and Support ComponentCost RangeCloud infrastructure and hosting$2,000 - $5,000API gateway and load balancer setup$1,000 - $3,000Ongoing maintenance and support$1,000 - $3,000 per month
By understanding these factors, businesses can better estimate the costs of their API development project and make informed decisions about resource allocation and budgeting.
sbb-itb-8abf120
Estimating Your 2024 API Budget
Estimating the cost of developing a custom API can be a complex task. However, it's crucial to budget effectively and make informed decisions about your project. In this section, we'll guide you through the process of estimating your API development costs, considering various influencing factors specific to 2024.
Cost Estimates by Complexity
The complexity of your API project plays a significant role in determining the overall cost. Here are some estimated cost ranges for developing APIs of differing complexity:
Complexity LevelEstimated Cost RangeSimple data connector$5,000 - $15,000Medium-complexity API with authentication and authorization$15,000 - $30,000Highly complex API with advanced features and integrations$30,000 - $50,000 or more
API Cost Estimation Checklist
When estimating your API costs, consider the following essential factors:
- Team expertise and experience: The cost of development can vary significantly depending on the expertise and experience of your development team.
- Technology choices: The choice of programming languages, frameworks, and tools can impact the development cost and timeline.
- Maintenance plans: The cost of ongoing maintenance, updates, and support can add up quickly if not planned for.
- Scalability and security requirements: Designing an API with scalability and security in mind can increase the initial development cost.
- Third-party integrations: Integrating with third-party services or APIs can add complexity and cost to your project.
- Testing and quality assurance: Thorough testing and quality assurance can ensure your API meets the required standards, but it can also increase the development cost.
By considering these factors and estimating your API costs accurately, you can make informed decisions about your project and ensure its success.
Summary: Custom API Costs
Cost-Effective API Development Tips
When developing a custom API, it's essential to prioritize cost-effectiveness without compromising on quality. Here are some actionable tips to help you achieve this:
- Plan Thoroughly: Clearly define your project requirements and identify potential roadblocks to avoid costly rework.
- Choose the Right Technology Stack: Select programming languages, frameworks, and tools that align with your project needs and budget.
- Collaborate with Experienced Developers: Partner with developers who have expertise in custom API development to ensure efficient development and minimize errors.
- Test and Iterate: Conduct thorough testing and iterate on your API design to ensure it meets the required standards and is scalable.
Benefits of Strategic API Investment
Investing in custom API development can lead to long-term cost savings and business growth when approached strategically. By developing a custom API, you can:
BenefitsDescriptionImprove Operational EfficiencyAutomate manual processes and streamline data exchange between systems, reducing costs and increasing productivity.Enhance Customer ExperiencesProvide seamless interactions with your business through intuitive and user-friendly APIs, leading to increased customer satisfaction and loyalty.Drive InnovationUnlock new business opportunities and revenue streams by leveraging the capabilities of your custom API.
By following these cost-effective API development tips and recognizing the benefits of strategic API investment, you can make informed decisions about your project and ensure its success.
FAQs
How to calculate API cost?
Calculating the cost of building an API depends on several factors, including the project's complexity, number of endpoints, data volume, and security requirements. Here's a rough estimate of the costs:
API ComplexityEstimated Cost RangeSimple$10,000 - $20,000Medium$20,000 - $40,000Complex$40,000 - $60,000 or more
How much does it cost to build a custom API?
The cost of building a custom API varies depending on its complexity and features. Here's a rough estimate:
Custom API FeaturesEstimated Cost RangeBasic$25,000 - $40,000Advanced$40,000 - $60,000Complex$60,000 - $80,000 or more
How much does it cost for an API?
The cost of building an API depends on several factors, including the project's complexity, number of endpoints, data volume, and security requirements. Here's a rough estimate:
API ComplexityEstimated Cost RangeSimple$10,000 - $20,000Medium$20,000 - $40,000Complex$40,000 - $60,000 or more
How much does a third-party API cost?
The cost of a third-party API depends on the provider's pricing model, which can be based on the number of requests, data volume, or other factors. Here's a rough estimate:
Third-Party API Pricing ModelEstimated Cost RangeRequest-based$100 - $500 per monthData volume-based$500 - $2,000 per monthCustom pricingVaries depending on the provider
How much does it cost to develop an API?
The cost of developing an API depends on several factors, including the project's complexity, number of endpoints, data volume, and security requirements. Here's a rough estimate:
API ComplexityEstimated Cost RangeSimple$10,000 - $20,000Medium$20,000 - $40,000Complex$40,000 - $60,000 or more
Related posts

Top 10 Mobile App Analytics Tools 2024
Mobile app analytics tools allow you to track, measure, and analyze user behavior within your app. By leveraging these insights, you can optimize the user experience, drive engagement, and boost revenue.
Here are the top 10 mobile app analytics tools for 2024:
- Facebook Analytics
- Amplitude
- Mixpanel
- CleverTap
- UXCam
- Adobe Analytics
- B2Metric
- App Radar
- Localytics
- Google Analytics
When choosing a tool, consider factors like:
- Business Goals: Align with your objectives (e.g., user engagement, retention, monetization)
- Data Privacy: Ensure compliance with regulations and robust data security
- Scalability: Accommodate future growth and advanced features
- Integration: Compatibility with your existing tech stack
- User-Friendliness: Intuitive interface, robust documentation, and support
Here's a quick comparison of the top tools:
ToolKey FeaturesPricingFacebook AnalyticsCross-device analysis, segments, funnelsFreeAmplitudeEvent tracking, user behavior analysis, retention analysisPaid plans from $995/monthMixpanelEvent tracking, funnel analysis, segmentationFree tier and paid plansCleverTapUser segmentation, event tracking, AI/ML capabilitiesCustom pricingUXCamSession recording, heatmaps, crash analyticsFree and paid plansAdobe AnalyticsReporting, data visualization, predictive analyticsCustom pricingB2MetricAuto-ML, anomaly detection, predictive analyticsFree plan, paid plans from $499/monthApp RadarKeyword intelligence, competitor analysisCustom pricingLocalyticsFunnel analysis, contextual targeting, location-based marketingFree plan, paid plans from $0.07/conversionGoogle AnalyticsEvent tracking, user segmentation, conversion trackingFree plan, paid plans from $0.07/conversion
By carefully evaluating your needs and the tool's capabilities, you can make an informed decision to drive growth and optimize your mobile app's performance.
Related video from YouTube
1. Facebook Analytics

Facebook Analytics is a powerful tool that helps businesses understand their app users' behavior. It provides insights into how users interact with your app, allowing you to optimize your marketing strategies.
Feature Set
Here are some key features of Facebook Analytics:
FeatureDescriptionCross-device analysisTrack user behavior across multiple devices and platformsSegmentsCreate custom segments based on user demographics, behavior, and other factorsCohortsAnalyze user behavior over time and identify trends and patternsFunnelsVisualize user journeys and identify drop-off pointsCustom audiencesCreate targeted audiences based on user behavior and demographics
User Ratings
Facebook Analytics has an average rating of 4.5 out of 5 stars on the Facebook Developer website, with many users praising its ease of use and powerful insights.
Pricing
Facebook Analytics is a free tool, making it an attractive option for businesses of all sizes.
Ease of Integration
Facebook Analytics is easy to integrate with your app, with a simple setup process that requires minimal technical expertise.
Support and Documentation
Facebook provides extensive documentation and support resources for Facebook Analytics, including guides, tutorials, and a community forum.
2. Amplitude

Amplitude is a product analytics platform that helps you understand how users interact with your app. It provides insights into user behavior, allowing you to optimize your app's performance.
Feature Set
Here are some key features of Amplitude:
FeatureDescriptionEvent-based trackingTrack user actions and events within your appUser behavior analysisAnalyze user behavior to identify trends and patternsRetention analysisAnalyze user retention rates to identify areas for improvementSegmentationSegment users based on demographics, behavior, and other factorsFunnelsVisualize user journeys and identify drop-off points
User Ratings
Amplitude has an average rating of 4.6 out of 5 stars on TrustRadius, with many users praising its ease of use and powerful insights.
Pricing
Amplitude offers a free plan, as well as several paid plans starting at $995 per month.
Ease of Integration
Amplitude is easy to integrate with your app, with a simple setup process that requires minimal technical expertise.
Support and Documentation
Amplitude provides extensive documentation and support resources, including guides, tutorials, and a community forum.
3. Mixpanel
Mixpanel is a comprehensive mobile app analytics tool that helps you understand user behavior and engagement. It offers advanced event tracking, funnel analysis, user segmentation, and cohort analysis.
Feature Set
Here are some key features of Mixpanel:
FeatureDescriptionEvent-based trackingTrack user actions and events within your appUser behavior analysisAnalyze user behavior to identify trends and patternsRetention analysisAnalyze user retention rates to identify areas for improvementSegmentationSegment users based on demographics, behavior, and other factorsFunnelsVisualize user journeys and identify drop-off pointsInsights, funnels, retention, & flows reportsGet in-depth insights into user behavior and engagementIntegrationsIntegrate with other tools and platforms to enhance analytics capabilitiesTemplatesUse pre-built templates to accelerate analytics setup
User Ratings
Mixpanel has an average rating of 4.2 out of 5 stars, with many users praising its ease of use and powerful insights.
Pricing
Mixpanel offers a free tier, as well as several paid plans:
PlanPriceFreeFreeStarting$20 per monthAdvanced$833 per monthCustomCustom pricing for enterprise customers
Ease of Integration
Mixpanel is easy to integrate with your app, with a simple setup process that requires minimal technical expertise.
Support and Documentation
Mixpanel provides extensive documentation and support resources, including guides, tutorials, and a community forum.
4. CleverTap
CleverTap is a popular mobile app analytics tool that helps businesses understand user behavior, retain customers, and drive revenue growth. It provides actionable insights to optimize user engagement, improve retention rates, and enhance overall app performance.
Feature Set
Here are some key features of CleverTap:
FeatureDescriptionUser SegmentationSegment users based on demographics, behavior, and other factorsEvent TrackingTrack user actions and events within your appRetention AnalysisAnalyze user retention rates to identify areas for improvementFunnel AnalysisVisualize user journeys and identify drop-off pointsOmnichannel EngagementEngage with users across multiple channels, including WhatsApp, push notifications, and SMSAI and ML CapabilitiesLeverage AI and ML to analyze real-time data and provide insights into specific segments
User Ratings
CleverTap has an average rating of 4.4 out of 5 stars, with many users praising its ease of use, powerful insights, and excellent customer support.
Pricing
CleverTap offers a free trial, as well as several paid plans:
PlanPriceFree TrialFreeCustomCustom pricing for enterprise customers
Ease of Integration
CleverTap is easy to integrate with your app, with a simple setup process that requires minimal technical expertise.
Support and Documentation
CleverTap provides extensive documentation and support resources, including guides, tutorials, and a community forum.
5. UXCam
UXCam is a popular mobile app analytics tool that helps businesses understand user behavior, improve app performance, and drive revenue growth. It provides actionable insights to optimize user engagement, identify pain points, and enhance overall app experience.
Feature Set
Here are some key features of UXCam:
FeatureDescriptionSession RecordingRecord and analyze user sessions to identify pain points and areas for improvementHeatmapsVisualize user behavior and identify areas of high engagementFunnel AnalysisAnalyze user journeys and identify drop-off pointsCrash AnalyticsIdentify and debug crashes to improve app stabilityCustom Event AnalyticsTrack custom events and user behavior to gain deeper insights
User Ratings
UXCam has an average rating of 4.6 out of 5 stars, with many users praising its ease of use, powerful insights, and excellent customer support.
Pricing
UXCam offers the following plans:
PlanPriceDescriptionFreeFreeLimited features and data retentionPremiumCustomAdvanced features and increased data retentionEnterpriseCustomTailored solutions and support for large enterprises
Ease of Integration
UXCam is easy to integrate with your app, with a simple setup process that requires minimal technical expertise.
Support and Documentation
UXCam provides extensive documentation and support resources, including guides, tutorials, and a community forum.
6. Adobe Analytics
Adobe Analytics is a comprehensive analytics platform that includes mobile app analytics capabilities. It allows businesses to collect, analyze, and visualize data from websites, mobile apps, and other digital channels.
Feature Set
Here are some key features of Adobe Analytics:
FeatureDescriptionReporting/AnalyticsView and track key metricsData VisualizationGraphical representation of dataPredictive AnalyticsPredict future data based on historical data setsDashboardA collection of graphs and charts for visualizing and tracking statistics and metricsData DiscoveryDiscover and connect various data sources to the application for analysisAPIApplication programming interface for integration with other systems/databasesCampaign AnalyticsTrack and interpret campaign performance metricsMulti-Touch AttributionEvaluate the impact of each touch point that drives a conversionScheduled/Automated ReportsSet a time to generate routine reports automatically
User Ratings
Adobe Analytics has an average rating of 4.5 out of 5 stars, with many users praising its comprehensive data analysis, integration with Adobe Experience Cloud, and ease of use.
Pricing
Adobe Analytics offers custom pricing plans, with costs varying depending on the specific features and capabilities required by the business.
Ease of Integration
Adobe Analytics is relatively easy to integrate with your app, with a simple setup process that requires minimal technical expertise.
Support and Documentation
Adobe Analytics provides extensive documentation and support resources, including guides, tutorials, and a community forum, to help users get the most out of the platform.
sbb-itb-8abf120
7. B2Metric
B2Metric is a cutting-edge predictive analytics software that helps businesses understand customer behavior and enhance their marketing strategies. This advanced IQ Analytics solution caters to businesses of all sizes, providing them with the power to make data-driven decisions.
Feature Set
Here are some key features of B2Metric:
FeatureDescriptionAuto-ML platformFor ad-hoc machine learning tasks with explainable ML reportsAnomaly detectionReal-time detection of anomalous behavior in dataCrash reportDetailed app crash report with crash-free rate, daily crash count, and morePerformance marketing reportsUp-to-date reports on campaign performance overview and Reach/Spend AnalysisMarketing automationSupport for creating push notification campaigns and push notification historyPredictive analyticsAI-powered predictive analytics to foresee user behavior and reduce churnSegmentation and cohort analysisLimitless segmentation and cohort analysis with detailed visualizationsInteractive Screen flow reportInteractive report with visualizationsUser retention and drop-off reportReport on user retention and drop-offFunnel analysis reportReport with interactive user inputCustomizable dashboardUser-friendly and highly interactive dashboardAd-hoc querying and data visualizationWithout SQLSeamless connectionConnection to data storage, analytics, CRM, and business communication tools
User Ratings
B2Metric has an average rating of 5.0 out of 5 stars, with many users praising its ease of use, customer service, and value for money.
Pricing
B2Metric offers a free plan for startups and individuals, as well as paid plans starting at $499/month with volume-based discounts. There is a 14-day free trial to experience the platform.
Ease of Integration
B2Metric is relatively easy to integrate with your app, with a simple setup process that requires minimal technical expertise.
Support and Documentation
B2Metric provides extensive documentation and support resources, including guides, tutorials, and a community forum, to help users get the most out of the platform.
8. App Radar
App Radar is a cloud-based App Store Optimization (ASO) solution designed to help developers, advertisement agencies, and game marketers.
Feature Set
Here are some key features of App Radar:
FeatureDescriptionKeyword IntelligenceAI-enabled keyword suggestions, mobile app performance monitoring, ranking progress tracking, top bidder identification, and ASO effort impact measurement on app visibility.Marketing IntelligenceComparative analysis of app ad strategies, detection of competitors' unique keywords, discovery of potential markets, and competitors' apps review summaries on App Store and Google Play.App Store Listing ManagementUpdate app store listings, manage release notes, and track activity.Competitor AnalysisResearch keywords, analyze competitors, and track ranking progress.
User Ratings
App Radar has received mixed reviews from users, with an overall rating of around 3.5 out of 5 stars.
Pricing
The pricing for App Radar is not publicly disclosed, and interested users are encouraged to contact the company for a custom quote.
Ease of Integration
App Radar is relatively easy to integrate with your app, with a simple setup process that requires minimal technical expertise.
Support and Documentation
App Radar provides extensive documentation and support resources, including guides, tutorials, and a community forum, to help users get the most out of the platform. However, some users have reported slow response times and unsatisfactory resolutions to issues.
9. Localytics

Localytics is a mobile app analytics and marketing platform that helps you understand user behavior, segment users, and engage with them. It offers personalized messaging and push notifications to drive user retention and re-engagement.
Feature Set
Here are some key features of Localytics:
FeatureDescriptionFunnel AnalysisIdentify areas where users drop offContextual TargetingSend personalized messages based on user behavior and preferencesAnalytics/ROI TrackingMeasure the effectiveness of marketing campaignsLocation-Based MarketingTarget users based on their location and behaviorIn-App Events TrackingTrack user activities and events within an applicationUninstall TrackingIdentify users who have uninstalled the app and understand why
User Ratings
Localytics has a rating of 4.4 out of 5 stars on G2, indicating high customer satisfaction.
Pricing
Localytics offers a free plan, as well as paid plans starting at $0.07 per conversion. The pricing is based on data volume, and the company provides a custom quote for enterprises.
Ease of Integration
Localytics is easy to integrate with your app, with a simple setup process that requires minimal technical expertise.
Support and Documentation
Localytics provides extensive documentation and support resources, including guides, tutorials, and a community forum, to help you get the most out of the platform.
10. Google Analytics

Google Analytics is a popular mobile app analytics tool that provides insights into user behavior, conversion tracking, and user acquisition data. Its integration with other Google services makes it a convenient choice for developers.
Feature Set
Here are some key features of Google Analytics:
FeatureDescriptionEvent trackingTrack user interactions and events within your appUser segmentationSegment users based on demographics, behavior, and preferencesConversion trackingMeasure the effectiveness of marketing campaigns and track conversionsReal-time dataGet instant insights into user behavior and app performance
User Ratings
Google Analytics has a rating of 4.4 out of 5 stars on G2, indicating high customer satisfaction.
Pricing
Google Analytics offers a free plan, as well as paid plans starting at $0.07 per conversion. The pricing is based on data volume, and the company provides a custom quote for enterprises.
Ease of Integration
Google Analytics is easy to integrate with your app, with a simple setup process that requires minimal technical expertise.
Support and Documentation
Google Analytics provides extensive documentation and support resources, including guides, tutorials, and a community forum, to help you get the most out of the platform.
Pros and Cons
This section summarizes the key advantages and disadvantages of the top mobile app analytics tools to help you make an informed decision.
Facebook Analytics
ProsConsComprehensive insights into Facebook ad campaignsLimited to Facebook apps and platformsDetailed demographic dataSteep learning curve for advanced featuresIntegrates with Facebook's other products
Amplitude
ProsConsUser behavior analyticsLimited free planPowerful segmentation and cohort analysisExpensive for small businessesIntuitive user interface
Mixpanel
ProsConsEvent-based trackingLimited data visualization optionsFunnel analysisPricing based on data volumeIntegrates with web and mobile
CleverTap
ProsConsOmnichannel user engagementLimited free planAdvanced segmentationSteep learning curveA/B testing and personalization
UXCam
ProsConsSession recordings and heatmapsFocused on UX analyticsCrash and performance monitoringPricing based on sessions recordedIntegrates with analytics tools
Adobe Analytics
ProsConsComprehensive feature setExpensiveAI-powered insightsComplex setup and learning curveIntegrates with Adobe's ecosystem
B2Metric
ProsConsCustomizable dashboardsLimited free planPredictive analyticsLacks some advanced featuresSupports multiple data sources
App Radar
ProsConsDetailed app store analyticsLimited to app store dataCompetitor trackingLacks in-app analyticsKeyword optimization
Localytics
ProsConsUser profiles and personasLimited free planPush notification analyticsFocused on marketing analyticsPredictive app marketing
Google Analytics
ProsConsFree and easy to useLimited in-app event trackingIntegrates with Google's ecosystemLacks advanced user behavior analysisComprehensive web and app analytics
Choosing the Right Tool
When selecting a mobile app analytics tool, consider your specific business needs, data privacy concerns, and scalability requirements. Here are key factors to keep in mind:
Align with Business Goals
Evaluate the metrics and insights that matter most to your business objectives. For example, if your goal is to increase user engagement, prioritize tools that offer in-depth user behavior analysis, cohort analysis, and retention metrics.
Data Privacy and Security
Ensure the analytics tool you choose complies with relevant data protection regulations and offers robust data encryption and access controls.
Scalability and Future Growth
As your app grows, your analytics needs may evolve. Consider tools that can scale seamlessly and offer advanced features like predictive analytics and custom dashboards.
Integration Capabilities
Evaluate how well the analytics tool integrates with your existing tech stack, such as marketing automation platforms, CRMs, and other data sources.
User-Friendliness and Support
Choose an analytics tool with an intuitive interface and robust documentation to ensure a smooth onboarding process for your team. Consider the level of customer support and training resources provided by the vendor.
Here's a summary of key considerations:
FactorDescriptionBusiness GoalsAlign with business objectivesData PrivacyComply with regulations and ensure data securityScalabilityConsider future growth and advanced featuresIntegrationEvaluate integration with existing tech stackUser-FriendlinessChoose an intuitive tool with robust documentation and support
By carefully evaluating these factors, you can make an informed decision that aligns with your business goals and sets you up for long-term success.
Final Thoughts
In conclusion, choosing the right mobile app analytics tool is crucial for businesses seeking to drive growth, improve user engagement, and optimize their app's performance. With the top 10 mobile app analytics tools compared, it's clear that each tool offers unique strengths and weaknesses.
Key Considerations
When selecting a tool, consider the following factors:
FactorDescriptionBusiness GoalsAlign with business objectivesData PrivacyEnsure data security and compliance with regulationsScalabilityConsider future growth and advanced featuresIntegrationEvaluate integration with existing tech stackUser-FriendlinessChoose an intuitive tool with robust documentation and support
Making an Informed Decision
By carefully evaluating these factors, you'll be able to make an informed decision that sets your app up for long-term success. Remember, the key to unlocking your app's full potential lies in leveraging the right analytics tool to gain actionable insights, identify areas for improvement, and drive data-driven decision-making.
Take the time to carefully evaluate your options, and don't hesitate to reach out to the vendors for more information or demos. With the right tool in place, you'll be able to unlock new levels of growth, engagement, and revenue for your mobile app.
FAQs
What is the best app analytics tool?
There is no single "best" app analytics tool that fits all needs. The ideal choice depends on your specific business goals, app type, and requirements. Here are some top contenders based on different criteria:
CriteriaRecommended ToolSmall BusinessesGoogle AnalyticsMid-Market BusinessesGoogle Analytics or MixpanelEnterpriseGlassbox or Adobe AnalyticsUser SatisfactionGlassboxFree SoftwareMixpanel (free tier)
Why these tools?
- Google Analytics is a popular choice for small and mid-sized businesses due to its comprehensive feature set and free pricing tier.
- Mixpanel offers a powerful free plan suitable for many use cases.
- For enterprises with advanced needs and stringent data privacy requirements, Glassbox and Adobe Analytics are robust enterprise-grade solutions.
- Glassbox stands out for its exceptional user satisfaction ratings and strong data privacy controls.
How to choose the right tool?
Carefully evaluate your requirements and prioritize factors like data security, scalability, user-friendliness, and integration capabilities to make an informed decision.
Related posts

10 Tips to Reduce Mobile Data Usage in Apps
Reducing mobile data usage is crucial for enhancing app performance, lowering costs, and contributing to sustainability. Here are the key tips:
- Optimize App Code: Follow efficient coding practices like using efficient data structures, minimizing memory allocation, optimizing loops, and implementing lazy loading.
- Use Data Compression: Compress data using algorithms like Gzip or Brotli to reduce data size and improve loading times.
- Limit Background App Refresh: Disable background data usage for apps to prevent unnecessary data consumption.
- Use Caching: Store frequently accessed data locally to reduce data transfer and improve app performance.
- Optimize Image Loading: Implement techniques like compression, lower resolution options, lazy loading, and format selection to reduce image data usage.
- Use a Content Delivery Network (CDN): Leverage CDNs to cache content on nearby servers, reducing latency and improving performance.
- Minimize Data Transfer: Optimize API calls, use compression, caching, and image optimization to minimize data exchange.
- Implement Data Synchronization: Use sync adapters, incremental updates, caching, and optimized network requests to reduce data transfer.
- Use Push Notifications: Send targeted notifications to minimize the need for users to constantly check the app, reducing data consumption.
- Monitor and Analyze Network Usage: Use tools like Android Studio's Network Profiler, Charles Proxy, or Fiddler to identify areas for optimization and improve data efficiency.
By following these tips, developers can create apps that are optimized for data efficiency, providing a better user experience and contributing to a more sustainable digital ecosystem.
Related video from YouTube
1. Optimize App Code
Optimizing app code is a crucial step in reducing mobile data usage. Well-structured and efficient code can significantly minimize the amount of data transmitted, resulting in faster app performance and lower costs. Here are some tips to optimize your app code:
Efficient Coding Practices
PracticeDescriptionUse Efficient Data StructuresChoose data structures that minimize memory usage and improve data transfer.Minimize Memory AllocationReduce the number of memory allocations to minimize data transfer.Optimize LoopsOptimize loops to reduce the number of iterations and minimize data processing.Use Lazy LoadingLoad data only when necessary to reduce data transfer and improve app performance.
By following these efficient coding practices, you can reduce mobile data usage, improve app performance, and enhance user experience.
Remember, every byte counts, and optimizing your code can make a significant difference in your app's overall performance.
2. Use Data Compression
Data compression is a powerful technique to reduce mobile data usage in apps. By compressing data, you can minimize the amount of data transmitted, resulting in faster app performance, lower costs, and improved user experience.
Faster Loading and Lower Bandwidth Consumption
Compressing data reduces the time it takes to download or upload data from the server, making your app more responsive. For example, Google's WebP image format can reduce image sizes by 25-34% compared to JPEG and PNG.
Choosing the Right Compression Algorithm
You have two main options for compression algorithms: lossless and lossy. Lossless compression retains all data, making it suitable for text and structured data. Lossy compression sacrifices some data for higher compression rates, often used for images and multimedia.
Compression AlgorithmDescriptionLosslessRetains all data, suitable for text and structured data.LossySacrifices some data for higher compression rates, often used for images and multimedia.
Implementing Data Compression
To implement data compression in your app, you can use Android's built-in compression libraries, such as Zlib, or libraries like OkHttp, which provide built-in support for request and response compression.
By using data compression, you can significantly reduce mobile data usage, improve app performance, and enhance user experience. Remember, every byte counts, and optimizing your app's data usage can make a significant difference in your app's overall performance.
3. Limit Background App Refresh
Limiting background app refresh is a crucial step in reducing mobile data usage in apps. When an app is running in the background, it can consume data without your knowledge, leading to unexpected data usage. By limiting background app refresh, you can prevent apps from consuming data unnecessarily.
How to Limit Background App Refresh on Android
To limit background app refresh on Android, follow these steps:
1. Go to Settings > Connections > Data Usage. 2. Select Mobile Data Usage in the Mobile section. 3. Select an App from below the usage graph. 4. Tap Allow background data usage to turn off.
Alternatively, you can also go to Settings > Apps > All apps, select the app you want to disable background data usage for, and toggle off Background data under Mobile data & Wi-Fi.
Benefits of Limiting Background App Refresh
By limiting background app refresh, you can:
- Reduce mobile data usage
- Improve battery life
- Enhance overall app performance
- Gain more control over data usage
Remember, every byte counts, and limiting background app refresh can make a significant difference in your app's overall performance and data usage.
4. Use Caching
Caching is a technique that reduces mobile data usage in apps. It stores frequently accessed data in a temporary storage location, allowing apps to retrieve data quickly and efficiently.
Benefits of Caching
Caching provides several benefits, including:
- Faster Load Times: Caching reduces the time it takes to load content, making your app more responsive.
- Reduced Server Load: By serving cached content, caching reduces the load on your servers.
- Improved Scalability: With reduced server load, caching helps your app handle a larger number of concurrent users without sacrificing performance.
Types of Caching Mechanisms
There are various caching mechanisms you can use in your app development process:
Caching MechanismDescriptionBrowser CachingStores static resources, such as CSS files, JavaScript libraries, and images, locally on a user's device.Database Query CachingStores results of frequently executed database queries in memory, reducing the load on the database server and improving overall app performance.Content Delivery Network (CDN) CachingUtilizes a network of servers strategically located worldwide to cache and serve your app's static content.
By implementing caching mechanisms within your app, you can enhance its performance and deliver a superior user experience.
5. Optimize Image Loading
Optimizing image loading is crucial for reducing mobile data usage in apps. With the majority of internet traffic coming from mobile devices, it's essential to deliver a superior user experience.
Smaller Image Sizes Mean Better Performance
Optimizing images can significantly reduce the size of your app, making it more lightweight and efficient. This can lead to faster loading times and improved overall performance.
Techniques for Optimizing Image Loading
Here are some techniques to optimize image loading:
TechniqueDescriptionCompressionImplement cutting-edge compression strategies to reduce image and video sizes without compromising quality.Lower Resolution OptionsUse lower resolution options for non-critical visual elements to reduce data usage.Lazy LoadingLoad images or videos only when they come into the user's viewport, optimizing data usage and initial load time.Format SelectionChoose the right format for your image or video files to reduce data usage. Formats like WebP for images and VP9 for videos provide good quality at smaller sizes.
By implementing these techniques, you can significantly reduce image loading times and mobile data usage in your app, resulting in a better user experience and improved performance.
sbb-itb-8abf120
6. Use a Content Delivery Network (CDN)
Using a Content Delivery Network (CDN) is an effective way to reduce mobile data usage in apps. CDNs store your app's content on servers located closer to your users, reducing the distance data needs to travel. This results in faster content delivery, lower latency, and improved overall performance.
How CDNs Help Mobile Apps
CDNs offer several advantages for mobile apps:
AdvantageDescriptionFaster PerformanceCDNs cache content on nearby servers, reducing latency and improving overall performance.Lower LatencyBy delivering content from nearby servers, CDNs minimize latency, ensuring a smoother user experience.ScalabilityCDNs can handle high traffic volumes, making them ideal for apps with large user bases.Improved SecurityCDNs provide robust security features, protecting your app from security threats.
By using a CDN, you can significantly reduce mobile data usage in your app, resulting in a better user experience and improved performance.
7. Minimize Data Transfer
Minimizing data transfer is crucial to reduce mobile data usage in apps. This involves optimizing the amount of data exchanged between the app and the server. By minimizing data transfer, you can reduce the amount of data consumed, resulting in faster app performance, lower latency, and improved overall user experience.
Strategies to Minimize Data Transfer
Here are some strategies to minimize data transfer:
StrategyDescriptionUse data compressionReduce data size by compressing it using algorithms like Gzip or Brotli.Optimize API callsLimit API calls and optimize their payload to reduce data exchange.Use cachingStore frequently accessed data locally to reduce repeated data transfers.Optimize image loadingCompress images, use lazy loading, and cache images to reduce data consumption.
By implementing these strategies, you can significantly minimize data transfer, reducing mobile data usage and improving the overall user experience.
Remember, every byte counts when it comes to mobile data usage. By minimizing data transfer, you can create a more efficient, faster, and more user-friendly app that consumes less data.
8. Implement Data Synchronization
Data synchronization is essential for reducing mobile data usage in apps. It ensures that data is consistent across different devices and platforms, reducing the need for frequent data transfers.
Strategies for Implementing Data Synchronization
Here are some strategies to implement data synchronization:
StrategyDescriptionUse sync adaptersAutomate data synchronization in the background at regular intervals.Implement incremental updatesTransfer only modified or new data, reducing data exchange.Use cachingStore frequently accessed data locally to reduce repeated data transfers.Optimize network requestsMinimize network latency and reduce data usage by optimizing network requests.
By implementing these strategies, you can significantly reduce mobile data usage, resulting in a more efficient, faster, and more user-friendly app that consumes less data.
9. Use Push Notifications
Push notifications can help reduce mobile data usage in apps. By sending targeted and personalized notifications, you can minimize the need for users to constantly check the app for updates, reducing data consumption.
Best Practices for Push Notifications
Here are some best practices to follow:
Best PracticeDescriptionKnow your audienceAnalyze user behavior and preferences to tailor notifications that are relevant and engaging.Test and refineExperiment with different notification frequencies and content to find the perfect balance for your app.Use behavioral triggersSend notifications based on user actions or inactions to increase relevance and engagement.Personalize notificationsUse user data and preferences to create targeted and personalized notifications.Avoid overwhelming usersBe mindful of notification frequency and content to avoid overwhelming users.
By following these best practices, you can effectively use push notifications to reduce mobile data usage in your app while still providing a engaging user experience.
10. Monitor and Analyze Network Usage
Monitoring and analyzing network usage is crucial to reducing mobile data consumption in apps. By understanding how your app interacts with the network, you can identify areas of improvement and optimize data usage.
Why Monitor Network Usage?
Monitoring network usage helps you:
- Identify data-intensive features and optimize them
- Detect and fix data leaks or unnecessary requests
- Improve app performance and user experience
- Reduce data consumption and save users' bandwidth
Tools for Monitoring Network Usage
Here are some tools to monitor network usage:
ToolDescriptionAndroid Studio's Network ProfilerA built-in tool that provides detailed insights into network traffic and data usageCharles ProxyA popular proxy server that allows you to record and analyze network trafficFiddlerA web debugging proxy that captures and analyzes network traffic
Best Practices for Monitoring Network Usage
Here are some best practices to follow:
- Regularly review network usage reports to identify trends and areas of improvement
- Use tools to monitor network traffic and analyze data usage
- Test and optimize data-intensive features to reduce data consumption
- Implement data compression and caching to reduce data transfer
- Analyze user behavior and feedback to identify areas of improvement
By monitoring and analyzing network usage, you can optimize your app's data consumption and provide a better user experience. Remember to regularly review network usage reports, use tools to monitor network traffic, and test and optimize data-intensive features to reduce data consumption.
Conclusion
Reducing mobile data usage in apps is crucial for a better user experience, faster app performance, and saving users' bandwidth. By implementing the strategies discussed in this article, developers can minimize data consumption, reduce latency, and enhance overall app efficiency.
Key Takeaways
Here are the main points to remember:
StrategyDescriptionMonitor network usageIdentify areas of improvement and optimize data usageOptimize app codeMinimize data transmission and improve app performanceUse data compressionReduce data size and improve loading timesImplement cachingStore frequently accessed data locally to reduce data transferLimit background app refreshPrevent apps from consuming data unnecessarily
By following these tips and best practices, developers can create apps that are optimized for data efficiency, providing a better experience for users and contributing to a more sustainable digital ecosystem.
Remember, every small optimization counts, and collective efforts can lead to significant improvements. By prioritizing data efficiency, developers can ensure their apps remain competitive, user-friendly, and environmentally sustainable.
FAQs
How do I keep my mobile data usage low?
Here are 9 simple tips to help you reduce your mobile data consumption:
TipDescription1. Use WiFiSwitch to WiFi whenever possible to reduce mobile data usage.2. Turn off background app refreshDisable background app refresh for apps that don't need it to prevent unnecessary data usage.3. Find which apps use the most dataIdentify data-hungry apps and limit their usage or uninstall them if necessary.4. Download, don't streamDownload content instead of streaming it to reduce data consumption.5. Switch off WiFi assist or network switchDisable WiFi assist or network switch to prevent your device from switching to mobile data when WiFi is weak.6. 'Fetch' mail less oftenReduce the frequency of mail fetching to minimize data usage.7. Use Safari's reading listUse Safari's reading list to download articles for offline reading, reducing data consumption.8. Switch off autoplay on YouTube or other video appsDisable autoplay on video apps to prevent unwanted data usage.9. Monitor your data usageRegularly monitor your data usage to identify areas of improvement.
By following these simple tips, you can significantly reduce your mobile data usage and save on your data plan.
Related posts

10 Best Color Contrast Checker Tools for Accessible App Design
Color contrast is crucial for ensuring your app's text and UI elements are readable for all users, including those with visual impairments or color blindness. To meet accessibility standards like WCAG 2.0, you need a contrast ratio of at least 4.5:1 for normal text and 3:1 for large text.
Here are the top 10 color contrast checker tools to help you create accessible app designs:
- WAVE - Free web-based tool that checks color contrast and other accessibility issues
- Contrast (macOS) - Simple macOS app with color suggestions for WCAG compliance
- Stark - Integrates with Figma and Sketch, offers color blindness simulation
- Tanaguru Contrast-Finder - Free online tool that suggests accessible color combinations
- Color Safe - Generates beautiful, accessible color palettes based on WCAG guidelines
- Spectrum - Web-based tool that checks contrast ratios against WCAG standards
- Accessible Colors - Modifies color lightness to find WCAG-compliant combinations
- Android Accessibility Scanner - Mobile app for scanning Android UI and improving color contrast
- Colour Contrast Analyzer (CCA) - Desktop program with eyedropper tool and color blindness simulator
- WebAim Contrast Checker - Simple online tool for checking contrast ratios against WCAG
Related video from YouTube
Quick Comparison
ToolWCAG ComplianceKey FeaturesWAVEAAWeb-based, freeContrast (macOS)AASimple interface, color suggestionsStarkAADesign integration, color blindness simulationTanaguru Contrast-FinderAAFree, color suggestionsColor SafeAAAccessible color palettesSpectrumAADesign integration, color suggestionsAccessible ColorsAAWeb-based, freeAndroid Accessibility ScannerAAFree, detailed reportsColour Contrast Analyzer (CCA)AAEyedropper tool, color blindness simulatorWebAim Contrast CheckerAAWeb-based, free
Choose the tool that best fits your needs and workflow to ensure your app meets accessibility standards and provides an inclusive experience for all users.
1. WAVE

WAVE (Web Accessibility Versatile Evaluator) is a suite of tools that helps authors make their web content more accessible to individuals with disabilities. It identifies many accessibility and Web Content Accessibility Guideline (WCAG) errors, facilitating human evaluation of web content.
Platform Compatibility
WAVE is available on multiple platforms, including:
PlatformAvailabilityWeb-based toolYesChrome browser extensionYesFirefox browser extensionYesEdge browser extensionYesSubscription APIYesStand-alone API and Testing EngineYes
WCAG Compliance
WAVE checks against the international standard for web accessibility, the Web Content Accessibility Guidelines (WCAG 2.0 or 2.1), and the US federal procurement standard, Section 508 of the Rehabilitation Act.
Design Integration
WAVE provides a detailed summary of scan results organized into six categories:
- Errors
- Contrast
- Alerts
- Features
- Structural Elements
- HTML5 and ARIA
It also allows users to disable page CSS style, making it easier to analyze the reading and navigation order.
Color-Blindness Simulation
WAVE does not have a built-in color-blindness simulation feature. However, it does provide assistance in evaluating cognitive web accessibility, which is particularly difficult to measure.
API/Bookmarklet Availability
WAVE offers a subscription API and Stand-alone API and Testing Engine, allowing users to collect accessibility test data on many pages. The API engine evaluates the user's web page after CSS and JavaScript has been applied, resulting in a very accurate evaluation of end-user accessibility.
2. Contrast (macOS)
Contrast is a macOS tool designed to help designers evaluate color choices for WCAG compliance and implement accessible design standards. This tool allows you to integrate it into your preferred design program or use it as a floating window anywhere on your desktop.
Platform Compatibility
PlatformAvailabilitymacOSYes
WCAG Compliance
Contrast is built to ensure WCAG compliance, providing a guide on accessibility standards. It enables designers to check color contrast scores against the Web Content Accessibility Guidelines (WCAG) standards.
Design Integration
Contrast seamlessly integrates into your design workflow, allowing you to evaluate color choices and implement accessible design standards effortlessly. You can open the app anywhere, anytime with a keyboard shortcut.
Color-Blindness Simulation
Contrast does not have a built-in color-blindness simulation feature. However, it provides an innovative preview mode that transforms your user interface into the selected colors, allowing you to see immediately how legible text is and how harmoniously the colors interact.
3. Stark
Stark is a powerful tool that helps streamline accessibility workflow. It includes a Contrast Checker, Focus Order, Alt-Text Annotations, Vision Simulator, and more. With Stark, you can check the AA and AAA color contrast of your text or shape layers.
Platform Compatibility
PlatformAvailabilityFigmaYesSketchYes
WCAG Compliance
Stark ensures WCAG compliance by providing a guide on accessibility standards. It helps designers check color contrast scores against the Web Content Accessibility Guidelines (WCAG) standards.
Design Integration
Stark integrates seamlessly into your design workflow, making it easy to evaluate color choices and implement accessible design standards. You can use it with Figma and Sketch plugins to fast-track your accessibility workflow.
Color-Blindness Simulation
Stark allows you to simulate how your work is perceived through the eyes of someone who is colorblind. You can quickly flip between eight colorblindness profiles while moving and resizing the Stark window around your file as you compare. You can also export these simulations as.png files to share with team members or include in client presentations.
With Stark, you can create and test accessible software quickly and easily. Whether you're building a website, online shop, mobile app, or SaaS product, Stark provides the tools you need to make it accessible.
4. Tanaguru Contrast-Finder

Tanaguru Contrast-Finder is a free online tool that checks if the color schemes chosen for a website or mobile app have sufficient contrast. It uses the international minimum contrast ratio established by the Web Content Accessibility Guidelines (WCAG).
WCAG Compliance
Tanaguru Contrast-Finder ensures WCAG compliance by providing a guide on accessibility standards. It helps designers check color contrast scores against the WCAG standards. If the colors entered into the finder are not sufficiently contrasting, Tanaguru Contrast-Finder suggests similar colors that meet contrast requirements.
Design Integration
Tanaguru Contrast-Finder is easy to integrate into your design workflow, allowing you to evaluate color choices and implement accessible design standards. It's a web-based tool, making it accessible from anywhere, and it's free to use.
Key Features
FeatureDescriptionWCAG ComplianceChecks color contrast scores against WCAG standardsColor SuggestionsProvides similar colors that meet contrast requirementsWeb-basedAccessible from anywhere, no installation requiredFree to useNo cost or subscription fees
5. Color Safe

Color Safe is a valuable tool for designers and developers who want to ensure their app designs are accessible to everyone. This tool provides beautiful and accessible color palettes based on the Web Content Accessibility Guidelines (WCAG).
WCAG Compliance
Color Safe ensures WCAG compliance by generating accessible text colors based on the recommended contrast ratios of 4.5 for small text or 3 for large text.
Design Integration
Color Safe is easy to integrate into your design workflow. Simply enter a background color and customize the styling of your text. The tool will generate accessible text colors based on WCAG guidelines.
Key Features
FeatureDescriptionWCAG ComplianceGenerates accessible text colors based on WCAG guidelinesCustomizableAllows users to customize the styling of their textAccessible Color PalettesProvides beautiful and accessible color palettes for app design
6. Spectrum
Spectrum is a powerful tool that helps designers and developers create accessible app designs. It provides a range of features to ensure your app meets the Web Content Accessibility Guidelines (WCAG).
Platform Compatibility
Spectrum is a web-based tool, accessible on any device with a web browser. This means you can use Spectrum on Windows, macOS, or Linux without any compatibility issues.
WCAG Compliance
Spectrum checks color contrast ratios against the recommended ratios of 4.5 for small text and 3 for large text. This ensures your app design is accessible to users with visual impairments.
Design Integration
Spectrum is easy to integrate into your design workflow. Simply enter a background color and customize the styling of your text. The tool will generate accessible text colors based on WCAG guidelines.
Key Features
FeatureDescriptionWCAG ComplianceChecks color contrast ratios against WCAG guidelinesPlatform CompatibilityAccessible on any device with a web browserDesign IntegrationEasy to integrate into your design workflowColor Contrast Ratio AnalyzerChecks against recommended contrast ratios for small and large text
sbb-itb-8abf120
7. Accessible Colors
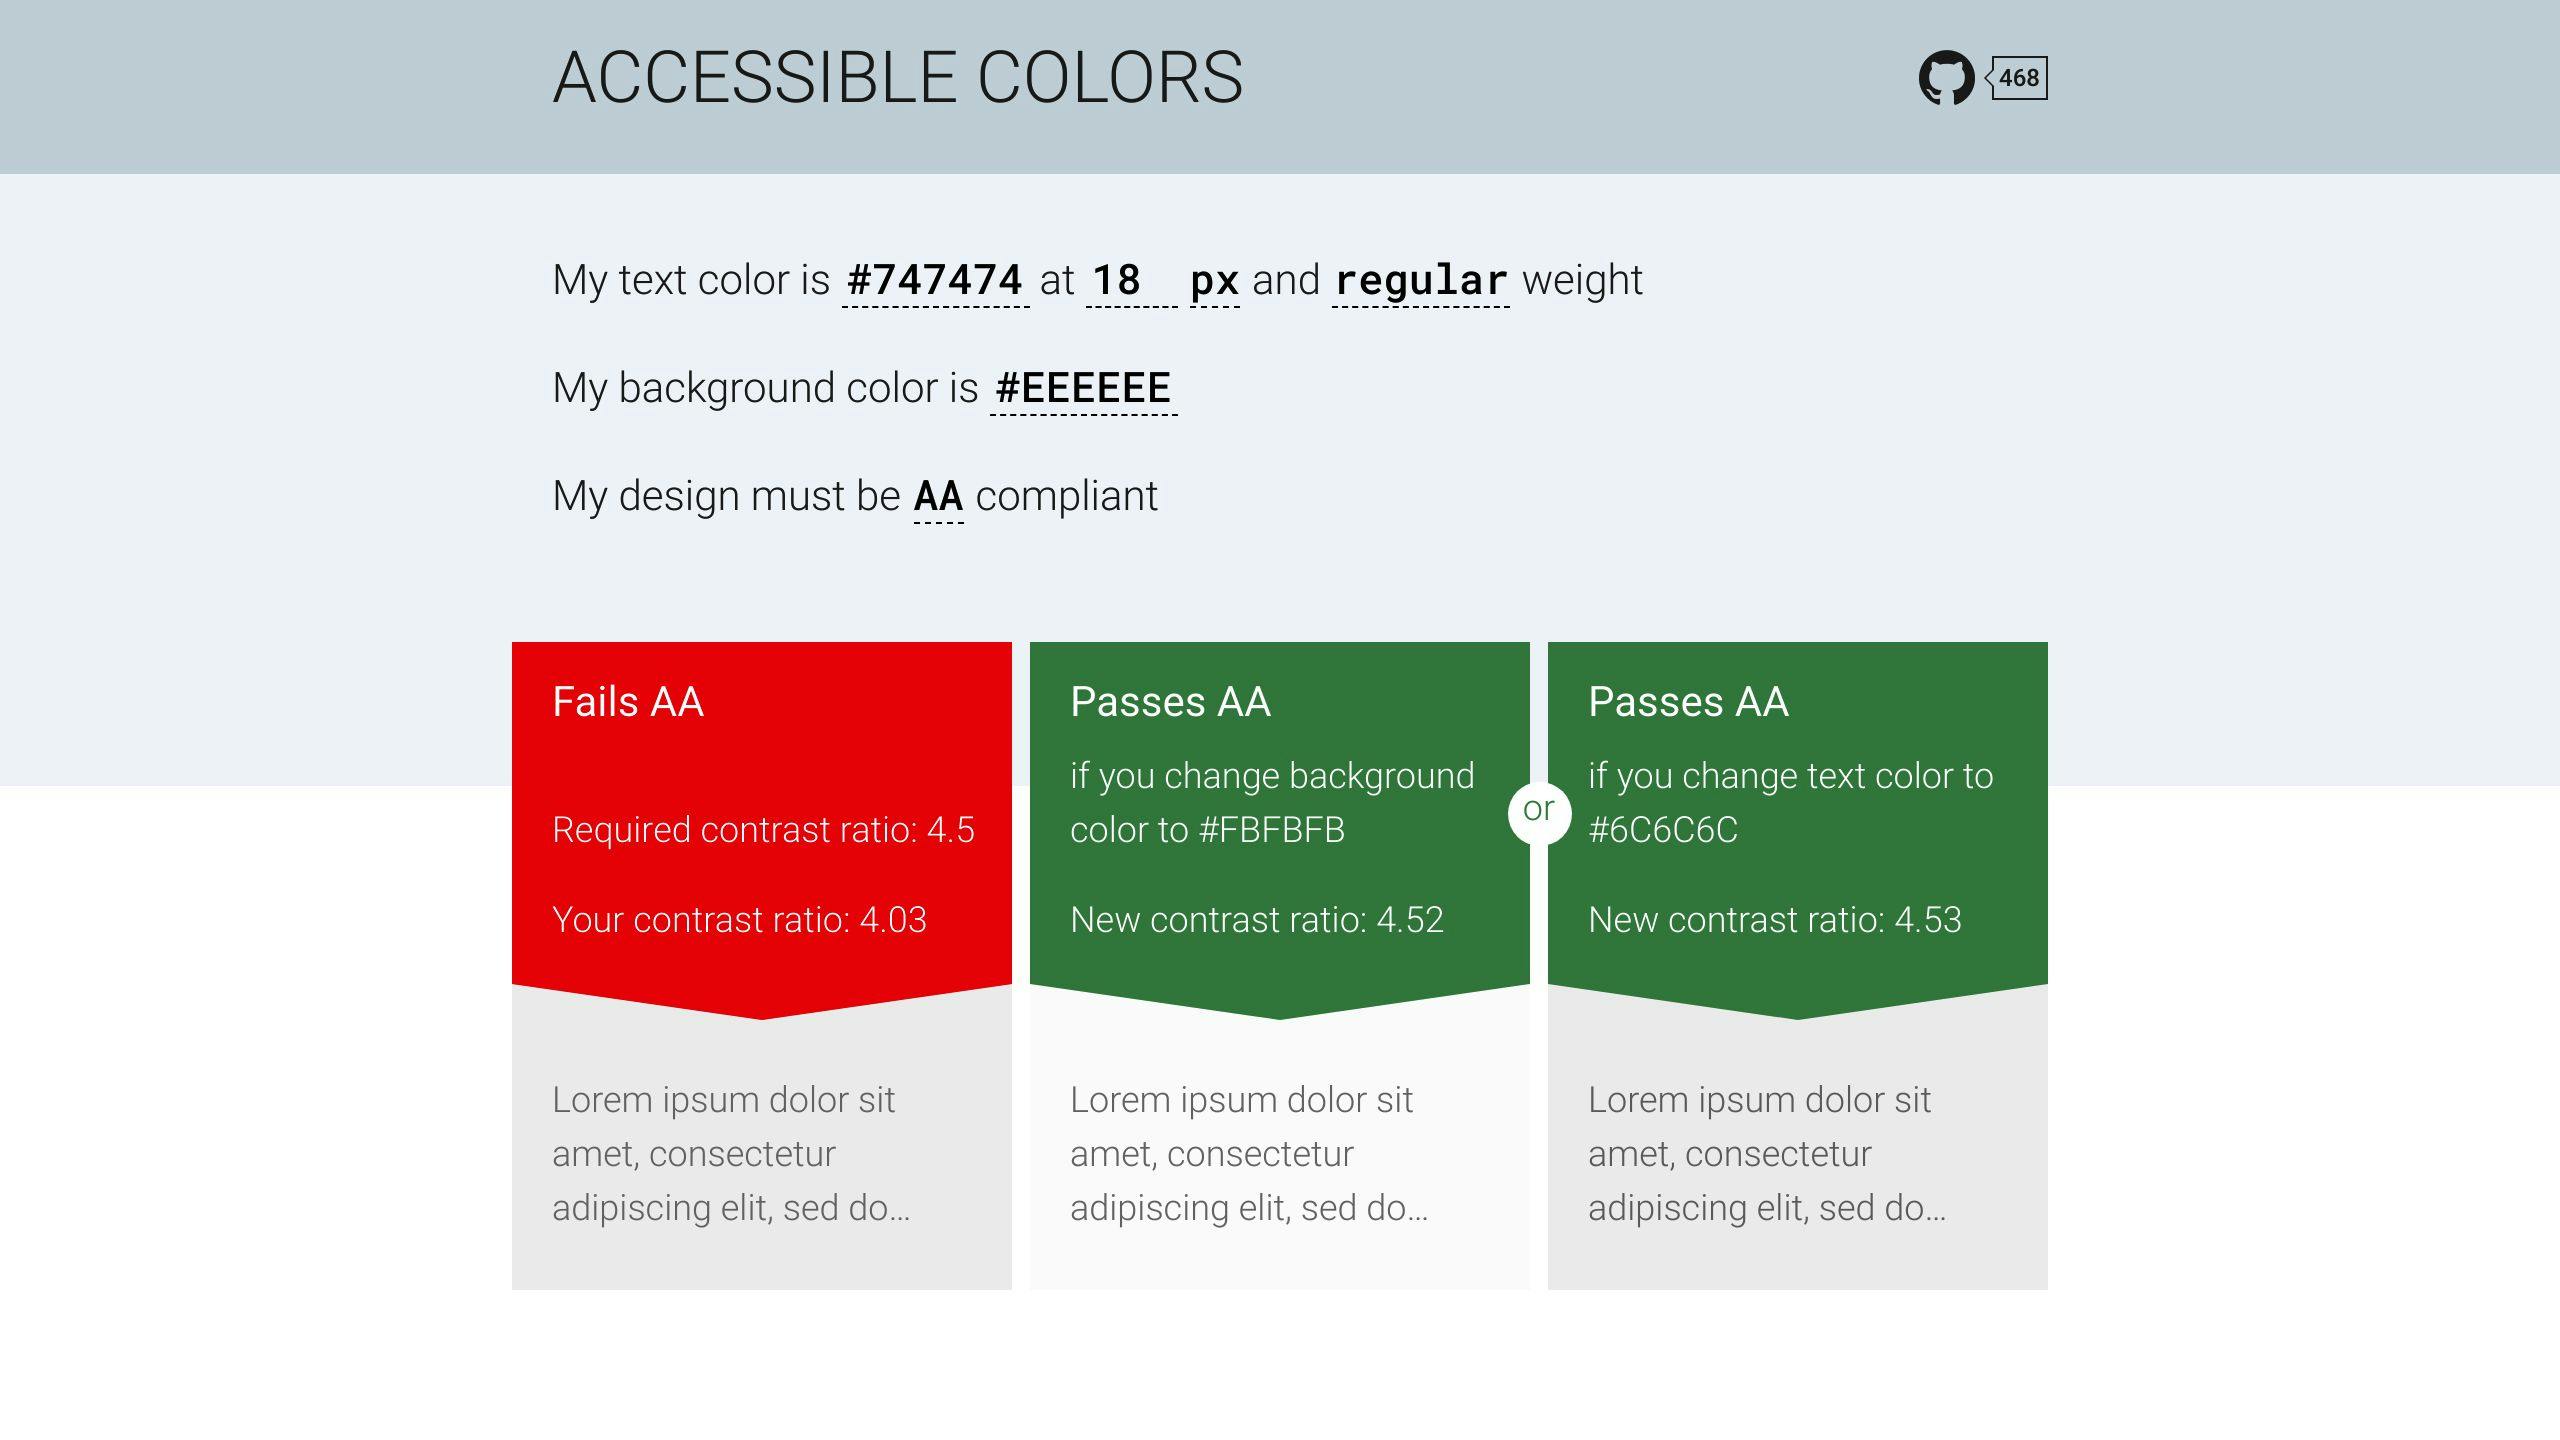
Accessible Colors is a tool that helps ensure color contrast in mobile app design. It evaluates a color combination using the WCAG 2.0 AA conformance level as the standard. If the color combination doesn't meet these standards, Accessible Colors modifies the color lightness to find the closest combination that does.
Platform Compatibility
Accessible Colors is a web-based tool, accessible on any device with a web browser. This means you can use it on Windows, macOS, or Linux without any compatibility issues.
WCAG Compliance
Accessible Colors checks color contrast ratios against the recommended ratios of 4.5 for small text and 3 for large text. This ensures your app design is accessible to users with visual impairments.
Design Integration
Accessible Colors is easy to integrate into your design workflow. Simply enter a background color, and the tool will generate accessible text colors based on WCAG guidelines.
Key Features
FeatureDescriptionWCAG ComplianceChecks color contrast ratios against WCAG guidelinesPlatform CompatibilityAccessible on any device with a web browserDesign IntegrationEasy to integrate into your design workflowColor Contrast Ratio AnalyzerChecks against recommended contrast ratios for small and large text
8. Android Accessibility Scanner
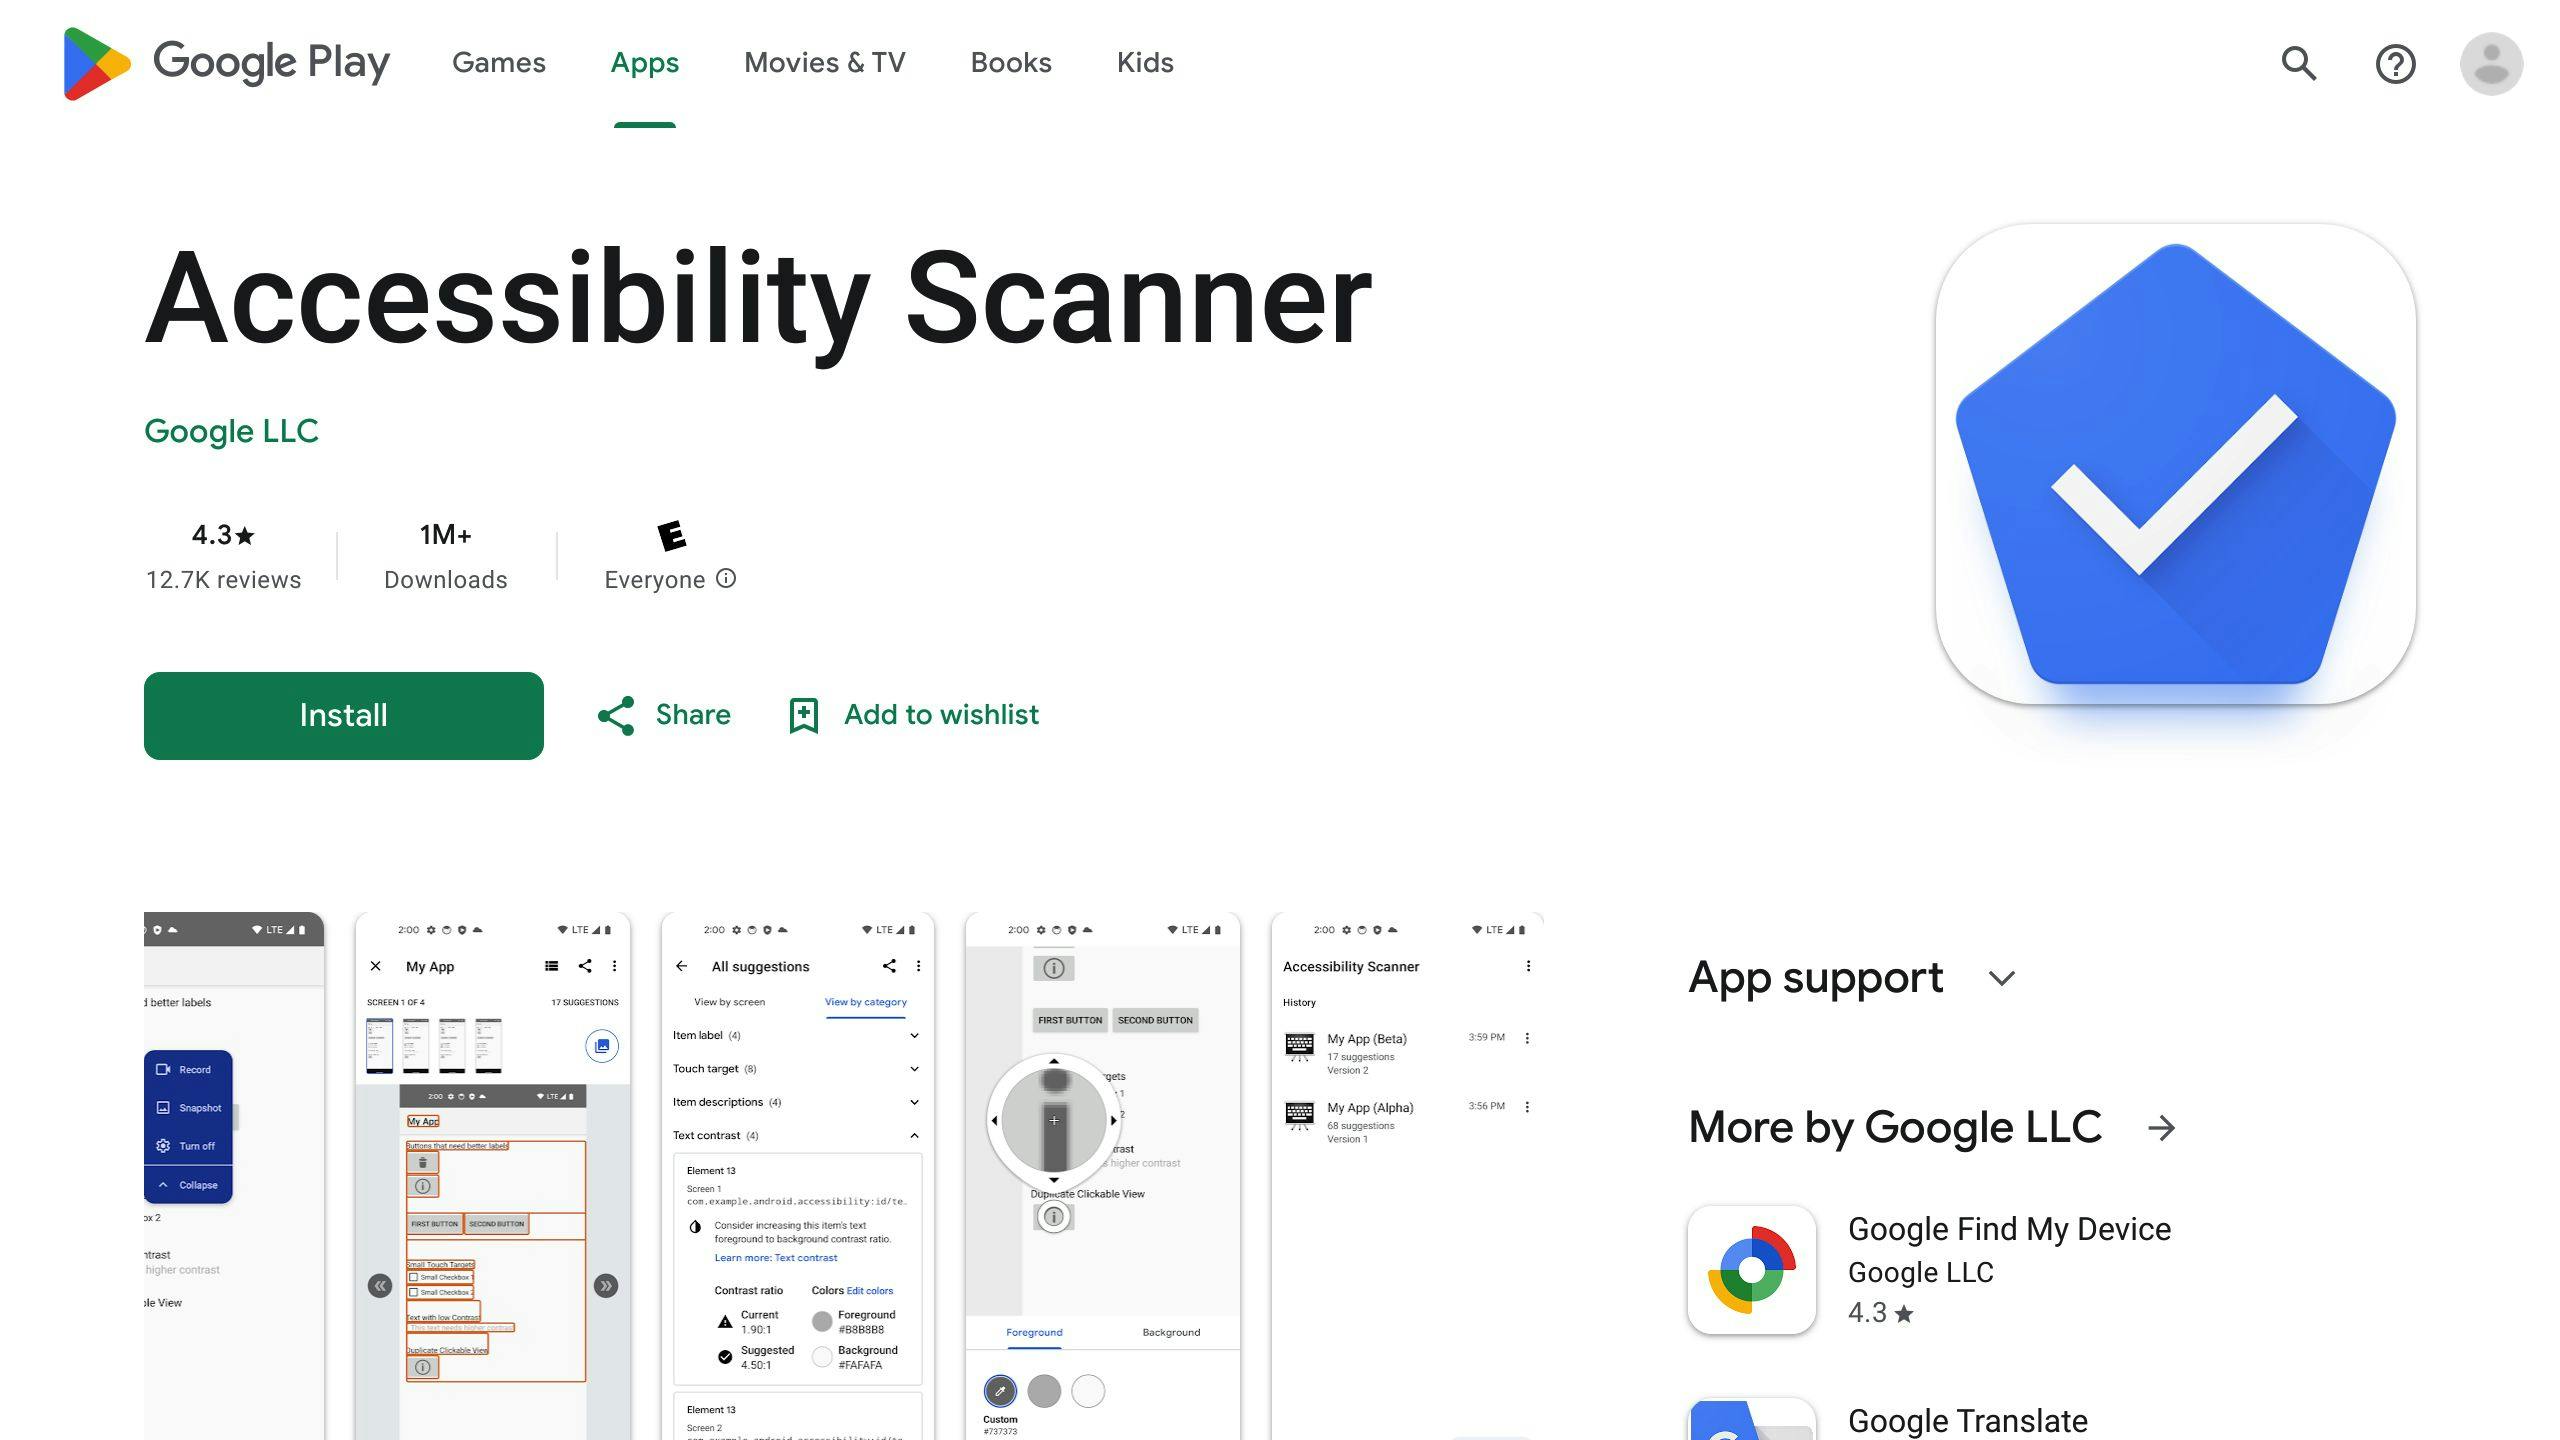
Platform Compatibility
Android Accessibility Scanner is a mobile app available on the Google Play Store, accessible on Android devices.
WCAG Compliance
This tool checks for color contrast issues in your app's UI, suggesting improvements to make your app more accessible to visually impaired users. It identifies text or images with a contrast ratio lower than 3.0 between the text color and background color, and provides recommendations to enhance the contrast ratio.
Design Integration
Android Accessibility Scanner allows you to edit contrast ratio results, enabling you to change the foreground or background color to improve accessibility. You can also use the app to scan your app's UI and identify other accessibility issues beyond color contrast.
Key Features
FeatureDescriptionWCAG ComplianceChecks color contrast ratios against WCAG guidelinesPlatform CompatibilityAvailable on Android devices via Google Play StoreDesign IntegrationAllows editing of contrast ratio results and scanning for other accessibility issuesColor Contrast Ratio AnalyzerIdentifies text or images with low contrast ratios and provides improvement suggestions
9. Colour Contrast Analyzer (CCA)
Colour Contrast Analyzer (CCA) is a downloadable program for Windows and macOS that helps you test color contrast within any program. It supports RGB, hex, and HSL formats and allows testing of colors with alpha (transparency).
Platform Compatibility
CCA is available for both Windows and macOS operating systems.
WCAG Compliance
CCA helps improve the readability and accessibility of your content for individuals with vision impairments such as color blindness and low vision. It measures the contrast ratio of two colors and checks if they meet the Web Content Accessibility Guidelines (WCAG).
Design Integration
CCA's greatest strength is its ability to use the eyedropper tool to measure the contrast of anything on the screen. You can select the eyedropper in the Foreground color section and move the crosshairs to the text or foreground color using a mouse or the arrow keys. If the background is any color other than white, do the same with the Background color eyedropper. CCA will notify you if the color combination meets AA and AAA requirements for text as well as WCAG 2.1 AA requirements for non-text content.
Color-Blindness Simulation
CCA also offers a Color Blindness Simulator, which allows you to see how your color combinations will appear to users with different types of color blindness.
Note: CCA is free software, which means you can use, study, share, and improve it at your will. Specifically, you can redistribute and/or modify it under the terms of the GNU General Public License as published by the Free Software Foundation.
10. WebAim Contrast Checker
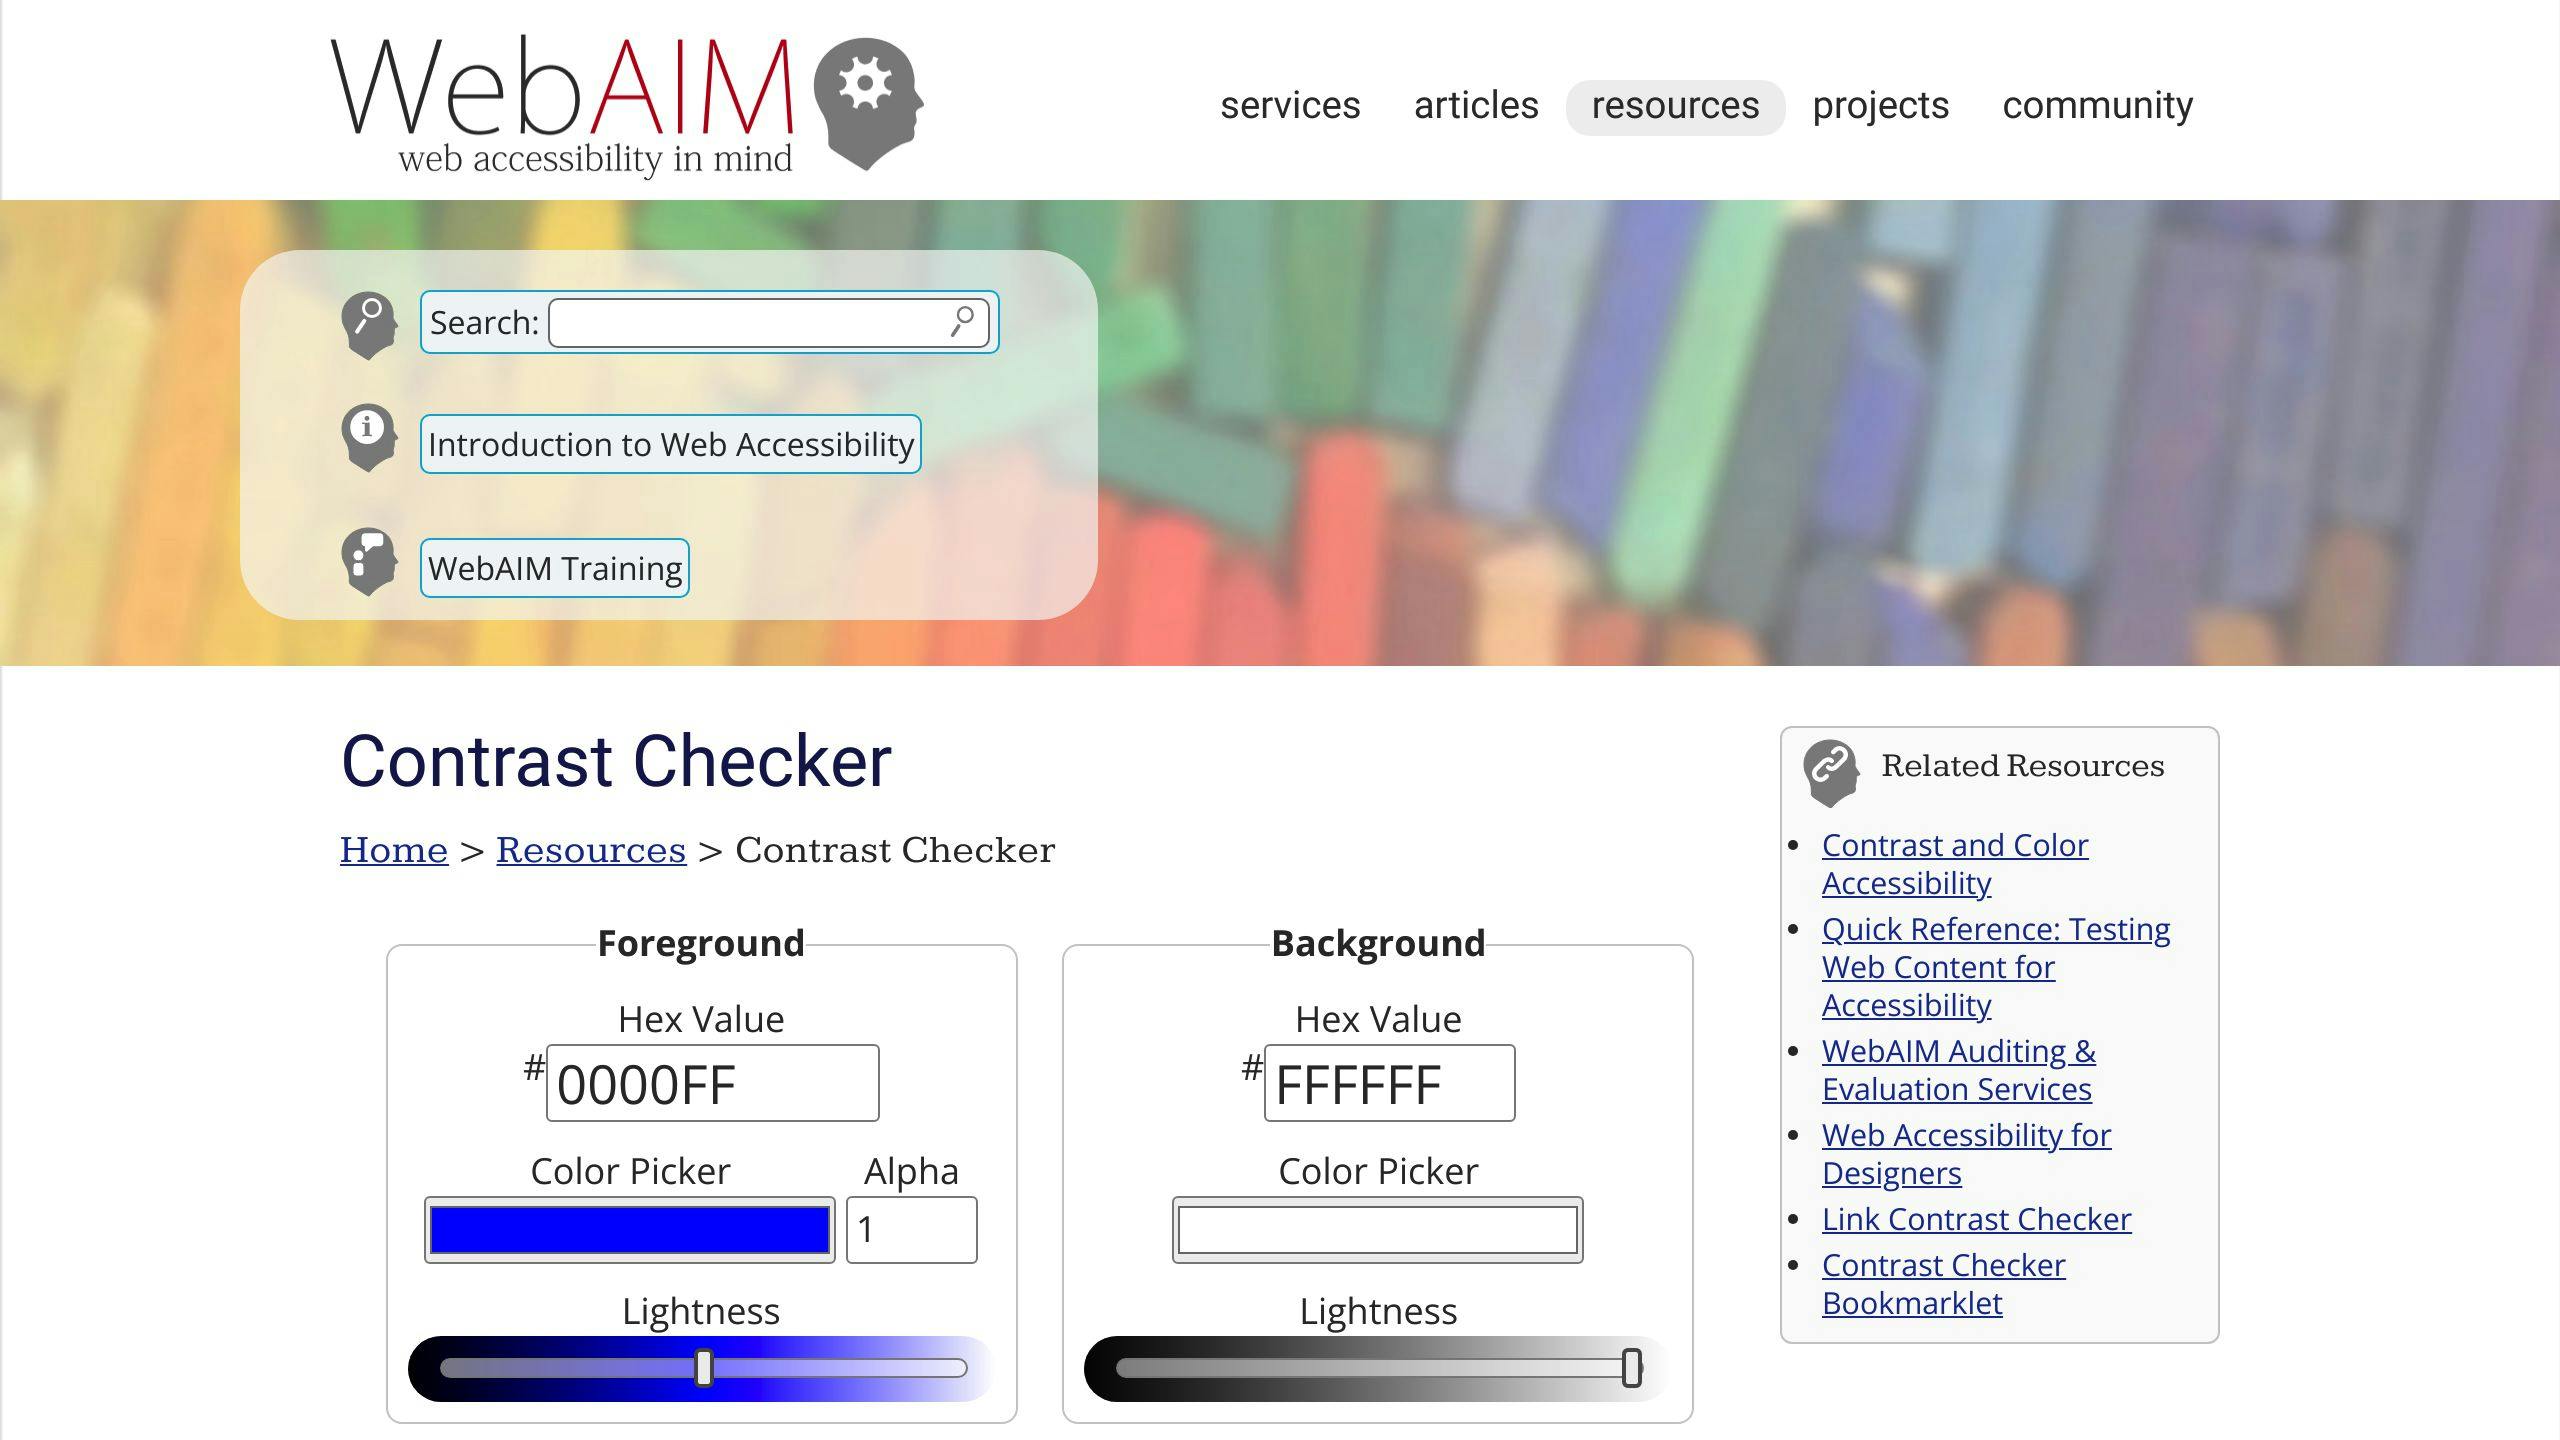
WebAim Contrast Checker is a free online tool that helps developers and designers check the contrast between two colors against the Web Content Accessibility Guidelines (WCAG). This tool is essential for ensuring that your app design is accessible to users with visual impairments.
Platform Compatibility
WebAim Contrast Checker is a web-based tool, making it compatible with any device that has a web browser.
WCAG Compliance
The WebAim Contrast Checker evaluates the contrast ratio of two colors and checks if they meet the WCAG guidelines. The tool provides a pass or fail result in three categories:
CategoryDescriptionNormal TextChecks contrast ratio for normal textLarge TextChecks contrast ratio for large textGraphical Objects and User Interface ComponentsChecks contrast ratio for graphical objects and user interface components
Design Integration
The WebAim Contrast Checker is easy to use and integrates seamlessly into your design workflow. You can:
- Enter the hex color codes or select colors using the color palette
- Adjust the lightness of the colors and update the contrast ratio automatically
Note: WebAim Contrast Checker is a free online tool, and you can use it without any restrictions or limitations.
Pros and Cons Comparison
Each tool has its strengths and weaknesses. Here's a quick comparison:
ToolAdvantagesDisadvantagesWAVEFree, web-based, easy to useLimited featuresContrast (macOS)Simple interface, color suggestionsOnly for macOS, limited featuresStarkIntegrates with design tools, color suggestionsLimited free features, subscription requiredTanaguru Contrast-FinderFree, web-based, easy to useLimited featuresColor SafeSimple interface, color suggestionsLimited featuresSpectrumIntegrates with design tools, color suggestionsLimited free features, subscription requiredAccessible ColorsFree, web-based, easy to useLimited featuresAndroid Accessibility ScannerFree, easy to use, detailed reportsOnly for Android, limited featuresColour Contrast Analyzer (CCA)Free, web-based, easy to useLimited featuresWebAim Contrast CheckerFree, web-based, easy to useLimited features
This table provides a quick overview of each tool's pros and cons, helping you decide which one best fits your needs.
WCAG Compliance and Key Features
WCAG guidelines are crucial for ensuring digital products are accessible to everyone, including individuals with disabilities. When it comes to color contrast, WCAG provides specific guidelines to ensure text and background colors have sufficient contrast to be readable by users with visual impairments.
WCAG Color Contrast Guidelines
WCAG 2.0 and 2.1 provide guidelines for color contrast, categorized into three levels of conformance: Level A, Level AA, and Level AAA. Level AA is the recommended level of compliance, requiring a contrast ratio of at least 4.5:1 for normal text and 3:1 for large text.
Key Features of Color Contrast Checker Tools
Here's a comparison table to help you identify which tool best meets your needs:
ToolWCAG ComplianceKey FeaturesWAVELevel AAWeb-based, easy to use, freeContrast (macOS)Level AASimple interface, color suggestions, only for macOSStarkLevel AAIntegrates with design tools, color suggestions, subscription requiredTanaguru Contrast-FinderLevel AAWeb-based, easy to use, freeColor SafeLevel AASimple interface, color suggestions, freeSpectrumLevel AAIntegrates with design tools, color suggestions, subscription requiredAccessible ColorsLevel AAWeb-based, easy to use, freeAndroid Accessibility ScannerLevel AAFree, easy to use, detailed reports, only for AndroidColour Contrast Analyzer (CCA)Level AAWeb-based, easy to use, freeWebAim Contrast CheckerLevel AAWeb-based, easy to use, free
This table provides a quick overview of each tool's WCAG compliance and key features, helping you decide which one best fits your needs.
Conclusion and Recommendations
In conclusion, choosing the right color contrast checker tool is crucial for accessible app design. With many options available, it's essential to consider factors like WCAG compliance, ease of use, and integration with design tools.
Recommended Tools
Based on our analysis, we recommend the following tools:
ToolRecommendationWAVEEasy to use and WCAG compliantTanaguru Contrast-FinderSimple and freeStarkIntegrates with design toolsSpectrumIntegrates with design toolsAndroid Accessibility ScannerFree and suitable for Android app designersColor SafeSimple and freeAccessible ColorsSimple and free
Key Takeaways
- Color contrast is a critical aspect of accessible app design.
- Choose a tool that meets your specific needs and priorities.
- Consider WCAG compliance, ease of use, and integration with design tools when selecting a tool.
By prioritizing color contrast and choosing the right tool, designers can create apps that are both visually appealing and accessible to users with visual impairments. Remember, accessible design is essential for creating inclusive and user-friendly apps.
FAQs
What tool helps determine the contrast between two colors and their accessibility?
You can use Contrast-Finder to calculate the contrast between two colors (background and foreground) and check if it meets accessibility standards. This tool helps you determine whether a color combination is accessible for users with visual impairments.
Related posts

Heuristic Evaluation vs Usability Testing for Mobile Apps
Heuristic evaluation examines a user interface against established usability principles, while usability testing involves observing real users interacting with the product. Both methods aim to enhance the user experience (UX) of mobile apps.
Related video from YouTube
Key Differences
Heuristic EvaluationUsability TestingExperts review the interfaceReal users test the appIdentifies common usability issuesUncovers real user pain pointsCost-effective and efficientMore resource-intensiveLimited to expert perspectivesProvides in-depth user feedback
When to Use Each Method
- Heuristic Evaluation: Early design stages for quick evaluation
- Usability Testing: Later stages with functional prototypes or beta versions
Combining Both Methods
Integrating heuristic evaluation and usability testing provides a comprehensive UX strategy:
- Identify issues early with heuristic evaluation
- Validate designs with real user feedback from testing
- Refine the app based on combined insights
By employing both methods iteratively, developers can create user-centered mobile apps that delight and engage users, driving success.
What is Heuristic Evaluation?
Heuristic evaluation is a method to examine a user interface and check if it follows established usability principles. These principles, also called "heuristics," help identify common usability problems.
How Heuristic Evaluation Works
In a heuristic evaluation, experts review the interface and identify potential usability issues based on a set of heuristics. The most widely used heuristics are the 10 principles developed by Jakob Nielsen and Rolf Molich:
HeuristicDescription1. Visibility of system statusThe system should always keep users informed about what is going on.2. Match between system and the real worldThe system should speak the users' language and follow real-world conventions.3. User control and freedomUsers should be able to undo and redo actions, and have control over the system.4. Consistency and standardsThe system should be consistent in its design and follow industry standards.5. Error preventionThe system should prevent errors from happening in the first place.6. Recognition rather than recallThe system should minimize the need for users to remember information.7. Flexibility and efficiency of useThe system should accommodate different user styles and preferences.8. Aesthetic and minimalist designThe system should have a simple and visually appealing design.9. Help users recognize, diagnose, and recover from errorsThe system should provide helpful error messages and recovery options.10. Help and documentationThe system should provide easy access to help and documentation.
The evaluators inspect the interface, noting any violations of these heuristics, and provide feedback and recommendations for improvement.
Pros and Cons of Heuristic Evaluation
ProsConsCost-effectiveSubjectivityEfficientLimited scopeEarly detectionLack of user feedbackBroad coverageExpertise required
While heuristic evaluation is a valuable tool for identifying usability problems, it is often recommended to combine it with other methods, such as usability testing, to obtain a more comprehensive understanding of the user experience.
sbb-itb-8abf120
Usability Testing Explained
Usability testing is a method of evaluating a mobile app's user experience by observing real users interacting with the app. This approach provides valuable insights into how users navigate the app, identify pain points, and uncover areas for improvement.
How Usability Testing Works
In a usability testing session, a small group of participants (typically 5-10) are asked to complete a set of tasks on the mobile app while being observed by a moderator. The tasks are designed to simulate real-world scenarios, and the participants are encouraged to think aloud as they navigate the app. This allows the moderator to understand their thought process, identify areas of confusion, and gather feedback.
The testing session is usually recorded, and the data is analyzed to identify patterns, trends, and areas for improvement. The results are then used to inform design decisions, iterate on the app's user experience, and improve its overall usability.
Advantages and Challenges of Usability Testing
Advantages
AdvantageDescriptionIn-depth dataProvides rich, qualitative data for targeted improvements.Real-user feedbackOffers a deeper understanding of users' needs, preferences, and pain points.Improved user experienceHelps identify areas for improvement, leading to a more intuitive app.
Challenges
ChallengeDescriptionResource-intensiveRequires a significant investment of time, money, and resources.Limited scopeTypically conducted with a small, targeted group of participants.SubjectivityResults may be influenced by the moderator's biases or participants' individual experiences.
By understanding the advantages and challenges of usability testing, developers can make informed decisions about when and how to use this method to improve their mobile app's user experience.
Comparing the Two Methods
Heuristic Evaluation vs Usability Testing
MethodAdvantagesDisadvantagesHeuristic Evaluation- Cost-effective and efficient
- Can be done early in the design process
- Identifies common usability issues- Limited to expert evaluators' perspectives
- May miss real-world user issues
- Potential for bias and false positivesUsability Testing- Provides real user feedback
- Identifies actual pain points
- Offers in-depth qualitative data- More resource-intensive
- Limited scope with small user groups
- Subjective results based on participants
When to Use Each Method
Heuristic Evaluation is ideal for early stages of mobile app development, when designs and prototypes need a quick evaluation. It can identify common usability issues before moving to user testing. However, it should not be the only evaluation method relied upon.
Usability Testing is crucial for later stages, once a functional prototype or beta version is available. It provides invaluable insights into real user behavior, pain points, and areas for improvement. While more resource-intensive, usability testing is essential for ensuring a positive user experience.
For optimal results, it's recommended to leverage both methods throughout the mobile app development lifecycle. Heuristic evaluation can identify initial issues early on, while usability testing validates the design with real users and uncovers additional areas for refinement.
Using Both Methods Together
Combining heuristic evaluation and usability testing can provide a more comprehensive understanding of UX issues in mobile app development. By leveraging both methods, developers can identify usability problems early on and validate their designs with real users.
Combining Heuristic Evaluation and Usability Testing
Heuristic evaluation helps identify common usability issues and provides a cost-effective way to evaluate designs early in the development process. Usability testing offers in-depth qualitative data and real user feedback, which can help refine the design and ensure a positive user experience. By combining both methods, developers can:
- Identify usability issues early on and make necessary changes before investing in usability testing
- Validate design decisions with real user feedback and make data-driven decisions
- Refine the design based on user testing results and ensure a more user-friendly experience
Benefits of Combining Both Methods
BenefitDescriptionEarly Identification of IssuesIdentify usability problems early on and make necessary changesData-Driven DecisionsValidate design decisions with real user feedback and make data-driven decisionsImproved User ExperienceRefine the design based on user testing results and ensure a more user-friendly experience
By integrating both methods into the development process, developers can create a more user-centered design that meets the needs of their target audience. This approach can help reduce development costs, improve user satisfaction, and increase the overall success of the mobile app.
In practice, developers can use heuristic evaluation to identify potential usability issues during the design phase and then validate their findings with usability testing during the prototyping phase. This iterative approach can help refine the design and ensure that it meets the needs of the target audience. By combining heuristic evaluation and usability testing, developers can create a more effective and user-friendly mobile app that meets the needs of their users.
Conclusion: Improving Mobile App UX
Final Thoughts on UX Evaluation
In conclusion, both heuristic evaluation and usability testing are crucial for improving the user experience of mobile apps. By understanding the strengths and weaknesses of each approach, developers can create a more comprehensive UX strategy.
Key Takeaways
- Heuristic evaluation identifies common usability issues early on
- Usability testing provides real user feedback and in-depth qualitative data
- Combining both methods helps refine the design and ensure a positive user experience
By using both methods, developers can reduce development costs, improve user satisfaction, and increase the overall success of the mobile app.
Ongoing UX Evaluation
UX evaluation is an ongoing process that requires continuous refinement and iteration. By staying committed to UX evaluation and improvement, developers can create mobile apps that truly delight and engage their users, driving business success and long-term growth.
Remember, the key to achieving superior UX in mobile apps lies in employing both heuristic evaluation and usability testing in an iterative and complementary manner.
FAQs
What is the main difference between a usability test and a heuristic evaluation?
Usability Testing: Observes real users interacting with a product to identify issues. Heuristic Evaluation: Experts review a product against design rules to identify problems.
How does usability testing for a new device differ from a heuristic evaluation?
Heuristic Evaluation: Experts evaluate a product against design rules. Usability Testing: Real users try out a product to identify issues that affect their experience.
What are the benefits of heuristic evaluation over user testing?
Heuristic Evaluation:
- Quick and cost-effective
- Identifies a wide range of problems
- Easier to correct errors in early design stages
How is usability testing for a new device different from a heuristic evaluation?
Heuristic Evaluation: Experts evaluate a product against design rules. Usability Testing: Real users try out a product to identify issues that affect their experience.
When should you use a heuristic evaluation of your mobile app or content?
Use heuristic principles when:
- Concise guidelines don't exist
- Overarching ideas can be used to evaluate a system and problem-solve for optimal solutions
- Efficiently identifying problems and making decisions is necessary
Related posts

Instagram API 2024: New Features for Developers
The 2024 Instagram API update introduces several new features to enhance the experience for creators, businesses, and developers:
For Creators and Businesses
- User Tagging in Reels: Tag other users in Reels for increased engagement
- Customizable 'Original Audio' Names: More control over audio content branding
- Higher Media Posting Limits: Share more content without restrictions
- Monetization and Discovery Tools:
- Creator Marketplace for brand partnerships
- Prioritized DMs for smoother collaborations
- Project Briefs for monetizing content
For Developers
FeatureDescriptionBusiness DiscoveryAccess metadata and stats of other Business/Creator accountsContent PublishingPublish photos, videos, and locationsComment ModerationManage comments (reply, disable, delete, hide)Hashtag SearchDiscover content by specific hashtagsPage InsightsTrack performance with detailed analytics
To access the new features, you'll need a Business Instagram account connected to a Facebook account, a configured Facebook App, verified Business accounts, and a Facebook Developer account. The approval process involves specifying data usage and providing a valid Privacy Policy.
By leveraging these updates, developers can create more engaging experiences, drive user interactions, and unlock new revenue opportunities for creators and businesses on Instagram.
Related video from YouTube
2024 Instagram API Release Overview
The 2024 Instagram API release introduces new features and improvements for developers, focusing on enhancing the overall user experience.
Key Improvements and Additions
The latest update includes:
FeatureDescriptionBusiness DiscoveryRetrieve essential metadata and stats about other Instagram Business and Creators accountsContent PublishingPublish different types of media, including photos and videos, with locationsComment ModerationManage comments with features like replying, disabling, deleting, and hidingHashtag SearchEasily discover content with specific hashtagsPage InsightsTrack performance with more detailed analytics and metrics
These updates aim to provide developers with more tools to create seamless Instagram experiences, driving user engagement and business success. In the following sections, we'll delve deeper into the specifics of these updates and explore how developers can leverage them to drive success.
New Tools for Creators and Businesses
The latest Instagram API update introduces new features and tools designed to support creators and businesses. These changes can help improve engagement and revenue opportunities.
Expanded Publishing Options for Creators
The updated API allows developers to integrate expanded publishing features into third-party apps. This enables creators to publish different types of media, including photos and videos, with locations. This feature makes it easier for creators to manage their content across various platforms.
FeatureDescriptionMedia PublishingPublish photos and videos with locationsContent ManagementManage content across various platforms
Monetization and Discovery Features
The updated API includes new monetization features and discovery tools. These features can significantly impact creator revenue streams and brand collaborations.
FeatureDescriptionCreator MarketplaceDiscover and partner with creators more efficientlyPrioritized DMsFacilitate smoother collaborations between brands and creatorsProject BriefsProvide creators with more opportunities to monetize their content
User Tagging in Reels
The new user tagging functionality in Reels allows creators to tag other users in their videos. This feature increases engagement and virality.
Customizing 'Original Audio' in Reels
The ability to rename 'Original Audio' in Reels provides creators with more control over their branding and content strategy.
Higher Media Posting Limits
The increased media posting limits enable creators and businesses to share more content without restrictions. This provides more opportunities for engagement and revenue generation.
By leveraging these features, developers can create more effective monetization strategies for creators and businesses.
sbb-itb-8abf120
Technical Guide to New API Features
This section provides technical insights into the new Instagram API features, offering guidance on how developers can integrate these updates to enhance app functionality and user experience.
Improved Comment Moderation
The new Instagram API introduces enhanced comment moderation features, enabling developers to maintain positive community interactions. With the updated API, you can:
FeatureDescriptionGet CommentsRetrieve comments on IG Media owned by your app usersReply to CommentsReply to comments on IG Media owned by your app usersDelete CommentsDelete comments on IG Media owned by your app usersHide/Unhide CommentsHide or unhide comments on IG Media owned by your app usersEnable/Disable CommentsEnable or disable comments on IG Media owned by your app users
Additionally, you can use the Instagram Messaging API to send private replies (direct messages) to users who have commented on your app users' live video IG Media.
Better Hashtag Search
The updated API improves hashtag search, allowing developers to fine-tune content discovery and marketing strategies. Although the old (legacy) API will shut down hashtag search, Facebook will make it available on the new Graph API. This change affects social walls in various ways, and developers need to adapt to these changes to ensure seamless integration.
More Page Insights Metrics
The new API provides more detailed analytics for developers, offering a better understanding of their clients' performance. With the updated API, businesses can access valuable insights, keeping track of their organic content's performance more effectively on third-party tools outside of the Instagram application.
By leveraging these technical features, developers can create more effective and engaging experiences for users, ultimately driving revenue and growth for creators and businesses.
Getting Started with the Updated API
To start using the updated Instagram API, you need to understand the initial setup, account requirements, and the approval process for accessing new features. This section will guide you through the essential steps to get started.
Requirements for New Features
To access the latest Instagram API features, you'll need to meet specific criteria and account types. Here's a checklist to ensure you're on the right track:
RequirementDescriptionBusiness Instagram accountConnected to a Facebook accountFacebook AppConfigured to access Instagram accountsVerified Business accountFor both Facebook and InstagramFacebook Developer accountRequired for API access
Approval Process Explained
The approval process for developers to gain access to the new API features involves specifying the type of data your app will be requesting from users and describing how you will use that data. Here are some tips for a smooth authorization experience:
1. Clear app purpose and data usage: Ensure you have a concise description of your app's purpose and data usage.
2. Valid Privacy Policy: Provide a valid Privacy Policy on a website.
3. Additional steps: Be prepared to complete additional steps as required by Facebook/Instagram.
4. Switch to Live mode: Only switch your app to Live mode after you have been approved to avoid losing access to all data.
By following these guidelines, you'll be well on your way to leveraging the updated Instagram API features and creating more effective and engaging experiences for users.
Conclusion: Benefiting from the Updates
The updated Instagram API brings new features and opportunities for developers, creators, and businesses. By understanding and using these changes, you can improve your projects and stay ahead.
Leverage Expanded Publishing Options
The new API allows creators to access more features and tools to manage their online presence. By integrating these features, you can help creators expand their reach, engage with their audience, and monetize their content more efficiently.
Enhance User Experience with Improved Comment Moderation and Hashtag Search
The updated API introduces improved comment moderation and hashtag search features, enabling developers to create more interactive and immersive experiences for users. By using these features, you can build more robust and engaging applications.
Unlock New Revenue Streams with Monetization Features
The new API also brings monetization features, allowing creators and businesses to explore new revenue streams and opportunities. By integrating these features, you can help your clients and users generate more revenue and grow their online presence.
In conclusion, the updated Instagram API offers many benefits and opportunities. By using these changes, you can improve your projects, enhance user experience, and unlock new revenue streams.
FAQs
What APIs does Instagram offer?
Instagram provides two APIs: the Basic Display API and the Graph API. The Basic Display API allows users to access basic profile information, photos, and videos from their Instagram accounts. The Graph API is designed for Instagram Businesses and Creators, enabling them to manage their presence on Instagram.
Is the Instagram API deprecated?
Yes, the Legacy API platform was deprecated in 2018. The final permission on the Legacy API (“Basic Permission”) ended on March 31, 2020. As of January 19, 2024, the Legacy API is no longer available.
What are the limitations of Instagram Graph API?
The Instagram Graph API has some limitations. It cannot access consumer accounts (non-Business or non-Creator Instagram accounts). If you're building an app for consumer users, use the Basic Display API instead. Additionally, the API has restrictions on user metrics, media metrics, and endpoint usage to ensure user privacy and security.
Related posts

PWA Offline Functionality: Caching Strategies Checklist
Progressive Web Apps (PWAs) can provide a seamless offline experience by caching resources locally on the device. This allows users to access critical content and functionality even without an internet connection. To achieve this, PWAs employ various caching strategies implemented through service workers:
Caching Strategies
StrategyDescriptionBest ForCache-FirstServe content from cache, falling back to network if not availableStatic assets that rarely changeNetwork-FirstFetch content from network, falling back to cache if not availableDynamic content that changes frequentlyStale-While-RevalidateServe stale content from cache while revalidating with networkContent that requires a balance between speed and freshnessCache-OnlyServe content only from cache, without attempting to fetch from networkContent that is rarely updatedNetwork-OnlyFetch content only from network, without cachingContent that requires real-time updates
To ensure a seamless offline experience, PWAs should:
- Implement Caching Strategies: Choose the appropriate caching strategy based on content type, network conditions, and user expectations.
- Handle Caching Errors: Provide graceful degradation, user notifications, and offline fallbacks when caching fails.
- Optimize Cache Size and Speed: Cache frequently accessed, large, and critical resources while setting practical storage limits and expiration policies.
- Update and Maintain Caches: Monitor cache performance, implement versioning strategies, and use cache invalidation techniques to ensure users receive the latest content.
By following these caching best practices, PWAs can deliver a fast, reliable, and engaging user experience, even in areas with poor or no internet connectivity.
Related video from YouTube
Caching Basics for PWAs
Caching is a crucial concept in Progressive Web Apps (PWAs) that enables offline functionality. It involves storing frequently-used resources, such as HTML, CSS, JavaScript, and images, on the user's device. This allows the app to load and operate even when the device is offline, ensuring a seamless user experience.
How Caching Works
Here's a step-by-step explanation of the caching process:
1. Service Worker Registration: The service worker script is registered in the browser, allowing it to manage caching and other offline-related tasks.
2. Cache Creation: The service worker creates a cache storage area, where resources are stored.
3. Resource Request: When a user requests a resource, the service worker intercepts the request and checks if the resource is cached.
4. Cache Hit: If the resource is cached, the service worker retrieves it from the cache and returns it to the user.
5. Cache Miss: If the resource is not cached, the service worker fetches it from the network and caches it for future use.
Benefits of Caching
Caching provides two significant benefits:
BenefitDescriptionFaster Load TimesCaching reduces the amount of data transferred over the network, resulting in faster load times and improved performance.Offline FunctionalityCaching enables offline functionality, allowing users to access critical resources even when they don't have an internet connection.
By leveraging caching, PWAs can provide a seamless user experience, even in areas with poor or intermittent connectivity. In the next section, we'll explore the different caching strategies available for PWAs and how to implement them effectively.
PWA Caching Strategies Checklist
Use Cache-First Strategy
- Definition: Serve content from the browser cache before fetching from the network. Ideal for static assets like images, stylesheets, and scripts that don't change frequently.
- Benefits: Faster load times and a seamless offline experience by delivering cached content immediately.
- Risks: Serving outdated or stale content if the cache isn't updated regularly.
- Implementation: Use the
cache.match()method in your service worker to check the cache for a matching request. If found, serve the cached response; otherwise, fetch from the network and update the cache.
Use Network-First Strategy
- Definition: Fetch content from the network first. If the network request fails, fall back to the cache.
- Best For: Dynamic content that changes frequently, such as news articles, user-generated content, or real-time data.
- Offline Usage: Ensure a fallback mechanism to serve cached content when offline, providing a basic experience until connectivity is restored.
- Implementation: Use the
fetch()method to retrieve the resource from the network, and handle the promise rejection by serving the cached response usingcache.match().
Use Stale-While-Revalidate Strategy
- Definition: Serve cached content immediately while simultaneously fetching fresh data from the network. If the network response differs from the cached version, update the cache.
- Balance: Provides a balance between speed (serving cached content quickly) and freshness (updating the cache with the latest data).
- Best For: Content that is relatively static but occasionally updated, like product listings or blog posts.
- Potential Pitfalls: Serving stale data temporarily and increased network load due to parallel cache and network requests.
- Implementation: Serve the cached response using
cache.match(), then fetch the latest version from the network usingfetch()and update the cache withcache.put().
Use Cache-Only Strategy
- Definition: Serve content exclusively from the cache, without any network requests.
- Best For: Ensuring offline access to critical resources without relying on network connectivity.
- Considerations: Requires upfront caching of all necessary assets and managing cache lifespans and updates.
- Implementation: Use
cache.match()to retrieve the cached response, and do not attempt any network requests.
Use Network-Only Strategy
- Definition: Always fetch content from the network, bypassing the cache entirely.
- Best For: Scenarios where the latest data is absolutely essential, such as real-time stock prices or live updates.
- Offline Behavior: Provide an appropriate fallback or error handling mechanism when the network is unavailable.
- Implementation: Use the
fetch()method to retrieve the resource from the network, without checking or updating the cache.
Caching Strategies Comparison
StrategyProsConsCache-FirstFastest load times, seamless offline experiencePotential for serving outdated contentNetwork-FirstAlways up-to-date content, handles dynamic data wellSlower initial load, limited offline functionalityStale-While-RevalidateBalance between speed and freshness, updates cache in the backgroundTemporary stale data, increased network loadCache-OnlyGuaranteed offline access, no network requestsRequires upfront caching, potential for stale contentNetwork-OnlyAlways serves the latest dataNo offline functionality, slower load times
Putting Caching Strategies into Action
Now that we've explored the different caching strategies for PWAs, let's see how to put them into practice. In this section, we'll discuss code snippets, Service Worker lifecycle events, and tips for testing and debugging caching behavior in PWAs.
Implementing Caching Strategies
When implementing caching strategies, it's essential to consider the Service Worker lifecycle events: install, activate, and fetch. Here's an example of how you can implement the Cache-First strategy using the fetch event:
self.addEventListener('fetch', (event) => {
  event.respondWith(
    caches.open('my-cache').then((cache) => {
      return cache.match(event.request).then((response) => {
        if (response) {
          return response;
        } else {
          return fetch(event.request);
        }
      });
    })
  );
});
In this example, we're using the caches.open method to open the cache, and then using the match method to check if the requested resource is in the cache. If it is, we return the cached response. If not, we fetch the resource from the network using the fetch method.
Testing and Debugging Caching Behavior
Testing and debugging caching behavior can be challenging, but there are several tools and techniques that can help. Here are a few tips:
TipDescriptionUse Chrome DevToolsInspect the cache and see which resources are being cached.Test with cache.matchCheck if a resource is in the cache.Test with fetch and cacheTest whether a resource can be fetched from the cache.Delete the cacheTest how the PWA behaves when the cache is empty.
By following these tips and considering the Service Worker lifecycle events, you can effectively implement caching strategies in your PWA and provide a fast and seamless user experience.
sbb-itb-8abf120
Updating and Maintaining Caches
To ensure your Progressive Web App (PWA) remains fast and efficient, it's crucial to update and maintain caches effectively. Here are some tips to help you achieve this:
Monitoring Cache Performance
Regularly track cache metrics such as cache hit ratio, cache size, and cache expiration to identify areas for improvement.
Versioning Strategies for Service Workers
Implement versioning strategies for Service Workers to ensure users receive the latest content. Increment the version number of your Service Worker script each time you make changes to your PWA.
Cache Invalidation Techniques
Use cache invalidation techniques to ensure users receive the latest content:
TechniqueDescriptionCache ExpirationSet a time-to-live (TTL) for cached resources to ensure they expire after a certain period.Cache Invalidation HeadersUse headers such as Cache-Control and ETag to invalidate cached resources.Cache ClearingClear the cache programmatically using the caches.delete() method.
Best Practices for Updating Caches
Follow these best practices to ensure your PWA remains fast, efficient, and up-to-date:
1. Use a consistent caching strategy: Stick to a consistent caching strategy throughout your PWA. 2. Test thoroughly: Test your caching strategy thoroughly to ensure it's working as expected. 3. Monitor cache performance: Monitor cache performance regularly to identify areas for improvement. 4. Use cache invalidation techniques: Use cache invalidation techniques to ensure users receive the latest content.
By following these tips and best practices, you can ensure your PWA remains fast, efficient, and up-to-date.
Optimizing Cache Size and Speed
Optimizing cache size and speed is crucial for a fast and efficient Progressive Web App (PWA). A bloated cache can lead to slower performance, increased storage usage, and a higher risk of caching errors.
Efficient Resource Selection for Caching
To optimize cache size and speed, focus on caching resources that are:
CriteriaDescriptionFrequently accessedResources that are often used by usersLarge in sizeResources that take up a lot of storage spaceCritical to the user experienceResources that are essential for the app's functionalityInfrequently updatedResources that do not change often
Setting Practical Limits on Cache Storage
To prevent cache bloat, set practical limits on cache storage. This can be achieved by:
MethodDescriptionImplementing cache expiration policiesSet a time limit for cached resources to expireSetting cache size limitsLimit the amount of storage space allocated to the cacheRegularly clearing unnecessary cache entriesRemove unused or outdated resources from the cache
Caching Strategies for Optimizing Performance
Different caching strategies can have a significant impact on cache size and speed. Consider the following strategies to optimize performance:
StrategyDescriptionCache-first strategyServe content from the cache to reduce network requestsNetwork-first strategyFetch content from the network to ensure users receive the latest contentStale-while-revalidate strategyServe stale content from the cache while updating the cache with fresh content from the network
By implementing these strategies, you can optimize cache size and speed, ensuring your PWA remains fast, efficient, and provides a seamless user experience.
Handling Caching Errors and Offline Fallbacks
When caching fails, it's crucial to have a plan in place to handle errors and provide a seamless user experience, even when offline. This section will cover best practices for handling caching errors, including graceful degradation, user notification mechanisms, and implementing fallback content.
Graceful Degradation
Graceful degradation is a technique that allows your PWA to continue functioning, albeit with reduced capabilities, when caching fails. This approach ensures that users can still access critical features and functionality, even if the cache is unavailable.
User Notification Mechanisms
When caching errors occur, it's crucial to notify users about the issue and provide them with alternatives. Implement user-friendly notification mechanisms, such as toast notifications or modal windows, to inform users about the caching error. These notifications should provide clear instructions on how to resolve the issue or offer alternative solutions.
Implementing Fallback Content
Fallback content is a backup plan that provides users with alternative resources when caching fails. This can include static HTML pages, cached resources, or even offline-enabled features. By implementing fallback content, you can ensure that users have a seamless experience, even when the cache is unavailable.
Fallback Content StrategiesDescriptionStatic HTML PagesServe static HTML pages as a fallback when caching fails.Cached ResourcesUse cached resources as a fallback when caching fails.Offline-Enabled FeaturesImplement offline-enabled features as a fallback when caching fails.
By implementing these strategies, you can ensure that your PWA provides a seamless user experience, even when caching errors occur. Remember to prioritize user experience, provide clear notifications, and offer alternative solutions to ensure that users can continue using your PWA, even when offline.
Key Takeaways and Caching Checklist
In this article, we've covered the importance of caching strategies in Progressive Web Apps (PWAs) and how they impact offline functionality. Here's a recap of the key points and a final checklist to ensure your PWA provides a seamless user experience, even when offline:
Key Takeaways
- Caching strategies are crucial for PWAs to function offline.
- Choose a caching strategy based on content type, network conditions, and user expectations.
- Service workers can implement caching strategies, including cache-first, network-first, stale-while-revalidate, cache-only, and network-only.
- Handle caching errors and provide offline fallbacks to ensure a seamless user experience.
Caching Checklist
Caching StrategyDescriptionWhen to UseCache-FirstServe content from cache, falling back to network if not available.For static assets that rarely change.Network-FirstFetch content from network, falling back to cache if not available.For dynamic content that changes frequently.Stale-While-RevalidateServe stale content from cache while revalidating with network.For content that requires a balance between speed and freshness.Cache-OnlyServe content only from cache, without attempting to fetch from network.For content that is rarely updated.Network-OnlyFetch content only from network, without caching.For content that requires real-time updates.
By following this checklist and choosing the right caching strategy for your PWA, you can ensure a seamless user experience, even when offline. Remember to prioritize user experience, provide clear notifications, and offer alternative solutions to ensure users can continue using your PWA, even when the network is unavailable.
FAQs
How does PWA caching work?
PWA caching allows your app to store some resources locally on the device. This means that users can access these resources without needing to send a request to the network. There are two main benefits to caching resources locally: offline operation and responsiveness.
Does PWA work offline?
Yes, PWAs can work offline by using a combination of service workers and offline storage technologies. Service workers act as a proxy between the browser and the network, enabling PWAs to cache and serve content when the user is offline or has a poor internet connection.
How to cache with service worker?
Here are some important API methods to use with service worker caches:
MethodDescriptionCacheStorage.openCreate a new Cache instance.add and Cache.putStore network responses in a service worker cache.matchLocate a cached response in a Cache instance.deleteRemove a cached response from a Cache instance.
By using these methods, you can effectively cache resources and provide a seamless offline experience for your PWA users.
Related posts

Custom App UI/UX Design: Guide & Best Practices 2024
In 2024, creating exceptional custom app UI/UX is crucial for driving business success. This guide covers key trends, best practices, and essential tools for designing engaging user experiences:
Key Trends in 2024:
TrendDescriptionAugmented Reality (AR) / Virtual Reality (VR)Create immersive experiencesAI IntegrationEnhance user experiences and streamline functionality
UI/UX Best Practices:
- Integrate new trends like AR, VR, and AI-driven personalization
- Balance aesthetics and performance through optimization techniques
- Make data-driven design decisions based on user analytics
- Maintain consistent branding across all platforms
- Conduct iterative design and user testing for continuous improvement
Top Design Tools:
ToolDescriptionSketchVector-based UI designFigmaCloud-based collaboration and prototypingAdobe XDComprehensive design and prototypingInVisionInteractive prototyping and feedback
To stay ahead, designers must embrace new technologies, upskill continuously, and remain open to innovative approaches that create personalized, intuitive, and visually appealing app experiences.
Related video from YouTube
Understanding UI and UX for Custom Apps
UI and UX: Keys to App Success
In custom apps, UI (User Interface) and UX (User Experience) are two connected aspects that play a crucial role in enhancing user satisfaction and driving business growth. UI refers to the visual and interactive elements of an app, such as buttons, screens, and menus, that users interact with to achieve their goals. UX encompasses the entire user journey, including their emotions, behaviors, and motivations, to create a seamless and personalized experience.
By 2024, UX design has evolved to focus on personalization, accessibility, and interactivity. Custom apps must incorporate these elements to provide users with a tailored experience that meets their unique needs and preferences. This includes leveraging AI-driven features, such as chatbots and voice UI, to create a more intuitive and human-centered experience.
Business Benefits of Well-Designed UI/UX
A well-designed custom UI/UX can have a significant impact on a business's bottom line. Here are some benefits:
BenefitDescriptionIncreased Conversion RatesProvide an intuitive and engaging experience to increase conversion ratesCustomer LoyaltyCreate a seamless and personalized experience to build customer loyaltyRevenue GrowthDrive revenue growth by providing a unique and engaging experienceCompetitive DifferentiationSet your business apart from competitors with a well-designed UI/UXReduced Development CostsIdentify and address user needs and pain points early on in the development process
User Research and Personas for Custom Apps
To create a successful custom app, it's essential to conduct thorough user research and create detailed user personas. This involves understanding the target audience's needs, goals, behaviors, and motivations to tailor the app's UI/UX effectively. User research can be conducted through various methods, including:
- Surveys
- Interviews
- Usability testing
By creating user personas, businesses can develop a deeper understanding of their target audience and design an app that meets their unique needs and preferences. This includes identifying pain points and areas of improvement, as well as opportunities to create a more engaging and personalized experience.
Design Elements for Custom App UI/UX
When creating a custom app, it's essential to consider various design elements that contribute to a seamless user experience. In this section, we'll explore the crucial aspects of custom app UI/UX design, including simplicity, responsiveness, interaction, and navigation.
Simplicity in App Design
A simple design approach is vital in custom app development. By focusing on essential features and eliminating clutter, you can ensure an intuitive and user-friendly experience. To achieve simplicity, consider the following:
Design ElementDescriptionClear typographyUse clear, readable fonts to communicate information effectively.Consistent layoutEstablish a consistent layout throughout the app to create a sense of familiarity.Limited color paletteSelect a limited color palette to avoid visual overload and ensure a cohesive look.
Responsive Design Across Devices
With the increasing use of various devices, it's crucial to optimize your custom app for different screen sizes, orientations, and devices. Responsive design ensures a smooth user experience across all platforms, including:
DeviceDesign ConsiderationsSmartphonesDesign for both portrait and landscape modes.TabletsOptimize for larger screens and different orientations.DesktopsEnsure a seamless experience on desktop devices.
Interactive Elements and User Feedback
Interactive elements, such as animations and transitions, can enhance the user experience. However, it's essential to provide immediate and clear user feedback to maintain engagement. Consider the following:
Interactive ElementDescriptionLoading animationsUse loading animations to indicate progress and reduce frustration.Error messagesDisplay clear and concise error messages to guide users.Success notificationsProvide positive feedback for successful actions.
Easy App Navigation
Easy navigation is critical to a seamless user experience. By providing a logical and consistent navigation structure, you can reduce friction and increase user satisfaction. Consider the following:
Navigation ElementDescriptionClear navigation patternsEstablish a clear navigation pattern throughout the app.Minimal navigation optionsLimit navigation options to avoid overwhelming users.Consistent iconographyUse consistent icons and graphics to create a sense of familiarity.
By incorporating these design elements, you can create a custom app that provides a seamless and engaging user experience. In the next section, we'll explore the best practices for custom app UI/UX design in 2024.
sbb-itb-8abf120
UI/UX Best Practices for 2024
Integrating New UX Trends and Tech
To stay ahead in the game, UI/UX designers must incorporate the latest trends and advancements into their designs. In 2024, some of the most significant trends to consider include:
Trend/TechnologyDescriptionAugmented Reality (AR) / Virtual Reality (VR)Create immersive and interactive experiences for users, particularly useful for industries like gaming, retail, and real estate.AI-Driven PersonalizationUse AI and machine learning to analyze user data and provide personalized experiences tailored to individual preferences and behaviors.Emphasis on AccessibilityEnsure your app is accessible to users with disabilities by following the latest accessibility guidelines and best practices.
Balancing Aesthetics and Performance
While aesthetically pleasing designs are essential for user engagement, it's crucial not to compromise on performance. To strike the right balance, consider the following:
1. Optimize Media Files: Compress images, videos, and other media files to reduce file sizes without compromising quality, improving load times and overall performance.
2. Leverage Caching Techniques: Implement caching strategies to store frequently accessed data locally, reducing the need for constant server requests and improving app responsiveness.
3. Adopt Progressive Web App (PWA) Technologies: PWAs combine the best of web and native apps, offering fast load times, offline functionality, and seamless updates.
Data-Driven Design Decisions
UI/UX designers have access to a wealth of information about user preferences, behaviors, and pain points. By leveraging data analytics tools and techniques, designers can make informed decisions that lead to more tailored and effective user experiences. Consider the following:
1. User Behavior Analytics: Analyze user interactions, click patterns, and navigation paths to identify areas for improvement and optimize the user journey.
2. A/B Testing: Conduct A/B tests to compare different design variations and determine which elements resonate best with your target audience.
3. User Feedback and Sentiment Analysis: Gather and analyze user feedback, reviews, and social media sentiment to understand user pain points and preferences better.
Consistent Branding Across Platforms
In today's multi-device world, users expect a consistent brand experience across all platforms and devices. A cohesive UI/UX design not only enhances brand recognition but also builds trust and loyalty among users. To achieve this, consider the following:
1. Develop a Comprehensive Design System: Create a design system that defines the visual language, components, and guidelines for your brand, ensuring consistency across all digital touchpoints.
2. Responsive and Adaptive Design: Implement responsive and adaptive design techniques to ensure your app's UI/UX seamlessly adapts to different screen sizes and device types.
3. Consistent Messaging and Tone: Maintain a consistent brand voice and messaging across all platforms, reinforcing your brand's identity and values.
Iterative Design and User Testing
UI/UX design is an iterative process that should be continuously refined based on user feedback and testing. By involving users throughout the design process, you can ensure that your app meets their evolving needs and expectations. Consider the following:
1. Conduct Usability Testing: Regularly test your app with real users to identify usability issues, pain points, and areas for improvement.
2. Gather User Feedback: Implement feedback mechanisms within your app to collect user feedback and suggestions for future updates and improvements.
3. Embrace Agile Methodologies: Adopt agile development methodologies that allow for rapid iteration and continuous improvement based on user feedback and testing results.
By following these best practices, you can create custom app UI/UX designs that not only meet but exceed user expectations in 2024 and beyond.
UI/UX Design Tools for 2024
In 2024, UI/UX designers have a wide range of powerful tools and software to create exceptional custom app experiences. These tools help maintain design consistency, streamline workflows, and facilitate collaboration among team members.
Top Design Tools in 2024
ToolDescriptionSketchA popular vector-based design tool for creating user interfaces and digital assets.FigmaA cloud-based design and prototyping tool for real-time collaboration and design systems.Adobe XDA comprehensive tool for designing, prototyping, and sharing user experiences, integrated with other Adobe products.InVisionA leading prototyping and collaboration platform for creating interactive prototypes and gathering feedback.
Creating a Design System
A design system is a set of guidelines, components, and principles that govern the visual language and interaction patterns of an app or product. To create a design system, follow these steps:
1. Define Design Principles Establish guiding principles that align with the brand's values and the desired user experience.
2. Establish a Component Library Create a collection of reusable UI elements, such as buttons, icons, and typography styles.
3. Document Design Patterns Document reusable solutions to common design problems, such as navigation structures and content layouts.
4. Facilitate Collaboration and Handoff Use design systems to facilitate collaboration among designers, developers, and stakeholders, ensuring a consistent and accurate final product.
By leveraging these powerful UI/UX design tools and establishing a robust design system, designers in 2024 can create custom app experiences that are visually appealing, intuitive, and consistent across all platforms and devices.
The Future of Custom UI/UX Design
The world of custom UI/UX design is constantly evolving. To stay ahead, it's crucial to understand the latest trends, best practices, and emerging technologies. This guide has provided a comprehensive overview of the essential insights and trends shaping the custom app development industry.
Key Takeaways
In the future of custom UI/UX design, we can expect:
- Personalized experiences: Users will expect tailored interactions and interfaces.
- Seamless interactions: Designers will focus on creating intuitive and natural interactions.
- AI, AR, and VR adoption: These technologies will continue to revolutionize the way we design and interact with digital products.
Staying Ahead of the Curve
To succeed in this rapidly evolving landscape, designers must:
- Stay informed: Keep up-to-date with the latest trends, technologies, and best practices.
- Upskill and reskill: Continuously develop new skills to meet the demands of the industry.
- Embrace change: Be open to new ideas and approaches to stay ahead of the curve.
By following these principles, we can create custom app experiences that provide real value to users and drive business success.
Related posts
![App Risk Management: Complete Guide [2024]](https://cdn.prod.website-files.com/6398f0e8fa9fd060d0c39626/693ab789c65fbf73aef69949_6641c3432f926f2021749d65_6641bad0948977092a72fde0-9db5de575fa83bfc5e0a54f42010e2c0.jpeg)
App Risk Management: Complete Guide [2024]
App Risk Management (ARM) is the process of identifying, assessing, and mitigating potential risks associated with software applications. It ensures applications are secure, stable, and compliant with industry regulations.
ARM involves four key stages:
- Risk Identification: Identify potential risks like security flaws, performance issues, compliance violations, and operational disruptions.
- Risk Assessment: Evaluate the likelihood and impact of each identified risk.
- Risk Mitigation: Implement measures to address and mitigate identified risks, such as security controls, performance optimization, and contingency plans.
- Risk Monitoring: Continuously monitor the application for new risks and assess the effectiveness of mitigation measures.
By integrating ARM into the software development lifecycle, organizations can:
BenefitDescriptionEnhance Application SecurityIdentify and mitigate security vulnerabilities, reducing the risk of data breaches and cyber attacks.Improve Application PerformanceIdentify and address performance-related risks, ensuring optimal user experience.Ensure ComplianceIdentify and address compliance risks, ensuring adherence to relevant regulations and standards.Minimize Operational DisruptionsIdentify and mitigate risks related to application dependencies, infrastructure, and operational processes, minimizing downtime.
Effective ARM involves a collaborative effort between developers, security experts, project managers, and stakeholders. It requires a continuous and iterative approach throughout the application's lifecycle, from planning and development to deployment and maintenance.
Related video from YouTube
Understanding App Risk Management
App Risk Management (ARM) is a proactive approach to identifying, assessing, and mitigating potential risks associated with software applications throughout their lifecycle. It plays a critical role in ensuring successful app development by managing uncertainties that could impact the application's security, performance, and overall user experience.
ARM involves a comprehensive process of:
Risk Identification
Identifying potential vulnerabilities, threats, and risks that could affect the application, such as:
- Security flaws
- Performance issues
- Compliance violations
- Operational disruptions
Risk Assessment
Evaluating the identified risks based on their likelihood of occurrence and potential impact on the application, business operations, and stakeholders.
Risk Mitigation
Implementing measures and strategies to address and mitigate the identified risks, such as:
- Implementing security controls
- Optimizing performance
- Ensuring compliance
- Developing contingency plans
Risk Monitoring
Continuously monitoring the application and its environment for new or emerging risks, as well as assessing the effectiveness of the implemented mitigation strategies.
By integrating ARM into the software development lifecycle, organizations can proactively address potential issues before they escalate into major problems. This approach helps:
BenefitsDescriptionEnhance Application SecurityIdentify and mitigate security vulnerabilities, reducing the risk of data breaches, cyber attacks, and other security incidents.Improve Application PerformanceIdentify and address performance-related risks, ensuring that applications run smoothly and efficiently, delivering an optimal user experience.Ensure ComplianceIdentify and address compliance risks, ensuring that applications adhere to relevant industry regulations and standards.Minimize Operational DisruptionsIdentify and mitigate risks related to application dependencies, infrastructure, and operational processes, minimizing the potential for operational disruptions and downtime.
Effective App Risk Management is a collaborative effort that involves developers, security experts, project managers, and other stakeholders. It requires a continuous and iterative approach throughout the application's lifecycle, from planning and development to deployment and maintenance.
Steps in App Risk Management
App Risk Management involves a series of steps to identify, assess, and mitigate potential risks associated with software applications. These steps provide a comprehensive framework for managing risks in app development:
Identifying Risks
The first step is to identify potential risks that could impact the application, business operations, and stakeholders. This involves:
- Brainstorming sessions with cross-functional teams
- Conducting threat modeling and vulnerability assessments
- Reviewing industry trends, compliance requirements, and regulatory standards
- Analyzing historical data and incident reports
Evaluating and Prioritizing Risks
Once risks are identified, they need to be evaluated and prioritized based on their likelihood of occurrence and potential impact. This involves:
Risk CategoryDescriptionHighHigh-impact, high-likelihood risks that require immediate attentionMediumMedium-impact, medium-likelihood risks that require monitoring and mitigationLowLow-impact, low-likelihood risks that can be accepted or transferred
Developing Mitigation Plans
Developing mitigation plans involves creating strategies to address and mitigate the identified risks. This includes:
- Implementing security controls
- Optimizing performance
- Ensuring compliance
- Developing contingency plans
Monitoring Risks
Monitoring risks involves continuously tracking and assessing the application and its environment for new or emerging risks. This includes:
- Conducting regular vulnerability assessments and penetration testing
- Monitoring application performance and user feedback
- Reviewing industry trends and compliance requirements
- Updating the risk management plan to address new or emerging risks
Implementing Action Plans
Implementing action plans involves executing the mitigation strategies and plans developed earlier. This includes:
- Assigning responsibilities and tasks to team members
- Allocating resources and budgeting
- Establishing a timeline for implementation
- Monitoring and evaluating the effectiveness of the mitigation strategies
By following these steps, organizations can proactively identify and mitigate potential risks, ensuring the successful development and deployment of software applications.
Types of Risks in App Development
App development involves various types of risks that can impact the project's success. These risks can be categorized into three main types: technical, operational, and external risks.
Technical Risks
Technical risks are related to the development process and the technology used. These risks include:
RiskDescriptionPerformance issuesThe app may not perform as expected, leading to slow loading times, crashes, or errors.Security vulnerabilitiesThe app may be vulnerable to cyber attacks, data breaches, or unauthorized access.Incompatibility with devices or platformsThe app may not be compatible with certain devices or platforms, leading to usability issues.Bugs and errorsThe app may contain bugs or errors that can cause crashes, data loss, or other issues.
Operational Risks
Operational risks are related to the project management and team operations. These risks include:
RiskDescriptionResource allocationInsufficient resources, such as time, money, or personnel, can lead to project delays or scope creep.Team managementPoor team management, communication, or coordination can lead to project delays or errors.Change managementChanges to the project scope, timeline, or budget can lead to delays, cost overruns, or scope creep.Stakeholder managementPoor stakeholder management can lead to misunderstandings, miscommunication, or unrealistic expectations.
External Risks
External risks are related to factors outside the organization's control. These risks include:
RiskDescriptionMarket volatilityChanges in market trends, consumer behavior, or competitor activity can impact the app's success.Regulatory changesChanges to laws, regulations, or industry standards can impact the app's compliance or functionality.Economic changesEconomic downturns, recessions, or changes in global economic conditions can impact the app's success.Natural disasters or outagesNatural disasters, outages, or other external events can impact the app's availability or functionality.
By understanding these types of risks, organizations can proactively identify and mitigate potential risks, ensuring the successful development and deployment of software applications.
sbb-itb-8abf120
Mitigating Risks in App Development
Mitigating risks is crucial in app development to ensure project success. Effective risk management involves identifying, assessing, and prioritizing risks, and then implementing strategies to mitigate or manage them.
Avoiding and Reducing Risks
To mitigate risks, it's essential to avoid them altogether or reduce their impact. Here are some strategies to achieve this:
StrategyDescriptionConduct thorough requirement gathering and analysisIdentify potential risks early onDevelop a detailed project plan and timelineEnsure all stakeholders are aware of risks and can plan accordinglyImplement robust testing and quality assurance processesIdentify and fix defects early onUse agile development methodologiesIterate and refine the app in response to changing requirements and risks
Additionally, reducing risks can be achieved by:
- Breaking down complex tasks into smaller, manageable chunks
- Implementing risk-reducing technologies and tools
- Providing training and resources to team members
Transferring or Accepting Risks
In some cases, it may not be possible to avoid or reduce risks. In such cases, it may be necessary to transfer or accept the risks. Here are some strategies to achieve this:
StrategyDescriptionOutsource certain tasks or components to third-party vendors or partnersTransfer risks to better-equipped partiesPurchase insurance or warrantiesProtect against potential losses or damagesAccept the risks and develop contingency plansMitigate the impact of risks
It's essential to carefully evaluate the risks and determine the best course of action. Transferring or accepting risks can be a viable option, but it requires careful consideration and planning.
By implementing these strategies, organizations can effectively mitigate risks and ensure the successful development and deployment of software applications.
Benefits of Effective Risk Management
Effective risk management is crucial in app development as it leads to better development outcomes and overall project success. By identifying, assessing, and mitigating risks, organizations can avoid potential pitfalls, reduce costs, and improve the quality of their software applications.
Improved Project Predictability
Effective risk management helps project teams to identify and address potential risks early on, increasing project predictability and minimizing surprises. This allows for better planning, resource allocation, and stakeholder management.
Better Software Quality
By mitigating potential risks, project teams can ensure that their software applications are free from defects, vulnerabilities, and other issues that can compromise their performance and security.
Reduced Project Costs
Identifying and addressing potential risks early on helps project teams to avoid costly rework, delays, and other issues that can drive up project costs.
Key Benefits of Effective Risk Management
BenefitDescriptionImproved Project PredictabilityIncrease project predictability and minimize surprisesBetter Software QualityEnsure software applications are free from defects and vulnerabilitiesReduced Project CostsAvoid costly rework, delays, and other issues
In conclusion, effective risk management is essential in app development as it leads to better development outcomes, improved project predictability, enhanced software quality, and reduced project costs. By prioritizing risk management, organizations can ensure the successful development and deployment of their software applications.
Best Practices for App Risk Management
Effective risk management is crucial in app development. Here are some best practices to help organizations manage risks effectively:
Continuous Risk Assessment
Regularly identify, assess, and mitigate risks throughout the project lifecycle. This helps teams stay proactive, address potential risks early, and minimize surprises.
Clear Risk Communication
Communicate risks clearly to all project stakeholders, including team members, project managers, and customers. This ensures everyone is aware of the risks, their impact, and the mitigation strategies in place.
Documenting Risks
Maintain a record of all identified risks, mitigation actions, and their outcomes. This helps teams track their progress, identify patterns, and learn from their experiences.
By following these best practices, organizations can ensure their app development projects are well-managed, and their software applications meet the required quality and security standards.
Benefits of Effective Risk Management
BenefitDescriptionImproved Project PredictabilityIdentify and address potential risks early on, increasing project predictability and minimizing surprises.Better Software QualityEnsure software applications are free from defects and vulnerabilities.Reduced Project CostsAvoid costly rework, delays, and other issues that can drive up project costs.
By adopting these best practices, organizations can ensure the successful development and deployment of their software applications.
Key Takeaways
Effective app risk management is crucial for ensuring the success of your mobile applications. Here are the key takeaways to keep in mind:
1. Identify Risks Early
Identify potential risks early in the app development lifecycle. This helps you prepare for potential issues and minimize their impact.
2. Prioritize and Mitigate Risks
Prioritize risks based on their likelihood and potential impact. Develop and implement mitigation strategies to address high-priority risks effectively.
3. Monitor and Adapt
Risk management is an ongoing process. Continuously monitor and reassess risks throughout the app development lifecycle, as well as after deployment. Adapt your risk management strategies as new risks emerge or circumstances change.
4. Clear Communication and Documentation
Maintain clear communication channels with all stakeholders, including developers, project managers, and end-users. Document identified risks, mitigation plans, and outcomes to facilitate knowledge sharing and enable continuous improvement.
5. Best Practices
Adopt industry best practices for app risk management, such as continuous risk assessment, clear risk communication, and thorough documentation. Stay up-to-date with the latest security standards, development methodologies, and risk management frameworks.
By integrating effective risk management practices into your app development process, you can minimize potential threats, ensure the quality and security of your applications, and ultimately deliver a superior user experience.
Best PracticesDescriptionContinuous Risk AssessmentRegularly identify, assess, and mitigate risks throughout the project lifecycle.Clear Risk CommunicationCommunicate risks clearly to all project stakeholders, including team members, project managers, and customers.Thorough DocumentationMaintain a record of all identified risks, mitigation actions, and their outcomes.
FAQs
What are the risks of mobile apps?
Mobile apps face various security risks, including:
RiskDescriptionHardcoded PasswordsApps with hardcoded passwords or credentials are vulnerable to unauthorized access and data breaches.Insecure Data StorageSensitive data stored insecurely on the device or transmitted over unsecured channels can be intercepted.Client-Side InjectionsVulnerabilities like SQL injection, cross-site scripting (XSS), and command injection can allow attackers to execute malicious code.Weak Server-Side ControlsInadequate server-side security controls, such as weak authentication or authorization mechanisms, can expose sensitive data and functionality.
Proper security measures, including secure coding practices, encryption, and regular security testing, are crucial to mitigate these risks.
What should be an adequate risk management for a software development project?
Effective risk management for software development projects involves:
1. Risk Identification: Identify potential risks that could impact the project.
2. Risk Analysis: Evaluate the likelihood and potential impact of each identified risk.
3. Risk Mitigation: Develop and implement strategies to mitigate or eliminate high-priority risks.
4. Risk Monitoring: Continuously monitor and reassess risks throughout the project lifecycle.
5. Risk Communication: Maintain clear communication channels with all stakeholders to ensure transparency and effective risk management collaboration.
6. Risk Documentation: Document identified risks, mitigation plans, and outcomes to facilitate knowledge sharing and enable continuous improvement.
By following a systematic and proactive approach to risk management, software development projects can minimize potential threats, ensure project success, and deliver high-quality software solutions.
Related posts

Kivy iOS Packaging & Distribution Guide
This guide provides a step-by-step process to package and distribute your Kivy-based apps on the Apple App Store. It covers the following key steps:
- Set Up Development Environment
- Join the Apple Developer Program
- Install kivy-iOS and dependencies on macOS
- Clone the kivy-iOS repository
- Build and Package Your App
- Compile your Kivy app for iOS
- Create an Xcode project
- Configure Xcode project settings
- Distribute on App Store
- Create an App Store listing
- Submit your app for review
- Release your app to the public
The guide also addresses common issues, troubleshooting tips, and how to get community support.
Related video from YouTube
Getting Started
Before you start packaging and distributing your Kivy-based app on the Apple App Store, there are a few essential steps to complete. This section outlines the initial requirements to set up your development environment and prepare your app for iOS.
Join Apple Developer Program

Enroll in the Apple Developer Program
To test your app on real devices and publish it on the App Store, you need to enroll in the Apple Developer Program. Visit https://developer.apple.com/programs/ios/ to learn how to enroll in the program.
Set Up kivy-iOS on macOS
Install kivy-iOS and Dependencies
To set up kivy-iOS on your macOS machine, you'll need to install the necessary dependencies. Use the following commands:
DependencyCommandautoconfbrew install autoconfautomakebrew install automakelibtoolbrew install libtool and brew link libtoolpkg-configbrew install pkg-configCythonpip install cythonkivy-iospip install kivy-ios
Clone kivy-iOS Repository
Clone the kivy-iOS Repository from GitHub
Clone the kivy-iOS repository from GitHub to your local development environment to begin the app packaging process:
git clone git://github.com/kivy/kivy-ios
By completing these initial steps, you'll have set up your development environment and prepared your app for iOS. In the next section, we'll cover the process of building and packaging your app.
Build and Package Your App
Now that you've set up your development environment and prepared your app for iOS, it's time to build and package your app. This section will guide you through the process of compiling your Kivy app for iOS, creating an Xcode project, and configuring the project settings.
Compile Kivy App for iOS
To compile your Kivy app for iOS, use the toolchain build kivy command. This command creates a Kivy distribution tailored for iOS devices, including any additional required Python modules. Make sure you have installed all the necessary dependencies, including autoconf, automake, libtool, pkg-config, and Cython.
Here's an example of how to run the toolchain build kivy command:
toolchain build python3 kivy
This command may take some time to complete, depending on your system configuration and the complexity of your app.
Create Xcode Project
Once you've compiled your Kivy app for iOS, create an Xcode project using the toolchain create command. This command creates a new Xcode project with the necessary settings and configurations for your app.
Here's an example of how to run the toolchain create command:
toolchain create <title> <app_directory>
Replace <title> with the title of your app, and <app_directory> with the directory where your app is located.
Configure Xcode Project
After creating the Xcode project, configure the project settings to ensure that your app runs smoothly on iOS devices. This includes setting up app icons, launch images, and other necessary configurations.
To configure the Xcode project, open the project in Xcode and navigate to the project settings. From there, you can update the following settings:
SettingDescriptionApp IconThe icon that represents your app on the App Store and on iOS devices.Launch ImageThe image that appears when your app is launched on an iOS device.Bundle IdentifierA unique identifier for your app that is used to identify it on the App Store.
By following these steps, you'll have successfully built and packaged your Kivy app for iOS. In the next section, we'll cover the process of distributing your app on the App Store.
sbb-itb-8abf120
Distribute on App Store
Distributing your Kivy app on the App Store is the final step in making your app available to the public. This section will guide you through the process of preparing your app for submission, including creating an App Store listing, submitting your app for review, and releasing your app.
Create App Store Listing
To create an App Store listing, you'll need to reserve a slot for your app on the App Store. This involves creating a new app record in iTunes Connect. Follow these steps:
- Log in to your iTunes Connect account.
- Click on "My Apps" and then click the "+" icon to create a new app.
- Fill in the required information, including:
- App name
- Description
- Keywords
- Upload your app's icon and screenshots.
- Set up your app's pricing and availability.
Submit App for Review
Once you've created your App Store listing, you'll need to assemble all the necessary metadata for your app listing. This includes:
MetadataDescriptionScreenshots and app previewsVisual representations of your appApp description and keywordsText describing your app and its featuresCategory and subcategory selectionClassification of your appRating and review informationInformation about your app's rating and reviews
To submit your app for review, follow these steps:
- Log in to your iTunes Connect account.
- Select your app from the "My Apps" page.
- Click on "Submit for Review" and fill in the required information.
- Upload your app's binary file.
- Wait for Apple to review your app.
Release Your App
Once your app has been approved, you can release it to the public. You can choose to release your app manually or automatically using the App Store Connect. To release your app, follow these steps:
- Log in to your iTunes Connect account.
- Select your app from the "My Apps" page.
- Click on "Release This Version" and select the release date.
- Choose whether to release your app manually or automatically.
- Monitor your app's performance and analytics.
By following these steps, you'll be able to successfully distribute your Kivy app on the App Store. Remember to test your app thoroughly before submitting it for review, and to follow Apple's guidelines and review process.
Troubleshooting
Known Issues and FAQ
When packaging and distributing your Kivy app on iOS, you may encounter some common issues. Here are some known problems and their solutions:
IssueSolutionApplication quit abnormally!Check the Xcode console logs to identify the issue. If you're still stuck, ask on the Kivy support Discord channels.How can Apple accept a python app?Kivy merges the app binary with all libraries into a single binary, called libpython. This means all binary modules are loaded beforehand, so nothing is dynamically loaded.
Additionally, you may encounter issues with invalid bundle structure, standalone executables, or linking errors. Refer to the Kivy issues tracker and community forums for up-to-date information and solutions.
Get Community Support
If you're facing issues or have questions, don't hesitate to reach out to the Kivy community. You can:
- Join the Kivy Discord servers for real-time support and discussion.
- Post on the Kivy mailing lists for help and feedback.
- Explore the Kivy GitHub repositories for source code and examples.
Remember, the Kivy community is active and willing to help. Don't be afraid to ask for assistance or share your knowledge with others.
Summary
This Kivy iOS Packaging & Distribution Guide has covered the essential steps to package and distribute your Kivy app on the Apple App Store. Here's a quick recap of the main steps:
Key Steps
- Enroll in the Apple Developer Program and set up your kivy-iOS environment on macOS
- Compile your Kivy app for iOS and create an Xcode project
- Configure your Xcode project, including setting up your app's bundle structure and certificates
- Distribute your app on the App Store, including creating an app store listing and submitting your app for review
By following these steps and troubleshooting common issues, you can successfully package and distribute your Kivy app on the Apple App Store. Don't hesitate to reach out to the Kivy community for support and guidance throughout the process.
Remember, this guide has provided you with the necessary information to navigate the packaging and distribution process for your Kivy app on iOS. If you encounter any issues or have questions, the Kivy community is always available to help.
FAQs
Does Kivy work with iOS?
Yes, Kivy apps can be published on the Apple App Store.
Can Kivy apps run on iOS?
Yes, Kivy apps can run on iOS devices.
How to convert a Kivy app to an iOS app?
To convert your Kivy app to an iOS app, follow these steps:
StepDescription1. Create Python EnvironmentNavigate to the location where you want to keep your virtual environment.2. Install kivy-iosUse pip to install kivy-ios.3. Create toolchain environmentCreate a toolchain environment using the kivy-ios toolchain.4. Create Xcode projectCreate an Xcode project using the kivy-ios toolchain.5. Sign in to XcodeSign in to Xcode with your Apple ID.6. Build to your iPhoneBuild and run your app on your iPhone.
By following these steps, you can successfully convert your Kivy app to an iOS app and distribute it on the Apple App Store.
Related posts

12 Mobile App Logging Best Practices for Stability
Logging is crucial for maintaining mobile app stability, security, and performance. By following these best practices, you can identify issues, debug efficiently, and ensure a seamless user experience:
- Identify Key Events to Log: Log user interactions, errors, business logic, and performance metrics to gain insights into app behavior.
- Standardize Log Structure: Use a consistent log format like JSON or XML to improve searchability, consistency, and machine readability.
- Select Appropriate Log Levels: Assign meaningful log levels (e.g., debug, info, warning, error) to categorize events and prioritize debugging efforts.
- Ensure Log Message Clarity: Keep log messages concise, provide context, avoid redundancy, and use plain English for easy comprehension.
- Utilize Logging for Multiple Purposes: Leverage logs for root cause analysis, continuous improvement, and enhancing user experience.
- Enrich Logs with Contextual Information: Include user/request IDs, timestamps, components, log levels, and descriptions for better insights.
- Protect Sensitive Information: Implement measures like code reviews, tokenization, and data privacy vaults to safeguard sensitive data.
- Adopt Structured Logging Formats: Use standardized formats like JSON or key-value pairs for easier parsing, searching, and analysis.
- Implement the Right Logging Tools: Choose tools with features like encryption, compression, log rotation, and integration with development tools.
- Avoid Logging Vendor Lock-In: Select open standards, multiple output options, and implement logging abstractions for flexibility.
- Manage Log Storage and Retention: Set retention policies, choose suitable storage, implement log rotation, and ensure log encryption.
- Regularly Review and Analyze Logs: Identify errors, optimize performance, enhance security, and refine your logging strategy based on insights.
By prioritizing logging and log analysis, you can stay ahead of potential issues, reduce downtime, and ensure your app meets evolving user needs.
Related video from YouTube
1. Identify Key Events to Log
To implement effective logging practices in mobile apps, it's essential to identify key events to log. This helps developers focus on the most critical aspects of the app's behavior, ensuring they can detect and resolve issues quickly.
Key Events to Log
The following events should be logged:
Event CategoryDescriptionUser InteractionsLog events related to user interactions, such as button clicks, form submissions, and navigation between screens.Error HandlingLog errors, exceptions, and crashes to identify and diagnose issues.Business LogicLog events related to business-critical functionality, such as payment processing, data storage, and retrieval.Performance MetricsLog performance metrics, such as response times, memory usage, and network latency, to identify bottlenecks and optimization opportunities.
By logging these key events, developers can gain valuable insights into the app's behavior, identify areas for improvement, and ensure that the app meets user needs and expectations.
2. Standardize Log Structure
Standardizing log structure is crucial for effective log analysis and debugging in mobile apps. A structured log format enables developers to easily search, filter, and analyze log data, making it easier to identify issues and optimize app performance.
Why Standardize Log Structure?
Standardizing log structure offers several advantages:
AdvantageDescriptionImproved SearchabilityEasily search for specific log events, reducing debugging time.ConsistencyAnalyze and compare log data across different systems and environments.AutomationIntegrate with log management tools for automated log analysis and notification.Machine ReadabilityMachines can parse and analyze structured logs, extracting insights and identifying trends.
Best Practices for Standardizing Log Structure
To standardize log structure, follow these best practices:
1. Use a Consistent Log Format Choose a log format (e.g., JSON or XML) and stick to it across all systems and environments.
2. Define a Log Schema Establish a log schema outlining the structure and content of log events, including fields, data types, and formatting.
3. Use Log Levels Implement log levels (e.g., debug, info, warning, and error) to categorize log events and prioritize debugging efforts.
4. Include Contextual Information Enrich log events with contextual information (e.g., user IDs, session IDs, and device information) for a comprehensive understanding of app behavior.
By standardizing log structure, developers can streamline log analysis, reduce debugging time, and improve overall app performance.
3. Select Appropriate Log Levels
Choosing the right log levels is vital for effective logging in mobile apps. Log levels categorize the severity of logs, aiding in debugging and monitoring. By selecting the appropriate log level, developers can focus on urgent issues, filter out negligible logs, and provide context for valuable ones.
Understanding Log Levels
Log levels are categorized based on their severity. The standard log levels include:
Log LevelDescriptionFatalCritical errors that put the application at risk.ErrorRecoverable errors that occur locally.WarnPotential issues or minor problems.InfoGeneral, informative messages.DebugTemporary log information for development.VerboseDetailed diagnostic information.
Best Practices for Selecting Log Levels
To select appropriate log levels, follow these best practices:
1. Use log levels consistently: Establish a log level hierarchy and stick to it. 2. Choose the right log level for the situation: Select a log level that accurately reflects the severity of the issue or event. 3. Avoid overusing log levels: Limit the use of high-severity log levels to prevent unnecessary noise.
By selecting the right log levels, developers can ensure that their logging strategy is effective, efficient, and scalable, ultimately leading to more stable and reliable mobile apps.
4. Ensure Log Message Clarity
Clear log messages are essential for effective logging in mobile apps. They help developers quickly identify and troubleshoot issues, reducing app downtime.
To achieve log message clarity, follow these best practices:
Log Message Guidelines
GuidelineDescriptionKeep it conciseLog messages should be brief and to the point. Aim for 100-1000 characters.Provide contextInclude relevant information to help developers understand the issue.Avoid redundancyRemove unnecessary information to prevent log message clutter.Use plain EnglishStick to widely accepted character sets and avoid technical jargon.
By following these guidelines, you can ensure that your log messages are clear, informative, and effective in helping you identify and resolve issues in your mobile app.
5. Utilize Logging for Multiple Purposes
Effective logging in mobile apps serves multiple purposes beyond just debugging and troubleshooting. It provides valuable insights into user behavior, app performance, and system interactions.
Facilitate Root Cause Analysis
Logging helps identify the root cause of issues, allowing developers to understand not just what went wrong but why. This enables them to make targeted improvements to the app, reducing the likelihood of similar issues occurring in the future.
Support Continuous Improvement
Logs provide a wealth of information that can be used to continuously improve the application. By regularly reviewing and analyzing logs, developers can spot potential areas of improvement, whether it's in terms of code quality, system architecture, or user experience.
Enhance User Experience
Logging can help developers understand how users interact with the app, identifying areas where the user experience can be improved. This leads to a more engaging and satisfying experience for users, driving app adoption and retention.
By leveraging logging for multiple purposes, developers can unlock the full potential of their mobile app, driving stability, performance, and user satisfaction.
PurposeDescriptionRoot Cause AnalysisIdentify the root cause of issues to make targeted improvements.Continuous ImprovementUse logs to spot potential areas of improvement in code quality, system architecture, or user experience.Enhance User ExperienceUnderstand user interactions to identify areas for improvement, leading to a more engaging and satisfying experience.
6. Enrich Logs with Contextual Information
Effective logging in mobile apps requires more than just recording events. To gain valuable insights and facilitate efficient debugging, it's essential to add relevant details to log messages. This includes information that provides a better understanding of the events and errors occurring within the app.
Why Context Matters
Without proper context, log messages can be unclear and unhelpful, making it challenging to diagnose and resolve issues. By incorporating contextual information, developers can pinpoint the exact spots where errors occurred and efficiently address them.
Key Contextual Elements
When enriching logs, consider including the following contextual elements:
ElementDescriptionUser or Request IDIdentify the user or request associated with the log eventTimestampRecord the exact time of the log eventComponentSpecify the component or module where the log event originatedLog LevelDenote the severity of the log event (e.g., debug, info, warning, error)DescriptionProvide a brief description of the log event
By incorporating these contextual elements, developers can create informative and actionable log messages that facilitate efficient debugging and issue resolution.
sbb-itb-8abf120
7. Protect Sensitive Information
When logging mobile app events, it's crucial to protect sensitive information to maintain user trust and comply with data privacy regulations. Sensitive data includes personally identifiable information (PII), financial details, and other confidential information.
Why Protect Sensitive Information?
Logging sensitive data can lead to security breaches, compromising user trust and violating data privacy regulations. To avoid this, it's essential to implement measures to safeguard sensitive information.
Best Practices for Protecting Sensitive Information
Best PracticeDescriptionCode ReviewsEnsure log statements do not reveal sensitive information during code reviews.Structured LoggingAdopt structured logging formats, such as JSON or key-value pairs, to detect and filter out sensitive data.Tokenization and MaskingReplace sensitive data with a unique identifier (tokenization) or hide sensitive information with asterisks or other characters (masking).Data Privacy VaultsUse data privacy vaults to isolate and protect sensitive information, ensuring it is never stored or transmitted in plain text.
By following these best practices, you can protect sensitive information and maintain user trust. Remember to always prioritize data privacy and security when logging mobile app events.
8. Adopt Structured Logging Formats
When logging mobile app events, using structured logging formats is crucial for efficient log analysis and debugging. This approach organizes log data in a standardized format, making it easier to parse, search, and analyze.
Why Structured Logging Matters
Structured logging offers several advantages:
AdvantageDescriptionEasier SearchQuickly find specific log events or patterns using filters and queries.Better AnalyticsExtract valuable insights from log data, such as trends and correlations.Faster DebuggingSimplify the debugging process and reduce the time spent on issue resolution.
Best Practices for Structured Logging
To get the most out of structured logging, follow these guidelines:
GuidelineDescriptionUse a Standard FormatAdopt a standardized format, such as JSON or key-value pairs, for consistency across all log events.Include ContextEnrich log events with contextual information, such as user IDs and device details, for a comprehensive view of app behavior.Use Meaningful Log LevelsAssign meaningful log levels, such as INFO, WARN, and ERROR, to categorize log events and prioritize debugging efforts.
By adopting structured logging formats and following these guidelines, you can streamline your logging process, improve log analysis, and enhance overall app stability.
9. Implement the Right Logging Tools
Choosing the right logging tools is crucial for effective logging practices in mobile apps. The right tools can help you streamline your logging process, enhance app stability, and facilitate easier debugging and maintenance.
Key Features to Consider
When selecting a logging tool, look for the following features:
FeatureDescriptionEncryptionProtects sensitive log dataCompressionReduces log file sizesRotation and DeletionPrevents storage issues by rotating and deleting log filesCustomizable Log LevelsAllows you to customize log levels to suit your app's needsIntegration with Development ToolsIntegrates with popular development tools, such as Android Studio or Xcode
Popular Logging Tools for Mobile Apps
Some popular logging tools for mobile apps include:
- CocoaLumberjack for iOS
- Timber for Android
- Serilog for Xamarin
- React-native-file-logger and react-native-logs for React Native
By implementing the right logging tools, you can ensure that your mobile app is equipped with a robust logging system that helps you identify issues, debug efficiently, and improve overall app stability.
10. Avoid Logging Vendor Lock-In
When choosing a logging tool for your mobile app, it's essential to avoid logging vendor lock-in. This occurs when you become too dependent on a specific logging tool or framework, making it difficult to switch to a different one if needed.
Why Avoid Vendor Lock-In?
Vendor lock-in can limit your flexibility and make it challenging to adapt to changing requirements. It can also lead to increased costs and complexity.
Best Practices to Avoid Vendor Lock-In
To avoid vendor lock-in, follow these best practices:
Best PracticeDescriptionChoose open standardsSelect logging tools that adhere to open standards, allowing for easy integration with other tools and frameworks.Use multiple output optionsOpt for logging frameworks that provide multiple output options, such as log files, console output, or network output.Implement logging abstractionsCreate logging abstractions or wrappers around your logging tool to decouple your app's logging mechanism from the underlying logging tool.
By following these best practices, you can avoid logging vendor lock-in and ensure that your mobile app's logging system remains flexible and adaptable to changing requirements.
11. Manage Log Storage and Retention
Effective log management is crucial for maintaining the stability and security of your mobile app. One critical aspect of log management is managing log storage and retention.
Why Manage Log Storage and Retention?
If you don't manage log storage, you may face issues like:
- Log data explosion: Unchecked log growth can consume valuable storage space, leading to performance issues and increased costs.
- Data loss: Without a retention policy, logs may be lost or deleted, making it difficult to troubleshoot issues or analyze app behavior.
- Security risks: Unsecured logs can be vulnerable to unauthorized access, putting sensitive app data and user information at risk.
Best Practices for Managing Log Storage and Retention
To avoid these issues, follow these best practices:
Best PracticeDescriptionSet retention policiesEstablish clear retention policies for logs, specifying how long they should be stored and when they can be safely deleted.Choose the right storageSelect a suitable storage solution that meets your app's logging needs.Implement log rotationUse log rotation to manage log file growth, ensuring that logs are regularly rotated and archived.Ensure log encryptionEncrypt logs to protect sensitive data and ensure they remain secure in transit and at rest.
By following these best practices, you can ensure that your mobile app's logs are properly managed, retained, and secured, providing a solid foundation for debugging, analysis, and security.
12. Regularly Review and Analyze Logs
Regular log analysis is crucial for maintaining your mobile app's stability and security. By reviewing logs regularly, you can:
- Identify and fix errors and exceptions
- Optimize app performance and user experience
- Enhance security and detect potential threats
- Refine your logging strategy based on feedback and lessons learned
Benefits of Regular Log Analysis
BenefitDescriptionImproved App StabilityIdentify and fix errors, reducing app crashes and downtime.Enhanced SecurityDetect potential security threats and take proactive measures to prevent them.Optimized PerformanceAnalyze logs to identify performance bottlenecks and optimize app speed.Better User ExperienceUse log insights to improve app usability and overall user experience.
To make the most of log analysis, establish a routine for reviewing logs and consider implementing alerting mechanisms to notify relevant stakeholders or development teams of critical errors or incidents requiring immediate attention.
Remember, logging is an ongoing process that requires continuous refinement and improvement. By regularly reviewing and analyzing logs, you can stay ahead of potential issues and ensure your app meets the evolving needs of your users.
Conclusion
In conclusion, effective logging practices are crucial for maintaining the stability and longevity of mobile applications. By following the 12 mobile app logging best practices outlined in this article, developers can ensure that their apps are robust, secure, and provide a seamless user experience.
Key Takeaways
Here are the key benefits of implementing effective logging practices:
BenefitDescriptionImproved App StabilityIdentify and fix errors, reducing app crashes and downtime.Enhanced SecurityDetect potential security threats and take proactive measures to prevent them.Optimized PerformanceAnalyze logs to identify performance bottlenecks and optimize app speed.Better User ExperienceUse log insights to improve app usability and overall user experience.
By prioritizing logging and log analysis, developers can stay ahead of potential issues, reduce downtime, and ensure that their apps meet the evolving needs of their users. Remember, logging is an ongoing process that requires continuous refinement and improvement.
FAQs
How to Improve Application Logging?
To improve application logging, follow these best practices:
Best PracticeDescriptionKnow what to logIdentify critical events and data to logInvest in softwareUse logging tools and software to streamline the processAggregate activityCollect logs from diverse sourcesCollaborateShare log insights with teams and stakeholdersSet security measuresProtect logs from unauthorized accessSet storage limitsManage log storage to prevent data explosionRegularly review logsAnalyze logs to identify issues and opportunities
What to Log: Best Practices
When logging, remember to:
Best PracticeDescriptionEstablish clear objectivesDefine logging goals and objectivesUse log levels correctlyAssign log levels (e.g., debug, info, warning, error)Structure logsOrganize logs for easy analysis and queryingWrite meaningful log entriesInclude context and details in log messagesSample logsSelect representative logs for analysisEmploy canonical log linesUse standardized log formatsAggregate and centralize logsCollect logs from diverse sourcesConfigure a retention policySet log retention periods and deletion schedules
How to Do Logging Well?
To do logging well, follow these guidelines:
GuidelineDescriptionImplement structured loggingOrganize logs for easy analysis and queryingBuild meaning and contextInclude relevant details in log messagesAvoid logging non-essential infoFocus on critical events and dataCapture logs from diverse sourcesCollect logs from multiple systems and applicationsAggregate and centralize logsCollect logs from diverse sourcesIndex logs for querying and analyticsPrepare logs for analysis and insightsMonitor logs with real-time alertsSet up alerts for critical log events
How to Standardize Logging?
To standardize logging, follow these best practices:
Best PracticeDescriptionUse a standard date and time formatAdopt a consistent date and time format (e.g., ISO8601)Add timestamps in UTC or local timeInclude timestamps with offsetEmploy log levels correctlyAssign log levels (e.g., debug, info, warning, error)Split logs of different levelsSeparate logs by level (e.g., debug, info, warning, error)Include the stack trace when logging exceptionsProvide detailed error information
Why Is Logging Important in Applications?
Logging is crucial for maintaining application stability, security, and performance. It helps:
BenefitDescriptionAssess threatsIdentify potential security risksAnalyze errorsDebug and fix application issuesIdentify potential issuesDetect problems before they disrupt workflowsGain insightsUnderstand application performance and user experience
Related posts

10 Steps to Influencer Collaboration Success
Influencer marketing is a powerful tool for app developers to promote their products and reach their target audience. By partnering with influencers who have a loyal following, you can tap into their influence and credibility. Here are the 10 essential steps to build successful influencer collaborations:
- Define Your Goals and Objectives: Set clear, measurable goals such as increasing brand awareness, driving engagement, generating sales, or collecting leads. Use the SMART (Specific, Measurable, Achievable, Relevant, Time-bound) framework.
- Choose the Right Influencer: Evaluate influencers based on their niche, audience alignment, engagement rates, authenticity, and credibility. Analyze their performance metrics and past collaborations.
- Develop a Collaboration Strategy: Outline the collaboration objectives, type (sponsored content, product placement, ambassador program, etc.), communication channels, and performance metrics.
- Establish a Budget and Compensation Plan: Determine your budget based on goals, influencer reach, and campaign duration. Choose a compensation model (pay-per-post, affiliate/commission, product exchange, flat rate) and negotiate fair terms.
- Create a Clear Collaboration Proposal: Introduce the campaign vision, provide influencer information, outline strategies, and define success metrics.
- Negotiate and Finalize the Collaboration Terms: Establish clear communication, discuss compensation and payment terms, define deliverables and timelines, agree on usage rights and exclusivity, and document the agreement.
- Monitor and Measure Campaign Performance: Track key performance indicators (KPIs) such as reach, engagement, follower growth, click-through rates, and conversions using influencer marketing platforms and tools.
- Optimize and Refine the Collaboration: Analyze campaign performance data, identify areas for improvement, and refine your strategy based on influencer feedback.
- Leverage User-Generated Content and Social Proof: Encourage users to create content, feature user-generated content on social media, include customer testimonials in influencer content, and create a dedicated UGC page.
- Review and Evaluate the Collaboration's Success: Measure KPIs such as engagement metrics, reach and impressions, website traffic and conversions, and return on investment (ROI). Gather feedback from influencers and audiences to refine your influencer marketing strategy.
By following these steps, app developers can maximize the impact of their influencer collaborations, driving meaningful results and building stronger partnerships with influencers.
Related video from YouTube
1. Define Your Goals and Objectives
Defining your goals and objectives is the first step towards a successful influencer collaboration. This step is crucial as it sets the foundation for the entire campaign. Without clear goals, you risk wasting resources and failing to achieve the desired outcomes.
Why Set Goals?
Setting goals helps you:
- Clarify your objectives and expectations
- Focus your efforts on what matters most
- Measure the success of your campaign
- Identify the right influencers for your brand
- Develop a strategy that aligns with your goals
Types of Goals
Here are some common types of goals for influencer collaborations:
Goal TypeDescriptionBrand AwarenessIncrease brand recognition and reach a larger audienceEngagementDrive likes, comments, shares, and other forms of engagement on social mediaSalesGenerate sales and revenue through influencer promotionsLead GenerationCollect leads and build a list of potential customersUser-Generated ContentEncourage influencers to create content that showcases your brand
How to Set SMART Goals
When setting goals, make sure they are Specific, Measurable, Achievable, Relevant, and Time-bound (SMART). Here are some examples:
- "Increase brand awareness among millennials by 20% within the next 6 months"
- "Drive 1,000 sales through influencer promotions within the next quarter"
- "Collect 500 leads through influencer-generated content within the next 3 months"
By setting SMART goals, you can create a clear roadmap for your influencer collaboration and ensure that you're working towards specific, measurable outcomes.
2. Choose the Right Influencer
Selecting the right influencer is vital for a successful collaboration. The influencer you choose should align with your brand values, resonate with your target audience, and have a genuine connection with their followers.
Evaluate the Influencer's Niche and Audience
To ensure the influencer is a good fit, consider the following:
CriteriaDescriptionContent alignmentDoes the influencer's content align with your brand's niche and values?Target audienceDoes the influencer's audience match your target demographic in terms of interests, location, age, and other relevant factors?Niche expertiseIs the influencer a specialist in a specific niche, and does that niche align with your brand?Engagement ratesDoes the influencer have high engagement rates, indicating a genuine connection with their audience?
Assess the Influencer's Authenticity and Credibility
When evaluating an influencer's authenticity and credibility, consider:
CriteriaDescriptionAuthentic contentDoes the influencer create genuine and trustworthy content that resonates with their audience?Sponsored content balanceDoes the influencer strike a balance between sponsored and organic content?Industry expertiseDoes the influencer have expertise or experience in your industry or niche, lending credibility to your brand?
Analyze the Influencer's Performance Metrics
To evaluate an influencer's performance, review:
MetricDescriptionEngagement ratesAre the influencer's engagement rates high, indicating a strong connection with their audience?Audience demographicsDoes the influencer's audience demographics align with your target audience?Past collaborationsHave the influencer's past collaborations been successful, and do they align with your campaign goals?Fake followers and engagementDoes the influencer have a high percentage of fake followers or engagement, which could undermine your campaign's effectiveness?
By carefully evaluating influencers based on these criteria, you can increase the chances of a successful collaboration that resonates with your target audience and achieves your campaign goals.
3. Develop a Collaboration Strategy
Developing a collaboration strategy is crucial for a successful influencer partnership. This strategy outlines the goals, objectives, and expectations of the collaboration, ensuring both parties are on the same page.
Define Collaboration Objectives
Identify the key objectives of the collaboration, such as:
- Increasing brand awareness
- Driving website traffic
- Boosting sales
- Improving engagement
- Enhancing brand reputation
Determine Collaboration Type
Decide on the type of collaboration that best suits your brand's goals, such as:
Collaboration TypeDescriptionSponsored contentPartner with influencers to create sponsored contentProduct placementFeature your product in an influencer's contentEvent partnershipCollaborate with influencers to host an event or webinarAmbassador programPartner with influencers for an extended periodUser-generated content campaignEncourage influencers to create content featuring your brand
Establish Communication Channels
Define the communication channels and protocols for the collaboration, including:
- Regular check-ins
- Content review and approval process
- Crisis management plan
Set Performance Metrics
Establish the key performance indicators (KPIs) to measure the success of the collaboration, such as:
MetricDescriptionEngagement ratesMeasure likes, comments, shares, and other engagement metricsReach and impressionsTrack the number of people who viewed the contentConversions and salesMonitor the number of sales generated from the collaborationSentiment analysisAnalyze the overall sentiment of the audience towards the brand
By developing a comprehensive collaboration strategy, you can ensure a successful and effective partnership with the influencer, ultimately driving business results and achieving your marketing goals.
4. Establish a Budget and Compensation Plan
When collaborating with influencers, it's essential to have a clear budget and compensation plan in place. Here's what you need to consider:
Determine Your Budget
Start by deciding how much you're willing to spend on the influencer campaign. Think about:
- Your campaign goals and expected return on investment (ROI)
- The influencer's reach and engagement rates
- The number of influencers you plan to work with
- The campaign duration
Choose a Compensation Model
There are several ways to compensate influencers:
ModelDescriptionPay-per-postFixed fee for each sponsored postAffiliate/CommissionPercentage of sales driven by the influencerProduct/Service ExchangeOffer free products or services in exchange for promotionFlat RateFixed fee for the entire campaign
Choose a model that aligns with your goals, budget, and the influencer's preferences.
Evaluate Influencer Rates
Influencer rates vary based on factors such as:
- Follower count
- Engagement rate
- Content quality
- Niche relevance
- Brand alignment
Research industry standards to ensure fair compensation.
Negotiate and Finalize Terms
Once you've identified potential influencers, negotiate the compensation package and finalize the terms of the collaboration. Be transparent about your budget and expectations, and ensure both parties are satisfied with the agreement.
Manage Payments Efficiently
Consider using an influencer marketing platform or payment provider to streamline the payment process. This can help ensure timely and transparent payments, while also simplifying invoicing and tracking.
By establishing a clear budget and compensation plan, you can foster successful and mutually beneficial collaborations with influencers, ultimately driving your marketing goals and maximizing your return on investment.
5. Create a Clear Collaboration Proposal
A well-structured proposal is essential for a successful influencer partnership. It outlines the campaign's objectives, scope, and expectations, ensuring both parties are on the same page.
Introduce the Campaign Vision
Explain the overall vision for your campaign, including the goals, target audience, and desired outcomes. This sets the stage for the influencer to understand the context and purpose of the collaboration.
Influencer Information
Provide details about the selected influencers, including their niche, reach, engagement rates, and previous collaborations. This demonstrates your understanding of their audience and content style.
Campaign Strategies
Describe the specific strategies and tactics you propose to achieve the campaign's objectives. This may include sponsored content, product placements, giveaways, or exclusive offers.
Measuring Success
Clearly outline the key performance indicators (KPIs) you'll use to measure the campaign's success. This may include engagement rates, conversions, website traffic, or sales.
Here's an example of what the proposal structure could look like:
SectionDescriptionCampaign VisionOverall vision, goals, target audience, and desired outcomesInfluencer InformationNiche, reach, engagement rates, and previous collaborationsCampaign StrategiesSponsored content, product placements, giveaways, or exclusive offersMeasuring SuccessKey performance indicators (KPIs) to measure campaign success
By creating a clear and comprehensive collaboration proposal, you'll increase the likelihood of securing influencer partnerships that drive meaningful results for your brand.
sbb-itb-8abf120
6. Negotiate and Finalize the Collaboration Terms
Once you've presented your collaboration proposal, it's time to negotiate the terms and finalize the agreement. This step is crucial to ensure that both parties are aligned on expectations, deliverables, and compensation.
Establish Clear Communication
Maintain open and transparent communication throughout the negotiation process. Address any concerns or questions the influencer may have, and be willing to compromise on reasonable requests.
Discuss Compensation and Payment Terms
Influencer compensation can take various forms. Discuss the preferred compensation model and agree on payment terms, including the amount, payment schedule, and method.
Define Deliverables and Timelines
Clearly outline the specific deliverables expected from the influencer, such as the number of posts, content format, and any specific requirements or guidelines. Establish realistic timelines for content creation, review, and publishing.
Agree on Usage Rights and Exclusivity
Determine who will own the rights to the content created during the collaboration and the terms for its usage. Discuss any exclusivity requirements, such as the influencer not promoting competing products or services during the campaign.
Document the Agreement
Once all terms have been agreed upon, formalize the collaboration by drafting a written agreement or contract. This document should clearly outline the responsibilities of both parties, compensation, deliverables, timelines, and any other relevant terms.
Here's a sample outline of what the agreement should cover:
TermDescriptionCompensationAmount, payment schedule, and methodDeliverablesNumber of posts, content format, and specific requirementsTimelinesContent creation, review, and publishing schedulesUsage RightsOwnership and terms for content usageExclusivityAny restrictions on promoting competing products or servicesResponsibilitiesRoles and obligations of both parties
By negotiating and finalizing the collaboration terms transparently and professionally, you establish a solid foundation for a successful influencer partnership that delivers value for both your brand and the influencer.
7. Monitor and Measure Campaign Performance
To ensure the success of your influencer collaboration, it's essential to regularly track and measure campaign performance. This step helps you identify areas for improvement and make data-driven decisions to optimize your campaign.
Track Key Performance Indicators (KPIs)
Establish a set of KPIs that align with your campaign goals and objectives. Common KPIs for influencer marketing campaigns include:
KPIDescriptionReach and impressionsThe total number of individuals exposed to the influencer's contentEngagement ratesThe level of interaction generated by the content, such as likes, comments, and sharesFollower growthThe increase in followers or subscribers resulting from the campaignClick-through rates (CTR)The percentage of users who click on links shared by the influencerConversions and salesThe number of conversions or sales generated from the campaign
Utilize Influencer Marketing Platforms and Tools

Leverage influencer marketing platforms and tools to streamline campaign tracking and measurement. These platforms often provide features such as:
- Campaign analytics and reporting
- Influencer performance tracking
- Content scheduling and publishing
- Collaboration and communication tools
Regularly Review and Refine Your Strategy
Schedule regular check-ins to review campaign performance and refine your strategy as needed. Analyze the data, identify areas for improvement, and make adjustments to optimize your campaign's success.
By monitoring and measuring campaign performance, you can ensure that your influencer collaboration is effective, efficient, and aligned with your brand's goals and objectives.
8. Optimize and Refine the Collaboration
Optimizing and refining your influencer collaboration is crucial to achieving the desired results. This step involves tracking campaign performance, identifying areas for improvement, and making data-driven decisions to refine your strategy.
Track Campaign Performance
Regularly monitor your campaign's performance using metrics such as engagement rates, reach, and conversions. This will help you identify what's working and what needs improvement.
Analyze and Refine Your Strategy
Use the data collected to analyze your campaign's performance and refine your strategy. Identify areas that require adjustments, such as content type, posting schedule, or influencer selection. Make data-driven decisions to optimize your campaign and improve its overall performance.
Leverage Influencer Feedback
Collaborate with your influencers to gather feedback on the campaign's performance. They may have valuable insights into their audience's preferences and behaviors, which can help refine your strategy.
Optimization Checklist
AreaActionContentReview and adjust content type, format, and tonePosting ScheduleAdjust posting frequency and timing to optimize engagementInfluencer SelectionRe-evaluate influencer selection based on performance and audience alignmentCampaign GoalsRefine campaign goals and objectives based on performance data
By continuously optimizing and refining your influencer collaboration, you can ensure that your campaign remains effective, efficient, and aligned with your brand's goals and objectives.
9. Leverage User-Generated Content and Social Proof
User-generated content (UGC) and social proof are essential for a successful influencer collaboration. UGC refers to content created by users, such as reviews, testimonials, photos, or videos, that showcases their experiences with a brand's products or services. Social proof is the psychological phenomenon where people adopt the actions of others because they believe it is the correct behavior.
The Benefits of UGC and Social Proof
BenefitDescriptionIncreased credibilityUGC and social proof increase the credibility of an influencer's contentImproved engagementUGC and social proof improve engagement rates, as users interact with relatable contentBoosted conversionsUGC and social proof boost conversions, as users make purchases based on others' recommendations
How to Leverage UGC and Social Proof
Here are some ways to leverage UGC and social proof in your influencer collaboration:
1. Encourage users to create content: Offer incentives, such as discounts or free products, in exchange for UGC.
2. Feature UGC on social media: Share UGC on social media platforms to increase engagement and credibility.
3. Use social proof in influencer content: Include customer testimonials or reviews in influencer content to increase credibility and trust.
4. Create a dedicated UGC page: Showcase user-generated content and social proof on a dedicated page on your website or social media platform.
By leveraging UGC and social proof, you can increase the success of your influencer collaboration and drive more engagement, conversions, and sales.
10. Review and Evaluate the Collaboration's Success
After the influencer campaign has ended, it's essential to review and evaluate its success. This step helps you assess the effectiveness of your collaboration and identify areas for improvement in future campaigns.
Measure Key Performance Indicators (KPIs)
To evaluate the success of your influencer collaboration, you need to measure the relevant KPIs. These may include:
Engagement Metrics
MetricDescriptionLikes, comments, shares, and savesTotal engagements on the influencer's postsEngagement rateTotal engagements / total reachSentiment analysisAnalysis of comments and mentions
Reach and Impressions
MetricDescriptionTotal unique usersNumber of users exposed to the campaignImpressionsTotal views of the influencer's content
Website Traffic and Conversions
MetricDescriptionReferral trafficTraffic from the influencer's contentClick-through rates (CTRs)CTRs on trackable linksConversion ratesSales, sign-ups, downloads, etc.
Return on Investment (ROI)
MetricDescriptionRevenue generatedRevenue from the campaignROI calculation(Revenue - Campaign Cost) / Campaign Cost
By analyzing these metrics, you can determine whether the influencer collaboration met your goals and objectives.
Gather Feedback and Insights
In addition to quantitative data, gather qualitative feedback and insights from both the influencer and your target audience. This can help you understand the campaign's strengths, weaknesses, and areas for improvement.
- Influencer Feedback: Ask the influencer for their perspective on the collaboration, including what worked well and what could be improved.
- Audience Feedback: Conduct surveys or analyze social media comments to gauge audience sentiment and gather insights into their perception of the campaign.
Refine Your Influencer Marketing Strategy
Based on your analysis of the KPIs, feedback, and insights, refine your influencer marketing strategy for future collaborations. Consider factors such as:
- Influencer selection criteria
- Content creation and messaging
- Campaign timing and duration
- Promotional tactics and channels
By continuously reviewing and evaluating your influencer collaborations, you can optimize your strategies, maximize your ROI, and build stronger, more effective partnerships with influencers.
Conclusion
In conclusion, successful influencer collaborations require careful planning, clear communication, and ongoing optimization. By following these 10 steps, app developers can enhance their marketing efforts and drive meaningful results through influencer partnerships.
Key Takeaways
StepDescription1. Define Goals and ObjectivesSet clear goals and objectives for the collaboration2. Choose the Right InfluencerSelect an influencer who aligns with your brand values and target audience3. Develop a Collaboration StrategyOutline the goals, objectives, and expectations of the collaboration4. Establish a Budget and Compensation PlanDetermine the budget and compensation model for the influencer5. Create a Clear Collaboration ProposalOutline the campaign's objectives, scope, and expectations6. Negotiate and Finalize the Collaboration TermsAgree on the terms and conditions of the collaboration7. Monitor and Measure Campaign PerformanceTrack and measure the campaign's performance using KPIs8. Optimize and Refine the CollaborationRefine the strategy based on campaign performance data9. Leverage User-Generated Content and Social ProofEncourage users to create content and showcase social proof10. Review and Evaluate the Collaboration's SuccessAssess the campaign's success and identify areas for improvement
By following these steps, app developers can maximize their ROI and build stronger, more effective partnerships with influencers.
Related posts

10 App Store Optimization Tips to Boost Conversion Rates
Optimizing your app's listing is crucial for driving downloads and conversions. Here are the key takeaways:
- Optimize Your App Icon
- Use a simple, contrasting design with a symbol representing your app
- Test variations and follow app store guidelines
- Craft a Clear Title and Subtitle
- Keep the title short (25-30 characters)
- Use the subtitle to highlight your app's unique value
- Test different variations
- Write a Persuasive Description
- Start with a hook
- Highlight key features and benefits
- Use formatting and bullet points
- Use High-Quality Visuals
- Showcase key features and user experience
- Optimize for different devices
- Consider video previews
- Leverage Reviews and Ratings
- Aim for a rating between 4.0 and 4.99
- Analyze and respond to reviews
- Encourage users to leave feedback
- Optimize for Keywords and Search
- Split terms and maximize characters
- Avoid duplicates and prioritize keywords
- Put most important keywords first
- Improve Visibility with Localization
- Adapt to different languages and cultures
- Use professional translators
- Create individual localizations
- Monitor and Analyze Performance
- Track conversion rates, rankings, retention, and more
- Use app store analytics tools
- A/B Test Listing Elements
- Test variations of icon, title, screenshots, etc.
- Measure and analyze performance
- Implement the winning variation
- Stay Up-to-Date with Guidelines and Trends
-   Check app store blogs and follow industry experts
-   Attend conferences and workshops
By following these tips, you can optimize your app's visibility, drive more downloads, and boost conversion rates.
Related video from YouTube
1. Optimize Your App Icon
Your app icon is the first thing users see, so make it count! A well-designed icon can boost visibility and conversion rates. Here's how to create an effective app icon:
Simple Design
Use a minimalist approach with a clear focal point. Avoid cluttered icons with too many elements. Look at successful app icons like Spotify, Instagram, and YouTube - they use simple shapes, colors, and symbols.
Contrasting Colors
Choose colors that stand out, especially against different device backgrounds. Ensure the colors align with your brand identity and evoke the right emotions for your app's purpose.
Symbolism
Incorporate a symbol or graphic that represents your app's core functionality. This helps users instantly recognize what your app does. For example, Evernote uses an elephant and folded paper to symbolize note-taking.
Test and Refine
Don't settle for your first icon design. Create variations and test them with your target audience to see which performs best. Small changes like color, shape, or composition can impact conversion rates.
Follow Guidelines
App stores like Google Play and Apple's App Store have specific guidelines for icon design, including size, shape, and visual specifications. Ensure your icon adheres to these guidelines for optimal display across devices.
2. Craft a Clear App Title and Subtitle
Your app title and subtitle are crucial for attracting users. A clear and concise title and subtitle can increase visibility, drive downloads, and boost conversion rates. Here's how to craft a effective app title and subtitle:
Keep it Short
Keep your app title within 25-30 characters. This length is long enough to convey your app's essence without being too long. Aim for brevity and clarity, like the app title "Uber".
Be Clear and Simple
Avoid using unnecessary words that don't add value or meaning. Instead, craft a title that reflects your app's purpose and leaves a lasting impression.
Highlight What Sets You Apart
Use your subtitle to explain the value of your app. Highlight what makes your app unique and different from others in the same category. This will help users understand what your app can do for them.
Avoid Misleading Content
Ensure your app title and subtitle accurately describe the content and value of your app. Avoid using "free" or "best" if you can't back it up.
Test and Refine
Don't settle for your first title and subtitle. Create variations and test them with your target audience to see which performs best. Small changes can impact conversion rates.
Here's a summary of the key takeaways:
TipDescriptionKeep it short25-30 charactersBe clear and simpleAvoid unnecessary wordsHighlight what sets you apartExplain the value of your appAvoid misleading contentAccurately describe your appTest and refineTry different variations
By following these tips, you can craft a clear and effective app title and subtitle that resonates with your target audience and drives downloads.
3. Write a Persuasive App Description
Your app description is a crucial element in convincing users to download your app. It's your opportunity to showcase your app's unique value proposition and features. Here are some tips for crafting a compelling app description:
Start with a Hook
Begin your description with a hook that grabs users' attention. Clearly convey the core purpose and value of your app. For example:
- Snapchat: "Snapchat is a fast and fun way to share the moment with friends and family."
- Duolingo: "The most downloaded education app for learning 40+ languages."
Highlight Key Features and Benefits
After the hook, provide a concise overview of your app's key features and how they benefit users. Focus on the unique value your app provides and how it solves users' problems or enhances their lives. Use clear and simple language that resonates with your target audience.
FeatureBenefitTrip planningHelps users discover the best hotels, attractions, and restaurantsLanguage learningEnables users to learn 40+ languagesSocial sharingAllows users to share moments with friends and family
Use Formatting and Bullet Points
Break down your app's features and benefits into a bulleted list for easy scanning. Use formatting like bold and italic to draw attention to important points. This improves readability and allows users to quickly grasp the app's core offerings.
Add Social Proof
If available, include positive reviews, testimonials, or statistics that demonstrate your app's success and user satisfaction. This helps build trust and credibility with potential users.
Consider Your Target Audience
Tailor your description to your target audience by understanding their needs, preferences, and language. Speak directly to them and explain how your app meets their specific requirements.
Test and Refine
Don't settle for your first draft. Create variations of your description and test them with your target audience to see which resonates best. Continuously refine and optimize based on user feedback and app store metrics.
By following these tips, you can craft a persuasive app description that effectively communicates your app's value proposition, features, and benefits, ultimately driving more downloads and conversions.
4. Use High-Quality Screenshots and Videos
App store screenshots and videos are crucial for showcasing your app's features, user interface, and overall experience. High-quality visuals can significantly impact user engagement and conversion rates. Here are some best practices to optimize your app's screenshots and videos:
Highlight Key Features
Use your screenshots and videos to show how your app solves user problems or enhances their experience. Focus on the most important features and functionalities that set your app apart from competitors.
Showcase User Experience
Demonstrate the app's flow, navigation, and user interface in action. This helps potential users understand how the app works and what they can expect from the overall experience.
Localize for Different Markets
If your app targets multiple markets or languages, ensure that your screenshots and videos are tailored to resonate with cultural preferences and languages of your target audiences.
Optimize for Different Devices
Ensure that your visuals are optimized for each supported device to provide a consistent and high-quality experience for all users.
Use Video Previews
Consider using video previews as your first screenshot or in addition to static images. Video previews can effectively showcase your app's functionality, user interface, and overall experience in a more engaging and dynamic way.
Test and Iterate
Continuously test and iterate on your app's visuals. Analyze user engagement metrics and feedback to identify areas for improvement. Experiment with different layouts, designs, and messaging to find the most effective approach for your target audience.
Here's a summary of the key takeaways:
TipDescriptionHighlight key featuresShowcase your app's unique value propositionShowcase user experienceDemonstrate the app's flow and navigationLocalize for different marketsTailor visuals to resonate with cultural preferencesOptimize for different devicesEnsure consistent quality across devicesUse video previewsShowcase functionality in a more engaging wayTest and iterateContinuously improve and refine your visuals
By following these best practices, you can create compelling and informative visuals that accurately represent your app's features and user experience, ultimately driving higher conversion rates and user engagement.
5. Leverage User Reviews and Ratings
User reviews and ratings play a crucial role in influencing conversion rates. They provide social proof, build trust, and help potential users make informed decisions about downloading your app. Here are some key takeaways to leverage user reviews and ratings effectively:
The Impact of Ratings and Reviews
Ratings and reviews are important marketing tools to convince potential users of your app's credibility. However, they are not as crucial as you might think. In both the App Store and Google Play, only a limited number of users explore reviews, and even fewer read them thoroughly.
Aim for a Good Rating
Aim for a rating between 4.0 and 4.99. This range indicates a high level of quality and credibility. Ratings below 4.0 can negatively impact conversion rates, as users associate them with low quality.
Analyze and Respond to Reviews
Use tools to analyze user reviews and identify areas for improvement. Respond to both positive and negative reviews to demonstrate your commitment to user satisfaction and continuous improvement.
Encourage Users to Leave Reviews
Ask users for feedback in a non-intrusive way, such as after a positive experience or milestone within your app. Provide an easy way for users to leave reviews, and consider incentivizing them with rewards or exclusive content.
Here's a summary of the key takeaways:
TipDescriptionAnalyze reviewsIdentify areas for improvementRespond to reviewsDemonstrate commitment to user satisfactionEncourage reviewsAsk users for feedback in a non-intrusive wayAim for a good ratingTarget a rating between 4.0 and 4.99
By leveraging user reviews and ratings effectively, you can increase conversion rates, build trust, and improve your app's overall visibility in the app stores.
sbb-itb-8abf120
6. Optimize for Keywords and Search
Optimizing your app's keywords and search functionality is crucial for increasing visibility and driving downloads. Here are some key takeaways to help you optimize your app's keywords and search:
Effective Keyword Management
To maximize your app's visibility, you need to manage your keywords effectively. Here's how:
TipDescriptionSplit termsEnter separate keywords to maximize character countMaximize charactersUse all 100 characters to include more keywordsAvoid duplicatesEliminate repeated keywords to keep your list concisePrioritize keywordsPut your most important keywords first in the list
By following these tips, you can optimize your app's keywords and search functionality, increasing your visibility and driving more downloads.
Remember, the order of your keywords matters. Apple's search algorithm prioritizes words at the beginning of your list, so make sure to put your most important keywords first. This will increase your app's visibility for the most relevant search terms.
Additionally, avoid repeating keywords multiple times. Instead, focus on using variations of the same keyword to target different search terms. This will enable you to include more related keywords and increase your app's visibility.
By optimizing your app's keywords and search functionality, you can increase your visibility, drive more downloads, and ultimately boost conversions.
7. Improve App Store Visibility with Localization
Localization is a crucial aspect of App Store Optimization (ASO) that can significantly improve your app's visibility and conversion rates. By adapting your app's product page to different languages, cultures, and regions, you can tap into new markets and reach a broader audience.
Why Localization Matters
Localization is more than just translating your app's content. It involves understanding local preferences, cultural nuances, and regional differences to create a tailored experience for users. By doing so, you can:
- Increase app downloads and conversions
- Enhance user engagement and retention
- Improve your app's overall visibility in the App Store
Best Practices for App Store Localization
Here are some best practices to keep in mind when localizing your app's product page:
TipDescriptionUse professional translatorsAvoid machine translation tools and opt for human translators who understand the local culture and language.Create individual localizationsAdapt your app's product page to each region, taking into account local preferences and cultural nuances.Avoid common mistakesSteer clear of common localization mistakes, such as using the wrong date format or ignoring local regulations.
By following these tips, you can effectively localize your app's product page and improve your App Store visibility.
8. Monitor and Analyze App Performance
Monitoring and analyzing your app's performance is crucial to understanding how users interact with your app and identifying areas for improvement. By tracking key metrics, you can make informed decisions to optimize your app's visibility, conversion rates, and overall success.
Key Metrics to Track
Here are the key metrics to focus on:
MetricDescriptionConversion RateThe percentage of users who download your app after viewing its product page.App Store RankingYour app's position in the App Store search results for specific keywords.User RetentionThe percentage of users who continue to use your app over time.Average Session LengthThe average time users spend using your app per session.Crash RateThe percentage of app crashes per user session.
Tools for Monitoring App Performance
Use tools like App Store Connect, Google Play Console, and third-party analytics platforms to track and analyze your app's performance metrics. These tools provide valuable insights into user behavior, helping you identify areas for improvement and optimize your app's performance.
By regularly monitoring and analyzing your app's performance, you can refine your ASO strategy, improve user engagement, and drive more downloads and revenue.
9. A/B Test Your App Listing Elements
A/B testing is a crucial step in optimizing your app's listing elements to boost conversion rates. By testing different variations of your app's icon, title, subtitle, screenshots, and description, you can identify which elements resonate best with your target audience and drive more downloads.
What is A/B Testing?
A/B testing is a method of comparing two or more versions of an element to see which one performs better. This helps you make informed decisions about your app's listing elements and improve user engagement.
Benefits of A/B Testing
A/B testing helps you:
- Increase conversions: Identify which elements lead to higher conversion rates, resulting in more downloads and revenue.
- Improve user engagement: Understand what resonates with your target audience, enabling you to create a more engaging and user-friendly app listing.
- Make informed decisions: Eliminate guesswork and make data-driven decisions about your app's listing elements.
How to A/B Test Your App Listing Elements
To A/B test your app listing elements, follow these steps:
StepDescription1. Identify elements to testDetermine which elements you want to test, such as the app icon, title, subtitle, screenshots, or description.2. Create variationsCreate multiple variations of each element, ensuring that each variation is significantly different from the others.3. Split trafficDivide your app's traffic into two or more groups, with each group seeing a different variation of the element.4. Measure and analyzeTrack the performance of each variation, measuring metrics such as conversion rates, user engagement, and revenue.5. Draw conclusions and optimizeAnalyze the results, identify the winning variation, and implement it as the new standard for your app's listing element.
By following these steps, you can leverage A/B testing to optimize your app's listing elements and drive more conversions, user engagement, and revenue.
10. Stay Up-to-Date with App Store Guidelines and Trends
Staying current with App Store guidelines and trends is vital to ensure your app's success. The App Store's algorithm and guidelines are constantly changing, and failing to adapt can result in decreased visibility, lower rankings, and even app rejection.
Why is it Important to Stay Current?
Staying current helps you:
- Avoid App Rejection: Ensure your app meets the latest guidelines and requirements.
- Improve Visibility: Keep your app visible in search results and top charts.
- Stay Ahead of Competition: Stay informed about the latest trends and best practices.
How to Stay Current?
To stay current:
MethodDescriptionRegularly Check the App Store's Official BlogStay informed about the latest updates and changes.Follow Industry Leaders and ExpertsKeep up-to-date with the latest news and insights.Participate in Online CommunitiesEngage with other developers and industry professionals.Attend Conferences and WorkshopsStay current with the latest trends and best practices.
By staying current with App Store guidelines and trends, you can ensure your app's success, improve visibility, and stay ahead of the competition.
Conclusion
By following these 10 ASO tips, you can significantly improve your app's conversion rates and drive more downloads and revenue. Remember to regularly monitor and optimize your app's listing to stay ahead of the competition.
Key Takeaways
TipDescriptionOptimize your app iconCreate a simple, contrasting, and symbolic icon that represents your app's core functionality.Craft a clear app title and subtitleKeep your title short, clear, and concise, and use your subtitle to highlight your app's unique value proposition.Write a persuasive app descriptionStart with a hook, highlight key features and benefits, and use formatting and bullet points to make your description easy to read.Use high-quality screenshots and videosShowcase your app's features, user interface, and overall experience in a clear and concise manner.Leverage user reviews and ratingsAnalyze and respond to reviews, and encourage users to leave feedback to improve your app's credibility.Optimize for keywords and searchEffectively manage your keywords, prioritize them, and avoid duplicates to maximize your app's visibility.Improve app store visibility with localizationAdapt your app's product page to different languages, cultures, and regions to tap into new markets.Monitor and analyze app performanceTrack key metrics, such as conversion rates, app store ranking, and user retention, to make informed decisions.A/B test your app listing elementsIdentify which elements resonate best with your target audience and drive more downloads.Stay up-to-date with app store guidelines and trendsRegularly check the app store's official blog, follow industry leaders, and participate in online communities to stay informed.
By implementing these ASO tips and staying committed to your optimization efforts, you can improve your app's visibility, drive more downloads, and increase revenue.
FAQs
How do you improve conversion rate in app store?
To improve your app's conversion rate in the app store:
- Optimize visuals: Showcase your app's best features and user experience through high-quality screenshots and videos.
- Craft a compelling title and subtitle: Include relevant keywords and highlight your app's key benefits.
- Write a persuasive description: Clearly communicate your app's value proposition and features.
- Leverage user reviews and ratings: Encourage users to leave feedback and respond to reviews to build credibility.
- Conduct A/B testing: Identify the most effective app listing elements for your target audience.
How to improve App Store ranking?
To improve your app's ranking in the App Store:
MethodDescriptionAnalyze app reviewsGain insights into user feedback and areas for improvement.Encourage user ratingsProvide an excellent user experience and prompt users to rate your app.Time rating prompts strategicallyAsk users to rate your app after a key task or level.Mix rating promptsUse different prompts to make leaving a review easy for users.Respond to reviewsAddress concerns and thank users for positive feedback.
How to do keyword research for app store optimization?
To conduct effective keyword research for app store optimization (ASO):
- Brainstorm primary keywords: Identify keywords related to your app's functionality and target audience.
- Research the app store: Identify relevant keywords and analyze competitor rankings.
- Check search visibility: Analyze your app's current search visibility and rankings.
- Refine your keyword list: Based on your app's features and functionality.
- Utilize keyword research tools: Leverage AI-powered tools and other reliable sources to expand your keyword list.
How to improve app store SEO?
To improve your app's search engine optimization (SEO) in the app stores:
- Optimize title and subtitle: Include relevant keywords and highlight your app's key benefits.
- Add keywords to description: Clearly communicate your app's value proposition and features.
- Use engaging visuals: Showcase your app's features and user experience through high-quality screenshots and videos.
- Encourage user reviews and ratings: Build credibility and improve your app's visibility.
- Update your app regularly: Maintain relevance and improve your app's performance.
How to optimize app store screenshots?
To optimize your app store screenshots:
TipDescriptionChoose the right sizeEnsure screenshots accurately represent your app's user interface on different devices.Highlight key featuresShowcase your app's best features and user experience.Add text captionsProvide context and highlight specific benefits or functionality.Ensure high-quality visualsAccurately represent your app's design and user experience.
Related posts

10 CDN Best Practices for Faster App Performance
Delivering fast and seamless app experiences is crucial for user engagement, conversions, and search rankings. Content Delivery Networks (CDNs) play a vital role by caching content closer to users, reducing latency, and enhancing security. Here are the top 10 CDN best practices to optimize your app's performance:
- Choose a High-Performance DNS: Use a global anycast DNS service like AWS, NS1, Cloudflare, Google, or Azure, and set high TTLs to reduce DNS queries.
- Optimize Origin Server Location: Move your origin server closer to your users and CDN edge servers to reduce latency.
- Leverage IPv6 Connectivity: Enable IPv6 to future-proof your app, improve security, and enhance network performance.
- Tune Initial Congestion Window (initcwnd): Adjust initcwnd to optimize TCP performance and reduce latency between the origin and CDN.
- Keep Connections Alive Forever: Maintain open connections with your origin server to reduce overhead and provide SSL/TLS security benefits.
- Reduce TLS Connection Time: Use OCSP stapling to reduce TLS handshake latency and improve connection establishment.
- Minimize Byte Size: Use compression algorithms like Gzip and Brotli to reduce file size and improve load times.
- Master Cache-Control Headers: Use cache-control headers effectively to control caching behavior and improve performance.
- Enable Conditional Requests: Use conditional requests to reduce the load on your origin server and improve cache miss performance.
- Be Cautious with Vary Headers: Avoid using unnecessary Vary headers to improve cache hit ratio and CDN performance.
By following these best practices, you can significantly improve your app's performance, reduce latency, and increase user satisfaction.
Best PracticeDescriptionChoose High-Performance DNSUse a global anycast DNS service and set high TTLsOptimize Origin Server LocationMove origin closer to users and CDN edge serversLeverage IPv6 ConnectivityEnable IPv6 for future-proofing, security, and performanceTune Initial Congestion WindowAdjust initcwnd for optimized TCP performanceKeep Connections Alive ForeverMaintain open connections with origin serverReduce TLS Connection TimeUse OCSP stapling to reduce TLS handshake latencyMinimize Byte SizeUse compression algorithms like Gzip and BrotliMaster Cache-Control HeadersControl caching behavior for improved performanceEnable Conditional RequestsReduce load on origin server and improve cache miss performanceBe Cautious with Vary HeadersAvoid unnecessary Vary headers for better cache hit ratio
Related video from YouTube
1. Choose a High-Performance DNS
A fast DNS (Domain Name System) is essential for your app's performance. DNS acts as a phonebook for the internet, translating domain names into IP addresses. When a user requests your app, their browser sends a DNS query to resolve the domain name to an IP address.
Here are some tips to help you choose a high-performance DNS:
- Use a reliable DNS service: Avoid using the DNS service provided by your hosting provider. Instead, opt for a global anycast DNS service like AWS, NS1, Cloudflare, Google, or Azure.
- Set high TTLs (Time-To-Live): Set high TTLs on your DNS records to allow resolvers to cache the records for a long time, reducing the number of DNS queries.
- Monitor DNS performance: Regularly monitor your DNS performance using tools like DNS Benchmark or dig to identify bottlenecks and optimize your DNS configuration.
DNS ServiceDescriptionAWSA global anycast DNS service provided by Amazon Web ServicesNS1A high-performance DNS service with advanced traffic management featuresCloudflareA content delivery network that also offers a high-performance DNS serviceGoogleA free DNS service provided by GoogleAzureA global anycast DNS service provided by Microsoft Azure
By choosing a high-performance DNS, you can significantly improve your app's performance, leading to higher user engagement and better search engine rankings.
2. Optimize Origin Server Location
Optimizing the origin server location is crucial for improving CDN performance. The origin server is the source of your content, and its proximity to the CDN edge servers can significantly impact latency and cache miss responses.
Why Move the Origin Closer to the CDN?
Moving the origin server closer to the CDN edge servers reduces latency, resulting in faster content delivery. This is because the distance between the origin and CDN edge servers is reduced, minimizing the time it takes for the CDN to retrieve content from the origin.
How to Optimize Origin Placement
To optimize origin placement, follow these steps:
1. Select strategic locations: Choose locations for your origins that are close to your users. 2. Migrate your content: Move your content to these new origins. 3. Configure your CDN: Update your CDN settings to retrieve content from these new locations.
Challenges and Considerations
While moving the origin closer to the CDN has benefits, it also presents challenges:
ChallengeDescriptionData sovereigntyStoring user data in a different country may raise concerns.Increased costsMigrating data and maintaining multiple origin servers can be costly.Technical complexityThe process requires expertise in CDN configuration and data migration.
By addressing these challenges, you can significantly enhance the performance of your CDN, resulting in a better user experience and potentially higher customer satisfaction.
3. Leverage IPv6 Connectivity
IPv6 connectivity is crucial for faster app performance. As the internet evolves, the need for IPv6 adoption grows. CDNs play a vital role in this transition by providing IPv6 connectivity to websites, even if they are hosted on IPv4-only infrastructure.
Benefits of IPv6
IPv6 offers several benefits:
- Improved security: IPv6 provides built-in security features like IPsec, which offers end-to-end encryption and authentication.
- Increased address space: IPv6 has a much larger address space than IPv4, allowing for more devices to be connected to the internet.
- Faster network performance: IPv6 enables faster network performance with features like Quality of Service (QoS) and multicast.
How CDNs Enable IPv6
CDNs enable IPv6 connectivity by caching content and delivering it to users over both IPv4 and IPv6. This means that even if a website is hosted on an IPv4-only server, the CDN can still deliver the content to users over IPv6.
FeatureDescriptionCachingCDNs cache content to reduce latency and improve performance.Dual-stack deliveryCDNs deliver content over both IPv4 and IPv6, ensuring compatibility with different network infrastructures.
By leveraging IPv6 connectivity, you can ensure that your website is prepared for the future of the internet and can take advantage of the benefits that IPv6 has to offer.
4. Tune Your Initial Congestion Window (initcwnd)
Tuning your initial congestion window (initcwnd) is crucial for optimizing your CDN's performance. The initcwnd setting determines how many packets are sent initially when a connection is established between the client and the server. A higher initcwnd value can significantly improve TCP performance, resulting in faster content transfer between the origin and CDN.
Why is initcwnd important?
The initcwnd setting affects the amount of data that can be sent initially, which in turn impacts the overall performance of your CDN.
How to tune initcwnd?
To tune initcwnd, follow these steps:
1. Check the current value: Use tools like the Initcwnd Checker to determine the current initcwnd value. 2. Adjust the value: Increase the initcwnd value to optimize TCP performance, but be cautious not to set it too high, as this can lead to network congestion. 3. Monitor performance: Keep an eye on network performance and adjust the initcwnd value as needed to ensure optimal performance.
Best practices for initcwnd tuning
Best PracticeDescriptionIncrease initcwnd valueOptimize TCP performance, but avoid setting it too high to prevent network congestion.Consider content typeAdjust the initcwnd value based on the type of content being transferred. Larger files may require a higher initcwnd value.Monitor performanceRegularly monitor network performance and adjust the initcwnd value as needed to ensure optimal performance.
By tuning your initcwnd setting, you can significantly improve the performance of your CDN and provide a better user experience for your customers.
5. Keep Connections Alive Forever
To optimize your CDN's performance, it's essential to keep connections alive forever. This means maintaining open connections with origin servers, allowing CDNs to reduce the overhead associated with initiating new connection requests for every user request.
Benefits of Keeping Connections Alive
By keeping connections alive, you can:
- Reduce the Round-Trip Time (RTT) associated with establishing new connections
- Provide SSL/TLS security benefits, ensuring your site remains secure while delivering content quickly
How to Implement This Best Practice
To implement this best practice, configure your CDN to maintain open connections with your origin server for a few minutes at a time. This allows your CDN to take advantage of the existing connection, reducing the need for new SSL/TLS negotiations and resulting in faster content delivery.
By keeping connections alive forever, you can significantly improve the performance of your CDN, providing a better user experience for your customers.
sbb-itb-8abf120
6. Reduce TLS Connection Time
Reducing TLS connection time is crucial for faster app performance. TLS (Transport Layer Security) is a cryptographic protocol used to provide secure communication between a client and a server. However, the TLS handshake process can introduce latency, affecting the overall performance of your application.
Understanding OCSP Stapling
OCSP (Online Certificate Status Protocol) stapling is a technique to reduce TLS connection time. It allows the presenter of a certificate to deliver the OCSP response to the client, eliminating the need for the client to send a separate request to the certificate authority.
Benefits of OCSP Stapling
BenefitDescriptionImproved PerformanceReduces latency associated with the TLS handshake process, resulting in faster connection establishment.Enhanced SecurityEnsures the client receives the certificate revocation status, preventing the use of revoked certificates.PrivacyReduces the need for clients to contact the certificate authority, maintaining user privacy.
To implement OCSP stapling, configure your CDN to cache the OCSP response and include it in the TLS handshake process. This approach can significantly reduce TLS connection time, resulting in faster app performance.
By reducing TLS connection time, you can improve the overall user experience, increase engagement, and drive business success.
7. Minimize Byte Size
Minimizing byte size is crucial for faster app performance. One effective way to achieve this is by using compression algorithms, such as Gzip and Brotli. These algorithms reduce the file size of text-based assets, resulting in faster transmission and loading times.
How Compression Algorithms Work
Gzip and Brotli are two popular compression algorithms used to minimize byte size. They work by finding and replacing duplicate data fragments in a file, reducing its overall size.
Benefits of Compression
BenefitDescriptionFaster Load TimesReduced file size results in faster transmission and loading times, improving the overall user experience.Improved PerformanceCompression algorithms reduce the amount of data that needs to be transmitted, resulting in improved performance and reduced latency.Enhanced SecurityCompression algorithms can also improve security by reducing the attack surface of your application.
To implement compression, configure your CDN to enable Gzip or Brotli compression for text-based assets. This approach can significantly minimize byte size, resulting in faster app performance and improved user experience.
8. Master Cache-Control Headers
Mastering Cache-Control headers is crucial for optimizing your app's performance. Cache-Control headers dictate how HTTP responses should be cached by browsers and intermediate caches. By understanding how to use these headers effectively, you can significantly improve your app's loading times and overall user experience.
Understanding Cache-Control Directives
Cache-Control headers use various directives to control caching behavior. Here are some common directives:
DirectiveDescriptionmax-ageSpecifies how long (in seconds) a resource is considered fresh.no-cacheThe cache must validate the stored copy with the server before serving it to the client, even if it's not yet stale.no-storeThe response should not be stored in any cache.public and privateDefine whether the response can be cached in a public cache (like a CDN) or only in a private cache (like a user's browser).
Benefits of Mastering Cache-Control Headers
By mastering Cache-Control headers, you can:
- Reduce load times: Effective use of Cache-Control headers can reduce the number of requests made to your origin server, resulting in faster load times.
- Improve performance: By controlling caching behavior, you can reduce latency and improve the overall performance of your app.
- Enhance user experience: By ensuring that users receive the most up-to-date content, you can improve their overall experience and increase engagement.
To master Cache-Control headers, it's essential to understand how they interact with your CDN and origin server. By configuring your Cache-Control headers correctly, you can significantly improve your app's performance and user experience.
9. Enable Conditional Requests
Enabling conditional requests is a crucial step in optimizing your app's performance. This feature allows the client to request a resource only if it has been modified since the last request, reducing the load on the origin server and improving performance.
How Conditional Requests Work
To enable conditional requests, configure your origin server to always send a Last-Modified and/or ETag header. This information helps the client determine if the resource has been modified. If the resource has not been modified, the server responds with a 304 Not Modified response, which is much smaller in size and requires less roundtrips between the CDN and origin server.
Benefits of Conditional Requests
BenefitDescriptionReduced load on origin serverConditional requests reduce the number of requests made to the origin server, resulting in faster load times and improved performance.Faster load timesBy only requesting modified resources, conditional requests result in faster load times.Improved performanceConditional requests reduce latency and improve cache miss performance, leading to improved overall performance.
Remember to remove any unnecessary Vary headers, such as Vary: Referer, Vary: User-Agent, or Vary: Cookie, as they can negatively impact cache hit ratio and CDN performance.
10. Be Cautious with Vary Headers
When optimizing your app's performance, it's essential to understand the Vary header. This header tells caches which request headers the upstream server considers important. Without explicit instructions, caches can't know which request headers the upstream server will consider important, leading to incorrect caching and slower performance.
Common Pitfalls of Vary Headers
Including unnecessary headers in the Vary response header can negatively impact cache hit ratio and CDN performance. For example, Vary: Referer, Vary: User-Agent, or Vary: Cookie can lead to a large number of unique variations, making it difficult for caches to store and retrieve content efficiently.
Best Practices for Vary Headers
To avoid these pitfalls, follow these best practices:
Best PracticeDescriptionOnly include necessary headersAvoid including unnecessary headers in the Vary response header.Normalize request headersNormalize request headers to reduce variations.Avoid Vary: *Avoid using Vary: *, as it can lead to uncacheable requests.
By being cautious with Vary headers and following these best practices, you can ensure that your app's performance is optimized and your users have a faster and more seamless experience.
Recap
In this article, we've covered the top 10 CDN best practices to help you optimize your app's performance, reduce latency, and improve the overall user experience.
Here's a summary of the key takeaways:
Best PracticeDescription1. Choose a high-performance DNSSelect a reliable DNS service and set high TTLs to reduce DNS queries.2. Optimize origin server locationMove your origin server closer to your users to reduce latency.3. Leverage IPv6 connectivityEnable IPv6 to future-proof your app and improve performance.4. Tune initial congestion window (initcwnd)Adjust initcwnd to optimize TCP performance and reduce latency.5. Keep connections alive foreverMaintain open connections with your origin server to reduce overhead.6. Reduce TLS connection timeUse OCSP stapling to reduce TLS connection time and improve performance.7. Minimize byte sizeUse compression algorithms like Gzip and Brotli to reduce file size and improve load times.8. Master cache-control headersUse cache-control headers to control caching behavior and improve performance.9. Enable conditional requestsUse conditional requests to reduce the load on your origin server and improve performance.10. Be cautious with Vary headersAvoid using unnecessary Vary headers to improve cache hit ratio and CDN performance.
By following these best practices, you can significantly improve your app's performance, reduce latency, and increase user satisfaction. Remember to always monitor your app's performance and adjust your CDN strategy accordingly to ensure optimal results.
FAQs
What are the advantages of using CDN?
CDNs offer several benefits, including:
BenefitDescriptionBetter PerformanceCDNs reduce latency and improve page load times, enhancing overall user experience.Increased ReliabilityCDNs provide scalability, handling sudden spikes in traffic and requests.Cost SavingsCDNs reduce the load on origin servers, resulting in cost savings.Resilience Against Cyber AttacksCDNs protect against DDoS attacks and other security threats.
By distributing content across multiple servers, CDNs improve the overall user experience and provide a more reliable and secure way to deliver content.
Related posts

Privacy by Design: 7 Principles for Secure App Development
Privacy by Design is a framework that integrates privacy and data protection into the core of software development. It emphasizes proactively addressing privacy risks and embedding privacy into the design process to create secure and user-friendly applications. The seven key principles are:
- Proactive not Reactive: Anticipate and prevent privacy issues before they occur.
- Privacy as the Default Setting: Prioritize user privacy without requiring user action.
- Embedded Privacy: Make privacy an integral part of the design process.
- Full Functionality: Ensure privacy does not compromise functionality.
- End-to-End Security: Protect user data throughout the entire data lifecycle.
- Visibility and Transparency: Be open and clear about how user data is collected and used.
- Respect for User Privacy: Prioritize user autonomy and control over personal data.
By following these principles, developers can create applications that prioritize user privacy, build trust, and comply with data protection regulations like GDPR.
PrincipleKey PracticesProactiveIdentify risks, implement preventative measures, prepare for incidentsDefault PrivacyCollect minimal data, use encryption and access controls, provide transparencyEmbedded PrivacyChoose privacy-friendly technologies, minimize data collection, robust securityFull FunctionalityBalance security and privacy requirements, privacy-friendly designEnd-to-End SecurityProtect data throughout lifecycle (collection, storage, transmission, access, deletion)Visibility & TransparencyClear policies, user control over data, accountability mechanismsRespect User PrivacyUser choices, avoid dark patterns, prioritize autonomy
By adopting a Privacy by Design approach, developers can create better products that respect user autonomy, protect privacy, and foster trust with users.
Related video from YouTube
1. Proactive not Reactive; Preventative not Remedial
The first principle of Privacy by Design emphasizes taking proactive measures to prevent privacy risks and data breaches before they occur, rather than reacting after the fact. This proactive approach is crucial in app development, where even a single data breach can severely damage user trust and your business reputation.
To achieve this, developers should:
Identify Potential Privacy Risks
Conduct thorough privacy impact assessments to identify potential risks associated with the data you collect, process, and store. Consider risks such as:
- Unauthorized access
- Data breaches
- Misuse of personal information
Implement Preventative Measures
Based on the identified risks, implement appropriate technical and organizational measures to prevent privacy violations. This may include:
MeasureDescriptionEncryption and AnonymizationProtect data in transit and at restAccess Controls and AuthenticationEnsure only authorized access to dataData MinimizationCollect only necessary dataSecure Coding PracticesImplement secure coding practices and regular security testing
Prepare for Incidents
While preventative measures can significantly reduce the likelihood of privacy incidents, it's essential to have robust incident response and business continuity plans in place. These plans should outline clear steps for:
- Detecting potential incidents
- Responding to incidents
- Recovering from incidents
By taking a proactive approach to privacy, app developers can build user trust, comply with data protection regulations, and mitigate the costly consequences of data breaches and privacy violations.
2. Privacy as the Default Setting
The second principle of Privacy by Design emphasizes the importance of making privacy the default setting in app development. This means that apps should prioritize user privacy without requiring users to take any action.
To achieve this, apps should:
- Collect only the necessary personal data
- Implement robust access controls and authentication mechanisms
- Use encryption and anonymization techniques to protect data
- Provide users with clear information about how their data is being used and shared
Benefits of Privacy by Default
BenefitDescriptionUser TrustUsers are more likely to trust apps that prioritize their privacyComplianceApps are more likely to comply with data protection regulationsData ProtectionPersonal data is better protected against unauthorized access and breachesReputationBusinesses can maintain a positive reputation by prioritizing user privacy
By making privacy the default setting, app developers can demonstrate their commitment to protecting user privacy and building trust with their users. This approach is essential in today's digital landscape, where user data is increasingly vulnerable to privacy violations and data breaches.
3. Privacy Embedded into Design
The third principle of Privacy by Design emphasizes integrating privacy into the design and infrastructure of systems and business practices. This ensures that privacy becomes an essential component of the core functionality being delivered, without diminishing functionality.
To achieve this, app developers should:
Choose Technologies that Prioritize Data Protection
Opt for technologies that inherently prioritize data protection, such as:
TechnologyDescriptionEncryptionProtects data in transit and at restPseudonymizationReplaces personal data with artificial identifiersSecure Data StorageProtects data from unauthorized access
Minimize Data Collection and Storage
Collect and store only the necessary personal data, and dispose of it securely once it's no longer needed.
Implement Robust Security Measures
Build strong security mechanisms throughout the data lifecycle, from collection and transmission to storage and deletion.
Design User-Friendly Privacy Controls
Make it easy for users to understand and manage their privacy settings within the product or service.
By embedding privacy into design, app developers can create products that are both privacy-protective and fully functional, ultimately building trust with their users.
4. Full Functionality—Positive-Sum, not Zero-Sum
The fourth principle of Privacy by Design emphasizes that privacy and functionality can coexist without compromising one for the other. This approach ensures that all legitimate interests and objectives are accommodated in a positive-sum manner.
To achieve full functionality, app developers should:
Balance Security and Privacy Requirements
Find a balance between security requirements, such as auditing all actions in the system, and privacy requirements, like keeping only a minimum amount of information about data subjects.
Security RequirementsPrivacy RequirementsAuditing all actions in the systemKeeping only a minimum amount of information about data subjects
Implement Privacy-Friendly Design
Design systems that prioritize privacy, without affecting security controls or causing performance impacts on other services. For example:
- Remove unnecessary information about data subjects from audit logs
- Move old logs to an archive tier to save costs
By adopting a positive-sum approach, app developers can create products that are both privacy-protective and fully functional, ultimately building trust with their users.
sbb-itb-8abf120
5. End-to-End Security—Lifecycle Protection
End-to-end security is a critical principle of Privacy by Design, ensuring that personal data is protected throughout its entire lifecycle, from collection to deletion. This principle involves implementing robust security measures to prevent unauthorized access, use, disclosure, modification, or destruction of personal data.
To achieve end-to-end security, app developers should:
Protect Personal Data Throughout Its Lifecycle
StageSecurity MeasureCollectionMinimize data collection and anonymize or pseudonymize data whenever possibleStorageUse robust encryption and secure storage mechanisms to protect data at restTransmissionUse secure communication protocols, such as HTTPS, to protect data in transitAccessEstablish strict access controls, including authentication and authorization mechanismsDeletionEnsure secure deletion of personal data when it's no longer needed
Provide Transparency and Accountability
- Provide users with clear information about how their personal data is collected, used, and protected
- Ensure that there are mechanisms in place for users to exercise their rights and hold the organization accountable for any breaches
By implementing these measures, app developers can ensure that personal data is protected throughout its entire lifecycle, building trust with users and minimizing the risk of data breaches.
6. Visibility and Transparency – Keep it Open
Visibility and transparency are crucial principles of Privacy by Design, ensuring that users are informed about how their personal data is collected, used, and protected. This principle involves being open and honest about data practices, providing users with clear and concise information about how their data is handled.
Make Your Processes Known
To achieve visibility and transparency, app developers should make their data collection and processing practices transparent to users. This can be achieved by:
- Providing clear and concise privacy policies that are easily accessible to users
- Using simple language to explain data practices
- Making information about data collection and processing easily available to users
- Providing users with options to control their data and make informed choices
Be Accountable
Visibility and transparency also involve being accountable for data practices. App developers should:
Accountability MeasureDescriptionEstablish mechanisms for users to exercise their rightsAllow users to access, correct, or delete their personal dataProvide clear information about how to access, correct, or delete personal dataMake it easy for users to understand their rights and optionsInvestigate and respond to user complaints and concernsTake user feedback seriously and respond promptly
By implementing these measures, app developers can build trust with users, demonstrate their commitment to privacy, and ensure that users are informed and in control of their personal data.
7. Respect for User Privacy – Keep it User-Centric
Respecting user privacy is a fundamental principle of Privacy by Design. It emphasizes the importance of prioritizing user privacy and control. This principle involves designing systems that respect user autonomy, provide transparency, and ensure that users have control over their personal data.
Empower Users with Choices
To respect user privacy, app developers should give users choices about how their personal data is collected, used, and shared. This can be achieved by:
- Providing clear and concise information about data collection and processing practices
- Offering users opt-in or opt-out options for data sharing
- Allowing users to access, correct, or delete their personal data
- Providing users with granular control over data sharing preferences
Prioritize User Autonomy
Respecting user privacy also involves prioritizing user autonomy and ensuring that users are not coerced or manipulated into sharing their personal data. App developers should:
Best PracticeDescriptionAvoid dark patternsDon't use deceptive design practices that manipulate users into sharing their dataEnsure transparencyProvide clear and transparent information about how user data will be used and sharedRespect user choicesDon't force users to share their data in order to use the app or service
By respecting user privacy and prioritizing user autonomy, app developers can build trust with users, demonstrate their commitment to privacy, and ensure that users are informed and in control of their personal data.
Conclusion
The 7 principles of Privacy by Design are crucial for ensuring secure and private data management in app development. By integrating these principles, developers can address privacy issues, enhance user trust, and comply with data protection regulations.
Key Takeaways
PrincipleDescriptionProactive not ReactiveAnticipate and prevent privacy issuesPrivacy as the Default SettingPrioritize user privacy without requiring user actionEmbedded PrivacyMake privacy an integral part of the design processFull FunctionalityEnsure privacy does not compromise functionalityEnd-to-End SecurityProtect user data throughout the entire data lifecycleVisibility and TransparencyBe open and clear about how user data is collected and usedRespect for User PrivacyPrioritize user autonomy and control
By adopting a Privacy by Design approach, developers can create better products that respect user autonomy and protect their privacy. This approach helps build trust with users and demonstrates a commitment to privacy.
In conclusion, the 7 principles of Privacy by Design are essential for any app development project that involves user data. By prioritizing user privacy and control, developers can create products that are both private and functional.
FAQs
What is privacy as default?
Privacy as default means that systems automatically protect users' personal data without requiring any action from the user. This ensures that privacy is the baseline, rather than an optional setting.
Which of the following are part of the seven principles of Privacy by Design?
The seven principles of Privacy by Design are:
PrincipleDescription1. Proactive not ReactiveAnticipate and prevent privacy issues2. Privacy as the Default SettingPrioritize user privacy without requiring user action3. Embedded PrivacyMake privacy an integral part of the design process4. Full FunctionalityEnsure privacy does not compromise functionality5. End-to-End SecurityProtect user data throughout the entire data lifecycle6. Visibility and TransparencyBe open and clear about how user data is collected and used7. Respect for User PrivacyPrioritize user autonomy and control
How do you demonstrate Privacy by Design?
To demonstrate Privacy by Design, organizations should:
1. Conduct Privacy Impact Assessments: Identify and mitigate privacy risks during the design phase.
2. Implement data minimization: Collect only necessary data for specific purposes.
3. Incorporate privacy controls and security measures: Protect user data throughout the entire data lifecycle.
4. Provide clear and transparent privacy policies: Detail data handling practices.
5. Offer user control: Provide consent management and data access/deletion options.
6. Regularly audit and assess privacy practices: Ensure compliance and continuous improvement.
Related posts

How to Implement SSO in Custom Apps: 7 Key Steps
Implementing Single Sign-On (SSO) in custom applications enhances user experience, improves security, and reduces administrative burden. Here are the key steps to follow:
- Pick an SSO Standard: Choose between SAML (ideal for enterprise, high-security environments) or OIDC (better for cloud-based apps and smaller user bases).
- Choose an SSO Provider: Evaluate providers like WorkOS, Auth0, AWS Cognito, GCP Identity Platform, Okta, OneLogin, and Microsoft Entra ID based on features, pricing, support, and scalability.
- Design SSO Architecture: Decide between on-premise (more control, higher costs) or cloud-based (scalable, lower maintenance). Consider security, scalability, user experience, integration, and compliance.
- Integrate SSO with Your App: Disable username/password logins, enforce session timeouts, implement deep linking, use domain verification, and Just-In-Time (JIT) User Provisioning.
- Manage Users and Groups: Implement automated user provisioning and deprovisioning, define clear group policies, use role-based access control, and create group hierarchies.
- Test and Debug SSO: Test valid/invalid login attempts, session management, error handling, and cross-browser/device compatibility. Use debugging tools like ssodebug, browser developer tools, log analysis, and testing frameworks.
- Monitor and Maintain SSO: Review logs and audit trails, monitor performance and availability, keep software updated, conduct security assessments, review and adjust policies, and train users.
By following these steps, you can provide a secure and seamless SSO experience for your custom app users.
Related video from YouTube
Pick an SSO Standard
When implementing Single Sign-On (SSO) in custom apps, choosing the right SSO standard is vital. The choice of standard depends on various factors, including the app's user base, security requirements, and technology stack compatibility. Two popular SSO standards are Security Assertion Markup Language (SAML) and OpenID Connect (OIDC).
SSO Standards Comparison
StandardFocusIdeal ForSecurity LevelSAMLAuthentication and AuthorizationEnterprise environments, government, healthcare, and finance sectorsHighOIDCAuthenticationCloud-based and mobile applications, social media, and e-commerce platformsMedium
Factors to Consider
When selecting an SSO standard, consider the following factors:
- User base: SAML is suitable for large, complex user bases, while OIDC is better for smaller, more agile user bases.
- Security requirements: SAML provides stronger authentication and authorization, making it ideal for high-security environments.
- Technology stack: Ensure the chosen standard is compatible with your app's technology stack, including programming languages, frameworks, and infrastructure.
By carefully evaluating these factors, you can select the right SSO standard for your custom app, ensuring a seamless and secure user experience.
Choose an SSO Provider
When implementing Single Sign-On (SSO) in custom apps, selecting the right SSO provider is crucial. With numerous providers available, it's essential to evaluate their features, pricing, support, and scalability to ensure a seamless and secure user experience.
SSO Provider Comparison
The following table compares key features, pricing, support, and scalability options of various SSO providers:
ProviderFeaturesPricingSupportScalabilityWorkOSAdmin Portal, SAML, OIDCFree, custom pricingEmail, phone, documentationHighAuth0Identity-as-a-service, SAML, OIDC$130/mo. (B2B), custom pricingEmail, phone, documentationHighAWS CognitoIdentity-as-a-service, SAML, OIDC$0.015 per SAML MAUEmail, phone, documentationHighGCP Identity PlatformIdentity-as-a-service, SAML, OIDC$0.015 per SAML MAUEmail, phone, documentationHighOktaIdentity governance, SAML, OIDC$2 per user/mo. (SSO), custom pricingEmail, phone, documentationHighOneLoginIdentity governance, SAML, OIDC$4 per user/mo. (Advanced), custom pricingEmail, phone, documentationHighMicrosoft Entra IDIdentity governance, SAML, OIDC$6 per user/mo. (Entra ID P1), custom pricingEmail, phone, documentationHigh
When evaluating SSO providers, consider the following factors:
- Features: Ensure the provider offers the necessary features, such as SAML, OIDC, and MFA, to meet your app's security requirements.
- Pricing: Evaluate the pricing model and ensure it aligns with your app's user base and growth projections.
- Support: Consider the provider's support options, including documentation, email, and phone support, to ensure timely assistance when needed.
- Scalability: Choose a provider that can scale with your app, offering high availability and performance to support a growing user base.
By carefully evaluating these factors and comparing the features, pricing, support, and scalability of various SSO providers, you can select the right provider for your custom app, ensuring a seamless and secure user experience.
Design SSO Architecture
When designing an SSO architecture, consider the overall security, business needs, and user experience. A well-designed SSO architecture should balance security, scalability, and usability.
On-Premise vs. Cloud-Based SSO
There are two primary approaches to designing an SSO architecture: on-premise and cloud-based.
ApproachAdvantagesDisadvantagesOn-PremiseMore control and security, customizableHigher upfront costs, maintenance requiredCloud-BasedScalable, lower maintenance costs, rapid deploymentDependence on third-party provider, potential security risks
Key Considerations
When designing an SSO architecture, consider the following key factors:
- Security: Implement strong authentication methods to ensure user credential security.
- Scalability: Design the architecture to scale with your organization's growth.
- User Experience: Ensure a seamless user experience by minimizing login prompts.
- Integration: Integrate the SSO solution with existing applications, directories, and infrastructure.
- Compliance: Ensure the SSO architecture complies with relevant regulations.
By evaluating these factors and choosing the right approach, you can design an SSO architecture that meets your organization's unique needs and provides a secure, scalable, and user-friendly experience.
sbb-itb-8abf120
Integrate SSO with Your App
Integrating Single Sign-On (SSO) with your custom application involves several technical steps. Here's a detailed walkthrough to help you get started:
Security Considerations
When integrating SSO, security is crucial. Ensure you follow best practices to prevent security vulnerabilities:
Security MeasureDescriptionDisallow username and password loginsDisable username/password-based authentication to prevent unauthorized access.Enforce session timeoutsExpire idle user sessions to prevent prolonged access.Force sign-in for active browser sessionsReplace existing sessions with new ones to maintain security.
Routing and Deep Linking
To ensure a seamless user experience, consider the following:
Routing and Deep LinkingDescriptionAsk users for information to determine the right IDPRequest users' email addresses, account subdomains, or unique account URLs to identify the correct identity provider.Implement deep linkingUse SAML's RelayState parameter to direct users to the correct page after authentication.
UX Enhancements
To improve the user experience, consider the following:
UX EnhancementDescriptionReplace one-off email verification with domain verificationVerify domains instead of individual email addresses to simplify the login process.Use Just-In-Time (JIT) User ProvisioningAutomate account creation for new users signing in via SAML to reduce friction.
By following these steps and considering security, routing, and UX enhancements, you can successfully integrate SSO with your custom application.
Manage Users and Groups
When implementing Single Sign-On (SSO) in custom applications, managing users and groups is a crucial step. This involves setting up a system to handle user authentication, authorization, and access control.
User Provisioning and Deprovisioning
Provisioning involves creating, updating, and deleting user accounts in multiple applications and systems. Deprovisioning involves revoking access to these systems when a user leaves an organization or changes roles.
To streamline user provisioning and deprovisioning, consider implementing automated processes using protocols like SAML and SCIM. These protocols enable secure and efficient user data exchange between identity providers and service providers.
Group Management
Group management involves creating, managing, and assigning user groups to specific roles or permissions. By doing so, you can control access to resources and applications based on group membership.
Here are some best practices for group management:
Best PracticeDescriptionDefine clear group policiesEstablish clear policies for group creation, management, and assignment.Use role-based access controlAssign permissions based on roles rather than individual users.Implement group hierarchiesCreate a hierarchical structure for groups to simplify management and reduce complexity.
By following these best practices and implementing automated user provisioning and deprovisioning, you can ensure a secure, scalable, and efficient SSO system that meets the needs of your organization.
Remember to prioritize security and scalability when managing users and groups in your SSO system. This will provide a seamless and secure experience for your users while protecting your organization's resources and data.
Test and Debug SSO
Testing and debugging are essential steps in implementing Single Sign-On (SSO) in custom applications. This process involves verifying that the SSO integration works as intended, identifying and resolving issues, and optimizing performance.
Testing Scenarios
To thoroughly test your SSO implementation, consider the following scenarios:
ScenarioDescriptionValid login attemptsTest successful logins with valid credentials to ensure seamless access to connected applications.Invalid login attemptsVerify that the system correctly handles invalid login attempts, including incorrect usernames, passwords, and expired sessions.Session managementTest session persistence, expiration, and revocation to ensure that user sessions are properly managed.Error handlingSimulate errors, such as network failures or authentication service downtime, to evaluate the system's response and error messaging.Cross-browser and device testingTest SSO functionality across different browsers, devices, and platforms to ensure compatibility and consistency.
Debugging Tools and Techniques
To effectively debug SSO issues, utilize the following tools and techniques:
Tool/TechniqueDescriptionSSO debug toolsLeverage tools like ssodebug to configure connections, validate basic authentication, and test SSO functionality.Browser developer toolsUse browser developer tools, such as the console and network inspector, to analyze HTTP requests and responses, identify errors, and troubleshoot issues.Log analysisReview system logs to identify errors, track user activity, and monitor SSO performance.Simulation and testing frameworksEmploy frameworks like Postman or SSO Tracer to simulate SSO requests and responses, and test various scenarios.
By thoroughly testing and debugging your SSO implementation, you can ensure a seamless and secure user experience, minimize errors, and optimize performance.
Monitor and Maintain SSO
To ensure the long-term reliability, security, and performance of your Single Sign-On (SSO) system, regular monitoring and maintenance are crucial. Here are some best practices to follow:
Review Logs and Audit Trails
Regularly analyze SSO logs and audit trails to identify potential security breaches, unauthorized access attempts, or anomalous user behavior. Implement a centralized logging solution and configure alerts for suspicious activities.
Monitor Performance and Availability
Continuously monitor the performance and availability of your SSO system, including the identity provider, authentication servers, and connected applications. Track key performance indicators (KPIs) such as response times, error rates, and uptime. Set up alerts for performance degradation or service disruptions to promptly address issues.
Keep Software and Components Updated
Regularly update your SSO software, identity provider, and connected applications with the latest security patches and bug fixes. Stay informed about new vulnerabilities and promptly apply necessary updates to mitigate risks.
Conduct Regular Security Assessments
Engage in regular security assessments, including vulnerability scanning, penetration testing, and code reviews. Identify and address potential security weaknesses in your SSO implementation, authentication mechanisms, and connected applications.
Review and Adjust SSO Policies
Periodically review and update your SSO policies to align with evolving business requirements, security best practices, and regulatory compliance standards. Adjust user access controls, session management settings, and authentication policies as needed to maintain a secure and efficient SSO environment.
Train and Educate Users
Provide ongoing training and education to users on the proper use of SSO, security best practices, and potential risks associated with improper usage. Emphasize the importance of strong passwords, multi-factor authentication, and reporting suspicious activities.
By following these best practices, you can ensure a secure and seamless user experience while minimizing the risk of security breaches and performance issues.
Best PracticeDescriptionRegularly review logs and audit trailsIdentify potential security breaches and unauthorized access attemptsMonitor performance and availabilityTrack KPIs and set up alerts for performance degradation or service disruptionsKeep software and components updatedApply latest security patches and bug fixes to mitigate risksConduct regular security assessmentsIdentify and address potential security weaknessesReview and adjust SSO policiesAlign with evolving business requirements and security best practicesTrain and educate usersEmphasize strong passwords, multi-factor authentication, and reporting suspicious activities
By consistently monitoring, maintaining, and improving your SSO system, you can ensure a secure and seamless user experience while minimizing the risk of security breaches and performance issues.
Conclusion
Implementing Single Sign-On (SSO) in custom applications is crucial for enhancing user experience, improving security, and reducing administrative burden. By following the 7 key steps outlined in this guide, you can successfully integrate SSO into your custom app, providing a seamless and secure authentication process for your users.
Key Takeaways
To ensure a secure and efficient SSO environment, remember to:
- Continuously monitor and maintain your SSO system
- Review logs and audit trails regularly
- Keep software and components up-to-date
- Conduct regular security assessments
- Review and adjust SSO policies as needed
- Train and educate users on SSO best practices
By prioritizing SSO implementation and maintenance, you can provide a better user experience, reduce the risk of security breaches, and improve overall productivity.
Related posts

Top 10 UI/UX Design Trends for Apps in 2024
In 2024, mobile app design will focus on creating immersive, personalized, and accessible experiences. The key trends shaping the UI/UX landscape include:
- Responsive and Adaptive Interfaces: Interfaces that adapt to different screen sizes and devices for a seamless user experience.
- Immersive AR and VR Experiences: Augmented and virtual reality technologies to create engaging, interactive environments.
- Enhanced Microinteractions: Small design elements that provide instant feedback, guidance, and delight.
- Voice-Activated Interfaces: Voice commands for hands-free, convenient app interactions.
- 3D Elements in Minimalist Design: Adding depth and realism to user interfaces while maintaining simplicity.
- AI-Powered Personalization: Tailored content and features using AI to cater to individual preferences.
- Dark Mode as a Standard: Dark mode designs that prioritize accessibility, readability, and battery life.
- Accessibility and Inclusive Design: Ensuring apps are usable and enjoyable for everyone, including people with disabilities.
- Gamification for Engagement: Game-like elements to increase user engagement and retention.
- Sustainable and Eco-Friendly Design: Reducing environmental impact through energy efficiency and resource optimization.
These trends aim to create engaging, user-centric experiences that prioritize accessibility, personalization, and sustainability.
Related video from YouTube
1. Responsive and Adaptive Interfaces
Mobile devices come in various screen sizes, resolutions, and orientations. To provide a seamless user experience, designers need to create interfaces that adapt to these differences. In 2024, responsive and adaptive interfaces will be crucial for mobile app design.
What's the difference?
Design ApproachDescriptionBenefitsResponsive DesignA fluid approach that adjusts layout, content, and visuals to fit different screen sizes and devices.Consistent user interface across devices, optimal experience regardless of device.Adaptive DesignCreates multiple layouts for specific devices or screen sizes, detecting the device's screen size and loading the appropriate layout.Optimized user interface for each device, tailored experiences for specific use cases.
Key Benefits
Both responsive and adaptive interfaces offer:
- Improved user experience: Optimized layouts and visuals for each device.
- Increased accessibility: Consistent user interface across various devices and screen sizes.
- Enhanced engagement and conversion rates: Tailored experiences for specific use cases.
- Simplified maintenance and updates: A single design approach for multiple devices.
In 2024, designers will need to balance the benefits of responsive and adaptive design to create interfaces that are both flexible and optimized for specific devices and use cases. By doing so, they can provide users with a seamless and engaging experience that drives loyalty and retention.
2. Immersive AR and VR Experiences
In 2024, mobile apps will see a surge in immersive AR and VR experiences. With the global AR market projected to reach $58.1 billion by 2028, designers must adapt to this trend. Popular apps like IKEA Place and Pokémon GO have already shown the power of AR to engage users in unique ways.
How AR is Changing User Interactions
AppAR FeatureUser BenefitIKEA PlaceVisualize furniture in your spaceMake informed buying decisionsPokémon GOInteractive gaming experienceEngage with the game in a new way
As AR technology advances, it will redefine user interactions and offer immersive experiences that were previously unimaginable. Designers are already exploring how to create 3D spaces that feel welcoming and intuitive for users. With the introduction of Apple's visionOS, designers are looking into creating 3D immersive experiences for this VR operational system and other similar technologies, like Meta's metaverse.
3. Enhanced Microinteractions
Microinteractions are small design elements that can greatly impact the user experience. In 2024, designers will focus on creating meaningful microinteractions that provide instant feedback, guide users through tasks, and add delight to the user journey.
What Microinteractions Can Do
Microinteractions can:
- Provide feedback and guidance: Let users know what's happening and what to do next.
- Enhance functionality and usability: Make it easier for users to complete tasks.
- Create emotion and personality: Add a touch of humanity to your app.
- Encourage engagement and loyalty: Make users want to come back for more.
Designing Effective Microinteractions
To design effective microinteractions, consider the following elements:
ElementDescriptionTriggerWhat initiates the microinteraction?RulesWhat defines the behavior and logic of the microinteraction?FeedbackWhat communicates the outcome of the microinteraction to the user?Loops and ModesWhat determines how long the microinteraction lasts and how it changes over time?
By carefully considering these elements, you can create microinteractions that enhance the user experience and set your app apart from the competition.
4. Voice-Activated Interfaces
Voice-activated interfaces are changing the way users interact with mobile apps. With the rise of voice assistants like Siri, Google Assistant, and Alexa, users are becoming more comfortable using their voices to perform tasks. In 2024, we can expect to see more mobile apps incorporating voice-activated interfaces to enhance user experience.
Benefits of Voice-Activated Interfaces
Here are some benefits of voice-activated interfaces:
- Convenience: Users can perform tasks hands-free, making it easier to multitask and access information on the go.
- Accessibility: Voice-activated interfaces can be especially helpful for users with disabilities, allowing them to interact with apps in a more accessible way.
- Speed: Voice commands can be faster than typing, making it a more efficient way to complete tasks.
Designing Effective Voice-Activated Interfaces
To design effective voice-activated interfaces, consider the following elements:
ElementDescriptionNatural Language Processing (NLP)Ensure that your app can understand natural language and respond accordingly.Clear and Concise FeedbackProvide users with clear and concise feedback on their voice commands, such as audio or visual cues.Error HandlingDesign your app to handle errors and miscommunications, providing users with helpful responses and alternatives.
By incorporating voice-activated interfaces into your mobile app, you can provide users with a more convenient, accessible, and efficient experience. As voice technology continues to evolve, we can expect to see even more innovative applications of voice-activated interfaces in the future.
5. 3D Elements in Minimalist Design
In 2024, 3D elements will revolutionize mobile app design by adding depth and realism to user interfaces. Combining 3D design with minimalist principles can result in visually stunning and user-friendly interfaces.
Benefits of 3D Elements
3D elements can:
- Enhance brand recognition: Create a unique and memorable brand identity.
- Visualize complex data: Simplify complex data, making it easier for users to understand and interact with.
- Create immersive experiences: Add a new level of immersion to mobile apps, making them more engaging and interactive.
Best Practices for Incorporating 3D Elements
To effectively incorporate 3D elements into your minimalist design, consider the following:
Best PracticeDescriptionBalance depth and simplicityEnsure 3D elements complement the minimalist design, rather than overwhelming it.Use 3D elements judiciouslyUse 3D elements only where they add significant value to the user experience, avoiding unnecessary clutter.Consider user feedbackTest your design with real users to ensure 3D elements are enhancing the user experience, rather than detracting from it.
By following these best practices, you can create visually stunning and user-friendly interfaces that engage users and enhance their experience.
sbb-itb-8abf120
6. AI-Powered Personalization
AI-powered personalization is changing the mobile app experience by providing users with tailored content, recommendations, and features that cater to their individual preferences and behaviors.
What AI-Powered Personalization Offers
AI-powered personalization provides several benefits, including:
- Better user engagement: Personalized experiences lead to increased user satisfaction and loyalty.
- Improved conversion rates: Tailored recommendations and content can drive conversions and revenue growth.
- Competitive advantage: Apps that offer personalized experiences stand out from the competition.
How AI Powers Personalization
AI algorithms analyze user behavior, preferences, and patterns to deliver personalized experiences. This includes:
AI TechniqueDescriptionMachine learningAI algorithms learn from user data to identify patterns and preferences.Real-time analysisAI analyzes user behavior in real-time to deliver instant personalized experiences.Predictive modelingAI predicts user behavior and preferences to deliver proactive personalized experiences.
By leveraging AI-powered personalization, mobile apps can deliver exceptional user experiences that drive engagement, conversion, and loyalty.
7. Dark Mode as a Standard
Dark mode has become a popular design choice in 2024, offering several benefits. It reduces eye strain, increases visibility in low ambient lighting, and enhances focus. Additionally, dark mode can conserve battery life, especially on OLED screens. Experienced designers should consider dark mode as an essential feature to enhance accessibility and user preference.
Designing Effective Dark Mode Experiences
To create a great dark mode experience, designers must prioritize accessibility and readability. This requires significant color contrast between the background and text, making it crucial for visually impaired users. The Web Content Accessibility Guidelines (WCAG) recommend following color accessibility guidelines to ensure text readability on dark backgrounds.
When designing a dark mode UI, it's essential to choose a dark gray palette with contrasting colors to produce a visual hierarchy. Icons, images, and other UI elements must be converted to dark mode to avoid visual discrepancies. A pleasant dark mode experience requires thorough user interface testing and refinement, considering contrast, spacing, and readability.
Best Practices for Dark Mode Design
Best PracticeDescriptionAvoid saturated colorsSaturated colors can create optical vibrations on dark backgrounds, causing eye strain.Communicate elevationUse lighter surfaces and shadows to create depth.Avoid pure black surfacesOpt for dark grays instead to reduce eye strain.Allow user customizationProvide a toggle switch to easily switch between light and dark settings based on user preferences and environment.
By following these guidelines and best practices, designers can create effective dark mode experiences that enhance user satisfaction and accessibility.
8. Accessibility and Inclusive Design
Mobile app developers must prioritize accessibility and inclusive design to ensure their apps are usable and enjoyable for everyone, including people with disabilities.
Why Accessibility Matters
Accessibility is not only a moral obligation but also a legal requirement in many countries. By designing accessible apps, developers can improve the overall user experience, increase user engagement, and enhance their brand reputation.
Key Accessibility Principles
To design accessible mobile apps, developers should consider the following key principles:
PrincipleDescriptionPerceivablePresent information and UI components in an easy-to-perceive way.OperableMake UI elements and content easy to navigate.UnderstandableEnsure content is intelligible and readable, and the application functions predictably.RobustEnsure app content is easily interpretable by various users and assistive technologies.
Designing for Accessibility
To ensure accessibility in mobile app design, developers can follow these best practices:
- Use high contrast colors: Ensure sufficient contrast between text and background to aid users with visual impairments.
- Provide alternative text: Offer alternative text for images, icons, and other visual elements to assist users with visual impairments.
- Make interactive elements accessible: Ensure interactive elements, such as buttons and form fields, are easily accessible and usable by users with mobility impairments.
- Test with assistive technologies: Test the app with assistive technologies, such as screen readers and keyboard-only navigation, to ensure compatibility.
By prioritizing accessibility and inclusive design, mobile app developers can create a more user-friendly and inclusive experience, enhancing the overall quality of their apps.
9. Gamification for Engagement
Gamification is a powerful tool to increase user engagement and retention in mobile apps. By incorporating game-like elements, developers can create a more interactive and enjoyable experience for users.
How Gamification Works
Gamification taps into human psychology, using rewards, challenges, and leaderboards to motivate users to perform specific actions or behaviors. This can be particularly effective in apps where user engagement is crucial, such as fitness, education, or productivity apps.
Examples of Gamification in Mobile Apps
Many popular mobile apps have successfully incorporated gamification elements to enhance user engagement. For example:
AppGamification ElementNike+ Run ClubRewards, badges, and leaderboards to motivate users to exercise regularlyDuolingoGamification to make language learning more engaging and funHabiticaRewards, challenges, and leaderboards to motivate users to develop good habits
Benefits of Gamification
The benefits of gamification in mobile apps are numerous. By increasing user engagement and retention, developers can:
- Improve user satisfaction and loyalty
- Increase revenue through in-app purchases and advertising
- Enhance brand reputation and credibility
- Gain a competitive edge in a crowded market
By incorporating gamification elements into their apps, developers can create a more engaging and enjoyable experience for users, ultimately driving business success.
10. Sustainable and Eco-Friendly Design
As people become more environmentally conscious, sustainable and eco-friendly design has become a crucial aspect of UI/UX design trends in 2024. Designers are now focusing on creating apps that not only provide a seamless user experience but also contribute to a greener future.
Why Sustainable Design Matters
The tech industry, including mobile app development, has a significant impact on the environment. By incorporating sustainable design principles, developers can reduce the environmental impact of their apps, making them more eco-friendly and socially responsible.
Key Principles of Sustainable Design
Here are some key principles of sustainable design:
PrincipleDescriptionEnergy EfficiencyDesigning apps that consume minimal energy.Minimalist DesignUsing simple, intuitive designs that reduce cognitive load.Resource OptimizationOptimizing resource usage, such as data storage and network bandwidth.Eco-Friendly MaterialsUsing eco-friendly materials in device manufacturing and reducing electronic waste.
By incorporating these principles into their design strategy, developers can create sustainable and eco-friendly apps that benefit both the environment and users.
Conclusion
As we look at the future of UI/UX design in 2024, it's clear that designers are on the verge of a new era. This era is marked by innovation, empathy, and a focus on inclusivity. The integration of AI-powered personalization, immersive AR and VR experiences, and a focus on ethical considerations will reshape the digital landscape, creating new standards for user engagement and empowerment.
By embracing these top 10 UI/UX design trends for apps in 2024, designers can create impactful, user-centric experiences that benefit both individuals and the environment. As technology advances, it's crucial for designers to stay ahead of the curve, prioritizing user needs and driving innovation.
Key Takeaways
Here are the key takeaways from the top 10 UI/UX design trends for apps in 2024:
TrendDescriptionResponsive and Adaptive InterfacesCreate interfaces that adapt to different screen sizes and devices.Immersive AR and VR ExperiencesUse AR and VR to create immersive experiences that engage users.Enhanced MicrointeractionsDesign microinteractions that provide instant feedback and guide users.Voice-Activated InterfacesIncorporate voice-activated interfaces to enhance user experience.3D Elements in Minimalist DesignUse 3D elements to add depth and realism to user interfaces.AI-Powered PersonalizationUse AI to deliver personalized experiences that cater to individual preferences.Dark Mode as a StandardDesign dark mode experiences that prioritize accessibility and readability.Accessibility and Inclusive DesignPrioritize accessibility and inclusive design to ensure apps are usable by everyone.Gamification for EngagementUse gamification elements to increase user engagement and retention.Sustainable and Eco-Friendly DesignDesign apps that contribute to a greener future and reduce environmental impact.
By following these trends, designers can create apps that are not only visually appealing but also provide a seamless user experience, prioritize accessibility, and contribute to a sustainable future.
FAQs
What's the next big trend in UX?
In 2024, we expect to see a resurgence of 3D designs in UX. This trend will make it easier for designers to create 3D designs using design tools.
Here's what you can expect:
TrendDescription3D DesignsEasier creation of 3D designs using design tools
This trend will change the way we interact with digital products and services. Get ready to experience more immersive and engaging user experiences!
Related posts

Kafka vs RabbitMQ: Cross-Language Message Brokers
Kafka and RabbitMQ are two popular message brokers that enable communication between different applications and services, even if written in different programming languages. Here's a quick comparison:
Kafka
- Distributed streaming platform for handling high-volume, high-velocity data streams
- Designed for real-time data processing, stream processing, and event-driven architectures
- High throughput (millions of messages/second) and low latency
- Horizontal scalability by adding more brokers
- Supports Java, Scala, Python, Go, and C/C++
RabbitMQ
- Flexible message broker supporting multiple messaging patterns (point-to-point, pub-sub, request-response)
- Suitable for message queuing, microservices, and IoT platforms
- Lower throughput (thousands of messages/second) compared to Kafka
- Vertical scalability by adding more resources
- Supports Java, .NET, Python, Ruby, C, and Go
Related video from YouTube
Quick Comparison
FeatureApache KafkaRabbitMQMessaging ModelPublish-subscribePoint-to-point, pub-sub, request-responseData StorageDistributed log, persistentTransient (unless configured)ThroughputHigh (millions of messages/sec)Lower (thousands of messages/sec)ScalabilityHorizontal (add more brokers)Vertical (add more resources)RedundancyReplication across brokersMirrored queues, clusteringLanguage SupportJava, Scala, Python, Go, C/C++Java, .NET, Python, Ruby, C, GoUse CasesReal-time data processing, stream processing, event-driven architectureMessage queuing, microservices, IoT platforms
The choice between Kafka and RabbitMQ depends on your project's specific requirements for throughput, scalability, language support, and use case (real-time data processing vs. message queuing).
Understanding Kafka and RabbitMQ

Apache Kafka and RabbitMQ are two popular message brokers that enable communication between different applications, systems, and services. While they share similar goals, they differ in their architecture, design, and use cases.
What is Apache Kafka?

Apache Kafka is a distributed streaming platform that handles high-volume, high-velocity streams of data in a distributed fashion. It provides low-latency, fault-tolerant, and scalable data processing.
Key FeaturesDescriptionDistributed architectureScalable and fault-tolerantHigh-throughput and low-latencyHandles massive amounts of dataMultiple data formatsSupports JSON, Avro, and ProtobufReal-time data processingEnables real-time analytics capabilities
What is RabbitMQ?
RabbitMQ is a message broker that enables communication between different applications, systems, and services. It provides a flexible and scalable messaging system that can handle high volumes of messages.
Key FeaturesDescriptionMultiple messaging patternsSupports point-to-point, publish-subscribe, and request-responseFlexible routing and queuingEnables efficient message handlingMultiple data formatsSupports JSON, XML, and MessagePackHigh availability and clusteringScalable and fault-tolerant
Both Kafka and RabbitMQ are designed to provide reliable and scalable messaging systems, but they differ in their architecture, design, and use cases. In the next section, we will compare and contrast the key features of Kafka and RabbitMQ.
Kafka vs. RabbitMQ: Key Features
Messaging Models
Kafka and RabbitMQ have different messaging models. Kafka uses a publish-subscribe model, where producers publish messages to topics, and consumers subscribe to these topics to receive messages. This model allows for loose coupling between producers and consumers, making it ideal for large-scale, distributed systems.
RabbitMQ, on the other hand, supports multiple messaging patterns, including point-to-point, publish-subscribe, and request-response.
Data Storage and Throughput
FeatureKafkaRabbitMQStorageLog-based storage systemIn-memory storage (default)ThroughputHigh-throughput processingCan impact throughput and scalability
Kafka's log-based storage system enables long-term data persistence and high-throughput processing. RabbitMQ's in-memory storage can impact throughput and scalability, but it provides options for persistent storage and clustering.
Scalability and Redundancy
Both Kafka and RabbitMQ provide scalability and redundancy features to ensure high availability and fault tolerance.
FeatureKafkaRabbitMQScalabilityPartitioning and replication mechanismsClustering and federation capabilitiesRedundancyHorizontal scaling and node failure handlingSimilar benefits with a different architecture
Language Support and Integration
Kafka and RabbitMQ offer extensive language support and integration capabilities.
LanguageKafkaRabbitMQJavaSupportedSupportedScalaSupportedPythonSupportedSupportedC++SupportedRubySupported.NETSupported
Both message brokers provide APIs and interfaces for seamless integration with various systems and applications, making them suitable for diverse use cases and environments.
Performance Metrics: Kafka vs. RabbitMQ
Message Throughput
Kafka is designed to handle high volumes of messages quickly. It can process millions of messages per second with limited resources. RabbitMQ can also process a large number of messages, but it requires more resources to do so.
Message BrokerTypical ThroughputApache KafkaMillions of messages/secondRabbitMQTens of thousands of messages/second
In general, Kafka is better suited for applications that require processing large volumes of data in real-time.
Message Delivery Latency
Kafka's architecture is designed to minimize latency, making it suitable for real-time data processing and time-sensitive applications. RabbitMQ's latency can vary depending on the configuration and use case. While RabbitMQ offers flexibility in terms of consistency and guarantees, Kafka's design provides an advantage in terms of latency.
Key Takeaways
- Kafka is generally better suited for high-throughput and low-latency applications.
- RabbitMQ can also handle large volumes of messages, but may require more resources to do so.
- The choice between Kafka and RabbitMQ ultimately depends on the specific requirements of your application.
sbb-itb-8abf120
Use Cases for Kafka and RabbitMQ
Kafka and RabbitMQ are both powerful message brokers, but they excel in different scenarios. Understanding the use cases for each broker is crucial in choosing the right tool for your project.
Kafka Use Cases and Adoption
Kafka is ideal for projects that require high-throughput, low-latency, and fault-tolerant data processing. Its ability to handle massive volumes of data makes it a popular choice for:
- Real-time data processing: Kafka's architecture is designed to handle high-velocity data streams, making it suitable for applications that require real-time processing.
- Stream processing: Kafka's stream processing capabilities make it an excellent choice for applications that require continuous data processing.
- Event-driven architecture: Kafka's event-driven architecture makes it an ideal choice for applications that require loosely coupled microservices.
CompanyUse CaseLinkedInReal-time data processingNetflixStream processingUberEvent-driven architecture
RabbitMQ Use Cases and Implementations
RabbitMQ is an excellent choice for projects that require flexible routing, message queuing, and guaranteed message delivery. Its ability to handle complex routing and message queuing makes it a popular choice for:
- Message queuing: RabbitMQ's message queuing capabilities make it an ideal choice for applications that require guaranteed message delivery.
- Microservices architecture: RabbitMQ's flexible routing and message queuing capabilities make it an excellent choice for applications that require communication between microservices.
- IoT platforms: RabbitMQ's ability to handle high volumes of messages and provide flexible routing makes it an ideal choice for IoT platforms.
CompanyUse CaseNASAMessage queuingSiemensMicroservices architectureSoundCloudIoT platforms
By understanding the use cases for Kafka and RabbitMQ, you can choose the right message broker for your project and ensure that your application meets its performance and scalability requirements.
Kafka and RabbitMQ Comparison
Kafka and RabbitMQ are two popular message brokers with different strengths and weaknesses. Here's a comparison of their key features to help you choose the right tool for your project:
Feature Comparison Table
FeatureApache KafkaRabbitMQMessaging ModelDumb broker, smart consumerSmart broker, dumb consumerData StorageDistributed log, persistentTransient, unless configuredMessage OrderingGuaranteed within partitionsGuaranteed within queuesThroughputHigh (millions of messages/sec)Lower (thousands of messages/sec)ScalabilityHorizontal (add more brokers)Vertical (add more resources)RedundancyReplication across brokersMirrored queues, clusteringLanguage SupportJava, Scala, Python, Go, C/C++Java,.NET, Python, Ruby, C, GoProtocolsCustom binary protocolAMQP, MQTT, STOMP, HTTPDelivery GuaranteesAt-least-onceAt-most-once, at-least-onceUse CasesReal-time data processing, stream processing, event-driven architectureMessage queuing, microservices, IoT platforms
This comparison highlights the differences in architecture, performance, and use cases between Kafka and RabbitMQ. By understanding these differences, you can choose the right message broker for your project and ensure it meets its performance and scalability requirements.
Choosing the Right Message Broker
When selecting a message broker, it's crucial to consider your project's specific needs. Both Kafka and RabbitMQ are powerful tools, but they cater to different use cases and requirements. Here are some key factors to consider when choosing between them:
Align Technical Capabilities with Project Needs
Evaluate your project's requirements in terms of throughput, scalability, and reliability. If you need to process large volumes of data in real-time, Kafka might be the better choice. Its distributed architecture and ability to handle high-throughput make it well-suited for stream processing and event-driven architectures.
On the other hand, if you're building a microservices-based system or require flexible routing and reliable message delivery, RabbitMQ might be a better fit. Its smart broker architecture and support for multiple messaging patterns make it an excellent choice for message queuing and IoT platforms.
Consider Language Support and Integration
Think about the programming languages and frameworks you're using in your project. Both Kafka and RabbitMQ offer support for multiple languages, but Kafka has a more extensive range of clients and libraries available. If you're working with Java, Scala, or Python, Kafka might be a more natural choice. However, if you're using .NET, Ruby, or C, RabbitMQ might be a better option.
Evaluate Redundancy and Fault Tolerance
Assess your project's requirements for redundancy and fault tolerance. Kafka's distributed architecture and replication capabilities make it highly resilient to failures, while RabbitMQ's mirrored queues and clustering features provide similar benefits.
FeatureKafkaRabbitMQThroughputHigh (millions of messages/sec)Lower (thousands of messages/sec)ScalabilityHorizontal (add more brokers)Vertical (add more resources)RedundancyReplication across brokersMirrored queues, clusteringLanguage SupportJava, Scala, Python, Go, C/C++Java,.NET, Python, Ruby, C, Go
By carefully evaluating these factors, you can choose the right message broker for your project and ensure it meets its performance and scalability requirements.
FAQs
What is the main difference between Kafka and RabbitMQ?
Kafka and RabbitMQ are both message brokers, but they serve different purposes. Kafka is ideal for handling large volumes of data in real-time, while RabbitMQ excels in low-latency message delivery and complex routing.
Why use Kafka instead of RabbitMQ?
ScenarioKafkaRabbitMQHandling large volumes of data in real-timeIdealNot suitableLow-latency message delivery and complex routingNot idealSuitableProject requires Java, Scala, or PythonMore natural choiceLess natural choice
In summary, Kafka is a better fit for projects that require handling massive amounts of data in real-time, while RabbitMQ is perfect for projects that need low-latency message delivery and complex routing.
Related posts

Top 10 Cross-Platform RMAD Frameworks 2024
In 2024, the demand for cross-platform mobile app development tools is increasing rapidly, driven by the need for efficient and cost-effective solutions that cater to multiple platforms. These frameworks allow developers to create apps that run seamlessly across Android, iOS, web, and desktop platforms using a single codebase.
Here are the top 10 cross-platform RMAD (Rapid Mobile App Development) frameworks for 2024:
- Flutter
- React Native
- Xamarin
- Ionic
- Adobe PhoneGap
- NativeScript
- Appcelerator Titanium
- Sencha
- Corona SDK (Solar2D)
- Qt
Related video from YouTube
Quick Comparison
FrameworkPerformanceDevelopment EfficiencyCommunity & SupportFlutterNative-like with AOT compilationHigh with hot reloadGrowing community, extensive documentationReact NativeNative-like with JavaScript bridgeHigh with reusable codeLarge community, extensive documentationXamarinNative with C# and .NETHigh with C# and .NETLarge community, extensive documentationIonicHybrid with HTML, CSS, JavaScriptHigh with web technologiesLarge community, extensive documentationAdobe PhoneGapHybrid with HTML, CSS, JavaScriptMedium with hybrid approachMedium community, limited documentationNativeScriptNative-like with JavaScript bridgeMedium with JavaScript bridgeMedium community, limited documentationAppcelerator TitaniumHybrid with JavaScript and native modulesMedium with JavaScript and native modulesMedium community, limited documentationSenchaHybrid with HTML, CSS, JavaScriptMedium with web technologiesMedium community, limited documentationCorona SDK (Solar2D)High with Lua scriptingLow with Lua scriptingSmall community, limited documentationQtHigh with C++ and QMLLow with C++ and QMLLarge community, extensive documentation
These frameworks offer a range of features, performance capabilities, and community support, enabling developers to choose the best fit for their project requirements and team expertise.
Cross-Platform App Development Explained
Cross-platform app development is the process of creating mobile applications that can run on multiple platforms, including Android, iOS, and web platforms, using a single codebase. This approach allows developers to write one codebase that can be deployed across various platforms, reducing the need for separate development efforts for each platform.
Advantages of Cross-Platform App Development
By using cross-platform frameworks, developers can:
- Save time and resources: Create apps quickly and efficiently.
- Reduce costs: Businesses can reduce development and maintenance costs.
- Reach a wider audience: Apps can be used by a larger audience, without the need for separate development and maintenance efforts for each platform.
- Improve user experience: Cross-platform apps can provide a consistent user experience across multiple platforms.
- Simplify maintenance: Developers can maintain a single codebase, making it easier to update and fix issues.
Overall, cross-platform app development is an efficient and cost-effective way to create mobile apps that can run on multiple platforms, providing a wider reach and improved user experience.
Choosing the Right Cross-Platform Tool
Selecting the right cross-platform framework is crucial for the success of your mobile app development project. Here are some key factors to consider when evaluating and choosing the right cross-platform tool:
Supported Platforms
PlatformConsiderationsiOSEnsure the framework provides robust support for iOS, including access to native APIs and features.AndroidCheck if the framework offers strong support for Android, including access to native APIs and features.WebConsider if the framework provides support for web platforms, including access to web-specific features.DesktopEvaluate if the framework offers support for desktop platforms, including access to desktop-specific features.
Development Efficiency
FactorConsiderationsProgramming languagesAlign the framework's programming languages with your team's existing skillset to improve development efficiency.ToolingEvaluate the framework's tooling, debugging capabilities, and overall developer experience.
Community Support
AspectConsiderationsUser baseLook for frameworks with a large and active user base.DocumentationEvaluate the framework's documentation and resources.EcosystemConsider the framework's ecosystem of third-party libraries and plugins.
Integration Capabilities
IntegrationConsiderationsExisting systemsAssess the framework's ability to integrate with existing systems.Third-party servicesEvaluate the framework's ability to integrate with third-party services.APIsConsider the framework's ability to integrate with APIs.
Performance and User Experience
AspectConsiderationsRendering capabilitiesEvaluate the framework's rendering capabilities.ResponsivenessAssess the framework's responsiveness across different devices and platforms.User experienceConsider the framework's overall user experience across different devices and platforms.
Scalability and Maintenance
AspectConsiderationsModular architectureEvaluate the framework's modular architecture.Code organizationAssess the framework's code organization.Testing frameworksConsider the framework's testing frameworks.
By carefully evaluating these factors and aligning them with your project requirements, team expertise, and business goals, you can make an informed decision and choose the cross-platform framework that best suits your needs.
1. Ionic

Supported Platforms
Ionic is a popular open-source framework for building cross-platform mobile applications using web development technologies like HTML, CSS, and JavaScript. It supports multiple platforms, including:
PlatformSupportediOS✅Android✅Web✅Desktop✅
Development Efficiency
Ionic allows developers to create apps using familiar web technologies, making it an attractive choice for web developers. It also provides a wide range of pre-built UI components, plugins, and tools to speed up development.
Community & Support
Ionic has a large and active community, with extensive documentation and resources available. It also has a strong ecosystem of third-party libraries and plugins, making it easy to find solutions to common problems.
Integration & Extensibility
Ionic provides access to native device features through plugins, allowing developers to integrate their apps with native APIs and features. It also supports integration with third-party services and APIs.
Performance
Ionic apps are optimized for web performance, making them suitable for small to medium-sized apps. However, they may not be suitable for large and complex applications that require native performance.
2. React Native

Supported Platforms
React Native supports the following platforms:
PlatformSupportediOS✅Android✅Web✅ (with limitations)Windows✅ (with limitations)tvOS✅macOS✅ (with limitations)
Development Efficiency
React Native allows developers to write code in JavaScript and React, enabling them to build native mobile apps for multiple platforms using a single codebase. This approach reduces the need to maintain separate codebases for different platforms.
React Native also provides pre-built components and libraries, making it easier to build user interfaces and integrate various functionalities.
Community & Support
React Native has a large and active community, backed by Facebook and other tech giants. The community contributes to the development of libraries, tools, and resources, making it easier for developers to find solutions to common problems.
React Native also has excellent documentation and learning resources, making it easier for developers to get started and stay up-to-date with the latest features and best practices.
Integration & Extensibility
React Native provides a bridge that allows developers to access native APIs and integrate with native code when necessary. This enables developers to build complex and high-performance applications that can leverage native device features and functionality.
React Native also supports integration with third-party libraries and services, allowing developers to extend the functionality of their applications.
Performance
React Native is designed to deliver native-like performance by rendering components using the same APIs as native applications. This approach ensures that React Native applications feel smooth and responsive, providing a user experience that is indistinguishable from native applications.
However, for applications with complex animations or demanding graphics, native development may still be required to achieve optimal performance.
3. Xamarin
Supported Platforms
Xamarin supports the following platforms:
PlatformSupportediOS✅Android✅Windows✅ (with limitations)macOS✅ (with limitations)
Development Efficiency
Xamarin allows developers to write code in C# and share up to 95% of the codebase across platforms. This approach reduces the need to maintain separate codebases for different platforms.
Xamarin provides a comprehensive set of tools and libraries, making it easier to build user interfaces and integrate various functionalities.
Community & Support
Xamarin has a large and active community, backed by Microsoft. The community contributes to the development of libraries, tools, and resources, making it easier for developers to find solutions to common problems.
Xamarin also has excellent documentation and learning resources, making it easier for developers to get started and stay up-to-date with the latest features and best practices.
Integration & Extensibility
Xamarin provides a bridge that allows developers to access native APIs and integrate with native code when necessary. This enables developers to build complex and high-performance applications that can leverage native device features and functionality.
Xamarin also supports integration with third-party libraries and services, allowing developers to extend the functionality of their applications.
Performance
Xamarin is designed to deliver native-like performance by rendering components using the same APIs as native applications. This approach ensures that Xamarin applications feel smooth and responsive, providing a user experience that is similar to native applications.
However, for applications with complex animations or demanding graphics, native development may still be required to achieve optimal performance.
4. Flutter

Supported Platforms
Flutter supports the following platforms:
PlatformSupportediOS✅Android✅Web✅Desktop (Windows, macOS, Linux)✅
Development Efficiency
Flutter allows developers to write code in Dart and share up to 95% of the codebase across platforms. This approach reduces the need to maintain separate codebases for different platforms.
Flutter provides a comprehensive set of tools and libraries, making it easier to build user interfaces and integrate various functionalities.
Community & Support
Flutter has a large and active community, backed by Google. The community contributes to the development of libraries, tools, and resources, making it easier for developers to find solutions to common problems.
Flutter also has excellent documentation and learning resources, making it easier for developers to get started and stay up-to-date with the latest features and best practices.
Integration & Extensibility
Flutter provides a bridge that allows developers to access native APIs and integrate with native code when necessary. This enables developers to build complex and high-performance applications that can leverage native device features and functionality.
Flutter also supports integration with third-party libraries and services, allowing developers to extend the functionality of their applications.
Performance
Flutter is designed to deliver native-like performance by rendering components using the same APIs as native applications. This approach ensures that Flutter applications feel smooth and responsive, providing a user experience similar to native applications.
Performance Comparison with React Native
FrameworkPerformanceFlutterNative-like performance with Ahead of Time (AOT) compilationReact NativeNative-like performance, but lacks native code compilation
Note: Flutter's performance is exceptional due to its Ahead of Time (AOT) compilation, which is not available in React Native.
5. Adobe PhoneGap

Supported Platforms
PhoneGap supports multiple platforms, including:
PlatformSupportediOS✅Android✅Web✅
Development Efficiency
PhoneGap allows developers to write code in HTML, CSS, and JavaScript, leveraging their existing web development skills. This approach enables rapid development and deployment of cross-platform mobile applications.
Community & Support
PhoneGap has a large and active community, with extensive documentation and resources available. Adobe provides support for PhoneGap, ensuring that developers have access to the necessary tools and expertise to build high-quality applications.
Integration & Extensibility
PhoneGap provides a robust set of APIs and plugins, enabling developers to access native device features and integrate with third-party services. This allows for the creation of complex and high-performance applications that can leverage native device functionality.
Performance
PhoneGap applications are known for their native-like performance, thanks to the use of web technologies and native APIs. This approach ensures that applications feel smooth and responsive, providing a user experience similar to native applications.
sbb-itb-8abf120
6. NativeScript
Supported Platforms
NativeScript supports the following platforms:
PlatformSupportediOS✅Android✅Web❌
Development Efficiency
NativeScript allows developers to write code using familiar web technologies like JavaScript, TypeScript, Angular, and Vue.js. This approach enables efficient cross-platform mobile app development.
NativeScript provides pre-built UI components and plugins, which can accelerate the development process.
Community & Support
NativeScript has a growing community, providing developers with access to resources, documentation, and support.
Integration & Extensibility
NativeScript allows direct access to native APIs and integration with third-party libraries from CocoaPods, Maven, and npm.js without the need for wrappers. This enables developers to create complex and high-performance applications.
Performance
NativeScript applications are compiled directly to native code, resulting in high performance and a native-like user experience. By providing direct access to native APIs, NativeScript allows for fine-tuning and optimization of an app's performance.
While there may be some overhead due to the bridge between JavaScript and native code, NativeScript's approach generally provides better performance compared to hybrid frameworks.
7. Appcelerator Titanium

Supported Platforms
Appcelerator Titanium supports the following platforms:
PlatformSupportediOS✅Android✅BlackBerry✅HTML5✅
Development Efficiency
Appcelerator Titanium allows developers to create native mobile apps using JavaScript. This approach enables efficient cross-platform mobile app development, reducing development time and effort.
Community & Support
Appcelerator Titanium has a large community of developers, providing access to resources, documentation, and support. The framework also offers pre-built UI components and plugins, which can accelerate the development process.
Integration & Extensibility
Appcelerator Titanium allows direct access to native APIs and integration with third-party libraries. This enables developers to create complex and high-performance applications.
Performance
Appcelerator Titanium applications are compiled directly to native code, resulting in high performance and a native-like user experience. The framework's ability to access native APIs and integrate with third-party libraries also enables fine-tuning and optimization of an app's performance.
8. Sencha

Supported Platforms
PlatformSupportediOS✅Android✅Desktop✅HTML5✅
Development Efficiency
Sencha offers a powerful JavaScript framework that helps developers build applications faster and more efficiently. It provides a rich set of web application tools, including IDE plugins, to improve productivity.
Community & Support
Sencha has a large community of developers and provides extensive resources, documentation, and support. The framework also offers pre-built UI components and plugins to accelerate development.
Integration & Extensibility
Sencha allows developers to create cross-platform apps using HTML5 and JavaScript. It provides a flexible layout manager to organize data and content across multiple mobile devices with different OS.
Performance
Sencha's framework offers robust data packages that can consume data from any backend data source. It also provides smooth scrolling and animations for a better mobile web application experience.
9. Corona SDK (Solar2D)

Supported Platforms
PlatformSupportediOS✅Android✅Desktop✅HTML5✅tvOS✅Android TV✅macOS✅Windows✅
Development Efficiency
Corona SDK (Solar2D) is a cross-platform framework that allows developers to create 2D games and apps quickly. It uses Lua scripting language, which is easy to learn and use. With Corona SDK, developers can build apps faster, making it ideal for rapid development and prototyping.
Community & Support
Corona SDK has a large community of developers who contribute to forums, tutorials, and plugins. It also provides extensive resources, documentation, and support, making it easier for developers to get started and resolve any issues they may encounter.
Integration & Extensibility
Corona SDK allows developers to call any native library or API using Solar2D Native, making it easy to extend the framework's capabilities. It also provides a wide range of plugins and APIs that enable developers to manipulate animations, audio, music, texture management, and more.
Performance
Corona SDK is known for its fast rendering capabilities, making it ideal for simple 2D games and apps. It also provides a real-time testing feature that allows developers to see changes instantly, making the development process more efficient.
10. Qt

Supported Platforms
Qt supports a wide range of platforms, including:
PlatformSupportedWindows✅OS X✅Linux✅Android✅iOS✅QNX✅More✅
Development Efficiency
Qt is known for its ease of use and high development efficiency. It provides a comprehensive set of libraries and tools that enable developers to create applications quickly.
Community & Support
Qt has a large and active community of developers who contribute to its development and provide support to other developers. Qt also provides extensive documentation, tutorials, and resources to help developers get started and resolve any issues they may encounter.
Integration & Extensibility
Qt provides a wide range of integration options, including support for various programming languages, such as C++, Java, and Python. It also provides a large set of libraries and APIs that enable developers to extend its capabilities and integrate it with other tools and services.
Performance
Qt is known for its high performance and ability to handle complex applications. Its modular design and optimized libraries enable developers to create applications that are fast and efficient.
Comparing Cross-Platform Tools
When choosing a cross-platform tool, it's essential to compare their features, strengths, and limitations. Here's a comparison of the top 10 cross-platform RMAD frameworks:
Performance Comparison
FrameworkPerformanceReact NativeNative-like performance with JavaScript bridgeFlutterHigh-performance with Dart code compilationXamarinNative performance with C# and.NETIonicHybrid performance with HTML, CSS, and JavaScriptAdobe PhoneGapHybrid performance with HTML, CSS, and JavaScriptNativeScriptNative-like performance with JavaScript bridgeAppcelerator TitaniumHybrid performance with JavaScript and native modulesSenchaHybrid performance with HTML, CSS, and JavaScriptCorona SDK (Solar2D)High-performance with Lua scriptingQtHigh-performance with C++ and QML
Development Efficiency Comparison
FrameworkDevelopment EfficiencyReact NativeHigh development efficiency with reusable codeFlutterHigh development efficiency with hot reload featureXamarinHigh development efficiency with C# and.NETIonicHigh development efficiency with HTML, CSS, and JavaScriptAdobe PhoneGapMedium development efficiency with hybrid approachNativeScriptMedium development efficiency with JavaScript bridgeAppcelerator TitaniumMedium development efficiency with JavaScript and native modulesSenchaMedium development efficiency with HTML, CSS, and JavaScriptCorona SDK (Solar2D)Low development efficiency with Lua scriptingQtLow development efficiency with C++ and QML
Community and Support Comparison
FrameworkCommunity and SupportReact NativeLarge and active community with extensive documentationFlutterGrowing community with extensive documentationXamarinLarge and active community with extensive documentationIonicLarge and active community with extensive documentationAdobe PhoneGapMedium-sized community with limited documentationNativeScriptMedium-sized community with limited documentationAppcelerator TitaniumMedium-sized community with limited documentationSenchaMedium-sized community with limited documentationCorona SDK (Solar2D)Small community with limited documentationQtLarge and active community with extensive documentation
Each framework has its unique strengths and limitations. When choosing a framework, consider factors such as performance, development efficiency, and community support to ensure the best fit for your project.
Integrating Mobile App Tools
When developing mobile apps, integrating various tools and software is crucial for efficient development. The top RMAD frameworks can be seamlessly integrated with other development tools and software, enabling developers to streamline their workflow, increase productivity, and deliver high-quality apps faster.
Code Reusability
Code reusability is a key advantage of cross-platform development. By structuring code in a modular and scalable way, developers can easily integrate platform-specific code with shared business logic. This approach simplifies maintenance, promotes code reuse, and enables efficient enhancements and updates.
Continuous Integration and Deployment
Automating build procedures, tests, and updates is essential for efficient development. Continuous integration and deployment ensure code quality, identify issues early, and enable frequent updates. This optimized workflow allows developers to accelerate development cycles, maintain code quality, and provide new features for a better user experience.
Third-Party Libraries and APIs
Integrating third-party libraries and APIs is common in app development. However, in a cross-platform setting, these integrations can introduce compatibility issues and dependencies that are difficult to manage. It's essential to carefully evaluate and select third-party services that are known for their cross-platform compatibility and robust support.
Integration BenefitsDescriptionCode ReusabilitySimplifies maintenance, promotes code reuse, and enables efficient enhancements and updates.Continuous Integration and DeploymentEnsures code quality, identifies issues early, and enables frequent updates.Third-Party Libraries and APIsEnables developers to leverage existing libraries and APIs, reducing development time and effort.
By integrating mobile app tools effectively, developers can overcome the challenges of cross-platform development, such as performance concerns, limited development tools, and integration problems. By leveraging code reusability, continuous integration and deployment, and carefully selecting third-party libraries and APIs, developers can create high-quality, scalable, and maintainable apps that meet the demands of modern users.
New Trends in Cross-Platform Development
Cross-platform development has seen significant advancements in 2024, driven by the growing demand for efficient and cost-effective app development solutions. Several trends have emerged, shaping the future of cross-platform development.
AI and ML Integration
AI and ML are being increasingly integrated into cross-platform development, enabling developers to create intelligent and adaptive applications. AI-powered tools simplify the development process, automate testing, and improve app performance.
Low-Code and No-Code Development
Low-code and no-code development platforms have gained popularity, allowing developers to build cross-platform apps with minimal coding. These platforms provide visual interfaces, drag-and-drop tools, and pre-built templates, making it easier to develop apps quickly and efficiently.
User Experience (UX) and User Interface (UI)
As users expect seamless and engaging experiences across multiple platforms, the focus on UX and UI has intensified. Cross-platform developers must prioritize creating responsive, intuitive, and visually appealing interfaces that cater to diverse user needs.
Enhanced Security
With the increasing importance of data security, cross-platform development frameworks are incorporating robust security features to protect user data and prevent cyber threats. Developers must prioritize security in their development workflow to ensure the integrity of their apps.
Cloud-Native and Serverless Architecture
Cloud-native and serverless architecture have become more prominent in cross-platform development, enabling developers to build scalable, flexible, and cost-effective apps. These architectures allow for efficient resource allocation, reduced maintenance, and improved app performance.
TrendDescriptionAI and ML IntegrationSimplifies development, automates testing, and improves app performance.Low-Code and No-Code DevelopmentEnables developers to build apps quickly and efficiently with minimal coding.User Experience (UX) and User Interface (UI)Prioritizes creating responsive, intuitive, and visually appealing interfaces.Enhanced SecurityProtects user data and prevents cyber threats with robust security features.Cloud-Native and Serverless ArchitectureEnables scalable, flexible, and cost-effective app development.
By embracing these trends, developers can stay ahead of the curve and create innovative, high-quality cross-platform apps that meet the evolving needs of users.
Conclusion
Choosing the right cross-platform RMAD framework is crucial for efficient development, app performance, and user experience. With the ever-changing landscape of mobile app development, it's essential to stay informed about the latest trends and capabilities of available frameworks.
Framework Comparison
Each framework offers unique strengths and caters to specific project requirements. Here's a brief comparison:
FrameworkKey StrengthsReact NativeLarge community, native performance, web-based skillsetFlutterHighly customizable UI, hot reload, Google's backingXamarinNative UI and performance, C# and.NET ecosystemIonicWeb technologies, extensive plugins, Angular/React/Vue supportNativeScriptTruly native apps, Angular/Vue support, native APIs
Selecting the Right Framework
When choosing a framework, consider factors such as project complexity, team expertise, and long-term goals. Evaluate the framework's ecosystem, community support, and future roadmap to ensure a sustainable and scalable solution.
By leveraging the power of cross-platform RMAD frameworks, developers can streamline development, reduce costs, and deliver exceptional mobile experiences that resonate with users across multiple platforms.
FAQs
What is the best cross-platform mobile development?
There is no single "best" cross-platform mobile development framework. The ideal choice depends on your project needs, team skills, and long-term goals. Here are some popular options:
FrameworkKey StrengthsFlutterCustomizable UI, hot reload, Google backingReact NativeLarge community, native performance, web-based skillsXamarinNative UI and performance, C# and.NET ecosystem
What is a cross-platform framework?
A cross-platform framework is a tool that lets developers create apps that run on multiple platforms (e.g., Android, iOS, Windows) using a single codebase. These frameworks provide libraries, tools, and UI components that abstract platform-specific details, enabling developers to write code once and deploy it across different operating systems with minimal changes.
What are the most popular app development frameworks in 2024?
Here are some popular cross-platform mobile app development frameworks in 2024:
FrameworkDescriptionFlutterGoogle-backed framework with customizable UI and hot reloadReact NativeLarge community and native performance with web-based skillsXamarinNative UI and performance with C# and.NET ecosystemIonicWeb technologies with extensive plugins and Angular/React/Vue supportNativeScriptTruly native apps with Angular/Vue support and native APIs
These frameworks offer robust toolsets, extensive community support, and continuous updates to meet the evolving needs of mobile app development.
Related posts

Ionic Framework Tutorial: Build Your First Mobile App
Ionic is an open-source framework for building hybrid mobile apps using web technologies like HTML, CSS, and JavaScript. This tutorial covers everything you need to get started with Ionic, from setting up your development environment to deploying your app to app stores.
Related video from YouTube
Key Takeaways
- Leverage Web Skills: Build mobile apps for iOS and Android using your existing web development skills.
- Easy to Use: Ionic is designed to be beginner-friendly and easy to learn.
- Single Codebase: Create apps for multiple platforms with a single codebase.
Getting Started
- Install Prerequisites: Node.js, npm, and the Ionic CLI.
- Create a New Project: Use the
ionic startcommand to create a new Ionic project. - Understand the Project Structure: Familiarize yourself with the
srcfolder andapp.module.tsfile.
Building and Testing
- Create New Pages: Use the Ionic generator to create new pages and components.
- Test with
ionic serve: Use theionic servecommand to test your app in a web browser. - Test on Devices: Use Live Reload to test your app on physical devices and emulators.
Advanced Features
- Native Device Features: Access native device capabilities like the camera and GPS using Ionic plugins.
- Photo Gallery: Create a photo gallery by capturing images with the camera plugin.
Deployment
- Prepare for Production: Archive your app and create a new version for submission.
- Publish to App Stores: Submit your app for review, and once approved, publish it to the App Store.
Quick ComparisonPlatforms- iOS- AndroidTechnologies- HTML, CSS, JavaScript- Angular- Native PluginsKey Features- Single Codebase- Native Device Access- App Store Deployment
sbb-itb-8abf120
Setting Up Your Development Environment
To start building a mobile app with Ionic, you need to set up a development environment. This section will guide you through the process of installing the necessary tools and creating a new Ionic project.
Installing Node.js, npm, and the Ionic CLI

To build an Ionic app, you need to install Node.js, npm (Node Package Manager), and the Ionic CLI (Command-Line Interface). Here's how:
ToolDescriptionNode.jsA JavaScript runtime environment that allows you to run JavaScript on the server-side.npmThe package manager for Node.js, used to install and manage dependencies.Ionic CLIA command-line tool that helps you create, build, and manage Ionic projects.
To install Node.js and npm, go to the official Node.js website and download the latest version of Node.js. Once installed, open a terminal or command prompt and run the following commands to verify the installation:
node --version
npm --version
Next, install the Ionic CLI globally using npm:
npm install -g @ionic/cli
This command installs the Ionic CLI and its dependencies.
Creating a New Ionic Project
Now that you have the Ionic CLI installed, you can create a new Ionic project. To do this, run the following command:
ionic start myApp blank
This command creates a new Ionic project called myApp using the blank template. The blank template is a basic template that includes the minimum required files and folders for an Ionic project.
Once the project is created, navigate to the project directory:
cd myApp
Now you can start building your Ionic app. In the next section, we'll explore the project structure and learn how to create new pages and components.
Note: Make sure you have the latest version of Node.js and npm installed on your system. Also, ensure that you have a stable internet connection to download the required dependencies.
Understanding the Project Structure
Now that you've created a new Ionic project, it's essential to understand the project structure and the role of each file and folder. This will help you navigate and work with your project efficiently.
Exploring the src Folder
The src folder is the most important folder in your Ionic project. It contains most of the files and folders that you'll be working on to create your application. The src folder is divided into several subfolders, each with its own specific purpose.
Here's a breakdown of the src folder structure:
Folder/SubfolderDescriptionappHolds the code for your applicationassetsContains static assets like images, fonts, and iconsenvironmentsHolds environment-specific configuration filesthemeContains theme-related files for your application
The app.module.ts File
The app.module.ts file is a crucial file in the Angular-based architecture of Ionic apps. It defines the basic structure and initial navigation of the app. In this file, you define which page will be the first one and the options and navigations of the side menu. You'll also get notified when the platform is ready and your plugins (Cordova and native stuff) are available.
Understanding the project structure is crucial for building and maintaining a successful Ionic app. By familiarizing yourself with the src folder and the app.module.ts file, you'll be able to create new pages, components, and services, and effectively manage your project.
Building a New Page
Creating a new page in your Ionic app is a straightforward process. Ionic provides a generator that can create a new page for you, saving you time and effort.
Using Ionic Components
To create a new page, you can use the Ionic generator by running the following command in your terminal:
ionic generate page contact
This will create a new page called contact with the necessary files and folders. You can then use Ionic's built-in components to create a user-friendly interface. For example, you can use the ion-card component to create a card-based layout:
<ion-card>
  <ion-card-header>
    Contact Us
  </ion-card-header>
  <ion-card-content>
    <!-- Your content here -->
  </ion-card-content>
</ion-card>
Working with Angular Components and Services

In addition to using Ionic components, you can also use Angular components and services to add functionality to your app. For example, you can create a new Angular component to handle form submissions:
import { Component } from '@angular/core';

@Component({
  selector: 'app-contact',
  template: `
    <form (ngSubmit)="submitForm()">
      <!-- Your form fields here -->
    </form>
  `
})
export class ContactComponent {
  submitForm() {
    // Your form submission logic here
  }
}
By using Ionic's generator and built-in components, you can quickly create a new page and add functionality to your app. In the next section, we'll explore how to test your app using ionic serve.
Testing Your App
Testing your app is a crucial step in the development process. It ensures that your app works as expected and provides a good user experience. In this section, we'll explore how to test your app using Ionic's built-in features and tools.
Live Development with ionic serve
The ionic serve command is a powerful tool for live testing and development. It allows you to see the changes you make to your app in real-time, without having to rebuild and redeploy the app. To use ionic serve, simply run the command in your terminal:
ionic serve
This will start a development server that will reload your app automatically whenever you make changes to the code. You can then access your app in a web browser by navigating to http://localhost:8100.
Testing Across Platforms
Testing your app across different platforms is essential to ensure that it works as expected on various devices and operating systems. Ionic provides several tools and features to make this process easier.
Using Live Reload
Live Reload allows you to test your app on a physical device or emulator while making changes to the code. To use Live Reload, you'll need to install the Ionic CLI and native-run, a cross-platform command-line utility for running native binaries on devices and simulators/emulators.
Here's how to use Live Reload for Android and iOS devices:
PlatformCommandAndroidionic cap run android -l --externaliOSionic cap run ios -l --external
By using ionic serve and Live Reload, you can quickly and easily test your app across different platforms and devices, ensuring that it provides a good user experience for all users.
Adding Advanced Features
In this section, we'll explore how to add more advanced features to your Ionic app, including using native device capabilities and creating a photo gallery.
Using Native Device Features
Ionic provides a range of native plugins that allow you to access native device features, such as the camera, GPS, and file system. These plugins are built on top of Apache Cordova and provide a JavaScript interface to native platform APIs.
To use native plugins in your Ionic app, you'll need to install the plugin using npm or yarn, and then import it into your component. For example, to use the camera plugin, you would install it using the following command:
npm install @ionic-native/camera
Then, in your component, you would import the plugin and use its methods to access the camera:
import { Camera } from '@ionic-native/camera/ngx';

constructor(private camera: Camera) { }

takePicture() {
  this.camera.getPicture({
    quality: 90,
    allowEditing: true,
    resultType: CameraResultType.Uri
  }).then(imageData => {
    console.log(imageData);
  }).catch(error => {
    console.error(error);
  });
}
Creating a Photo Gallery
To create a photo gallery in your Ionic app, you'll need to use the camera plugin to capture images, and then display them in a gallery component.
Here's an example of how you might create a photo gallery component:
import { Component, NgZone } from '@angular/core';
import { Camera } from '@ionic-native/camera/ngx';

@Component({
  selector: 'app-photo-gallery',
  template: `
    <ion-grid>
      <ion-row>
        <ion-col *ngFor="let image of images">
          <img [src]="image" />
        </ion-col>
      </ion-row>
    </ion-grid>
  `
})
export class PhotoGalleryComponent {
  images = [];

  constructor(private camera: Camera, private ngZone: NgZone) { }

  takePicture() {
    this.camera.getPicture({
      quality: 90,
      allowEditing: true,
      resultType: CameraResultType.Uri
    }).then(imageData => {
      this.ngZone.run(() => {
        this.images.push(imageData);
      });
    }).catch(error => {
      console.error(error);
    });
  }
}
In this example, we use the camera plugin to capture an image, and then add it to an array of images. We then use an ion-grid component to display the images in a gallery layout.
By using native plugins and components, you can create a more advanced and feature-rich Ionic app that provides a great user experience.
Deploying to App Stores
Preparing for Production
Before publishing your app to the App Store, you need to prepare it for release. Here's what to do:
- Archive the iOS application using Xcode. This creates a
.ipafile, similar to the.apkfile for Android. - Ensure you have an Apple Developers Account (App Store connect Account) and Xcode installed on your Mac.
- Create an app in App Store Connect, providing required information like app name, bundle ID, and app screenshots.
- Select the Archive option in Product Options in XCode, and then select Distribute App to create a new version of the iOS build.
Publishing to App Stores
Once your app is prepared, you can publish it to the App Store. Here's how:
StepAction1Select the App Store Connect distribution method and click Next.2Select the platform and destination for the app upload.3Click Upload and wait for the upload to complete.4Submit the app for review. This may take up to a week, but Apple will review your app and contact you if there are any issues.5If your app is approved, it will be published to the App Store, and you can make it available for download.
By following these steps, you can successfully deploy your Ionic app to the App Store. Remember to test your app thoroughly before submitting it for review to ensure it meets Apple's guidelines and provides a great user experience.
Conclusion and Next Steps
In this Ionic Framework tutorial, we've covered the essential steps to build your first mobile app using Ionic. You've learned how to set up your development environment, create a new Ionic project, understand the project structure, build a new page, test your app, add advanced features, and deploy to app stores.
Key Takeaways
Here are the key concepts we've covered in this tutorial:
ConceptDescriptionIonic componentsUsing Ionic components and Angular components and servicesNative device featuresWorking with native device featuresPhoto galleryCreating a photo galleryApp store deploymentPreparing and publishing your app to the App Store
Continuing Your Ionic Learning
Now that you've completed this tutorial, you're ready to take your Ionic development skills to the next level. Here are some next steps to consider:
- Explore the official Ionic documentation and tutorials for more advanced topics and best practices
- Join the Ionic community to connect with other developers, ask questions, and share your experiences
- Build more complex apps using Ionic to solidify your understanding of the framework
- Stay up-to-date with the latest Ionic releases and features to ensure your apps remain modern and competitive
Related posts

10 Gesture UI Design Tips for iOS & Android Apps
Designing intuitive gesture-based interfaces is crucial for creating user-friendly mobile apps. Here are the key tips:
- Understand User Context: Consider the device form factor, screen size, and tasks users will perform.
- Keep it Simple: Design thumb-friendly interactions and avoid overly complex gestures.
- Provide Visual Cues and Feedback: Use animations, visual hints, and haptic feedback to indicate gestures and confirm actions.
- Accommodate Accessibility: Design gestures that are inclusive and offer customizable options for users with disabilities.
- Test and Refine: Conduct usability testing, gather feedback, and iterate on your design to improve gesture intuitiveness.
- Allow for Customization: Provide settings for users to personalize gesture sensitivity and complexity.
- Ensure Consistency Across Platforms: Maintain consistent gesture recognition, visual cues, and feedback across iOS and Android.
- Use Realistic Responses: Provide feedback that mirrors real-life interactions, balancing animations with realism.
- Indicate Gestures: Use visual cues and animations to educate users about available gestures.
- Educate Users: Provide contextual education, walkthroughs, and progressive disclosure to teach users about gestures.
By following these tips, you can create mobile apps with intuitive and engaging gesture-based interfaces that enhance the user experience.
Comparison CriteriaTap GestureSwipe GesturePinch GestureDescriptionSelect an item or perform an actionNavigate through screens or perform an actionZoom in or out of contentCommon Use CasesSelecting options, opening menusSwiping between screens, deleting itemsZooming maps, imagesAccessibility ConsiderationsEasy for most usersMay be difficult for users with motor impairmentsMay require dexterity
Related video from YouTube
1. Understand User Context
When designing gesture-based interactions for mobile apps, it's crucial to consider the user's situation. Think about the device's size, screen size, and the tasks the user will perform. By understanding the user's context, you can create gestures that meet their needs and improve their overall experience.
Factors to Consider
FactorDescriptionDevice form factorThe size and shape of the deviceScreen sizeThe size of the screen in inches or pixelsTasksThe actions the user will perform in the app
For example, when designing for one-handed operation on larger devices, create gestures that are easy to reach and comfortable to use with one hand. By considering the user's context, you can design gestures that are intuitive, efficient, and enjoyable to use, ultimately leading to a better user experience.
2. Keep it Simple
When designing gesture-based interactions for mobile apps, simplicity is key. Complex gestures can be overwhelming and frustrating for users, leading to a poor user experience.
Design for Thumb-Friendly Interactions
GuidelineDescriptionPlace interactive elementsIn areas easily accessible by the thumbAvoid gestures that requireStretching or contorting the hand
Avoid Overly Complex Gestures
Type of GestureWhy to AvoidMulti-finger gesturesDifficult to perform and rememberPrecise movementsRequire too much accuracy and controlIntricate patternsConfusing and hard to understand
By keeping gestures simple, you can create a more intuitive and user-friendly experience. Remember, the goal of gesture-based interactions is to make it easy and natural for users to interact with your app.
3. Provide Visual Cues and Feedback
When designing gesture-based interactions for mobile apps, it's essential to provide visual cues and feedback to users. This helps them understand the available gestures, learn how to interact with the app, and feel confident and informed about their actions.
Visual Cues for Gesture Discovery
Design for discoverability by providing subtle visual signifiers that help users learn gestures. For example, a slight animation or a visual hint can indicate that a swipe or tap gesture is available.
Visual CueDescriptionAnimationA slight animation that indicates a gesture is availableVisual hintA visual hint that suggests a gesture can be used
Immediate Feedback for Gesture Recognition
Provide immediate and clear feedback when users perform gestures. Visual cues, animations, and haptic feedback can confirm that the gesture was recognized and executed correctly.
Feedback TypeDescriptionVisual cueA visual indication that the gesture was recognizedAnimationAn animation that confirms the gesture was executed correctlyHaptic feedbackA tactile response that confirms the gesture was recognized
By providing visual cues and feedback, you can create a more intuitive and user-friendly experience.
4. Accommodate Accessibility
When designing gesture-based interactions for mobile apps, it's essential to make them accessible to users with disabilities or mobility impairments. This ensures that all users can interact with your app comfortably and confidently.
Design for Inclusivity
Design your gestures to be accessible and usable for users with disabilities. For example, provide alternative methods for users who cannot perform complex gestures, such as those with motor impairments.
Provide Customizable Options
Offer customizable options for users to adjust gesture sensitivity, speed, and complexity to suit their needs. This allows users to personalize their experience and interact with your app in a way that feels comfortable and natural to them.
Follow Platform Guidelines
Follow platform-specific guidelines for accessibility and gesture design. For example, Apple's Human Interface Guidelines and Android's Accessibility Guidelines provide valuable resources for designing accessible and inclusive gestures.
Accessibility Guidelines
PlatformGuidelineAppleHuman Interface GuidelinesAndroidAccessibility Guidelines
By accommodating accessibility and designing for inclusivity, you can create a more user-friendly and engaging experience for all users, regardless of their abilities.
5. Test and Refine
Testing and refining your gesture-based interface is crucial to ensure a seamless user experience. This involves identifying areas for improvement and making necessary adjustments to enhance usability and accessibility.
Conduct Usability Testing
Conduct usability testing with real users to gather feedback on the intuitiveness of gestures. This will help identify any gestures that users find confusing or challenging.
Testing Goals
GoalDescriptionIdentify confusing gesturesFind gestures that users struggle withGather user feedbackCollect feedback on gesture intuitiveness
Iterate and Refine
Iterate on your design based on user feedback and testing results. Refine gestures to make them more intuitive and responsive.
Refinement Steps
1. Analyze testing results: Identify areas for improvement based on user feedback. 2. Refine gestures: Make adjustments to gestures to improve usability and accessibility. 3. Test again: Conduct further testing to ensure refinements are effective.
Document Supported Gestures
Document the supported gestures and their functionalities for future reference. This documentation can be valuable for developers, testers, and even end-users.
Documentation Benefits
BenefitDescriptionConsistencyEnsures consistency across platforms and devicesReferenceProvides a valuable resource for developers, testers, and users
By testing and refining your gesture-based interface, you can create a more user-friendly and engaging experience for your users.
sbb-itb-8abf120
6. Allow for Customization
When designing gesture-based interfaces, it's essential to provide users with customization options to cater to their diverse needs and preferences. This can lead to increased user satisfaction and engagement.
Balancing Customization and Consistency
While customization is crucial, it's equally important to maintain consistency in your app's design and functionality. Too many customization options can overwhelm users, while too few may limit their ability to personalize their experience.
Implementing Customization Options
To effectively implement customization options, consider the following:
GuidelineDescriptionProvide clear settingsMake it easy for users to find and adjust customization options.Offer intuitive interfacesEnsure that customization interfaces are user-friendly and easy to navigate.Test and refineGather user feedback and iterate on customization options to ensure they meet user needs.
By allowing for customization and balancing it with consistency, you can create a more user-friendly and engaging experience for your users.
7. Ensure Consistency Across Platforms
When designing gesture-based interfaces for both iOS and Android apps, it's essential to ensure consistency across platforms. This consistency allows users to switch between devices without relearning different interaction patterns.
Consistency in Gesture Recognition
To provide a seamless user experience, ensure that gestures are recognized consistently across platforms. For example, if a swipe gesture is used to navigate between screens on one platform, use the same motion for the same action on the other platform.
Visual Cues and Feedback
Consistency also extends to visual cues and feedback. Ensure that visual indicators, animations, and responses align with user expectations and provide a cohesive experience.
Consistency Benefits
BenefitDescriptionEasy to useUsers can switch between devices without relearning interactionsConfident usersConsistency helps users feel comfortable and confident in their interactionsSeamless experienceConsistency provides a seamless user experience across platforms
By ensuring consistency across platforms, you can create a more user-friendly and engaging experience for your users.
8. Use Realistic Responses
When designing gesture-based interfaces, it's essential to provide realistic responses to user interactions. This means that the app should respond in a way that mirrors real-life interactions, making the experience more intuitive and natural.
Realistic Feedback
To achieve realistic responses, provide feedback that is consistent with the user's expectations. For example, when a user swipes to delete an item, the item should disappear from the list, and the remaining items should adjust their positions accordingly.
ActionExpected FeedbackSwipe to deleteItem disappears, and remaining items adjust positionsTap to selectItem is highlighted, and relevant actions are displayed
Balance Feedback and Animation
While animations can enhance the user experience, too much animation can detract from the realism of the responses. Strike a balance between providing feedback and overwhelming the user with too much animation.
Consistency is Key
Consistency is crucial in providing realistic responses. Ensure that the app responds consistently to user interactions, even when the user performs the same action multiple times.
By providing realistic responses, you can create a more immersive and engaging experience for your users, making them more likely to return to your app.
9. Indicate Gestures
When designing gesture-based interfaces, it's essential to indicate gestures to users, especially for those who are new to the app or unfamiliar with specific gestures.
Partial Surface Gestures
Partial surface gestures involve prompting users to perform a gesture that affects a portion of the screen. A "hint motion" can be used to show a preview of how sample cards move when performing the action marked by the gesture indicator.
GestureDescriptionSwipeSwipe a card to perform an actionTapTap to select an item
Entire Screen Gestures
Entire screen gestures involve prompting users to perform a gesture that affects the entire screen. In this case, a subtle animation or visual cue can be used to indicate the expected behavior.
GestureDescriptionPinchPinch to zoom in or outTapTap to select an item
By indicating gestures, you can help users learn and understand the app's interaction patterns, reducing the learning curve and improving the overall user experience.
10. Educate Users
Educating users about gestures is crucial to ensure a seamless user experience. When users are familiar with the gestures, they can navigate the app with ease, and it reduces the learning curve. Here are some ways to educate users about gestures:
Contextual Education
Provide subtle visuals or animations to educate users in context. For example, you can display a brief text command that prompts users to perform a gesture and explains the result.
Walkthroughs and Tutorials
Create short tutorials or animations that inform users about the usability of gestures. Keep them concise and focused on 2-3 key points.
Progressive Disclosure
Gradually introduce UI hints as the user interacts with the app. For example, show specific hints when a user reaches a section or feature of your app.
Education MethodDescriptionContextual EducationEducate users in context with subtle visuals or animationsWalkthroughs and TutorialsProvide short tutorials or animations to inform users about gesturesProgressive DisclosureGradually introduce UI hints as the user interacts with the app
By educating users about gestures, you can enhance their overall experience and encourage them to explore your app's features.
Conclusion
Designing an intuitive gesture-based UI requires careful consideration of user context, simplicity, feedback, accessibility, and education. By following these ten design tips, startup founders can create apps that provide a seamless and natural user experience, leading to higher user satisfaction and engagement.
Key Takeaways
Design TipDescriptionUnderstand User ContextConsider device size, screen size, and user tasksKeep it SimpleDesign intuitive gestures that are easy to useProvide Visual Cues and FeedbackHelp users learn and understand gesturesAccommodate AccessibilityMake gestures accessible to users with disabilitiesTest and RefineEnsure gestures are intuitive and responsiveAllow for CustomizationProvide users with options to personalize their experienceEnsure Consistency Across PlatformsProvide a seamless experience across devicesUse Realistic ResponsesProvide feedback that mirrors real-life interactionsIndicate GesturesEducate users about available gesturesEducate UsersProvide contextual education and tutorials
By following these design tips, you can create an app that is both functional and enjoyable to use.
FAQs
What are gestures in mobile apps?
Gestures in mobile apps are physical actions, such as swipes, taps, and more complex hand movements, used to interact with mobile applications. These gestures are designed to be intuitive and natural, allowing users to navigate and engage with apps in a seamless and efficient manner.
Common Gestures:
GestureDescriptionTapSelect an item or perform an actionSwipeNavigate through screens or perform an actionPinchZoom in or out of contentRotateChange the orientation of the screen
By using these gestures, users can easily interact with mobile apps and access various features and functions.
Related posts
Ready to Build Your Product, the Fast, AI-Optimized Way?
Let’s turn your idea into a high-performance product that launches faster and grows stronger.