Insights from Zee Palm's Team
We talk about products, app development, and next-generation apps.

Blockchain in Public Sector Software: Use Cases
Blockchain is transforming how government agencies manage data and deliver services. Its decentralized structure, tamper-proof records, and automated processes address longstanding challenges like data security, fraud, and inefficiency. Unlike older systems that rely on centralized databases vulnerable to breaches, blockchain distributes data across multiple nodes, enhancing security and transparency.
Key benefits include:
- Transparency: Publicly verifiable records improve accountability.
- Data Security: Distributed networks reduce hacking risks.
- Fraud Prevention: Immutable ledgers and smart contracts minimize manipulation.
- Efficiency: Automation reduces manual work and speeds up processes.
However, challenges like regulatory uncertainty, integration with existing systems, and high initial costs require careful planning and expertise. Pilot programs and collaborations with experienced developers can help agencies navigate these hurdles.
Blockchain is already being tested in areas like digital identity, voting, and tax collection, with states like Colorado and Wyoming leading the way. Agencies adopting this technology now will be better equipped to meet future demands for secure, efficient public services.
Top 10 Government Blockchain Use Cases
1. Blockchain Technology in U.S. Public Sector Software
Blockchain is reshaping how U.S. government agencies manage data and deliver services to citizens. By 2018, 18 U.S. states had introduced blockchain-related legislation, with 9 bills successfully passed into law. This growing interest highlights how blockchain's features can tackle persistent challenges in public administration, particularly in areas like transparency, security, and efficiency.
Transparency
One of blockchain's standout features is its ability to create a tamper-proof, publicly verifiable record - a level of transparency that traditional databases simply can't achieve.
Take the Colorado Department of State as an example. Back in 2018, Colorado initiated efforts to explore blockchain for encryption and data integrity in government records. This move was aimed at not only securing public records but also ensuring citizens could independently verify the authenticity of government data.
Such initiatives help foster trust between citizens and government agencies. Whether it's procurement decisions, voting records, or benefit distributions, blockchain ensures that citizens can verify these processes on their own, reinforcing accountability.
Data Security
Traditional systems often rely on centralized databases, making them vulnerable to breaches. Blockchain, on the other hand, distributes data across multiple nodes, significantly reducing the risk of unauthorized access.
With its cryptographic safeguards, blockchain ensures that sensitive information - like health records - remains accessible only to authorized parties. This reduces the chances of data breaches while maintaining privacy. Additionally, blockchain's sequential linking of encrypted data ensures that information cannot be altered without detection.
For government agencies managing sensitive citizen data, such as Social Security numbers or tax records, blockchain's "security-by-design" approach offers a robust solution to protect against unauthorized access and tampering.
Fraud Prevention
Blockchain's immutable ledger ensures that every transaction is permanently recorded, leaving no room for manipulation or erasure.
Smart contracts, another key feature, automate processes like compliance checks and benefit distributions. These self-executing agreements reduce human error and opportunities for corruption. For example, when eligibility criteria are embedded into a smart contract, payments are only released when all conditions are met, eliminating bias or manipulation.
Moreover, blockchain's audit trail makes it easier for government auditors to trace financial transactions and decisions, providing a clear path to identify and address any suspicious activity.
Operational Efficiency
Blockchain also has the potential to streamline government workflows. By automating approvals and generating real-time reports, the technology can reduce bottlenecks and errors. Similar success has been seen in municipal projects abroad, and U.S. agencies could achieve comparable results in areas like land registry management, business licensing, and payroll tax collection.
For example, blockchain-based systems can execute these processes faster and with greater accuracy, saving time and resources. Combined with its enhanced security features, blockchain offers a compelling case for modernizing government operations.
However, implementing blockchain in government settings isn't without its challenges. The complexity of integrating blockchain with existing systems and ensuring compliance with regulations requires specialized expertise. This is where partnerships with experienced developers, such as Zee Palm (https://zeepalm.com), can make a difference. Their proven expertise in blockchain development helps ensure secure, scalable solutions tailored to government needs.
2. Traditional Public Sector Software Solutions
Before blockchain technology entered the scene, U.S. government agencies relied heavily on legacy software to manage tasks like citizen records and tax collection. These systems, built on centralized databases, handle millions of public records each year. However, as digital demands grow, these older systems struggle to keep up. This creates challenges in areas like transparency, security, fraud prevention, and operational efficiency.
Transparency
Traditional systems often fall short when it comes to transparency. Unlike blockchain's tamper-resistant records, legacy systems are plagued by fragmented data silos and delayed information sharing. Citizens frequently encounter disconnected systems that prevent real-time data exchange between agencies. For example, tracking government spending or contract details can be a frustrating process. Delayed disclosures, bureaucratic red tape, and incomplete audit trails make it hard for the public to follow how decisions are made or funds are allocated. Instead of having access to real-time updates, citizens are left relying on periodic reports.
Data Security
Transparency isn’t the only issue - data security is another major weakness of traditional systems. These systems use standard security tools like firewalls, encryption, and access controls to safeguard sensitive information. However, their centralized design creates a single point of failure, which makes them vulnerable to cyberattacks. Each year, the U.S. public sector reports numerous data breaches. These breaches are often linked to outdated software, poor patch management, or stolen credentials. Budget limitations frequently delay critical updates, leaving many agencies stuck with infrastructure that can’t support modern security measures.
Fraud Prevention
Fraud prevention is another area where traditional systems show their limitations. These systems rely on internal controls, segregation of duties, audits, and compliance checks to catch fraudulent activity. Unfortunately, these measures are often reactive, identifying fraud only after it has occurred. Manual processes in these older systems are particularly susceptible to manipulation. For instance, welfare and benefits programs have long struggled with fraudulent claims, partly because they lack integrated, real-time verification tools. Without the ability to cross-check data across agencies, individuals can sometimes receive duplicate benefits from multiple programs.
Operational Efficiency
Traditional systems aim to boost efficiency with tools like workflow automation, electronic document management, and centralized case management platforms. Despite these efforts, inefficiencies persist due to outdated infrastructure and siloed databases. Routine processes - such as issuing business licenses or managing land titles - often require interactions with multiple agencies and involve redundant paperwork. Citizens are frequently asked to provide the same information to different departments, while government employees waste time on repetitive data entry. Because these systems lack interoperability, agencies must rely on expensive custom solutions or manual data transfers to bridge the gaps.
sbb-itb-8abf120
Pros and Cons
When comparing blockchain-based public sector software with traditional systems, the differences are striking. Each approach brings its own set of strengths and challenges that government agencies must carefully evaluate. Below is a breakdown of how these two systems stack up across key criteria:
CriteriaBlockchain-Based SystemsConventional SystemsTransparencyImmutable, auditable records create a full transaction history, making tracking straightforward and reliableIsolated databases and manual record-keeping make it harder to trace data and often delay auditsData SecurityDecentralized networks with cryptographic security reduce vulnerabilities and improve resistance to cyberattacksCentralized systems are more prone to hacking and other disruptionsFraud PreventionTamper-resistant ledgers and automated smart contracts reduce the risk of manipulation and fraudReliance on manual processes opens doors to errors, fraud, and duplicate claimsOperational EfficiencyAutomating tasks like payments and compliance through smart contracts minimizes manual work and speeds up servicesManual workflows and redundant paperwork slow down processes and increase labor demandsImplementation CostsHigh upfront investment can lead to cost savings over time through automation and efficiencyLower initial costs are often outweighed by ongoing administrative expensesScalabilityRequires advanced infrastructure and careful planning to scale for large government applicationsHandles large transaction volumes but may struggle to meet modern digital needsRegulatory FrameworkLegal and compliance requirements for blockchain remain uncertain as regulations continue to developEstablished guidelines and compliance procedures are already in place
Real-world examples highlight these differences. For instance, the Groningen Stadjerspas system and the Emmen Energy Wallet showcased how blockchain enables secure, anonymous participation and rapid citizen engagement. These projects underline blockchain's potential to transform public services while reinforcing the challenges outlined above.
However, adopting blockchain isn't without hurdles. Integration with existing systems, unclear regulatory frameworks, and resistance from staff accustomed to traditional workflows can complicate implementation. Expert guidance is often essential to navigate these complexities effectively.
Scalability is another sticking point. Traditional systems can handle high transaction volumes but often compromise on efficiency and user experience. Blockchain networks, on the other hand, must carefully balance security, decentralization, and performance - an increasingly difficult task as applications grow.
Addressing these challenges calls for a strategic approach. Pilot programs and collaborations with experienced developers, such as those at Zee Palm, can help tackle technical obstacles, ensure compliance, and pave the way for successful implementation.
Conclusion
Blockchain is paving the way for a new era in public services, offering unmatched transparency, security, and efficiency. While traditional systems have served well in the past, they often fall short of meeting today’s demand for accountability and streamlined governance. Blockchain, on the other hand, aligns with these modern expectations, presenting a practical path forward.
The growing support for blockchain across U.S. states reflects its potential, and international success stories, like municipal projects in the Netherlands that serve thousands, showcase its effectiveness in real-world applications. These examples highlight not only the promise of blockchain but also the importance of strategic, well-planned implementation.
Of course, challenges remain. Regulatory uncertainty and the complexity of integrating legacy systems are significant hurdles. To address these, government agencies should start with pilot projects that demonstrate tangible value. Engaging stakeholders early, designing thoughtful pilot programs, and partnering with experienced developers are crucial steps. Collaborating with experts like Zee Palm (https://zeepalm.com), known for their deep experience in blockchain and public sector solutions, can provide the guidance needed to navigate these complexities.
Looking ahead, blockchain's role in modernizing U.S. public sector software is undeniable. Its ability to automate processes with smart contracts, create tamper-proof audit trails, and build citizen trust makes it an essential tool for the future of government operations. Agencies exploring blockchain applications in areas like identity management, benefit distribution, and record keeping today will be best positioned to lead tomorrow.
The evolution of public sector software through blockchain isn’t just a possibility - it’s an unfolding reality. Those who act now with careful planning, expert collaboration, and a focus on citizen needs will set the standard for transparent, secure, and efficient public services.
FAQs
How does blockchain improve transparency and trust in government services?
Blockchain brings a new level of transparency and trust to government services by using a decentralized and tamper-resistant ledger to record transactions and data. This system ensures that records can't be altered or manipulated, boosting accountability while curbing corruption.
When applied to areas like voting systems, land registries, and supply chain tracking, blockchain technology simplifies processes and provides citizens with greater visibility into government operations. At Zee Palm, we develop Web3 and blockchain solutions designed specifically for these purposes, enabling governments to implement secure and trustworthy systems.
What challenges might government agencies encounter when implementing blockchain in their systems?
Government agencies often encounter a range of obstacles when trying to incorporate blockchain into their existing systems. A major sticking point is compatibility with legacy systems. Many public sector platforms were developed long before blockchain was even a consideration, which can create significant technical and operational challenges during the integration process.
Another hurdle is maintaining data privacy and security compliance. While blockchain is known for its secure structure, government agencies must still navigate intricate regulations to ensure sensitive information is handled correctly. On top of that, high implementation costs and the demand for specialized expertise can make adoption difficult, especially for agencies operating with tight budgets or limited technical resources.
Even with these challenges, blockchain has the potential to revolutionize public sector operations by improving transparency, bolstering security, and increasing efficiency - provided it’s implemented with careful planning and strategy.
What are some key public sector applications of blockchain, and how has it improved transparency and security?
Blockchain technology has found its way into various public sector applications, offering improvements in transparency, security, and operational efficiency. Take voting systems, for instance - blockchain has been used to create secure, tamper-resistant election processes, helping to build trust in democratic practices. Similarly, in land registry management, blockchain provides a way to establish unchangeable records of property ownership, cutting down on fraud and ownership disputes.
Another area where blockchain shines is public finance and procurement. By enabling transparent tracking of transactions and contracts, it reduces opportunities for corruption and ensures greater accountability. These examples highlight how blockchain can reshape public sector functions, offering a reliable way to protect sensitive information and promote trust.
Related Blog Posts

RESTful API Design for Enterprise Integration
RESTful APIs are critical for modern businesses to connect software, databases, and services. They enable scalable, secure, and efficient communication across systems, making them essential for industries like finance, healthcare, manufacturing, and e-commerce. For example, a U.S. financial company processes 360 billion API calls monthly, and Netflix uses RESTful APIs to support millions of users through microservices.
Key Takeaways:
- Scalability & Performance: RESTful APIs handle high traffic with stateless communication and lightweight JSON payloads.
- Industry Use Cases:
- Healthcare: Real-time patient data exchange enhances telehealth.
- Manufacturing: IoT integration improves monitoring and predictive maintenance.
- E-commerce: APIs power omnichannel shopping experiences, like eBay's billion-plus listings.
- Design Principles:
- Use clear, logical URIs (
/users/123/orders). - Secure APIs with OAuth 2.0, HTTPS, and role-based access.
- Plan for versioning (
/v1/orders) to ensure smooth updates.
- Use clear, logical URIs (
- Legacy Systems: RESTful APIs outperform older methods like SOAP, offering faster performance, simpler implementation, and lower maintenance costs.
RESTful APIs are reshaping industries by providing reliable, scalable, and secure solutions for enterprise integration. Businesses transitioning from legacy systems to RESTful APIs report reduced costs, faster response times, and improved operational efficiency.
Kickstart Your MuleSoft Journey: What is REST API & Its Role in Digital Transformation | Part 3
Core Design Principles for Enterprise RESTful APIs
Building enterprise-grade RESTful APIs requires more than just basic functionality. These APIs must handle heavy traffic, safeguard sensitive information, and remain dependable under demanding conditions. The architecture of an enterprise API sets it apart from simpler implementations. Let’s dive into the essential design principles that form the backbone of a robust enterprise API.
Resource Modeling and URI Design
Effective resource modeling lays the foundation for maintainable APIs. The structure of URIs should reflect real-world business relationships in a way that’s intuitive for developers. Instead of using ambiguous endpoints like /data/fetch/user123, opt for logical hierarchies such as /users/123/orders or /projects/{id}/tasks/{taskId}/documents.
For example, a consulting and engineering company successfully streamlined its operations by centralizing project data from two separate systems. They designed resources around actual business processes, using URIs like /projects/{id}/tasks/{taskId}/documents. This approach improved data accuracy and simplified workflows across teams.
To keep things consistent, use plural nouns for collections (e.g., /orders) and apply uniform naming conventions throughout the API. A manufacturing ERP system, for instance, uses /inventory/items to represent product data, making it easier for developers to integrate and work with the API.
However, avoid creating overly complex, deeply nested URIs. While something like /users/123/orders/456/items/789/reviews might seem logical, it quickly becomes cumbersome. A flatter structure, such as /reviews/789, paired with query parameters to filter by user or order, can achieve the same functionality while maintaining clarity.
Security and Scalability Implementation
Security is non-negotiable in enterprise environments. Start with multi-layered protection: OAuth 2.0 for authentication, HTTPS to encrypt communication, and role-based access controls tailored to your organizational structure.
A great example of security in action is Mastercard's Tokenization API. It adheres to PCI-DSS standards for secure payment processing, reducing fraud risks while supporting millions of secure transactions worldwide. By embedding security from the outset, this API ensures trust and reliability at scale.
To handle high traffic, implement throttling based on user tiers and design for horizontal scaling. Intelligent caching can further boost performance. RESTful APIs, for example, can handle 2.5 times more concurrent users than legacy systems while delivering response times up to 50% faster.
Netflix’s microservices architecture is a prime example of scalability in action. Built on RESTful APIs, it supports over 200 million subscribers with fault tolerance and rapid scaling. This design ensures minimal downtime during peak traffic events, enabling efficient troubleshooting and seamless scalability.
API Versioning and Documentation
Clear versioning is crucial to avoid integration headaches. URI versioning, like /v1/orders or /v2/users, helps communicate changes and updates clearly. Many enterprises manage multiple API versions simultaneously during migrations, using transformation layers to support older clients while introducing new features.
It’s equally important to establish deprecation policies. Provide advance notice and detailed migration guides to help clients transition smoothly when retiring older API versions. This transparency builds trust with partners who rely on your APIs for critical business functions.
Good documentation is the key to adoption and reducing support overhead. Tools like Swagger or OpenAPI make it easier for developers to onboard and minimize errors during integration. Companies like eBay and Twitter have shown how well-documented APIs can drive ecosystem growth and encourage broader adoption.
Comprehensive documentation should cover endpoint details, request and response examples, authentication methods, error codes, and real-world use cases. Go beyond listing capabilities - illustrate practical integration scenarios and provide troubleshooting tips for common challenges developers might face.
Finally, real-time monitoring and error logging are essential for long-term success. Track metrics like response times, error rates, and usage patterns to identify areas for improvement. This data helps you make informed decisions about scaling, caching, and feature enhancements.
Case Studies: RESTful API Integration in Enterprises
Real-world examples show how RESTful APIs can reshape enterprise operations across various industries. These case studies highlight measurable improvements achieved through effective API integration.
Healthcare: Patient Data Integration Systems
In 2023, a major hospital network faced a critical issue: its telehealth platform couldn't access real-time electronic health records (EHR), leading to delays and tedious manual cross-referencing. By integrating RESTful APIs, the hospital established secure, real-time data exchange between the telehealth platform and its existing EHR system, all while adhering to HIPAA regulations.
This change revolutionized patient care. Medical professionals could now access comprehensive patient histories, lab results, and medication records directly through the telehealth interface. Patients no longer had to repeat their medical details during virtual consultations, and administrative tasks like appointment scheduling and prescription management became far more streamlined.
Retail: Omnichannel Transaction Management
A national retail chain struggled with mismatched inventory data between its online store and physical locations. Customers frequently encountered out-of-stock messages, and store associates lacked up-to-date inventory information.
To fix this, the retailer deployed RESTful APIs to synchronize inventory and customer data across its e-commerce platform, point-of-sale systems, warehouse software, and mobile apps. The results were impressive: mobile load times improved by 38%, cart abandonment rates dropped by 17%, and cross-channel transactions increased by 23%. These upgrades created a seamless shopping experience, allowing customers to reserve items online for in-store pickup or easily return purchases at physical locations.
Manufacturing: IoT and ERP System Integration
A North American manufacturer faced inefficiencies in equipment monitoring due to its outdated SOAP-based ERP system, which couldn’t effectively communicate with modern IoT sensors. Over 18 months, the company transitioned from SOAP to RESTful APIs, running both systems simultaneously with transformation layers to convert XML to JSON.
This migration delivered tangible results: API response times dropped by 40%, annual savings reached $450,000, and a new mobile inventory management app was launched, giving plant managers and technicians real-time access to production data and inventory levels. Additionally, production equipment now automatically transmits performance metrics, temperature readings, and maintenance alerts. By leveraging machine learning, the company can predict equipment failures before they happen, reducing downtime and boosting efficiency.
These examples underscore how strategic API integration can enhance operations and deliver measurable benefits across industries.
sbb-itb-8abf120
RESTful APIs vs Legacy Integration Methods
Enterprises are increasingly moving away from legacy systems in favor of RESTful APIs to achieve better performance and scalability. Understanding the distinctions between these approaches is essential for successful system integration and modernization.
RESTful APIs vs SOAP: Key Differences
When comparing RESTful APIs and SOAP, the differences in performance, data handling, and developer experience stand out. RESTful APIs rely on lightweight JSON payloads, which are 30-70% smaller than SOAP's XML format. This results in up to 70% faster performance and the ability to handle 2.5 times more requests than SOAP. These advantages, combined with a stateless architecture, translate into measurable performance improvements that organizations can leverage.
FeatureRESTful APIsSOAP (Legacy)Payload FormatJSON (lightweight)XML (verbose)PerformanceHigh, stateless, scalableSlower, stateful, less scalableDeveloper ExperienceEasier, widely adoptedComplex, steeper learning curveFlexibilitySuited for microservicesMonolithic, rigidMaintenanceLower overheadHigher maintenance costsAdoptionModern, cloud-nativeLegacy, on-premises
For developers, RESTful APIs are far more approachable. They use standard HTTP methods like GET, POST, PUT, and DELETE, simplifying implementation and reducing the learning curve. RESTful APIs also require less boilerplate code and provide straightforward documentation, making integration and onboarding much faster. SOAP, on the other hand, involves strict XML schemas and the use of complex WSDL files, which increase development effort and require specialized expertise.
The benefits of RESTful APIs are evident in real-world applications. For instance, a large U.S.-based financial services company transitioned to a RESTful API-driven architecture and now manages an astounding 360 billion API calls per month (roughly 12 billion per day, with peaks of 2 million calls per second). This demonstrates the scalability and efficiency that modern APIs can achieve.
These advantages highlight why RESTful APIs are a powerful solution for addressing the limitations of legacy systems.
Legacy System Challenges
Legacy integration systems often fall short of meeting the needs of today's enterprises. These older systems are associated with high maintenance costs, slower performance, and limited scalability. Compatibility issues frequently arise when attempting to connect legacy systems with modern platforms, leading to increased technical debt and making it harder to support new business initiatives or digital transformation efforts.
Security and compliance also pose significant challenges. Legacy systems often rely on outdated protocols, making it difficult to implement modern security measures and leaving organizations vulnerable to cyber threats. Additionally, these systems struggle to adapt to changing regulatory requirements, further complicating compliance efforts. Their rigid design limits flexibility, making it challenging for businesses to respond quickly to evolving market demands or customer needs.
The financial strain of maintaining legacy systems is well-documented. For example, a North American manufacturing company saved $450,000 annually after migrating from SOAP to RESTful APIs, while also achieving a 40% improvement in API response times. These savings stem from reduced infrastructure costs, lower maintenance requirements, and better operational efficiency.
RESTful APIs offer a modern alternative that aligns with current enterprise needs, including mobile applications, IoT integration, and cloud-native systems. Their lightweight, stateless design and reliance on standard web protocols make them especially well-suited for mobile and IoT use cases, which demand efficient, scalable, and real-time data exchange. RESTful APIs also integrate seamlessly with SaaS platforms and distributed systems, making them a cornerstone of digital transformation initiatives.
Migrating from legacy systems to RESTful APIs requires thoughtful planning but delivers clear benefits. Many enterprises adopt a phased approach, running SOAP and REST endpoints concurrently during the transition. Transformation layers are used to convert between XML and JSON formats, ensuring minimal disruption while enabling a gradual shift to modern API architecture. This strategy allows organizations to modernize their systems efficiently while maintaining continuity.
Best Practices from Enterprise API Projects
Enterprise API projects consistently demonstrate that smooth migrations, real-time performance tracking, and strong collaboration with stakeholders are key to achieving success. Companies that adopt these strategies often avoid costly mistakes and deliver better results.
Enterprise API Migration Strategies
A phased rollout with dual endpoint support is one of the most effective ways to manage API migrations. This approach allows businesses to introduce new RESTful endpoints while keeping legacy systems fully operational, minimizing disruptions during the transition.
For example, a major US financial services company successfully consolidated three API management platforms into a single open-source gateway. By employing live configuration switching, they processed 360 billion API calls monthly without any downtime during upgrades. This effort, led by their DevOps and engineering teams, significantly reduced operational complexity and improved scalability.
Transformation layers also play a critical role in API migrations, especially when bridging the gap between legacy systems and modern platforms. These layers can handle tasks like XML-to-JSON data conversions, which streamline communication between systems. A North American manufacturing company used transformation layers to achieve a 40% improvement in response times and save $450,000 annually.
Another best practice is prioritizing high-impact APIs during migration. By focusing on customer-facing APIs and high-volume transactions first, businesses can ensure critical operations remain uninterrupted. Internal systems can then be migrated gradually, reducing risks to revenue-generating activities. This approach requires meticulous planning and thorough testing to protect core business functions.
Backward compatibility is another essential consideration. Maintaining support for existing integrations while introducing new capabilities allows internal teams and partners to migrate at their own pace. Additionally, having clear rollback procedures in place ensures that any issues can be quickly addressed without jeopardizing the system.
Even after a migration is complete, continuous monitoring and optimization are necessary to maintain top-notch API performance.
API Monitoring and Performance Optimization
Real-time analytics and automated error detection are indispensable for keeping enterprise APIs running smoothly at scale. For companies processing billions of API calls each month, monitoring systems that track response times, error rates, throughput, and uptime are critical.
Enterprises that invest in robust monitoring often experience up to a 30% reduction in downtime and a 25% boost in performance. These gains come from the ability to identify and address issues proactively, preventing minor problems from escalating into major outages.
Custom alerts and detailed error logging further enhance performance management. For instance, one company monitoring RESTful APIs for IoT devices reduced latency by 50% and cut data overhead by 45%.
Ongoing performance optimization involves closely watching key metrics. Response times can reveal slow endpoints, while throughput analysis uncovers capacity bottlenecks. Tracking error rates helps pinpoint integration issues or system failures that need immediate attention.
Automated tuning tools and regular performance reviews ensure that APIs continue to meet growing demands. Load testing and capacity planning are especially important for organizations expecting to support millions of users or handle spikes in traffic during peak periods.
Working with Stakeholders on API Projects
Beyond the technical aspects, aligning with stakeholders is essential for sustained API success. Open communication and early involvement help prevent costly rework and ensure the project aligns with business priorities. Many successful companies create collaborative workshops and feedback loops to keep technical teams connected to business needs throughout the development cycle.
Cross-functional collaboration between IT and business stakeholders is critical. When technical teams have a clear understanding of real-world business requirements, they can build APIs that address practical challenges rather than hypothetical ones. This alignment is crucial in complex enterprise environments where multiple departments rely on interconnected systems.
Transparent documentation and regular updates also play a big role in stakeholder engagement. Companies that maintain detailed API documentation and consistent versioning practices find it easier to onboard new partners and manage future integrations. As API programs grow and new endpoints are added, this documentation becomes even more valuable.
Involving stakeholders early in the planning phase helps identify potential issues that technical teams might miss. Business stakeholders often have a deep understanding of data flows and integration points, making their input invaluable for ensuring APIs support complete business processes.
Regular feedback sessions with stakeholders help catch misalignments before they become bigger problems. These touchpoints allow teams to adjust when business needs shift or initial assumptions prove incorrect. Companies that adopt this approach often report higher adoption rates and fewer post-launch changes.
Zee Palm's RESTful API Development Services

With over a decade of experience in enterprise RESTful API development, Zee Palm has successfully completed more than 100 projects, supported by its 13-member team of specialists. They craft secure, scalable API solutions designed to meet the complex demands of modern enterprises, helping businesses navigate digital transformation with confidence. Their expertise is rooted in creating APIs that streamline enterprise integration, ensuring seamless connectivity across systems.
Zee Palm's approach is all about customization. Each API is tailored to the unique needs of the client, leveraging best practices like modular architecture, consistent versioning, and advanced security protocols. This ensures APIs deliver top-tier performance while remaining adaptable to evolving business requirements.
Zee Palm's Enterprise Integration Expertise
Zee Palm prioritizes both security and scalability in its API designs. By implementing cutting-edge measures like OAuth 2.0 authentication, HTTPS encryption, and fine-grained access controls, they ensure API endpoints remain secure. At the same time, they design stateless APIs, use rate limiting, and deploy API gateways to manage traffic efficiently and maintain high availability.
This meticulous approach reduces integration time by up to 60% and cuts costs significantly. The team addresses challenges like legacy system compatibility, data consistency, and performance bottlenecks through phased rollouts, transformation layers (e.g., XML-to-JSON), and parallel endpoint operations.
Long-term usability is another cornerstone of Zee Palm's strategy. They emphasize clear documentation, modular architecture, and consistent versioning to ensure APIs can evolve alongside the client’s business. Ongoing monitoring and performance optimization further support the seamless integration of APIs into growing and changing technological ecosystems.
Industries Served by Zee Palm
Zee Palm’s API solutions cater to a wide range of industries, including healthcare, manufacturing, EdTech, blockchain/Web3, and IoT. Their expertise in these sectors allows them to develop tailored solutions that address specific industry challenges.
In healthcare, Zee Palm has developed APIs that enable real-time patient data exchange and improved care coordination. These solutions comply with HIPAA regulations and support interoperability standards, ensuring secure and efficient handling of sensitive medical data.
For EdTech, Zee Palm has created APIs for e-learning platforms and learning management systems. These tools ensure smooth content delivery, effective user management, and scalability to accommodate large student populations.
In the manufacturing sector, their APIs integrate seamlessly with ERP and IoT systems, enabling real-time data exchange and process automation. Manufacturers benefit from enhanced operational visibility, inventory tracking, and workflow optimization.
Zee Palm’s work in blockchain and Web3 includes APIs that facilitate secure transaction management and decentralized data handling. These solutions meet the unique demands of blockchain applications while maintaining enterprise-grade reliability and performance.
Why Choose Zee Palm for API Development
Zee Palm’s portfolio includes more than 70 satisfied clients, with each project rooted in a deep understanding of industry-specific needs. Their API solutions are designed to align with business goals, delivering measurable benefits such as improved data accuracy, enhanced mobile app performance, streamlined workflows, and increased cross-channel transactions.
The company’s experience spans diverse fields like AI, SaaS, healthcare, EdTech, Web3, and IoT, giving them the expertise to tackle even the most complex enterprise integration challenges. By applying insights gained from past projects, Zee Palm reduces development risks and accelerates deployment timelines, ensuring RESTful APIs play a pivotal role in modern enterprise systems.
FAQs
How do RESTful APIs improve the scalability and performance of enterprise systems compared to older integration methods?
RESTful APIs bring a boost to scalability and performance for enterprise systems by relying on lightweight, stateless communication. Instead of outdated methods, they use standard HTTP protocols, which makes it simpler to scale operations across distributed systems. This approach helps ensure quicker response times and better use of resources.
Another advantage lies in their modular design. Enterprises can add new services or features without needing to revamp the whole system. With support for real-time data exchange and the ability to handle heavy traffic, RESTful APIs offer the adaptability and efficiency that modern businesses depend on to keep up with growth and change.
What are the essential security practices for designing a RESTful API in enterprise applications?
When building a RESTful API for enterprise applications, security should be a top priority to safeguard sensitive information and keep systems running smoothly. Here are some essential practices to keep in mind:
- Authentication and Authorization: Implement robust methods like OAuth 2.0 to ensure only verified users or systems can access the API.
- Data Encryption: Use HTTPS to encrypt data during transmission, and consider encrypting sensitive information stored on servers to add an extra layer of protection.
- Rate Limiting: Set limits on the number of requests a single client can make to prevent abuse and minimize the risk of denial-of-service (DoS) attacks.
- Input Validation: Reduce vulnerabilities like injection attacks by thoroughly validating and sanitizing all incoming data.
Focusing on these strategies helps enterprises create APIs that are secure, dependable, and ready to integrate seamlessly with other systems.
What are the best practices for managing API versioning to ensure smooth enterprise integration and minimal disruption during updates?
To manage API versioning effectively in enterprise settings, it’s crucial to implement strategies that maintain compatibility and reduce downtime. API versioning helps developers and systems handle updates without disrupting existing integrations.
Here are some key practices to consider:
- Use clear version identifiers: Make versioning straightforward by including version numbers in the API URL (e.g.,
/v1/). This approach ensures developers can easily identify and work with the appropriate version. - Maintain backward compatibility: Whenever possible, avoid introducing breaking changes. Instead, phase out outdated features gradually, providing enough time for users to adapt before removing them.
- Communicate changes clearly and early: Offer detailed release notes, migration guides, and timelines to help users transition smoothly to newer versions.
By sticking to these principles, enterprises can update APIs efficiently while minimizing disruptions for users and ensuring smooth system integration.
Related Blog Posts

Debugging SQLite Databases in Mobile Apps
SQLite is widely used for local data storage in mobile apps due to its simplicity and offline functionality. However, debugging SQLite databases can be tricky, especially on mobile platforms like Android and iOS. Here's what you need to know:
- Why Debugging Matters: Ensures data integrity, prevents app crashes, and avoids issues like slow queries or corrupted data.
- Challenges: Limited file access, platform-specific tools, real-time data handling, and strict security policies.
- Tools: Android Studio Database Inspector, ADB commands, third-party libraries like Stetho, and desktop tools like DB Browser for SQLite.
- Best Practices: Regular database inspections, automated testing for CRUD operations and migrations, and expert support for complex issues.
Debugging SQLite databases is crucial for maintaining app performance and user trust. The right tools and methods can help you identify and fix issues efficiently, ensuring a smoother experience for your app users.
Database Inspector - Live Database Tool | Android Studio Tutorial

Tools for SQLite Database Debugging

When it comes to debugging SQLite databases, having the right tools can make all the difference. These tools generally fall into three categories: built-in utilities that are readily available during development, third-party libraries offering web or app-based interfaces, and desktop applications designed for in-depth analysis. Each category brings something unique to the table, making it easier to identify and resolve errors efficiently.
Built-In Debugging Tools
Android Studio Database Inspector is a standout tool for Android developers. It allows you to inspect SQLite databases in real-time while your app is running. You can execute Room DAO and custom SQL queries directly within the IDE, with results displayed instantly in a tabular format. If you're using Room with LiveData or Flow, the tool even updates the UI dynamically. Plus, its query history feature helps you quickly repeat common debugging tasks.
ADB (Android Debug Bridge) commands offer another powerful option for accessing database files on Android devices. By using the run-as command with your app's package name, you can navigate to the app’s private directory. The adb pull command lets you copy database files to your computer for further analysis. This method works with any debuggable app and simplifies file management for use with desktop tools.
Third-Party Debugging Libraries
Android Debug Database provides a user-friendly, web-based interface for database debugging. With this tool, you can view and edit database values, run SQL queries, and even export databases - all without needing root access. Its local server interface makes it easy to inspect your app’s data directly from a web browser.
Stetho, created by Facebook, integrates seamlessly with Chrome Developer Tools. This makes it a great choice for web developers familiar with Chrome’s debugging environment, as it brings SQLite debugging directly into the browser.
SQLScout focuses on delivering a smooth user experience for in-app database browsing and editing. Its graphical interface simplifies complex tasks and supports simultaneous interactions with multiple databases. This makes it particularly useful for apps with more intricate data structures.
These third-party libraries are especially helpful in collaborative settings, such as during QA testing, where quick checks on data integrity are often required.
Desktop Tools for Database Analysis
For more comprehensive database analysis, DB Browser for SQLite is a go-to option. This open-source application works across Windows, macOS, and Linux, offering features like a visual query builder, schema editing, and advanced data import/export capabilities. It’s perfect for handling complex queries and visualizing data.
SQLiteStudio is another excellent desktop tool, known for its flexibility and support for plugins. It ensures smooth performance across various operating systems while providing robust features for database management.
Desktop tools are particularly effective when dealing with large datasets, performing batch operations, comparing schemas, or generating detailed reports. A common workflow involves exporting database files using ADB commands, then analyzing them with these applications for a deeper dive into the data.
As highlighted by developers at Zee Palm, custom scripts and automated toolchains can further streamline debugging workflows. Armed with these tools, developers are well-prepared to tackle the direct debugging techniques discussed next.
Step-by-Step SQLite Database Debugging Methods
Following the tools and challenges previously discussed, here's a practical workflow for debugging SQLite databases. This process involves accessing database files, inspecting them in real time, and exporting them for detailed desktop analysis. These steps transition smoothly from theory to hands-on application.
Accessing Database Files on Mobile Devices
Start by copying your app's database file from internal storage to external storage. Use Android Debug Bridge (ADB) commands with the run-as command. Note that your app must be in debug mode for this to work without rooting the device.
Here’s the command structure:
adb shell 'run-as com.your.package cp databases/yourdb.db /sdcard/yourdb.db'
adb pull /sdcard/yourdb.db
Replace com.your.package with your app's actual package name and yourdb.db with your database filename. This will copy the database to an accessible location and then transfer it to your development machine.
Alternatively, stream the database content using the cat command:
adb shell 'run-as com.your.package cat databases/db-file.db > /sdcard/db-file.db'
If you're using Windows, opt for adb exec-out to avoid line-ending issues that might corrupt the database file.
Once the file is accessible, proceed to live inspection for immediate debugging.
Using Database Inspector for Live Debugging
Run your app in debug mode and open the Database Inspector in Android Studio. Navigate to View > Tool Windows > Database Inspector to access it. The tool detects your running app and lists the available databases.
The interface provides a tree view of your database structure, making it easy to browse tables. You can execute custom SQL queries directly in the query tab, with results displayed in real time. If your app uses Room with observable data types like LiveData or Flow, the app's UI will reflect changes as you modify data.
For apps using Room, you can execute DAO (Data Access Object) queries directly. The inspector identifies your DAOs and lets you test their methods with real parameters. Additionally, the query history feature allows you to quickly repeat frequently used commands, saving time during extended debugging sessions.
When you need deeper insights, export your database for desktop analysis.
Exporting Databases for Desktop Analysis
Use the ADB commands mentioned earlier to extract your database file. Open it with DB Browser for SQLite, a tool available on Windows, macOS, and Linux. This software provides features like visual query building, schema editing, and advanced data import/export options.
To open your database, go to File > Open Database in DB Browser for SQLite and select your exported file. Desktop analysis is especially useful for comparing schemas between app versions, performing bulk data operations, or generating detailed reports on database content and structure.
If your app uses multiple databases, desktop tools allow simultaneous access to all files, which is crucial for troubleshooting synchronization or migration issues.
To maintain data privacy, delete temporary copies from your device's external storage once you're done:
adb shell rm /sdcard/yourdb.db
sbb-itb-8abf120
Common SQLite Debugging Problems and Solutions
When working with SQLite, debugging can sometimes feel like solving a puzzle. Issues like permission restrictions, query errors, or handling multiple databases often crop up. Knowing how to tackle these problems can save you a lot of time and frustration.
Managing Permissions and Device Access
Accessing SQLite databases on mobile devices can be tricky, especially with Android's app sandboxing. This feature protects database files by limiting access to the app’s data directory on non-rooted devices. To navigate these restrictions, make sure your app is built in debug mode. Why? Because the adb run-as command only works when the debuggable flag is enabled in your app's manifest. Also, enable USB debugging in Developer Options to allow ADB to communicate with your device. If file system restrictions block access, consider copying files to external storage before transferring them to your computer for inspection.
Fixing Query and Syntax Errors
Once you’ve resolved access issues, the next hurdle is often SQL syntax errors. These errors are common and usually stem from typos, incorrect table names, or poorly structured SQL statements. Tools like Android Studio's Database Inspector make life easier by flagging errors and providing real-time feedback. To minimize mistakes, use the query history feature to review and refine previous queries. Start with simple queries - like a basic SELECT statement - and gradually add conditions. This step-by-step approach helps pinpoint where things go wrong. And don’t forget to double-check that your queries align with your app’s most recent schema definitions to avoid referencing outdated table or column names.
Debugging Apps with Multiple Databases
Apps using multiple SQLite databases bring their own set of challenges, from schema mismatches to data synchronization issues. When debugging these apps, clear organization is key. Android Studio's Database Inspector lets you choose the target database for your queries, so adopting consistent naming conventions for your databases is crucial. Automated tests can help ensure schema consistency across databases, while exporting databases individually allows for easier comparison and troubleshooting. Tools that highlight schema differences can save you hours of manual work. Creating up-to-date schema diagrams can also clarify each database's role and how they interact. For more advanced cases, consider using database versioning strategies to track changes over time. If things get too complicated, teams like Zee Palm specialize in providing tailored solutions to maintain both data security and performance.
Best Practices for SQLite Database Debugging
Debugging SQLite databases isn’t just about solving problems as they appear - it’s about adopting habits that help you avoid those issues altogether. Leading mobile app development teams stick to consistent practices that catch bugs early and keep databases running smoothly throughout the development process.
Regular Database Debugging
Making database inspections a regular part of your workflow can save you a lot of headaches down the road. Routine debugging helps identify problems like data corruption, inconsistent states, and performance slowdowns early in the process. If you wait until deployment to uncover these issues, fixing them becomes far more costly and time-consuming.
One of the best tools for this is Android Studio’s Database Inspector, which allows live database inspection during development. Teams that incorporate this tool into their daily workflow often see fewer production problems and can resolve issues faster when they do arise. Beyond these regular checks, automated testing adds another layer of protection for your database.
Automated Database Testing
While manual debugging is helpful, automated testing ensures a level of consistency that human efforts can’t always match. In fact, automated testing can reduce production issues by as much as 40%. This method involves creating tests that validate database operations, schema migrations, and data integrity as part of your CI/CD pipeline.
Key areas to focus on include:
- CRUD operations: Ensuring data can be created, read, updated, and deleted without issues.
- Schema migration tests: Verifying that database upgrades don’t damage existing data.
- Constraint and index validation: Confirming data integrity and maintaining performance.
- Edge case and error handling tests: Checking how your app behaves with invalid or unexpected data.
For Android apps, frameworks like JUnit integrate well with Room or SQLiteOpenHelper, allowing you to write tests that simulate database interactions. These tests run automatically with every code update, catching problems before they affect users. When even automated tests can’t resolve complex issues, turning to experts can make all the difference.
Getting Expert Development Support
Some database challenges require specialized expertise, especially when dealing with complex schema migrations, multiple databases, or performance optimization. Expert development teams bring years of experience to the table, offering tailored solutions that improve SQLite performance, optimize queries, and establish robust testing practices.
For instance, teams like Zee Palm provide comprehensive support, including automated testing services as part of their development packages. With more than a decade of industry experience, they focus on quality assurance, CI/CD best practices, and code optimization to ensure your app’s database is reliable and high-performing.
This kind of expert support is particularly valuable when database reliability is crucial to your app’s success. Not only do these professionals resolve immediate issues, but they also share knowledge that strengthens your team’s debugging skills over time. The result? Faster development cycles, fewer production problems, and a more stable app for your users. Investing in expert help can ultimately save time and resources while delivering a better product.
FAQs
What are the best tools for debugging SQLite databases in mobile apps, and how do they compare?
When it comes to debugging SQLite databases in mobile apps, some of the best tools at your disposal include Android Studio's Database Inspector, iOS's Core Data Debugger, and third-party options like DB Browser for SQLite and SQLite Expert. These tools make it easier to inspect, modify, and resolve database issues.
Each tool has its own strengths. For instance, Android Studio's Database Inspector lets you examine app databases in real time directly within the IDE, which is incredibly handy during development. On the iOS side, Core Data Debugger works seamlessly with Xcode, making it ideal for debugging SQLite databases tied to Core Data. Meanwhile, third-party tools such as DB Browser for SQLite offer a cross-platform interface packed with features like running queries and editing schemas.
The tool you choose will depend on your platform, development setup, and the specific debugging features you need.
How can I maintain data integrity and optimize performance when using SQLite in my mobile app?
To ensure data integrity and boost performance when using SQLite in your mobile app, start with a thoughtfully designed database schema. Use transactions to group operations into atomic units, which keeps your data consistent and reduces the risk of errors.
Incorporate indexes to make your queries faster, and regularly run the VACUUM command to clean up fragmentation and reclaim unused space. This keeps your database lean and efficient.
Handle concurrent access with care to avoid conflicts or data corruption, and aim to limit unnecessary database writes whenever possible. For debugging and improving performance, take advantage of tools designed to pinpoint bottlenecks and identify areas for improvement. These steps will help you create a stable and high-performing database for your app.
How can I troubleshoot common SQLite database issues on Android and iOS?
To tackle frequent SQLite database issues on Android and iOS, the first step is to look for database corruption or file access issues. Tools like Android Studio's Database Inspector or SQLite tools available for iOS can help you review the database structure and data for any irregularities.
Turn on verbose logging to pinpoint errors during database operations. This can also help you confirm that schema migrations are being applied properly, preventing compatibility problems between different app versions. Make sure to thoroughly test your SQL queries for any syntax errors and tweak them to boost performance. If the problem is particularly tricky, reaching out to developers experienced in mobile database optimization can provide valuable insights.
Related Blog Posts

Message Brokers in Middleware Integration
Message brokers are software tools that enable distributed systems to communicate efficiently by routing, queuing, and delivering messages. They are essential for middleware integration, allowing diverse applications to exchange data without direct dependencies. By supporting asynchronous communication, message brokers ensure systems function smoothly, even during high traffic or failures.
Key Takeaways:
- Two Messaging Models:
- Point-to-Point (Queue): One producer sends a message to one consumer, ideal for tasks like payment processing.
- Publish/Subscribe (Topic): One producer sends messages to multiple subscribers, suited for real-time updates like notifications.
- Applications: Used in industries like healthcare (EHR integration), IoT (device communication), and SaaS (scalable systems).
- Benefits: Scalability, fault tolerance, asynchronous operations, and reliable message delivery.
- Challenges: Complexity, debugging difficulties, potential latency, and risks of a single point of failure.
Message brokers are vital for modern architectures like microservices and cloud-native environments. They ensure flexibility in communication, enabling businesses to scale and maintain systems efficiently. For tailored solutions, expert teams can simplify implementation and maximize performance.
Demystifying Message-Oriented Middleware: Unlocking Seamless Communication
Core Models and Architecture Patterns in Message Brokers
Message brokers rely on two main models to manage message flow and fulfill business requirements. Understanding these models is key to creating middleware integration solutions that align with specific operational goals.
Point-to-Point Messaging
The point-to-point model uses a queue system where messages are sent from a single producer to one specific consumer. Producers send messages to a queue, where they remain until a consumer retrieves and processes them. Once consumed, the message is removed from the queue, ensuring it is only handled once.
This model is perfect for transactional workflows that demand reliable delivery and strict order. For instance, financial systems use this approach for payment processing, where handling duplicate transactions could lead to significant issues. Similarly, job scheduling systems rely on queues to assign tasks to individual workers, ensuring each task is completed by only one worker.
A standout feature of this model is its ability to balance workloads. By sharing the queue among multiple consumers, it distributes messages efficiently, enabling scalable processing. This is particularly helpful during high-traffic periods when extra processing capacity is needed.
Additionally, its fault-tolerance mechanisms ensure messages assigned to a failed consumer are reassigned, preventing data loss.
Publish/Subscribe Messaging
The publish/subscribe model operates on a topic-based system. Publishers send messages to specific topics, and all subscribers to those topics receive a copy of the message. This creates a one-to-many communication flow, ideal for distributing real-time information across various systems.
This model supports loose coupling - publishers don’t need to know who the subscribers are, and subscribers don’t need to know who the publishers are. This independence allows systems to evolve separately while maintaining communication. For example, if a new service needs to receive certain messages, it can simply subscribe to the relevant topic without modifying existing publishers.
This model thrives in event-driven systems where multiple services need to act simultaneously. Take an e-commerce scenario: when a customer places an order, the order service can publish an "order created" event. The inventory, shipping, and notification services can all subscribe to this topic and act accordingly, all in real time.
Stock trading platforms use this model to broadcast price updates to thousands of traders instantly. Similarly, social media platforms rely on it to send notifications to users in real time.
Integration with Modern Architectures
These messaging models play a critical role in modern architectures, especially in microservices environments, where applications are broken into smaller, independent services. Message brokers allow these services to communicate without direct dependencies, enabling teams to deploy, scale, and maintain services independently. This setup accelerates development cycles and reduces the risk of system-wide failures.
In cloud-native environments, brokers ensure stable communication as containerized services scale dynamically. This capability supports auto-scaling and fault recovery - key features in cloud operations.
For organizations transitioning to the cloud, hybrid architectures leverage brokers to bridge legacy systems with modern cloud services. By translating protocols, brokers ensure seamless integration, making them invaluable for gradual cloud migrations.
Message brokers also excel at concurrent processing, allowing multiple clients to access shared resources without conflicts. This is critical for high-traffic applications that must maintain performance while serving thousands of users.
Architecture PatternCommunication ModelPrimary BenefitBest Use CasePoint-to-PointOne-to-one (queue)Ensures single processingPayment systems, task distributionPublish/SubscribeOne-to-many (topic)Enables real-time updatesEvent notifications, data streamingHub-and-SpokeCentralized brokerSimplifies managementSmall to medium deploymentsMessage BusDistributed brokersSupports scalabilityLarge-scale, geographically dispersed systems
These models provide the foundation for creating flexible architectures that meet a variety of integration needs. They are essential for building high-performance applications capable of adapting to the demands of digital transformation.
For organizations tackling complex integration challenges, expert guidance can make all the difference. Teams like Zee Palm (https://zeepalm.com) specialize in designing middleware solutions tailored to industries such as healthcare, IoT, SaaS, and blockchain. Their expertise ensures businesses can harness the full potential of these communication models.
Pros and Cons of Message Brokers
Message brokers are powerful tools for managing communication in distributed systems, but they come with their own set of challenges. Understanding the benefits and limitations can help teams decide when and how to use them effectively.
Benefits of Message Brokers
One of the biggest advantages of message brokers is scalability. They allow producers and consumers to grow independently, which means you can add more message publishers without worrying about overwhelming the consumers. This is especially useful during traffic spikes or when scaling up your system, as workloads can be distributed across multiple consumers to handle the load efficiently.
Another key benefit is fault tolerance. If a consumer goes offline - whether due to maintenance, failure, or overload - the message broker can temporarily store messages in a queue. This ensures that no data is lost and that operations can resume smoothly once the consumer is back online. Many brokers also offer automatic retries for failed messages, adding an extra layer of reliability.
Asynchronous communication is another strength. By removing the need for immediate responses, message brokers improve responsiveness on the front end. For instance, a payment processing system can accept user requests instantly while handling the actual transaction in the background. This also ties into system decoupling, which allows teams to update individual services without affecting the entire system. It speeds up development and reduces the risk of system-wide failures during updates.
Finally, reliable message delivery is critical in scenarios like financial transactions or medical data processing. With persistence mechanisms that ensure messages are stored until successfully processed, message brokers reduce the risk of data loss - even in high-stakes situations.
Challenges and Limitations
While the benefits are clear, message brokers also introduce complexities that can’t be ignored.
Added complexity is one of the main hurdles. Setting up a message broker involves more than just plugging it into your system. Teams need to configure it correctly, monitor its performance, and possibly learn new tools. This can slow down initial development and require specialized expertise.
Eventual consistency issues are another challenge, especially in distributed systems. For example, if a customer updates their address, it might take time for that information to sync across all connected systems. This delay can lead to temporary discrepancies, such as incorrect billing or order processing.
Debugging difficulties can also arise. When problems occur across multiple services and message queues, traditional debugging methods often fall short. Teams may need specialized tools to trace messages and diagnose issues, which can complicate troubleshooting.
Potential latency is another consideration. Although queuing and routing delays are usually minor, they can add up in real-time applications, potentially impacting performance. For systems that rely on instant responses, this latency could be a dealbreaker.
Lastly, single point of failure concerns are significant in centralized broker architectures. If the broker itself goes down, communication between all connected services halts. While high-availability configurations can reduce this risk, they also increase costs and complexity.
Comparison Table
Here’s a side-by-side look at the key pros and cons:
AspectAdvantagesDisadvantagesScalabilityIndependent scaling of producers and consumersRequires careful capacity planning for brokersFault ToleranceMessage buffering and retry capabilitiesBroker failure can disrupt the entire systemSystem DecouplingIndependent updates for servicesDebugging across services becomes more complexCommunicationSupports asynchronous operationsMay introduce eventual consistency issuesReliabilityEnsures message delivery through persistenceQueuing and routing may add latencyManagementCentralizes tracking and monitoringIncreases operational complexity and overheadIntegrationWorks with diverse protocols and platformsRequires specialized expertise and tools
The choice to use a message broker depends on your system’s needs. For applications handling large volumes of data, requiring fault tolerance, or operating in distributed environments, the benefits often outweigh the challenges. On the other hand, simpler systems with straightforward communication needs might find the added complexity unnecessary.
If your team is weighing these trade-offs, expert advice can make a big difference. Organizations like Zee Palm (https://zeepalm.com) specialize in middleware integration and can help tailor message broker solutions to your specific needs, minimizing complexity while maximizing benefits.
sbb-itb-8abf120
Message Broker Use Cases
Message brokers play a key role in enabling smooth communication across industries like finance, healthcare, and smart technology. By simplifying the integration of complex systems, they help create efficient and dependable operations. Let’s explore how these tools are used in real-world scenarios to enhance performance across different sectors.
Transactional Workflows and Event-Driven Pipelines
Message brokers are crucial for payment systems and e-commerce platforms, ensuring secure, reliable, and orderly message delivery. They prevent delays in one service - such as fraud detection, inventory management, or shipping - from causing disruptions to the entire operation.
By separating data producers (like IoT sensors, mobile apps, or web applications) from consumers (such as analytics engines or storage systems), message brokers enhance scalability and maintain fault-tolerant data processing. This separation ensures that critical transactions are completed, even if a specific service temporarily goes offline. These capabilities are seamlessly integrated into middleware architectures, supporting both point-to-point and publish/subscribe messaging models.
Healthcare and Medical Applications
In healthcare, message brokers facilitate the secure and efficient exchange of critical patient data. They integrate systems like Electronic Health Records (EHR), medical IoT devices, and diagnostic tools. For instance, patient vitals from devices such as heart monitors or blood pressure cuffs are routed through brokers to update EHR systems and dashboards in real time. This ensures consistent data updates, compliance with healthcare standards, and timely decision-making.
AI-powered diagnostic tools also benefit from these data streams by analyzing patient information for predictive alerts and automated insights. This allows healthcare providers to make quick, informed decisions, whether in traditional clinical settings or during telemedicine consultations. By enabling real-time updates, message brokers are transforming healthcare workflows and improving patient outcomes.
IoT and Smart Technology Solutions
In the world of IoT, message brokers act as intermediaries between edge devices and central systems, ensuring reliable, asynchronous communication. For example, in smart home setups, devices like thermostats, security cameras, lighting systems, and door locks communicate through brokers to coordinate their operations seamlessly.
In industrial automation, brokers handle tasks like aggregating sensor data, triggering alerts, and coordinating machine actions. This enables predictive maintenance and optimizes processes. These systems have proven scalability, with some implementations consolidating data from over 150 sources to support both real-time and batch analytics.
To make the most of these technologies, expert guidance is essential. Teams with specialized knowledge in fields like healthcare, IoT, and AI can design integration patterns that maximize the benefits of message broker architectures while keeping complexity in check. At Zee Palm (https://zeepalm.com), we specialize in building scalable, secure, and interoperable middleware solutions that help businesses run more efficiently.
Best Practices for Message Broker Implementation
Getting the most out of a message broker requires a focus on data integrity, security, and scalability. These factors are the backbone of successful middleware integration, ensuring your system performs well even under demanding conditions. Below, we’ll dive into the key practices that help create reliable, secure, and scalable message workflows.
Data Consistency and Accuracy
Maintaining accurate and consistent data across systems is critical. To achieve this, message validation and schema enforcement should be in place. These steps ensure that every application interprets incoming data correctly. Additionally, techniques like idempotent message processing and deduplication help prevent errors such as duplicate entries, while transactional queues ensure operations are completed fully or rolled back if something goes wrong.
For workflows like financial transactions, exactly-once delivery guarantees are non-negotiable. Imagine a payment system where duplicate charges occur due to network retries - this is precisely the kind of problem exactly-once delivery prevents. Brokers with this capability ensure accurate account balances and avoid customer dissatisfaction.
To maintain atomicity across multiple services, especially in distributed systems, protocols like two-phase commit can be invaluable. These protocols help ensure that all parts of a transaction succeed or fail together, even in the face of network disruptions.
When integrating legacy systems with modern platforms, auto-schema mapping and built-in transformations are game-changers. For example, in healthcare, brokers can automatically convert HL7 messages into FHIR format, bridging the gap between older hospital systems and newer cloud-based applications. This ensures data integrity while modernizing operations.
Security and Compliance Requirements
Once data accuracy is addressed, securing your message flows becomes the next priority. End-to-end encryption and strong authentication mechanisms are must-haves, particularly for sensitive data. Using TLS encryption and encrypted queues ensures secure communication channels, which is especially crucial in industries where data breaches can lead to hefty fines and legal troubles.
Role-based access control (RBAC) adds another layer of security, limiting access to message queues based on user roles. For instance, in a healthcare setting, only licensed medical professionals might have access to patient data streams, while administrative staff would be restricted to scheduling or billing information.
For industries like healthcare or finance, compliance with regulations such as HIPAA or GDPR is essential. This means encrypted data transmission, detailed audit logs, and traceable messages. For example, HIPAA mandates that every message containing patient data must be logged from origin to destination, with records of who accessed what and when. GDPR adds the requirement for secure data handling and the ability to delete personal information upon request.
Additional safeguards like network segmentation and continuous monitoring help detect and respond to threats proactively. Isolating broker traffic from general network traffic and monitoring for suspicious activity ensures that potential issues are flagged before they escalate.
Scalability and Reliability Optimization
As your business grows, your message broker infrastructure should grow with it. Horizontal scaling is key here. Brokers that support load balancing across nodes can handle increasing message volumes without bottlenecks. Apache Kafka, for instance, uses partitions and replication to manage high throughput while ensuring fault tolerance through automated failover systems.
To avoid data loss during node failures, message persistence is essential. Configuring brokers to save messages to disk ensures that critical data remains intact even during hardware or network outages. This is particularly important in IoT scenarios, where sensor data may be collected sporadically and must be queued reliably for processing.
Monitoring is another critical component of scalability. Real-time monitoring tools like Prometheus and Grafana provide visibility into metrics such as queue length, message latency, and delivery success rates. Automated alerts can notify your team of issues like message backlogs or failures, allowing for quick resolution.
Finally, concurrent processing capabilities allow brokers to handle multiple message streams simultaneously. This is especially useful in environments like e-commerce, where tasks such as inventory updates, payment processing, and shipping notifications need to run in parallel without delays.
At Zee Palm (https://zeepalm.com), we specialize in helping businesses implement these best practices. Whether you’re working in healthcare, IoT, or AI, our team can guide you through the complexities of message broker integration while ensuring compliance and high performance.
Conclusion
Message brokers play a critical role in creating efficient middleware integration. By enabling teams to update and scale systems independently, they address key challenges like ensuring reliable delivery, maintaining correct message order, and providing fault tolerance. This means that even when network disruptions occur, vital data continues to flow without interruption.
With versatile messaging models - like point-to-point for transactional needs and publish/subscribe for broadcasting events - organizations can customize their integrations to meet specific requirements. As businesses move toward cloud-native systems and microservices, the importance of message brokers grows, especially in supporting event-driven architectures that modernize operations.
Adopting these tools can significantly strengthen integration frameworks. For companies ready to take the leap, collaborating with experienced development teams can make all the difference. At Zee Palm (https://zeepalm.com), we specialize in areas like healthcare, IoT, and custom application development, guiding organizations through the complexities of message broker integration to ensure their systems deliver the performance and reliability they need.
When implemented correctly, message brokers enhance system resilience, simplify maintenance, and provide the flexibility to adapt to shifting business demands. This combination of reliability, performance, and adaptability cements their place as a cornerstone in modern middleware integration.
FAQs
How do message brokers maintain data consistency and accuracy in distributed systems?
Message brokers are essential for maintaining data consistency and accuracy in distributed systems. Acting as intermediaries, they manage communication between various services using methods like message queuing, acknowledgments, and retry mechanisms. These techniques ensure messages are delivered reliably and in the right order.
By decoupling services, message brokers ensure that even if some parts of the system go offline temporarily, the overall system remains consistent. This prevents data loss and guarantees that every service gets the information it needs to operate correctly. Features such as message persistence and transaction support add another layer of reliability, making them indispensable in managing complex systems.
How can message flows be secured while ensuring compliance with regulations like HIPAA and GDPR?
Securing message flows while staying compliant with regulations like HIPAA and GDPR calls for a well-planned approach. One key step is using end-to-end encryption to shield sensitive data as it travels between systems. This ensures that even if intercepted, the data remains unreadable to unauthorized parties.
It's equally important to establish strong access controls, allowing only authorized individuals to view or modify messages. This reduces the risk of internal breaches or accidental mishandling of sensitive information.
To stay on top of compliance, conduct regular system audits. This helps verify that your processes align with regulatory standards. For personal or health-related data, consider employing data anonymization techniques to further protect individual privacy.
Finally, using a dependable message broker with built-in security tools can simplify compliance while maintaining the integrity of your data. It’s a practical way to combine security with operational efficiency.
How can message brokers in cloud-native environments scale effectively to handle growing message volumes without creating bottlenecks?
Scaling message brokers in a cloud-native setup often relies on horizontal scaling - essentially adding more broker instances to share the workload. Many modern brokers incorporate features like partitioning or sharding, which split messages across multiple brokers to enhance performance and efficiency.
Cloud-native tools take this a step further. Features such as auto-scaling, load balancers, and container orchestration platforms like Kubernetes can automatically adjust resources to meet fluctuating demands. To keep everything running smoothly, it's crucial to monitor key metrics like throughput and latency. This helps identify potential bottlenecks and ensures the system scales seamlessly.
Related Blog Posts

Agile for Startups: Budget-Friendly Development
Agile development helps startups save time and money by focusing on small, iterative updates and user feedback. Instead of building a full product upfront, Agile prioritizes delivering functional pieces quickly, reducing the risk of wasted resources. Startups benefit from Agile's ability to control costs, avoid unnecessary features, and adapt to market needs.
Key takeaways:
- Cost control: Agile reduces waste by focusing on validated features, cutting failed feature costs by 50%.
- Faster delivery: Short cycles (sprints) allow for quick MVP launches and early feedback.
- Flexibility: Agile methods like Scrum, Kanban, and Lean help manage resources effectively.
- Budget management: Aligning budgets with sprints ensures financial control and avoids overruns.
For startups, Agile is a practical way to build products efficiently while staying within tight budgets. Tools like monday.com, Jira, and Trello simplify planning and tracking, while practices like automated testing and MVP development keep costs predictable. Partnering with experienced Agile teams, such as Zee Palm, can further streamline the process.
Agile Budgeting versus Traditional Project Budgeting
Top Agile Methodologies for Budget-Friendly Development
Startups looking to keep development costs in check often turn to Agile methodologies like Scrum, Kanban, and Lean. Each of these approaches offers distinct advantages for managing budgets effectively, and understanding their core principles can help you decide which one best fits your project needs. Let’s break down how each methodology supports cost control and faster delivery.
Scrum: Development in Short, Predictable Cycles
Scrum organizes development into sprints - short, fixed-length cycles that typically last 2–4 weeks. This structured approach ensures predictable costs by freezing the scope of work at the start of each sprint. Once a sprint begins, the team focuses exclusively on a defined set of tasks, preventing scope creep, which can lead to wasted resources. In fact, scope creep accounts for an average loss of 11.4% of project budgets.
The product owner plays a pivotal role in prioritizing the project backlog, ensuring that the most valuable features are tackled first. This prioritization, combined with Scrum’s iterative nature, supports the development of a minimum viable product (MVP) early in the process. Regular sprint reviews and retrospectives provide checkpoints to evaluate progress and spending, allowing for mid-project adjustments to stay on track financially.
Kanban: Streamlined Visual Workflows
Kanban focuses on maintaining a continuous workflow rather than adhering to fixed-length cycles. Using visual boards with columns like "To Do", "In Progress", and "Done", Kanban makes it easy to track tasks, spot bottlenecks, and improve team efficiency. A key cost-saving feature is the use of work-in-progress (WIP) limits, which prevent teams from overcommitting and reduce the inefficiencies caused by frequent task-switching.
This method is particularly effective for startups juggling ongoing maintenance with new feature development. By clearly visualizing workflows, Kanban helps teams allocate resources wisely and address inefficiencies before they escalate into costly delays.
Lean: Focus on Value and Waste Reduction
Lean methodology is all about delivering what customers need while cutting out unnecessary steps. Every decision is guided by the principle of maximizing value and minimizing waste. Lean teams regularly assess their processes to identify inefficiencies and eliminate redundant tasks, which naturally helps lower costs over time.
Lean also prioritizes early delivery and fast feedback. By releasing an initial version of your product and refining it based on real-world usage, you can avoid overengineering solutions to problems that may not even exist. Tools like value stream mapping help teams visualize how resources are being used, making it easier to eliminate steps that don’t directly contribute to customer value.
MethodologyBest ForCost Control FeaturesTime to MarketScrumTeams requiring structured workflowsFixed sprint scope and regular reviews2–4 week cyclesKanbanTeams with dynamic prioritiesWIP limits and workflow visualizationContinuous deliveryLeanEfficiency-focused teamsWaste reduction and value-driven decisionsRapid, iterative updates
Agile Practices and Tools for Startups
Agile methods thrive in startups because they help teams move quickly while keeping costs under control. The best startups pair thoughtful planning with automation and strategic product development to make every dollar count.
Sprint Planning and Feature Prioritization
Sprint planning works best when you break your product into small, manageable pieces. For example, instead of tackling an entire messaging system, focus on delivering one feature, like 1-on-1 chat, at a time. This approach ensures your team delivers value quickly and can adapt based on user feedback.
By committing to short cycles - such as delivering one feature per week - you’re forced to prioritize only what matters most. This way, every development hour directly benefits your users.
Tools like monday.com can speed up this process. According to their data, teams using their platform achieve a 28% faster time to market, which translates to significant cost savings. Their AI-powered features identify risks early, helping teams avoid delays.
"monday dev ensures clear alignment between what we're building and market demand. Does it help us move faster? Without a doubt." – Alan Schmoll, Executive VP, Vistra Platform
Other tools like ClickUp and Slack also play a vital role, streamlining feature requests and tracking progress. These platforms help teams maintain efficiency and align their work with tight budgets.
Once you’ve prioritized features, the next step is ensuring quality through integration and testing.
Continuous Integration and Automated Testing
Automated testing is a smart investment for startups aiming to save money. Teams using strong CI/CD (Continuous Integration/Continuous Deployment) pipelines report a 66% reduction in post-release bugs. Fewer bugs mean fewer emergency fixes, less downtime, and more predictable costs.
Continuous integration allows teams to catch and fix issues early, avoiding the chaos of reactive development. Once your testing pipeline is up and running, it works automatically, saving developer time with every release.
These practices lay the groundwork for creating an effective MVP.
Building a Minimum Viable Product (MVP)
When building an MVP, the goal is to validate your core idea, not deliver a fully-featured product. Start with the bare essentials - just enough to demonstrate your product’s primary value. This approach minimizes upfront costs while providing real-world data to guide future decisions.
A successful MVP solves one key problem. Using frameworks like the MoSCoW method (Must have, Should have, Could have, Won’t have) can help you prioritize features based on user impact and technical complexity. This prevents scope creep and keeps costs predictable.
For example, a basic development package - delivering one feature every two weeks with up to three developers - might cost around $3,000 per month. A more robust package, delivering one feature per week with up to five developers, could cost $6,000 per month. Structuring your development this way forces disciplined decision-making and ensures steady progress.
"It's customizable to your needs. It's like water. It'll take its shape and wrap around whatever you need it to do." – Chris Funk, Senior Director of Product Innovation, Zippo
Sticking to a weekly delivery schedule keeps your team focused and allows for regular adjustments based on user feedback. This approach not only maintains momentum but also reduces the risk of costly course corrections later on.
Budget Management in Agile Development
Managing your budget effectively is just as crucial as following Agile's iterative techniques. For startups, this can mean the difference between making the most of every dollar or running into financial trouble. Agile development helps maintain financial control by aligning spending with short, iterative cycles and keeping a close watch on expenses.
Match Budget Cycles with Development Sprints
Aligning your budget with development sprints is a practical way to manage costs. By forecasting sprint expenses and reviewing spending at the end of each cycle, you can spot potential overruns early on. Tools like Jira, Trello, and Asana make this process easier with visual dashboards that track both progress and costs, helping you make informed decisions. Daily stand-ups and retrospectives are also great opportunities to address budget concerns in real time.
To avoid unnecessary expenses, lock the scope of work once a sprint begins. Evaluate any change requests carefully to understand their financial impact. For instance, Hypersense Software demonstrated how daily scrums and regular retrospectives helped them stay on top of their budget throughout a project. With sprint costs under control, you can focus on delivering features that provide immediate value.
Focus on Core Features for Early Releases
Spending wisely often means prioritizing the features that matter most. In Agile, failed features cost 50% less compared to traditional methods because of early validation and iterative delivery. Start with product discovery workshops involving cross-functional teams to identify the features that are truly essential. Using user stories to clarify requirements and keeping a well-organized backlog prevents the temptation to add unnecessary "nice-to-have" features.
For example, if you're building a messaging platform, focus first on basic one-on-one chat functionality. Features like group messaging, file sharing, or video calls can come later. This minimum viable product (MVP) approach allows you to validate ideas quickly and use real user data to guide further development. It also speeds up your time-to-market while conserving resources for future enhancements.
Plan for Unexpected Changes in Your Budget
Agile thrives on flexibility, and your budget should, too. Set aside a contingency buffer to handle unexpected costs. These might include market shifts that require new features, technical challenges that extend timelines, or team changes. For every change request, document and estimate its potential budget impact. A transparent process for handling these requests reduces the risk of overspending.
Subscription-based services can also add financial flexibility. Platforms that allow you to cancel at any time let you pause development if budget constraints arise.
"No hidden contract surprises. Same price and value every month, with the freedom to cancel anytime." – Zee Palm
This flexibility can be a lifesaver when external factors - like delayed funding rounds or sudden market changes - affect your resources. It allows you to adjust your spending as needed, scaling up or down without long-term commitments.
sbb-itb-8abf120
Pros and Cons of Agile for Startups
For startups exploring Agile development, it's crucial to weigh its strengths against its potential hurdles. Agile offers budget-conscious teams a way to adapt quickly to changes while keeping costs under control. However, its challenges must be carefully managed to unlock its full potential. Let’s dive into both sides to see how Agile impacts startup development.
Benefits: Flexibility, Speed, and Cost Efficiency
Flexibility: Agile thrives on adaptability. When market conditions change or user feedback shifts priorities, Agile teams can adjust course without discarding large amounts of completed work. This ability to pivot is a game-changer in the fast-moving startup world.
Cost Efficiency: Agile’s iterative approach helps avoid wasting resources on features that don’t work. By validating ideas early and halting unproductive efforts, startups save money and focus on what matters most.
Speed to Market and Early Feedback: Agile’s sprint cycles and focus on Minimum Viable Products (MVPs) allow startups to deliver working software quickly - sometimes in as little as four weeks. Early releases provide real-world feedback, enabling teams to refine their product without committing excessive resources upfront. This aligns with the MVP strategy, where early insights guide smarter spending decisions.
Challenges: Managing Scope, Discipline, and Stakeholder Demands
Scope Creep: Without strict controls, Agile teams may find themselves adding features mid-sprint, leading to budget overruns. For startups with limited resources, this lack of restraint can be particularly damaging.
Team Discipline: Agile requires consistent practices like daily stand-ups, sprint planning, and retrospectives. Skipping these steps can cause projects to lose focus, derail timelines, and exceed budgets.
Prioritization Struggles: Startups must constantly decide which features to tackle first. With limited resources, prioritizing high-impact user stories becomes a critical - and often challenging - skill.
Stakeholder Involvement: Agile depends on regular feedback from stakeholders and product owners. For startup founders juggling multiple roles, staying actively involved in the process can be difficult, potentially delaying decisions and slowing progress.
"Startups need speed; even a one-week delay can be critical. Agile must be rigorously paced to avoid lengthy cycles that hinder market responsiveness."
- Zee Palm
This insight highlights that even Agile, with its focus on speed, may sometimes feel too slow for startups operating in ultra-competitive markets. Many teams experiment with strategies to further accelerate delivery cycles.
Balancing Agile's Benefits and Challenges
Here’s a side-by-side comparison of how Agile’s strengths and weaknesses play out for startups:
BenefitsChallengesAdapts easily to changing requirementsRisk of scope creep without strong controlsFaster delivery through iterative releasesRequires disciplined adherence to Agile practicesSaves money by validating ideas earlyDemands sharp prioritization of resourcesMinimizes risk of building unnecessary featuresNeeds consistent stakeholder involvementCuts costs on failed features by 50% compared to traditional methodsMay feel slow for startups in competitive marketsEnables real-time budget adjustmentsRisks inconsistency across sprints without proper oversight
For startups, understanding these dynamics is essential. Addressing challenges like scope creep, discipline, and prioritization head-on can help teams make the most of Agile’s strengths. By doing so, startups can deliver high-quality products on time and within budget.
Zee Palm's Agile Development Services
For startups on a tight budget, Zee Palm offers Agile development services designed to deliver results without breaking the bank. By leveraging Agile's ability to control costs - like minimizing scope creep and avoiding budget blowouts - Zee Palm ensures startups can enjoy the fast-paced delivery and flexibility that make Agile so effective.
Why Choose Zee Palm for Agile Development?
With over a decade of experience, 100+ completed projects, and 70+ happy clients, Zee Palm knows the unique challenges startups face. Their subscription-based model is tailored to address these needs, offering two plans: Basic, which delivers one feature every two weeks, and Standard, which delivers weekly. This approach is a game-changer for startups operating in highly competitive markets, where even a short delay can have significant consequences.
Here’s a snapshot of their pricing:
- Basic Plan: $3,000/month, ideal for bootstrapped startups.
- Standard Plan: $6,000/month, designed for seed-stage companies.
- Enterprise Plan: Starting at $15,000/month, for Series A+ startups with more complex requirements.
Zee Palm’s track record speaks for itself. In just a week, they successfully delivered key features like Profile Management for one app and Web3 Wallet integration for another. This rapid, cost-conscious delivery is a lifeline for startups that need immediate results.
How Zee Palm Helps Startups Get More Value
Zee Palm builds on Agile principles to maximize value for startups. Their scalable, cross-functional teams adapt to the demands of your product without inflating costs. This eliminates the need for startups to hire expensive senior developers or project managers while still providing access to top-tier expertise.
Their "first feature free" trial lets startups test their services risk-free for a week, ensuring there’s no financial commitment until they’re confident in Zee Palm’s capabilities. Transparency is a cornerstone of their process, with clear change request workflows and detailed backlogs that keep projects focused and budgets in check.
Quality is baked into their system. Automated linting and clean code practices ensure that delivered features meet high standards, and active subscribers get bug fixes at no additional cost. This commitment to quality and cost-efficiency sets Zee Palm apart.
Clients consistently praise their work. Tyler Smith shared:
"I've hired Zubair and worked with him many times, and I can't recommend him enough. He's been phenomenal in the work that he's provided. I haven't found another Flutter developer that matches his skills, his speed, and his professionalism."
Kevin Goldstein emphasized their technical expertise:
"Zubair continues to do excellent work on our Flutter-based app. His integration experience with Twilio, Google Firebase, and RevenueCat has been very beneficial."
For startups grappling with the challenges of Agile development, Zee Palm offers a model that balances structure with flexibility, ensuring projects stay on track while delivering the adaptability Agile is known for.
Conclusion
Agile development has proven to be a game-changer for startups operating on tight budgets. By cutting failed feature costs by 50% and reducing losses from scope creep by 11.4%, Agile's iterative approach and focus on early validation help transform spending into smarter, more strategic investments. This methodology prioritizes essential features, facilitates rapid MVP launches, and incorporates user feedback before committing to unnecessary expenses.
Key Takeaways
Startups that embrace Agile benefit from its cost-saving structure and efficient resource allocation. Through sprint planning, scope management, and ongoing monitoring, Agile ensures that every dollar spent delivers measurable value. Additionally, Agile management tools provide real-time insights into progress and costs, allowing for quick adjustments to avoid budget overruns.
To fully capitalize on these benefits, startups should consider partnering with experts who can seamlessly implement Agile principles. Such partnerships eliminate the trial-and-error phase that often leads to costly mistakes. For instance, Zee Palm offers a subscription-based model starting at $3,000 per month, showcasing how expert guidance can maximize returns while minimizing financial risks.
By focusing on disciplined sprint planning and validating features at every step, startups can ensure that their budgets directly contribute to market success. Aligning budget cycles with development sprints and prioritizing features strategically creates a clear path to efficient product development. When paired with experienced Agile partners, startups can unlock a powerful formula for building successful products.
In today’s competitive startup environment, Agile development provides the speed, flexibility, and cost control necessary to thrive. With the right approach and expert collaboration, startups can turn financial constraints into strategic opportunities, delivering meaningful value quickly and efficiently.
FAQs
How can Agile development help startups stay within budget?
Agile development helps startups manage their budgets effectively by emphasizing the delivery of high-priority features in smaller, more manageable chunks. This method reduces waste, ensures resources are used wisely, and allows teams to make quick adjustments based on real-time feedback.
By focusing on adaptability and steady progress, startups can sidestep overspending on features that may not add value. Instead, they can channel their efforts into creating meaningful solutions for their users. With the right team in place, Agile transforms limited budgets into opportunities to achieve smart and impactful growth.
What are the main differences between Scrum, Kanban, and Lean for startups aiming to stay within budget?
Scrum, Kanban, and Lean are three Agile methodologies that can be game-changers for budget-conscious startups. Here’s how each stands out:
- Scrum breaks down work into short, time-boxed sprints. This structured approach is perfect for teams that thrive on routine and regular progress reviews.
- Kanban focuses on visualizing workflows and limiting tasks in progress. This helps teams work more efficiently and avoid bottlenecks.
- Lean is all about cutting out waste and focusing on what adds value. It’s a great fit for startups aiming to streamline their processes and keep customer needs front and center.
At Zee Palm, we tailor these methodologies to fit your unique project requirements. By combining streamlined workflows with fewer meetings, we deliver high-quality, cost-effective development that meets your goals.
How can a startup choose the right Agile methodology for their project?
Choosing the right Agile methodology hinges on your startup's goals, team dynamics, and the scope of your project. For instance, if your team prioritizes flexibility and quick iterations, Scrum or Kanban could be a perfect match. However, if your main objective is to roll out a minimum viable product (MVP) as swiftly as possible, embracing Lean Agile principles might be the smarter route.
At Zee Palm, our seasoned developers excel in fields like AI, SaaS, and custom app development. We work closely with startups to align their Agile strategies with their unique project demands. By taking the time to understand your priorities and limitations, we can help you choose a methodology that boosts productivity while keeping costs under control.
Related Blog Posts

Checklist for CCPA Compliance in SaaS
If your SaaS business handles data from California residents, complying with the California Consumer Privacy Act (CCPA) is mandatory. The law grants consumers rights like knowing what personal data is collected, requesting its deletion, and opting out of its sale. Non-compliance risks fines of up to $7,500 per violation, reputational damage, and lawsuits.
Here’s how to ensure compliance:
- Check if CCPA applies: Does your business exceed $26.6M in annual revenue, process data for 100,000+ California residents, or earn 50%+ of revenue from selling data?
- Map your data: Understand where personal data is collected, stored, shared, and processed.
- Create a privacy policy: Clearly explain data collection, sharing, and opt-out options.
- Handle consumer requests: Set up systems to respond within 45 days to data access, deletion, or opt-out requests.
- Secure data: Use encryption, access controls, and audit logs to protect personal information.
- Monitor vendors: Ensure third-party partners comply with CCPA standards through agreements and regular reviews.
- Train employees: Equip your team to handle data responsibly and recognize CCPA-related requests.
- Conduct regular reviews: Update policies, processes, and vendor agreements as your business grows or regulations change.
Starting in 2026, additional requirements like annual cybersecurity audits will apply to larger companies. Proactively preparing now can save time and resources later.
How Does CCPA Affect SaaS Data Privacy Regulations? - The SaaS Pros Breakdown
Check if CCPA Applies to Your SaaS Business
Before diving into compliance efforts, it's crucial to determine whether the California Consumer Privacy Act (CCPA) applies to your SaaS business. Since the law targets companies that meet specific thresholds, this evaluation can help you avoid unnecessary work or, worse, hefty penalties for non-compliance.
CCPA Requirements and Thresholds
To figure out if the CCPA applies, start by assessing your business against three key criteria. These thresholds focus on companies that handle large amounts of personal data or generate significant revenue.
1. Annual Gross Revenue: If your SaaS business has a global annual gross revenue exceeding $26,625,000 (adjusted for inflation in 2025), the CCPA applies. This includes revenue from all sources, not just California-specific operations.
2. Data Volume: The law covers businesses that process personal information from at least 100,000 California residents or households annually. This could include website visitors, app users, or email subscribers. For example, if your site gets 10,000 monthly visitors from California, that adds up to 120,000 annually - easily meeting this threshold.
3. Data Monetization: If 50% or more of your annual revenue comes from selling or sharing personal data - such as email lists, behavioral advertising, or third-party data sharing - the CCPA applies.
CCPA Applicability Criteria (2025)Threshold/RequirementDetailsAnnual Gross Revenue$26,625,000+Includes global revenue, all sources Data Volume100,000+ CA residents/householdsCovers website visitors, app users, employees Revenue from Selling/Sharing Data50%+ of annual revenueIncludes data sales, behavioral ads, third-party sharing
Early-stage SaaS startups often fall below these thresholds. However, businesses with high web traffic, large subscriber lists, or a significant California user base may qualify even with modest revenues. Sectors like HealthTech, FinTech, and EdTech, which handle sensitive personal data, are particularly likely to be affected.
Once you've determined your threshold status, it's time to examine how and where you collect customer data.
Review Customer Location and Data Collection
If your SaaS business serves California residents, it's essential to understand your data collection practices and where your users are located. The CCPA specifically protects California residents, so even if your headquarters is elsewhere, you must comply if you handle data from California consumers.
Start by auditing your data collection points. These might include:
- Website forms and landing pages
- Mobile app registrations
- Customer support interactions
- Marketing campaigns
- Third-party integrations
Remember, under the CCPA, "personal information" is a broad category. It includes names, email addresses, IP addresses, device IDs, payment details, and even behavioral data like browsing history or app usage.
To identify California users, use tools like IP analysis, billing address tracking, or geolocation. Many SaaS companies are surprised to find they have more California users than initially estimated.
Once you know where your data comes from, map out its flow - from collection to storage, processing, and sharing with vendors or partners. This step is critical for understanding your compliance obligations.
If your business is nearing the CCPA thresholds, don't wait. Setting up compliance systems early is far easier than rushing to implement them after you've crossed the line. Partnering with experienced professionals, like Zee Palm, can simplify the process.
Finally, make it a habit to review your data collection practices regularly - at least once a year. If your business is growing quickly or undergoing significant changes, more frequent reviews may be necessary to stay compliant as your user base evolves.
Set Up Your CCPA Compliance System
If the California Consumer Privacy Act (CCPA) applies to your SaaS business, it’s time to establish a compliance system. This involves creating processes to handle consumer rights requests, mapping personal data across your platform, and drafting a privacy policy that meets the law’s requirements. Taking a structured approach not only ensures you meet legal standards but also helps avoid penalties of up to $7,500 per violation.
Handle Consumer Rights Requests
Make sure consumers can easily exercise their rights under CCPA. Your platform should offer clear, accessible channels for submitting requests.
Start by setting up multiple ways for users to reach you. Options like online forms, dedicated email addresses, or toll-free phone numbers work well. Place these links or details prominently - such as in your privacy policy footer or account settings - so users don’t have to hunt for them.
Under CCPA, you’re required to respond to requests within 45 days. For complex cases, you can extend this by another 45 days, but failing to meet these deadlines can lead to regulatory consequences and harm your reputation.
As your user base grows, manually processing requests becomes impractical. Automating these processes can save time and reduce errors. For instance, systems that automatically locate and compile user data or process deletion requests across databases can handle higher volumes efficiently.
Keep detailed records of all requests. Logs should include the date of receipt, the type of request, the actions taken, and the response date. These records need to be securely stored and readily available for audits or regulatory reviews. Proper documentation not only demonstrates compliance but also protects your business during investigations.
If your SaaS product handles sensitive information - like in HealthTech, FinTech, or EdTech - extra care is essential. For instance, a HealthTech company successfully implemented automated workflows for privacy requests, enabling them to meet the 45-day response requirement while maintaining compliance. This approach not only mitigated legal risks but also boosted customer trust.
Once your process for handling requests is in place, focus on mapping your data flows to maintain a comprehensive compliance framework.
Map All Personal Data in Your System
To manage and protect personal data effectively, you need a complete map of where it resides in your systems. Without this, compliance becomes nearly impossible.
Start by documenting how data flows through your company - from collection to storage, processing, and sharing. For each type of personal information, identify its source, where it’s stored, how it’s processed, and whether it’s shared with third parties. This includes both internal systems and external vendors.
Pay attention to data retention policies. How long do you store different types of personal information? Some data may be kept indefinitely, while others should be deleted after a set period. Knowing these timelines helps you handle deletion requests accurately and demonstrates strong data management practices.
If you work with third-party vendors, review how they handle the data you share with them. Your contracts should include CCPA-compliant clauses, and you’ll need to verify their compliance regularly. A vendor’s non-compliance can put your business at risk.
For larger or more complex systems, consider using tools designed for data mapping. These tools can scan your systems, identify personal data, and create visual representations of data flows. While smaller SaaS companies might manage this manually, automated tools become necessary as your operations grow.
Keep your data map updated. Revisit it at least once a year or whenever you introduce new systems, integrations, or data collection methods. Treat it as a living document that evolves with your business.
With your data mapping complete, you can move on to creating a privacy policy that aligns with CCPA requirements.
Write a CCPA-Compliant Privacy Policy
Your privacy policy is a key document that outlines your data practices to both consumers and regulators. To comply with CCPA, it must clearly explain what personal information you collect, why you collect it, and how you share it.
A compliant privacy policy should include:
- Categories of personal information collected (e.g., identifiers, commercial data, browsing activity)
- Business purposes for collecting the information
- Categories of third parties with whom the data is shared
- Clear opt-out mechanisms, including a prominent "Do Not Sell My Personal Information" link - even if you don’t sell data
Write the policy in plain English. Avoid legal jargon and complex language that could confuse readers. The goal is to make your practices transparent and easy to understand. Use headers and bullet points to break up dense sections and organize the information logically.
Be specific about your data practices. For example, instead of saying, "We may share information with partners", detail what types of data you share, with which kinds of partners, and why. This level of clarity builds trust and shows your commitment to compliance.
Update your privacy policy annually or whenever your data practices change. New features, integrations, or business models often involve new data collection or sharing methods. Keeping your policy up to date ensures it accurately reflects your operations.
Finally, make the policy easy to find. Include links to it in your website’s footer, display it during account sign-up, and notify users whenever significant changes are made.
If your SaaS business operates in a highly regulated industry or has a complex data ecosystem, working with experts like Zee Palm can help. They specialize in compliance-driven solutions for sectors like healthcare, EdTech, and AI, ensuring your privacy standards remain intact while your product continues to evolve.
sbb-itb-8abf120
Secure Data and Manage Vendors
The California Consumer Privacy Act (CCPA) sets clear expectations for data security, requiring SaaS companies to implement "reasonable security procedures and practices" to safeguard personal information from unauthorized access, destruction, misuse, or disclosure. Building on earlier steps like data mapping and consumer rights protocols, it's crucial to establish layered safeguards - technical, administrative, and physical.
Your security framework must address not only your internal systems but also the third-party vendors you rely on. A breach at any point in this chain could lead to penalties and tarnish your reputation.
Set Up Data Security Measures
Effective data security begins with knowing what you're protecting. Use your data map to pinpoint the personal information requiring protection.
- Encryption: Encrypt all personal data, whether it's at rest or in transit. Any data exchanged between systems - whether internally or with third parties - should travel through encrypted channels.
- Access Controls: Limit data access to authorized personnel only. Use multi-factor authentication for sensitive systems and apply role-based permissions to ensure employees access only the data they need for their roles.
- Audit Logs: Keep detailed logs of who accesses data and when. These logs help detect suspicious activity, demonstrate compliance during audits, and provide evidence in case of a breach. Automated tools can flag unusual patterns, such as large data downloads outside regular hours.
For industries like healthcare, finance, or education, extra precautions are often necessary. For instance, an EdTech SaaS provider implemented a multi-layered security strategy that included encrypting student data, conducting annual risk assessments, and using automated tools to monitor vendor compliance. This approach not only helped them pass a CCPA audit but also built trust with educational institutions.
- Employee Training: Since human error is a major risk, regular training is essential. Cover topics like data privacy basics, recognizing phishing attempts, handling customer data requests, and responding to security incidents. Make training an ongoing process, not a one-time event.
- Incident Response Planning: Prepare for potential breaches with a clear plan. Outline who to notify, steps to contain the breach, how to investigate, and procedures for informing affected customers and regulators. Test the plan regularly through simulations.
Starting in 2026, SaaS companies with annual revenues over $25 million will need to conduct formal cybersecurity audits and risk assessments. Even if your company isn't in this category yet, adopting these practices now can prepare you for future growth and demonstrate your commitment to data security.
Once your internal systems are secure, it's time to extend these practices to your third-party vendors.
Monitor Third-Party Vendors
Even with strong internal safeguards, your security is only as strong as your weakest vendor. Under CCPA, you're responsible for how third parties handle the personal data you share with them. You can't just hand off data and hope for the best - active oversight is key.
- Data Processing Agreements (DPAs): Require every vendor to sign a DPA before accessing any data. These agreements should outline what data they can process, how they can use it, the security measures they must implement, and their role in responding to consumer rights requests. Include breach notification clauses so you're informed immediately if a vendor experiences a security incident.
- Vendor Compliance Reviews: Verify that vendors follow the security practices they promise. Request documentation of certifications, evidence of employee training, and their incident response procedures. For high-risk vendors, increase the review frequency.
- Security Questionnaires: Use standardized questionnaires to evaluate vendor practices. Cover areas like encryption standards, access controls, employee background checks, and data retention policies. Analyze their responses to identify risks and decide if additional safeguards are necessary.
Some SaaS companies streamline vendor monitoring with automated compliance management platforms. These tools can track certifications, send alerts when they expire, and flag changes in vendor security practices. While smaller companies might not need automation, it becomes invaluable as your vendor network grows.
- Continuous Monitoring: Go beyond annual reviews. Stay updated on vendor security incidents, changes in their ownership, and updates to their compliance certifications. Set up Google alerts for key vendors or subscribe to security newsletters covering major incidents.
When selecting vendors like cloud providers or payment processors, prioritize those with strong compliance records. Look for certifications such as SOC 2 Type II, ISO 27001, or standards relevant to your industry. While certifications don't guarantee perfect security, they signal a serious commitment to compliance.
Vendor relationships evolve over time. A vendor that met your security requirements initially may not keep up with regulatory changes or emerging threats. Regular reassessments ensure your vendor network remains aligned with your compliance goals.
If managing these responsibilities feels overwhelming, consider working with experienced development teams like Zee Palm. Their expertise in sectors like healthcare, EdTech, and AI applications can help you navigate current and future regulatory demands with confidence.
Keep Your CCPA Compliance Current
Once you've built a compliance system, the work doesn’t stop there. Staying compliant with the California Consumer Privacy Act (CCPA) means keeping up with regular reviews and ensuring your team is well-trained. As your business grows and the regulatory landscape shifts, what worked last year might not cut it today. For instance, new amendments coming in 2026 will require larger companies to conduct mandatory cybersecurity audits. Treat compliance as a continuous process - it not only shields you from fines of up to $7,500 per violation but also strengthens customer trust.
Run Regular Compliance Reviews
Your compliance reviews should align with regulatory deadlines and your company’s growth. Starting in 2026, businesses generating over $25 million in revenue will need to complete formal cybersecurity audits, with deadlines varying by revenue bracket. Even if your company doesn’t meet this threshold, conducting annual internal reviews is a smart way to stay ahead and show proactive compliance.
To stay on top of things, schedule quarterly mini-reviews. These help you address small issues before they escalate. Use these sessions to evaluate whether your data collection practices have changed, confirm that new product features meet privacy standards, and check if any vendors have updated their data handling policies.
Focus your reviews on a few critical areas:
- Compare your current data collection and processing activities against your data map. New features or integrations may introduce data flows you hadn’t previously accounted for.
- Ensure your privacy policy reflects your actual practices. Discrepancies here are a common audit red flag and can result in penalties.
- Test your consumer rights request processes regularly. Can you retrieve and delete data within the required 45 days? Are third-party vendors complying with deletion requests? These tests can uncover gaps before they become problems.
- Reassess vendor compliance during every review cycle. Vendors may change ownership, update their practices, or encounter security issues, which could affect your compliance. A vendor that met your standards last year might not anymore.
- Document everything. Keep detailed records of what you reviewed, the issues you found, and how you resolved them. These records are invaluable during an audit and help you track progress over time.
Regular reviews are only half the battle - your team also needs to be well-prepared to handle compliance responsibilities.
Train Staff and Keep Records
Your team plays a central role in ensuring compliance, so their understanding of CCPA requirements is crucial. Role-specific training is key. Employees handling sensitive data or consumer rights requests should know exactly what to do and when to escalate more complex situations. For instance, customer service reps need to recognize when a customer’s question - like “What data do you have on me?” - qualifies as an access request under the CCPA, even if the law isn’t explicitly mentioned.
Make training practical. Use real-world examples during sessions instead of vague policy overviews. Walk through actual access, deletion, and opt-out requests your company has received. Show employees how to use your request tracking system and stress the importance of meeting the 45-day response window. Include CCPA training as part of onboarding for new hires. Untrained employees can unintentionally create compliance gaps by mishandling requests or collecting data without proper consent.
Annual refresher training is non-negotiable, with more frequent updates for high-risk roles. Laws and internal procedures change, and even seasoned employees benefit from staying up to date. Make sessions interactive - quiz employees on different request types and have them practice using compliance tools.
Keep thorough records of all training activities, including dates, topics covered, and attendance. The CCPA requires businesses to maintain compliance records for at least 24 months, so documenting your training efforts can demonstrate preparedness during audits.
Track consumer rights requests systematically. Record when a request is received, who handled it, what actions were taken, and when the response was sent. This not only proves compliance during audits but can also reveal trends, like a spike in deletion requests tied to a specific feature, which might indicate a larger privacy concern.
Your record-keeping should go beyond requests. Track policy updates, review findings, vendor assessments, and any security incidents. Together, these records provide a complete picture of your compliance efforts for regulators.
To make this process more manageable, consider using automated compliance tools. These platforms can monitor regulatory updates, send reminders for expiring certifications, and maintain audit trails for all your compliance activities.
For SaaS companies navigating complex compliance needs in industries like healthcare, education, or finance, partnering with experts like Zee Palm can be a game-changer. Their knowledge of regulatory frameworks ensures your compliance efforts scale effectively as your business grows.
Final Steps for CCPA Compliance Success
Once you've tackled the earlier steps toward compliance, it's time to tie everything together with some final, crucial actions. Start by thoroughly documenting all your compliance efforts. This includes keeping records of consumer requests and your responses for at least 24 months, as required by the CCPA. Additionally, track key metrics to identify areas for improvement. This documentation isn't just for audits - it helps refine your processes over time.
Stay on top of evolving CCPA requirements. The law is not static; new rules, like cybersecurity audits and risk assessment mandates, are expected to affect companies with higher revenue thresholds. Even if these rules don't apply to you yet, staying informed prepares you for future growth. Subscribing to regulatory updates and engaging in industry forums can help you stay ahead of the curve. This proactive approach not only keeps you compliant but also strengthens your position in the market.
Keep an eye on important indicators like response times for consumer requests, how often your privacy policies are updated, staff training completion rates, and any security incidents. These metrics can reveal potential weak spots early and demonstrate your accountability to both regulators and customers. Beyond avoiding penalties, strong CCPA compliance builds trust - a key differentiator for SaaS platforms in competitive markets. In privacy-focused industries, showing a commitment to compliance can even become a selling point.
To ensure long-term success, make compliance a part of your company culture. The best SaaS companies don't see privacy protection as just a box to check - they treat it as a core value. When your team understands the importance of CCPA compliance and how their roles impact customer trust, you're laying the groundwork for a company that can adapt to future challenges and regulatory changes naturally.
If your business operates in a highly regulated sector or deals with complex data flows, consider partnering with specialists like Zee Palm. They offer the technical expertise to automate privacy workflows, helping you stay compliant as your company grows.
FAQs
What should a SaaS company do if they are nearing the CCPA applicability thresholds?
If your SaaS business is nearing the thresholds for CCPA applicability, it's time to take action to ensure you're meeting the requirements. Start with a data inventory to map out the personal information you collect, process, and store. This will help you determine if your data practices fall under the scope of the CCPA.
Next, take a close look at your privacy policies. They should clearly explain how you handle user data and provide transparency about your practices. This isn't just about compliance - it also helps reassure your customers that their information is being managed responsibly.
It's also important to set up strong data subject rights processes. These processes should make it easy for users to request access to their personal data, delete it, or opt out of its sale. Having these systems in place shows that you're serious about respecting user privacy.
Lastly, it’s a smart move to consult with legal or compliance professionals. They can help identify any gaps in your approach and make sure your practices align with CCPA requirements. By addressing these areas early, you can avoid potential penalties and strengthen user trust in your brand.
How can SaaS companies ensure their third-party vendors comply with CCPA regulations?
To make sure third-party vendors stick to CCPA regulations, SaaS companies need to take deliberate steps to verify and keep tabs on their partners. Start by thoroughly vetting vendors during the selection process. Look for solid privacy policies and practices, and ask for documentation or certifications that prove they meet CCPA standards.
Set up clear data processing agreements (DPAs) that spell out the vendor's responsibilities for managing personal data in line with CCPA rules. It's also important to regularly audit and review their practices to ensure ongoing compliance. Make sure vendors inform you about any updates to their policies or how they handle data. Keeping the lines of communication open and holding vendors accountable helps safeguard your customers' data and maintain compliance.
How can SaaS companies automate consumer rights requests to meet CCPA compliance deadlines effectively?
To streamline consumer rights requests and stay on track with CCPA timelines, SaaS companies can adopt tools and workflows that make the process more efficient. Here are some effective strategies:
- Automated workflows: Set up systems that can track, validate, and process requests within the CCPA's specified timeframes, like the 45-day window for most requests.
- AI-powered tools: Use AI to locate and categorize personal data across your systems, simplifying tasks like handling deletion or access requests.
- Integrated request management: Connect request management tools with your SaaS platform to make intake, verification, and responses smoother and more cohesive.
These approaches help reduce manual work, cut down on errors, and ensure compliance with CCPA rules - all while providing a better experience for your consumers.
Related Blog Posts

RTB Integration Checklist for Developers
Real-Time Bidding (RTB) is transforming app monetization by enabling real-time auctions for ad impressions, replacing older waterfall systems. Developers can increase ad revenue by 20–40% and improve fill rates by implementing RTB properly. This checklist breaks down the process into clear steps, from preparing your technical setup to testing and optimizing performance.
Key steps include:
- Preparation: Update SDKs, ensure OpenRTB compliance, and meet GDPR/CCPA standards.
- Integration: Configure ad units, connect bidder adapters, and set timeouts for optimal performance.
- Testing: Validate bid requests, test across devices, and monitor key metrics like latency and fill rates.
- Optimization: Reduce latency, update configurations, and maintain compliance to sustain long-term success.
RTB integration is essential for boosting ad revenue and enhancing user targeting. With the right approach, developers can maximize their app's monetization potential.
Monetize Your App With the Smaato Publisher Platform (SPX)

Pre-Integration Setup Requirements
Before jumping into RTB integration, it’s important to lay the groundwork. This preparation phase can make or break the process - either ensuring smooth integration or leading to delays and performance headaches.
Technical Prerequisites
Start by making sure your infrastructure is up to date with the latest SDKs and libraries. For instance, Google requires the most recent SDKs and protocol buffers, with all necessary fields configured correctly, to enable proper RTB functionality.
Your systems also need to handle low-latency, high-throughput transactions. Bid responses often have to be completed within 1,000 milliseconds or less. Persistent HTTP connections (Keep-Alive) can help here, cutting connection overhead and reducing latency by 20–30%.
To manage traffic spikes and handle continuous bid requests, use load balancing, redundancy, and scalable architecture. Geographically distributed servers are another key component - they reduce physical distance to ad exchanges, improving response times. Once your infrastructure is ready, make sure it meets all regulatory and industry standards.
Compliance and Standards Requirements
With a strong technical setup in place, the next step is ensuring compliance with key standards. This includes adhering to OpenRTB protocols (such as version 2.5 or 2.6) and meeting GDPR and CCPA requirements. Secure, encrypted data transmissions and user consent management are non-negotiable.
Protecting user privacy is critical. Data anonymization should be implemented, and only the user data fields required by OpenRTB protocols should be transmitted. Consent signals must be securely stored, and regular audits of your data flows can help prevent unauthorized access and maintain compliance over time.
Tools and Resources Needed
To get started, you’ll need access to SSP/DSP platforms like Google Authorized Buyers, AppLovin MAX, or Unity LevelPlay.
Testing is another crucial step before going live. Use sandbox or staging environments provided by SSPs and DSPs to simulate real bid requests and error scenarios without impacting actual users. These environments allow you to test various ad formats, timeout behaviors, and error handling processes.
Real-time analytics dashboards are essential for monitoring bid requests, tracking performance metrics, and ensuring compliance. Device-level testing tools are also important - they help validate your integration across different mobile devices and operating systems. Additionally, creative review tools can confirm that your ad formats display properly on various screen sizes and orientations.
Finally, set up configuration tools for pretargeting groups and ad units. These tools will be vital for ensuring a smooth transition to the testing phase, where everything comes together for final validation.
RTB Integration Implementation Steps
Now that the groundwork is set, it's time to turn your preparation into action by building the RTB (Real-Time Bidding) integration. This is where your system starts handling real-time auctions and delivering ads to users.
Setting Up Ad Units
Ad units are the backbone of RTB auctions. These configurations should align with the technical standards you established earlier. Start by defining ad unit sizes that fit your app's design. For example:
- 320x50 pixels for banners
- 300x250 pixels for interstitials
Assign unique slot IDs to each unit, like "banner_01" or "interstitial_home", for easy identification. Next, set floor prices that align with your revenue goals - such as $0.50 for premium banners - and configure bidder parameters accordingly. Don’t forget to include targeting criteria, like user demographics or geographic location, and specify the media type (banner, video, native, or interstitial) based on the placement’s purpose and requirements.
Connecting Bidder Adapters
Bidder adapters are what link your app to the RTB system, enabling seamless data exchange. To integrate, map your ad units to the adapter and ensure all data exchanges comply with OpenRTB protocol standards. A proper bid request should include key fields such as:
BidRequest.imp.ext.ad_unit_mappingBidRequest.app.ext.installed_sdk.id- Timeout values
- Currency (USD for U.S.-based apps)
- Device information
Here’s an example of a correctly formatted bid request:
id: "<bid_request_id>"
imp {
  id: "1"
  banner { w: 320, h: 50 }
  ext { ad_unit_mapping: { key: "banner_01", value: "320x50" } }
}
app { ext { installed_sdk { id: "com.example.sdk", sdk_version: { major: 1, minor: 0, micro: 5 } } } }
device { ... }
user { ... }
tmax: 300
cur: "USD"
Always use the most up-to-date SDKs and OpenRTB protocol versions. Platforms like Meta Audience Network and InMobi frequently phase out older versions, and failing to update could result in losing access to bidding endpoints.
Configuring Timeout Settings
Timeout settings are critical for balancing user experience with revenue potential. Most RTB auctions wrap up within 120–800 milliseconds, with mobile environments typically working best in the 300–500 millisecond range.
- Shorter timeouts (150–300 ms): Reduce latency and keep your app responsive but may exclude slower bidders who might offer higher prices.
- Longer timeouts: Allow more bidders to participate but could delay ad delivery, impacting user experience.
Start with a 300-millisecond timeout and adjust based on performance and latency data. For users on slower connections, consider dynamic timeout settings to improve results. Keep a close eye on these metrics as you test and refine your integration.
Connecting to Ad Server
Once a bidder wins an auction, their data - such as creative details, price, and advertiser information - needs to be mapped correctly to your ad server’s request format. This ensures the ad is rendered properly.
Here’s an example of a bid response:
id: "<bid_request_id>"
seatbid {
  bid {
    id: "bid_123"
    impid: "1"
    price: 0.75
    adm: "<creative_markup>"
    ext { sdk_rendered_ad: { sdk_id: "com.example.sdk", rendering_data: "<data>" } }
  }
}
cur: "USD"
Log all auction outcomes, including win notices, settlement prices, and creative performance, to identify areas for optimization. Before going live, test your integration thoroughly on real devices. Use sandbox environments provided by SSPs and DSPs to validate that bid requests are formatted correctly and that winning creatives display properly across different screen sizes and orientations.
With your ad server integration complete, focus on thorough testing to ensure everything performs smoothly and meets compliance standards across all devices. This will set the stage for a successful RTB implementation.
Testing and Validation Process
Once you've implemented RTB integration, thorough testing and validation become essential. These steps ensure your ads are delivered effectively, perform well, and comply with industry standards. Skipping this process could lead to missed revenue, poor user experiences, and potential compliance issues.
Testing Ad Requests
Testing on real devices is crucial for identifying issues like network latency, memory constraints, and operating system-specific quirks - problems that emulators often fail to catch.
Start by configuring the BidRequest.test field in your bid request payload. Setting this field to 1 flags the request as a test, ensuring the response won't affect live metrics. This allows you to fine-tune your integration without impacting revenue or skewing performance data.
Begin with test ads to validate basic functionality, then move to production ads to ensure they’re handled correctly. Test across various device types, screen orientations, and network conditions to uncover edge cases that could disrupt production. For example, in 2022, publishers using Meta Audience Network who conducted robust device-based testing reported a 15% drop in bid request errors and a 12% boost in fill rates within three months, according to Meta's Monetization Manager dashboard. Make sure your staging environment mirrors your production setup for accurate testing.
Additionally, confirm that every bid request adheres to protocol standards.
Checking Bid Request Formats
Bid requests that don't meet specifications are rejected by bidding endpoints, leading to lost revenue and inaccurate reporting. Ensuring compliance with OpenRTB protocol documentation is critical.
Pay close attention to these key elements:
- Mandatory fields like
imp.id,device,user, andappmust be included and correctly formatted to avoid rejection. - Ad unit mappings in
BidRequest.imp.ext.ad_unit_mappingshould align perfectly with your publisher setup. - SDK identifiers in
BidRequest.app.ext.installed_sdk.idmust match your actual SDK version and implementation.
Automated tools can help you verify OpenRTB compliance. For example, publishers working with InMobi who regularly validated bid requests and tested on real devices saw up to a 20% increase in ad revenue compared to those relying only on emulators or automated testing. Update your validation processes whenever you upgrade SDKs or adjust ad unit configurations, as these changes can introduce new requirements.
Once your bid requests are properly formatted, shift your focus to monitoring performance metrics to ensure ongoing success.
Tracking Performance Metrics
Tracking key metrics during testing can reveal issues before they affect revenue. Focus on three main KPIs that reflect the health of your integration: latency, fill rate, and ad revenue.
- Latency: Keep it under 100ms to maximize fill rates and revenue. Latency exceeding 1,000ms can harm user experience and reduce auction participation. Use analytics dashboards to monitor latency across devices and networks.
- Fill Rate: This measures the percentage of ad requests that result in served ads. A fill rate above 90% is ideal for optimizing inventory monetization. Rates below 70% often signal compliance or integration problems. Track fill rates by ad format, device type, and region to identify specific issues.
- Ad Revenue: Metrics like eCPM and total revenue should be tracked in U.S. dollars ($) using standard reporting formats (e.g., MM/DD/YYYY for dates). Set up alerts for sudden revenue drops, as these could indicate integration issues or market shifts.
KPIRecommended ValueImpact on RTB IntegrationLatency< 100msOptimizes revenueFill Rate> 90%Maximizes inventory monetizationBid Request Error Rate< 1%Ensures auction participationSDK VersionLatestAccess to new features and stability
Real-time monitoring dashboards that update every few minutes during testing can provide immediate feedback. This allows you to identify and resolve issues quickly, minimizing the risk of revenue loss or a poor user experience.
Set up automated alerts for anomalies in these metrics. Timely notifications about latency spikes, fill rate drops, or error rate increases are essential for maintaining smooth operations and protecting your bottom line.
sbb-itb-8abf120
Performance Optimization and Maintenance
Once you've thoroughly tested and validated your RTB integration, the journey doesn't end there. To ensure long-term success, continuous optimization is key. Without regular attention to latency, configuration, and compliance, even the most well-executed setup can degrade over time, impacting user experience and revenue.
Reducing Latency and Improving Speed
Did you know that cutting latency by just 10ms can increase win rates by up to 8%?.
One effective way to reduce latency is by distributing RTB servers geographically. For example, placing servers in major U.S. data centers like AWS us-east-1 or Google Cloud us-central1 minimizes the physical distance data needs to travel, which dramatically reduces response times for American users.
Another strategy is refining bid decision algorithms. By analyzing historical auction data, you can uncover patterns to make faster, smarter decisions. Techniques like caching frequently used bid responses or pre-computing common scenarios can also save valuable processing time. For those seeking an edge, machine learning can predict optimal bids based on user context and past performance, provided it doesn’t overlook high-value opportunities.
For best results, aim for an average auction latency under 100 milliseconds. Top-performing platforms often target response times below 50ms to maximize win rates. Automated alerts can help you catch and resolve performance issues before they start affecting revenue.
Updating Configuration Settings
Once you've optimized speed, focus on keeping your configuration settings in line with your performance goals. Over time, configuration drift can quietly erode efficiency, so it’s essential to regularly review and adjust settings based on changes like increased latency, shifting advertiser demand, or updated industry protocols. For example, if timeout errors spike during peak U.S. traffic hours, extending the auction window slightly might help - just be sure to balance this against potential user experience impacts.
Timeout settings are particularly tricky. A U.S.-based gaming app might benefit from shorter auction timeouts during peak hours to improve responsiveness, while other apps might extend timeouts during quieter periods to maximize yield. A/B testing these adjustments can reveal what works best for your specific use case.
Keep a close eye on metrics like error rates, fill rates, win rates, and eCPM. Segment these metrics by ad unit, geography, device type, and time of day to pinpoint and address any emerging issues quickly.
SDK updates also demand your attention. Subscribe to notifications from major platforms and mediation providers to stay informed. Before rolling out updates to production, always test them thoroughly in a staging environment. For instance, when iOS introduces new privacy features, make sure your bid request logic incorporates the latest consent signals.
Maintaining Compliance Standards
Staying compliant isn’t just about meeting legal requirements - it’s about protecting your business from risks like lost inventory access, legal penalties, and reputational harm. In the U.S., regulators like the FTC enforce laws such as COPPA and CCPA, which require transparency and proper consent handling. Failing to signal user consent in bid requests can lead to auction exclusions or even regulatory action.
To stay ahead, update your integration to support the latest protocol versions and consult IAB Tech Lab documentation for new requirements. Non-compliant bid requests are often rejected by major RTB endpoints, so adhering to industry standards is critical.
Implement strong data governance policies, and provide clear opt-in and opt-out mechanisms for personalized ads. Ensure your bid requests include all required fields for user consent and data provenance, and conduct regular audits to verify compliance with industry and legal standards.
Where possible, automate protocol validation to catch formatting issues before they reach production. Keep in mind that the OpenRTB protocol is updated regularly, so monitor announcements to allow enough time for necessary adjustments.
Finally, go beyond the basics. Maintain transparent documentation of your data flows and practices to build trust with users and advertising partners. Regular compliance audits can help identify and address gaps before they become larger issues, ensuring your integration remains aligned with evolving technical and legal standards.
Zee Palm RTB Integration Services
Zee Palm provides specialized RTB (Real-Time Bidding) integration services designed to deliver top-tier programmatic advertising performance. With years of experience, we’ve perfected the art of creating seamless and efficient RTB workflows that go well beyond basic setup.
RTB Development Solutions
Our team of 10+ experienced developers brings more than a decade of expertise in programmatic advertising and mobile app development. This depth of knowledge allows us to address common challenges like auction timeouts, bid rejections, and compliance hurdles, ensuring smoother operations.
We strictly follow OpenRTB standards to guarantee compatibility with major ad exchanges. Our methods include implementing the latest protocol buffers, fine-tuning bidder adapters for ultra-low latency, and configuring pretargeting groups to boost both fill rates and revenue.
What makes our RTB development stand out is our emphasis on real-world performance metrics. We don’t just set up your integration - we optimize it for the demands of today’s fast-paced programmatic advertising environment. Using advanced monitoring tools, we track bid performance and latency in real time, fine-tuning secure signals and SDK ad formats to improve targeting.
For instance, we recently completed an RTB integration for a US-based EdTech company, achieving a 35% increase in ad revenue and a 20% reduction in latency, as verified through detailed real-time analytics.
These strategies seamlessly carry over into our customized development solutions.
Custom App Development
RTB integration needs can vary significantly by industry, and our custom app development services are designed to address specific regulatory and technical challenges.
We’ve delivered RTB-enabled applications across a range of industries. In healthcare, we’ve implemented privacy-compliant ad delivery systems that meet HIPAA regulations, ensuring patient data remains secure while maximizing ad revenue. For EdTech platforms, we’ve developed e-learning apps with advanced in-app bidding systems that support freemium models without sacrificing user experience.
Our expertise also extends to Web3 and blockchain technologies, where we’ve integrated blockchain-based ad verification systems into RTB workflows. These solutions enhance transparency and help prevent ad fraud. Each project is tailored to meet the unique technical and regulatory needs of the industry it serves.
Our broad specialization spans AI and SaaS development, healthcare applications, EdTech platforms, Web3 and blockchain DApps, social media platforms, and IoT solutions. This diverse experience gives us a deep understanding of how RTB requirements vary across app categories, enabling us to adapt our approach to meet specific needs.
Project Success Record
With a strong focus on optimizing latency and ensuring compliance, Zee Palm has delivered measurable results across more than 100 completed projects for 70+ satisfied clients. Our ability to handle complex RTB integrations on time and within budget highlights not only our technical skill but also our dedication to clear communication and responsive support throughout each project.
Our post-integration services include continuous performance monitoring, regular updates, and bidder configuration tuning. We provide detailed analytics dashboards, proactive troubleshooting, and scheduled maintenance to adapt to changing ad market conditions, ensuring your system continues to perform at its best.
Conclusion
RTB integration plays a critical role in mobile app monetization. In 2023, mobile programmatic ad spending in the US surpassed $100 billion, and by 2025, RTB is expected to account for more than 90% of all digital display ad spending. This checklist provides a straightforward framework to guide developers through effective RTB integration. Here’s a quick recap of the key elements that drive success in this area.
Main Points Summary
Three core pillars support successful RTB integration:
- Preparation: Keep SDKs updated and ensure OpenRTB compliance.
- Testing: Validate bid formats and consistently track key KPIs.
- Optimization: Regularly refine configurations and conduct compliance audits.
Unified auctions and header bidding have transformed the landscape, allowing publishers to boost revenue by fostering real-time competition among multiple demand sources. To maintain strong performance as industry standards evolve, it’s essential to prioritize SDK updates, make necessary configuration changes, and perform routine compliance checks.
Next Steps
To ensure continued success, developers should implement robust monitoring and maintenance strategies. This includes tracking performance metrics, conducting regular compliance audits, and staying proactive with SDK updates to adapt to evolving protocols. Major platforms like Google and Meta frequently revise their standards and phase out outdated SDKs, making it crucial to stay ahead of these changes.
Collaborating with expert development partners can also help tackle complex integration challenges and maintain peak performance over time. By adhering to this checklist and committing to best practices, developers can unlock their app’s full monetization potential while delivering a seamless and engaging user experience.
FAQs
What are the common challenges developers face during RTB integration, and how can they address them?
Real-Time Bidding (RTB) integration comes with its fair share of hurdles. Developers often grapple with ensuring smooth communication between demand-side and supply-side platforms, managing massive volumes of bid requests, and achieving low latency to deliver real-time responses. If not handled well, these challenges can take a toll on app performance and the user experience.
Addressing these issues requires a focus on strong API implementation, fine-tuning server infrastructure to handle heavy traffic, and conducting rigorous testing under diverse scenarios. Partnering with developers who have expertise in RTB systems can also simplify the process and boost the chances of a successful integration.
How can developers ensure their RTB implementation complies with GDPR and CCPA regulations?
To align with GDPR (General Data Protection Regulation) and CCPA (California Consumer Privacy Act) during RTB integration, developers need to prioritize privacy and data protection principles.
Start by implementing user consent mechanisms that are easy to understand and meet GDPR and CCPA standards. Users should have a clear choice to opt in or out of data collection and processing, and their preferences must always be honored.
Next, focus on data minimization - only collect the information that’s absolutely necessary and ensure it’s used solely for its intended purpose. Whenever possible, anonymize or pseudonymize personal data to add an extra layer of security.
Lastly, partner with vendors and organizations that comply with GDPR and CCPA rules. Establish clear agreements for data sharing to safeguard user information, and regularly audit your practices to keep up with evolving privacy laws.
How can developers reduce latency and boost ad revenue during RTB integration?
To reduce latency and boost ad revenue in Real-Time Bidding (RTB) integrations, developers can take several practical steps:
- Speed up server response times: Use streamlined code, cut down on unnecessary processes, and incorporate content delivery networks (CDNs) to handle bid requests quickly and efficiently.
- Leverage caching: Store frequently used data in a cache to avoid repeated database queries, ensuring faster ad delivery.
- Adapt timeout settings: Dynamically adjust timeout thresholds based on network conditions to maintain timely bid responses while maximizing revenue opportunities.
These strategies can help developers deliver a seamless RTB experience and enhance ad performance in mobile applications.
Related Blog Posts

Ultimate Guide to Flutter UI Prototyping
Flutter makes UI prototyping faster and more efficient. Its widget-based architecture, hot reload, and cross-platform capabilities allow developers to create and test designs quickly for Android, iOS, web, and desktop - all from one codebase. Prototyping with Flutter saves time, reduces errors, and bridges the gap between design and development.
Key Takeaways:
- Widgets: Modular building blocks for creating complex UIs.
- Hot Reload: Instantly see code changes without restarting.
- Cross-Platform: One prototype works on Android, iOS, web, and desktop.
- Prototyping Benefits: Identify design flaws early, improve collaboration, and maintain consistency.
- Tools: FlutterViz (drag-and-drop), Android Studio (debugging), VS Code (lightweight), and Flutter DevTools (performance analysis).
- Customization: Use Material Design for Android and Cupertino for iOS for platform-specific designs.
Flutter also supports advanced trends like AI-driven design tools and AR/VR testing, making it a future-ready choice for UI prototyping.
🚀📱 Learn Flutter UI Design with 4 REAL Projects | Flutter Tutorial for Beginners 2024

Tools for Flutter UI Prototyping
Using the right tools can make Flutter prototyping faster, more efficient, and collaborative. Picking the right ones for your needs ensures smoother development and better results.
Popular Prototyping Tools Overview
FlutterViz is a free, drag-and-drop UI builder designed to speed up screen design. It offers 50 standard widgets, real-time design previews, and the ability to export clean, production-ready Flutter code instantly. With pre-made screen templates and an intuitive widget tree view, it’s a great choice for both beginners and seasoned developers.
Android Studio serves as a powerful IDE for Flutter prototyping. It includes advanced features like code completion, an integrated emulator, visual widget inspection, and detailed debugging tools. It's particularly useful for large-scale projects, offering options like memory profiling and network inspection for more complex development needs.
Visual Studio Code stands out as a lightweight, fast editor. It supports hot reload, Flutter debugging, and a wide range of extensions to customize your workspace. VS Code is perfect for developers who value a streamlined, focused environment.
Flutter DevTools provides tools for widget inspection, performance profiling, and layout visualization. It helps identify bottlenecks, debug UI issues by analyzing the widget tree, monitor rendering performance, and track memory usage.
GetWidget, an open-source UI library, includes over 1,000 pre-built components, making it easier to develop consistent designs quickly.
Specialized libraries like FL Chart allow for data visualization and interactive elements, while Styled Widget simplifies code readability by introducing CSS-like styling to Flutter. For cross-platform consistency, Flutter Platform Widgets ensures native components render properly on both Android and iOS.
Each tool has its strengths, so choosing the right one depends on your project’s specific needs.
How to Choose the Right Tool for Your Project
Flutter's rapid prototyping capabilities shine when paired with the right tools. Your choice should depend on factors like project size, team expertise, prototype fidelity, and collaboration needs.
Project size and complexity play a significant role. For smaller projects or quick concept validation, FlutterViz’s visual interface can turn ideas into interactive prototypes in no time. On the other hand, large-scale applications benefit from Android Studio’s advanced debugging and comprehensive features.
Team expertise is another key factor. Developers with strong coding skills often prefer tools like Android Studio or Visual Studio Code, which let them fully utilize their programming knowledge. For mixed teams that include designers or non-technical members, visual tools like FlutterViz are excellent for collaboration and quick iterations.
Prototype fidelity also matters. High-fidelity prototypes requiring detailed animations or complex interactions are best tackled with Android Studio or VS Code. For simpler user testing or stakeholder reviews, FlutterViz’s drag-and-drop approach is more than sufficient.
Collaboration requirements may influence your choice as well. Visual tools are particularly effective for client presentations and cross-functional teamwork, while code-based tools integrate seamlessly with version control systems and established workflows.
ToolMain FeaturesIdeal Use CaseBest ForFlutterVizDrag-and-drop UI, code export, templatesRapid, no-code prototypingQuick concepts, client demosAndroid StudioFull IDE, emulator, advanced pluginsLarge projects, full-stack teamsComplex apps, debuggingVisual Studio CodeLightweight, fast, extensibleQuick prototyping, solo developersSpeed, customizationFlutter DevToolsWidget inspection, performance profilingDebugging, UI optimizationPerformance analysis
Integration with existing workflows is another consideration. If your team already uses specific IDEs or has established processes, selecting tools that complement these workflows can make adoption easier and reduce friction.
Lastly, think about your target platforms. For cross-platform projects, tools like Flutter Platform Widgets ensure consistent previews across Android, iOS, web, and desktop.
Hot reload functionality across these tools provides instant feedback, enabling rapid iteration.
Many teams find success with a hybrid approach - starting with visual tools like FlutterViz for initial ideation and stakeholder feedback, then transitioning to code editors for deeper implementation and integration. This method balances speed, flexibility, and code quality.
At Zee Palm, we follow this strategy by combining visual builders for client demos and MVPs with robust IDEs for production development. This approach has helped us consistently deliver top-notch Flutter apps for industries like healthcare, EdTech, and custom app solutions.
Techniques and Best Practices for Effective Prototyping
Creating effective prototypes in Flutter isn't just about mastering the tools - it's about using smart techniques to streamline development while keeping the user's needs front and center.
Using Flutter's Hot Reload for Quick Iterations
Flutter’s hot reload feature is a game-changer. It lets you see code changes instantly in your running app without restarting the entire application, making it easier to test and refine UI elements on the fly.
To make the most of this feature, break your UI into small, reusable widgets. This structure allows you to update specific components without affecting the entire interface. For instance, tweaking the padding or color of a button is as simple as adjusting its properties and immediately viewing the changes.
Use StatelessWidget for static elements and StatefulWidget for dynamic ones. However, remember that hot reload doesn’t apply to changes in native platform code, plugin initialization, or certain stateful services. These require a hot restart or a full rebuild, which can slow down your workflow.
Save your progress frequently and rely on version control to protect your work. Avoid making changes that disrupt the hot reload process, such as modifying the main() function or platform-specific code. These interruptions can derail the rapid iteration that hot reload enables, which is essential for a smooth prototyping process.
By leveraging hot reload effectively, you can iterate faster and focus on refining a design that truly puts users first.
Building with User-Centered Design in Mind
While hot reload speeds things up, a user-centered design approach ensures that your prototypes meet real user needs. This process starts well before writing your first line of code.
Begin with user research to understand your audience. Create personas to guide decisions about layout, navigation, and functionality. Before jumping into Flutter, sketch out wireframes or mockups using tools like Figma or Adobe XD. This step saves time and reduces the need for major revisions later.
Testing with real users is essential. Regular feedback sessions allow users to interact with your prototype and share their experiences. Pay attention to how they navigate the app, where they get stuck, and what feels intuitive. This feedback can guide improvements and ensure your design aligns with user expectations.
Accessibility should also be a priority. Flutter’s widget-based system makes it easier to implement features like proper contrast ratios, large touch targets (minimum 44×44 pixels), and clear visual feedback for interactions. Focus on the most important user journeys first - don’t try to build every feature at once. By zeroing in on the core workflows that define your app’s value, you can validate key ideas quickly and gather actionable feedback.
Collaborating with Development Teams
A successful prototype isn’t just about the design - it’s about seamless teamwork between designers and developers. Clear communication and workflows ensure everyone stays on the same page.
Take advantage of tools that integrate design and development. For example, Figma can export Flutter code, bridging the gap between design concepts and working prototypes. Version control systems like Git are vital for managing contributions from multiple team members. Establish branching strategies to allow parallel work on different features while keeping the main branch stable for testing and demos.
Project management platforms, such as ClickUp, can help track feature requests, organize tasks, and maintain documentation. For communication, prioritize asynchronous methods like Slack to minimize unnecessary meetings. Reserve meetings for critical moments, such as major design reviews or initial planning sessions.
"We use ClickUp and Slack to manage all of our requests. You can request directly on a ClickUp ticket, sharing a doc or wireframes, or record a video in Slack. Either way, we get to your request with speed and quality."
- Zee Palm
Code quality matters, even in prototypes. Following clean code principles and using tools like lints and static checks helps prevent technical debt and makes it easier to transition from prototype to production.
"We follow all necessary clean code principles. We also use AI + Human resources heavily for code quality standards. We have lints and static checks in place."
- Zee Palm
"We aim to keep meetings to a minimum to ensure affordability of our service for you."
- Zee Palm
Consistency is another key factor. Shared design systems with standardized colors, typography, and spacing ensure a cohesive look and feel. Flutter’s widget-based structure makes it simple to create reusable components, enabling team members to work on different features without sacrificing consistency.
At Zee Palm, combining collaborative workflows with rapid iteration cycles - delivering features weekly - has proven highly effective. This approach balances flexibility and structure, allowing prototypes to evolve quickly while satisfying both user needs and technical requirements.
sbb-itb-8abf120
Customization and Design Principles in Flutter Prototyping
Flutter’s ability to quickly create prototypes is a game changer, but the real magic lies in how well you can tailor those prototypes to fit your vision while sticking to established design principles. Thanks to Flutter’s widget-based architecture, you have complete freedom to shape every aspect of your app’s interface, ensuring your prototypes both look and feel exactly as intended.
Customizing Flutter Widgets for Unique Designs
The heart of Flutter’s customization lies in its widgets. By extending and tweaking existing widgets or combining them in creative ways, you can build components that perfectly match your project’s needs. For instance, when you subclass StatelessWidget or StatefulWidget, you can override the build() method to craft layouts, styles, and behaviors that align with your brand.
To streamline your workflow, reusable components are key. Imagine creating a custom ButtonWidget that incorporates your brand’s colors and typography. Once built, you can use it throughout your app, saving time and ensuring consistency.
When working on intricate designs, breaking them into smaller, manageable parts is essential. For example, designing a custom navigation bar might involve combining a Container for the background, a Row for layout, custom IconButton widgets for navigation elements, and an AnimatedContainer for smooth transitions. This modular approach not only simplifies debugging but also makes future updates easier.
Even during prototyping, performance matters. Deep widget trees can slow things down, so tools like the widget inspector are invaluable. They let you visualize your widget hierarchy and identify areas where excessive nesting might be an issue.
Once you’ve nailed down customization, the next step is to align your designs with platform-specific guidelines for a more native feel.
Using Material Design and Cupertino Guidelines
Flutter makes it easy to cater to both Android and iOS users by offering built-in support for Material Design and Cupertino guidelines. Knowing when to use each ensures your prototypes feel right at home on their respective platforms.
For Android, Material Design focuses on bold visuals, responsive animations, and a clear hierarchy. Widgets like MaterialApp, Scaffold, FloatingActionButton, and AppBar are designed to follow these principles, making it easier to maintain proper spacing, elevation, and interaction patterns.
On the other hand, Cupertino widgets bring the clean, flat aesthetics of iOS. If you’re designing for iOS, components like CupertinoApp, CupertinoNavigationBar, and CupertinoButton will help you replicate the native iOS experience with subtle gradients and smooth navigation.
Interestingly, some apps successfully blend elements from both design systems. For instance, navigation is an area where platform conventions often differ - Android users expect a back button and navigation drawer, while iOS users lean toward tab bars and swipe gestures. Striking a balance between these expectations can make your app feel intuitive across platforms.
To simplify visual theme customization, tools like Panache let you adjust colors, fonts, and styles while staying within the bounds of design system guidelines. With Flutter’s Platform.isAndroid and Platform.isIOS, you can also apply platform-specific tweaks to create a seamless experience for both user groups.
Testing your prototypes on actual devices is crucial. What works beautifully on one screen size or aspect ratio might need adjustments on another. Regular testing ensures your designs translate well across different platforms and devices.
Maintaining Consistency Across Platforms
Consistency doesn’t mean making everything look identical - it’s about creating an experience that feels right for each platform while staying true to your app’s identity. Flutter’s widget system makes this balance achievable with shared design tokens and smart conditional logic.
Start by defining a comprehensive ThemeData. This acts as your single source of truth for colors, typography, spacing, and other visual elements. When platform-specific variations are necessary, conditional logic allows you to adapt styles without disrupting the overall structure.
Responsive design is another critical aspect. Widgets like MediaQuery and LayoutBuilder help your prototypes adjust to various screen sizes, from phones to tablets and desktops. For instance, a card layout might display as a single column on phones, two columns on tablets, and three on desktops, all while maintaining consistent spacing and proportions.
Navigation consistency is equally important. While the visual style might differ - think Android’s navigation drawer versus iOS’s tab bar - the overall user journey should remain predictable. A settings screen, for example, should be easy to find regardless of platform conventions.
Typography and iconography often require fine-tuning. Icons might need slight size adjustments to maintain balance, while colors might need tweaking to match platform-specific preferences. Android typically uses more saturated colors and pronounced shadows, whereas iOS leans toward softer gradients and lighter shadows. Your base palette can remain the same, but its application might differ slightly to suit each platform.
At Zee Palm, where we've completed over 100 projects across industries like healthcare, EdTech, and IoT, maintaining this balance has been key to user satisfaction and app store approval. By establishing clear design principles early in the prototyping process and rigorously testing on target devices, you can ensure your app feels polished and native across platforms.
Future Trends in Flutter UI Prototyping
The world of Flutter UI prototyping is rapidly changing, building on Flutter's strengths in speed and cross-platform development. Two game-changing trends - artificial intelligence (AI) integration and immersive AR/VR experiences - are transforming how developers approach their workflows. AI-powered tools, in particular, are expected to grow by over 30% annually.
AI Integration for Automated Design Suggestions
Artificial intelligence is reshaping Flutter UI prototyping by automating repetitive tasks and offering smart design suggestions. AI-driven tools can analyze your code, identify user behavior patterns, and recommend improvements for widget arrangements, color schemes, and accessibility features. They also help optimize layouts and flag performance issues, ensuring a smoother design process.
One standout feature is natural language interfaces. Imagine describing a UI component in plain English - like, "create a card with a user profile photo, name, and follow button" - and instantly receiving a fully built Flutter widget tree. AI-powered code generators can even transform design mockups into functional Flutter code. While the generated code might need some tweaking, it provides a solid foundation, saving developers hours of manual work.
At Zee Palm, where AI tools are integrated into healthcare and EdTech projects, these advancements have cut design iteration times by up to 40%. This allows their team to focus on creative problem-solving and complex challenges, rather than spending time on repetitive layout adjustments.
AI tools also take user analytics into account, offering data-driven UI improvement suggestions. For example, if analytics reveal users struggling with a specific navigation flow, the AI might propose alternative layouts or interaction patterns that have worked well in similar scenarios. These insights ensure designs are optimized for real-world usability.
Using AR/VR for Interactive Prototyping
While AI simplifies and speeds up design processes, augmented reality (AR) and virtual reality (VR) are redefining how developers and stakeholders interact with prototypes. These immersive technologies allow for 3D interaction with prototypes, offering a more realistic sense of scale, navigation, and usability compared to traditional 2D designs.
The impact of AR/VR is especially evident in specialized fields. For instance, healthcare app prototypes can be tested in simulated clinical environments, enabling developers to see how medical professionals might use the interface in real-life scenarios. Similarly, educational apps can be evaluated in virtual classroom settings, uncovering potential accessibility or workflow challenges that might not be apparent in flat designs.
AR-based testing is invaluable for identifying usability issues like navigation problems or poor information hierarchy - issues that are often missed in traditional prototyping. Implementing these technologies requires specific hardware, SDKs like ARCore or ARKit, and Flutter plugins for 3D rendering, but the results can be transformative.
Emerging collaborative AR/VR environments are taking things a step further. These tools allow distributed teams to review and iterate on prototypes together in real time, no matter where they’re located. For U.S.-based teams, this means testing prototypes in realistic settings that include imperial measurements, MM/DD/YYYY date formats, Fahrenheit temperatures, and dollar currency symbols.
As hardware becomes more affordable and tools grow easier to use, AR/VR prototyping is becoming an increasingly viable option. While there’s a learning curve, early adopters of these immersive technologies can deliver more innovative, user-focused solutions.
Conclusion: Key Takeaways for Flutter UI Prototyping
Flutter stands out for its speed, adaptability, and ability to work across multiple platforms seamlessly. With more than 2 million developers using Flutter as of 2025, it has become a popular choice for building apps efficiently.
Key features like the widget-first design approach and hot reload make it easy to create and refine designs quickly. Flutter’s compatibility with both Material and Cupertino design systems allows developers to build prototypes that can run natively on Android, iOS, web, and desktop platforms - all from a single codebase. This dual capability is a game-changer for teams looking to save both time and resources.
The framework’s ecosystem, which includes visual builders, powerful IDEs, and an extensive library of tools, further simplifies the prototyping process. When paired with best practices - like reusing widgets, maintaining a consistent design, and iterating rapidly - Flutter prototypes can transition smoothly into fully functional production apps.
Looking ahead, Flutter is poised to integrate cutting-edge features like AI-powered design tools and AR/VR prototyping capabilities. These advancements aim to streamline repetitive tasks and provide immersive testing environments, offering insights that go beyond traditional 2D prototypes.
As the prototyping landscape evolves, collaboration with experienced professionals becomes even more critical. At Zee Palm, our team brings years of expertise to help transform your Flutter prototypes into polished, user-focused applications.
Flutter’s declarative UI style, combined with its robust ecosystem and forward-thinking enhancements, positions it as a smart choice for both immediate results and long-term development needs. If you’re ready to take your next project to the next level, Flutter’s combination of speed, flexibility, and cross-platform functionality could redefine how you approach UI prototyping.
FAQs
How does Flutter's widget-based architecture simplify UI prototyping?
Flutter's widget-based design makes UI prototyping a breeze. By using reusable and customizable components, developers can quickly build, tweak, and refine interfaces without needing to start over. This modular setup is perfect for testing ideas and making adjustments on the fly.
Our team, with extensive experience in app development, taps into Flutter's adaptability to craft prototypes that align perfectly with your needs. This approach not only speeds up the development process but also ensures a smoother path to delivering top-notch results.
What are the advantages of using AI-powered design tools and AR/VR testing in Flutter UI prototyping?
AI-driven design tools and AR/VR testing are transforming the way Flutter UI prototypes are developed, making the process faster, more imaginative, and user-focused. AI tools handle repetitive tasks, propose design tweaks, and streamline workflows, freeing developers to concentrate on crafting innovative solutions. Meanwhile, AR/VR testing provides immersive simulations that mimic real-world interactions, enabling teams to spot usability issues early and fine-tune designs for better user engagement.
Using these advanced technologies, developers can build Flutter apps that are not only visually striking but also intuitive and tailored to users' needs - all in less time.
How do I maintain consistent designs across Android and iOS when prototyping with Flutter?
To keep your Flutter prototypes looking consistent on both Android and iOS, make the most of Flutter's built-in widgets. Widgets like Material are tailored for Android, while Cupertino is designed for iOS, ensuring your design respects each platform's unique guidelines.
You can also create custom themes to unify colors, fonts, and other design elements, giving your app a polished and consistent appearance across platforms.
For an added edge, consider collaborating with skilled developers, such as the team at Zee Palm. Their expertise can help you balance platform-specific standards with a smooth, cohesive user experience.
Related Blog Posts

Real-Time Data Integration Architecture Explained
Real-time data integration ensures that data is continuously processed and made available as soon as it’s generated. Unlike batch processing, which works in intervals, this approach offers near-instantaneous insights, enabling faster decisions and operational efficiency.
Why It Matters:
- Speed: Processes data in milliseconds, not hours.
- Use Cases: Fraud detection, IoT monitoring, live dashboards, healthcare emergencies.
- Competitive Edge: 60% of enterprises prioritize this for digital transformation.
Core Components:
- Data Sources & Ingestion: Tools like Kafka and Kinesis capture data streams.
- Processing Frameworks: Systems like Apache Flink ensure quick transformations.
- Storage Solutions: NoSQL databases (e.g., Cassandra) enable fast access.
- Monitoring Tools: Ensure data quality and system reliability.
Common Integration Patterns:
- Change Data Capture (CDC): Tracks and syncs database changes in real time.
- Event-Driven Architecture: Reacts to events as they happen.
- Data Virtualization & Microservices: Simplifies access and scales easily.
Challenges & Fixes:
- Latency Issues: Minimized with partitioning and fewer data hops.
- System Integration: Solved with modular designs and standard connectors.
- Security Risks: Addressed with encryption, access controls, and compliance measures.
Real-time integration is reshaping industries like healthcare, finance, and IoT. By leveraging cutting-edge tools and strategies, businesses can stay ahead in a fast-paced world.
Streamline Operations with Real Time Data Integration
Core Components of Real-Time Data Integration Architecture
Real-time data integration depends on several interconnected components, each playing a specific role to ensure data flows smoothly and efficiently from its source to its destination. Here’s a closer look at these key elements and how they work together to meet the speed and reliability that modern businesses require.
Data Sources and Ingestion Engines
At the heart of any real-time integration setup are the data sources. These are the origins of raw data that businesses need to process instantly. Common examples include transactional databases like PostgreSQL, SQL Server, and Oracle; IoT devices and edge sensors that generate continuous telemetry streams; and APIs and cloud platforms such as Salesforce, Shopify, and Google Analytics.
However, challenges like schema drift or inaccurate timestamps can disrupt downstream operations. That’s why choosing stable and real-time–ready data sources is a crucial first step in building a reliable architecture.
Next, we have ingestion engines, which act as the bridge between data sources and processing systems. These tools capture and transfer data streams swiftly and dependably. Popular options include Kafka, Amazon Kinesis, and Azure Event Hubs, known for their ability to handle high-throughput workloads, scale automatically, and offer fault tolerance. These engines also provide varying delivery guarantees, such as at-least-once or exactly-once processing, which directly impact reliability and system performance. Additionally, modern ingestion engines manage back-pressure to prevent upstream systems from overwhelming downstream components, maintaining stability even during traffic surges.
Real-Time Processing Frameworks
Once data is ingested, real-time processing frameworks take over to transform and route it efficiently. Tools like Apache Flink, Apache Spark Streaming, and Kafka Streams are commonly used for this purpose. Each has its strengths:
- Apache Flink: Delivers low-latency processing with exactly-once state consistency, making it ideal for handling complex event scenarios.
- Apache Spark Streaming: Processes data in micro-batches, which allows for easier debugging and monitoring, though with slightly higher latency.
- Kafka Streams: Embeds stream processing directly into applications, simplifying deployment and reducing operational demands.
These frameworks are designed to optimize throughput and minimize latency through features like partitioning and parallelism. Additionally, caching frequently accessed data in memory can cut down on repeated computations and reduce query response times.
Storage and Monitoring Solutions
In real-time systems, storage needs often differ from traditional data warehouses. NoSQL databases like Cassandra, MongoDB, and DynamoDB are favored for their flexible schema designs and horizontal scalability, enabling fast read/write operations. For ultra-fast caching, in-memory data stores such as Redis are commonly used, while time-series databases like InfluxDB are ideal for handling timestamped data, especially in monitoring or IoT contexts. The choice of storage depends on factors like consistency, availability, and partition tolerance, with many real-time setups prioritizing availability and eventual consistency to maintain performance.
Equally important are monitoring and observability tools, which serve as the backbone of operational reliability. These tools continuously track performance metrics, identify bottlenecks, and ensure data quality throughout the pipeline. Effective monitoring goes beyond system uptime, focusing on data lineage, latency, and quality. In real-time systems, where batch processing windows for error correction are absent, proactive monitoring is critical. Failover mechanisms and redundancy in key components further enhance availability and reliability.
Real-Time Integration Patterns and Workflows
Real-time integration revolves around patterns that process data instantly and trigger actions without delay. These patterns form the backbone of modern data systems, each tailored to specific business needs. Understanding how they work is key to selecting the right approach for your organization's integration goals.
Change Data Capture (CDC)
Change Data Capture (CDC) is a method for tracking and relaying database changes as they happen. Instead of transferring data in bulk, CDC captures updates - like inserts, updates, or deletes - and forwards them immediately to downstream systems.
CDC typically works by monitoring database transaction logs or using triggers to detect changes. Tools like Debezium and AWS Database Migration Service are commonly used to capture these changes and send them to message brokers like Apache Kafka. This setup allows downstream systems to process updates in real time.
This pattern is especially useful for real-time analytics and operational reporting. For example, e-commerce platforms use CDC to keep inventory data synchronized between transactional databases and dashboards, ensuring stock levels and sales metrics are always up-to-date. Similarly, financial institutions rely on CDC for immediate fraud detection, where processing transaction changes in real time can make a critical difference.
In 2022, Netflix implemented a real-time CDC pipeline using Apache Kafka and Debezium to sync user activity data from MySQL databases to their analytics platform. This reduced data latency from 10 minutes to under 30 seconds, enabling near-instant personalization for over 200 million users worldwide.
CDC is a game-changer for maintaining data consistency across systems without overloading the source database. It also fits seamlessly with event-driven architectures, triggering immediate actions as changes occur.
Event-Driven Architecture
Event-driven architecture operates by processing data as individual events, enabling systems to respond instantly to user actions, sensor readings, or state changes. Each event triggers a specific workflow, moving away from traditional request-response models to create more reactive and scalable systems.
This architecture typically involves event producers, brokers (like Apache Kafka or Amazon Kinesis), and consumers that process events as they arrive. For example, social media platforms use event-driven systems to update user feeds and notifications in real time. Similarly, IoT applications depend on this pattern to trigger alerts or automated actions based on sensor data.
In April 2023, Walmart adopted an event-driven architecture for its inventory management system. Using AWS Kinesis, they processed millions of updates daily, achieving real-time stock visibility across 11,000+ stores and reducing out-of-stock incidents by 15%.
The modular nature of event-driven systems makes it easy to add new components without disrupting existing workflows. This flexibility, combined with the ability to handle large-scale data streams, makes event-driven architecture a cornerstone of modern integration strategies.
Data Virtualization and Microservices
Building on the strengths of other patterns, data virtualization and microservices add another layer of flexibility and scalability to integration workflows.
Data virtualization creates a logical layer that allows unified access to data across multiple sources without physically moving or replicating it. This approach simplifies data management, reduces duplication, and lowers storage costs. The virtualization layer optimizes queries, enforces security, and provides a consistent interface for applications, making it ideal for agile analytics and reporting.
Siemens leveraged data virtualization to unify access to sensor data from over 5,000 IoT devices in its manufacturing plants. This enabled real-time monitoring and predictive maintenance without the need to duplicate data.
Microservices integration, on the other hand, breaks down integration logic into small, independent services. Each microservice handles a specific task, such as data validation or transformation, and communicates with others through APIs. This design allows for rapid updates, fault isolation, and the ability to scale individual components as needed. For example, healthcare platforms often use microservices to manage patient data, appointments, and billing as separate services that work together seamlessly.
The combination of data virtualization and microservices creates an adaptable architecture. Organizations can integrate new data sources, tweak processing workflows, or scale specific components without disrupting the entire system.
PatternKey AdvantageIdeal Use CasesTypical LatencyChange Data CaptureInstant data synchronizationReal-time analytics, replicationUnder 1 secondEvent-Driven ArchitectureImmediate responsivenessIoT, e-commerce, alertingMillisecondsData VirtualizationUnified access to distributed dataAgile analytics, federated queries1–5 secondsMicroservices IntegrationModularity and scalabilityAPI integration, streaming ETLSub-second
These patterns are often combined in real-world systems. For instance, CDC can feed data into event-driven microservices, while data virtualization provides a unified view of aggregated insights. By blending these approaches, organizations can create robust real-time integration solutions that meet the demands of modern business environments.
sbb-itb-8abf120
Design Considerations and Best Practices
Creating an efficient real-time data integration system requires thoughtful planning to address performance, reliability, and security. The design phase is crucial - it determines whether your system can handle increasing data volumes while maintaining the speed and accuracy your business relies on.
Optimizing for Low Latency and Scalability
Partitioning data streams by key (like user ID or region) is a smart way to enable parallel processing and increase throughput. Tools such as Apache Kafka, Google Pub/Sub, and Amazon Kinesis come with built-in features for partitioning and horizontal scaling, making it easier to expand your ingestion and processing layers as needed. The trick lies in selecting partition keys that balance the load evenly and maintain data locality.
To reduce latency and minimize failure points, design your architecture to move data through as few components as possible while still meeting processing requirements. This might involve combining transformation steps or using tools capable of handling multiple functions within a single component.
Cloud services like AWS Auto Scaling can dynamically adjust resources based on real-time demand, helping maintain performance during peak usage and cutting costs during slower periods. Proper buffer management and back-pressure handling are also essential for absorbing sudden spikes in data without overwhelming the system.
These measures create a solid foundation for maintaining data integrity, which we'll explore next.
Ensuring Data Consistency and Quality
Centralized schema registries and staging areas play a key role in enforcing compatibility, cleaning data, and validating formats before processing. For instance, the Confluent Schema Registry for Kafka helps manage and version data schemas, performing compatibility checks before data enters the pipeline. Staging areas allow you to apply business rules, validate formats, and handle exceptions without disrupting real-time workflows.
To prevent data loss during failures, implement retries, dead-letter queues, and checkpointing mechanisms. Depending on your business needs, your system should support exactly-once or at-least-once delivery guarantees, with clear strategies for handling duplicate or missing data.
Synchronization tools like distributed locks and consensus protocols ensure consistency across distributed components. While these add complexity, they are critical for scenarios where data accuracy is non-negotiable.
Regular monitoring for schema drift and anomalies is essential to catch quality issues early. Automated validation at the ingestion layer, along with real-time monitoring tools, provides multiple checkpoints to safeguard data integrity. Additionally, Kafka's offset management and replay features add confidence that temporary failures won’t result in permanent data loss.
Security and Compliance
Performance and data quality are critical, but protecting your data is equally vital.
End-to-end encryption should be applied to data in transit and at rest, covering all transfers, storage, and temporary processing areas. Access control mechanisms like OAuth/SAML and role-based access control (RBAC) help restrict access to sensitive information.
Network segmentation further bolsters security by isolating different parts of your infrastructure, reducing the risk of breaches and containing potential threats within specific zones.
For industries with strict regulations, such as healthcare or finance, compliance with standards like HIPAA or GDPR must be baked into the system from the start. This includes using data masking, anonymization, audit trails, and automated policy enforcement throughout the pipeline.
Tracking data lineage provides visibility into how data moves and transforms within your system, an essential feature for compliance audits and troubleshooting data quality issues. Centralized governance policies ensure consistent security and compliance practices across all components. To maintain security, conduct regular audits, vulnerability scans, and software updates.
A healthcare provider offers a great example of these principles in action. They built a real-time data integration system using Apache Kafka for ingestion, Flink for processing, and Snowflake for storage. By partitioning workloads by patient region, the system scaled horizontally as data volumes grew. End-to-end encryption protected data, RBAC controlled access, and a centralized schema registry managed changes. Automated monitoring and alerting ensured low latency and quick error recovery, while detailed audit logs and data masking met HIPAA compliance requirements.
Experts stress the importance of keeping designs simple, focusing on observability and monitoring, and planning for failure and recovery. Using modular, loosely coupled components makes scaling and maintenance easier, while regular testing helps catch issues early. Partnering with experienced teams, like Zee Palm, can also streamline implementation and help avoid costly mistakes in complex projects.
Challenges and Solutions in Real-Time Data Integration
Real-time data integration isn't just about connecting systems; it’s about doing so with speed and reliability. While the core design principles set the foundation, the process comes with its own set of challenges. Let’s break them down and explore practical ways to overcome them.
Latency and Throughput Bottlenecks
One of the biggest hurdles in real-time integration is latency. Every extra step in the data journey - often called a "data hop" - adds delay and increases the risk of failure. Think of it as adding unnecessary stopovers on a flight; the more stops, the longer and more error-prone the trip becomes. On top of that, inefficient partitioning can overload individual components, leaving others underutilized and creating a bottleneck in the system.
Another culprit? Network congestion and poorly configured systems. Without proper tuning - like optimizing message queues or setting buffer sizes - systems can buckle under even normal workloads.
The fix? Streamline the path data takes. Fewer hops mean quicker results. Consolidate transformation steps and choose tools that handle multiple tasks efficiently. Partitioning data streams by logical keys (like user ID or region) is another game-changer, enabling parallel processing and better load distribution. Tools such as Apache Kafka and Amazon Kinesis already offer features to simplify this.
To handle traffic surges, auto-scaling and smart buffer management are essential. These measures help systems absorb sudden spikes without overwhelming downstream components, keeping everything running smoothly.
Integrating Different Systems
Modern organizations rarely operate in a one-size-fits-all data environment. Systems evolve, schemas change, and suddenly, what worked yesterday breaks today. Add to that the challenge of juggling multiple data formats - JSON, XML, CSV, and even binary data from IoT devices - and it’s easy to see why integration gets tricky.
Different communication protocols add another layer of complexity. REST APIs, gRPC, MQTT, and database change streams all require unique handling. Managing these differences manually can feel like trying to speak multiple languages at once.
Here’s where modular architectures shine. By breaking systems into smaller, independent components (think microservices), you can update one part without disrupting the whole pipeline. Data virtualization also simplifies things by creating a unified view of your data, no matter its format or protocol.
Standardized connectors and APIs can save a ton of effort. Tools like RudderStack and Integrate.io offer pre-built solutions for common systems, cutting down on custom development work. Additionally, transformation layers can harmonize data formats, validate schemas, and enrich data before it even reaches the processing stage, ensuring everything flows seamlessly.
Addressing Security Risks
Real-time data flows bring speed, but they also introduce new security challenges. Without proper encryption, sensitive information can be intercepted during transmission. And with multiple integration points, managing access control becomes a complex balancing act.
Compliance adds another layer of pressure, especially for industries like healthcare and finance. Regulations such as HIPAA and GDPR demand strict data handling practices, which can be tough to maintain in high-speed environments.
Security ChallengeRisk LevelPrimary SolutionData interceptionHighEnd-to-end encryption (TLS/SSL)Unauthorized accessHighStrong authentication & RBACCompliance violationsCriticalContinuous monitoring & audit logsData exposureMediumData masking & tokenization
For starters, encrypt data at every stage - both in transit (using TLS/SSL) and at rest. This ensures sensitive information stays protected, even if intercepted. Role-based access control (RBAC) and strong authentication mechanisms like OAuth or SAML can further tighten security by limiting access to only those who need it.
Continuous monitoring and audit logging provide visibility into data access and usage patterns, helping to catch potential breaches early. And for sensitive fields, techniques like data masking or tokenization can protect information while still allowing it to be useful for analytics.
For example, a healthcare provider integrating IoT medical devices with cloud analytics faced latency and data consistency issues due to diverse device protocols and high data volumes. By implementing Apache Kafka for ingestion, partitioning workloads by patient region, and adding schema validation at the edge, they reduced latency by 40% and improved reliability - all while staying HIPAA-compliant.
Organizations don’t have to tackle these challenges alone. Expert teams like Zee Palm, with over 10 years of experience and 100+ successful projects, can help navigate the complexities of real-time integration. Their expertise spans industries like healthcare and IoT, ensuring solutions that address performance, integration, and security needs all at once.
The Future of Real-Time Data Integration
Real-time data integration is advancing at breakneck speed, fueled by AI, edge computing, and cloud-native architectures that are redefining how data is managed. AI is taking the lead by automating complex tasks, making data pipelines more intelligent and self-sufficient. At the same time, edge computing is bringing processing closer to where data is generated, significantly cutting down on latency for critical, time-sensitive applications. Meanwhile, cloud-native architectures provide the scalability and resilience needed to handle the ever-growing appetite for data among modern organizations. This progress builds on earlier-discussed challenges, pushing the limits of speed and efficiency.
A striking statistic from Gartner reveals that 75% of enterprise-generated data will be created and processed at the edge by 2025, up from just 10% in 2018. This dramatic shift underscores the pivotal role edge computing is playing in real-time integration strategies. Businesses that have embraced real-time data integration are already reaping rewards, such as 30% faster decision-making and a 25% reduction in operational costs compared to traditional batch processing.
AI now handles tasks like schema mapping, data quality checks, and routing optimization. In healthcare, for instance, AI-driven systems can instantly flag anomalies in patient vitals, enabling quicker medical interventions.
Edge computing is transforming industries that rely on low-latency data processing. Manufacturing companies, for example, use edge analytics to monitor equipment performance in real time, catching potential issues before they lead to costly downtime.
Cloud-native architectures add another layer of power to real-time integration by simplifying deployment and scaling. With containerized and serverless setups that auto-scale based on demand, these architectures streamline integration processes and support over 200 pre-built connectors.
The global market for real-time data integration is expected to grow at a compound annual growth rate (CAGR) of more than 13% from 2023 to 2028. This growth reflects not just technological progress but a deeper transformation in how businesses operate and compete.
However, adopting these technologies requires expertise in areas like technical architecture, compliance, and scalability. Challenges like scaling and data security, as discussed earlier, remain critical, but these emerging trends are addressing them in innovative ways.
Zee Palm (https://zeepalm.com) brings a wealth of experience to the table, offering scalable, secure, and compliant real-time integration solutions tailored specifically for the US market. Their expertise spans key technologies driving this evolution, including AI, SaaS development, healthcare applications, IoT solutions, and custom app development. With a team of over 10 skilled developers and a proven track record with 70+ satisfied clients, they know how to design and implement solutions that meet the demands of real-time data integration.
Real-time integration is becoming smarter and more responsive, aligning with the needs of modern businesses. Companies that invest in these technologies today, supported by the right expertise, will be well-positioned to seize the opportunities of a data-driven future.
FAQs
How does real-time data integration enhance decision-making compared to batch processing?
Real-time data integration allows organizations to process and analyze information the moment it’s generated, offering instant insights. This capability empowers decision-makers to act swiftly in response to changing conditions, streamline operations, and capitalize on opportunities much faster than traditional batch processing methods, which often come with delays.
With real-time integration, businesses can spot trends, identify anomalies, or recognize critical events as they happen. This leads to smarter, faster decision-making - something especially crucial in fields like healthcare, finance, and logistics, where quick responses can make a significant difference in outcomes.
What challenges arise when implementing real-time data integration, and how can they be solved?
Real-time data integration isn't without its challenges. Businesses often grapple with issues like maintaining data consistency, managing large volumes of data, and addressing system latency. If not tackled effectively, these problems can disrupt workflows and impact overall performance.
To address these challenges, companies can take proactive steps. For instance, adopting a scalable architecture helps manage massive data streams efficiently. Incorporating data validation mechanisms ensures the accuracy of incoming data, while using low-latency technologies such as in-memory processing reduces delays. Building fault-tolerant systems also adds resilience, allowing operations to continue smoothly even when unexpected failures occur.
How do Change Data Capture (CDC) and event-driven architecture improve the efficiency of real-time data integration?
Change Data Capture (CDC) and event-driven architecture play a crucial role in enabling real-time data integration, ensuring that updates are processed as soon as they happen. CDC works by monitoring and capturing changes in data sources, allowing systems to stay synchronized and current without unnecessary delays. On the other hand, event-driven architecture allows systems to react instantly to specific triggers, keeping workflows smooth and minimizing lag.
When combined, these methods provide a strong foundation for handling dynamic data, making them indispensable for applications that demand real-time precision and quick responses.
Related Blog Posts

Checklist for Scalable Middleware API Design
Want to build middleware APIs that scale effortlessly under high traffic? Here's the key: focus on performance, security, and maintainability from the start. Middleware APIs act as the backbone of modern software systems, managing tasks like authentication, data transformation, and routing between services. But without scalability, these APIs can become bottlenecks, leading to slow performance, crashes, and unhappy users.
Key Takeaways:
- Performance: Optimize resources, streamline database queries, and implement caching.
- Security: Use strong authentication (OAuth2, JWT), encrypt data, and follow compliance standards.
- Scalability: Design stateless APIs, use horizontal scaling, and decouple systems with message brokers.
- Maintainability: Ensure modular design, versioning, and clear documentation.
- Monitoring: Regularly test and monitor APIs to identify bottlenecks and handle traffic spikes.
This guide covers practical steps, common mistakes to avoid, and best practices to ensure your middleware APIs are reliable and ready for growth.
How I Build REST APIs that Scale
Planning and Assessment Phase
Careful planning and assessment lay the groundwork for building middleware APIs that can handle growth and deliver reliable performance. This phase ensures that every decision aligns with both technical and business needs.
Gather Business and User Requirements
Understanding business goals and user needs is the first step toward developing successful APIs. Start by hosting workshops and conducting interviews with stakeholders to gather detailed use cases. These sessions will help clarify how the API will be used and what it needs to achieve.
For instance, healthcare APIs must comply with HIPAA regulations, focusing on aspects like data flows, authentication, and patient privacy. On the other hand, EdTech APIs may prioritize tracking student progress and seamless integration with learning management systems.
A great way to visualize these interactions is through user journey mapping. This process highlights how mobile apps retrieve user profiles or how systems synchronize data. Also, take the time to define your audience - whether they’re internal developers, third-party integrators, or automated systems. Each group will have specific needs for documentation, error handling, and response formats. Once these requirements are clear, move on to assess your existing architecture to identify potential issues.
Evaluate Current Architecture and Issues
Before diving into development, it’s crucial to audit your current infrastructure. Review API logs and performance profiles to identify slow endpoints, bottlenecks, or recurring timeouts. Real-time monitoring tools can provide valuable insights into your API’s health, helping you spot overloaded endpoints or sluggish queries.
Document all external systems that interact with your API, including their expected data formats, protocols (like REST or gRPC), and authentication methods. Creating detailed integration diagrams can help you avoid complications during periods of high traffic.
Be aware of common architectural challenges. For example, monolithic designs often limit scalability, while poor caching strategies and synchronous processes can create significant bottlenecks. To ensure your API remains resilient during heavy usage, prioritize statelessness and proper resource structuring. These evaluations will guide the standards you set in the next step.
Define Performance and Security Standards
Establish clear performance benchmarks and robust security practices early in the process. For example, aim for response times under 200 ms and set limits on concurrent connections to maintain efficiency.
Security should be tailored to your domain. For healthcare, compliance with HIPAA is essential, while payment systems must adhere to PCI DSS, and educational platforms need to follow FERPA guidelines. Choose authentication methods that suit your API’s use case, such as OAuth2 for third-party integrations, JWT tokens for stateless sessions, or Web3 wallet authentication for blockchain applications. Adding two-factor authentication is also a smart way to secure sensitive operations.
Document compliance requirements thoroughly. This includes detailing applicable regulations, data retention policies, and audit trail procedures. Encrypt data both in transit (using TLS/SSL) and at rest, and establish practices for key management and certificate rotation. These steps not only protect against security breaches but also build user trust and ensure adherence to regulatory standards.
Design Checklist for Scalable Middleware APIs
This checklist outlines essential design practices for creating middleware APIs that can handle high traffic and maintain top performance. By following these principles, you can build APIs that are reliable, efficient, and ready to scale.
Resource Structure and RESTful Design
A well-thought-out resource structure is the backbone of a scalable API. Start by using plural nouns for resource endpoints like /users, /orders, and /products. This approach keeps your API intuitive and avoids unnecessary confusion for developers.
Consistency is key. Stick to uniform URL patterns, such as /users/{id} and /orders/{id}, to make integration straightforward.
To enable horizontal scaling, design your API to be stateless. Every request should carry all the necessary information, eliminating the need for server-side session storage. This ensures any server in your cluster can process requests independently, making it easier to add more servers as demand grows.
Follow RESTful conventions by using standard HTTP methods:
- GET for retrieving data
- POST for creating resources
- PUT for full updates
- DELETE for removing resources
This consistency reduces the learning curve for developers and ensures your API behaves predictably.
Asynchronous Processing and System Decoupling
Handling long-running operations synchronously can bog down performance. Instead, queue these tasks and return immediate responses to clients while processing in the background. This approach keeps your API responsive, even during complex operations.
Message brokers like RabbitMQ and Kafka are excellent tools for decoupling services. Instead of relying on direct service-to-service communication, implement an event-driven system where services publish and subscribe to events. This method improves fault tolerance, as queued messages can be processed once a service recovers from downtime.
A great example of this in action is Raygun. In 2023, they scaled their API to manage hundreds of thousands of requests per second by using RabbitMQ for queuing and DataDog to monitor worker health. This setup allowed them to handle enterprise-level traffic while maintaining reliability and providing real-time performance insights.
Monitor your worker processes to ensure smooth operation. Track metrics like queue lengths and processing times, and scale up worker processes automatically when queues start to build up. This proactive approach helps maintain performance during peak loads.
Security and Access Management
Strong security measures are essential for protecting your API. Start with robust authentication methods to suit different use cases. For example:
- Use email and password for traditional apps.
- Implement OAuth2 for seamless social logins.
- Leverage Web3 wallet authentication for blockchain applications.
For added protection, enable two-factor authentication (2FA) for sensitive operations. QR code-based linking with authenticator apps provides secure offline verification, reducing the risk of unauthorized access.
Role-based access control (RBAC) ensures users only interact with resources they’re authorized to access. Create tailored user roles - like buyers, contractors, or administrators - with permissions that match their specific needs. This approach minimizes the risk of privilege escalation.
To prevent abuse, implement rate limiting and throttling. Set limits based on user tiers or authentication levels, and provide clear error messages when these limits are exceeded. This strategy ensures your API remains available to legitimate users while blocking malicious traffic.
Finally, secure data in transit and at rest. Use TLS/SSL for communication and encrypt sensitive data stored on servers. Regularly update encryption keys and rotate certificates to maintain long-term security.
Error Handling and API Versioning
Clear error handling is a must for a developer-friendly API. Use standard HTTP status codes like 400 (bad request), 401 (unauthorized), 404 (not found), and 500 (server error) alongside detailed, actionable messages.
From the start, implement API versioning to manage changes without breaking existing integrations. Use URL path versioning (e.g., /v1/users and /v2/users) to clearly separate updates. This approach allows clients to migrate at their own pace.
When deprecating older versions, give users plenty of notice. Share migration guides and maintain older versions for a reasonable period to ease the transition. This builds trust and encourages developers to stick with your API.
Include detailed error documentation in your API guides. Provide examples of error responses, common causes, and solutions to reduce support requests and help developers integrate smoothly.
Caching and Performance Tuning
Caching is a powerful way to boost API performance and reduce server load. Use multiple caching layers for optimal results:
- Client-side caching for quick access.
- CDN integration for faster delivery.
- In-memory stores like Redis for frequently accessed data.
Develop effective cache invalidation strategies to keep data fresh. Use time-based expiration for predictable updates, manual purging for critical changes, and version tags for complex dependencies. The goal is to strike a balance between performance and data accuracy.
Distribute traffic across servers with load balancing to avoid overloading any single instance. Opt for horizontal scaling - adding more servers rather than upgrading existing ones - for better fault tolerance and flexible capacity management.
Continuously monitor your API’s performance using tools like DataDog or StatsD. Keep an eye on response times, error rates, and resource usage to identify and resolve bottlenecks early. Set up automated alerts to respond quickly to any issues.
For handling unexpected traffic spikes, implement autoscaling templates. These templates automatically adjust resources during high-demand periods while scaling down during quieter times, ensuring consistent performance without unnecessary costs.
sbb-itb-8abf120
Common Mistakes and Best Practices
Steering clear of these common errors can save you from unnecessary downtime and mounting technical debt.
Mistakes to Avoid
Skipping thorough documentation is a misstep that can lead to confusion and inefficiencies. Without clear and detailed documentation, team members and third-party developers struggle to understand your API's behavior. This slows onboarding, increases errors, and adds to technical debt, all while raising operational risks.
Inconsistent endpoint and payload design leads to unpredictable behavior and unnecessary headaches for developers. When endpoints aren’t uniform, maintaining and scaling your API becomes a more complicated task.
Overlooking security during development is a recipe for disaster. Treating security as an afterthought can result in weak authentication, inadequate encryption for data in transit, and accidental exposure of sensitive information through poorly managed error messages.
Ignoring API versioning can disrupt client integrations and create chaos during updates. Without a clear versioning strategy, breaking changes can lead to outages and erode user trust.
Weak error handling makes debugging a frustrating process. Generic error messages and inconsistent status codes force developers to waste time troubleshooting instead of focusing on meaningful improvements.
To sidestep these issues, prioritize proactive and scalable API design strategies.
Best Practices for Scalability
Here’s how you can ensure your API is scalable and future-proof:
Start with stateless API design to enable horizontal scaling. By avoiding reliance on server-side sessions, any server can process requests, making it easier to add resources as demand increases.
Adopt clear and consistent design standards for endpoints, payloads, and HTTP methods. Tools like OpenAPI or Swagger, combined with automated linting, code reviews, and API style guides, help maintain uniformity and reduce errors during implementation.
Make authentication and authorization a priority from the beginning. Use trusted methods like OAuth 2.0, enforce HTTPS for all communications, and validate inputs rigorously. Regular vulnerability assessments and applying the principle of least privilege further strengthen your API's security.
Implement API versioning early on by using clear URL paths like /v1/resource and /v2/resource. Isolating each major version in both code and documentation, along with clear deprecation policies, ensures smooth transitions and minimizes client disruptions.
Optimize caching strategies to handle traffic spikes by reducing server load and improving response times. Employ tools like Redis for server-side caching and CDNs for static content, and ensure proper cache invalidation to avoid stale data issues.
Automate deployments and monitor API health to reduce manual errors and support rapid scaling. Automation ensures consistent releases, while monitoring response times, error rates, and resource usage helps you detect and resolve bottlenecks before they impact users.
Comparison Table: Problems and Solutions
Here’s a quick reference table summarizing common challenges and their solutions:
ProblemSolutionImpactLack of documentationMaintain up-to-date, detailed docsSpeeds up onboarding and reduces integration issuesInconsistent designUse clear naming and structure guidelinesImproves developer experience and simplifies maintenanceSecurity as an afterthoughtBuild security into the design processPrevents vulnerabilities and fosters user trustNo API versioningVersion APIs from the startSmooth updates without breaking integrationsManual deploymentsAutomate the deployment processReduces errors and supports fast scalingPoor scalability planningUse stateless, event-driven architecturesHandles high traffic and reduces complexityLack of monitoringSet up robust monitoring and alertsEnables proactive issue detection and resolutionInefficient cachingApply strategic caching with expirationLowers server load and boosts response times
Middleware API Documentation Requirements
Clear and detailed documentation is the backbone of any successful API. It not only simplifies integration and maintenance but also minimizes developer frustration and reduces support demands. For middleware APIs, which often need to handle high scalability and performance, well-structured documentation is essential for seamless adoption.
According to Postman's 2023 State of the API Report, 60% of developers identify poor documentation as a major challenge when working with APIs. This underscores how important documentation is for an API's success. APIs with robust documentation experience up to 30% faster integration times and 40% fewer support tickets compared to those with incomplete or unclear documentation.
Here’s a breakdown of the critical components that every middleware API documentation should include.
Core Components of API Documentation
To ensure developers can effectively integrate and maintain your middleware, your documentation must cover key areas:
- Authentication Details: Clearly explain the authentication methods your API supports, such as API keys, OAuth 2.0, or JWT tokens. Include step-by-step instructions for obtaining credentials, sample authentication headers, and details about token lifecycles. For example, if you use OAuth, provide specific guidance on implementing it with your endpoints and scopes.
- Endpoint Examples: Offer real-world request and response payloads for each endpoint. Include complete sample requests with all required parameters, optional fields, and expected data formats. Developers benefit greatly from being able to copy and paste working examples, which can significantly speed up integration.
- Error Codes and Messages: Go beyond listing basic HTTP status codes. Provide a detailed guide to all possible errors, along with troubleshooting steps. This reduces guesswork and minimizes support requests.
- Version History: Maintain a clear changelog that tracks modifications, additions, and deprecations. This helps development teams plan upgrades and stay aligned with your API's evolution.
- Rate Limits and Quotas: Clearly document your throttling policies, such as request limits per minute or hour. Explain how developers can monitor these limits using response headers and provide strategies for handling rate limit responses, like implementing backoff mechanisms.
- Security Practices: Outline encryption requirements, data protection measures, and best practices for handling sensitive information. Include details about HTTPS requirements, data encryption (both at rest and in transit), and any compliance standards your API meets.
Best Practices for Clear Documentation
Having the right components is just the start. To make your documentation truly effective, focus on usability and presentation. Even the most accurate technical details can fall short if the documentation is hard to navigate or understand.
- Interactive Documentation Tools: Tools like Swagger/OpenAPI and Postman Collections allow developers to test endpoints directly within your documentation. This hands-on approach helps bridge the gap between theory and practice, giving developers confidence in your API.
- Visual Examples: Use diagrams to illustrate complex concepts like data flows and system interactions. Sequence diagrams, for instance, can show how different middleware components communicate. Include code samples in multiple programming languages that reflect realistic usage scenarios.
- Continuous Updates: Keep your documentation up-to-date by integrating updates into your CI/CD pipeline. This ensures that changes in your API automatically trigger a review of the documentation. Automated checks can flag instances where new endpoints are added without corresponding documentation.
- Consistent Organization: Structure your documentation logically, starting with fundamental concepts like authentication before diving into endpoint specifics. Use consistent naming conventions, include a search function, and provide quick-start guides for common use cases alongside detailed references.
- Developer Feedback Integration: Actively seek feedback from developers to identify areas for improvement. Monitor which sections generate the most support inquiries and address those gaps. Metrics like time-to-integrate and user satisfaction surveys can help pinpoint issues.
- Regular Audits: Schedule quarterly reviews of your documentation to remove outdated information, fix broken links, and add missing examples. As your API evolves and your user base grows, their documentation needs will also change, making these audits essential.
Conclusion: Building Scalable and Reliable Middleware APIs
Creating middleware APIs that can scale effectively requires a careful balance of performance, security, and maintainability. These elements not only ensure smooth operations but also deliver measurable value to your business by meeting growing demands without sacrificing reliability.
A well-thought-out scalable design directly impacts business success and enhances customer satisfaction. For example, companies that incorporate robust queuing systems and monitoring tools are better equipped to maintain performance during peak usage periods.
Key Practices for Middleware API Development
Here's a quick checklist to guide you in building reliable and scalable middleware APIs:
- Design and Architecture: Stick to consistent, RESTful resource naming and ensure endpoints remain stateless to support horizontal scaling. Incorporate asynchronous processing and event-driven patterns to decouple systems effectively.
- Performance and Caching: Use caching strategies across multiple layers, including client-side, CDN, and server-side, with appropriate expiration settings. Regularly monitor and log performance metrics to detect and resolve bottlenecks early.
- Security and Access: Strengthen your APIs with robust authentication and authorization protocols. Encrypt all data in transit and adhere to established best practices for protecting sensitive information.
- Reliability and Maintenance: Implement clear error handling with detailed status codes. Plan for versioning from the start, and handle deprecations carefully to avoid breaking changes. Maintain thorough, up-to-date documentation to simplify onboarding and support.
- Monitoring and Operations: Continuously review and improve security measures. Use automated deployment pipelines and monitoring tools to track system health and performance, ensuring swift responses to potential issues.
When challenges arise, collaborating with seasoned developers can help you overcome obstacles efficiently.
Partnering with Expert Development Teams
Developing middleware APIs capable of handling enterprise-scale demands is no small feat. Managing thousands of concurrent requests, ensuring airtight security, and maintaining peak performance requires a team with deep technical expertise.
Zee Palm brings over 10 years of experience, having delivered 100+ successful projects to 70+ satisfied clients. Our team of 13 professionals, including 10+ expert developers, specializes in building scalable middleware APIs across industries such as AI, SaaS, healthcare, EdTech, Web3, and IoT.
We adhere to clean coding principles and combine AI with human resources for rigorous quality assurance. From static analysis and linting to comprehensive testing, we ensure every solution is robust and bug-free. Our track record includes seamless integration with major platforms like Twilio, Firebase, and RevenueCat, guaranteeing reliable connections across systems. Plus, we offer flexible scaling of development resources to match your growth needs without inflating costs.
With our ability to deliver and release features within a week, we strike the perfect balance between speed and quality. This agility, paired with technical expertise and proven methodologies, ensures your APIs not only keep up with growth but thrive alongside your business.
FAQs
What are the advantages of using message brokers like RabbitMQ or Kafka in scalable middleware API design?
Message brokers such as RabbitMQ and Kafka are essential in creating middleware APIs that can scale effectively. They enable asynchronous communication between services, which helps separate different components, allowing systems to manage large volumes of data without being tightly interconnected.
Here’s why they’re so useful:
- Boosted performance and scalability: By using message queues to handle tasks, APIs can process requests more quickly and expand horizontally to keep up with increasing workloads.
- Dependability: These brokers come with features like acknowledgments, retries, and message persistence, which help ensure data is delivered reliably and minimize the chances of losing information.
- Versatility: Supporting various messaging patterns, such as publish/subscribe and point-to-point, they can fit into a range of architectural setups.
By integrating RabbitMQ or Kafka, middleware APIs can deliver better performance, handle faults more effectively, and adapt to evolving needs, making them a solid choice for long-term scalability and ease of maintenance.
How can I design a secure middleware API that complies with regulations like HIPAA or PCI DSS?
To keep your middleware API secure and in line with regulations like HIPAA or PCI DSS, focus on strong encryption, strict access controls, and detailed audit logging. Encrypt sensitive data both while it's being transmitted and when it's stored, using reliable encryption protocols. Set up role-based access control (RBAC) to ensure only authorized users can access specific data or functions, and keep a close eye on access logs to catch any unusual activity.
It's also critical to stay informed about regulatory updates and perform regular security assessments to uncover and fix vulnerabilities. Adopting a secure development lifecycle (SDLC) and collaborating with skilled developers can help you build an API that not only meets compliance requirements but is also scalable for future needs.
How can middleware APIs effectively handle sudden traffic surges?
To manage unexpected traffic spikes in middleware APIs, having a plan to maintain performance and reliability is essential. A scalable architecture plays a big role here. Using tools like load balancers helps spread traffic evenly across multiple servers, while auto-scaling ensures resources adjust automatically based on demand.
Another critical component is caching. By temporarily storing frequently accessed data, caching reduces the strain on servers and speeds up response times. Adding rate limiting is also smart - it controls how many requests a client can make in a given period, preventing the system from being overwhelmed.
Lastly, set up strong monitoring and alerting systems. These tools can spot bottlenecks or failures as they happen, allowing for quick responses. Together, these strategies help your API stay resilient and deliver a smooth experience, even during traffic surges.
Related Blog Posts

IoT Firmware Obfuscation: Key Techniques
IoT firmware obfuscation is a method to protect device firmware from being reverse-engineered, tampered with, or cloned. By scrambling code and encrypting critical segments, it ensures that IoT devices remain secure, even in environments where they might be physically accessed. However, the limited resources of IoT devices - like processing power, memory, and battery life - make implementing such techniques challenging.
Key techniques include:
- Instruction Reordering: Rearranges code to work only on specific hardware, adding minimal overhead.
- Critical Segment Encryption: Secures sensitive data like cryptographic keys and algorithms.
- Control Flow Obfuscation: Scrambles code with misleading instructions to confuse attackers.
- Address Obfuscation: Masks memory addresses to prevent mapping of firmware components.
- Code Renewal: Regularly updates obfuscated firmware to disrupt reverse engineering.
These methods help IoT devices meet U.S. security standards, such as OWASP and UL-2900, which are critical for sectors like healthcare and industrial systems. By balancing security measures with device limitations, manufacturers can protect against attacks while maintaining usability and compliance.
Getting Started in Firmware Analysis & IoT Reverse Engineering
Core Techniques for IoT Firmware Obfuscation
Obfuscation techniques work together to make reverse engineering a daunting task while aligning with U.S. IoT security standards.
Instruction Reordering and Swapping
Instruction reordering and swapping rearrange firmware instructions so the code functions correctly only on the intended hardware. A 2019 study from Auburn University highlighted how specific instructions can be swapped without causing immediate errors. This method hides the relative addresses of these instructions using a device-specific identifier derived from a physically unclonable function (PUF) and a secure key stored in tamper-proof memory. During startup, a bootloader dynamically reconstructs the correct execution order from a reorder cache, effectively binding the firmware to the hardware. This makes cloning nearly impossible and adds only minimal resource overhead, making it a practical choice for low-cost IoT devices.
Encryption of Critical Segments
Encrypting critical segments protects essential components like cryptographic keys, authentication routines, and proprietary algorithms. White-box cryptography stands out as a top-tier approach here, embedding cryptographic processes directly into the application code. This ensures that even if attackers access the code, the keys and algorithms remain secure, providing continuous protection during runtime. For IoT devices with limited resources, this technique offers a cost-effective, layered security solution.
Control Flow Obfuscation
Control flow obfuscation scrambles code into a mix of genuine and misleading instructions, making both static and dynamic analysis extremely challenging. Techniques like code flow transformation and the "jump-in-the-middle" method mix real instructions with deceptive ones. Adding unnecessary control statements and garbage code further disrupts analysis attempts.
To complement this, code splitting can scatter firmware logic across multiple segments, adding another layer of complexity.
Code Splitting and Redundancy
Code splitting divides firmware into separate segments that can be loaded independently, while redundancy introduces alternate execution paths that achieve the same results. Together, these methods obscure program logic by spreading interdependent code segments across the system. For devices with limited resources, selective redundancy - focused on critical functions - strikes a balance between improved security and efficient use of memory and processing power. Manufacturers can also use remote update capabilities to periodically replace firmware with newly obfuscated versions, making reverse engineering even harder.
Address Obfuscation
Address obfuscation disguises memory addresses, pointers, and key instruction locations, making it difficult for attackers to map firmware components or understand data flow. By masking the relative positions of code and data - often using device-specific identifiers from PUFs - this technique creates a dynamic link between hardware and firmware. Even if an attacker captures a memory snapshot, the extracted addresses are unlikely to match actual runtime locations. Frequent changes, such as those triggered at each boot cycle or firmware update, further complicate unauthorized reconstruction. Proper implementation requires close coordination with the bootloader and runtime environment to ensure legitimate execution while blocking unauthorized access.
Regularly updating obfuscated code through firmware updates adds another layer of defense, forcing attackers to start their reverse engineering efforts from scratch. This increases both the cost and complexity of potential attacks.
Comparison of Obfuscation Methods
After exploring the details of various techniques, the table below outlines the key trade-offs for each method. When choosing an obfuscation strategy, consider factors like security, performance, and complexity.
Comparison Table of Techniques
This table provides a side-by-side evaluation of obfuscation methods based on their security, performance impact, and other critical factors:
TechniqueSecurity LevelPerformance ImpactImplementation ComplexityResistance to Reverse EngineeringSuitability for Low-Cost IoTInstruction Reordering/SwappingMediumLowLowMediumHighEncryption of Critical SegmentsHighMediumMediumHighMediumControl Flow ObfuscationHighModerateHighHighMediumAddress ObfuscationMediumLowMediumMediumHighCombined White-Box CryptographyVery HighModerateHighVery HighMediumRegular Renewal of Obfuscated CodeHighLow-MediumMediumHighHigh
Performance benchmarks from a 2019 IEEE study indicate that instruction reordering adds less than 1% overhead for battery-powered devices.
Security levels vary significantly across techniques. For example, combining white-box cryptography with obfuscation offers the strongest protection but demands more computational resources. Control flow obfuscation is also highly secure, as it makes the code structure difficult to predict. On the other hand, address obfuscation strikes a balance with moderate security and excellent resource efficiency.
Implementation complexity plays a big role in determining the feasibility of each method. Techniques like instruction reordering can be applied through simple toolchain modifications, while more advanced methods like control flow obfuscation require in-depth compiler changes and rigorous testing to ensure the code functions correctly.
Choosing the Right Method for Your Device
Using the comparison above, select a method that aligns with your device’s resource constraints and security demands. Let the device’s capabilities and intended use guide your decision.
For resource-constrained devices, such as those with limited CPU power and memory, lightweight methods like instruction reordering and selective encryption of critical segments are ideal. These techniques are also cost-effective for mass-market IoT products, where complex methods requiring significant processing power are impractical.
For high-value targets handling sensitive data, a layered approach is more suitable. Combining white-box cryptography with dynamic code signing provides robust protection, especially for industrial IoT devices where security takes precedence over power consumption.
Devices with update capabilities can benefit from regular renewal of obfuscated code. This method significantly increases attack difficulty and works well for smart home devices and connected appliances with reliable internet access.
Compliance requirements in U.S. markets often mandate stronger obfuscation techniques. NIST security standards emphasize robust firmware protection, which may necessitate encryption-based methods even for cost-sensitive devices. For example, medical IoT devices and components of critical infrastructure typically require the highest levels of security, regardless of complexity.
Traditional memory protection in microcontrollers is no longer sufficient to prevent firmware extraction and cloning. Software-based obfuscation has become essential. Real-world cases, such as challenges faced by Schneider Electric with firmware reverse engineering, underscore the importance of robust obfuscation strategies.
Finally, the expertise of the development team matters. Teams familiar with cryptographic techniques may find white-box cryptography easier to implement, while those specializing in embedded systems might prefer simpler methods like instruction reordering. At Zee Palm, with over a decade of experience in IoT, we specialize in crafting balanced obfuscation strategies tailored to specific needs.
sbb-itb-8abf120
Implementation Considerations for U.S. IoT Market
When developing IoT firmware for the U.S. market, it’s crucial to align with local standards, regulations, and platform requirements. This ensures both compliance and a user-friendly experience.
Localization for U.S. Standards
Getting the details right for U.S. users starts with understanding their preferences for formatting and measurements.
For example, date and time formats are a key consideration. Americans use the MM/DD/YYYY format, so a date like "03/04/2024" is read as March 4th, not April 3rd. Similarly, time is typically displayed in the 12-hour AM/PM format, rather than the 24-hour clock. This is especially relevant for devices like smart locks or security cameras, where timestamps are frequently referenced.
Measurement units also require attention. Devices should display temperature in Fahrenheit, not Celsius, and use imperial units like feet, inches, and pounds for distance, weight, and other metrics. This ensures that metrics on smart home devices, wearables, and other IoT products feel intuitive to U.S. consumers.
Language consistency is another factor. Use U.S. English spelling - for instance, "color" instead of "colour" and "center" instead of "centre" - in firmware interfaces and documentation. This small adjustment can significantly improve clarity for both users and technicians.
These localization efforts also support compliance with the strict security and usability standards expected in the U.S. market.
Compliance with U.S. Security Regulations
Security is non-negotiable in the U.S. IoT landscape, and adhering to established guidelines is a must.
Start with the OWASP guidelines, which outline best practices for secure coding. These address vulnerabilities like weak authentication and unencrypted communications, both critical for IoT firmware.
For higher-stakes applications, UL-2900 cybersecurity standards are becoming increasingly relevant. This certification evaluates how well firmware resists reverse engineering and other threats. It’s especially important for devices used in critical infrastructure, healthcare, or industrial settings.
The Federal Trade Commission (FTC) also plays a role, requiring manufacturers to implement "reasonable" security measures. This includes protecting firmware against tampering to avoid potential regulatory penalties.
Finally, the NIST Cybersecurity Framework provides a roadmap for managing risks. For IoT devices serving government clients or critical infrastructure, compliance with NIST standards is often essential. Here, firmware obfuscation acts as one layer in a broader defense strategy, helping protect sensitive systems from potential breaches.
Integration with U.S.-Based Platforms
Seamless integration with leading U.S. platforms is just as important as security and localization.
For example, Amazon Web Services (AWS) IoT Core dominates the U.S. IoT ecosystem. Firmware must support features like device management, over-the-air (OTA) updates, and secure token exchanges while maintaining robust obfuscation.
Similarly, Google Cloud IoT Core presents its own challenges, particularly in managing device registries and ensuring smooth telemetry data transmission. Obfuscation techniques should be designed to work seamlessly with Google’s APIs without compromising functionality.
Microsoft Azure IoT Hub is another major player. Firmware integration here requires support for core services like OTA updates and device management, while preserving advanced features like device twin operations and direct method invocations. Secure, bidirectional communication must remain intact.
At Zee Palm, we’ve spent over a decade navigating the complexities of IoT development. Our team specializes in balancing security, compliance, and platform compatibility, ensuring your devices meet U.S. standards while delivering a seamless experience for users. Whether it's adhering to strict regulations or integrating with major platforms, we’re here to help your IoT solutions succeed.
Best Practices for Secure Firmware Development
Creating secure IoT firmware demands thorough testing, consistent updates, and hardware-level protections to establish a multi-layered defense.
Using Static and Dynamic Analysis Tools
Static analysis tools scrutinize firmware code without running it, helping identify issues like buffer overflows, weak cryptography, and hardcoded credentials. On the other hand, dynamic analysis tools execute the firmware in controlled environments, uncovering runtime vulnerabilities, memory leaks, and unexpected behaviors that might not surface during static testing.
For obfuscated firmware, specialized tools are indispensable. These tools can navigate complexities such as instruction reordering, control flow changes, and encrypted code segments. By integrating these tests throughout the development process, vulnerabilities can be spotted and addressed early, streamlining efforts and reducing costs. This proactive testing lays the groundwork for consistent updates and hardware-based protections.
Regular Updates and Renewal of Obfuscation
Once strong analysis practices are in place, maintaining obfuscation through regular updates becomes critical. Periodically renewing obfuscated firmware disrupts attackers, forcing them to start their analysis from scratch. For consumer IoT devices, updates every 3–6 months are advisable, while critical infrastructure may require even more frequent revisions.
Immediate updates should be triggered when new vulnerabilities are discovered, similar devices are successfully attacked, significant threats emerge, or compliance requirements change. Regularly replacing firmware not only hinders attackers but also ensures devices stay aligned with evolving security needs. Combining this strategy with remote update capabilities enhances its effectiveness.
Hardware Signatures and Secure Updates
Hardware-based measures add another layer of protection to firmware security. Hardware signatures create a unique link between firmware and the device, preventing unauthorized clones from operating. Advanced implementations use physically unclonable functions (PUFs) alongside tamper-proof nonvolatile memory to generate device-specific identifiers. During obfuscation, swapped instruction addresses are concealed using a PUF-derived identifier and a unique key stored in secure memory. The bootloader verifies this hardware signature at startup, ensuring the firmware only runs on authenticated devices.
For secure remote updates, the process must authenticate the update source, verify firmware integrity, and maintain obfuscation during transmission and installation. Techniques like dynamic code signing, which validates code integrity at runtime by checking its structure and call stack, are crucial. A robust update mechanism should enable remote deployment of obfuscated firmware without physical access to the device. Encryption, signed images, and rollback protection further secure the process, ensuring that firmware integrity and obfuscation remain intact.
At Zee Palm, we’ve spent over a decade navigating the complexities of IoT development. We understand that security isn’t just about implementing the right methods - it’s about staying vigilant and evolving those methods over time. Our team specializes in balancing security, performance, and cost, ensuring your IoT devices remain protected against ever-changing threats.
Conclusion
Protecting IoT devices from reverse engineering and tampering is more critical than ever, and firmware obfuscation plays a key role in this defense. By adopting a layered approach, organizations can create multiple barriers that make attacks far more challenging. Research supports this strategy, showing that robust obfuscation significantly reduces the likelihood of successful breaches.
Consider this: a study revealed that 96% of 237 IoT devices were reverse engineered using standard tools, with over 70 of them displaying common vulnerabilities. However, devices with obfuscated or encrypted firmware proved much harder to compromise. These findings highlight how essential strong obfuscation is, especially for meeting U.S. market and regulatory standards.
For organizations operating in the U.S., compliance with IoT cybersecurity standards demands effective measures against cloning and reverse engineering. Techniques like instruction reordering, control flow obfuscation, and hardware fingerprinting provide robust protection while remaining feasible for devices with limited resources.
The success of these measures, however, depends on working with skilled development teams. At Zee Palm, we bring over a decade of experience in IoT and smart technology development, having successfully delivered more than 100 projects. Our expertise covers everything from initial code obfuscation to ongoing firmware updates and compliance support, ensuring devices remain secure over time.
It's important to remember that security isn't a one-time effort. Continuous updates and rigorous testing are crucial to staying ahead of emerging threats and maintaining compliance with evolving U.S. standards. Investing in strong firmware obfuscation not only reduces security incidents but also builds customer trust and safeguards an organization’s reputation.
The path to a secure IoT future starts with action today. By implementing comprehensive obfuscation strategies and collaborating with experienced teams, organizations can protect their devices, secure their customers, and thrive in an increasingly connected world.
FAQs
What techniques are used to secure IoT firmware while considering the limited resources of IoT devices?
Balancing security with limited resources in IoT firmware demands a thoughtful approach to obfuscation techniques. Some widely used methods include encryption, which secures sensitive data by encoding it; code splitting, where firmware is broken into smaller segments to complicate reverse engineering; and control flow obfuscation, which modifies the logical structure of code to confuse potential attackers.
These strategies aim to strengthen security while respecting the constraints of IoT devices, such as limited processing power, memory, and energy. By focusing on efficiency, developers can achieve strong protection without compromising the device's performance.
What challenges do manufacturers face when applying obfuscation techniques to IoT device firmware?
Manufacturers face a variety of challenges when trying to implement obfuscation techniques for IoT device firmware. One major issue is finding the right balance between security and performance. Techniques like encryption or control flow obfuscation can add extra computational demands, which might reduce the device's overall efficiency - a critical factor for many IoT applications.
Another challenge lies in ensuring that the firmware remains compatible across different hardware platforms. IoT devices often operate in diverse environments, and maintaining scalability for large-scale deployments adds another layer of complexity.
On top of these technical hurdles, manufacturers must also keep pace with ever-evolving cyber threats. Hackers are constantly developing new ways to reverse-engineer firmware, which means obfuscation methods need regular updates and improvements to stay effective. Despite these difficulties, implementing strong obfuscation strategies is crucial for safeguarding sensitive data and protecting intellectual property in IoT devices.
How does firmware obfuscation support IoT devices in meeting U.S. security standards like OWASP and UL-2900?
Firmware obfuscation is a key strategy in boosting the security of IoT devices, ensuring they meet U.S. standards like the OWASP IoT Security Guidelines and UL-2900. Techniques such as encryption, code splitting, and control flow obfuscation make it much more difficult for attackers to reverse-engineer firmware or exploit potential vulnerabilities.
These approaches help protect sensitive data, secure intellectual property, and minimize the chances of unauthorized access - core principles emphasized by these security standards. By adopting these methods, developers can create IoT devices that are better prepared to tackle today's cybersecurity threats.
Related Blog Posts

Top 10 APM Tools for Mobile Apps 2025
Mobile app performance is critical in 2025, with over 70% of users abandoning apps that take more than 3 seconds to load. Application Performance Monitoring (APM) tools help developers track, analyze, and optimize app performance in real-time, ensuring smooth user experiences and reducing issues like crashes, slow load times, and high resource usage. Below are 10 top APM tools for mobile apps, each offering distinct features, platform support, and pricing models:
- BrowserStack: Real device testing on 3,500+ devices with real-time monitoring. Starts at $39/month.
- Appium: Open-source UI automation for Android, iOS, and Windows. Free.
- New Relic Mobile: Enterprise-grade monitoring with crash analytics and user interaction tracking. Starts at $49/user/month.
- Firebase Performance Monitoring: Free tool from Google for real-time performance insights and custom traces.
- AppDynamics: Advanced analytics for mobile apps, crash rates, and user journeys. Pricing starts at $60/month per CPU core.
- TestFairy: Combines performance metrics with video session recordings. Starts at $49/month.
- SolarWinds AppOptics: Backend and infrastructure monitoring with customizable dashboards. Starts at $9.99/host/month.
- Android Profiler: Free built-in Android Studio tool for CPU, memory, and network profiling.
- LeakCanary: Free Android memory leak detection tool by Square.
- BlazeMeter: Cloud-based load testing for mobile apps, starting at $99/month.
Quick Comparison:
ToolPlatform SupportKey FeaturesStarting Price (USD)BrowserStackiOS, AndroidReal device testing, session replays$39/monthAppiumiOS, Android, WindowsCross-platform UI automationFreeNew Relic MobileiOS, AndroidReal-time monitoring, crash analytics$49/user/monthFirebaseiOS, Android, FlutterFree real-user performance insightsFreeAppDynamicsiOS, AndroidEnd-to-end monitoring, AI-driven analytics$60/month per coreTestFairyiOS, AndroidVideo session recordings$49/monthSolarWindsBackend onlyInfrastructure monitoring, tracing$9.99/host/monthAndroid ProfilerAndroid onlyCPU, memory, network profilingFreeLeakCanaryAndroid onlyMemory leak detectionFreeBlazeMeteriOS, Android, WebLoad testing, JMeter-based$99/month
Each tool suits different needs, from free solutions like Firebase and LeakCanary to enterprise-focused platforms like AppDynamics. Choose based on your app's complexity, platform, and budget.
The Next Wave of APM Is Mobile
1. BrowserStack
BrowserStack is a cloud-based platform designed to test mobile app performance using 3,500+ real devices and browsers for both iOS and Android. Unlike traditional methods that depend on emulators, BrowserStack provides real device environments, offering a more accurate representation of actual user conditions.
The platform includes three primary tools tailored to different testing needs: App Live for manual testing, App Automate for running automated workflows, and App Performance for tracking app performance metrics.
Platform Support (iOS, Android, Cross-Platform)
BrowserStack supports testing on both iOS and Android devices, covering a wide range of operating system versions. By utilizing this extensive real device cloud, teams can avoid the hassle of maintaining physical device labs. This makes scaling testing efforts far more efficient and allows seamless integration with the platform's advanced performance features.
Core Features (Real-Time Monitoring, Crash Analytics, User Experience Tracking)
BrowserStack offers real-time monitoring to capture key metrics like FPS, ANR rates, loading times, and resource usage across its 3,500+ devices. Features such as session replays, detailed graphs, and audit reports provide teams with actionable insights into performance issues. Additionally, the platform allows developers to simulate various network conditions, helping them optimize app performance for scenarios like low bandwidth or high latency environments.
Integration Capabilities and Pricing
BrowserStack integrates smoothly with CI/CD tools such as Jenkins, Travis CI, and CircleCI, as well as test automation frameworks like Appium and Selenium. This integration streamlines the testing process, making it easier to incorporate into existing development workflows.
Pricing for BrowserStack follows a subscription model, starting at $39 per month for individual users. Larger teams can opt for business or enterprise plans, and organizations with specific needs or high testing volumes can request custom pricing. All prices are listed in U.S. dollars, adhering to standard American billing conventions.
A fintech company in the U.S. used BrowserStack to test their mobile banking app on multiple real devices and under various network conditions. Through the platform's real-time monitoring and crash analytics, they identified a memory leak on older Android devices and UI lag issues on iOS 14. After resolving these problems, the company achieved a 30% drop in crash rates, leading to higher user satisfaction and showcasing the platform's practical benefits.
2. Appium

Appium is an open-source framework designed to automate testing for native, hybrid, and mobile web apps across multiple platforms.
Platform Support
Appium supports Android, iOS, and Windows, making it a versatile choice for cross-platform testing. You can write test scripts in popular programming languages like Java, Python, JavaScript, or Ruby, and these scripts can run seamlessly across all supported platforms. Whether you're using real devices or emulators/simulators, Appium provides the flexibility to suit different budgets and testing needs.
Core Features
Appium specializes in automating UI interactions such as taps, swipes, and screen transitions, while also measuring response times. Although its primary focus is on UI automation and performance measurement, you can expand its functionality with tools like Firebase Crashlytics or Sentry for broader performance insights.
Integration Capabilities
Appium easily integrates into CI/CD pipelines using tools like Jenkins, GitHub Actions, and Bitrise. It supports the WebDriver protocol, ensuring compatibility with cloud-based device testing platforms like BrowserStack and Sauce Labs. These integrations help streamline your testing process and improve overall test coverage.
Pricing
Appium is completely free and open-source, meaning there are no licensing fees. However, you may incur costs for infrastructure, such as setting up device labs or using cloud testing services. Despite this, Appium remains a budget-friendly option for teams of all sizes.
3. New Relic Mobile

New Relic Mobile delivers enterprise-level monitoring for mobile apps, providing real-time analytics and in-depth performance insights to help developers maintain high standards.
Platform Support
This tool works seamlessly with both iOS and Android platforms. It also supports cross-platform frameworks like React Native, ensuring that no matter your development approach, you can consistently monitor your entire mobile app portfolio.
Core Features
New Relic Mobile offers real-time tracking for crash rates, error rates, user interactions, and network response times. Its detailed crash analytics help developers quickly pinpoint and address root causes. Additionally, user experience tracking gathers metrics that reveal how users interact with the app under real-world conditions. This data allows teams to fine-tune responsiveness and eliminate performance bottlenecks.
Integration Capabilities
The platform integrates smoothly with the broader New Relic suite, providing a unified view of both mobile and backend performance. This integration connects mobile app issues to potential server-side problems, offering a complete picture of the application ecosystem. It also supports CI/CD pipeline integration, automating performance monitoring throughout development and deployment. With connections to alerting and incident management tools, teams can proactively address potential issues before they escalate.
Pricing
New Relic provides a free tier, ideal for small teams or initial testing, though it comes with limited data retention and features. Paid plans begin at approximately $49 per user per month, with pricing adjusted based on data retention, the features included, and the number of users. For larger organizations with complex monitoring needs, custom enterprise pricing is available upon request.
4. Firebase Performance Monitoring
Firebase Performance Monitoring is a free application performance management (APM) tool from Google, designed specifically for mobile apps. It offers real-time insights into how apps perform based on actual user interactions, helping developers identify and address performance issues under real-world conditions.
Platform Support
This tool works seamlessly across major mobile platforms, including iOS, Android, and widely-used cross-platform frameworks like Flutter and React Native. With this compatibility, developers can monitor performance across various apps with a single, unified approach.
Core Features
Firebase Performance Monitoring collects essential performance metrics automatically, such as:
- App startup time
- Network request latency
- Screen rendering performance
Its real-time monitoring and customizable traces make it easy to pinpoint issues like slow startups, high latency, frozen frames, or delayed rendering. Developers are notified of these issues directly through the Firebase Console, enabling swift action. Additionally, the tool integrates with Firebase Crashlytics, combining performance and crash data for a more complete view of app health.
Integration Capabilities
Integrating Firebase Performance Monitoring is straightforward with the Firebase SDK. The tool works natively with other Firebase services, such as Analytics, Remote Config, and Crashlytics, creating a cohesive ecosystem for mobile app development. For teams needing deeper analysis, performance data can be exported to BigQuery for long-term tracking and custom reporting. Its compatibility with cross-platform frameworks ensures consistent monitoring, no matter the development approach.
Pricing
Firebase Performance Monitoring is available at no cost as part of the Firebase platform. However, exporting large amounts of data to BigQuery or using other paid Firebase services may incur additional fees. Pricing is handled in USD, making it easier for U.S. developers to manage budgets effectively.
5. AppDynamics

AppDynamics is a powerful enterprise-level APM solution that provides detailed insights into mobile app performance while ensuring strong security and reliable support. As part of Cisco's portfolio, it’s a trusted option for organizations managing complex mobile ecosystems.
Platform Support
AppDynamics offers comprehensive monitoring for both iOS and Android platforms, covering native and hybrid mobile apps. Its ability to handle cross-platform monitoring ensures that organizations can manage their apps across multiple operating systems in a unified way. This makes it particularly useful for enterprises that need consistent oversight across diverse mobile environments.
Core Features
The platform delivers real-time performance monitoring, detailed crash analytics with stack traces, and Experience Journey Mapping to help teams visualize user flows. These tools make it easier to identify and address performance issues before they affect users.
AppDynamics tracks essential metrics such as:
- App launch times
- Crash frequency
- Error rates
- Session durations
- Network latency
- Response times
These metrics allow developers to pinpoint bottlenecks and focus on fixes that improve user retention and business outcomes.
The platform also leverages AI-driven analytics to automatically flag anomalies and performance issues. This reduces the need for manual monitoring and cuts down mean time to resolution (MTTR) for mobile incidents by up to 70%. Its alerting and root cause analysis features are particularly effective for minimizing downtime.
For example, a leading retail company used AppDynamics to monitor its mobile shopping app. During peak sales events, they identified a spike in crash rates, traced the issue to a memory leak in the checkout process, and deployed a fix. This reduced crash rates by 40%, boosting user satisfaction and sales conversions.
Additionally, AppDynamics integrates seamlessly with IT and DevOps tools, enhancing its usability across teams.
Integration Capabilities
AppDynamics works with CI/CD pipelines and major cloud platforms like AWS and Azure. These integrations allow for smooth data sharing and workflow automation, helping teams correlate app performance with infrastructure metrics.
Its end-to-end transaction tracing feature is especially valuable, as it enables developers to follow a user’s journey through the app and backend services. This capability is crucial for troubleshooting and optimizing user experiences in complex environments.
Pricing
AppDynamics uses a subscription-based pricing model, billed in U.S. dollars (USD). Costs vary depending on factors like the number of mobile agents, desired features, and deployment scale. As of 2025, detailed pricing is available upon request, with enterprise plans tailored to specific needs. U.S. customers can choose between monthly or annual billing.
While AppDynamics offers an impressive range of features, organizations should be aware that setup and configuration can be complex, especially for large-scale or multi-platform deployments. Despite this, the platform consistently earns high ratings (4.5/5 or higher) on major review sites for its ability to deliver actionable insights. Some users note that training may be necessary to fully utilize its advanced analytics and integrations.
6. TestFairy
TestFairy stands out by combining traditional performance tracking with visual session recordings, offering teams detailed insights into user interactions.
Platform Support
TestFairy works with both iOS and Android, making it a solid choice for teams focused on native app development. While it's not specifically designed for frameworks like React Native or Flutter, it can still be integrated into hybrid app workflows with some adjustments.
Core Features
What makes TestFairy special is its ability to provide visual insights alongside performance metrics. It records video sessions of user interactions, capturing what happens just before a crash. This feature simplifies the process of reproducing and diagnosing bugs by showing exactly how users interact with the app in real time.
In addition to session recordings, TestFairy tracks performance metrics and links crashes to session details. This connection helps teams understand the conditions that led to a crash, offering context that traditional tools often miss. By turning raw data into actionable feedback, TestFairy helps teams focus on improving app performance.
Integration Capabilities
TestFairy integrates seamlessly with tools like Jira, Slack, and CI/CD pipelines, making it easy to fit into existing development workflows. For instance:
- Crash reports and test results can be sent directly to Slack, keeping teams updated in real time.
- The Jira integration allows automatic creation of bug tickets, speeding up issue tracking and resolution.
These integrations ensure that TestFairy supports smooth communication and efficient feedback collection.
Pricing
TestFairy offers a tiered pricing structure in USD, with plans based on the number of apps, users, or sessions being monitored. A free trial or limited free tier is often available, making it accessible for small teams or those evaluating the tool. For exact pricing and enterprise options, teams need to contact TestFairy for a customized quote.
QA teams and smaller development groups appreciate TestFairy for its ease of use and the clarity of its insights. While its analytics might not be as extensive as tools tailored for large enterprises, most users find it easy to integrate with standard iOS and Android projects. It’s a practical choice for organizations aiming to improve mobile app performance monitoring without a complicated setup.
sbb-itb-8abf120
7. SolarWinds AppOptics
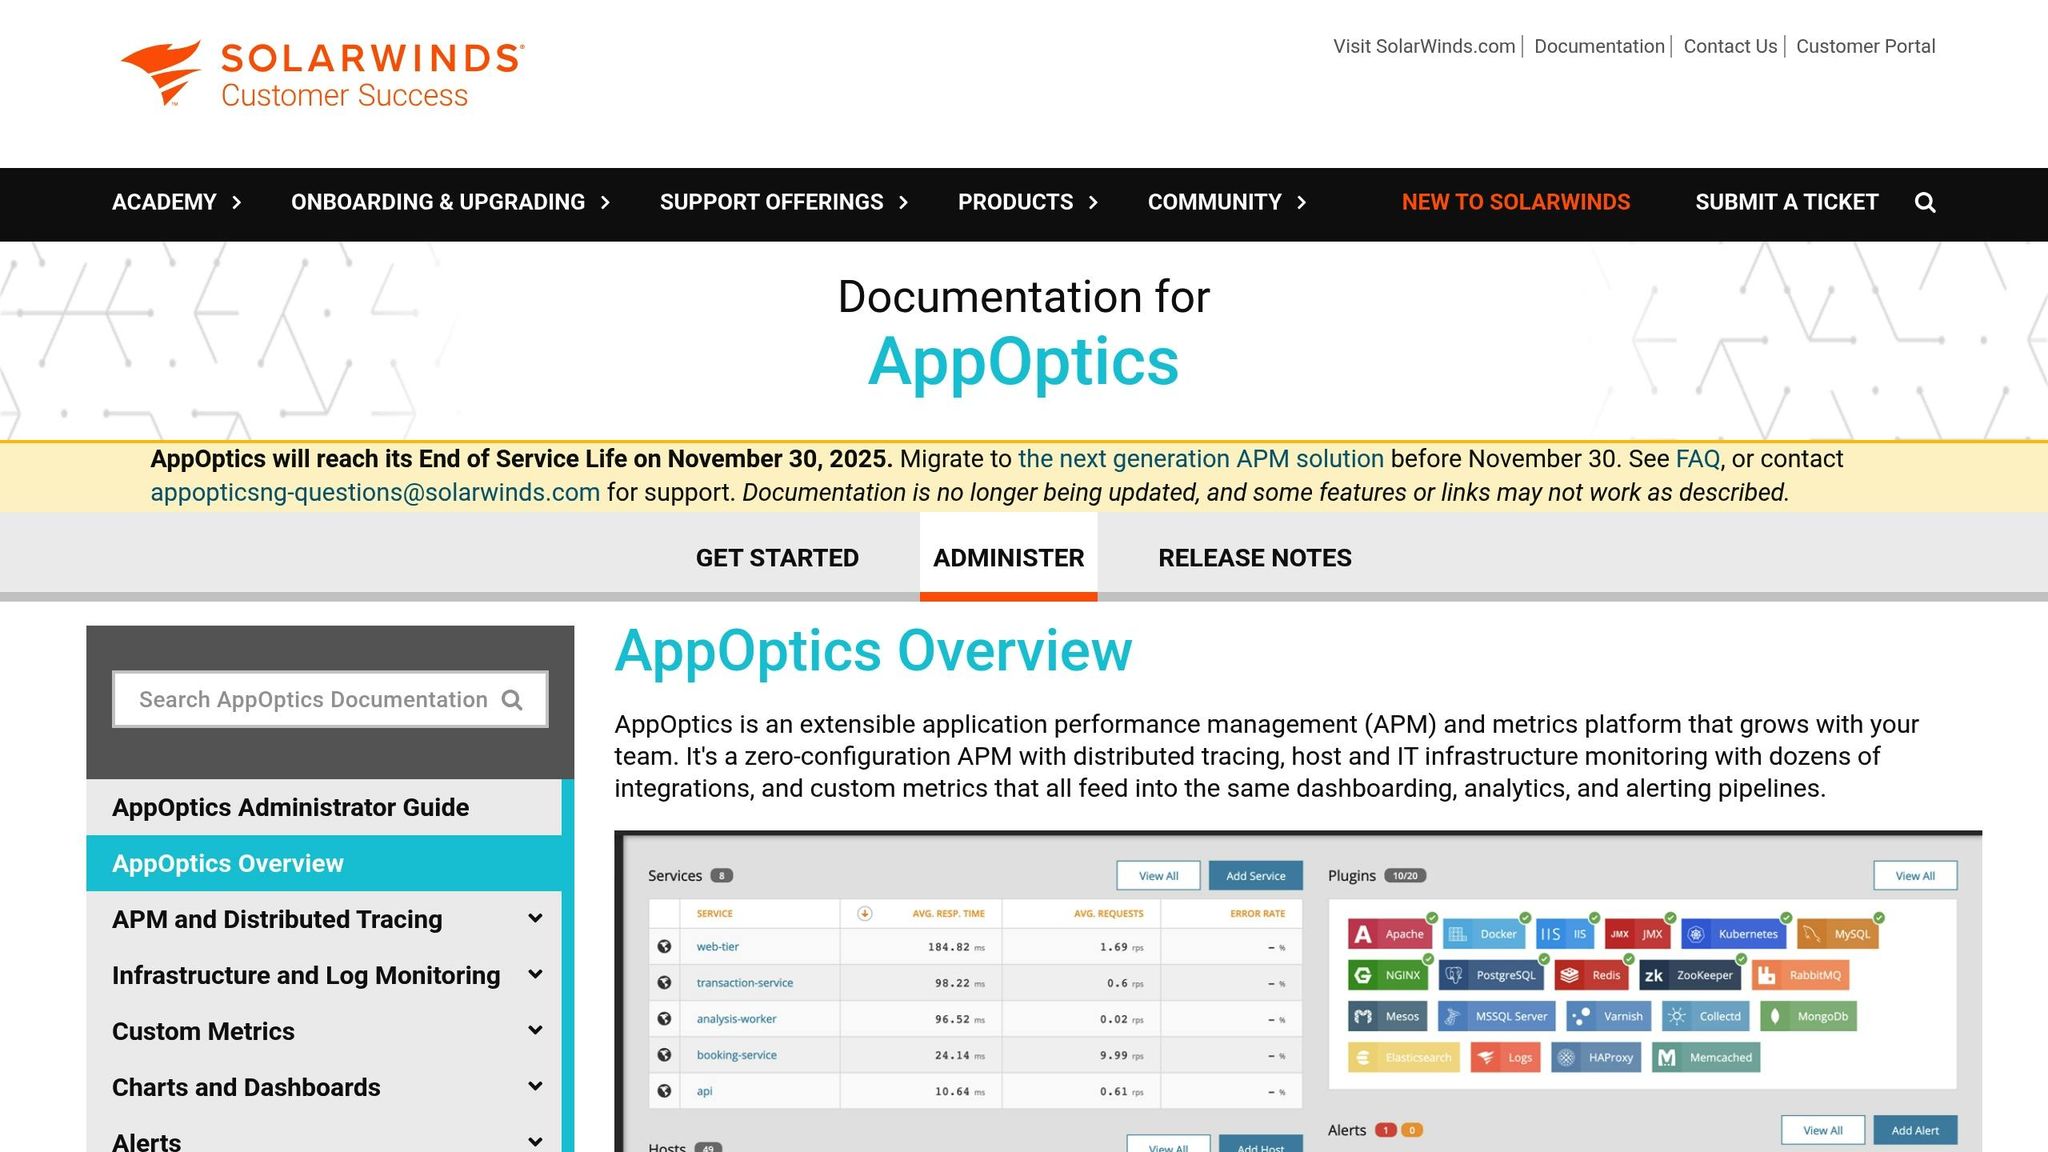
SolarWinds AppOptics provides a full-stack monitoring solution for mobile apps, focusing primarily on the backend services, APIs, and infrastructure that power these applications. Instead of diving into in-app performance, it emphasizes monitoring the systems behind the scenes, making it a great complement to tools that handle in-app metrics.
Platform Support
While AppOptics doesn't offer native SDKs for direct in-app tracking, it excels at monitoring backend services and APIs for iOS, Android, and web applications. By integrating with Pingdom, it delivers a complete view of the user experience, from the backend to the front end.
Core Features
AppOptics stands out with tools like distributed tracing, live code profiling, and customizable dashboards, all designed to identify performance issues in microservices and app backends. Its real-time data feeds, exception tracking, and centralized log analysis make it easier to link mobile issues to backend problems. Developers can also use its custom metrics feature to create dashboards tailored to specific app performance indicators.
For example, a U.S. healthcare provider used distributed tracing in AppOptics to uncover and resolve latency issues caused by a particular database query. This fix improved app speed and boosted patient satisfaction.
Integration Capabilities
AppOptics goes beyond backend monitoring by integrating seamlessly with major cloud providers and DevOps tools. It works natively with AWS, Azure, and Google Cloud and supports popular DevOps tools and CI/CD pipelines. Additionally, its API-based integrations allow for custom workflows and reports, ensuring a unified view of app performance across both client-side and backend systems.
Pricing
SolarWinds AppOptics uses a subscription-based pricing model in U.S. dollars. Infrastructure monitoring starts at about $9.99 per host per month, while full application performance monitoring (APM) capabilities are available at approximately $24.99 per host per month. Pricing adjusts based on the number of hosts and features needed, making it suitable for both small teams and large enterprises. The tool has earned a user rating of around 4.3/5 on major software review platforms.
8. Android Profiler (Android Studio)
Android Profiler is a built-in performance monitoring tool in Android Studio, tailored specifically for developers. Unlike cloud-based Application Performance Monitoring (APM) tools, it provides real-time performance insights during the development phase. This allows teams to identify and address performance issues long before the app reaches production.
Platform Support
Android Profiler is exclusively designed for Android app development and is seamlessly integrated into Android Studio. Its Android-specific focus enables it to deliver detailed, native-level performance data, making it an indispensable tool for Android developers.
Core Features
This tool provides real-time monitoring of key performance metrics, including:
- CPU usage: Track how much processing power your app consumes.
- Memory consumption: Identify memory leaks and optimize memory usage.
- Network activity: Monitor data transfer rates and detect network spikes.
- Battery usage: Analyze how your app impacts battery life.
Additionally, it helps developers pinpoint issues like slow method calls, rendering delays, and other bottlenecks on devices and emulators. Features like session recording and APK debugging streamline the optimization process, though it lacks dedicated crash analytics tools like Firebase Crashlytics.
Integration Capabilities
As part of Android Studio, Android Profiler fits seamlessly into the development workflow. Developers can move between writing code and profiling performance without leaving their Integrated Development Environment (IDE). It works with all Android projects, supporting both debug and release builds.
For teams using Firebase, Android Profiler complements Firebase Performance Monitoring by focusing on development-time optimization. Firebase handles monitoring in the production environment, creating a well-rounded performance strategy.
Pricing
Android Profiler is included with Android Studio, making it a free, professional-grade tool for performance monitoring.
9. LeakCanary
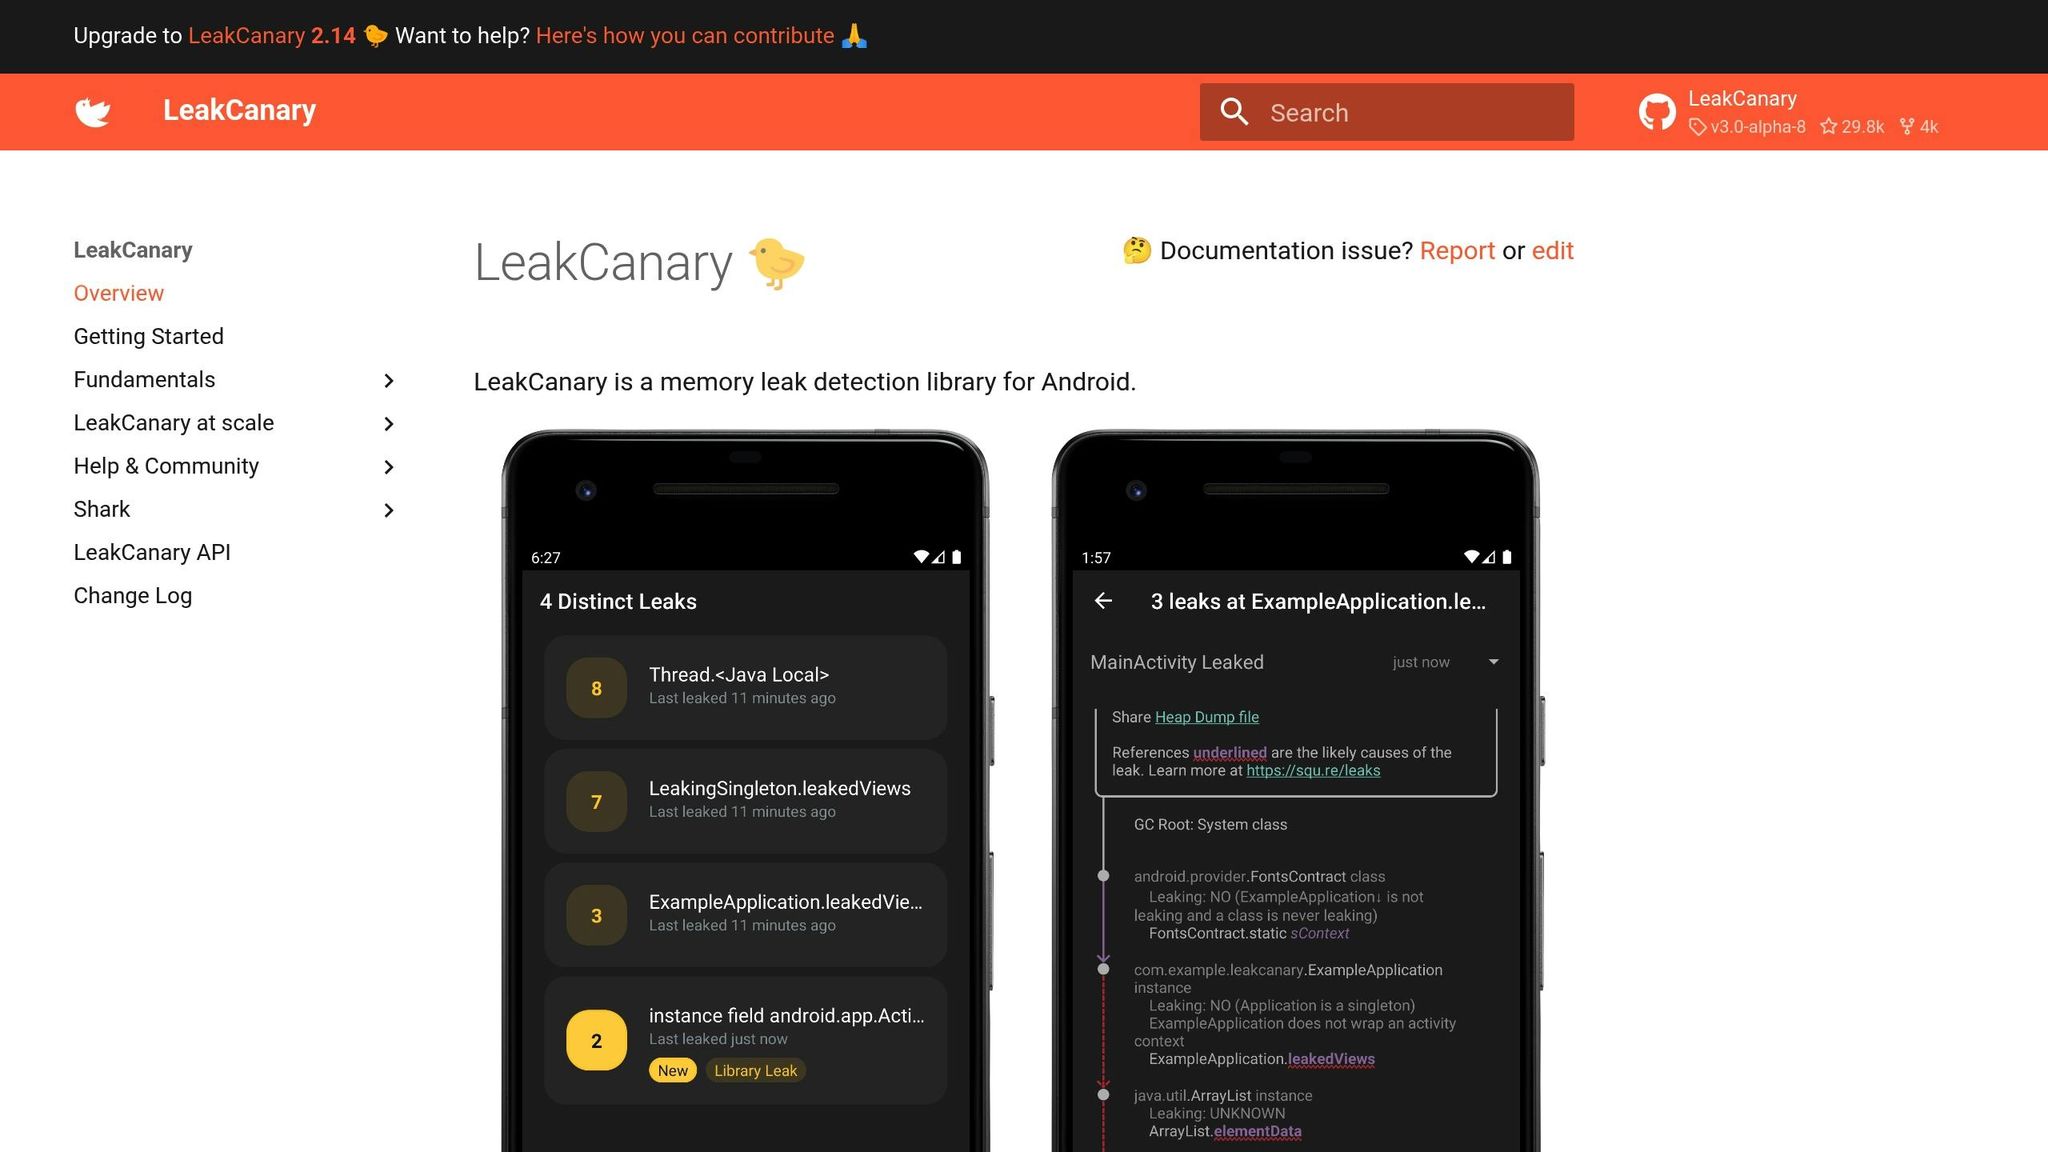
LeakCanary is a specialized tool built by Square (now Block, Inc.) to detect memory leaks in Android apps. Unlike broader performance monitoring tools, LeakCanary zeroes in on memory leaks that can cause crashes or slow performance, making it a go-to resource for Android developers looking to fine-tune their apps.
Platform Support
This tool is exclusively designed for Android apps. It doesn't extend support to iOS or cross-platform frameworks, a limitation that allows it to focus on providing in-depth insights into Android-specific memory management issues.
Core Features
LeakCanary stands out for its ability to automatically detect memory leaks in real time during development and testing. After being integrated, it monitors your app’s memory usage and flags instances where objects that should be garbage collected are still lingering. It provides detailed reports that highlight the leaking objects and the reference chains causing the issue. This level of detail helps developers quickly identify and fix potential problems before they reach production.
Integration Capabilities
Adding LeakCanary to your project is simple. You just include it as a library dependency in your Android project's build.gradle file. Once included, it starts monitoring memory leaks automatically with minimal setup required. Many developers pair it with tools like Firebase Performance Monitoring or Android Profiler for a more comprehensive performance analysis.
Pricing
LeakCanary is completely free to use. As an open-source tool, it has no licensing fees, making it accessible for both commercial and personal projects.
10. BlazeMeter
BlazeMeter is a cloud-based performance testing platform designed to ensure applications can handle heavy traffic and operate efficiently before they’re released. Built on Apache JMeter, it scales testing to mimic real-world usage patterns across large, distributed systems.
Platform Support
BlazeMeter expands on performance strategies, such as those used by LeakCanary, by simulating realistic user loads. It supports cross-platform testing for iOS and Android mobile apps, as well as web and API testing. This flexibility allows teams to replicate user behavior and network conditions across various devices and operating systems, making it a versatile tool for diverse mobile environments.
Core Features
BlazeMeter shines when it comes to real-time performance monitoring during simulated load tests. It can generate millions of virtual users to evaluate how mobile apps and backend systems perform under intense traffic. Key metrics like response times, throughput, error rates, and resource usage are tracked, helping teams spot potential issues.
The platform runs JMeter scripts in the cloud, removing the need for local infrastructure. It also offers interactive dashboards and customizable reports, presenting performance data in real time. Reports are easy to share with stakeholders, available in formats like PDF and CSV, and help quickly identify bottlenecks.
While BlazeMeter focuses on load and performance testing, it doesn’t provide crash analytics or direct user experience tracking. Teams looking for detailed crash reports will need to integrate additional tools to fill that gap.
Integration Capabilities
BlazeMeter integrates seamlessly with popular CI/CD tools like Jenkins, Bamboo, and TeamCity through REST APIs. This allows for continuous performance testing during the development and deployment process, catching issues early in the pipeline.
It also connects with analytics platforms like Grafana and Splunk for deeper data analysis. Automated alerts can be set up through Slack and email, ensuring teams stay informed. Additionally, test results can be exported to centralize performance data alongside other operational metrics.
Pricing
BlazeMeter operates on a subscription-based pricing model, billed in USD. It offers a free tier with limited test runs and virtual users, ideal for small teams or trial purposes. Paid plans start at around $99 per month (as of 2025), with pricing based on factors like the number of concurrent tests, virtual users, and access to advanced features. Enterprise plans are available for larger teams, offering higher testing capacities and dedicated support options.
Tool Comparison Chart
After exploring each APM tool's features, this chart breaks down the essential metrics and capabilities to help you make an informed choice.
ToolPlatform SupportCore FeaturesPricing (USD)Ideal Use CaseBrowserStackAndroid, iOSReal device testing (3,500+ devices), session replays, cross-browser testingFrom $39/monthLarge-scale device/network testing across multiple platformsAppiumAndroid, iOS, WindowsCross-platform UI automation, multi-language support (Java, Python, etc.)Free (open-source)Automated regression testing with a single codebaseNew Relic MobileAndroid, iOSReal-time monitoring, crash analytics, user interaction trackingFrom $99/monthProduction monitoring and user experience analyticsFirebase Performance MonitoringAndroid, iOS, Flutter, React NativeReal-user session monitoring, custom traces, automatic performance trackingFreeLive app usage monitoring with Google ecosystem integrationAppDynamicsAndroid, iOSEnd-to-end APM, business transaction tracking, user journey mappingFrom $60/month per CPU coreEnterprise-grade monitoring with business impact analysisTestFairyAndroid, iOSVideo session recording, beta testing platform, feedback collectionFrom $49/monthVisual performance analysis and beta testing workflowsSolarWinds AppOpticsAndroid, iOSInfrastructure monitoring, distributed tracing, customizable dashboardsFrom $9.99/month per hostCombined infrastructure and app monitoring for SMBsAndroid ProfilerAndroid onlyCPU, memory, network, battery profiling with Android Studio integrationFree (included with Android Studio)Development-time debugging and performance optimizationLeakCanaryAndroid onlyAutomated memory leak detection, detailed leak reportsFree (open-source)Early memory leak detection during developmentBlazeMeterAndroid, iOS, WebLoad testing, performance analytics, JMeter-based cloud testingFrom $99/monthPerformance and load testing with CI/CD integration
The chart above highlights the main differences to guide your decision-making process. Let’s break it down further.
Pricing is a key factor. Free tools like Firebase Performance Monitoring and LeakCanary are ideal for teams with limited budgets, while enterprise-level solutions like AppDynamics provide advanced business insights at a premium.
Platform compatibility is another priority. If your focus is solely on Android, specialized tools like Android Profiler and LeakCanary offer detailed insights tailored to that environment. On the other hand, cross-platform teams can benefit from tools like Appium and BrowserStack, which streamline workflows across multiple operating systems.
When it comes to features, the depth varies significantly. Firebase Performance Monitoring stands out for its easy real-user monitoring, requiring little to no setup. AppDynamics, meanwhile, offers robust business transaction tracking for enterprises, and TestFairy’s video recording capabilities add a unique layer for visual debugging.
For teams in the U.S., tools offering localized features - such as pricing in USD and seamless integration with imperial units and MM/DD/YYYY formats - can make implementation smoother.
Finally, integration capabilities can save time and effort. Tools like Firebase Performance Monitoring and BlazeMeter connect directly with CI/CD pipelines and cloud services, ensuring compatibility with your existing development framework.
Conclusion
Selecting the right APM tool in 2025 is more than just a technical choice - it’s a decision that can directly influence user retention and revenue. With mobile users expecting apps to load in under three seconds, and up to 80% of users uninstalling apps due to poor performance, there’s little room for error.
Different tools cater to different needs: Firebase Performance Monitoring is ideal for teams seeking free, real-user monitoring; AppDynamics provides enterprise-level transaction tracking; and LeakCanary paired with Android Profiler excels at diagnosing Android-specific issues. Each of these tools offers unique strengths that can lead to tangible performance gains.
The benefits of real-time monitoring are undeniable - it can cut downtime by 60% and improve user retention by over 25%, directly impacting business metrics. Companies leveraging these APM solutions have successfully tackled network latency across regions, streamlined user workflows to reduce churn, and lowered support costs by identifying issues before they escalate.
However, implementing and fine-tuning APM solutions isn’t a simple task. Expert teams like Zee Palm, with over a decade of experience and more than 100 completed projects, specialize in turning raw performance data into actionable insights. Their expertise spans industries like AI, SaaS, healthcare, and IoT, making them a valuable partner for optimizing app performance.
As technology continues to advance, integrating the right tools and expertise will remain crucial. Choosing the right APM solutions not only improves user satisfaction and app store ratings but also strengthens a company’s competitive edge and overall success.
FAQs
What should I look for when selecting an APM tool for my mobile app in 2025?
When choosing an APM tool for your mobile app in 2025, it's important to consider factors like core functionalities, cost, and how well the tool fits your app's specific requirements. Look for solutions that offer real-time performance monitoring, proactive issue detection, and insights you can act on to improve your app's performance.
The team at Zee Palm, backed by over 10 years of experience, excels in building custom solutions for AI, SaaS, and app development. Their expertise ensures your app runs smoothly and delivers an outstanding user experience.
How do real-time monitoring and crash analytics in APM tools enhance user experience and boost retention?
Real-time monitoring and crash analytics are essential components in application performance management (APM) tools, helping ensure apps deliver a smooth user experience. These features enable developers to quickly identify and address issues like slow load times, crashes, or bugs, keeping the app running efficiently.
When problems are resolved promptly, users face fewer frustrations, which naturally leads to greater satisfaction and confidence in the app. A dependable, well-functioning app not only keeps users engaged but also boosts retention, encouraging them to stick around for the long haul.
Are free APM tools like Firebase Performance Monitoring and LeakCanary enough for small development teams?
Free APM tools like Firebase Performance Monitoring and LeakCanary can be excellent options for small development teams. They’re particularly useful for spotting performance bottlenecks and identifying memory leaks in mobile apps. For teams working with limited budgets or straightforward needs, these tools can serve as a solid starting point.
That said, getting the most out of these tools requires experienced developers who know how to integrate them seamlessly into your workflow. Developers with expertise in areas like AI, SaaS, and custom app development can ensure these tools are used effectively, helping you fine-tune your app’s performance and reliability.
Related Blog Posts

Responsive Design for Android Apps
Responsive design ensures Android apps work well across different devices, from smartphones to tablets and foldables. With over 24,000 Android device models globally and 45% of the US smartphone market on Android, creating adaptable layouts is crucial. Here's how developers can achieve this:
- Use ConstraintLayout: Build flexible UIs by defining relationships between elements, avoiding nested structures for better performance.
- Leverage Resource Qualifiers: Tailor assets for specific screen sizes, orientations, and densities using directory suffixes (e.g.,
values-sw600dpfor tablets). - Create Layout Variants: Design separate layouts for phones and tablets to optimize space and usability.
Testing is key - use Android Studio’s Device Preview, emulators, and physical devices. Graphics should include SVGs for scaling and optimized images for performance. Localization for US users (e.g., $ currency, MM/DD/YYYY dates) enhances usability.
Responsive design improves user experiences, boosts retention, and meets the demands of a diverse Android ecosystem.
How to Support ALL Screen Sizes on Android - Full Guide
Core Principles of Responsive Android Layouts
To create Android apps that look great on everything from compact smartphones to large tablets, there are three key principles to master: flexible UI design with ConstraintLayout, resource qualifiers for tailored assets, and layout variants for restructuring interfaces. Together, these principles form the backbone of modern Android development. Let’s dive into how each works, starting with the role of ConstraintLayout in crafting adaptable designs.
Using ConstraintLayout for Flexible UI Design
ConstraintLayout is the go-to layout for building responsive Android interfaces. Its strength lies in defining spatial relationships, allowing UI elements to adjust seamlessly as screen dimensions change. Instead of relying on deeply nested layouts - which can slow down performance - ConstraintLayout uses a flat hierarchy, positioning elements relative to one another and the parent container. For instance, you can set a button to maintain a 16dp margin on a phone and automatically expand to 24dp on a tablet, all within a single layout file.
Android Studio’s Layout Editor makes working with ConstraintLayout straightforward. It provides a visual interface where you can drag and drop elements, set constraints interactively, and preview how your layout adjusts to different screen sizes in real time. This tool not only saves time but also helps identify potential design issues early, ensuring better performance and smoother user experiences.
Working with Resource Qualifiers
Resource qualifiers are essential for delivering device-specific assets and dimensions, enabling you to create a truly responsive app. By appending specific suffixes to resource directories, you guide Android to select the right resources based on characteristics like screen size, density, or orientation. For example, you could define a default margin of 16dp in values/dimens.xml and override it with 24dp in values-sw600dp/dimens.xml for tablets.
Here’s a quick look at how resource qualifiers can address different scenarios:
Qualifier TypeExample DirectoryUse CaseScreen Widthvalues-sw600dpDimensions and styles tailored for tabletsOrientationvalues-landAdjustments for landscape modeScreen Densitydrawable-xxhdpiHigh-resolution images for dense displays
You can even combine qualifiers, like values-sw600dp-land, to target very specific configurations. This flexibility ensures your app looks polished across a wide range of devices.
Creating Layout Variants
While resource qualifiers handle differences in dimensions and assets, layout variants let you restructure your app’s interface to fully utilize available screen space. For example, you might use a single-column design for phones (layout/main_activity.xml) and a two-pane layout for tablets (layout-sw600dp/main_activity.xml) to show navigation and content side by side.
This approach is particularly useful for foldable devices and multi-window setups. A layout placed in layout-sw720dp-land can optimize the interface for unfolded devices in landscape mode, ensuring a balance between usability and aesthetics as configurations change.
One major advantage of layout variants is that Android automatically selects the most suitable layout based on the device’s characteristics - no extra code needed. Using Android Studio’s Device Preview and Emulator, you can simulate different screen sizes and configurations to verify that transitions between layouts are smooth and intuitive.
Best Practices for Implementing Responsive Design
Creating responsive Android apps goes beyond basic layouts; it’s about delivering a seamless experience across all devices. These best practices will help ensure your app performs smoothly no matter the screen size.
Start with a Mobile-First Approach
A mobile-first design begins by crafting your app’s interface for smaller screens, like smartphones, before expanding it to larger devices such as tablets. This approach prioritizes essential features and usability for mobile users, ensuring a streamlined and functional UI.
To implement this, start with base layouts tailored for phones, then create enhanced versions for tablets using resource-specific directories. Android automatically selects the right layout based on screen width, making it easier to provide an optimal experience for every device. By focusing on essentials first, you ensure your app adapts effortlessly to various devices.
Use Breakpoints and Fluid Layouts
Breakpoints are predefined screen widths where your app’s layout adjusts to fit the available space. For example, you might use values-sw600dp to define layouts for tablets. This ensures your app looks polished and functional, whether it’s on a phone, tablet, or even a foldable device.
Pair breakpoints with fluid layouts, which use flexible sizing and positioning instead of fixed dimensions. This allows UI elements to scale smoothly between breakpoints. A common practice is setting a 600dp breakpoint for small tablets, while fluid layouts handle the scaling in between. Together, these techniques create a responsive design that feels natural across devices.
Optimize Graphics and Images
Visual assets are key to a great user experience, especially when users switch between devices with varying screen densities. Using SVGs (Scalable Vector Graphics) for icons and simple illustrations ensures crisp visuals at any resolution. Unlike raster images, SVGs maintain their quality when resized, making them ideal for responsive designs.
For more complex images, Android’s resource system allows you to offer multiple versions tailored to different screen densities. Place images in directories like drawable-mdpi, drawable-hdpi, and drawable-xxhdpi, ensuring Android selects the right asset for the device. This avoids pixelation on high-density screens while keeping file sizes efficient for lower-density devices.
Performance is just as important as visual quality. Compress images, use caching, and minimize file sizes to ensure fast loading times even on slower networks. Tools like Android Studio’s image optimization feature can simplify this process by generating appropriately sized assets for various density buckets.
Zee Palm, a company with over 100 completed projects and 70+ happy clients, excels in crafting responsive Android apps for industries like healthcare and EdTech. For instance, their team developed a medical app using ConstraintLayout and layout variants, enabling it to adapt seamlessly from smartphones to tablets. By incorporating scalable SVG icons, optimized image assets, and thorough device testing, they delivered a highly rated and user-friendly product.
sbb-itb-8abf120
Key Tools and Resources for Android Responsive Design
Creating responsive Android apps becomes much more manageable when you have the right tools and resources. Let’s dive into some essential options that can streamline your workflow and improve your designs.
Android Studio Layout Editor

The Android Studio Layout Editor is a go-to tool for visually designing app layouts with ease. It allows you to drag and drop UI components directly onto your layout and set constraints visually, offering instant previews of how your design adapts to various screen sizes. This real-time feedback is invaluable for catching potential issues early in the design process.
One of its standout features is its seamless integration with ConstraintLayout, Android's recommended layout manager for responsive designs. By visually linking UI elements to each other or the parent container, you can create dynamic relationships that adjust automatically to different screen dimensions. This approach not only simplifies your layout structure but also improves performance by reducing view hierarchy complexity, which translates to faster rendering and lower memory usage.
Once your layout is designed, testing tools come into play to ensure everything works as expected across devices.
Device Preview and Emulators
Android Studio's Device Preview and built-in emulators make testing responsive layouts much more straightforward. These tools simulate a wide range of device configurations, helping you spot layout issues before they reach end users.
The Device Preview panel displays your layout on multiple device screens simultaneously, making it easy to identify problems like clipped text or buttons that feel too cramped on smaller devices. Emulators allow for hands-on interaction with your app, letting you test features like screen rotation, different Android versions, and even foldable layouts. While these tools are indispensable, testing on physical devices is still essential for a complete picture.
Material Design Guidelines

To complement your development and testing efforts, Material Design Guidelines provide a robust framework for creating intuitive and adaptable interfaces. These guidelines offer clear instructions on grids, spacing, and flexible UI elements, simplifying the responsive design process. For example, the responsive layout grid uses scalable columns and gutters to ensure content stays organized and easy to read across different screen sizes. A phone might use a 4-column grid, while a tablet could expand to 8 or 12 columns.
Material Design also includes pre-designed components like navigation drawers, app bars, and cards, all optimized for responsiveness. By following these patterns, you can save time during development while delivering polished, user-friendly experiences. Apps that adhere to these guidelines often see better user engagement and retention.
Common Challenges and Solutions in Responsive Design
Responsive design for Android apps comes with its own set of hurdles. By addressing these challenges head-on, you can create layouts that work seamlessly across a wide range of devices. Let’s dive into some common obstacles and practical solutions.
Handling Device Fragmentation
Android's versatility is a double-edged sword. With over 24,000 device models running the OS, designing layouts that look and function well across the board can feel daunting. Variations in screen sizes and pixel densities only add to the complexity.
To tackle this, use flexible layouts like ConstraintLayout, which minimizes nested structures and adapts better to different screen sizes. Incorporate size classes to group screens into categories (compact, medium, expanded), allowing you to adjust UI elements based on screen width. Pair this with resource qualifiers to serve the right assets for each configuration, ensuring optimal performance.
Testing is your safety net. Use a combination of emulators and real devices to catch those tricky edge cases. This thorough approach helps maintain a consistent design, no matter the device.
Managing Extreme Aspect Ratios
Foldable devices and ultra-wide screens have introduced new challenges, as they can switch aspect ratios on the fly. Traditional responsive techniques often fall short here.
The solution? Rely on adaptive widgets and scrollable containers. For example, horizontal scrollable containers can preserve comfortable reading widths on ultra-wide screens, while adaptive layouts can reorganize content dynamically when a device’s configuration changes.
ConstraintLayout shines in these scenarios, allowing UI elements to reposition themselves based on available space rather than fixed coordinates. These strategies ensure your app stays user-friendly, even on the latest devices.
Maintaining Consistent Formatting
Formatting consistency is key, especially for U.S. users who expect familiar standards like MM/DD/YYYY dates, 12-hour clocks with AM/PM, and temperatures in Fahrenheit. Android’s built-in tools, such as java.text.DateFormat and NumberFormat, can be configured with the en-US locale to meet these expectations. For example, display dates as 12/25/2025 and monetary values as $1,234.56.
For apps targeting U.S. users, stick to imperial units for measurements (feet, inches, pounds) and Fahrenheit for temperatures. If your app serves a global audience, use resource files to automatically apply the correct formatting based on the device’s locale. However, always test the U.S. experience separately to ensure accuracy.
ChallengePrimary SolutionKey BenefitDevice FragmentationConstraintLayout, Size Classes, Resource QualifiersConsistent UI across diverse Android devicesExtreme Aspect RatiosAdaptive Widgets, Scrollable ContainersSmooth experience on foldable and ultra-wide screensFormatting ConsistencyLocale-aware DateFormat and NumberFormatPolished and professional look for U.S. users
At Zee Palm, our team has successfully navigated these challenges across countless projects. By combining smart layout strategies with rigorous testing, we deliver Android apps that perform beautifully on any device.
Building Better Android Experiences
Creating a standout Android experience hinges on responsive design. When your app effortlessly adjusts to different devices, users take notice. In fact, apps with responsive design enjoy up to 30% higher user retention rates compared to those with rigid layouts.
The journey to better Android experiences begins with understanding your audience. With over 70% of global smartphone users on Android, your app needs to perform flawlessly on everything from compact phones to foldable tablets.
A crucial tool for this is ConstraintLayout, which helps build adaptable user interfaces. Pairing it with resource qualifiers and layout variants ensures your app looks polished and functions well across devices. These techniques are the backbone of creating experiences that cater to a diverse user base. Rigorous testing on both emulators and physical devices is essential to refine performance.
For U.S. users, localization adds a personal touch. Displaying dates as 12/25/2025, using $1,234.56 for currency, and adopting 12-hour time formats with AM/PM makes the app feel familiar and user-friendly.
Examples from the field show that responsive design significantly improves usability and boosts user ratings. At Zee Palm, our team has honed responsive Android design for over a decade, delivering solutions in healthcare, EdTech, and custom app development. Our expertise ensures apps perform seamlessly across the entire Android ecosystem.
FAQs
How does using ConstraintLayout enhance the performance of Android apps compared to traditional nested layouts?
ConstraintLayout boosts Android app performance by cutting down on the need for deeply nested view hierarchies, which can bog down rendering and layout calculations. Instead, it lets you define complex relationships between UI elements within a single hierarchy, simplifying the layout process and reducing unnecessary overhead.
This layout tool offers a lot of flexibility, making it easier to design responsive interfaces that work well across various screen sizes and orientations. For developers looking to enhance both performance and user experience, ConstraintLayout stands out as an excellent option.
What are the advantages of using resource qualifiers in Android app development, and how do they improve the user experience?
Resource qualifiers in Android app development let you design layouts, images, and other resources specifically tailored for various device configurations, like screen sizes, resolutions, or languages. This approach helps your app work smoothly across a wide range of devices, ensuring a consistent and polished experience for all users.
With resource qualifiers, you can make your app feel more intuitive and personalized. For instance, you can supply high-resolution images for larger screens or tweak layouts to fit different orientations. This way, your app not only looks great but also functions seamlessly in every situation.
Why is it essential to test Android app designs on both emulators and real devices, and what challenges might arise if you don’t?
Testing your Android app's design on both emulators and physical devices is a must to ensure it works smoothly across various screen sizes, resolutions, and hardware setups. While emulators are excellent for early testing, they fall short when it comes to mimicking real-world conditions like touch accuracy, hardware quirks, or network variability.
Relying solely on emulators can result in problems such as misaligned layouts, unresponsive touch interactions, or performance hiccups that only surface on specific devices. To provide a polished user experience, it’s essential to test your app in both controlled emulator settings and real-world scenarios using actual devices.
Related Blog Posts

How AI Chatbots Use Data for Personalization
AI chatbots are transforming how businesses interact with customers by tailoring responses based on user data. Here's how they do it:
- What They Use: Chatbots analyze user profiles, browsing habits, and interaction history to create personalized experiences.
- How It Works: Techniques like session-based memory, natural language processing (NLP), and predictive analytics enable chatbots to deliver context-aware, relevant responses.
- Why It Matters: Personalization boosts customer satisfaction, loyalty, and efficiency, especially in industries like healthcare, education, and SaaS.
- Challenges: Privacy and data security are critical. Businesses must ensure compliance with regulations like HIPAA and GDPR while protecting user information.
AI chatbots aren't just about answering questions - they're about understanding users and anticipating needs, making interactions feel more human and effective.
How to Build Personalized Marketing Chatbots (Gemini vs LoRA) | SingleStore Webinars

Data Sources for Chatbot Personalization
Personalized chatbot interactions thrive on the variety of data these systems gather and analyze. By pulling from multiple data streams, AI chatbots can create a detailed understanding of each user, enabling responses that feel tailored and relevant. Grasping these data sources is key to deploying advanced AI for context-aware conversations.
User Profile Data
User profile data is the starting point for chatbot personalization. Information from user sign-ups and purchases provides insights into demographics and preferences, which chatbots use to craft customized interactions.
Chatbots gather profile data through email sign-ups, social media logins, and even Web3 wallets. For instance, fitness apps might collect details about workout habits and dietary needs, while business platforms differentiate between contractors and homeowners to refine their responses.
Capturing specific details during interactions is essential. If a user mentions an order ID, a product they like, or a particular issue, the chatbot stores this information for future use. This allows conversations to feel more relevant and consistent, with context carried over seamlessly.
Behavioral and Interaction Data
While profile data reveals who your users are, behavioral data uncovers what they do. This includes browsing habits, time spent on specific pages, click-through rates, and engagement metrics from previous interactions. Real-time behavior tracking helps chatbots predict user intent and respond proactively.
By analyzing both live activity and past interactions, chatbots can refine how they recognize intent and minimize repetitive questions. For example, Actionbot monitors website clicks, chat phrases, and user interests to deliver responses that align with the user's current needs. If someone spends several minutes on a product page, the chatbot might step in with a timely suggestion or offer.
A real-world example comes from TaskRabbit in 2023. Their AI chatbot analyzed customer behavior and service request histories, enabling it to offer more relevant suggestions. This approach resulted in a 60% increase in requests handled and a 28% drop in support tickets.
Integration with Backend Systems
The most advanced chatbot personalization happens when AI connects directly to a company’s backend systems. Backend integration allows chatbots to pull data from CRMs, transaction histories, support platforms, and, in healthcare, electronic health records.
Healthcare applications highlight this well. By accessing electronic health records, chatbots can provide personalized health tips based on a patient’s medical history, current treatments, and medication schedules. Similarly, in e-commerce, chatbots can recommend products like winter coats by referencing past purchases and preferences, such as eco-friendly materials or specific colors.
For this level of integration, businesses need robust data pipelines and regular updates to ensure accuracy. Partnering with skilled developers is essential to achieving secure and scalable solutions. For example, Zee Palm specializes in building chatbot systems that connect seamlessly with backend infrastructures in industries like healthcare, EdTech, and SaaS. Their expertise ensures these systems work reliably while safeguarding user data and maintaining performance.
These data sources form the backbone of the advanced AI techniques explored in the next section.
AI Techniques for Chatbot Personalization
When chatbots have access to rich data sources, they use advanced AI techniques to transform that data into customized responses. By applying methods like session-based memory, natural language processing (NLP), and predictive analytics, chatbots can hold conversations that feel natural, relevant, and tailored to each user’s needs. These tools take the raw data we discussed earlier and turn it into meaningful, actionable insights.
Session-Based Memory for Context
Session-based memory allows chatbots to remember details from earlier in a conversation, ensuring a smooth and consistent flow during multi-turn interactions. For example, if a user mentions their location or budget early on, the chatbot can recall that information later, eliminating the need for repetitive questions. This approach doesn’t just store facts - it also captures the broader context of the conversation, making interactions more seamless and improving the overall user experience.
Natural Language Processing for Intent Recognition
At the core of chatbot personalization lies Natural Language Processing (NLP). This technology goes beyond simple keyword matching to understand user intent, extract key details, and adjust responses accordingly. For instance, when a user asks, "Can you help me with my order?", NLP can determine whether the request involves tracking a shipment, modifying an order, or resolving an issue. It also uses entity extraction to identify specifics like product names or dates, refining its responses further. On top of that, sentiment analysis helps the chatbot gauge the user’s emotions, enabling it to respond in a way that’s both precise and empathetic. A great example of this is Canva, which uses NLP to customize onboarding flows based on user goals detected through their input.
Predictive Analytics and User Insights
Predictive analytics takes chatbot personalization a step further by anticipating user needs. By analyzing historical data, behavioral trends, and real-time interactions, chatbots can proactively suggest solutions. For instance, if data shows that users browsing a specific product category often make purchases within two days, the chatbot might offer a timely discount or address potential concerns. In financial services, chatbots might observe patterns like frequent overdraft inquiries and suggest budgeting tools or account alerts. Dynamic user segmentation further enhances this process by grouping users based on their real-time behavior, ensuring that interactions remain contextually relevant.
This proactive approach has been particularly successful for companies like TaskRabbit, which improved request handling and reduced support tickets by leveraging predictive analytics.
Zee Palm’s expert team seamlessly integrates these AI techniques into personalized chatbot solutions, delivering robust and efficient user experiences.
TechniquePrimary FunctionKey BenefitSession-Based MemoryRetains conversation contextReduces repetition and ensures smooth dialogueNLP for Intent RecognitionInterprets user queries and detects sentimentDelivers accurate and empathetic responsesPredictive AnalyticsAnticipates needs and segments usersEnables proactive and relevant recommendations
sbb-itb-8abf120
Privacy and Ethics in Data Usage
Protecting user data is just as important as the advanced AI techniques driving personalized chatbot experiences. As chatbots increasingly rely on sensitive information - ranging from personal preferences to health details - businesses must carefully balance the benefits of personalization with strong privacy measures and ethical practices.
Data Privacy and User Consent
Transparency is the cornerstone of ethical data use. Chatbots often handle sensitive information like names, contact details, and behavioral patterns, which, if mishandled, could lead to serious risks like identity theft or financial fraud.
Studies reveal that most users expect companies to respect their data preferences and provide clear information about how their data is used. To meet these expectations, businesses should ensure that user consent is explicit and informed.
For instance, chatbots can display clear consent prompts before collecting personal information. Features like privacy settings menus allow users to manage their preferences easily, giving them the ability to opt in or out and withdraw consent whenever they choose. Real-time notices about data usage and regular updates on privacy policies further strengthen trust and transparency.
Secure Data Handling Practices
Robust security measures are key to safeguarding user data. Strategies like end-to-end encryption, regular security audits, strict access controls, and secure authentication protocols help protect sensitive information.
Using HTTPS for all communications and encrypting stored user profiles ensures data remains secure during transmission and storage. Access controls limit data visibility to authorized personnel, while audit trails track who accessed specific information and when. These measures create accountability and reduce the risk of unauthorized access.
Regular security assessments are also vital. By monitoring chatbot interactions for unusual activity, conducting penetration testing, and updating security protocols to address emerging threats, businesses can proactively address vulnerabilities. Additionally, adopting data minimization practices - only collecting the information necessary for a chatbot’s function - reduces the impact of potential security incidents and reinforces respect for user privacy.
Compliance with Industry Regulations
Regulatory requirements differ by industry and region, with healthcare being one of the most tightly regulated sectors. For example, HIPAA (Health Insurance Portability and Accountability Act) mandates that healthcare chatbots implement strict safeguards, such as encryption, audit trails, and user authentication, to protect health information. Non-compliance can lead to hefty fines, highlighting the importance of adhering to these rules.
Similarly, GDPR (General Data Protection Regulation) applies to businesses serving European users. It emphasizes data minimization, user rights, and quick breach notifications. Despite their differences, both HIPAA and GDPR share common goals: ensuring user control over personal data, maintaining transparency, and upholding strong security standards.
RegulationSectorKey RequirementsChatbot ImpactHIPAAHealthcareProtect health information, user consent, audit trailsRequires encryption, consent mechanisms, and strict data handlingGDPRGeneral (EU)Data minimization, user rights, breach notificationDemands transparency, user control, and rapid breach response
For companies like Zee Palm, which specialize in AI and healthcare applications, prioritizing privacy and compliance is critical. This means integrating privacy-by-design principles, secure data storage, and routine compliance checks into their chatbot solutions.
Continuous monitoring is essential to keep up with evolving regulations. Conducting privacy impact assessments, maintaining data access logs, tracking consent rates, and documenting incident responses can help identify and address compliance gaps. These efforts not only prevent violations but also demonstrate a commitment to ethical data handling, building trust and enhancing user confidence in chatbot interactions.
Measuring and Improving Chatbot Personalization
Creating personalized chatbot experiences is not a one-and-done task - it requires consistent evaluation and fine-tuning. Without tracking the right metrics, you’re essentially flying blind, missing opportunities to boost user satisfaction and achieve better business outcomes.
Monitoring Engagement and Feedback
Metrics like session length, interaction frequency, and task completion rates provide a clear snapshot of how well your chatbot’s personalization efforts are resonating with users. When personalization is effective, users tend to spend more time interacting, return more often, and complete their intended tasks.
Collecting direct feedback is just as critical. Built-in tools like post-interaction surveys, star ratings, or open-ended comment boxes can capture user sentiment in real time. These insights help pinpoint exactly where the chatbot excels and where it falls short.
One key area to monitor is where users drop off during conversations. If users abandon chats at specific points, it’s often a sign that the bot isn’t delivering relevant responses. Analytics can help identify these patterns, showing exactly where users lose interest and highlighting areas for improvement.
Customer satisfaction scores (CSAT) and repeat usage are strong indicators of how well personalization is working. When users feel the chatbot understands their needs, they’re more likely to rate interactions positively and return for future assistance. Conversion rates also tend to improve when the chatbot guides users through tailored experiences that align with their specific goals.
Comparing Personalization Techniques
Testing different personalization methods is essential to understanding their strengths and weaknesses. A/B testing can reveal how various techniques impact engagement, satisfaction, and conversion rates.
TechniqueAdvantagesDisadvantagesSession-Based MemoryMaintains conversational flow within a single sessionLimited to current session; doesn’t use historical user dataPredictive AnalyticsAnticipates user needs using historical data; enables proactive supportRequires clean, extensive data; demands high processing power; risk of overfittingReal-Time Behavior TrackingAdapts instantly to user actions; provides contextually relevant suggestionsMay overlook broader usage patterns; depends on continuous data streams
For example, real-time behavior tracking is excellent for immediate responsiveness but can miss larger trends without historical data. Pairing it with predictive analytics allows for a more balanced approach, combining instant adaptability with deeper personalization.
Ongoing Improvement Using Analytics
Analytics tools are invaluable for identifying patterns and refining chatbot personalization. Segmenting users based on interaction styles, preferences, and goals can reveal where generic responses fail and tailored approaches succeed.
Regular analysis should focus on common issues like frequently asked questions, high drop-off points, or low satisfaction scores. For instance, if users keep asking the same questions despite previous interactions, it could indicate the chatbot isn’t effectively using its historical data to provide proactive answers.
Updating user segmentation models with fresh data ensures the chatbot stays aligned with evolving user needs. This might involve refining response templates, testing new personalization features, or creating feedback loops where analytics-driven insights inform updates. By consistently revisiting and adjusting these models, businesses can ensure their chatbot remains relevant and effective.
The improvement process should always be iterative and grounded in data. Over time, this approach creates a chatbot experience that feels increasingly tailored and valuable to users.
For businesses looking to implement these strategies, expert teams like Zee Palm can provide specialized AI and chatbot development services. With experience in industries like healthcare, EdTech, and SaaS, they offer tailored solutions designed to meet specific business goals while ensuring compliance with industry standards.
Personalization isn’t a one-time project - it’s an ongoing journey. Businesses that prioritize consistent monitoring, testing, and refinement will be the ones delivering chatbot experiences that truly resonate with users. By leveraging data and feedback, they can create interactions that feel more meaningful and effective over time.
Conclusion and Future of AI Chatbot Personalization
AI chatbots have reached a point where they can deliver interactions that feel genuinely tailored to each user. By leveraging data - like user profiles, behavioral patterns, and backend system integrations - these systems now offer context-aware, real-time responses that align with individual needs and preferences.
Technologies such as session-based memory, natural language processing (NLP), and predictive analytics are already reshaping how businesses interact with their customers. Consider this: 66% of consumers expect companies to understand their needs, and 70% are more likely to buy from brands that demonstrate this understanding. These numbers highlight why personalization is no longer optional - it’s essential for staying competitive.
Looking ahead, advancements in Large Language Models and agent-based frameworks promise even more transformative capabilities. These technologies will allow chatbots to anticipate user needs, delivering proactive assistance and a deeper understanding of intent and context.
Healthcare stands to gain significantly from these developments. Imagine chatbots that go beyond appointment reminders to offer dynamic health advice, create adaptive wellness plans, and adjust recommendations based on a patient’s recovery progress or lifestyle changes.
In education technology (edtech), personalized chatbots could revolutionize learning by crafting adaptive learning paths tailored to a student’s progress, learning style, and academic goals. These systems could provide one-on-one tutoring and recommend content intelligently, making education more engaging and effective.
For SaaS platforms, advanced personalization could mean proactive customer support, smarter product recommendations, and dynamic user experiences that adapt to how customers interact with the product. This would result in fewer support tickets, happier users, and stronger product adoption.
The future also points toward multimodal interactions. Chatbots will soon combine capabilities across voice, text, images, and IoT devices, enabling them to interpret not just words but the broader context of a user’s environment and situation.
To stay ahead, organizations can work with experts like Zee Palm. Their experience in AI, healthcare, edtech, and SaaS solutions can help businesses harness these innovations while ensuring compliance with industry standards and privacy regulations.
Investing in data-driven personalization today isn’t just about keeping up - it’s about thriving in a world where user expectations are rapidly evolving. The real challenge isn’t whether AI chatbots will become more personalized, but how quickly businesses can adapt to meet these rising demands.
FAQs
How do AI chatbots personalize user interactions while protecting data privacy and following regulations like HIPAA and GDPR?
AI chatbots create personalized interactions by analyzing user data like preferences, behavior, and past conversations. To maintain privacy and comply with regulations such as HIPAA and GDPR, they use robust data protection practices, including encryption, anonymization, and secure storage.
These chatbots are programmed to gather only the data needed for personalization, staying within the limits of legal requirements. Regular audits and updates help them keep up with changing privacy standards, ensuring user trust while providing customized experiences.
Which industries benefit the most from AI chatbot personalization, and how do they use this technology?
AI chatbots bring a tailored touch to various industries, enhancing user experiences by adapting to individual needs and preferences. Take e-commerce, for instance - chatbots here are often used to suggest products based on a shopper's browsing history or previous purchases, making the online shopping journey more engaging and personalized.
In healthcare, chatbots step in to offer personalized health tips, manage appointment bookings, and even send medication reminders. These features not only make patient care more convenient but also help streamline day-to-day health management.
Other sectors, like education and financial services, also benefit from AI chatbots. In education, they help create learning paths that suit each student’s pace and style, allowing for a more customized learning experience. Meanwhile, financial institutions use chatbots to offer tailored financial advice, monitor spending patterns, and assist with managing accounts. By tapping into user data, these industries can provide interactions that are both relevant and efficient, leading to higher satisfaction and improved service delivery.
How can businesses evaluate and improve their chatbot's personalization efforts?
To fine-tune chatbot personalization, businesses should keep an eye on key metrics like user engagement - this includes tracking the number of conversations and the average duration of those interactions. Another critical area is customer satisfaction, which can be assessed through user feedback or ratings. On top of that, monitoring conversion rates and studying user behavior patterns can highlight opportunities for improvement.
Using this data, businesses can make informed adjustments to boost the chatbot's performance and create more personalized experiences for users. With more than ten years of experience in AI and custom app development, Zee Palm excels at optimizing chatbot capabilities to meet the changing demands of businesses.
Related Blog Posts

Ultimate Guide to Code Quality Metrics and Standards
Code quality is the backbone of reliable, maintainable, and high-performing software. It ensures your code is easy to read, modify, and scale while reducing bugs and long-term costs. This guide breaks down the key metrics, tools, and standards you need to know to improve your software development process.
Key Takeaways:
- Core Metrics: Cyclomatic complexity, code coverage, and technical debt are essential for evaluating code health.
- Best Practices: Use consistent coding guidelines, automated testing, and regular code reviews to maintain quality.
- Tools: Platforms like SonarQube, JaCoCo, and GitHub Actions streamline quality checks and automate testing.
- Standards: ISO/IEC 25010 and SEI CERT Coding Standard ensure compliance and secure coding practices.
By combining metrics, standards, and automation, you'll minimize bugs, improve maintainability, and deliver scalable software that meets industry requirements. Whether you're tackling healthcare, fintech, or blockchain projects, these strategies will elevate your code quality game.
Code Quality Metrics to Measure and Quantify Quality of Code
Key Code Quality Metrics and Their Applications
Measuring code quality transforms abstract ideas into actionable improvements. Three key metrics - cyclomatic complexity, code coverage, and technical debt - offer distinct ways to evaluate and enhance your codebase. Each sheds light on different aspects like maintainability, testing effectiveness, and long-term project costs. Let’s break down how these metrics work and their practical applications.
Cyclomatic Complexity
Cyclomatic complexity gauges the number of independent paths through your code’s control flow. Essentially, it counts the unique execution paths created by if/else statements, loops, and case statements.
For instance, a simple function with no conditional logic has a complexity of 1. But add nested conditionals, and the score climbs quickly. Take a function designed to find the maximum of three numbers using nested if/else statements - it might reach a complexity score of 5. Refactoring this to use a built-in function like max(a, b, c) simplifies the logic and drops the score to 1.
Lower complexity makes code easier to maintain and reduces the likelihood of bugs. Research shows that functions with higher cyclomatic complexity are more prone to defects and require more test cases. Many development teams aim to keep complexity scores below 10 for individual functions.
Tools like SonarQube and Codacy can automatically calculate cyclomatic complexity, flagging overly complex functions so developers can address them early in the process.
Code Coverage
Code coverage measures how much of your code is executed during automated tests. It’s typically expressed as a percentage: divide the number of lines, statements, or branches tested by the total number in the codebase. For example, if 800 out of 1,000 lines are tested, the coverage is 80%.
Higher coverage reduces the chances of undetected bugs slipping into production. Different types of coverage - like line coverage and branch coverage - offer varying insights into test effectiveness. While many teams in the U.S. target 70–80% coverage, the ideal percentage depends on the project's nature and criticality.
Tools such as JaCoCo (Java), Istanbul (JavaScript), and Coverage.py (Python) integrate with continuous integration pipelines, offering real-time feedback on coverage changes and helping teams maintain high testing standards.
Technical Debt
Technical debt refers to the cost of rework caused by opting for quick, less-than-ideal solutions instead of better, but more time-consuming ones. Unlike other metrics, technical debt can be expressed in financial terms, making it easier to communicate with stakeholders.
To calculate technical debt, multiply the estimated hours needed to fix the issue by the developer’s hourly rate. For example, 40 hours of work at $75/hour results in $3,000 of technical debt.
This financial framing helps prioritize fixes based on business impact. A module with $10,000 in technical debt that’s frequently updated might take precedence over $15,000 in debt tied to rarely modified legacy code. Teams often categorize debt by severity and impact - critical issues that block new features are addressed immediately, while minor improvements can be scheduled for later.
Tracking technical debt in dollar terms helps justify refactoring efforts by linking technical challenges to budget considerations.
Bringing It All Together
Successful teams use these metrics together to create a well-rounded view of code quality. By leveraging static analysis tools to simplify complex functions and improving test coverage, teams can reduce production issues by 40% and speed up feature delivery.
Zee Palm incorporates these metrics, along with automated tools and expert reviews, to enhance project outcomes. This approach is especially valuable in demanding fields where code quality directly affects user experience and compliance requirements. By combining these metrics with established best practices, teams can consistently deliver high-quality software.
Industry Standards and Best Practices for Code Quality
Maintaining consistent quality standards is essential for ensuring code is secure, maintainable, and scalable. By relying on established metrics and frameworks, development teams can improve code quality while meeting industry-specific requirements. In the U.S., two widely recognized frameworks - ISO/IEC 25010 and the SEI CERT Coding Standard - play a pivotal role in shaping code quality, compliance, and long-term project success.
Recognized Code Quality Standards
ISO/IEC 25010 outlines eight key software quality attributes: functional suitability, performance efficiency, compatibility, usability, reliability, security, maintainability, and portability. This framework provides measurable criteria to evaluate software, making it particularly valuable for industries like healthcare and finance, where regulatory compliance is critical. For example, U.S. government contracts and other regulated sectors often require adherence to ISO/IEC 25010 to ensure software meets stringent quality benchmarks.
Beyond its technical scope, this standard also helps organizations meet regulatory and security demands. Healthcare providers and financial institutions frequently use ISO/IEC 25010 to align with industry-specific requirements.
The SEI CERT Coding Standard, on the other hand, focuses specifically on secure coding practices for languages like C, C++, and Java. It offers guidelines to minimize vulnerabilities, making it indispensable for organizations that handle sensitive data. For instance, healthcare companies use CERT practices to comply with HIPAA regulations, while payment processors rely on them to meet PCI DSS certification standards.
Together, these two frameworks provide a well-rounded approach. ISO/IEC 25010 covers broad quality assessments, while SEI CERT hones in on secure coding practices. Many development teams adopt automated tools to ensure compliance with these standards, streamlining the process of monitoring and maintaining code quality.
Best Practices for Code Quality
In addition to adhering to industry standards, following best practices can significantly enhance the day-to-day development process.
- Consistent coding guidelines: Establishing clear style guides for naming conventions, indentation, comments, and file organization ensures uniformity across the codebase. This shared structure reduces confusion and makes it easier for teams to collaborate. Automated linters like ESLint (for JavaScript) or Pylint (for Python) can enforce these standards and catch deviations before they reach production.
- Regular code reviews: Code reviews are essential for identifying defects early and encouraging knowledge sharing within the team. Effective reviews focus on logic, adherence to standards, and overall code quality. Using structured checklists and rotating reviewers can further improve the process.
- Automated testing: Automated tests are critical for maintaining reliability and preventing regressions. Test suites often include unit tests (for individual functions), integration tests (for component interactions), and end-to-end tests (for full workflows). Teams that integrate testing into their development process aim for at least 70% test coverage to ensure robust software.
- Comprehensive documentation: Good documentation supports both current development and future maintenance. This includes API specifications, architecture overviews, setup instructions, and troubleshooting guides. Tools like Swagger for REST APIs and well-maintained README files can streamline development and onboarding.
- Continuous integration pipelines: Continuous integration (CI) automates quality checks, including testing and vulnerability scanning, with every code change. Configuring pipelines to enforce quality thresholds - such as maintaining test coverage above 70% or blocking critical vulnerabilities - helps teams catch issues early and maintain high standards.
These practices not only improve code quality but also create a collaborative and efficient development culture. By reducing production bugs, speeding up feature releases, and simplifying onboarding for new developers, teams can ensure smoother workflows and better outcomes.
With over a decade of experience, Zee Palm applies these industry standards and best practices to build secure, maintainable software for sectors like healthcare, fintech, and AI. This expertise enables U.S. businesses to achieve compliance while developing scalable solutions that support long-term growth.
sbb-itb-8abf120
Tools for Code Quality Analysis and Automation
Automated tools play a vital role in monitoring, analyzing, and enforcing code quality standards. Here's a closer look at how specific tools handle static analysis, test coverage, and integration needs.
Static Analysis Tools
Static analysis tools examine source code without executing it, identifying potential bugs, security risks, and quality issues during development. SonarQube is a standout platform that tracks metrics like cyclomatic complexity, code duplication, maintainability, and security vulnerabilities across multiple programming languages. With its integration into development workflows and detailed dashboards, SonarQube helps teams monitor code quality over time, making it especially useful for large codebases.
For JavaScript and TypeScript, ESLint is a go-to tool. It enforces coding standards and detects errors with customizable rule sets. Its plugin system and IDE integration provide real-time feedback, streamlining the development process.
Codacy automates code reviews, measuring metrics like cyclomatic complexity to highlight functions needing refactoring. It visually presents trends in code quality and identifies issues such as duplication, bugs, and security vulnerabilities.
A maintainability index above 85 (on a scale of 0-100) is considered strong, signaling code that is easier to maintain and extend. These tools efficiently measure complexity, duplication, and maintainability to help teams uphold high standards.
"We follow all necessary clean code principles. We also use AI + Human resources heavily for code quality standards. We have lints and static checks in place." - Zee Palm
Test Coverage Tools
Test coverage tools assess how much of the codebase is executed during automated tests, measuring lines, branches, functions, and statements. JaCoCo is tailored for Java applications, providing detailed reports on line and branch coverage. It integrates seamlessly with build tools like Maven and Gradle, generating HTML reports that highlight tested and untested areas.
For Python, Coverage.py performs similar functions, tracking statement and branch coverage while generating reports that pinpoint test gaps. Both tools provide insights into testing effectiveness, helping teams identify areas that need more robust test cases.
While achieving 100% coverage isn't always practical, maintaining high coverage minimizes the risk of undetected bugs. These tools often integrate with continuous integration (CI) platforms, automatically generating coverage reports after each build. Teams can set minimum coverage thresholds, ensuring code meets quality standards before merging. High unit test pass rates - close to 100% - indicate reliable code, while lower rates may reveal logic errors or gaps in coverage.
Continuous Integration Platforms
CI platforms automate code quality checks by integrating tools for testing, analysis, and validation directly into the development process. Jenkins, a widely-used open-source automation server, enables teams to create pipelines that run static analysis tools, execute test suites, measure code coverage, and generate quality reports whenever code is committed.
GitHub Actions offers similar automation features, with the added benefit of native integration into GitHub repositories. Developers can define workflows using YAML files to trigger quality checks on pull requests, commits, or scheduled intervals. This integration simplifies automated quality enforcement for teams already using GitHub.
CI platforms track metrics like structure, readability, and performance, and can fail builds when thresholds are not met. For example, a build might fail if cyclomatic complexity exceeds acceptable limits, code coverage falls below a set percentage, or security vulnerabilities are detected. By combining static analysis results, test outcomes, and performance benchmarks into unified reports, CI platforms ensure that only high-quality code reaches production.
Tool TypeExample ToolsPrimary FunctionTypical Use CaseStatic AnalysisSonarQube, ESLintDetect code issues, complexity, duplicationEarly bug detection, refactoringTest CoverageJaCoCo, Coverage.pyMeasure % of code testedReliability, regression testingContinuous IntegrationJenkins, GitHub ActionsAutomate quality checks, enforce standardsDevOps, automated deployments
With extensive experience delivering projects in AI, healthcare, EdTech, Web3, and IoT, Zee Palm leverages these tools to deliver scalable and maintainable software solutions. This integrated approach to automated quality analysis supports both rapid feature development and long-term project stability.
How to Apply Code Quality Metrics and Standards in Real Projects
Turning code quality metrics and standards into actionable practices within real projects requires a structured approach that aligns with team capabilities and business goals. Here's how to put those ideas into motion.
Implementation Process
Start by evaluating your existing codebase using static analysis tools. This helps you measure key aspects like cyclomatic complexity, code coverage, and technical debt. Use these insights to set realistic quality benchmarks, especially for legacy code.
Focus on a few core metrics to begin with - cyclomatic complexity, code coverage, and code duplication. These provide a strong foundation for addressing common quality issues without overwhelming teams, particularly those new to these practices.
Integrate automated testing and static analysis into your CI pipeline. This ensures continuous enforcement of quality standards without burdening developers with manual checks. Automation becomes a reliable gatekeeper for maintaining consistency.
Set achievable quality thresholds based on industry norms, but remain flexible. Adjust these targets to reflect your team's skills and the specific demands of the project. For organizations managing multiple projects, adopting company-wide standards that allow for project-specific adjustments can be especially effective.
Regularly review metrics to track trends and refine thresholds. For example, a sudden spike in cyclomatic complexity or a drop in unit test success rates can signal growing technical debt that needs immediate attention.
Once these practices are in place, teams may encounter some common challenges - but with the right strategies, they can overcome them.
Common Challenges and Solutions
For distributed teams working across time zones, automated quality gates within CI/CD pipelines ensure every commit meets basic standards, no matter when or where it’s made.
Developers may initially resist these practices, feeling that they slow down progress. To counter this, highlight the long-term benefits: less debugging time when code coverage is high, and fewer bugs when cyclomatic complexity is reduced. These advantages ultimately speed up development.
Tool integration can also be tricky. Simplify the process by choosing platforms that offer native integrations and clear APIs, making adoption smoother.
Finding the right balance for quality thresholds is another challenge. Overly strict standards can frustrate teams, while overly lenient ones fail to improve quality. A good approach is to apply stricter standards to new code and focus on gradual improvements for legacy code. Instead of rigid targets, track progress trends as a measure of success.
Legacy code often doesn’t meet modern quality metrics, but that doesn’t mean it should be ignored. Prioritize critical modules for immediate attention and adopt a risk-based strategy for the rest, improving them over time.
These challenges highlight the importance of expertise in navigating code quality efforts. Zee Palm’s approach offers a clear example of how to make this work effectively.
Zee Palm's Expertise in Code Quality
With over a decade of experience, 100+ completed projects, and 70+ successful client partnerships, Zee Palm has honed a methodical approach to achieving high code quality. Their team of 13 professionals, including more than 10 expert developers, applies rigorous standards across industries like AI, healthcare, EdTech, Web3, and IoT.
Using the metrics and tools discussed earlier, Zee Palm combines automated solutions with human oversight to deliver consistently high-quality code. Their process is tailored to meet the unique demands of each industry:
- Healthcare Projects: For applications requiring HIPAA compliance, Zee Palm prioritizes security metrics and defect density. They achieve near-perfect unit test pass rates and maintain code coverage above 90%, ensuring patient safety.
- EdTech Platforms: By monitoring code churn and maintainability, Zee Palm helps clients manage tight budgets without sacrificing long-term reliability.
- Web3 and Blockchain: With security as a top priority, Zee Palm keeps cyclomatic complexity low to minimize risks in smart contracts. They also employ formal verification methods and blockchain-specific measures like gas optimization.
"We follow all necessary clean code principles. We also use AI + Human resources heavily for code quality standards. We have lints and static checks in place." - Zee Palm
Zee Palm’s process includes setting up CI/CD pipelines for clients who lack them and releasing features weekly while adhering to clean code practices. This approach supports fast development cycles without compromising on quality.
Their "AI and Web3 First" strategy integrates advanced tools like TensorFlow, PyTorch, and large language models, while maintaining high standards across diverse tech stacks such as MERN, MEAN, Python, LAMP, and Flutter. This combination of technical expertise and systematic quality practices allows Zee Palm to deliver solutions that are both scalable and maintainable, no matter the complexity or industry.
Conclusion: Building High-Quality Software with Code Metrics and Standards
Key Takeaways
The earlier sections highlight how essential metrics and standards are for achieving top-tier software quality. Metrics like cyclomatic complexity, code coverage, and technical debt provide a clear snapshot of your code's health, helping teams make informed decisions about maintenance and scalability. For example, keeping cyclomatic complexity below 10 and maintaining code coverage above 80% results in software that's easier to debug, update, and expand.
Pairing expert oversight with automated tools is key to maintaining consistent quality. By incorporating static analysis tools, test coverage platforms, and CI/CD pipelines into the development process, teams can meet quality benchmarks with every code commit while reducing the need for manual checks.
Focusing on these metrics not only minimizes bugs but also accelerates release cycles and boosts developer productivity - critical advantages in high-cost markets like the US. Additionally, adhering to standards such as ISO/IEC 25010 provides a structured framework to prioritize reliability, maintainability, and security in your software.
The Role of Expert Teams
Automated tools and methodologies are powerful, but experienced teams bring them to life by tailoring quality frameworks to meet specific business needs. These teams know which metrics matter most in different industries and how to balance quality with delivery timelines.
Zee Palm serves as a great example of this expertise. With over a decade of experience and a track record of delivering more than 100 successful projects, their team has shown how applying metrics and standards effectively leads to consistent results. They've handled everything from HIPAA-compliant healthcare systems to intricate Web3 platforms, proving their ability to adapt to diverse challenges.
This adaptability is especially critical for complex projects. Healthcare software often requires near-flawless reliability, while blockchain applications demand a security-first approach to minimize vulnerabilities in smart contracts. Experienced teams know how to adjust quality metrics and standards to meet these unique demands without compromising development speed.
For US-based organizations aiming to create scalable and maintainable software, working with expert teams provides a reliable path forward. These partnerships ensure access to proven quality frameworks, advanced tools, and the strategic know-how needed to apply code metrics effectively in real-world scenarios.
FAQs
What are the best code quality metrics to focus on for my project?
Choosing the right code quality metrics starts with understanding your project's specific goals and needs. Decide which aspects of quality matter most - whether it's readability, maintainability, performance, or security. For instance, if maintainability is a priority, you might focus on metrics like cyclomatic complexity. On the other hand, test coverage is a great way to ensure your code's functionality is thoroughly validated.
At Zee Palm, we take pride in delivering clean, efficient code by using proven industry tools like linters and static analysis. With over ten years of experience across industries like AI, SaaS, and custom app development, our team ensures your project aligns with the highest quality standards tailored specifically to your requirements.
How can I effectively integrate code quality tools into a continuous integration pipeline?
Integrating code quality tools into your CI pipeline is a smart way to ensure your code stays polished throughout development. Start by adding automated tools like linters and static analyzers. These tools can quickly spot coding style issues, potential bugs, and even security vulnerabilities early in the process.
Make sure your pipeline runs these checks automatically with every code commit or pull request. This way, quality standards are consistently enforced without extra effort. To complement this, establish clear coding guidelines for your team and make it a habit to review the tool outputs regularly. Address flagged issues right away to prevent problems from piling up. By blending automation with human review, you can keep your code clean and dependable.
What are the benefits of following standards like ISO/IEC 25010 and the SEI CERT Coding Standard in software development?
Following standards such as ISO/IEC 25010 and the SEI CERT Coding Standard ensures your software meets high benchmarks for reliability, security, and maintainability. These frameworks offer clear, actionable guidelines for crafting code that reduces vulnerabilities and enhances system performance.
Adopting these standards streamlines the development process, cuts down on technical debt, and promotes smoother team collaboration. At Zee Palm, we emphasize code quality by combining advanced tools - like linters and static analyzers - with the expertise of our skilled developers to create strong, industry-compliant solutions.
Related Blog Posts

How to Integrate Free Live Streaming APIs in Apps
Live streaming APIs let you add real-time video features to your app without building complex systems from scratch. Whether you're creating a gaming app, e-learning platform, or telemedicine tool, these APIs can enhance user engagement with live chat, Q&A, and interactive features. Free APIs like YouTube Live, api.video, and Agora are great for small projects or testing ideas but come with limitations like restricted usage and fewer advanced features. Paid APIs, on the other hand, offer scalability, detailed analytics, and better support.
To get started, you'll need programming skills, compatible hardware, a stable internet connection, and broadcasting software like OBS Studio. Ensure your app complies with US privacy laws (e.g., CCPA, HIPAA, COPPA) and meets accessibility standards (e.g., WCAG). Choosing the right API depends on your app's needs, such as encoding speed, global delivery, and analytics.
Get started with the Mux live stream API
Prerequisites for Live Streaming API Integration
Before diving into live streaming API integration, make sure your development environment checks all the right boxes.
Technical and Hardware Requirements
Programming Skills and Tech Stacks
You’ll need solid programming skills in languages like JavaScript for web apps, Swift for iOS, or Java/Kotlin for Android. On the server side, languages such as Python, Node.js, or PHP are commonly used. Many live streaming APIs offer SDKs to simplify the process. For instance, api.video provides Go client libraries that can help you set up live stream containers with minimal effort:
client := apivideosdk.ClientBuilder("YOUR_API_TOKEN").Build()
liveStreamCreationPayload := *apivideosdk.NewLiveStreamCreationPayload("My Live Stream Video")
res, err := client.LiveStreams.Create(liveStreamCreationPayload)
Hardware and Infrastructure Requirements
Your hardware setup plays a key role in ensuring a smooth streaming experience. At the very least, you’ll need a good-quality camera, a reliable microphone, and a device with sufficient processing power. For mobile devices, aim for a quad-core processor and at least 2 GB of RAM running iOS 13+ or Android 8.0+. For desktops, a dual-core CPU, 4 GB of RAM, and a modern operating system like Windows 10+ or macOS 10.14+ should suffice.
Internet speed is equally critical. A stable broadband connection is a must, with upload speeds of around 2 Mbps for standard definition, 5–10 Mbps for HD, and 20 Mbps or more for 4K streaming. A wired Ethernet connection is generally more reliable than Wi-Fi, particularly during live events. Once your hardware is ready, you’ll need to configure broadcasting software to work seamlessly with your API.
Broadcasting Tools and Software
OBS Studio is a popular choice for developers, as it’s free, open-source, and works well with most streaming APIs. In fact, over 65% of live streaming integrations in the US use OBS Studio as their go-to broadcasting tool. By configuring OBS Studio with the ingest URLs and stream keys provided by your API, you can support industry-standard protocols like RTMP, RTMPS, and SRT.
US Compliance and Localization Standards
Once your technical setup is in place, it’s time to ensure your application aligns with US-specific privacy, accessibility, and localization standards.
Privacy and Data Protection Requirements
If your application is US-based, it must comply with relevant privacy regulations. For example, healthcare apps need to follow HIPAA guidelines when handling patient data or telemedicine sessions. Educational platforms must adhere to FERPA for protecting student information and COPPA for services involving children under 13. Secure data transmission is essential - use HTTPS and encrypted streams, and always obtain clear user consent for recording or broadcasting. Make sure your privacy policy is transparent about how data is handled, stored, or shared. Additionally, users should be notified when sessions are being recorded.
Accessibility and Localization Standards
To ensure inclusivity, your application should meet WCAG 2.1 AA accessibility guidelines. This includes adding features like closed captions for live streams, screen reader compatibility, keyboard navigation, and high-contrast UI options.
For localization, stick to US conventions. Use the MM/DD/YYYY date format and a 12-hour clock with AM/PM for time. Numbers should include commas as thousand separators and periods as decimal points (e.g., 1,000.50). Display currency in US dollars ($), use imperial units (inches, feet, pounds) for measurements, and show temperatures in Fahrenheit.
Industry-Specific Considerations
Different industries have unique compliance needs that could impact your live streaming setup. For instance, healthcare apps might require end-to-end encryption and detailed audit trails for video communications. Educational platforms may need content filtering and moderation capabilities. Social media apps often need robust reporting systems and moderation tools to meet platform policies and legal requirements.
How to Choose the Right Free Live Streaming API
Selecting the right free live streaming API is crucial for ensuring smooth performance and meeting US regulatory standards. Here are the key features and considerations to guide your decision.
Key Features to Evaluate
When assessing a free live streaming API, focus on these critical features:
- Fast Video Encoding: Speedy encoding across multiple formats ensures seamless playback on various devices.
- Global Content Delivery: A strong CDN (Content Delivery Network) reduces latency. For example, api.video boasts over 140 global points of presence, 99.999% uptime, and playback latency as low as 0.02 seconds.
- Analytics Capabilities: Access to viewer engagement data and quality metrics helps fine-tune performance.
- AI-Powered Features: Tools like transcription and summarization enhance accessibility and reduce operational workload.
- Developer-Friendly Design: Look for APIs with straightforward documentation and effortless integration.
- Transparent Pricing: Understand the limits of the free tier, potential overage fees, and any scaling discounts as your app grows.
These features can help you narrow down the best options in the free API space.
Spotlight on api.video
Among the available choices, api.video stands out for its impressive capabilities and scalability. With the ability to handle up to 1 petabyte of traffic monthly, it’s designed to manage even the most demanding applications.
"We were losing clients initially because of issues in the upload of videos. After having api.video onboard, the drop rate came down by 99%, which was a great thing for our business."
– Akash Patange, Head of Marketing, Testlify
"With api.video, I could just put my credit card, put my email, invite my team, make the implementation, and go to production - it was that simple. Their documentation is super clear. As a CTO, it was a magical point for our business."
– Alejandro Duque Correa, CTO, HackU
Compliance Considerations
Make sure the API aligns with US regulatory requirements. For example, HIPAA compliance is essential for healthcare applications, FERPA for education, and COPPA for services targeting children. Not all free APIs offer these features, so it’s important to address compliance needs early in your selection process.
Step-by-Step Integration Guide
Now that you've picked your free live streaming API, it's time to dive into the integration process. This guide walks you through everything - from setting up your API to tackling the challenges that can impact your streaming experience.
Setting Up Your API
Start by setting up authentication and your client. First, sign up for an account with your chosen provider. Head to the developer dashboard to grab your API key or access token - this will act as your app's gateway to the streaming service.
For example, if you're using api.video, log in, select your environment, and copy your API key. Be sure to store this key securely in environment variables instead of hardcoding it into your app.
Next, install the SDK. Most providers make this simple by offering client libraries through standard package managers. For instance:
- JavaScript (Agora): Run this command in your terminal:
npm install agora-rtc-sdk - Python: Use
pipto install the required package. The exact package name depends on your provider.
Here’s how you can initialize your API client in various programming languages:
JavaScript (Agora):
import AgoraRTC from 'agora-rtc-sdk';
const client = AgoraRTC.createClient({ mode: 'live', codec: 'vp8' });
client.init('YOUR_API_KEY');
Python (Generic Example):
import livestreamapi
client = livestreamapi.Client("YOUR_API_KEY")
Go (api.video):
client := apivideo.NewClient("YOUR_API_KEY")
Once your client is initialized, use the API to create a live stream. For Python, it might look like this:
stream = client.create_stream(name="My First Live Stream")
stream_id = stream["id"]
The API response will give you the ingest URL and stream key - both are essential for broadcasting.
Creating and Embedding Live Streams
With your API client ready, the next step is to create a live stream and embed it into your app. You’ll need three key details: the stream ID, ingest URL, and stream key.
If you’re using OBS Studio, configuring it is straightforward. Go to Settings > Stream, select "Custom" as the service type, and enter the ingest URL (e.g., rtmp://broadcast.api.video/s) along with your unique stream key. For additional security, many providers support RTMPS or SRT protocols, which you can use by referencing the URLs and ports in your API documentation.
Embedding the stream into your app depends on your platform. For web apps, you can attach the video stream to an HTML element using the SDK. Here’s a basic example:
// Initialize and attach stream to a DOM element
client.init("YOUR_API_KEY", () => {
  const localStream = AgoraRTC.createStream({
    streamID: 'your-stream-id',
    video: true,
    audio: true
  });
  localStream.play('video-container');
});
For mobile apps, use native SDKs to render streams within view components. iOS and Android developers should refer to platform-specific guides, as implementation details vary between frameworks.
Testing is crucial. Make sure your stream works smoothly on both mobile and desktop browsers. Test across multiple devices and operating systems to ensure a seamless experience.
Error Handling and User Feedback
Once your stream is embedded, focus on error handling to keep things running smoothly. Streaming in the real world comes with challenges like network interruptions, authentication issues, and unexpected glitches. How you handle these can make or break the user experience.
Common errors include invalid API keys, incorrect stream IDs, network problems, and insufficient permissions. A solid error-handling strategy should catch these issues and provide helpful feedback to users. Here's an example of effective error handling in Python:
try:
    stream = client.create_stream(name="Live Event")
    stream_id = stream["id"]
except AuthenticationError:
    show_error("Please check your connection and try again")
    log_detailed_error("Invalid API key used")
except NetworkError:
    show_error("Connection issue - retrying in 5 seconds")
    retry_automatically()
except Exception as e:
    show_error("Stream could not start - please try again")
    log_detailed_error(f"Unexpected error: {e}")
Real-time user feedback can significantly improve the experience. Use status callbacks and event listeners from your SDK to monitor stream health and update your UI dynamically. For instance, show a loading spinner during initialization, display a "Live" badge when broadcasting, and provide clear error messages if something goes wrong.
Keep an eye on your stream's performance using your provider’s analytics tools or dashboard. Metrics like connection stability, viewer count, and stream quality can help you spot problems early. For US-based apps, ensure error messages use American English and display timestamps in a 12-hour format with AM/PM. Also, consider mobile users with limited bandwidth by offering options to adjust stream quality.
sbb-itb-8abf120
Best Practices for Live Streaming API Integration
Building a reliable live streaming app means prioritizing secure API management, ensuring smooth performance, and committing to regular upkeep.
Security and Compliance Requirements
To protect your app, store API keys securely in environment variables or secure vaults, and rotate them regularly - every 90 days is a good benchmark. Never hardcode these keys. Use authentication methods like OAuth 2.0 or token-based systems to manage access effectively. For instance, Mux employs a token key pair system (Token ID and Token Secret) that should always remain hidden from client-side code. This setup not only tightens security but also simplifies access control and revocation when needed.
In June 2024, a US-based EdTech platform integrated Mux Live Streaming API using OAuth 2.0 authentication and adaptive bitrate streaming. Over three months, this reduced buffering incidents by 55% and boosted average viewer engagement by 22%. CTO Michael Lee led the project, which included weekly SDK updates to meet security standards.
Compliance with copyright and privacy laws is equally important. Implement content moderation tools to block unauthorized material and adhere to the Digital Millennium Copyright Act (DMCA). If your app targets younger users, ensure compliance with the Children’s Online Privacy Protection Act (COPPA) by obtaining verifiable parental consent before collecting data from children under 13.
Your app's privacy policy should clearly outline how user data is managed. Protect sensitive information such as stream keys and validate all user inputs to guard against injection attacks. For added security, consider enabling two-factor authentication (2FA) for streamers, especially in business or educational settings where content protection is critical.
These steps provide a solid foundation for long-term security and operational stability.
Optimizing Stream Performance and Reliability
Once security is in place, focus on delivering a seamless viewing experience. Adaptive bitrate streaming is a game-changer, ensuring video quality adjusts to each viewer's network conditions. This can cut buffering by up to 60% compared to fixed bitrate streams. Most modern APIs support this feature, so make sure to enable it.
Prepare for network interruptions by implementing automatic reconnection features. If a stream drops, display clear messages like "Reconnecting..." to keep users informed. You can also provide fallback options, such as switching to a lower-quality stream or pausing the broadcast until the connection stabilizes.
Real-time monitoring is essential for spotting issues before they affect your audience. Use analytics tools to track metrics like viewer count, watch time, buffering events, and engagement. Mux, for example, offers built-in analytics to monitor stream health, helping you address problems as they arise.
Choosing the right protocol is another key decision. RTMP remains widely used, but RTMPS adds encryption with minimal complexity. For ultra-low latency needs, WebRTC is a strong option, though it requires more advanced implementation. A 2023 survey revealed that 70% of US-based streaming platforms rely on RTMP or RTMPS for live video ingestion.
Test your app under real-world conditions. Simulate high viewer loads and varying network speeds to ensure reliability. Mobile users on cellular networks face different challenges than desktop users on broadband. Data shows that over 80% of live streaming outages stem from network interruptions or misconfigured ingest URLs, highlighting the importance of thorough testing.
Maintenance and Updates
Keeping your streaming app secure and efficient requires regular updates. Stay on top of SDK updates, as API providers frequently release patches to address security vulnerabilities and improve performance. Check for updates monthly and test new versions in a staging environment before rolling them out.
Use tools like npm audit or pip-audit to monitor for vulnerabilities in your dependencies. When issues arise, update affected components promptly rather than waiting for your next scheduled maintenance.
Be ready for breaking changes. API providers often announce deprecation timelines in advance, so subscribe to developer newsletters and monitor changelogs. When notified, plan migrations well before older endpoints are retired to avoid disruptions.
Document your integration thoroughly. Include details like API versions, authentication methods, stream configurations, and any workarounds for edge cases. This documentation will save time when onboarding new team members or troubleshooting issues down the line.
Continuous monitoring of your app's performance metrics is equally important. Set up alerts for unusual activity, such as increased error rates, longer connection times, or drops in stream quality. Addressing these issues quickly can prevent them from escalating into larger problems.
Lastly, consider the total cost of ownership for your APIs. While free tiers may suffice initially, growing apps often outgrow these limits. Understanding pricing structures and feature restrictions early on will help you plan for scaling your solution effectively.
Partner with Zee Palm for Live Streaming Solutions
When it comes to integrating live streaming into your app, having the right partner can make all the difference. Building a high-quality live streaming app requires expertise in real-time video delivery, security, and scalability - areas where Zee Palm excels.
Why Choose Zee Palm?
With over a decade of experience, Zee Palm has completed more than 100 live streaming projects, earning the trust of 70+ clients. Their team of 13 professionals specializes in creating secure, scalable streaming solutions tailored specifically for the US market.
What makes Zee Palm stand out? Their subscription-based model allows for rapid feature delivery - often within a week. This approach eliminates the long development cycles typical of traditional methods, offering a streamlined, in-house development experience that adapts to your product's needs.
By combining modern development tools with expert oversight, Zee Palm ensures enterprise-grade live streaming integrations. They’re proficient in a variety of tech stacks, including AI, Web3, and custom real-time solutions. This versatility is especially valuable for projects requiring complex backend architecture, real-time data processing, or blockchain-based features.
Tailored Solutions for Every Industry
Zee Palm doesn’t believe in cookie-cutter solutions. Instead, they take the time to understand your industry, audience, and technical needs, delivering custom streaming solutions that work seamlessly across different sectors.
- Healthcare Applications: Zee Palm develops HIPAA-compliant telemedicine platforms with secure video streaming, end-to-end encryption, and integration with Electronic Health Record (EHR) systems. These solutions prioritize patient privacy while ensuring smooth video quality for remote consultations.
- EdTech Platforms: For educational institutions, Zee Palm creates interactive e-learning tools with live video, real-time chat, and adaptive streaming. Features like automated captions, session recording, and engagement analytics help enhance the learning experience.
- Social Media and Networking: Zee Palm builds systems for real-time event broadcasting, user-generated content moderation, and infrastructures that can handle sudden spikes in traffic during viral events or major broadcasts.
- Web3 and Blockchain: Their expertise extends to decentralized live streaming platforms, incorporating cryptocurrency payments, NFT-gated content, and distributed content delivery networks for blockchain communities.
Designed for US Localization
Every solution is designed to meet US standards, from currency formatting ($1,000.00) to MM/DD/YYYY date formats and 12-hour time notation. Zee Palm also ensures compliance with accessibility guidelines like WCAG, so your app feels natural and user-friendly for American audiences.
Try Before You Commit
Zee Palm offers a free trial for your first feature, giving you the chance to experience their development quality and efficiency without any upfront commitment. Once your app is live, they provide ongoing support, including performance monitoring, security updates, and service-level agreements tailored to your needs. This ensures your app stays reliable and secure as technologies evolve.
Partnering with Zee Palm simplifies live streaming integration and guarantees your app remains cutting-edge and dependable.
Conclusion and Key Takeaways
Successfully integrating live streaming APIs requires thoughtful planning, selecting the right tools, and adhering to proven practices. By focusing on these elements, you can create a reliable and engaging streaming experience that aligns with your business goals.
Start with solid planning. Before diving into development, it’s crucial to define your technical requirements, understand your audience, and ensure compliance with any relevant regulations. This groundwork prevents costly mistakes and keeps your project aligned with your objectives. Once you’ve mapped out your needs, the next step is identifying an API that fits your vision.
Selecting the appropriate API is critical for a smooth integration process. Options like Mux, api.video, and YouTube Live offer features suitable for various scales, from small events to large-scale productions. Evaluate these tools carefully to find one that matches your project’s specific needs.
Follow best practices for reliability. Effective error handling is essential to avoid disruptions, while robust security measures - such as managing API keys responsibly and using secure protocols like RTMPS - protect your application and users. Regular performance monitoring with built-in analytics helps you detect and address issues before they impact your audience.
The integration process generally follows a straightforward path: sign up for an API, obtain your API keys, install the client, set up stream containers, configure broadcasting, and enable monitoring. While the specifics may vary depending on the programming language you’re using - whether it’s Python, JavaScript, or another - this framework provides a reliable roadmap for implementation.
Stay ahead with continuous optimization. API providers often release updates, introduce new features, or phase out older functionalities. Keeping up with documentation and changelogs ensures your integration remains secure and benefits from the latest improvements.
FAQs
What are the drawbacks of using free live streaming APIs compared to paid options?
Free live streaming APIs can serve as a helpful entry point for developers, but they often come with trade-offs. Common limitations include fewer features, reduced streaming quality, and constraints on scalability, which may not align with the demands of larger or more complex applications. Another drawback is the lack of strong customer support, which can be crucial when resolving technical issues or expanding your app's capabilities.
For apps that demand advanced features, consistent reliability, or dedicated support, investing in a paid API could be a better choice to ensure those requirements are met.
How can I make sure my live streaming app meets US privacy and accessibility standards?
To make sure your live streaming app aligns with U.S. privacy and accessibility standards, it's crucial to follow key regulations like GDPR, CCPA, and ADA. On the privacy side, focus on secure data practices - this includes using encryption and ensuring users give clear, informed consent before their data is collected. For accessibility, stick to WCAG 2.1 guidelines, which help make your app functional for people with disabilities. Features like closed captioning and screen reader compatibility are essential.
Collaborating with skilled developers who understand these regulations can save you both time and effort. At Zee Palm, we specialize in building apps that meet these standards while keeping your audience's needs front and center.
What should I consider when selecting a live streaming API for my app?
When selecting a live streaming API for your app, there are several critical factors to weigh to ensure it aligns with your requirements. Start by checking its compatibility with your app's platform - whether it's iOS, Android, or web - and make sure it supports the programming languages and frameworks your team relies on. This ensures a smoother integration process.
Next, take a close look at the API's features. Does it offer adaptive streaming for varying network conditions? How about low latency to keep streams in near real-time? And can it handle scalability as your user base grows? These are essential considerations for delivering a seamless user experience.
Another important aspect is the documentation and support provided by the API provider. Clear, detailed documentation can make integration much easier and save you time when troubleshooting issues. Support options, whether through forums, live chat, or dedicated account managers, can also be a game-changer during development.
Finally, don't overlook costs. Even if the API is advertised as free, dig into the fine print. Look out for hidden fees or usage limits that could strain your budget as your app gains more users. Balancing features, support, and cost will help you make the right choice for your app's success.
Related Blog Posts

Debugging Cordova Apps: Common Issues
Debugging Cordova apps can be frustrating, especially when dealing with build errors, plugin conflicts, or runtime problems. These challenges often stem from platform-specific quirks, outdated dependencies, or misconfigurations in files like config.xml. Here's what you need to know to troubleshoot effectively:
- Build Failures: Check for missing SDKs, outdated tools (like Gradle or Xcode), or syntax errors in configuration files.
- Plugin Issues: Ensure plugins are updated and compatible with your Cordova version. Conflicts between plugins often require careful testing and adjustments.
- Runtime Errors: Missing permissions or platform-specific API differences can cause features to fail. Test on real devices to catch these problems.
Quick Fixes:
- Validate
config.xmlfor errors or missing tags. - Use tools like Chrome DevTools (Android) or Safari Web Inspector (iOS) for debugging.
- Regularly update Cordova CLI, platforms, and plugins to avoid compatibility issues.
- Analyze logs using
adb logcat(Android) or Xcode debug tools (iOS).
If these steps don't work, consider seeking expert help to resolve complex issues quickly. With the right approach, you can ensure your Cordova app runs smoothly across platforms.
Example of debugging Cordova apps with Visual Studio Code

Common Debugging Problems in Cordova
When diving into Cordova development, developers often encounter a few recurring challenges that can disrupt workflows and delay project timelines. These issues usually fall into three main categories, each requiring a different approach to troubleshoot effectively.
Platform-Specific Build Failures
Build failures are a frequent headache in Cordova projects. These errors crop up during the compilation process and often stem from missing dependencies, outdated or incompatible plugins, or misconfigured settings in files like config.xml. For instance, missing SDKs, outdated Gradle or Xcode setups, or even small syntax errors in configuration files can bring the build process to a halt. Unlike web development, where errors are usually flagged immediately, Cordova builds can fail at various stages, making it tricky to pinpoint the root cause.
Plugin Compatibility Issues
Plugins are essential in Cordova, but they can also be a source of frustration. Compatibility issues often arise when plugins aren't updated to align with newer Cordova versions or specific platform requirements. For example, a plugin that works seamlessly on Android might fail on iOS due to version mismatches. These problems often surface late in the development cycle, forcing developers to replace plugins or create custom solutions. Things get even messier when multiple plugins conflict with each other, requiring developers to comb through documentation and issue trackers to resolve the problems.
Runtime Errors on Devices
Runtime errors can be particularly challenging because they directly affect how the app performs for users. These errors often show up as JavaScript exceptions, inconsistent behavior across platforms, or failures to access native features. For example, missing permissions for accessing the camera, location services, or internet connectivity can cause features to fail silently or even crash the app. Another common issue is that the same JavaScript code might behave differently on iOS versus Android due to platform-specific API differences or plugin variations. This makes testing on actual devices - not just desktop simulations - an essential step to catch these hidden problems and ensure a smoother user experience.
Troubleshooting Methods
When Cordova issues arise, taking a structured approach can save you hours of frustration and quickly get your app back on track. Instead of randomly trying fixes, sticking to a step-by-step process helps pinpoint root causes and apply lasting solutions. These methods address the build, runtime, and plugin challenges discussed earlier.
Checking Configuration Settings
The config.xml file is the backbone of any Cordova project, and even minor errors here can cause significant problems. Open your config.xml file and run it through an XML validator to catch issues like missing tags or improper quotes.
Focus on core app settings such as the app name, version number, and author information. These fields must be correctly formatted and complete. For example, errors in the <name>, <version>, or <author> tags can prevent your app from building successfully.
Permissions are another critical area. Ensure permissions for features like the camera, location, or internet access are correctly declared for each platform. While missing permissions might not stop a build, they can lead to runtime problems when users try to access those features.
Finally, double-check plugin declarations in config.xml. Make sure every plugin your app relies on is listed and that the plugin IDs match exactly with what's installed in your project.
Using Development Tools
Once your configuration settings are verified, the next step is to dive into logs and debugging tools. For Android, connect your device via USB, enable debugging, and run cordova run android. You can then inspect logs using Chrome at chrome://inspect. This gives you access to console logs, network requests, JavaScript debugging, and DOM inspection.
For iOS, Safari Web Inspector offers similar functionality. Enable it on your iOS device by navigating to Settings > Safari > Advanced, then connect your device to your Mac. Your Cordova app will appear in Safari's Develop menu, allowing you to debug JavaScript, inspect elements, and monitor network activity.
If your device isn't directly connected to your development machine, Weinre (Web Inspector Remote) provides a great alternative. It creates a web-based inspector that connects to your app, enabling remote debugging across platforms.
Device logs can uncover issues that standard debugging tools might miss. For Android, use adb logcat to view real-time system logs, which can reveal missing modules, permission errors, or resource-loading issues. For iOS, Xcode's debug area is invaluable for catching errors during app startup and runtime.
Managing Dependencies and Platforms
If initial diagnostics don't resolve the issue, it may be time to refresh your platforms and plugins. Keeping Cordova platforms and plugins updated is key to avoiding compatibility problems. If you encounter issues, reinstalling platforms often clears up unexplained build errors or runtime glitches.
Use the following commands to refresh a platform:cordova platform rm <platform>cordova platform add <platform>@latest
The @latest flag ensures you’re installing the most up-to-date version with recent fixes.
Plugins require similar attention. Running cordova plugin update regularly ensures all plugins are compatible with your Cordova version. If a specific plugin causes trouble, check its repository for known issues or compatibility notes. In some cases, downgrading to a more stable version might be a better choice.
After making changes to configurations or dependencies, run cordova prepare. This command synchronizes your project files with the installed platforms and plugins, ensuring updates in config.xml or new plugins are correctly applied to platform-specific files.
Version compatibility between the Cordova CLI, platforms, and plugins is critical. Persistent issues often stem from mismatched versions, so consult plugin documentation to confirm you’re using supported versions.
For particularly challenging problems, expert help can save time and frustration. Advanced issues like plugin conflicts or platform-specific bugs may require deeper expertise. If you’re stuck, consider reaching out to experienced developers. For instance, the team at Zee Palm (https://zeepalm.com) has over a decade of experience resolving complex Cordova issues, helping projects stay on schedule and perform smoothly.
sbb-itb-8abf120
Fixing Specific Cordova Problems
When general troubleshooting doesn't cut it, it's time to focus on specific Cordova issues. Here are some targeted solutions to help you address common problems.
Resolving Plugin Conflicts
Plugin conflicts can be a real headache, often emerging after updates or new installations. To pinpoint the issue, start by running cordova plugin list to see all installed plugins. Then, cross-check this list with your config.xml and package.json files. Pay close attention to plugins that are outdated or generate warnings during installation. These conflicts usually occur when two plugins try to modify the same native code or access overlapping device features.
If you suspect a plugin is causing trouble, temporarily remove it using cordova plugin rm <plugin-name>. If the problem disappears, you've found your culprit. At this point, try installing a different version of the problematic plugin or look for an actively maintained alternative. For instance, camera and file plugins often clash over how they access device storage, leading to build errors or crashes. Updating both plugins to their latest compatible versions can typically clear things up.
Fixing Build Errors
Build errors can bring your progress to a screeching halt, but they're often caused by common issues like SDK misconfigurations or version mismatches. Start by ensuring your SDK and CLI versions are up to date. If needed, re-add the latest platform version as explained in the dependency management section.
For iOS builds, make sure you're using the correct Xcode version. After major Xcode updates, you'll need to accept new license agreements or update command-line tools by running xcode-select --install. Another frequent culprit is NPM package conflicts. Running npm update followed by cordova prepare can help sync your project files with the installed platforms and plugins, resolving many build-related problems.
Debugging Platform-Specific Problems
Some issues only show up on specific platforms, making them tricky to diagnose. This is where debugging tools come in handy. For Android, use Chrome DevTools and Android Studio Logcat. For iOS, Safari Web Inspector and Xcode Debug Area are your go-to options. These tools allow you to monitor real-time logs and identify platform-specific errors, such as permission issues or module loading failures.
Testing on real devices is critical because certain problems only appear under actual conditions like low memory, poor network connectivity, or unique hardware setups. Make it a habit to test on multiple devices and OS versions to catch these edge cases. This approach ensures a more stable multi-platform build.
PlatformPrimary Debug ToolLog AccessIdeal ForAndroidAndroid Studio Logcatadb logcatPermission errors and module issuesiOSXcode Debug AreaXcode consoleApp crashes and startup failuresCross-PlatformChrome DevToolsBrowser consoleJavaScript debugging and DOM inspection
If you're still stuck after trying these methods, consider seeking expert help. For instance, Zee Palm (https://zeepalm.com) offers over a decade of cross-platform development experience, helping teams tackle tough technical challenges and keep their projects on track.
Key Points
To tackle troubleshooting effectively, begin by reviewing configuration files - especially config.xml - for syntax errors or missing elements. Also, verify your plugin installations and platform versions to ensure they align with your project setup. This structured approach forms the foundation for resolving most issues.
Platform-specific build failures often arise from missing dependencies, mismatched plugin versions, or configuration problems. Regularly updating your platforms and plugins can help you sidestep these common challenges.
When it comes to plugin compatibility, it’s crucial to monitor plugin repositories for updates and known issues. Before adding new plugins, confirm that their versions are compatible with your current Cordova and platform configurations. Diagnosing runtime errors can be more complex since they manifest differently on each platform. Use tools like Chrome DevTools for Android or Safari Web Inspector for iOS to pinpoint problems.
Log analysis plays a key role in identifying root causes. For Android, tools like adb logcat can provide detailed logs, while iOS developers can rely on Xcode's debugging tools. These logs help uncover issues such as missing modules, permission errors, or network failures, providing the exact error messages needed for quick fixes.
Staying current is another time-saver. Regularly update your Cordova CLI, plugins, and dependencies to avoid preventable issues. Additionally, consult the official Cordova documentation and community forums for insights into new troubleshooting strategies.
For more complex scenarios - like intricate plugin conflicts or platform-specific errors - consider reaching out to experts. Teams like Zee Palm (https://zeepalm.com) specialize in resolving complicated Cordova issues efficiently.
FAQs
How can I identify and resolve plugin conflicts in my Cordova app?
Plugin conflicts in Cordova apps can crop up for a variety of reasons, like mismatched versions, overlapping dependencies, or compatibility hiccups with the Cordova framework itself. Tackling these issues effectively requires a systematic approach:
- Verify plugin compatibility: Double-check that all plugins align with your version of Cordova. Dig into the plugin documentation to confirm, and update or downgrade plugins as needed to match your setup.
- Investigate dependency conflicts: Run the
cordova plugin listcommand to see all installed plugins and their dependencies. If you spot conflicts between plugins, you may need to adjust or replace certain dependencies to resolve them. - Test plugins one by one: Add plugins individually to your project. This step-by-step process makes it much easier to identify which plugin is causing the trouble.
- Analyze error logs: Debugging tools like Chrome DevTools or Xcode Console are invaluable here. Check the error logs for any hints pointing to problematic plugins or code.
If you’re feeling stuck or need a more hands-on approach, it might be worth consulting with professionals who specialize in Cordova and app development. With the right expertise, you can sort out conflicts and get your app running seamlessly.
How can I make sure my Cordova app works smoothly across different platforms and versions?
To make sure your Cordova app works smoothly across different platforms and versions, prioritize thorough testing and follow established best practices. Start by running tests on all the platforms you’re targeting - like iOS and Android - and include their various versions to catch any potential problems early. Be cautious when using platform-specific plugins and always keep them updated to avoid compatibility hiccups.
Keep an eye on the official Cordova documentation for any updates or deprecations, as platform requirements can shift over time. It’s also a good idea to implement responsive design, so your app looks and functions well across different screen sizes and resolutions. By staying diligent with testing and proactive in your approach, you can reduce compatibility challenges and provide a consistent experience for your users.
What are the best practices for debugging Cordova apps on Android and iOS devices?
Debugging Cordova apps can sometimes feel like a puzzle, but with the right tools and strategies, you can simplify the process. For Android, Chrome DevTools offers a reliable way to inspect and debug your app in real-time. If you're working on iOS, Safari's Web Inspector is a go-to resource for diagnosing problems and enhancing performance.
Here are some practical tips to streamline your debugging process:
- Turn on debugging options: Make sure your app is built in debug mode, and enable debugging on your devices to access essential troubleshooting features.
- Use platform-specific tools: Tools like Android Studio and Xcode come with built-in emulators and debugging tools designed for their respective platforms, making it easier to pinpoint issues.
- Check Cordova plugins: Many problems stem from plugins. Double-check their compatibility with your app and update them regularly to avoid unnecessary headaches.
By incorporating these approaches, you can tackle bugs more efficiently and keep your Cordova development workflow running smoothly.
Related Blog Posts

Multi-Region Serverless: Active-Active vs. Active-Passive
Want a globally available, resilient system for your application? Multi-region serverless architectures can deliver. They distribute resources across different regions to ensure high availability, disaster recovery, and better performance. But choosing between active-active and active-passive models is key.
- Active-Active: All regions handle traffic simultaneously, offering maximum uptime, fast failover, and low latency. Ideal for applications needing uninterrupted service but comes with higher costs and complexity.
- Active-Passive: One region is active while others stay on standby, reducing costs and simplifying management. However, failover takes longer, and performance depends on the active region's location.
Quick Comparison:
FeatureActive-ActiveActive-PassiveAvailability99.99%+ (all regions active)99.9% (failover required)Failover SpeedInstantDelayed (minutes)CostHigher (all regions active)Lower (standby regions idle)ComplexityHigh (multi-region sync)Moderate (single region active)PerformanceExcellent (global coverage)Variable (depends on active region)
Bottom Line:
Choose active-active for global apps needing constant uptime and low latency. Go with active-passive for cost-effective disaster recovery with some tolerance for downtime.
Building Multi-Region, Active-Active, Serverless Backend | Demo | Route Traffic when Failover occurs
Active-Active Serverless Architecture Explained
An active-active serverless architecture involves deploying resources across multiple regions simultaneously, with all regions working together as a single system. This setup ensures that resources are always in use - no idle servers here. Every region contributes to handling user requests, processing data, and keeping your application running smoothly. The result? A system that’s highly available and delivers top-notch performance to users around the globe.
This approach pairs seamlessly with global load balancing, which helps distribute traffic efficiently across regions.
How Active-Active Deployment Works
In an active-active architecture, each region operates independently while being part of a coordinated system. When a user interacts with your application, a global traffic routing mechanism decides which region will handle the request. This decision is based on factors like the user’s location, server load, or the health of a particular region.
Global load balancers act as the traffic managers in this setup. Tools like Amazon Route 53 use latency-based or geolocation-based routing to direct users to the nearest or most efficient region. For instance, a customer in London might connect to your European region, while someone in New York is served by your North American region.
Each region must be capable of handling your entire application load if necessary. To make this possible, the system relies on real-time health monitoring and traffic redistribution. If one region - say, the European one - goes offline, the other regions, such as North America or Asia, must seamlessly absorb the extra traffic without affecting performance.
Real-time replication ensures that functions, databases, and storage stay consistent across regions. Built-in conflict resolution logic is used to manage simultaneous updates, providing the foundation for the system’s high availability and responsiveness.
Benefits of Active-Active
The active-active model offers several key advantages.
The standout benefit is maximum availability. With multiple regions handling traffic at the same time, your application can continue functioning even if one region experiences a failure. Users are automatically redirected to healthy regions, often without even realizing there was an issue.
Low latency and fast failover capabilities enhance the user experience. By connecting users to the closest region, response times are minimized. At the same time, automatic traffic routing ensures uninterrupted service, even during regional outages. For example, in 2022, AWS implemented an active-active serverless architecture for a major gaming platform. This setup enabled real-time matchmaking and live streaming across North America and Europe, achieving 99.99% availability and cutting latency for European users by up to 200 milliseconds.
Scalability is another big win. Instead of overwhelming a single region with increased traffic, active-active deployments spread the load across multiple regions. This approach allows for more efficient resource management and prevents any one region from becoming a bottleneck.
Drawbacks of Active-Active
Despite its advantages, active-active architectures come with challenges, particularly around data synchronization. Keeping data consistent across regions requires advanced replication mechanisms and meticulous planning. Applications with heavy write operations face additional hurdles, as simultaneous updates from different regions can create conflicts.
Conflict resolution is a critical requirement in this setup. When users in different regions modify the same data at the same time, your system needs a way to handle these conflicts. Strategies like last-write-wins, custom merge logic, or application-level reconciliation can address this, but they add complexity to your code and testing processes.
Higher costs are another consideration. Since every region needs the capacity to handle the full application load, you’re essentially duplicating your infrastructure. For example, AWS deployments often see costs double compared to single-region setups, as each region requires its own compute, storage, and networking resources.
The complexity of deployment also increases. Distributed systems require extensive monitoring across all regions, carefully coordinated deployments, and thorough disaster recovery testing. Your team will need expertise in distributed systems, which might mean additional training or hiring specialized talent.
Finally, resource duplication drives up operational expenses. Costs for data transfer between regions, advanced monitoring tools, and logging all add up. Organizations must account for these ongoing expenses when planning their budgets.
Active-Passive Serverless Architecture Explained
An active-passive serverless architecture operates differently from the active-active model. Instead of having multiple regions actively handling traffic, this setup assigns one primary region to manage all live operations. Secondary regions remain on standby, ready to take over if the primary region encounters issues.
How Active-Passive Deployment Works
In this deployment model, the primary region is responsible for handling 100% of live traffic and operations. This means all user requests and activities are processed in that region. Meanwhile, one or more passive regions stay in standby mode, continuously synchronized with the primary region to ensure readiness.
The system uses a heartbeat mechanism to monitor the health of the primary region. This mechanism checks for any signs of trouble, such as server unresponsiveness, system errors, or network disruptions. If a problem is detected, the failover process kicks in, activating a standby region and redirecting traffic to it.
Standby regions can be set up with varying levels of readiness, depending on recovery needs:
- A hot standby keeps everything fully deployed and ready for immediate activation.
- A warm standby maintains partial deployment, which can quickly scale up when needed.
- A pilot light approach keeps only the essential infrastructure running, requiring more time to activate but significantly reducing costs.
During failover, traffic is switched to the standby region. While this transition ensures continuity, there’s often a brief service interruption as the passive region comes online and begins handling requests.
Benefits of Active-Passive
This architecture offers several advantages, particularly for organizations balancing cost and reliability.
- Lower operational costs: Since passive regions are not actively serving traffic, expenses are limited to core replication and storage.
- Simpler management: With only one region actively handling traffic, there’s less complexity. Teams have fewer systems to monitor, analyze, and maintain, making it easier to manage disaster recovery without straining resources.
- Strong disaster recovery capabilities: The passive region stays synchronized with the primary region and activates only during downtime, ensuring continuity for essential services and meeting compliance requirements.
Drawbacks of Active-Passive
Despite its strengths, the active-passive approach comes with some limitations.
- Slower failover times: Unlike active-active setups where traffic instantly shifts to healthy regions, active-passive configurations require time to activate the standby region. This delay can vary based on the readiness level of the standby region.
- Single-region bottlenecks: All operations are funneled through the primary region, which can limit performance and scalability. Users located far from the primary region may face higher latency, and during peak traffic, the single region might struggle to keep up.
- Underutilized standby regions: While passive regions are cost-effective, they remain idle most of the time. This can feel like a missed opportunity for organizations that could benefit from the processing power of multiple active regions.
- Data consistency risks: If the primary region fails before completing data replication to the standby regions, some recent transactions may be lost. Careful planning around acceptable data loss and recovery objectives is essential to mitigate this risk.
- Geographic challenges: Routing all traffic through a single region can lead to higher latency for users in distant locations, especially compared to active-active setups that serve users from the closest region.
While active-passive architecture simplifies disaster recovery and reduces costs, it requires careful planning to address its trade-offs, particularly when it comes to failover speed and data consistency.
sbb-itb-8abf120
Active-Active vs. Active-Passive: Side-by-Side Comparison
Let’s break down the key differences between these two deployment models.
Comparison Table
Here’s how they stack up:
AspectActive-ActiveActive-PassiveAvailabilityHighest (99.99%+) – all regions are liveHigh (99.9%) – depends on how quickly failover occursFailover SpeedInstant (seconds) – no switchover requiredDelayed – standby activation takes minutesCostHigher – all resources are active and incur chargesLower – standby resources remain idle until neededOperational ComplexityHigh – requires advanced synchronization and monitoringModerate – simpler failover and data synchronizationData ConsistencyComplex – multi-region synchronization is challengingEasier – single write region with background syncGeographic PerformanceExcellent – users are served from the nearest regionVariable – traffic routes through the primary regionResource UtilizationMaximum – all regions actively process requestsPartial – standby regions stay idle
Active-active setups keep all regions operational at all times, which means higher costs due to constant resource usage and the need for real-time data synchronization. On the other hand, active-passive configurations save on costs by keeping standby resources idle until needed, making them more budget-friendly.
Failover speed is another critical difference. Active-active deployments offer near-instant failover, while active-passive setups may take a few minutes to activate standby resources.
When to Choose Each Model
The choice between these models depends on your application’s specific requirements.
Active-active is ideal for applications that demand maximum availability and performance. Think global SaaS platforms or financial trading systems, where even a brief outage can have serious consequences. For example, global e-commerce platforms using AWS Lambda across multiple regions can ensure low latency and uninterrupted service - even during regional outages. While this approach comes with higher complexity and costs, it guarantees a seamless experience for users and helps maintain revenue stability.
Active-passive, on the other hand, is a better fit for cost-conscious scenarios where slight downtime is acceptable. This model works well for internal business tools, disaster recovery plans, or systems with predictable, non-critical workloads. For instance, healthcare organizations using Azure Functions might pair a primary US region with a passive backup in another region to meet disaster recovery needs while keeping costs manageable.
Your team’s expertise also plays a role. Active-active setups demand advanced skills in monitoring and synchronization, while active-passive configurations are easier to manage. Budget constraints often tip the scales too - active-active provides top-tier performance and availability but at a premium. Active-passive, with its lower costs, makes multi-region deployments more accessible for smaller teams or organizations with limited resources.
Conclusion and Final Thoughts
Key Takeaways
Deciding between active-active and active-passive setups depends on the specific needs of your application. Active-active systems offer the highest level of availability, near-instant failover, and localized performance. These features make them a great fit for global SaaS platforms and real-time systems where even a moment of downtime could have severe consequences. On the other hand, active-passive configurations are more budget-friendly, easier to manage, and still provide solid disaster recovery capabilities, making them ideal for cost-conscious scenarios.
For example, in healthcare, active-active ensures uninterrupted access to patient data across regions during critical moments. SaaS companies benefit from consistent performance worldwide, while IoT systems managing distributed devices often need the scalability that active-active provides.
However, the technical expertise required for each setup varies. Active-active systems demand advanced skills in monitoring and synchronizing data across regions, while active-passive setups are simpler to manage and deploy. Budget considerations also play a role - active-passive systems utilize idle standby resources, which can be more cost-effective compared to the continuous multi-region resource use in active-active systems.
Ultimately, your decision should weigh factors like availability needs, budget, team expertise, and compliance requirements. These considerations will help you choose the right approach for your deployment.
Zee Palm's Expertise in Multi-Region Serverless Solutions
Zee Palm’s team of 13 seasoned professionals specializes in creating tailored multi-region serverless solutions, whether active-active or active-passive, to meet the demands of various industries. With over a decade of experience and a track record of delivering more than 100 successful projects, we are equipped to handle the challenges of multi-region deployments.
Our expertise spans diverse fields like AI, SaaS, and custom app development. For healthcare and medical AI applications, we ensure a balance between high availability, regulatory compliance, and cost efficiency. In IoT and smart technology projects, we excel at managing large-scale, distributed workloads.
Whether you're developing an EdTech platform with global reach or a Web3 application that demands constant uptime, we handle everything from system architecture and data synchronization to failover strategies and compliance planning. Our goal is to design and implement solutions that deliver the performance and reliability your business needs to thrive in a multi-region environment.
FAQs
What should I consider when choosing between active-active and active-passive serverless architectures?
When choosing between active-active and active-passive serverless architectures, it’s important to weigh factors like availability, latency, and data consistency.
An active-active setup offers great availability and faster response times by distributing traffic across multiple regions at the same time. But, this comes with added complexity - think about the challenges of keeping data synchronized and resolving conflicts when they arise. In contrast, an active-passive architecture simplifies maintaining data consistency. However, it may lead to slightly higher latency and brief downtime during failovers.
For applications where performance and scalability are top priorities, these trade-offs should guide your decision on which architecture fits best.
How is data synchronized in an active-active serverless architecture, and what challenges can arise?
In an active-active serverless architecture, keeping data synchronized across regions is crucial. This is typically achieved through real-time replication methods, paired with conflict resolution systems to manage simultaneous updates. The aim is to ensure users can access consistent and up-to-date data, no matter where they are.
That said, this approach isn't without its hurdles. Latency during replication can be an issue, especially over long distances. Handling conflict resolution for simultaneous updates adds complexity to the system. Plus, maintaining multiple active regions can lead to higher operational costs. To address these challenges, careful planning and a well-thought-out design are key to maintaining reliability and performance.
Is an active-passive serverless architecture suitable for a global application with users across multiple regions?
When considering a global application, an active-passive serverless setup can work well, but it ultimately depends on your application's specific needs. In this model, one region actively manages all traffic, while another stays on standby, ready to take over if the active region experiences a failure. This approach tends to be more budget-friendly compared to an active-active setup, though it might lead to slightly higher latency for users located farther from the active region.
For applications where maintaining low latency across all regions is critical, an active-active architecture might be a better choice. On the other hand, if cost savings and reliable disaster recovery are your main priorities, the active-passive setup can be a sensible option. The key is to thoroughly evaluate your application's performance requirements and where your users are located to determine the best fit.
Related Blog Posts

Metrics to Monitor for Auto-Scaling SaaS Apps
Auto-scaling keeps your SaaS app efficient and responsive by adjusting resources based on demand. The key to success lies in monitoring the right metrics, setting smart scaling policies, and using tools that automate the process. Here's what you need to know:
- Key Metrics: Track CPU utilization, memory usage, request rate, response time, queue lengths, and custom business metrics (like API calls or active sessions).
- Scaling Policies: Choose from target tracking (maintain a specific metric), step scaling (tiered responses to demand), or scheduled scaling (based on predictable traffic patterns).
- Tools: Use platforms like AWS CloudWatch, Azure Monitor, or Google Cloud Operations Suite for real-time monitoring and automated scaling actions.
- Best Practices: Review historical data, set alerts for anomalies, and optimize resource allocation regularly to balance performance and cost.
Auto-scaling isn't a one-time setup - it requires continuous monitoring and adjustment to ensure your app stays fast, stable, and cost-effective.
Getting the most out of AWS Auto Scaling | The Keys to AWS Optimization | S12 E7
Key Metrics to Monitor for Auto-Scaling
To make auto-scaling work effectively, you need to keep an eye on the right metrics. These metrics give you a snapshot of your system's health and demand, helping you strike the perfect balance between maintaining performance and managing costs. Here's a breakdown of the key metrics every SaaS team should monitor.
CPU Utilization
CPU utilization is one of the most important indicators of how much demand is being placed on your compute resources. It shows how much of your processing capacity is being used at any given moment. For example, if your average CPU usage regularly hits 80% or higher during peak times, it’s time to scale out by adding more instances. On the flip side, scaling down during quieter periods can save you money by cutting back on unused resources.
Memory Usage
Keeping tabs on memory usage is just as important as monitoring CPU. Applications that handle large datasets or run complex analytics can quickly run into trouble if they don’t have enough memory. High memory consumption can lead to bottlenecks or even out-of-memory errors, which can disrupt operations. Adding instances with more memory during high-demand periods ensures that your system stays stable and responsive.
Request Rate and Response Time
The request rate and response time are two metrics that work hand in hand to give you a clear sense of how your system is performing under load. The request rate tells you how many incoming requests your system is handling per second, while response time measures how quickly those requests are being processed. If you notice a spike in incoming requests paired with slower response times, it’s a clear signal that you need to scale up to maintain a smooth user experience.
Queue Lengths
For systems that rely on background processes or asynchronous tasks, monitoring queue lengths is critical. This metric tracks how many jobs or messages are waiting to be processed. If the queue grows beyond a certain threshold, it’s a sign that your system is struggling to keep up with demand. For instance, during live-streaming events, monitoring queue lengths ensures that video playback remains seamless for viewers by scaling up worker instances as needed.
Custom Business Metrics
In addition to system-level metrics, it’s crucial to track application-specific KPIs that align with your business goals. These might include active user sessions, database query rates, or the volume of API calls. By keeping an eye on these custom metrics, you can fine-tune your scaling strategies to better meet user needs and adapt to shifts in demand.
Tools and Methods for Monitoring Metrics
Using the right tools to monitor metrics is essential for making smart auto-scaling decisions. Today’s cloud platforms provide real-time tracking of key metrics, which can guide scaling actions effectively. Let’s dive into some of the best tools and methods available for monitoring and analyzing metrics that support successful auto-scaling.
Cloud Monitoring Solutions
AWS CloudWatch is a popular choice for monitoring SaaS applications hosted on Amazon's infrastructure. It gathers metrics directly from EC2 instances and Auto Scaling Groups, displaying them in customizable dashboards. You can set alarms to automatically trigger scaling actions when certain thresholds are met. For example, if CPU utilization goes above 80% for more than five minutes, AWS CloudWatch can initiate scaling to handle the load.
Azure Monitor offers a comprehensive way to collect data across your Azure environment. It allows you to combine multiple scaling rules - like scaling up based on memory usage during business hours and using different thresholds during off-peak times. This flexibility makes it a great fit for managing dynamic workloads.
Google Cloud Operations Suite (formerly Stackdriver) integrates smoothly with managed instance groups and provides robust visualization tools for monitoring scaling activities. Its machine learning capabilities make it especially useful for SaaS applications that include AI features.
These tools have a measurable impact. For instance, in 2022, an e-commerce SaaS provider used AWS CloudWatch to handle increased traffic during Black Friday. The result? They achieved 99.99% uptime while cutting infrastructure costs by 30%.
For businesses operating in hybrid or multi-cloud environments, third-party solutions like SolarWinds Observability can be game-changers. These tools provide cross-cloud visibility and AI-driven insights, aggregating data from multiple platforms into a single view.
Tool/PlatformKey StrengthsBest Use CaseAWS CloudWatchReal-time monitoring, deep AWS integrationAWS-based SaaS applicationsAzure MonitorEnd-to-end monitoring, flexible alertingMicrosoft Azure environmentsGoogle Cloud Operations SuiteStrong visualization, ML integrationGoogle Cloud SaaS with AI featuresSolarWinds ObservabilityMulti-cloud support, AI-powered insightsHybrid or multi-cloud deployments
These tools form the backbone of a solid monitoring setup, seamlessly connecting with your SaaS application’s automation workflows.
Integration and Automation
To fully leverage monitoring tools, they must be integrated with your SaaS applications. This can be done using SDKs, command-line interfaces (CLI), REST APIs, or configurations through cloud portals. For example, Azure Monitor can be configured using the Azure portal, PowerShell, CLI, or REST API. Similarly, Google Cloud offers the gcloud CLI for setting up autoscaling policies based on both standard and custom metrics.
It’s vital to capture both infrastructure and business-specific metrics. Custom metrics - like active user sessions, API requests, or transaction volumes - can be sent to monitoring platforms such as Application Insights in Azure, or custom metrics in CloudWatch and Google Cloud. This approach ties traditional infrastructure signals with business-focused KPIs, ensuring your auto-scaling strategy is responsive to both technical and business needs.
Alerts and automation should align with your scaling patterns. For instance, you can set up alerts for CPU usage exceeding 80%, unusual scaling activity, or unexpected cost increases. AWS CloudWatch can automatically add or remove instances when thresholds are crossed, while Azure Monitor can trigger scaling events based on more complex combinations of rules.
To keep your monitoring setup secure, enforce strong authentication methods like IAM roles or API keys, ensure data is encrypted during transmission, and regularly audit access points. Following the principle of least privilege ensures that your monitoring integrations remain both effective and secure.
With these tools and automation in place, you’re well-equipped to define precise auto-scaling policies that maintain peak performance.
sbb-itb-8abf120
Setting Up Auto-Scaling Policies
Once monitoring is in place, the next step is to establish auto-scaling policies. These policies automatically adjust resources based on real-time metrics, allowing your system to handle traffic spikes efficiently while cutting costs during slower periods.
The key to success lies in selecting the right policy type and setting thresholds that balance performance with cost management.
Policy Types: Target Tracking, Step Scaling, and Scheduled Scaling
There are three main types of auto-scaling policies, each suited to different workload patterns. Understanding these options helps you pick the best fit for your application.
Target Tracking is the simplest and most dynamic option. This policy adjusts resources to maintain a specific metric at a target value. For example, you can configure it to keep CPU utilization at 60%. If usage exceeds this target, additional instances are launched; if it drops below, instances are scaled down. This approach is ideal for workloads with unpredictable or highly variable demands because it reacts in real-time.
Step Scaling offers more granular control by defining a series of scaling actions based on different metric thresholds. For instance, if CPU usage surpasses 70%, the system might add two instances; if it goes beyond 85%, it could add four. This method works well when your application needs different scaling responses for varying levels of demand.
Scheduled Scaling is a proactive method that adjusts resources at specific times based on anticipated traffic patterns. For example, if you know your platform sees a surge in usage every weekday at 9:00 AM, you can schedule additional resources just before this time. This approach is particularly effective for applications with predictable, time-based usage, such as payroll systems or educational platforms.
Policy TypeFlexibilityComplexityBest Use CasesTarget TrackingHighLowUnpredictable workloads; steady performanceStep ScalingMediumMediumVariable workloads with tiered responsesScheduled ScalingLowLowPredictable, time-based load changes
When multiple rules are in place, auto-scaling expands resources if any rule is triggered but only scales down when all conditions are met.
After selecting a policy type, the next step is to carefully define the thresholds that will trigger scaling actions.
Setting Scaling Thresholds
Choosing the right thresholds requires a thorough analysis of historical performance data. Setting thresholds too low can lead to frequent scaling events and instability, while thresholds that are too high might delay responses to demand surges.
Start by examining metrics like CPU, memory usage, request rates, and any custom metrics relevant to your application. For CPU-based scaling, many SaaS platforms find that setting targets in the 60–70% utilization range provides enough buffer to handle sudden traffic increases. Memory thresholds often work well in the 70–80% range, depending on how your application uses memory.
If your application experiences frequent spikes in resource usage, you can reduce unnecessary scaling by implementing cooldown periods or averaging metrics over a set time. For example, instead of scaling up immediately when CPU usage hits 80%, configure the policy to wait until the usage remains above 80% for five consecutive minutes.
Custom metrics can also provide more precise scaling decisions. For example, an e-commerce platform might scale based on transactions per second, while a user-centric app might scale based on active session counts. Tailoring thresholds to your business metrics often leads to better results than relying solely on infrastructure metrics.
Regularly reviewing and adjusting thresholds is essential as usage patterns evolve over time.
The financial benefits of well-optimized thresholds can be dramatic. For instance, in 2023, a real-time analytics SaaS tool saved $50,000 annually by fine-tuning its scaling thresholds to reduce resources during off-peak hours. This highlights how thoughtful configuration can lead to substantial savings while maintaining performance.
For complex SaaS environments - whether in AI, healthcare, or EdTech - working with an experienced development team can make a huge difference. At Zee Palm, our experts apply proven strategies to fine-tune auto-scaling settings, ensuring your application stays efficient and cost-effective.
Best Practices for Auto-Scaling
Once you've set up your auto-scaling policies and thresholds, it's time to focus on fine-tuning. These best practices can help you strike the right balance between maintaining performance and controlling costs. Auto-scaling isn't a "set it and forget it" process - it requires ongoing monitoring, smart alerts, and regular resource adjustments.
Review Historical Data
Your past performance data holds the key to smarter auto-scaling decisions. By analyzing historical metrics, you can identify patterns - like seasonal traffic surges or weekly spikes - that should influence your scaling thresholds.
Dive into metrics such as CPU usage, memory consumption, request rates, and response times across various time frames. For instance, you may discover that your app consistently experiences traffic surges every Tuesday at 2:00 PM or that the holiday season brings a predictable increase in demand. These insights allow you to fine-tune your scaling triggers, helping you avoid the twin pitfalls of over-provisioning and under-provisioning.
Take the example of an e-commerce SaaS provider in November 2022. They analyzed historical sales and traffic data to prepare for Black Friday. By setting precise scaling rules, they automatically added resources during peak shopping hours and scaled back when traffic subsided. The result? They maintained 99.99% uptime on the busiest shopping day and cut infrastructure costs by 30% compared to previous years.
Make it a habit to review your data quarterly, though any major traffic event or system update should prompt an immediate analysis. Also, pay close attention to metrics during unexpected incidents - these moments often reveal gaps in your current setup that need fixing.
Set Alerts for Anomalies
Alerts are your early warning system for scaling issues and unexpected costs.
Set up notifications for unusual scaling behavior, such as rapid increases in instances, sudden drops in resources, or cost spikes that go beyond your daily averages. Persistent high queue lengths can also signal that your scaling isn't keeping pace with demand.
For example, a video streaming SaaS platform used alerts to monitor queue lengths and CPU spikes during live events. This proactive approach allowed them to detect and address potential scaling problems before viewers experienced buffering or disruptions.
Don't overlook cost-related alerts. Configure notifications to flag when your spending exceeds expected thresholds - whether daily or weekly. Sudden cost jumps often point to overly aggressive scaling policies or instances that aren't scaling down as they should during off-peak times.
Tools like AWS CloudWatch and Azure Monitor make it easy to implement these alerts. For instance, you could set an alert to trigger when CPU usage remains above 85% for more than 10 minutes or when daily infrastructure costs exceed 120% of your average.
Optimize Resource Allocation
Fine-tuning your resource allocation is essential for both performance and cost-efficiency. The instance types and sizes that worked six months ago might no longer be ideal, especially as your application evolves or cloud providers roll out new options.
Review your resource allocation quarterly or after significant updates. Check if your current instance types align with your workload. For example, if your app has become more memory-intensive, switching to memory-optimized instances might make sense. Or, if newer CPU-optimized instances offer better pricing for compute-heavy tasks, it may be time to make the switch.
Using a mix of instance types can also help balance costs and performance. Reserved instances are great for predictable workloads, while spot instances can save money for variable or experimental tasks - though they come with availability trade-offs.
Remember, right-sizing is an ongoing process. As your user base grows and your application changes, your resource needs will shift. Regular reviews ensure your auto-scaling strategy adapts to these changes, keeping your setup efficient.
For SaaS platforms tackling complex environments - whether it's AI-driven tools, healthcare solutions, or education platforms - collaborating with experienced developers can make a big difference. At Zee Palm, our team specializes in helping SaaS companies optimize their auto-scaling strategies, drawing on experience across a wide range of industries. By following these practices, you'll ensure your auto-scaling stays aligned with real-time demands.
Building a Complete Auto-Scaling Strategy
A solid auto-scaling strategy brings together monitoring, policy setup, and smart practices. It should be guided by data, mindful of costs, and tailored to your SaaS application's unique requirements.
Start with the basics: core infrastructure metrics. Then, layer on custom business metrics like user sign-ups or transaction volumes. These insights help you design scaling policies that respond to your application's ever-changing needs.
Policy configuration puts your strategy into action. Use a mix of approaches: target tracking policies for maintaining steady performance, step scaling for managing predictable load increases, and scheduled scaling for handling known traffic patterns. A well-prepared policy setup ensures your application runs smoothly while keeping costs in check.
Monitoring is the backbone of your strategy. Pair it with a robust alerting system to quickly catch anomalies, such as unexpected scaling events, rising costs, or performance issues. Real-time alerts enable rapid responses, laying the groundwork for better cost management and performance tuning.
When these components come together, they create a streamlined auto-scaling framework. Regularly review historical data, instance types, and scaling thresholds to fine-tune your setup. Post-mortem analyses after traffic spikes or incidents can also reveal areas for improvement, helping you refine your approach over time.
For SaaS companies tackling complex projects - whether it's AI platforms, healthcare apps, or educational tools - working with seasoned developers can speed up implementation. At Zee Palm, our team of 10+ developers brings more than a decade of experience building scalable SaaS solutions across various industries. We specialize in crafting auto-scaling strategies that balance performance with cost efficiency, ensuring your infrastructure remains reliable without overspending.
The best SaaS companies treat scaling strategies as dynamic systems, evolving with user behavior, seasonal trends, and business growth. By focusing on metrics, fine-tuning policies, and consistently improving, your auto-scaling strategy can become a key advantage, driving both performance and cost management forward.
FAQs
What are the key metrics to monitor when setting thresholds for auto-scaling in a SaaS application?
To set up effective thresholds for auto-scaling your SaaS application, keep a close eye on a few critical metrics that reveal how well your system is performing and how much demand it's handling. The key metrics to track include CPU usage, memory utilization, request rates, and latency. These provide a clear picture of when your application might need extra resources or when it's safe to scale back and cut costs.
Start by analyzing historical data to spot patterns or times of peak usage. For instance, if your CPU usage frequently goes above 70% during high-traffic periods, consider configuring your auto-scaling to kick in just below that level. Similarly, keep tabs on memory usage and request rates to ensure your application stays responsive without over-allocating resources.
It’s also important to revisit and adjust these thresholds regularly since user behavior and application demands can shift over time.
Why should you track custom business metrics alongside standard infrastructure metrics for auto-scaling SaaS apps?
Tracking custom business metrics alongside standard infrastructure metrics gives you a clearer picture of your app's performance and how users interact with it. While metrics like CPU usage, memory consumption, and request rates are essential for keeping tabs on system health, custom business metrics - like user engagement, transaction counts, or revenue trends - tie your scaling efforts directly to your business priorities.
By blending these two types of metrics, you can strike a balance between meeting demand and controlling costs, all while delivering a smooth user experience. This dual approach helps prevent over-provisioning resources and ensures your scaling decisions align with your business goals.
What steps can I take to keep my auto-scaling strategy effective as my SaaS app grows and user demand changes?
To keep your auto-scaling strategy running smoothly as your SaaS app grows and user demand fluctuates, it's important to keep an eye on critical metrics like CPU usage, memory consumption, and request rates. These metrics give you a clear picture of when adjustments are necessary to maintain performance and use resources wisely.
On top of that, having the right development expertise can be a game-changer. At Zee Palm, our team brings deep experience in SaaS and custom app development to the table. We can help fine-tune your application to handle changing demands and ensure your scaling approach stays strong and effective.
Related Blog Posts

Twitch API Integration: Step-by-Step Guide
The Twitch API allows you to integrate live streaming, user authentication, and chat features directly into your app, tapping into Twitch's massive audience of over 140 million monthly users. Here's what you need to know:
- What It Does: Access data like live streams, user profiles, and chat features through RESTful endpoints.
- Why Use It: Boost user engagement with real-time updates, personalized content, and notifications.
- Getting Started:
- Create a Twitch developer account.
- Register your app and obtain API credentials (Client ID and Client Secret).
- Use OAuth 2.0 for secure authentication.
- Features:
- Fetch live stream info, user profiles, and chat data.
- Use EventSub for real-time notifications.
- Manage tokens securely and handle rate limits.
- US Localization: Format dates (MM/DD/YYYY), times (12-hour AM/PM), and currency ($).
Integrating Twitch API can make your app more interactive and engaging while ensuring a secure and responsive experience for users.
Twitch API Tutorial using Node JS

Setting Up Your Twitch Application
To get started with Twitch's API, you'll need to register your app through the Twitch Developer Console and obtain API credentials.
Registering a New Twitch App
Before registering your app, make sure you enable two-factor authentication (2FA) in your Twitch account's Security settings. This is a required step to proceed.
Once 2FA is set up, go to the Twitch Developer Console and navigate to the "Applications" section. Click on "+ Register Your Application" to begin the registration process. You'll need to provide three key details about your app:
- Application Name: Choose a name that is both unique and descriptive. For example, if you're creating a US-based mobile app to help users find gaming streams, a name like "StreamCompanionUS" would work well. Avoid overly generic names that could conflict with existing apps.
- OAuth Redirect URI: This is the URL where Twitch will redirect users after they authenticate. For development, you might use something like
http://localhost:3000, while for production, you could usestreamcompanionus://auth. Make sure the URI matches exactly between your app code and the Developer Console - any mismatch, even a single character, will cause authentication errors. - Application Category: Select a category that best describes your app's primary function, such as "Mobile", "Game Integration", or "Analytics." This helps Twitch understand your app's purpose and may impact permissions or review processes.
Getting Your API Credentials
Once your app is registered, it will appear under "Developer Applications" in the console. Click "Manage" to access the credentials page, where you'll find two critical pieces of information:
- Client ID: This is your app's public identifier. It's safe to include in client-side code or on web pages, as it is designed to be public-facing. Copy this ID and add it to your app's configuration - it will be included in every API request to identify your app to Twitch's servers.
- Client Secret: This credential must be kept private. Generate it using the "New Secret" button, but remember that creating a new secret will immediately invalidate the old one. Store the Client Secret securely, such as in environment variables or a secrets manager on your server. Never include it in client-side code, public repositories, or any location where users could access it.
For US-based apps, ensure that credentials and documentation follow American formatting standards, such as MM/DD/YYYY for dates and $ for currency, to provide a consistent user experience.
With your Client ID and Client Secret ready, you're all set to implement OAuth 2.0 authentication for your app.
Setting Up OAuth 2.0 Authentication
OAuth 2.0 is the backbone of secure communication between your app, Twitch, and users. It allows your app to access the necessary features without exposing sensitive user information, like passwords. This ensures both security and functionality.
Understanding OAuth 2.0 Flows
Twitch relies on two types of tokens, each with a specific role. User Access Tokens are necessary when your app interacts with user-specific data, such as managing stream settings or viewing subscription details. On the other hand, App Access Tokens are used for general operations, like fetching public stream data or game categories, that don't require user-specific permissions.
For mobile apps, the Implicit Grant Flow is the go-to method for obtaining User Access Tokens. This approach avoids exposing the client secret on the device. When a user connects their Twitch account to your app, you direct them to Twitch’s authorization endpoint with your app's Client ID and the permissions (scopes) it needs.
The authorization URL should look like this:https://id.twitch.tv/oauth2/authorize?client_id=YOUR_CLIENT_ID&redirect_uri=YOUR_REDIRECT_URI&response_type=token&scope=REQUESTED_SCOPES.
Once the user grants permission, Twitch redirects them to your app, including the access token in the URL fragment.
For App Access Tokens, the Client Credentials Flow is simpler. You send a POST request to https://id.twitch.tv/oauth2/token with your Client ID and Client Secret. This flow is ideal for accessing public data, such as popular games or general stream information, without requiring user authentication.
Token TypeBest ForSecurity LevelLifespanUser Access TokenUser-specific data and actionsHigh (requires user consent)4–6 hoursApp Access TokenPublic data and app-level tasksMedium (app-level permissions)60 days
Managing Tokens
Proper token management ensures your app runs smoothly and securely. On Android, use EncryptedSharedPreferences, and on iOS, rely on the Keychain to store tokens securely. Avoid storing tokens in plain text files or unsecured locations like regular shared preferences.
Tokens have specific expiration times: User Access Tokens typically last 4–6 hours, while App Access Tokens remain valid for about 60 days. Your app should always check a token’s validity before making API requests and refresh tokens automatically to avoid disruptions.
When using refresh tokens, store them securely, just like access tokens. The refresh process should happen seamlessly in the background, ensuring a smooth user experience without unnecessary login prompts. If the refresh fails, guide users through re-authentication.
Common challenges include revoked permissions, expired tokens, or network errors during refresh attempts. Build fallback mechanisms to handle these issues and prompt users to re-authenticate when necessary. Additionally, log authentication events for debugging purposes, but never include sensitive token data in your logs.
Striking a balance between strong security and user convenience is essential. Your app should handle token operations behind the scenes while ensuring secure storage and transmission. By doing so, your app can consistently and safely access Twitch features.
sbb-itb-8abf120
Making API Requests and Using Twitch Features
Once your OAuth setup is complete, you can start using the Twitch API to fetch live stream data and manage interactions. With OAuth 2.0 in place, you can make authenticated requests to unlock Twitch's features. The API works with standard HTTP methods and delivers responses in JSON format, making it easy to integrate into your mobile app.
To make an API request, you’ll need two key headers: Client-Id and Authorization (which includes your access token). Here's an example:
GET https://api.twitch.tv/helix/streams?user_login=example_user
Headers:
  Client-Id: YOUR_CLIENT_ID
  Authorization: Bearer USER_ACCESS_TOKEN
Twitch enforces rate limits: 800 requests per minute for user tokens and 1,200 requests per minute for app tokens. Keep an eye on the Ratelimit-Remaining header in the response, and if you hit the limit, implement retry logic to avoid disruptions.
Core API Features
With authentication ready, you can take advantage of several key Twitch API features to enhance your app:
- Live stream data: Access real-time information like stream status, viewer counts, game categories, and stream titles to keep users updated.
- User profiles and channel data: Fetch details like profile pictures, bios, follower counts, and subscription info to enrich user interactions.
- Chat management: Enable chat functionality, including sending and receiving messages, moderating conversations, and managing subscriber-only modes.
- Clip creation and management: Allow users to capture and share exciting moments from streams, while the API handles the technical side.
- EventSub integration: Receive real-time notifications for events like channels going live, new subscribers, or raids - no need for constant polling.
Here’s a quick breakdown of some features:
FeatureToken RequiredRate Limit ImpactReal-time UpdatesLive Stream DataUser or AppMediumVia EventSubUser ProfilesUser (for private data)LowManual refreshChat ManagementUserHighWebSocket connectionClip CreationUserMediumImmediate
Formatting Data for US Users
To create a smooth experience for American users, format API response data in familiar local styles. Use MM/DD/YYYY for dates, display times in the 12-hour format with AM/PM, and format monetary values with $ and commas. For measurements, stick to imperial units.
Since Twitch timestamps are provided in UTC, ensure your app converts them to the user’s local timezone. Consistently applying their timezone preferences for all time-related displays adds a polished touch to your app.
Finally, when rate limits are exceeded, use exponential backoff for retries and display clear, friendly error messages like, “Too many requests – please wait a moment.” This helps maintain a positive user experience.
Next up, dive into advanced integration techniques like EventSub and better error handling.
Advanced Integration Techniques
Advanced integration techniques are essential for building apps that can handle high traffic, respond to events instantly, and provide a dependable user experience. These methods emphasize real-time data delivery, effective error management, and secure session handling.
Using EventSub for Real-Time Updates
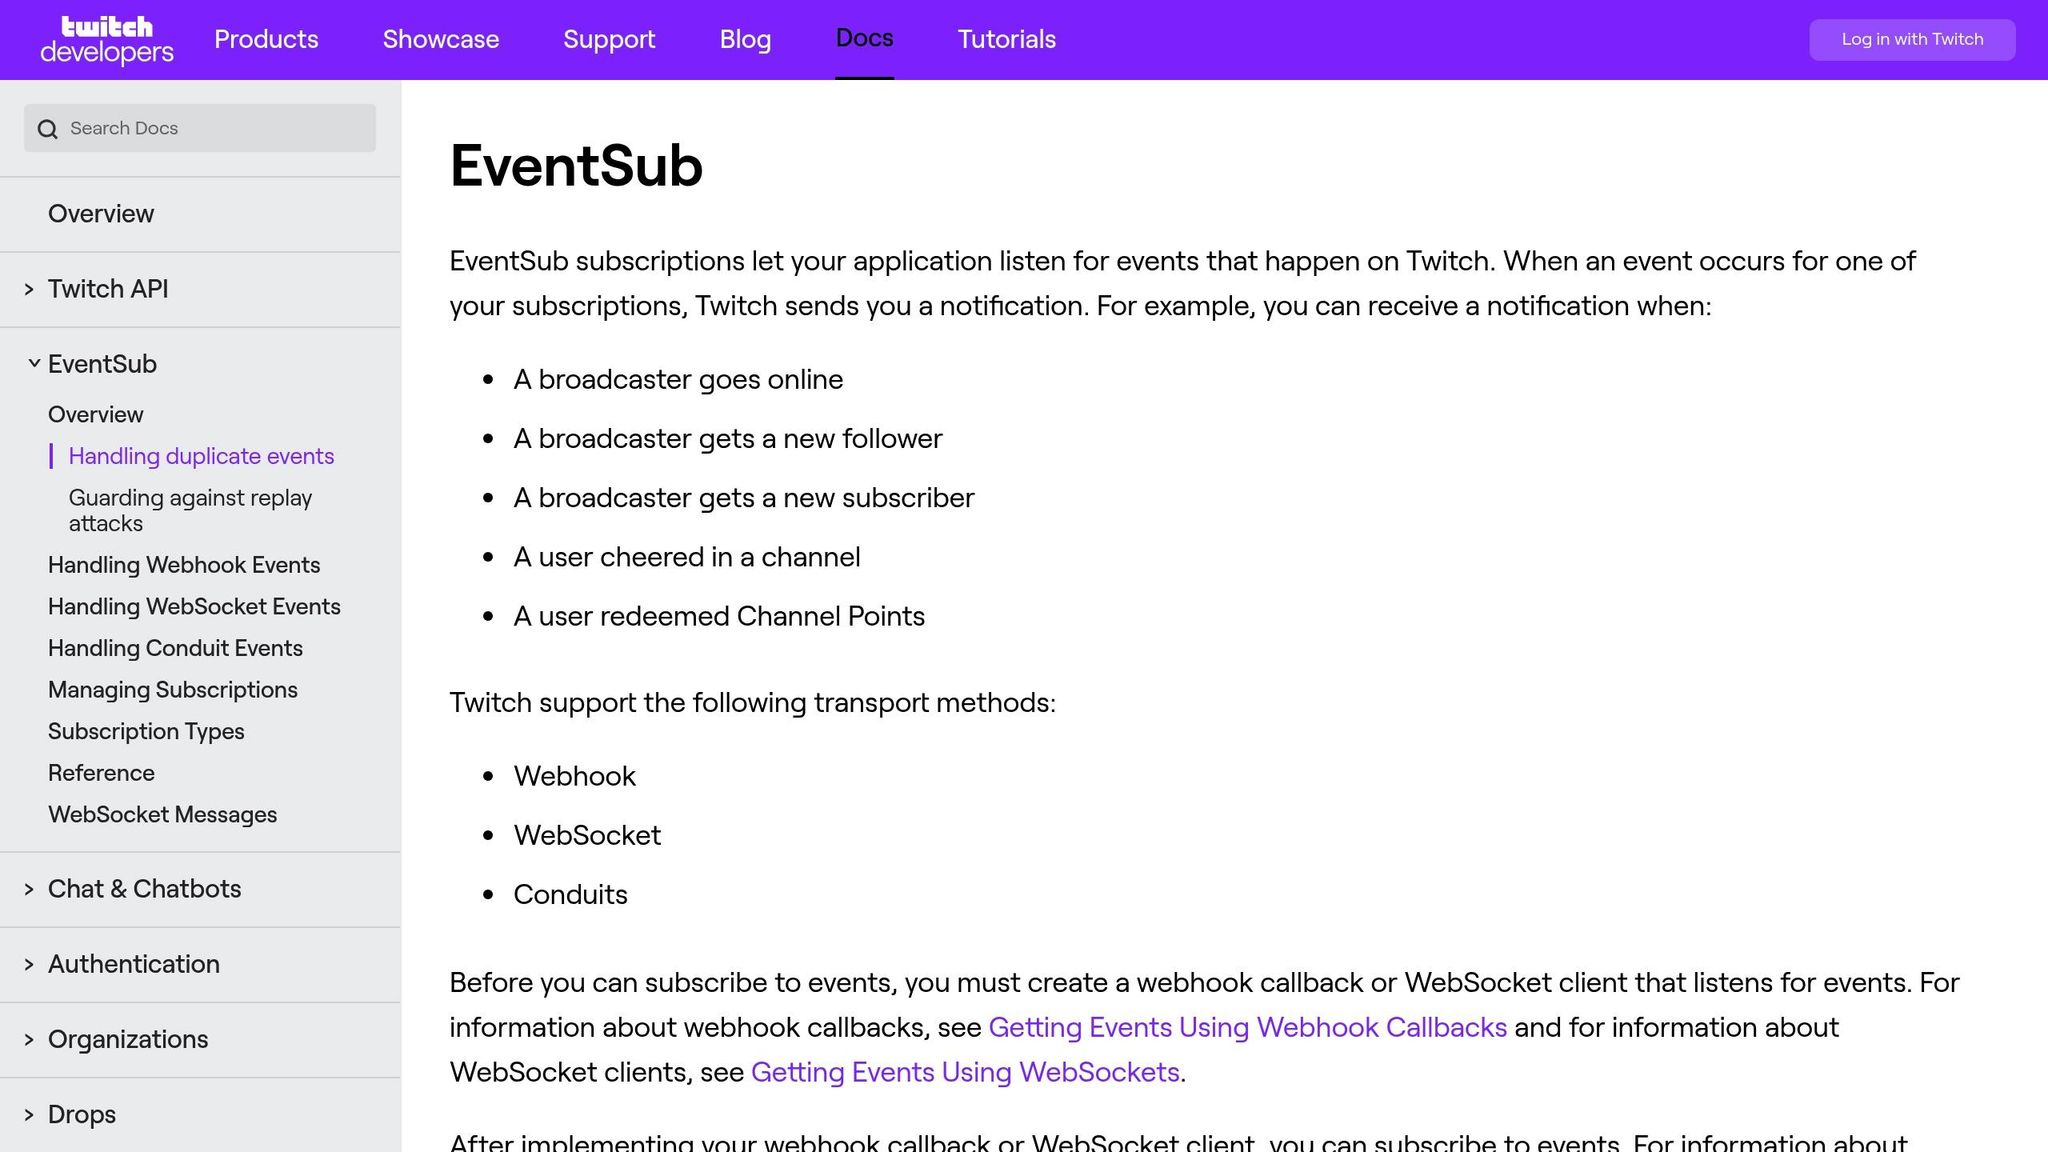
EventSub, Twitch's webhook system, allows your app to receive notifications in real-time when specific events occur. Instead of constantly polling Twitch for updates, EventSub ensures your app is notified immediately when a streamer goes live, gains a new follower, or receives a subscription.
To set up EventSub, you'll need a callback URL capable of handling HTTP POST requests from Twitch. When you subscribe to an event, Twitch sends a verification challenge to your endpoint. Your server must respond with the challenge value exactly as it was received to confirm ownership. Once verified, Twitch begins sending event notifications as JSON payloads to your callback URL.
Here’s how the verification process works: Twitch sends a POST request with a challenge string, and your server replies with that same string. After this step, you’ll start receiving real-time updates for all the events you’ve subscribed to.
Here's a quick comparison between polling and EventSub webhooks:
ApproachResponse TimeServer LoadScalabilityComplexityPollingDelayed (30–60s)High (frequent calls)LimitedSimple to implementEventSub WebhooksInstant (real-time)Low (event-driven)Highly scalableRequires setup
EventSub is especially useful for mobile apps that send push notifications. For example, when a followed streamer goes live, your webhook can process the event, retrieve relevant details, and send a push notification to users. For US-based audiences, ensure notifications use familiar time formats for better user experience. Once this is set up, focus on error handling and managing rate limits to keep your app running smoothly.
Handling Errors and Rate Limits
Managing API rate limits and errors is crucial for maintaining app performance. Monitor the Ratelimit-Remaining header in every API response to keep track of your remaining requests. If you're approaching the limit, slow down your request rate or queue less urgent calls to avoid hitting the cap.
Different API errors require tailored responses. For example:
- A 401 Unauthorized error means your access token has likely expired or is invalid. In this case, trigger an automatic token refresh using your stored refresh token.
- A 400 Bad Request error points to malformed data. Make sure to validate all parameters before sending requests.
- Network timeouts should prompt retries with progressively longer delays to avoid overwhelming the server.
Logging error patterns and response times can help you identify recurring issues. If certain API endpoints are consistently failing or responding slowly, consider fallback options like displaying cached data with a "last updated" timestamp. This keeps your app functional even during temporary disruptions.
Managing User Sessions and Data
Once your app handles errors effectively, focus on secure session management to ensure a smooth user experience. Store tokens securely using resources like iOS Keychain or Android Keystore. For session data, use fast local storage combined with centralized state management to keep everything synchronized.
User session data often needs both quick access and long-term storage. For instance:
- Frequently accessed data, like user profiles or followed streamers, can be stored in memory or fast local storage (e.g., SQLite).
- Dynamic data, such as live stream statuses, can be cached locally and updated through EventSub notifications or periodic API calls.
A centralized state management system can help maintain consistency across your app. For example, when an EventSub notification indicates a streamer is live, you can update your local database, refresh the stream list on the UI, and trigger a push notification - all from a single event handler.
To further enhance security:
- Use HTTPS for all API communications.
- Implement automatic logout after periods of inactivity.
- Conduct regular security audits to identify vulnerabilities.
For apps targeting US users, timezone-aware session management is key. Store user timezone preferences and convert Twitch’s UTC timestamps to local time before displaying them.
If you need expert guidance, teams like Zee Palm (https://zeepalm.com) specialize in building robust backend systems for webhook management, secure session handling, and API optimization. Their experience in scaling infrastructure and tailoring apps for the US market can ensure high performance and a seamless user experience.
Key Points for Twitch API Integration
Integrating the Twitch API into your mobile app opens the door to interactive and multimedia-rich features. Here's a guide to help you navigate the process, from setup to real-time updates.
Integration Checklist
After setting up and authenticating your application, use this checklist to ensure a complete and secure Twitch API integration.
Authentication and Setup
Start by registering your app to obtain API credentials. Make sure to enable two-factor authentication for added security. Use a unique app name and provide a proper OAuth Redirect URL to streamline the process.
OAuth 2.0 Implementation and Security Practices
OAuth 2.0 is essential for secure API access. For mobile apps, the Implicit Grant flow works well since it avoids handling client secrets. Server-side applications, on the other hand, should use the Authorization Code Grant flow. Always follow security best practices: use HTTPS, encrypt tokens in local storage, and rotate secrets regularly.
Core Feature Integration
Twitch's API offers access to user data, live streams, chat functionality, and multimedia features. With Twitch attracting over 140 million monthly active users, these features can enhance engagement significantly.
Real-Time Capabilities
Use EventSub webhooks to receive real-time updates about streams, followers, and other activities. This approach is more efficient than polling, reducing server load while keeping your app up-to-date.
Error Handling and Rate Limits
Monitor error codes and respect rate limits to maintain smooth functionality. Implement exponential backoff to handle retries effectively.
US Localization Standards
For applications targeting US users, format data accordingly. Display currency as $1,234.56, use MM/DD/YYYY for dates, 12-hour AM/PM time format, and imperial units for measurements. Temperatures should be shown in Fahrenheit.
By following these steps, you can create a secure, optimized, and user-friendly Twitch API integration.
About Zee Palm's Development Services

If you're looking for expert assistance, Zee Palm offers specialized services to simplify the integration process.
Building a reliable Twitch API integration requires a deep understanding of authentication flows, real-time data management, and secure session handling. Zee Palm has over a decade of experience in custom mobile app development, with more than 100 successful projects delivered to over 70 clients. Their expertise spans social media platforms, AI, SaaS, and applications requiring advanced multimedia and real-time features.
With a team of 13 professionals, including 10 skilled developers, Zee Palm is well-equipped to handle everything from OAuth 2.0 implementation to EventSub webhook management and US market localization. They also excel in building scalable backend systems and optimizing API performance, making them a strong partner for developers aiming to create engaging, real-time apps powered by Twitch.
Whether you need help with security, performance, or scaling your application, Zee Palm's experience ensures your Twitch-powered project is in capable hands.
FAQs
How do I keep my Client Secret secure when integrating the Twitch API into my app?
To keep your Client Secret secure when working with the Twitch API, consider these key practices:
- Avoid exposing your Client Secret in client-side code (like JavaScript or mobile apps), as it can be easily accessed by others.
- Securely store your Client Secret on your server and manage sensitive credentials using environment variables.
- Always use HTTPS for API requests to ensure data is encrypted during transmission.
- Regularly update your Client Secret and immediately revoke any keys that may have been compromised.
These steps can help protect your app and its connection to the Twitch API from potential threats.
What are the advantages of using EventSub for real-time updates instead of traditional polling?
EventSub brings a clear advantage over traditional polling methods when it comes to real-time updates. Instead of repeatedly pinging the server for changes, EventSub sends updates immediately as events happen. This approach not only eases the strain on servers but also makes better use of resources and boosts app performance.
On top of that, EventSub enhances the user experience by providing timely and precise updates. This is especially important for applications that thrive on real-time interaction, like live streaming or interactive platforms. By adopting EventSub, developers can channel their energy into creating engaging features without being bogged down by the inefficiencies of constant polling.
What are the best practices for managing API rate limits to ensure smooth app functionality?
To keep your app running smoothly and avoid interruptions caused by API rate limits, here are some practical tips you can follow:
- Keep an eye on API usage: Regularly monitor how many API requests your app is making to ensure you stay within the allowed limits.
- Leverage caching: Save commonly used data locally so you don’t have to make repeated API calls for the same information.
- Use exponential backoff for retries: If you hit the rate limit, wait progressively longer before retrying requests to avoid putting extra strain on the server.
- Streamline your API calls: Combine multiple requests into one whenever possible, and only request the data that’s absolutely necessary.
By staying on top of your API usage and making these adjustments, you can deliver a consistent experience for your users while minimizing downtime.
Related Blog Posts

Ultimate Guide to SaaS User Onboarding
SaaS user onboarding is the process of helping new users quickly understand and use a cloud-based software product. The goal is to guide users to their "Aha!" moment, where they see the product's value and are more likely to become long-term customers. Effective onboarding improves user retention, reduces churn, and boosts engagement.
Key takeaways:
- Why onboarding matters: 90% of users think companies can improve their onboarding. Poor experiences lead to high drop-off rates.
- Best practices: Use personalized journeys, interactive tutorials, and behavior-triggered communication to simplify the process.
- Metrics to track: Focus on activation rates, time-to-value, feature adoption, and completion rates.
- Real-world examples: Companies like Slack and Canva have improved onboarding success by tailoring flows and celebrating user milestones.
To build a successful onboarding process:
- Set clear goals: Define measurable objectives like reducing time-to-value or increasing feature adoption.
- Segment users: Personalize onboarding based on user roles, industries, or goals.
- Map the journey: Identify key steps and milestones for each user type.
- Use interactive tools: Welcome screens, guided tours, and contextual tooltips help users learn by doing.
- Measure and improve: Track metrics, analyze user behavior, and gather feedback to refine the experience.
Zee Palm, a SaaS development team, specializes in creating onboarding solutions tailored to specific industries like healthcare, EdTech, and IoT. Their approach focuses on reducing friction, improving user engagement, and aligning onboarding with business goals. Whether you're launching a new product or optimizing an existing one, effective onboarding can make all the difference.
Mastering B2B SaaS Onboarding (with Ramli John)
Planning Your SaaS Onboarding Strategy
Building an effective SaaS onboarding strategy requires a thoughtful, data-informed approach that aligns user needs with your business goals. The most successful strategies are built around clear objectives, a deep understanding of your users, and a well-mapped plan that guides them from signup to success.
Setting Onboarding Goals and Objectives
To create a meaningful onboarding process, start by setting SMART goals - specific, measurable, achievable, relevant, and time-bound. Avoid vague aspirations like "improve user experience." Instead, focus on well-defined targets that directly support your business growth.
The best onboarding goals often fall into three categories: reducing time-to-value, increasing feature adoption, and improving onboarding completion rates. Time-to-value measures how quickly users achieve their first meaningful success with your product. Feature adoption tracks whether users engage with the core functionality your product offers. Completion rates indicate how many users finish the onboarding process instead of dropping out midway.
Take Automox as an example. By setting clear, measurable goals, they managed to cut manual onboarding time by 75% and tripled their training enrollments.
When setting your own goals, you might focus on metrics like decreasing the time it takes for users to complete their first key action, increasing the percentage of users who activate core features within their first week, or boosting retention rates over the first 30 days. These goals should tie directly to your broader business objectives while remaining realistic given your resources and user base.
Once your goals are in place, the next step is to tailor the onboarding experience for distinct user profiles.
User Segmentation and Personalization
With your goals defined, segmenting your users allows you to create more targeted and meaningful onboarding experiences. Segmentation helps you deliver content and guidance that resonate with specific user groups, improving both engagement and satisfaction.
The most effective segmentation strategies gather key user data either during signup or through brief welcome surveys. This might include details like user roles (e.g., admin, end-user, or decision-maker), industry type, company size, and specific goals or use cases. Even simple segmentation can yield big results.
For example, Miro uses a welcome screen to ask users about their primary goals, allowing them to choose a tailored onboarding journey. This approach accelerates activation and improves satisfaction by ensuring users see content and features that align with their needs.
Personalization takes segmentation a step further by using collected data to create dynamic onboarding experiences. For instance, marketing managers and IT administrators might see different product tours, while small businesses and enterprise clients could be guided to features that suit their unique requirements. The goal is to ensure every user quickly sees value in your product based on their context and objectives.
Interestingly, 92% of top SaaS apps use in-app guidance during onboarding, but the most effective ones customize this guidance based on user segments. Tailored onboarding experiences not only improve engagement but also help users achieve their goals faster.
The next step is to convert these insights into a clear, actionable user journey.
Mapping the User Journey
Once you've set your objectives and personalized your approach, mapping the user journey transforms your strategy into a step-by-step plan. This process involves visualizing the path users take from signing up to achieving their first major success. It includes identifying key touchpoints and setting clear milestones along the way.
Start by defining what success looks like for each user segment. For example, in a project management tool, success might mean creating a first project, inviting team members, and completing an initial task. In an analytics platform, it could involve connecting a data source, building a dashboard, and sharing insights with stakeholders.
Effective journey maps also highlight potential friction points where users might get stuck or drop off. Use analytics to identify these areas and incorporate behavioral triggers to guide users forward. For instance, if users struggle with a specific feature, you could offer contextual help or suggest alternative actions to keep them moving.
Behavior-based triggers often outperform time-based sequences when guiding users. Instead of sending a generic "Day 3" email, trigger communications based on user actions. For example, if a user completes their profile setup, guide them immediately to the next step. If they stall, provide timely help or resources to re-engage them.
Some industries require unique considerations. For example, healthcare platforms like Zee Palm integrate compliance-focused steps to ensure clarity, while educational tools must cater to different user types, such as students, teachers, and administrators, who may have varying levels of technical expertise.
The goal isn’t to rush users through the process but to create a journey that’s effective and meaningful. Sometimes adding an extra step - like a tutorial or a confidence-building task - can lead to better long-term outcomes by ensuring users fully understand and appreciate their "success" moments.
Key Components of a SaaS Onboarding Process
Once you’ve mapped out your user journey, the next step is building the key elements that guide users from signup to success. The most effective SaaS onboarding combines three main components: welcome screens that capture user intent, interactive guidance to simplify feature discovery, and strategic communication to keep users engaged throughout their journey.
Welcome Screens and Surveys
Welcome screens are your first opportunity to make a connection and gather essential information for creating a personalized experience.
Microsurveys are a powerful tool for collecting just the right amount of data without overwhelming users. These short questionnaires can ask about user roles, goals, or experience levels, helping you segment users and tailor their onboarding paths. The trick? Keep it brief - just 2-3 focused questions that directly shape the onboarding process.
For example, a project management tool might ask users whether they’re managing personal tasks, small team projects, or enterprise-level initiatives. Each answer could trigger a different onboarding flow, highlighting the most relevant features for that user’s needs.
In December 2024, Zee Palm boosted survey engagement by introducing reward points and cooldown periods, making the process more appealing. Transparency also plays a big role here. When users know their answers will directly improve their experience, they’re far more likely to complete the survey. Be sure to follow through by using their input to personalize the next steps.
Guided Tours and Interactive Tutorials
Interactive guidance turns complex software into an approachable experience. Guided tours and interactive tutorials break down workflows into manageable steps, helping users quickly grasp core features without feeling overwhelmed.
The best guided tours focus on delivering quick wins rather than bombarding users with every feature your product offers. By helping users achieve their first meaningful success, you build confidence and momentum that encourages further exploration.
Interactive checklists are another effective tool. They tap into the Zeigarnik effect - a psychological principle where people remember unfinished tasks better than completed ones. By showing progress and clearly marking what’s left to do, checklists motivate users to keep going.
Contextual tooltips provide help right when users need it. These pop-ups appear as users encounter new features or potentially confusing elements, offering just-in-time guidance without disrupting their flow. This approach has been shown to improve retention rates by up to 30%.
When designing interactive elements, use progressive disclosure. Start with the basics and gradually introduce advanced features as users become more comfortable. This prevents users from feeling overwhelmed and abandoning the product before they see its value.
Communication Touchpoints
Beyond interactive tools, ongoing communication is key to supporting users throughout their journey. Email campaigns and in-app notifications keep users engaged by providing timely prompts, educational content, and encouragement to complete important actions.
The most effective communication is behavior-triggered rather than time-based. For instance, instead of sending a generic “Day 3” email, trigger messages based on specific actions or inactions. If a user completes their profile setup, guide them to the next step immediately. If they get stuck, offer help or alternative approaches to keep them moving forward.
Personalized welcome emails should reinforce your product’s value while offering clear next steps. Progress reminders work best when they acknowledge what users have already achieved before suggesting what comes next. Contextual feature tips - highlighting capabilities that align with users’ actions or goals - are especially impactful.
From December 2024 to January 2025, Zee Palm introduced a dedicated chat system for their client PROJEX. This feature allowed users to connect directly with admin support for real-time help, significantly reducing friction during onboarding.
In-app notifications should feel supportive, not intrusive. Use them to celebrate milestones, offer contextual guidance, or highlight features relevant to user behavior. The goal is to create a sense of partnership, not interruption.
For users who prefer to learn independently, self-service resources are invaluable. Knowledge bases, video tutorials, and FAQ sections empower users to find answers on their own while easing the burden on support teams. The key is ensuring these resources are easy to access and genuinely useful.
sbb-itb-8abf120
Measuring and Improving Onboarding Success
To make your onboarding process work better, you need to measure its performance. Tracking the right data and gathering feedback can help you reduce churn and improve user satisfaction.
Key Metrics for Onboarding Success
Successful SaaS companies rely on specific metrics to understand how users engage with their onboarding. Here are some of the most important ones:
- Activation rate: This tracks the percentage of users who complete key actions during onboarding, like setting up a profile, finishing a tutorial, or using a core feature for the first time. It’s a strong indicator of how well your process is driving engagement.
- Time-to-value: This measures how quickly users experience their first meaningful outcome with your product. The faster they see value, the more likely they’ll stick around. Depending on the product, this could range from minutes to days.
- Feature adoption rate: This shows how effectively your onboarding encourages users to explore and use important features. If a highlighted feature has low adoption, it’s a sign something needs to be adjusted.
- Onboarding completion rate: This metric tells you how many users finish the entire onboarding process. While not every user needs to complete every step, large drop-offs at specific points suggest there’s friction in the flow.
- Customer effort score: This measures how easy users find your onboarding. Collecting this data through surveys helps uncover pain points that might not be obvious from behavioral data alone.
For example, Slack revamped its onboarding in 2024 by introducing adaptive flows tailored to user roles and engagement levels. By using behavioral analytics to provide contextual tooltips and simplify advanced features, they boosted their onboarding completion rate by 18%, reduced early churn by 12%, and increased feature adoption by 25%.
Analyzing and Improving the Onboarding Funnel
Once you’ve identified the right metrics, the next step is figuring out where users are struggling or dropping off. Tools like funnel analysis, heatmaps, and session recordings can give you valuable insights:
- Funnel analysis pinpoints where users exit your onboarding process. High exit rates often signal confusion, technical issues, or steps that are too complex.
- Heatmaps show where users click, scroll, or ignore content. This helps you understand if users are missing important guidance or getting distracted.
- Session recordings provide a deeper look by showing how individual users navigate the process. Watching these recordings can reveal moments of hesitation or confusion that aggregate data might miss.
Combining this data with user journey mapping gives a clearer picture of what’s working and what’s not. Overlaying user actions and drop-off rates onto your onboarding flow can highlight gaps between your intentions and the actual user experience.
Take Zenefits as an example. They overhauled their onboarding by integrating training with support systems and carefully tracking engagement metrics. This led to a 13% increase in training participation and a 5% drop in support tickets, proving how data-driven changes can lead to real improvements.
The key is acting on what you find. If users abandon a setup screen, consider breaking it into smaller steps. If a feature isn’t being adopted, make sure your tutorials clearly explain its value. Pair these adjustments with direct user feedback to understand the "why" behind the numbers.
Using User Feedback
While behavioral data shows you where issues exist, direct user feedback helps you understand the reasons behind them. Here are a few ways to gather this feedback:
- In-app surveys: Keep them short and time them strategically, such as right after users complete a key step. A simple question like, "Was this step easy to complete?" can uncover friction points.
- Post-onboarding questionnaires: These allow for more detailed feedback after users have completed the onboarding process. Open-ended questions can surface specific pain points and improvement ideas.
- Net Promoter Score (NPS): Asking users to rate their experience during or after onboarding can reveal overall satisfaction levels. Follow-up questions about their score can provide actionable insights.
- Direct user interviews: These require more effort but offer the richest insights. Speaking with users who dropped out of onboarding can help you identify barriers that aren’t obvious from successful completions.
The most important step? Closing the feedback loop. When users see their suggestions lead to changes, it builds trust and engagement. For instance, if multiple users report confusion at a specific step, updating instructions or redesigning that part shows you’re listening.
Zee Palm, a team of 13 experts specializing in AI and SaaS development, has helped over 100 projects implement feedback systems that turn user insights into measurable improvements. Their experience in custom app development allows them to build advanced tracking and feedback tools that drive continuous optimization.
Best Practices and Common Challenges
When building a seamless onboarding experience, it's essential to recognize common pitfalls and implement strategies to address them. A well-thought-out onboarding process can significantly boost user engagement and retention.
Avoiding Common Mistakes
One of the biggest mistakes is overwhelming users with too much information at once. New users are eager to get started and experience immediate benefits. Bombarding them with every feature or function right away can lead to confusion, more support requests, and even user churn.
Another misstep is failing to provide personalized guidance. Treating all users the same ignores the fact that their goals, technical skills, and use cases vary widely. For instance, a marketing manager might need different onboarding steps than a software developer using the same tool.
A lack of clarity about the product's value is also a common issue. Users need to understand how the product benefits them. If this value isn't communicated effectively, they may lose interest and abandon the onboarding process before experiencing its benefits.
Timing matters, too. Using time-based communications instead of action-triggered ones can feel disconnected. For example, sending a generic introductory email to a user who has already completed setup might seem irrelevant, while someone who hasn’t logged in yet might need a nudge.
Lastly, rigid onboarding flows that force all users through the same steps can alienate both beginners and experienced users. Beginners may feel overwhelmed, while advanced users might feel frustrated by unnecessary steps.
Proven Best Practices
Breaking tasks into smaller, manageable steps is key. Tools like checklists and progress bars help users track their progress, creating a sense of accomplishment and motivating them to continue.
Celebrating milestones - like completing a profile or using a feature for the first time - also encourages users to stay engaged. Positive reinforcement can go a long way in building loyalty.
Interactive, step-by-step guides are another effective tool. Instead of relying solely on static documentation, integrating clear, on-screen instructions allows users to learn by doing. This hands-on approach improves retention and reduces the need for customer support.
Some companies are already seeing results with tailored onboarding strategies. For example, Slack improved its user activation rates by segmenting its onboarding flows. By tailoring in-app tutorials and tooltips to each user’s role and goals, they created a more personalized experience supported by real-time analytics. Similarly, Canva boosted feature adoption by introducing interactive checklists and celebrating milestones.
Offering flexible paths that let users skip or revisit steps is another way to enhance satisfaction. It allows users to move at their own pace, whether they’re beginners or seasoned pros. Additionally, focusing communication on how features help users achieve their goals - rather than just listing what the product can do - makes the value of the product much clearer.
How Zee Palm Delivers Custom Solutions
Zee Palm takes these best practices to the next level by crafting tailored solutions that address onboarding challenges head-on. With over 10 years of experience and more than 100 successful projects, their team of 13 professionals - including 10 expert developers - specializes in AI and SaaS development, making them well-equipped to design sophisticated onboarding experiences.
Their approach starts with data-driven user segmentation. By analyzing user behavior, they create personalized onboarding flows that adapt to individual needs. Unlike generic templates, Zee Palm develops custom processes aligned with each client's specific business goals.
Using advanced analytics and behavior tracking, Zee Palm identifies friction points and continuously refines the onboarding journey. Their expertise allows them to build interactive tutorials, automated communication tools, and feedback systems that transform user insights into actionable improvements.
Zee Palm’s experience spans diverse industries like healthcare, EdTech, and IoT. Whether simplifying complex medical workflows or guiding students through an educational platform, they understand the unique challenges each sector faces. Their scalable solutions ensure that every new user finds value from the very beginning, with onboarding processes that evolve alongside client needs.
Conclusion: Driving Success through Good Onboarding
A well-structured onboarding process lays the groundwork for SaaS success. With 90% of customers identifying room for improvement in onboarding and 92% of leading SaaS apps incorporating in-app guidance, the message is clear: getting onboarding right isn’t just an opportunity - it’s essential for staying competitive.
Effective onboarding doesn’t just make a good first impression - it drives long-term engagement. For instance, interactive tours can boost feature adoption by 42%, while tooltips enhance retention by 30%. When users quickly grasp your product’s value and feel confident navigating it, they’re far more likely to stick around, becoming loyal customers who contribute to sustainable revenue growth. These numbers highlight just how critical onboarding is to fostering lasting success.
This guide has broken down the core elements of successful onboarding: personalized user journeys, strategic segmentation, interactive tutorials, and data-driven optimization. Case studies show that tailored onboarding not only increases user engagement but also reduces the volume of support tickets.
The takeaway? Onboarding isn’t just about adding a few tutorials or tips - it’s a strategic process that demands a deep understanding of your users, careful planning, and scalable solutions. It’s no wonder many teams find this challenging, especially when juggling onboarding improvements alongside other product priorities.
For businesses aiming to maximize results, working with seasoned SaaS experts can make all the difference. Zee Palm’s experienced team - comprising over 10 expert developers and 13 professionals who’ve completed 100+ projects - specializes in crafting custom onboarding solutions that drive activation and retention.
In the competitive SaaS arena, efficient onboarding is a game-changer. It reduces churn, lowers support costs, and increases customer lifetime value. Companies that prioritize seamless user onboarding will be the ones leading the pack.
FAQs
What are the best ways for SaaS companies to measure the success of their user onboarding process?
To evaluate how well a SaaS onboarding process is working, you need to focus on metrics that highlight user engagement and satisfaction. One key metric to watch is the activation rate, which tells you the percentage of users who complete the essential actions needed to experience your product's value. Another critical measure is time-to-value, which tracks how quickly users begin to see the benefits of using your product.
You should also collect customer satisfaction scores (CSAT) through surveys to gain insights into user feedback and pinpoint areas that could use improvement. By keeping an eye on these metrics, SaaS companies can ensure their onboarding process is effectively setting users up for success while identifying ways to make it even better.
How can you tailor the onboarding experience to suit different user groups?
Personalizing the onboarding experience for various user groups is a smart way to boost engagement and satisfaction right from the start. Begin by breaking users into segments based on factors like their role, industry, or specific goals. For instance, the needs of a small business owner will likely differ from those of a large enterprise client.
Create custom onboarding flows that directly address the challenges and priorities of each group. This might involve offering tailored tutorials, showcasing relevant features, or even providing pre-configured settings that match their objectives. You can also leverage behavioral data to adjust the onboarding process in real-time, ensuring users get the guidance they need as they navigate your platform.
Don’t forget to collect feedback during the onboarding phase. This not only helps you fine-tune the experience but also demonstrates to users that their opinions are valued, fostering trust and loyalty from the very beginning.
Why is behavior-triggered communication more effective than time-based sequences during onboarding?
Behavior-triggered communication works better because it aligns perfectly with what users are doing, offering a more tailored and meaningful experience. Instead of sticking to a rigid time-based schedule, these messages are sent at just the right moment - like after a user completes a task or faces a challenge.
This method not only strengthens trust but also minimizes user drop-off. By addressing immediate needs and providing timely support, it ensures a smoother onboarding process where users feel guided and cared for throughout their journey.
Related Blog Posts

Scaling Design Systems: 4 Team Collaboration Models
When scaling a design system, choosing the right collaboration model is essential for managing growth and maintaining efficiency. The article outlines four main models, each suited to different team sizes, workflows, and organizational needs:
- Centralized: A single team manages the system, ensuring consistency but risking bottlenecks as demand grows. Ideal for small teams or early-stage systems.
- Federated: Responsibility is shared across teams, balancing oversight and flexibility. Best for larger organizations with multiple products.
- Community-Driven: Open participation from all team members fosters engagement but requires strong governance to avoid inconsistencies. Works well for mature organizations with collaborative cultures.
- Contribution: Teams actively develop components with structured processes, distributing workload and speeding up growth. Suitable for organizations with high request volumes.
Each model has unique trade-offs in collaboration, governance, scalability, and speed. Selecting the right approach depends on your organization’s size, maturity, and workload. Below is a quick comparison to help you decide.
Quick Comparison
ModelProsConsBest ForCentralizedStrong consistency, clear decision-makingBottlenecks, limited flexibilitySmall teams or early-stage systemsFederatedShared workload, promotes collaborationRisk of inconsistencies, requires coordinationLarger teams managing multiple productsCommunity-DrivenHigh engagement, diverse perspectivesSlower decisions, needs strong governanceMature organizations with collaborative culturesContributionSpeeds up growth, shared ownershipRequires clear processes, structured oversightHigh-volume, fast-growing organizations
Your collaboration model should align with your team’s current needs while preparing for future growth.
In the file: Building a collaborative design system at scale
1. Centralized Model
The centralized model places full control in the hands of a single, dedicated design team. This team oversees the creation of components, establishes guidelines, maintains documentation, and approves updates, ensuring consistency across the entire organization.
Other teams - such as product, engineering, and design teams - primarily act as users rather than contributors. Any requests for new components or updates must go through this central team, making it the gatekeeper of the design system.
Collaboration Level
In this model, the core team drives all decisions, while other teams provide feedback or submit requests. This separation allows product teams to focus on their projects without worrying about maintaining design system standards. However, this structure can sometimes result in lower engagement from product teams, as they may feel disconnected from the system's development. The trade-off is clear: the organization gains consistency, but at the expense of diverse input. This dynamic is further reinforced by the governance structure's strict controls.
Governance Structure
Governance in the centralized model relies on a top-down approach. The core team establishes standards, reviews contributions, and has the final say on what gets added to the design system. While this hierarchy ensures clear roles and responsibilities, it can also create bottlenecks if the core team becomes overwhelmed or struggles to address organizational needs promptly.
Scalability Potential
This model is well-suited for small to medium-sized organizations where the core team can effectively manage the workload while maintaining quality and consistency. However, as the organization grows, the central team's capacity may become a limiting factor. When more product teams require components, updates, or support, the increased demand can lead to delays that stretch out for weeks. Recognizing these constraints often signals the need to transition to a more distributed approach.
Speed of Iteration
The speed of iteration in the centralized model depends on the efficiency of the core team. A small, focused team can make decisions quickly, but as demand increases, the workload may slow progress. This model prioritizes quality over speed, ensuring that every component meets established standards before deployment.
For highly specialized teams, such as Zee Palm, the centralized model enforces strict design standards across complex projects. However, as project volume and complexity grow, balancing centralized control with the flexibility needed for customization becomes increasingly challenging.
Ultimately, the centralized model excels at maintaining design consistency but may struggle to scale quickly as organizational demands increase.
2. Federated Model
The federated model shifts away from a centralized approach by distributing the responsibility for the design system across multiple teams. Instead of relying on a single dedicated group, this approach empowers individual teams to contribute components and updates, all while adhering to core guidelines established by a central oversight team.
In this setup, teams are seen as active collaborators. They focus on their specific projects while also playing a role in shaping and evolving the broader design system. This creates a shared sense of responsibility and collaboration across the organization. Let’s dive deeper into how this model fosters teamwork and maintains structure.
Collaboration Level
The federated model thrives on cross-functional collaboration. Teams from various parts of the organization actively contribute to the design system, promoting shared ownership and bringing in diverse perspectives. Regular coordination ensures that contributions align with the system's overall vision, allowing teams to make changes while staying within defined boundaries.
To prevent inconsistencies, clear guidelines are critical. These standards help maintain alignment across teams, even as each group addresses its unique needs. For organizations with multiple product lines, this model is particularly effective - solutions developed by one team can often be reused by others facing similar challenges, creating a ripple effect of shared knowledge and efficiency.
Governance Structure
Governance in the federated model strikes a balance between autonomy and oversight. A core team sets the overarching standards and guidelines, but individual teams retain the freedom to contribute within these parameters. This ensures consistency without stifling creativity or adaptability.
To maintain quality and coordination, organizations often rely on documented contribution processes, review boards, and regular audits. These tools help streamline efforts across teams and identify potential conflicts before they escalate. The governance structure needs to be robust enough to uphold standards while flexible enough to accommodate the varying needs of different teams. Clear documentation, well-defined review processes, and proper training are essential to ensure teams can contribute effectively.
Scalability Potential
One of the key strengths of the federated model is its ability to scale alongside organizational growth. By distributing the workload and tapping into the expertise of multiple teams, this approach allows the design system to adapt and evolve without overburdening a single group. As new teams join, the system can expand naturally, addressing diverse needs more effectively.
However, scalability relies heavily on strong governance and clear communication to prevent fragmentation. For organizations with fewer than 20 designers, this model is often manageable, but larger teams may struggle to maintain cohesion without more structured oversight. It’s also a practical choice for organizations testing the waters with design systems, as it requires minimal upfront investment and stakeholder buy-in.
Speed of Iteration
The federated model can significantly accelerate iteration by enabling multiple teams to work on different components simultaneously, bypassing the bottlenecks of centralized approval processes. This parallel approach allows the system to evolve faster than it would under a single-team model.
That said, the speed advantage depends on effective governance and communication. Without clear standards or proper coordination, teams risk delays or conflicting updates. Regular synchronization meetings are crucial to ensure everyone stays aligned and avoids duplicating efforts.
For example, teams like Zee Palm use the flexibility of the federated model to iterate quickly across various projects. By contributing directly to the design system while focusing on client deliverables, they can adapt to specific project needs without compromising overall consistency.
Success in this model hinges on establishing clear contribution guidelines from the start and ensuring all teams understand their roles within the larger system. When executed well, the federated model combines rapid iteration with consistent quality, even across multiple projects running in parallel.
3. Community-Driven Model
The community-driven model thrives on open participation, inviting contributions from anyone within the organization. Unlike centralized or federated models, which restrict input to a select group, this approach encourages designers, developers, product managers, and other stakeholders to suggest updates or introduce new components. By doing so, it transforms the design system into a dynamic, evolving platform shaped by continuous input - a bottom-up approach that fosters inclusivity and collaboration. This contrasts sharply with the controlled, hierarchical nature of centralized and federated systems.
Collaboration Level
Collaboration reaches its peak with the community-driven model. Everyone, regardless of their role, is encouraged to share ideas and insights, creating a rich mix of perspectives. This openness often leads to solutions and components that might not emerge from a smaller, more isolated team. A great example of this is GitLab's Pajamas design system. In 2023, GitLab allowed any team member to propose changes, a move that helped the system stay aligned with organizational needs. This open approach not only improved adoption but also enhanced satisfaction among product teams.
Governance Structure
While open participation is the cornerstone of this model, strong governance is crucial to ensure quality and consistency. Without clear oversight, the system could easily become fragmented. Typically, a group of maintainers or a dedicated committee reviews contributions to ensure they meet established standards. Proposals are discussed and refined collaboratively to maintain cohesion while encouraging innovation. For instance, in 2023, the Dutch Government adopted a "Relay Model" for their design system, enabling multiple teams to contribute through a structured review process. This ensured the system remained adaptable and effective for diverse needs. Transparent guidelines and clear review processes are vital for helping new contributors engage confidently while safeguarding the system's integrity.
Scalability Potential
The community-driven model's reliance on collective expertise makes it highly scalable. With more individuals and teams contributing, the system can quickly adapt to changing requirements without overloading a central team. However, this scalability depends on robust governance. Without proper oversight, there's a risk of inconsistency or fragmentation. To sustain growth, organizations must invest in thorough documentation, well-defined standards, and effective communication tools.
Speed of Iteration
This model's open nature accelerates idea generation but can slow down decision-making due to the need for consensus. While multiple contributors can quickly propose diverse solutions, reaching agreement often takes longer compared to models driven by a core team. For example, teams managing varied project types, like those at Zee Palm, benefit from the flexibility of this approach. It allows teams to address specific challenges while leveraging insights from across the organization. Striking the right balance between rapid innovation and rigorous review is key to maintaining both speed and quality. This trade-off is a defining feature of the community-driven model and highlights its unique dynamics compared to other collaboration methods.
sbb-itb-8abf120
4. Contribution Model
The contribution model takes collaboration to the next level by introducing structured ownership. This approach allows teams to actively shape and improve the design system, moving beyond just offering suggestions. Unlike the open-ended participation of a community-driven model, this method emphasizes structured participation, providing clear steps for implementation.
Collaboration Level
This model encourages teams to take an active role in building the system, not just brainstorming ideas. Teams are responsible for turning their concepts into reality, fostering a deeper sense of ownership and commitment to the system's success. Collaboration here goes beyond discussions - it involves hands-on development.
A great example is LaunchDarkly, which provides detailed documentation to guide contributors through the process. This support system ensures contributors have the confidence and resources to implement changes themselves, rather than merely submitting requests.
Governance Structure
To maintain quality and consistency, the contribution model relies on a well-defined governance system. Typically, a core team or committee oversees contributions, ensuring they align with the design system’s standards and principles. This balance is crucial as the system grows and serves diverse teams.
For instance, some organizations use structured review processes to ensure quality while fostering a collaborative culture. This approach not only keeps the system evolving efficiently but also promotes shared knowledge among contributors. Detailed guidelines and documentation are vital, enabling contributors to work independently while safeguarding the system’s integrity.
Scalability Potential
The contribution model shines when it comes to scaling. By distributing development work across teams, it ensures the design system can grow alongside the organization without overburdening a small core team. Unlike centralized models, this approach eliminates bottlenecks by tapping into the collective capacity of multiple teams.
That said, scalability depends on robust governance. Organizations need efficient review workflows, automated quality checks, and clear contribution paths to prevent fragmentation or inconsistency as the system expands.
Speed of Iteration
With contributions happening in parallel, this model speeds up the journey from concept to implementation. It’s especially effective for complex industries like AI, healthcare, and SaaS, where domain-specific needs must be addressed without compromising the system’s overall coherence. Teams can focus on contributions that directly impact their projects while benefiting the entire organization.
Clear and well-documented processes reduce friction, making it easier to integrate contributions quickly. When these systems function smoothly, teams can iterate faster while maintaining the quality and consistency that make design systems so valuable. This approach aligns with agile practices seen in federated models, ensuring efficient integration without sacrificing robustness.
Model Comparison: Advantages and Disadvantages
After breaking down the different models, let’s compare their strengths and weaknesses to help guide decisions on scaling your design system. Each model has its own trade-offs, making it suitable for different organizational needs.
ModelAdvantagesDisadvantagesBest ForCentralizedEnsures strong consistency and quality control; Clear authority for decisions; Unified brand identityCan create bottlenecks; Limited flexibility; Struggles to scale with growthSmall teams or early-stage design systemsFederatedReduces bottlenecks by distributing workload; Encourages innovation; Promotes collaboration through shared responsibilityRisk of inconsistencies if guidelines aren’t strictly followed; Requires strong communication and coordinationLarger teams managing multiple productsCommunity-DrivenBoosts adoption and engagement; Brings in diverse perspectives; Encourages collective decision-makingHard to maintain consistency and quality; Slower decision-making; Needs robust governanceOrganizations with a mature, collaborative cultureContributionAllows teams to contribute without overwhelming the core team; Speeds up system growth; Builds a culture of shared ownershipRequires clear, documented review processes; Needs structured governance to ensure qualityOrganizations with high request volumes that exceed core team capacity
This table serves as a roadmap for aligning each model with your organization’s specific needs.
Collaboration and Governance
Collaboration levels vary widely across these models. The centralized approach offers low collaboration but excels in maintaining control and consistency. On the other end, community-driven models promote very high collaboration, though this often slows decision-making. Federated and contribution models strike a balance, offering high collaboration with a manageable level of governance overhead.
Governance structures also differ significantly. Centralized models rely on strict control by a single team, ensuring consistency but creating bottlenecks as organizations grow. In contrast, contribution-based governance allows broader participation while maintaining quality through structured processes.
Scalability and Speed
When it comes to scalability, centralized models tend to hit limits as demand increases. Federated and contribution models, however, excel at distributing workloads across multiple teams. Transparent contribution processes, like those seen in Nitro’s implementation, can balance growth and control by using simple tools like forms for token requests, fostering continuous improvements.
Speed of iteration isn't solely tied to the model but rather to process design. Centralized models can handle simple changes quickly but slow down with heavy request volumes. Clear documentation and streamlined review processes can help maintain speed even as demands grow.
Resource Considerations and Maturity
Resource needs depend heavily on team size and organizational maturity. Small teams can often succeed with minimal setups, while larger teams require dedicated resources, specialized tools, and formal governance structures. Startups typically benefit from centralized models early on, transitioning to federated or contribution models as their needs expand. A key sign that it’s time to shift is when the core team becomes overwhelmed with requests, signaling the need for a more scalable, collaborative approach.
Conclusion
When choosing a collaboration model for your design system, consider your team's size and needs. A centralized model works well for smaller teams, while a federated approach suits growing organizations. For more established teams with a mature culture, a community-driven model can thrive. If your team handles a high volume of work, a contribution-based model may be the best fit. The right model should align with your organization's scale and workflow, ensuring it supports your growth effectively.
Governance plays a critical role in maintaining order and efficiency within your design system. Clear guidelines, well-documented processes, and flexible governance structures can transform potential chaos into streamlined collaboration. Industry examples, like those shared by Zee Palm, highlight how structured yet adaptable governance can lead to success. With the right approach, design system collaboration can accelerate progress without sacrificing quality.
As your team evolves, so should your design system. Successful organizations often start with a simple model and adapt as their needs grow. For instance, when your team reaches around 20 designers, it's time to consider dedicating resources specifically to your design system. Planning for such transitions early on can help you avoid bottlenecks that could hinder your scaling efforts.
Ultimately, your collaboration model should serve both the designers contributing to the system and the end users engaging with its products. Achieving the right balance between control and creativity, consistency and speed, and structure and adaptability is essential for sustained success.
FAQs
How can I choose the right collaboration model for scaling my organization's design system?
Choosing the right collaboration model to scale your design system hinges on several factors, including your team's structure, project objectives, and available resources. Begin by assessing how complex your design system is and determining the extent of collaboration required across teams. For instance, centralized models are ideal for smaller teams aiming for uniformity, while federated or hybrid models are better suited for larger organizations with varying needs.
Engaging key stakeholders early in the process is crucial. Aligning on priorities ensures the collaboration model you select promotes both scalability and efficiency. And if you need expert help to implement solutions that scale effectively, our team of skilled developers can work with you to create systems tailored to your specific requirements.
What are the main governance challenges in a community-driven design system model, and how can they be addressed?
Community-driven design systems often hit roadblocks like inconsistent contributions, unclear accountability, and struggles to maintain a cohesive vision. These challenges tend to surface when multiple contributors work independently without clear direction or oversight.
To tackle these issues, start by creating clear contribution guidelines that outline expectations and processes. Forming a dedicated core team to review and approve changes ensures accountability and keeps the system on track. Regular communication - whether through team check-ins or shared updates - helps keep everyone aligned and focused. Tools like version control systems and thorough documentation can also play a big role in simplifying collaboration and preserving quality across the design system.
What are the steps for transitioning from a centralized design system model to a federated or contribution-based model as an organization grows?
Transitioning from a centralized design system to one that’s based on contributions or a federated model takes thoughtful planning and teamwork. The first step is to put clear governance structures in place. These structures help maintain consistency while giving teams the freedom to contribute meaningfully. Shared guidelines, thorough documentation, and reliable tools are key to keeping everyone aligned.
Fostering open communication is equally important. Set up regular check-ins, create feedback loops, and provide shared spaces where teams can collaborate and exchange ideas. As responsibilities are gradually handed over to individual teams, it’s essential to maintain some level of oversight to prevent the system from becoming disjointed. This balanced approach ensures the design system can grow and evolve without losing its core structure.
Related Blog Posts

How to Debug PWAs with Chrome DevTools
Debugging PWAs requires understanding their unique features, like offline functionality and installability. Chrome DevTools simplifies this process with tools to inspect service workers, manage storage, and test offline behavior. Here's how you can use it effectively:
- Access DevTools: Right-click on your app and select "Inspect" or use shortcuts (
Ctrl+Shift+Ion Windows/Linux,Cmd+Option+Ion Mac). - Application Panel: Debug service workers, check your manifest file, and manage cache/storage.
- Offline Testing: Use the "Offline" switch to simulate no internet and test app behavior.
- Service Worker Debugging: Check registration status, update cycles, and caching strategies.
- Lighthouse Audits: Evaluate PWA performance, accessibility, and compliance.
Each step ensures your PWA works across devices and network conditions, delivering a reliable user experience.
Opening Chrome DevTools for PWA Debugging

How to Open Chrome DevTools
To open Chrome DevTools, right-click on any element in your PWA and select "Inspect". This will not only open the DevTools but also highlight the chosen element for easier inspection.
For quick access, you can use the following shortcuts:
- Windows/Linux: Press
Ctrl+Shift+IorF12. - Mac: Press
Cmd+Option+I.
Another way is through Chrome's menu. Click the three-dot icon in the top-right corner, go to "More Tools", and then select "Developer Tools".
If you're testing a mobile experience, press Ctrl+Shift+M (or Cmd+Shift+M on Mac) to toggle Device Mode. This allows you to simulate how your PWA behaves on different mobile devices.
Now that you’ve opened DevTools, let’s look at how to adjust the layout for a smoother debugging experience.
Docking and Layout Options
Chrome DevTools offers flexible docking options to fit your debugging needs. You’ll find the docking controls in the top-right corner of the DevTools panel, represented by three small icons.
Here’s how you can position the panel:
- Bottom Docking: Keeps a full-width view of your app, which is great for layout debugging.
- Right-Side Docking: Lets you view your app and code side by side, ideal for comparing interface changes with the underlying code.
- Left-Side Docking: Another option for multitasking, depending on your workflow.
- Undocked: Opens DevTools in a separate window, giving you maximum screen space to view both your app and tools simultaneously. This is especially helpful for complex debugging scenarios.
For tasks like service worker debugging or monitoring offline functionality, side-docking or undocking works best. This setup ensures the Application panel remains visible, allowing you to track service worker registration, cache updates, and network changes in real time.
Experiment with these layouts to find what works best for your screen setup and debugging tasks.
Debugging PWA with DevTools #DevToolsTips
Using the Application Panel for PWA Debugging
The Application panel in DevTools is a hub for debugging key components of Progressive Web Apps (PWAs), like manifest files, service workers, and storage systems. It provides tools to ensure your app aligns with PWA standards and operates as expected.
To access the Application panel, click the Application tab in DevTools. From there, you can explore sections such as Manifest, Service Workers, Storage, and Cache. Each section focuses on a specific part of your PWA, making it easier to identify and resolve issues.
Checking the Manifest File
The manifest file acts as the blueprint for how your PWA looks and behaves when installed. In the Manifest section, you'll find a visual representation of your manifest.json file.
Key properties to review include the app name, icons, start URL, display mode, and theme color. If any of these are missing or incorrectly formatted, error messages will appear, often with helpful suggestions for fixes.
Debugging Service Workers
The Application panel is also essential for monitoring and debugging service workers. In the Service Workers section, you can check the registration status and lifecycle stages, such as installing, activating, or redundant states.
To test updates, enable the Update on reload option, which forces the browser to load the latest version of your service worker. You can also simulate features - click Push to test push notifications or Sync to trigger background sync events. If something goes wrong, the Console tab provides detailed error messages to help you pinpoint issues with registration or runtime.
Managing Cache and Storage
Maintaining fast and reliable performance, even offline, depends on managing storage and cache effectively. The Application panel offers tools to inspect and clean up these resources.
- Cache Storage: View and manage caches created by your service worker. Inspect individual resources (HTML, CSS, JavaScript, images, or API responses) or delete specific entries or entire caches.
- IndexedDB: Explore and manage your app's structured data.
- Local Storage and Session Storage: View and edit key-value pairs stored by your app. These sections let you modify or clear data to test different scenarios.
For a complete reset, use the Clear storage option. This removes cached data, stored information, and service worker registrations, giving you a fresh start for troubleshooting stale or outdated cache issues. Additionally, the panel displays storage quotas and usage statistics, which can help you fine-tune your app's performance.
Fixing Common PWA Issues
Once you've used DevTools to inspect your PWA's components, the next step is to address any issues that might be affecting its performance. Chrome DevTools offers powerful diagnostic tools to help you identify and fix these problems efficiently. The most common trouble spots usually involve the manifest file, service workers, and offline functionality.
Fixing Manifest Errors
Manifest file errors often stem from missing or incorrectly configured fields like name, short_name, icons, start_url, or display. Without these essential properties, your PWA might fail to install properly or display incorrectly on users' devices.
The Manifest section in Chrome DevTools' Application panel is your go-to place for identifying these problems. For instance, if your app's icon paths are broken or the icon sizes don't match the required dimensions, DevTools will flag these issues and provide detailed error descriptions.
Another common issue is invalid JSON formatting in the manifest file. Even a tiny mistake, like a misplaced comma or quotation mark, can render the entire file unusable. Luckily, Chrome DevTools highlights JSON syntax errors directly in the Manifest panel, making it easy to spot and fix these mistakes.
Running a Lighthouse audit in DevTools can also be incredibly helpful. This tool generates a detailed report that highlights missing or misconfigured properties in your manifest file and provides actionable recommendations to ensure your PWA meets platform standards.
Once your manifest file is in good shape, you can move on to resolving service worker issues.
Resolving Service Worker Issues
Service worker problems can be tricky to diagnose and fix, but they are crucial for ensuring your PWA functions smoothly. Common issues include registration failures, update loops, and incorrect caching strategies, all of which can lead to stale content, failed updates, or a complete breakdown of functionality.
Registration failures are often caused by incorrect file paths, syntax errors, or the lack of HTTPS. In the Service Workers section of the Application panel, Chrome DevTools displays error messages that pinpoint the root cause of registration issues, making it easier to address them.
Update loops occur when a service worker gets stuck in an endless cycle of trying to update without successfully activating the new version. To break this cycle, enable Update on reload in DevTools, which forces the latest service worker to activate. Alternatively, you can manually unregister the problematic service worker and re-register it to resolve the issue.
Caching strategy errors are another common problem. These can lead to stale content or failed resource loading. Use the Cache Storage section in DevTools to inspect and clear outdated or missing resources. Additionally, review your service worker's fetch event handlers in the Sources panel to ensure they align with your intended caching strategy.
After addressing service worker issues, it's time to test your app's offline capabilities.
Testing Offline Functionality
Offline functionality is a key feature of any PWA, but it's also an area where many apps fall short. Thorough testing ensures users can access your app even without an internet connection.
To simulate offline mode, use the Offline checkbox or set network throttling to Offline in DevTools. This will disable network access, allowing you to confirm that your service worker serves cached assets correctly.
Keep an eye on the Console tab during offline testing. Any resources that fail to load will generate error messages, helping you identify gaps in your caching strategy. Check the Cache Storage section to verify that all critical resources - such as HTML, CSS, JavaScript, images, and API responses - are properly cached and accessible offline.
It's also important to test navigation while offline. Try moving between different pages of your app to ensure all routes load as expected. If certain pages fail to load, revisit your service worker's routing logic and confirm that the necessary resources are included in your cache.
For apps that rely on dynamic content, test how they handle data synchronization when the connection is restored. Use the Background Services section in DevTools to monitor background sync events and confirm that your app queues and processes offline actions correctly once the network is available again.
sbb-itb-8abf120
Advanced Debugging Methods
When basic debugging tools don't do the trick, Chrome DevTools steps in with advanced features to tackle more complex PWA issues. These tools are especially useful for addressing cross-device compatibility glitches, performance slowdowns, or background service failures that might not show up during routine testing. One key step in this process is testing your PWA on real mobile devices.
Remote Debugging on Mobile Devices
Testing on actual mobile hardware is essential to uncover issues that desktop emulators might miss. Chrome DevTools' remote debugging feature allows you to inspect and debug your PWA running on an Android device while retaining full access to all DevTools functionalities.
To get started, connect your Android device to your computer using a USB cable. Then, enable Developer Options on your device by going to Settings > About Phone and tapping the build number seven times. Once Developer Options is activated, turn on USB Debugging from the same menu.
Next, open Chrome on both your desktop and Android device. On your computer, type chrome://inspect in the Chrome address bar. This page will show all connected devices along with any active tabs or PWAs running on your mobile device. Click "Inspect" next to the relevant tab to open a full DevTools session connected to your mobile app.
This setup enables powerful debugging features, such as live editing of CSS, running JavaScript commands in the console, and monitoring network activity. You can tweak styles, test scripts, and analyze network requests in real time to fine-tune your PWA.
Performance and Network Analysis
The Performance and Network panels in Chrome DevTools offer in-depth insights into how your PWA operates under various conditions. These tools are invaluable for identifying slowdowns or excessive resource usage.
To evaluate runtime performance, open the Performance panel and start recording. Interact with your PWA for about 10–15 seconds, then stop the recording. The panel will generate a detailed report showing JavaScript execution times, rendering performance, and frame rates. The flame chart is particularly useful for pinpointing slow resources.
Pay special attention to frame rendering times. If a frame takes longer than 16.67 milliseconds to render (the threshold for smooth 60 frames-per-second animations), users may experience noticeable lag. The Performance panel highlights these problematic frames, helping you pinpoint and resolve the issue.
The Network panel complements this by detailing how your PWA loads and caches resources. It tracks every network request, helping you diagnose failures, optimize caching, and minimize resource consumption. You can also simulate conditions like slow 3G or offline mode to test how your PWA handles different network scenarios.
Background Services and Event Monitoring
PWAs often rely on background services like push notifications, background sync, and periodic sync to deliver a seamless, app-like experience. Chrome DevTools' Background Services panel makes it easier to inspect and debug these operations.
To access this panel, open DevTools and go to Application > Background Services. From here, you can record and review events such as push notifications, background sync, and periodic sync. Make sure to enable recording for the specific events you want to monitor.
For push notifications, you can log push events to confirm that the service worker is receiving and processing them correctly. If push events are logged but notifications don't appear, the issue might be with how the service worker handles notification display.
To debug background sync, enable recording and perform actions that should trigger sync events, like submitting a form while offline. The panel will log these events along with their payloads, timing, and any service worker interactions, making it easier to verify that offline-to-online data syncing is working as expected.
Periodic sync events can also be tracked to ensure regular content updates occur, even when the app is idle. Use the panel to monitor when these events are triggered, how long they take, and whether any errors arise during execution.
Teams like Zee Palm use these advanced debugging methods to build PWAs that function reliably across diverse devices and network conditions. With these tools, you can ensure your PWA delivers a smooth and consistent experience for all users.
Testing PWA Quality with Lighthouse

After resolving immediate issues using DevTools, Lighthouse audits provide a deeper evaluation to ensure your Progressive Web App (PWA) aligns with modern web standards. These audits assess performance, accessibility, best practices, SEO, and PWA compliance, offering a detailed report that highlights areas needing improvement to enhance the user experience.
Running a Lighthouse Audit
To begin, open your PWA in Chrome and press F12 or Ctrl+Shift+I to access DevTools. From there, navigate to the Lighthouse tab, located among the main options at the top of the interface.
Choose the categories you want to evaluate. For PWA testing, focus on Performance, Accessibility, Best Practices, and Progressive Web App. Select the device type - Mobile or Desktop - based on your primary audience. Since most PWAs are designed for mobile users, mobile-first testing is often the best approach.
Click Generate report to start the audit. Lighthouse will reload your PWA and run a series of automated tests, analyzing factors like load speed and the validity of your manifest file. The process typically takes 30-60 seconds.
When the audit finishes, you'll receive a comprehensive report with scores from 0 to 100 for each category. Higher scores reflect better adherence to web standards and user experience best practices. The report includes a breakdown of passed and failed audits, along with detailed explanations and actionable recommendations.
In the PWA category, Lighthouse checks for service worker registration, manifest completeness, and offline functionality. Failed audits in this section often point to missing or incorrectly configured elements that prevent the app from being installable or working offline as intended.
Use the report's insights to refine your PWA and address any flagged issues.
Improving PWA Scores
Building on earlier debugging efforts, Lighthouse's recommendations guide you in enhancing performance, accessibility, and overall PWA compliance. Each flagged issue includes actionable fixes and links to further documentation.
- Performance: To improve load times, focus on optimizing resource loading and minimizing render-blocking elements. Common fixes include compressing images, reducing JavaScript and CSS file sizes, and implementing effective caching strategies with your service worker. According to Google's 2022 data, PWAs with high performance scores can experience up to a 68% boost in mobile traffic and significantly faster load times.
- Accessibility: Accessibility improvements ensure your PWA is usable for everyone, including those relying on assistive technologies. Lighthouse highlights issues like missing alt text, poor color contrast, and incorrect heading structures. Adding ARIA labels, improving keyboard navigation, and using proper semantic HTML can resolve most accessibility concerns.
- Best Practices: This category often flags security issues or outdated web standards. Switching to HTTPS, updating deprecated APIs, and addressing console errors can significantly boost your score.
Lighthouse CategoryCommon IssuesQuick FixesPerformanceLarge images, unused JavaScriptCompress assets, eliminate unused codeAccessibilityMissing alt text, poor contrastAdd ARIA labels, improve color contrastPWA ComplianceNo service worker, incomplete manifestRegister a service worker, complete manifest fields
A 2023 study found that only 36% of PWAs passed all core Lighthouse PWA audits on their first attempt, underscoring the importance of iterative testing. After implementing fixes, re-run the audit to confirm improvements and address any new issues that arise.
For teams like Zee Palm, incorporating Lighthouse audits into the development process ensures consistent quality across projects. Regular testing not only helps maintain high standards but also catches potential issues before they reach production. This approach results in PWAs that meet both technical requirements and user expectations.
To get the most out of Lighthouse, use it as a continuous quality assurance tool rather than a one-time check. Run audits after major updates, track score trends over time, and prioritize fixes that have the greatest impact on user experience.
Conclusion and Best Practices
Key Takeaways
Chrome DevTools provides everything you need to build and maintain high-quality PWAs. The Application panel simplifies the process of inspecting critical PWA components, while Lighthouse audits help confirm your fixes and track performance improvements. The Performance panel is the final piece of the puzzle, helping you identify bottlenecks that might slow down your app.
Here's why this matters: Google reports that PWAs can boost engagement by up to 137% and conversions by up to 52% when implemented correctly. On the flip side, a 2023 study found that over 60% of PWA install failures are caused by misconfigured manifest files or service workers. These are exactly the kinds of problems DevTools is designed to help you catch and resolve.
The best way to debug PWAs is by following a logical sequence. Start with validating your manifest file, then check the registration and lifecycle of service workers. From there, test offline functionality, analyze performance metrics, and wrap up with a thorough Lighthouse audit. This step-by-step process ensures you're covering all the bases and avoiding issues that could disrupt the user experience.
Don't forget to use device emulation and remote debugging to test your PWA on different screen sizes. Whether users are on a smartphone, tablet, or desktop, your app needs to perform seamlessly across devices.
These tools and techniques provide a strong foundation for refining your debugging process.
Next Steps
To incorporate these debugging practices into your workflow, make it a habit to run Lighthouse audits and test offline functionality after every major update. This ensures your PWA maintains consistent performance over time.
For more advanced debugging, explore DevTools' background services event monitoring. This feature tracks critical activities like push notifications, background sync, and payment processing - all essential for PWAs that need to function even when users aren’t actively using them.
If you’re managing multiple PWA projects, consider standardizing your debugging process. Teams, like those at Zee Palm, benefit from creating a shared checklist of common issues and their solutions. This documentation not only speeds up future debugging sessions but also builds a knowledge base that everyone can rely on.
Finally, make DevTools debugging a regular part of your development routine. Dedicate time during each sprint to run through your debugging checklist. Catching issues early saves time, reduces costs, and ensures a smoother experience for your users. By staying proactive, you can deliver PWAs that truly stand out.
FAQs
How can I keep my PWA running smoothly and adaptable to changing network conditions?
To keep your Progressive Web App (PWA) running smoothly across different network conditions, Chrome DevTools is an invaluable tool for debugging and performance optimization. Start by opening DevTools and heading to the Application tab. Here, under the Service Workers section, you can enable the 'Offline' option. This lets you test your app’s behavior when there’s no internet connection, ensuring it remains functional offline.
You can also use the Network tab to simulate various network speeds, like 3G or even slower connections. This helps pinpoint performance issues that could affect users with limited bandwidth. By regularly testing your PWA under these scenarios, you can make sure it delivers a reliable experience, regardless of network conditions.
What are common issues when debugging service workers, and how can I fix them?
Debugging service workers can feel like a challenge, but knowing how to tackle common issues can make things much easier. One frequent hiccup is when service workers don’t update as expected. To fix this, try enabling the 'Update on reload' option in Chrome DevTools. Also, clear your browser cache to make sure the latest version of the service worker is loaded.
Another typical problem involves failed network requests. Head over to the Network tab in Chrome DevTools to analyze these requests. Look for errors like incorrect file paths or server misconfigurations. Don’t forget to check the Console as well - it often provides helpful error messages that can guide you toward a solution.
If you’re looking for professional assistance, teams like Zee Palm, known for their expertise in custom app development, can help debug and fine-tune Progressive Web Apps effectively.
How do Lighthouse audits enhance the performance and compliance of a Progressive Web App (PWA)?
Lighthouse audits play a crucial role in assessing and refining the performance, accessibility, and overall compliance of your Progressive Web App (PWA). Using Chrome DevTools, Lighthouse runs a thorough analysis, delivering in-depth insights into critical aspects like load speed, responsiveness, SEO, and alignment with PWA best practices.
The audit doesn't just pinpoint issues - it offers actionable recommendations, such as compressing images, removing unused JavaScript, or enhancing accessibility features. By applying these changes, you can boost your app's user experience, making it faster, more dependable, and aligned with modern web standards.
Related Blog Posts

Best Practices for Native Ad Placement in Apps
Native ads outperform display ads by 53% more views and 40% higher engagement. Why? They blend into app layouts without disrupting the user experience. Here's how to make them work for your app:
- Design ads to match your app's style: Use the same fonts, colors, and layouts for seamless integration.
- Clearly label ads: Use terms like "Sponsored" or "Ad" to maintain transparency and user trust.
- Place ads strategically: Show them during natural breaks (e.g., after a game level or between content) to avoid frustration.
- Personalize ads: Use user data (e.g., behavior, location) to deliver relevant content.
- Test and refine: Run A/B tests on placement, design, and timing to find what works best.
These steps ensure ads feel like part of the app, boosting both user satisfaction and revenue.
Introduction to native ads for developers | AdMob Fireside Chat Episode 3

How to Design Effective Native Ads
Creating native ads that fit seamlessly into your app requires thoughtful design. The aim is to make these ads feel like a natural part of the user experience, rather than an intrusive element. When done well, this seamless integration can significantly boost user engagement.
Match Ads with App Style
The cornerstone of effective native advertising is maintaining visual harmony with your app's design. Ads should reflect the same design principles that define your app - using identical fonts, color palettes, spacing, and layout styles that users are already accustomed to.
For instance, if your app features clean, minimalist cards with rounded edges, your ads should follow suit. Matching the typography, color schemes, and overall layout ensures that the ads don't stand out awkwardly but instead feel like an organic part of the interface. This consistency not only preserves the user experience but also encourages interaction.
While maintaining this design flow, it’s equally important to be upfront about the nature of the content.
Use Clear Ad Labels
Transparency is key to building user trust, and trust is what drives engagement. Even though native ads should visually blend with your app's content, users must be able to identify them as sponsored material. Simple labels like "Sponsored", "Ad", or "Promoted" make it clear, helping users distinguish between organic content and advertising.
Adding recognizable markers, such as AdChoices icons, further reinforces this transparency. Position these labels where users naturally look - commonly in the top-left or top-right corners - so they are noticeable but don’t disrupt the overall design.
Once users know they’re viewing an ad, a compelling call-to-action can guide them toward taking the next step.
Create Strong Calls-to-Action
A well-crafted call-to-action (CTA) bridges user interest and meaningful engagement. The best CTAs use clear, actionable language to tell users exactly what to do. Instead of vague phrases like "Learn More" or "Click Here", try more specific prompts such as "Download Now", "Start Free Trial", or "Get Directions."
To maintain consistency, ensure that CTA buttons align with your app’s design style. This includes matching the button size, font, and color scheme. For mobile usability, buttons should be large enough to tap easily - typically at least 44 pixels high - and positioned logically within the ad layout.
Here are the recommended image sizes for native ad creatives on popular platforms:
PlatformRecommended Image Size (px)Ad TypeFacebook1200 x 628In-feed socialFacebook1080 x 1080CarouselTwitter1200 x 675In-feed socialLinkedIn1200 x 627In-feed professionalLinkedIn1080 x 1080Carousel
To maximize engagement, experiment with different CTA variations. Some users may respond better to benefit-driven language like "Save 20%", while others might prefer direct action words such as "Shop Now." The key is to stay true to your app’s voice while continuously refining your approach to see what resonates best.
Where to Place Native Ads
The placement of native ads can significantly influence their effectiveness. Thoughtful positioning ensures ads grab attention without annoying users or disrupting their experience. The key is to integrate ads into moments when users naturally pause or transition, making them feel seamless and less intrusive.
Place Ads in Natural Content Breaks
The best time to show ads is during natural breaks in user activity. Think of spots like the space between posts, after completing a level in a game, or between articles. These pauses align perfectly with the way users consume content, making ads feel less jarring and more engaging.
For example, in gaming apps, showing an ad right after a victory feels rewarding, while placing it after a loss might irritate the player. On social media, maintaining a consistent rhythm by spacing ads evenly within a feed helps retain a natural flow. These subtle strategies enhance engagement without disrupting the user experience.
Avoid Blocking User Actions
Ads that interfere with essential app functions can quickly frustrate users. In fact, 40% of users say non-intrusive ad placement is critical for staying loyal to an app. To avoid causing frustration, keep ads away from key interactive areas like navigation buttons, search bars, or other controls. Ads placed too close to these elements often lead to accidental clicks, creating a poor experience that might even drive users to abandon the app.
Consider the user's journey. If someone is completing a purchase, filling out a form, or actively playing a game, these moments shouldn’t be interrupted by ads. Instead, ads should appear during natural pauses, ensuring the flow of activity remains uninterrupted.
Use User Behavior Data for Placement
Understanding how users interact with your app is crucial for effective ad placement. Analyzing behavior patterns - such as session lengths, engagement levels, and task completion rates - can highlight the best moments to show ads. For instance, if data reveals users spend an average of 2–3 minutes reading articles, placing an ad around the 90-second mark can capture attention during a natural pause.
Research shows that native ads are viewed 53% more than display ads, reinforcing the importance of timing to match user receptivity.
Placement StrategyBest TimingImpactNatural Content BreaksBetween posts, after levels, transitionsHigh engagement with minimal disruptionAvoid Blocking ActionsAway from navigation and key UI elementsReduced frustration and better user experienceBehavior-Based PlacementAfter task completion or during downtimeIncreased receptivity and improved performance
Regularly reviewing user data is essential to keep ad placements effective. As user behavior shifts due to app updates or seasonal trends, analyzing performance ensures your strategy stays relevant.
For apps requiring more advanced ad integration, partnering with experienced development teams can make a huge difference. Teams like Zee Palm (https://zeepalm.com) specialize in custom app development and native ad integration, ensuring your ads drive engagement while maintaining a smooth user experience.
Once ad placement is optimized, the next step is tailoring native ads to user behavior and timing to maximize their impact.
When and How to Personalize Native Ads
Personalization turns ordinary ads into meaningful experiences by delivering the right content at the right time. In fact, personalized ads can boost engagement by up to 40% compared to generic banners. Let’s dive into how timing and tailored content can make a difference.
Time Ads for Better Engagement
Refreshing ads every 60 seconds keeps them relevant and engaging. But timing isn’t just about frequency - it’s also about understanding the user’s journey within your app. For example, in gaming apps, showing ads after a player finishes a challenging level can feel like a reward rather than an interruption. Similarly, in reading apps, ads placed after an article align with natural pauses when users are deciding what to do next.
Avoid showing ads immediately when users open your app. This can create a poor first impression and might even drive users away. Instead, allow them to get comfortable with the app before presenting the first ad. Also, steer clear of interrupting users during moments of active engagement. Waiting for natural breaks in activity improves the user experience.
Ad frequency should also match user behavior. Power users who spend hours in your app can tolerate more frequent ads, while casual users may prefer fewer interruptions. A/B testing different timing strategies is a great way to figure out what works best for your audience.
Customize Ad Content for Users
While perfect timing grabs attention, personalized content keeps users engaged. Use behavioral data, demographics, and location to deliver ads that feel relevant and useful.
For instance, someone who frequently interacts with fitness content might respond well to ads for sportswear or health supplements. A user who shops often in your app might appreciate discount offers or product launches. Location-based targeting is especially effective for apps like maps or weather services, where ads for local businesses can feel immediately relevant.
Demographics add another layer of personalization. Age and gender can guide ad content, while knowing a user’s device type ensures ads display properly across different screen sizes and operating systems.
Purchase history and in-app activity patterns provide deeper insights. Recent buyers might welcome ads for complementary products, while users who browse but don’t purchase could be enticed with discounts or free trials.
It’s important to prioritize privacy when using personal data. Always secure user consent and comply with regulations like CCPA and GDPR. Make it easy for users to opt out and be transparent about how their data improves their ad experience.
Machine learning can take personalization to the next level. By analyzing user behavior in real time, these systems optimize both ad timing and content automatically. They learn from user interactions, continuously improving ad relevance without requiring manual updates.
For apps needing advanced personalization, partnering with experienced development teams can make all the difference. Teams like Zee Palm (https://zeepalm.com) specialize in AI-driven solutions and custom app development. They can help you implement sophisticated personalization algorithms while maintaining user privacy and app performance.
The ultimate goal is to create ads that feel helpful, not intrusive. When users see ads for products or services they actually care about, the experience becomes valuable rather than annoying. By integrating these strategies, native ad placements can seamlessly enhance your app’s overall user experience.
sbb-itb-8abf120
How to Test and Improve Native Ad Performance
Testing and refining native ad campaigns is essential for success. A structured approach helps you uncover what resonates most with your audience.
Run A/B Tests on Ad Performance
A/B testing is a straightforward way to determine which strategies deliver the best results. The key is to focus on one variable at a time. Testing multiple elements at once can muddy the waters, leaving you unsure of what actually influenced the outcome.
Start by experimenting with ad placement. For example, one group of users could encounter native ads after every third piece of content, while another group only sees ads during natural session breaks. Run the test for at least two weeks to collect meaningful data. You might find that frequent placements boost click-through rates by 20%, but at the cost of lower user retention - helping you strike the right balance.
Next, test visual design elements. Small changes, like the style or color of a call-to-action button, can have a big impact. For instance, does a "Learn More" button outperform "Get Started"? By keeping all other elements of the ad consistent, you can isolate the effect of this single change.
Ad formats are another area worth exploring. Some audiences respond better to text-heavy ads that blend with the surrounding content, while others prefer image-rich formats. For gaming apps, reward-based ads like "Watch this ad for 50 coins" often outperform traditional promotions.
Don’t forget to test ads across different devices. An ad that looks great on an iPhone might feel cramped on a larger Android tablet. Create distinct test groups based on device type to ensure your ads look and perform well everywhere.
Lastly, consider how seasonal factors might influence results. An ad placement that performs well on weekdays might not work as effectively on weekends when users engage with content differently. Take these patterns into account when scheduling tests and analyzing results.
Once A/B tests uncover key trends, analytics can help you turn those findings into actionable strategies.
Track Performance with Analytics
After testing, use analytics to track key metrics and understand how your adjustments impact performance. These metrics connect ad performance to your broader business goals.
Pay close attention to CTR (aim for 0.5–2%), conversion rates, and eCPM. CTR shows immediate user interest, while conversion rates indicate whether those clicks lead to meaningful actions, like purchases or sign-ups. A higher eCPM signals better monetization efficiency, but it’s important to balance that against user experience metrics.
Dive deeper with post-ad engagement metrics to fine-tune your targeting. This helps avoid optimizing for short-term gains that could harm long-term user relationships.
Segmentation analysis is another powerful tool. Different user groups respond to ads in unique ways. For instance, new users might engage more with educational content, while seasoned users prefer premium upgrades or advanced features. Geographic segmentation can also reveal regional preferences, enabling you to tailor ads for specific audiences.
Real-time monitoring is critical for spotting issues quickly. Sudden drops in CTR or spikes in user complaints should trigger immediate action. Set up automated alerts to flag significant changes in performance metrics, so you can address problems before they escalate.
For apps with complex analytics needs, working with experts can simplify the process. Teams like Zee Palm (https://zeepalm.com) specialize in integrating advanced analytics and AI-driven tools. These tools can adjust ad strategies in real-time based on user behavior, saving time and improving results.
Working with Experts for Native Ad Success
Getting native ads right isn’t just about dropping them into your app - it’s about precision, seamless design, and constant refinement. That’s why teaming up with experts can make all the difference.
Experienced developers know how to integrate native ads so they blend perfectly with your app, avoiding issues like crashes, memory leaks, or sluggish performance. They also help you choose the best ad networks, ensuring smooth programmatic integration that fits your app’s needs.
Here’s a key stat: native ads generate 40% higher engagement when they’re naturally embedded into an app’s design flow. Expert UI/UX designers make this happen by aligning ads with your app’s style - matching typography, colors, and layout so the ads feel like part of the experience, not an interruption.
Beyond design, expert teams use advanced tools to track user behavior, run A/B tests, and analyze ad performance. This data-driven approach ensures your ads are always optimized for revenue. A great example is Zee Palm (https://zeepalm.com), a company with over a decade of experience and more than 100 successful projects, known for crafting strategies that deliver results.
Another big advantage? Cost efficiency. Hiring an in-house team means paying fixed salaries and dealing with a learning curve. On the other hand, expert firms bring a full range of skills without the overhead costs.
ApproachTechnical ExpertiseSpeed to MarketOngoing OptimizationCost StructureIn-House TeamVariable, learning curveSlower if inexperiencedResource-intensiveFixed salaries, risk of errorsExpert Development FirmProven, deep experienceFaster with established processesBuilt-in, continuousProject-based, ROI-focused
Experts also stay on top of complex ad regulations like CCPA and GDPR, ensuring compliance so you don’t risk penalties or revenue loss. And because user behavior changes constantly, expert teams can adjust ad placements in weeks, not months, keeping your revenue strong.
When choosing a partner, look for a track record in mobile app development, successful ad integrations, and glowing client testimonials. Flexibility with different tech stacks and third-party services is also a must.
The payoff? Well-placed native ads can increase brand affinity by 9% and boost purchase intent by 18%. With the right team, you can maximize revenue without sacrificing the user experience.
Conclusion
Integrating native ads into your app can boost revenue while maintaining a smooth and enjoyable user experience. The secret? Making ads feel like a natural part of your app, not like intrusive distractions.
Native ads outperform traditional banners, driving 40% higher engagement and 53% more views. By designing ads that align with your app's visual style, placing them at logical content breaks, and clearly labeling them, you set the stage for success.
Placement matters more than you might think. Steering clear of interactive UI elements, timing ads based on user behavior, and leveraging data-driven personalization can deliver measurable results. These strategies directly impact revenue while keeping users happy.
As discussed earlier, A/B testing and performance tracking are essential for refining ad placements. User behavior shifts over time, and staying adaptable ensures your native ads remain effective.
FAQs
How can I use native ads in my app effectively without losing user trust?
To maintain both effectiveness and user trust when using native ads, the first step is to make sure they are clearly labeled as "Sponsored" or "Advertisement." This transparency helps avoid any potential confusion and ensures users can easily distinguish ads from regular content.
It's also important to display ads that are aligned with your users' interests and the overall purpose of your app. By doing so, you create a smoother experience that feels natural rather than disruptive. Additionally, placing ads thoughtfully in less intrusive areas of your app can help maintain user trust while keeping the ads visible.
What are the best practices for placing native ads in apps to boost engagement while maintaining a seamless user experience?
To keep users engaged with native ads while maintaining a seamless app experience, here are some smart approaches to consider:
- Choose the right moments: Show ads during natural breaks in the user journey, like after finishing a task or between screens. Steer clear of interrupting users during crucial interactions.
- Match the app's look and feel: Design ads that align with your app's visual style, tone, and layout, so they blend in naturally with the interface.
- Focus on relevance: Leverage data-driven targeting to present ads that resonate with users' preferences and behaviors, making them more appealing and effective.
These strategies can help you integrate ads in a way that feels organic and enhances engagement. If you're looking for professional guidance in creating user-friendly app experiences, the team at Zee Palm is here to help with custom app development designed to meet your specific needs.
How can I personalize native ads using user data while complying with privacy regulations like GDPR and CCPA?
Personalizing native ads can significantly enhance user engagement, but it must be done thoughtfully and in line with privacy regulations like GDPR and CCPA. Here are some practical tips to help you navigate this process effectively:
- Be transparent about data collection: Clearly explain what data you’re collecting and the reasons behind it. Use straightforward language in your privacy policies to ensure users understand.
- Secure explicit consent: Make sure users provide informed consent before you collect personal data, particularly when dealing with sensitive information.
- Use anonymized data when possible: Rely on aggregated or anonymized data to minimize privacy risks while still achieving effective ad targeting.
- Offer opt-out options: Give users the ability to easily opt out of personalized ads if they prefer not to participate.
By implementing these practices, you can deliver tailored ad experiences without compromising user trust or violating legal standards.
Related Blog Posts

Enterprise Software Training Best Practices
Enterprise software training directly impacts how effectively employees use new systems, which can influence productivity, error rates, and overall return on investment. Poor training leads to misuse, frustration, and low adoption rates. The solution? Targeted, role-specific training programs that focus on real-world tasks, clear goals, and ongoing support.
Key Takeaways:
- Role-Specific Training: Tailor content to employee roles for higher adoption rates (e.g., Siemens achieved 98% adoption in 6 months with role-based training).
- Set Measurable Goals: Use the SMART framework to set clear objectives and track success (e.g., reduce errors by 30% in 3 months).
- Blended Training Methods: Combine instructor-led sessions, e-learning, and hands-on practice to address diverse learning needs.
- Practical Scenarios: Use sandbox environments and scenario-driven exercises to build user confidence and reduce errors.
- Continuous Support: Provide refresher courses, updated materials, and accessible helpdesks to maintain proficiency over time.
Quick Comparison of Training Methods:
Training MethodCostScalabilityUser EngagementFlexibilityBest ForInstructor-LedHigh ($2K–$5K)Low–MediumHighLow (fixed times)Complex software onboardingE-Learning ModulesLow ($50–$200)HighMediumHigh (24/7 access)Ongoing education, distributed teamsSandbox EnvironmentsMedium ($500+)Medium–HighHighMediumSkill-building, pre-launch prep
Effective training isn't one-size-fits-all. By tailoring to roles, using multiple methods, and providing continuous reinforcement, businesses can maximize their software investments while reducing frustration and errors.
Best Software Training and Adoption Strategies for ERP, HCM, and CRM Implementations
1. Assess User Roles and Training Requirements
Before jumping into training design, it's essential to identify user roles. Employees interact with the same system differently depending on their job responsibilities, technical expertise, and daily tasks. By understanding these differences, you can create training programs that address the specific needs of each group.
For example, start by mapping out your organization's structure. A finance team might need in-depth training on reporting and compliance, while customer service reps may only require basic navigation and data entry skills. IT administrators will need to master system configurations, while sales staff should focus on lead management and tracking their pipelines.
This targeted training approach pays off. A 2023 survey by Training Industry revealed that organizations offering role-specific training see a 30% higher software adoption rate compared to those using generic programs. Similarly, the Association for Talent Development reported that companies implementing role-based training experience a 24% boost in employee performance metrics after rollout.
Take Siemens AG as an example. During their 2022 SAP S/4HANA rollout, they identified over 50 distinct user roles and customized training for each. The result? A 98% user adoption rate within six months and a 40% drop in support tickets. This success highlights the importance of conducting thorough needs assessments. Use interviews, surveys, and workflow reviews to understand how employees interact with the system and where they might face challenges. For instance, department heads can provide insights into workflow dependencies, while direct employee feedback can pinpoint skill gaps.
Combining this data with a skills gap analysis allows you to create detailed user personas. These personas should include technical comfort levels, key software functions, usage frequency, and business goals. Beginners might need step-by-step tutorials, while experienced users can dive into advanced features. By tailoring training to these personas, you ensure that the content stays relevant and engaging.
User personas also help streamline the training process. Instead of trying to meet everyone's needs at once, focus on these profiles to design content that resonates with specific groups.
Finally, don’t treat training as a one-and-done effort. Regularly review and update your programs to align with new processes and software updates. Establish feedback loops with department leaders and end users to identify emerging training needs as roles evolve over time. This ensures your training remains effective and keeps pace with organizational changes.
2. Set Clear Training Goals and Metrics
Once you’ve thoroughly assessed user roles, the next step is to define clear, actionable training goals. Without specific objectives, your training program risks becoming unfocused and ineffective. Instead of vague aspirations like "improve software usage", aim for measurable targets such as "reduce data entry errors by 30% within three months."
The SMART framework is perfect for setting these goals. It ensures your objectives are Specific, Measurable, Achievable, Relevant, and Time-bound. For example, rather than saying "increase productivity", you could aim to "cut task completion time by 25% within 90 days of training completion." This approach provides a clear direction and timeline for everyone involved.
It’s also essential to tie your training goals directly to broader business objectives. If customer satisfaction is a key priority for your company, your training might focus on reducing response times or improving data accuracy in customer-facing systems. For instance, a financial services firm successfully increased CRM adoption from 60% to 85% in just 90 days, surpassing their target with an 88% adoption rate. This effort, led by Senior Training Specialist Mark Davis, also cut customer entry errors by 35%.
Tracking metrics is crucial to measure the success of your training program. Key metrics to monitor include:
- User adoption rates: Determine how many employees are actively using the new tools or features.
- Error frequency: Compare the number of errors before and after training to evaluate accuracy improvements.
- Task completion times: Measure efficiency gains by tracking how quickly tasks are completed post-training.
- Post-training assessment scores: Assess how well employees understand and retain the material.
According to industry research, setting clear goals and tracking metrics can boost software adoption by 20–25%, reduce errors by 15–20%, and speed up onboarding by as much as 30%.
Here’s a real-world example: In Q2 2024, a healthcare provider launched an ERP training program with the aim of cutting patient billing errors by 50% within six months. By monitoring error rates and staff proficiency, they achieved a 47% reduction in billing errors and a 22% increase in staff productivity, guided by IT Training Manager Lisa Monroe.
Communication makes all the difference. Share your goals and metrics with everyone involved - from executives to end users. When employees understand what success looks like and how their efforts will be measured, they’re more likely to engage fully with the training. This alignment builds on the groundwork laid during the user role assessments.
Finally, remember to revisit and update your metrics quarterly. As software evolves and business priorities shift, your goals and measurements should reflect those changes. Tailor metrics to each department’s needs - sales might focus on lead conversion rates, while finance could prioritize compliance accuracy. This customization ensures that the training delivers value across the organization.
3. Use Multiple Training Methods
People learn in different ways. Some employees thrive in hands-on environments, others prefer the structure of a classroom, and some enjoy the flexibility of self-paced online learning. To meet these varied needs, it's important to use a mix of training methods. A blended approach that combines multiple formats can help ensure everyone gets the most out of the training. In fact, organizations that use blended training often see better user adoption rates and faster productivity gains compared to those that stick to just one method.
Instructor-led training is great for providing personalized feedback and answering questions on the spot. Whether done in-person or virtually, these sessions allow trainers to explain complex topics in detail and address questions immediately. However, this method requires careful scheduling to accommodate different learning speeds and availability.
E-learning modules offer flexibility for those with busy schedules. These self-paced courses often include videos, interactive exercises, and quizzes, making them ideal for learning foundational concepts or revisiting tricky topics. They’re particularly effective for employees who prefer to learn at their own pace.
Hands-on practice lets employees apply what they’ve learned in a controlled, risk-free setting. For example, sandbox environments that mimic real software allow users to practice tasks without affecting live data. This approach builds both confidence and competence.
Workshops and group activities encourage teamwork and peer learning. These sessions provide opportunities for employees to discuss challenges, solve problems together, and share tips. More experienced users can guide newer team members, fostering collaboration and practical knowledge-sharing.
Each of these methods caters to different learning styles. Visual learners benefit from multimedia tools, kinesthetic learners thrive in hands-on scenarios, auditory learners excel in interactive discussions, and reading/writing learners prefer detailed guides. By tailoring training to these styles, organizations can create a more inclusive and effective learning experience.
A well-rounded training program might start with self-paced online modules, followed by instructor-led sessions for deeper understanding, hands-on practice for real-world application, and collaborative workshops to reinforce learning. Incorporating multimedia tools throughout can simplify complex concepts and make the material more engaging.
It’s also crucial to keep training materials up to date. Regular updates ensure employees stay informed about new features and processes, keeping them productive and engaged as the software evolves.
Training MethodStrengthsLimitationsInstructor-ledPersonalized feedback, immediate Q&AResource-intensive, limited scheduling flexibilityE-learning modulesFlexible, scalable, cost-effectiveLess interactive, risk of disengagementHands-on practiceBuilds confidence, real-world applicationRequires dedicated practice environmentsWorkshops/Group activitiesCollaborative, peer learning, engagingTime-consuming to organize and facilitate
4. Create Complete Training Materials
Once you've established diverse training methods, the next step is crafting materials that truly help users learn and master the software. These resources should go beyond basic instructions to support both onboarding and long-term use.
User manuals and step-by-step guides are essential starting points. These documents should clearly explain all major features and workflows, using straightforward language. Make sure they're well-organized, with searchable PDFs and indexed sections, so users can quickly locate the information they need when they need it.
Video tutorials are especially helpful for breaking down complex processes. When paired with interactive elements, they cater to different learning preferences and improve retention.
Visual aids like screenshots and flowcharts can simplify instructions, making it easier for users to follow along. This is particularly useful for audiences with varying levels of technical expertise.
FAQs and troubleshooting guides are another must-have. By organizing these resources by topic and regularly updating them based on user feedback and support trends, you can reduce the number of support tickets. Quick access to answers for common questions minimizes frustration and keeps users productive.
Real-world scenarios and case studies are invaluable for helping users see how the software fits into their day-to-day tasks. For instance, sales teams might need a guide on entering a new lead, while finance teams benefit from materials on generating specific reports. These practical examples make the training more relevant and actionable.
To avoid overwhelming users, create role-specific materials tailored to different departments like HR, finance, or IT. This targeted approach ensures that users focus on the features most relevant to their responsibilities.
Keeping training materials up-to-date is crucial. Establish a regular review process and update resources promptly after software updates. Notify users of changes via email or in-app alerts, and include a version history to track updates over time. Staying current ensures users remain proficient and confident in their tasks.
5. Provide Role-Based, Scenario-Driven Training
When it comes to training, the best results come from making it practical and relevant to the actual work employees do. By designing training programs that mimic real workplace situations, you can turn abstract software features into skills that employees can immediately use on the job.
Role-based training zeroes in on the specific tools and workflows each department needs. Instead of overwhelming everyone with every feature, focus on what matters most to their roles. For example, HR teams might dive into employee onboarding workflows, while finance staff could concentrate on reporting and approval processes. By tailoring sessions this way, employees see how the training connects directly to their day-to-day tasks, which keeps them engaged and motivated.
Scenario-driven exercises take this a step further by simulating real challenges employees are likely to face. Instead of generic examples, use realistic situations. For instance, an accounts payable clerk could practice processing a vendor invoice - from entry to payment approval - while tackling issues like duplicate invoices or missing purchase orders. This hands-on approach not only builds confidence but also reduces errors when employees transition to live work environments. In fact, a Northpass study revealed that scenario-based training can boost knowledge retention by up to 60% compared to traditional lecture formats.
To make this learning even more effective, use sandbox environments for risk-free practice. Sales teams, for instance, can work through lead entry and opportunity management scenarios, while customer service representatives can simulate ticket resolution workflows. These environments let employees experiment, make mistakes, and learn without any real-world consequences.
One success story comes from Assima, which in 2023 helped a global healthcare provider implement scenario-driven, role-based training for a new enterprise EHR system. By simulating workflows like patient intake, billing, and compliance for different roles, the provider reduced onboarding time by 40% and improved data accuracy by 25%.
For the best results, consider a blended learning approach that combines various methods. Instructor-led sessions can tackle complex scenarios, self-paced modules can cover foundational concepts, group activities can encourage peer learning, and individual simulations can let users progress at their own speed. This variety not only reinforces concepts but also caters to different learning styles.
To keep training relevant, regularly update scenarios to reflect software updates and user feedback. Collaborate with subject matter experts from each department to ensure the scenarios align with current workflows and challenges. After each session, gather feedback to refine and improve future training content.
sbb-itb-8abf120
6. Work with Expert Trainers and Support Teams
The success of enterprise software implementation heavily relies on the expertise of your trainers. Skilled trainers not only understand the software inside and out but also have deep knowledge of your industry. This ensures that training sessions are tailored, relevant, and practical. They can anticipate potential challenges users might face, offering solutions and sharing best practices that encourage adoption while minimizing costly mistakes.
When choosing trainers, look for those with certifications and a proven history of successful implementations. The best trainers adapt their teaching methods to suit different learning styles, making even the most complex concepts understandable for users at all proficiency levels.
In addition to expert trainers, dedicated support teams are crucial for long-term success. These teams assist users, answer questions, and address any issues that arise during and after training. Their availability ensures users can quickly overcome obstacles, maintain productivity, and reinforce their learning through real-time problem-solving and feedback. Support teams also act as a vital link between users and software developers, facilitating continuous improvement.
A great example of this approach is Siemens Healthineers, which implemented a new enterprise resource planning (ERP) system in 2022. They brought in trainers with healthcare expertise and set up a dedicated support helpdesk. Over six months, this strategy led to a 40% drop in support tickets and a 20% boost in user satisfaction scores compared to earlier software rollouts. Regular feedback sessions with end users created a feedback loop that refined the training program over time.
Investing in quality training and support pays off in more ways than one. According to the 2023 LinkedIn Workplace Learning Report, 94% of employees say they would stay longer at a company that prioritizes their learning and development. Additionally, the Association for Talent Development reports that companies with robust training programs see 24% higher profit margins than those with minimal training investments.
To make training and support as effective as possible, establish clear communication between trainers and support teams. Coordination and shared feedback help ensure consistent messaging. Organizing support teams to provide role-based assistance - assigning specialists to specific departments or user groups - allows them to address unique workflows and challenges more efficiently.
Ongoing support is equally important after initial training. Regular refresher sessions, updated documentation, and accessible help desks keep users confident and effective, especially when encountering advanced features or software updates. This continuous reinforcement is key to maintaining high adoption rates and maximizing the return on your software investment.
Bringing together expert trainers and support teams creates a strong foundation for a successful training ecosystem. To further enhance results, consider partnering with external specialists like Zee Palm, a company with over a decade of experience in enterprise software training and support. With expertise spanning AI, SaaS, healthcare, and EdTech, and a track record of over 100 successful projects and 70+ satisfied clients, Zee Palm demonstrates the value of working with professionals who understand both technical implementation and industry-specific needs.
7. Provide Continuous Support and Reinforcement
Training doesn’t stop once users complete their initial sessions. Enterprise software is always evolving, with updates, new features, and shifting business requirements. Without ongoing support, even the most thorough initial training can lose its impact over time. That’s where targeted strategies like refresher courses come into play to help users maintain and build their proficiency.
Refresher courses are a cornerstone of continuous learning. These sessions revisit foundational skills while introducing new features and offering hands-on practice. Unlike the initial training, refresher sessions are more focused, addressing specific gaps identified through user feedback and performance data. For example, a Fortune 500 healthcare company implemented quarterly refresher courses alongside a 24/7 knowledge base for their ERP users in 2022. Over a year, they saw a 37% drop in helpdesk tickets related to basic system usage and a 22% boost in user satisfaction. This shows how regular reinforcement not only prevents skill loss but also builds user confidence.
Advanced training sessions take things a step further, helping users move beyond the basics to master advanced features that enhance productivity. These sessions are most effective when tailored to specific roles and real-world scenarios, showing users how advanced tools integrate into their daily tasks. Instead of sticking to a fixed schedule, plan these sessions based on user skill levels and business priorities.
Your knowledge base serves as the go-to resource for self-service support. Organize it by topic and include step-by-step guides that users can easily search. Regular updates are essential to keep the content aligned with software changes and user feedback. The best knowledge bases go beyond text, offering video tutorials, screenshots, and troubleshooting guides that address practical, everyday challenges.
In addition to self-service tools, immediate support systems are crucial for real-time problem-solving. Helpdesk support should be accessible through multiple channels with clear expectations for response times. Tracking common issues can also reveal training gaps or areas where the knowledge base could be improved.
Virtual IT labs and interactive simulations are gaining traction for ongoing reinforcement. For instance, in 2023, a global manufacturing company used CloudShare’s virtual IT labs to provide scenario-based training for their SAP users. This approach led to a 30% reduction in onboarding time for new hires and a 15% increase in system adoption rates.
Feedback mechanisms are another key component of continuous support. Regular surveys, usage analytics, and helpdesk ticket reviews can pinpoint areas that need extra attention. Use this data to refine your training schedule and allocate resources where they’ll make the biggest difference.
Organizations that prioritize ongoing training see clear benefits. Businesses with continuous learning programs report higher operational efficiency and up to a 50% improvement in employee retention rates.
Creating a culture of continuous learning is equally important. Recognize and reward employees who actively engage with training resources. This not only normalizes ongoing learning but also shows users that their development is valued. When employees see this commitment, they’re more likely to take advantage of the tools and resources provided. This approach ensures that users stay skilled and confident as the software evolves.
For companies aiming to implement a comprehensive support strategy, partnering with experienced development teams can be invaluable. Firms like Zee Palm, with over a decade of expertise in enterprise software solutions and more than 100 successful projects, offer insights into structuring support systems that adapt to both technological advancements and changing user needs.
8. Consider Zee Palm Expertise for Customized Digital Solutions
Partnering with a specialized team can make all the difference when it comes to improving user engagement and integrating complex systems. With over a decade of experience and more than 100 successful projects under their belt, Zee Palm stands out as a trusted provider of enterprise software solutions. Their dedicated team of 13, including 10 skilled developers, focuses on delivering tailored digital platforms that meet unique business needs.
Zee Palm has worked across a range of industries, including AI, SaaS, healthcare, EdTech, Web3, and IoT, crafting solutions that enhance functionality and drive user adoption. In the EdTech and LMS space, they specialize in creating scalable, interactive platforms designed to support hands-on learning. By customizing applications to fit specific workflows and interfaces, they ensure their tools align seamlessly with business operations.
In healthcare, Zee Palm has proven expertise in developing medical and AI health applications. Their deep understanding of regulatory compliance and the importance of precise software performance ensures they can deliver systems that meet stringent industry standards.
With over 70 satisfied clients, Zee Palm has built a reputation for delivering solutions that cater to varying user skill levels and adapt to evolving system requirements. Their knowledge of Web3 and blockchain further strengthens their ability to support organizations venturing into decentralized technologies. Whether it’s blockchain integration or creating decentralized applications, their expertise ensures smooth implementation and user acceptance.
Zee Palm also simplifies digital infrastructure management by ensuring that applications and platforms can be updated or modified quickly to meet changing business demands. Their experience with IoT and smart technologies enables them to integrate connected devices and automation systems effectively, using tailored tools to enhance user interaction.
For businesses looking to stay ahead with cutting-edge digital solutions, Zee Palm offers the expertise and flexibility needed to navigate complex technological landscapes.
Training Methods Comparison Table
Selecting the right training method is a critical step in ensuring the success of your enterprise software rollout. Each approach comes with its own strengths and challenges, influencing factors like cost, scalability, and how well users engage with the material.
The three main training methods - instructor-led training, e-learning, and sandbox environments - serve different needs depending on your organization's goals. Here's a quick breakdown of these methods, comparing their costs, scalability, user engagement, flexibility, and ideal use cases:
Training MethodCostScalabilityUser EngagementFlexibilityIdeal ForInstructor-Led TrainingHigh ($2,000–$5,000 per session)Low–MediumHighLow (fixed schedules)Complex software onboarding, initial rolloutsE-LearningLow–Medium ($50–$200 per user)HighMedium (60–70% completion rates)High (24/7 access)Ongoing training, compliance, distributed teamsSandbox EnvironmentsMedium ($500–$2,000 setup + maintenance)Medium–HighHigh (up to 75% retention)MediumHands-on skill building, pre-launch preparation
Instructor-Led Training
This method excels in user engagement due to real-time interaction with instructors. However, it comes with a hefty price tag and rigid scheduling. For larger organizations, scalability can be a hurdle, especially when dealing with multiple locations or time zones.
E-Learning
E-learning stands out for its affordability and scalability. It allows users to access training materials anytime, making it ideal for distributed teams and ongoing education. Research from the Brandon Hall Group highlights that e-learning can cut training time by 40–60% compared to traditional classrooms. The main drawback? Keeping users engaged. Completion rates often hover around 60–70% unless additional incentives or interactive elements are included.
Sandbox Environments
This method offers a hands-on, risk-free way to practice skills in real-world scenarios. Studies show that sandbox training can boost knowledge retention by up to 75% compared to passive learning methods. For example, a U.S. healthcare organization successfully reduced errors and increased employee confidence by incorporating sandbox environments into their training program.
Each method has its place, and the best choice depends on your organization's specific needs, resources, and goals. Balancing cost, engagement, and scalability is key to a successful training strategy.
Conclusion
Creating effective enterprise software training programs takes thoughtful planning, strategic execution, and an ongoing commitment to improvement. When done well, these programs can deliver measurable results that truly make a difference.
As discussed earlier, defining clear goals and targeting specific roles are the foundation of success. Training that aligns closely with employees' daily tasks naturally boosts engagement and makes it easier for them to retain what they learn. In fact, research highlights that organizations with ongoing training programs see 50% higher software adoption rates compared to those relying on one-time sessions.
Using a mix of training methods is another key factor. Combining approaches like instructor-led sessions, e-learning modules, and hands-on sandbox environments helps address various learning preferences, ensuring employees stay engaged and absorb the material effectively.
Continuous support plays a crucial role in maintaining the momentum of training efforts. Regular updates and refresher sessions keep employees up to speed, while expert guidance reinforces their skills. Companies that provide comprehensive ongoing support see a 30% increase in productivity and a 20% reduction in support tickets after implementation.
For businesses seeking expert help, partnering with experienced teams can make all the difference. Take Zee Palm, for example. With over a decade of experience in AI, SaaS, and custom app development across industries like healthcare, EdTech, and e-learning, they understand the technical and training challenges enterprises face. Their ability to create user-friendly software translates into training programs that meet real business needs.
Committing to well-designed training programs not only boosts productivity and reduces costs but also enhances user satisfaction. By following these best practices, organizations can set themselves up for long-term success in today’s increasingly digital landscape.
FAQs
What’s the best way to evaluate user roles and create tailored training programs for enterprise software?
To create effective training programs tailored to different user roles, begin by examining the responsibilities, skill levels, and current knowledge of each group. This step is crucial for pinpointing their specific needs and ensuring the training material aligns with what’s most relevant to them.
Once you’ve identified these needs, you can design programs that address the unique challenges and requirements of each role. This approach not only boosts user engagement but also enhances the adoption of the software. Collaborating with an experienced team of developers can provide valuable expertise in crafting these personalized training solutions.
What are the advantages of using a blended training approach, and how does it support different learning styles?
Blended training brings together in-person learning and digital tools, creating a flexible and engaging way to teach enterprise software. This approach uses a mix of formats, including hands-on workshops, video tutorials, and interactive e-learning modules, to cater to various learning preferences.
By addressing visual, auditory, and kinesthetic learning styles, blended training helps participants stay interested and absorb information more effectively. It also gives users the freedom to learn at their own pace while still having access to real-time support when they need it. This combination makes it an excellent choice for both onboarding and ongoing skill-building.
Why is ongoing support important for enterprise software training, and how can businesses implement it effectively?
Ongoing support plays a key role in enterprise software training. It helps users retain what they've learned, adjust to updates, and confidently integrate the software into their daily routines. Without consistent reinforcement, users can face challenges that lower productivity and hinder software adoption.
To maintain effective support, businesses can offer on-demand training materials for easy access, schedule regular refresher sessions to reinforce learning, and set up a dedicated support system to address user questions or issues quickly. These measures ensure that users remain confident and capable long after the initial training phase.
With over ten years of experience, Zee Palm specializes in custom app development, offering tailored solutions for ongoing training and support. This ensures your team gets the most out of your enterprise software.
Related Blog Posts

How to Write Custom Lint Rules for Kotlin
Want to enforce specific coding standards in your Kotlin project? Custom lint rules let you tailor automated checks to your unique needs, ensuring code quality and consistency. Here's the quick breakdown:
- Why Custom Lint Rules? Standard tools like Android Lint, ktlint, and Detekt catch common issues but fall short for project-specific requirements (e.g., naming conventions, security protocols).
- Setup Essentials: Use Android Studio, Kotlin, and Gradle. Add dependencies like
lint-api(Android Lint),ktlint-core, ordetekt-apibased on your chosen framework. - Rule Creation: Write logic using tools like
Detector(Android Lint),Rule(ktlint), orRule(Detekt) to flag violations. - Testing & Integration: Validate rules with testing libraries and integrate them into CI pipelines and IDEs for seamless enforcement.
- Best Practices: Keep rules modular, document thoroughly, and update for Kotlin compatibility.
Custom linting isn't just about catching errors - it's about embedding your project's standards into every line of code. Let’s dive into how to set this up.
Setup Requirements and Environment
Required Tools and Dependencies
To begin creating custom lint rules, you’ll need specific tools and dependencies. Fortunately, most Kotlin developers already have the basics in place.
Android Studio is your go-to development environment, offering everything necessary for writing and debugging custom lint rules. Alongside this, you’ll need the Kotlin language and Gradle for build automation and dependency management.
The specific linting framework you choose will determine additional dependencies. For Android Lint, include the lint-api and lint-tests libraries in your build.gradle file. Use compileOnly for the API and testImplementation for testing libraries to avoid bloating your main application with unnecessary dependencies.
For ktlint, you’ll need to add the ktlint plugin to your build.gradle.kts and include the required dependencies for rule creation and testing. A key dependency here is com.pinterest:ktlint-core, which serves as the foundation for building custom rules.
If you’re using Detekt, add it as a dependency and configure your custom rules in the detekt.yml file. The primary dependency for this framework is io.gitlab.arturbosch.detekt:detekt-api.
To avoid compatibility problems, ensure that the versions of your lint framework, Kotlin, and Gradle align.
Once your dependencies are in place, you can move on to structuring your project for seamless integration of custom lint rules. Below is an example build.gradle configuration for Android Lint:
plugins {
  id 'java-library'
  id 'kotlin'
}
java {
  sourceCompatibility = JavaVersion.VERSION_1_8
  targetCompatibility = JavaVersion.VERSION_1_8
}
dependencies {
  implementation "org.jetbrains.kotlin:kotlin-stdlib:$kotlin_version"
  compileOnly "com.android.tools.lint:lint-api:$lint_version"
  testImplementation "com.android.tools.lint:lint-tests:$lint_version"
  testImplementation 'junit:junit:4.13.2'
}
jar {
  manifest {
    attributes('Lint-Registry-v2': 'com.example.lint.CustomLintRegistry')
  }
}
This setup ensures your module is ready for developing and testing lint rules, with the manifest registration making your custom rules discoverable.
Project Structure Setup
A well-organized project structure is essential for maintaining and testing your custom lint rules effectively.
To keep things manageable, it’s best to create a dedicated module at the root level of your project, separate from your main application module. Name this module based on the framework you’re using, such as lint-rules, custom-ktlint-rules, or custom-detekt-rules. All your custom lint rule classes, configuration files, and test cases should reside in this module.
For Android Lint, the module should apply the java-library and kotlin plugins, set Java compatibility to version 1.8, and register your IssueRegistry in the JAR manifest. Ensure the minApi value in your custom Android Lint registry matches the version of your Android Gradle Plugin to avoid compatibility issues.
ktlint projects require an extra step: create a resources/META-INF/services directory to register your custom RuleSetProvider. This setup allows ktlint to automatically discover and apply your custom rules. You can even package your ruleset as a plugin for easy distribution across multiple projects.
For Detekt, the process involves adding your custom rule class to the ruleset provider and activating it in the detekt.yml configuration file.
Here’s a summary of the registration process for each framework:
FrameworkModule SetupKey DependenciesRegistration StepAndroid Lintlint-rules modulecom.android.tools.lint:lint-apiRegister IssueRegistry in manifestktlintcustom-ktlint-rulescom.pinterest:ktlint-coreRegister RuleSetProvider in META-INFDetektCustom ruleset moduleio.gitlab.arturbosch.detekt:detekt-apiRegister in detekt.yml and provider
Testing is a crucial part of the process. Use the appropriate testing libraries to verify your rules’ correctness. Organize your test directories to align with the framework you’re using.
Keep your dependencies up to date and watch for compatibility issues, particularly during major updates to linting frameworks or Kotlin itself. Many teams enforce strict version control and integrate lint rule testing into CI/CD pipelines to ensure smooth development.
Write your own Kotlin lint checks! | Tor Norbye
How to Write Custom Lint Rules for Kotlin
This section explains how to implement custom lint rules using Android Lint, ktlint, and detekt. These tools help enforce coding standards and maintain consistency across your Kotlin project. Each framework has a specific process for creating, registering, and integrating rules.
Creating Rules for Android Lint

Android Lint provides a powerful framework for defining custom rules that go beyond standard checks. To begin, create an IssueRegistry class in a dedicated lint module. This class acts as the central hub for your custom rules. Extend the IssueRegistry class and override the issues property to include your custom issues.
class CustomLintRegistry : IssueRegistry() {
    override val issues: List<Issue> = listOf(
        RxJavaNamingRule.ISSUE
    )

    override val minApi: Int = CURRENT_API
}
Next, define your custom rule by extending the appropriate detector class. For instance, to enforce naming conventions for methods, extend Detector and implement UastScanner. The rule uses the visitor pattern to analyze code and report violations.
class RxJavaNamingRule : Detector(), UastScanner {
    companion object {
        val ISSUE = Issue.create(
            id = "RxJavaNaming",
            briefDescription = "RxJava methods should follow naming conventions",
            explanation = "Methods returning Observable should end with 'Observable'",
            category = Category.CORRECTNESS,
            priority = 8,
            severity = Severity.WARNING,
            implementation = Implementation(
                RxJavaNamingRule::class.java,
                Scope.JAVA_FILE_SCOPE
            )
        )
    }

    override fun getApplicableMethodNames(): List<String>? = null

    override fun visitMethodCall(context: JavaContext, node: UCallExpression, method: PsiMethod) {
        val returnType = method.returnType?.canonicalText
        if (returnType?.contains("Observable") == true && !method.name.endsWith("Observable")) {
            context.report(
                ISSUE,
                node,
                context.getLocation(node),
                "Method returning Observable should end with 'Observable'"
            )
        }
    }
}
This method helps ensure code consistency and maintainability. Don’t forget to register your custom rules as outlined in the setup process.
Creating Rules for ktlint
ktlint takes a different approach, focusing on code formatting and style. To create a custom rule, extend the Rule class and implement the visit method with your logic.
class NoAndroidLogRule : Rule("no-android-log") {
    override fun visit(
        node: ASTNode,
        autoCorrect: Boolean,
        emit: (offset: Int, errorMessage: String, canBeAutoCorrected: Boolean) -> Unit
    ) {
        if (node.elementType == CALL_EXPRESSION) {
            val text = node.text
            if (text.contains("Log.d") || text.contains("Log.e") ||
                text.contains("Log.i") || text.contains("Log.w")) {
                emit(node.startOffset, "Android Log statements should be removed", false)
            }
        }
    }
}
Group your rules by creating a RuleSetProvider, which acts as a container for related rules.
class CustomRuleSetProvider : RuleSetProvider {
    override fun get(): RuleSet = RuleSet(
        "custom-rules",
        NoAndroidLogRule()
    )
}
To enable ktlint to recognize your rules, create a file at resources/META-INF/services/com.pinterest.ktlint.core.RuleSetProvider and reference your provider class. You can further configure these rules using .editorconfig files and include the custom rule module as a dependency in your project.
Creating Rules for detekt
Unlike ktlint, detekt focuses on broader code quality checks. Writing custom rules involves extending the Rule class and overriding the appropriate visit* function to analyze code and flag issues.
class TooManyParametersRule : Rule() {
    override fun visitNamedFunction(function: KtNamedFunction) {
        super.visitNamedFunction(function)

        val parameterCount = function.valueParameters.size
        if (parameterCount > 5) {
            report(
                CodeSmell(
                    issue,
                    Entity.from(function),
                    "Function ${function.name} has $parameterCount parameters, maximum allowed is 5"
                )
            )
        }
    }
}
Organize your rules by implementing a RuleSetProvider, which helps group them logically.
class CustomRulesetProvider : RuleSetProvider {
    override val ruleSetId: String = "custom-rules"

    override fun instance(config: Config): RuleSet = RuleSet(
        ruleSetId,
        listOf(
            TooManyParametersRule()
        )
    )
}
Activate your rules in the detekt.yml configuration file by setting active: true and adjusting parameters.
custom-rules:
  TooManyParametersRule:
    active: true
    maxParameters: 5
Real-World Example
In November 2022, Zee Palm developed custom lint rules for Qualoo to identify unlocalized strings in Flutter codebases. These rules helped extract and translate 300 app strings into Spanish, addressing a specific project need that standard tools couldn’t handle.
Choosing the right tool depends on your goals. Android Lint is ideal for in-depth code analysis, ktlint ensures formatting consistency, and detekt offers flexibility for broader quality checks.
sbb-itb-8abf120
Testing and Integration
Once you've implemented your custom lint rules, the next step is to ensure they're accurate and seamlessly integrated into your development workflow. Proper testing and integration are essential to make sure these rules provide real value in your projects.
Testing Your Lint Rules
Testing is crucial to confirm that your custom rules behave as expected. Most linting tools come with dedicated testing libraries to help you validate your rules. For Android Lint, you’ll need to include the following dependency in your project:
testImplementation "com.android.tools.lint:lint-tests:$lint_version"
You can then write JUnit tests to feed sample code snippets to your custom rule and verify that it detects violations. For example:
@Test
fun testDetectLogStatements() {
    val code = "fun foo() { Log.d(\"TAG\", \"message\") }"
    val findings = customRule.lint(code)
    assertTrue(findings.contains("Avoid using Log statements"))
}
If you're working with ktlint, its testing library allows you to create test cases to validate your rule's behavior against various code samples. Similarly, for Detekt, you can extend the Rule class and write tests to simulate code analysis and confirm accurate reporting.
In addition to unit tests, it's a good idea to run your custom rules on real projects to ensure they scale well with larger codebases. Integration tests are especially useful for catching edge cases that might not surface during unit testing. Be sure to profile the performance of your rules to avoid slowdowns during linting.
For Detekt users, keep in mind that rule modifications may require restarting the Gradle daemon using the --no-daemon flag. Double-check that your rules are active in the configuration files and that the correct module paths are set up.
Finally, make sure to integrate these tests into your build process to catch issues early.
Adding Rules to Development Workflows
To make your custom lint rules a part of daily development, integrate them into your Gradle build and CI pipelines. Add lint tasks - such as ./gradlew lint, ./gradlew detekt, or ktlint - to your CI build steps. Configure the pipeline to fail builds if lint violations are detected, preventing problematic code from being merged into your main branch.
IDE integration is another important step. This gives developers immediate feedback as they write code:
- For Android Lint, custom rules are automatically detected if the lint rule module is properly included and registered in the project.
- For ktlint, use the
--apply-to-ideaflag or relevant plugin tasks to integrate your custom rules into Android Studio or IntelliJ IDEA. - For Detekt, ensure the IDE plugin is installed and configured to recognize your custom ruleset.
Here’s a quick summary of how to integrate with different tools:
ToolGradle IntegrationCI Pipeline CommandIDE SetupAndroid LintAdd module dependency; register IssueRegistry./gradlew lintAutomatic with proper registrationktlintInclude ruleset in dependenciesktlintUse --apply-to-idea flagDetektAdd to detekt.yml, activate rules./gradlew detektInstall IDE plugin; configure ruleset
To ensure a smooth transition, start with warning mode instead of failing builds immediately. This approach gives your team time to familiarize themselves with the new rules and fix existing violations without disrupting development. Once the team is comfortable and the codebase is clean, you can switch to error mode to enforce strict compliance.
Regular testing, both locally and in CI environments, helps catch issues early. You can also package your custom lint rules as separate modules or JARs, making them reusable across multiple projects. This modular approach allows you to share common rules across teams while still accommodating project-specific needs.
Best Practices and Maintenance
Creating custom lint rules is just the start. The bigger challenge is keeping them relevant and effective as your project evolves. By following some tried-and-true practices, you can ensure your rules remain useful and adaptable over time.
Writing Maintainable Rules
When designing lint rules, aim for a modular approach. Each rule should handle one specific task. This makes it easier to develop, test, and update individual rules without affecting the rest of your ruleset.
Naming is another key factor. Use names that clearly describe what the rule does. For example, instead of vague names like Rule1 or CustomCheck, go for something like NoHardcodedApiKeysRule or PreferDataClassOverClassRule. Clear names save your team time by making the purpose of each rule immediately obvious.
Documentation is equally important. Every rule should include details about its purpose, examples of compliant and non-compliant code, and any configuration options. This not only helps new team members onboard faster but also reduces the risk of misuse.
As your project grows, focus on performance. Target only the relevant parts of the code and avoid unnecessary deep AST traversals. Use caching for intermediate results where applicable, and profile your rules to identify any bottlenecks that could slow down builds on larger projects.
Lastly, make unit testing a core part of your rule development process. Test for a variety of scenarios, including edge cases. These tests not only ensure your rules work as expected but also act as a form of documentation, showing how the rules should behave.
By following these practices, you'll create rules that are easier to maintain and perform consistently, even as Kotlin evolves.
Updating Rules for New Kotlin Versions
Kotlin evolves quickly, and your lint rules need to keep up. Regular updates are essential to ensure compatibility with new language features, deprecations, and API changes.
Start by keeping an eye on Kotlin's release notes. They’ll alert you to any changes that could affect your rules. Make sure to also update your dependencies, including lint APIs, detekt, and ktlint. Running automated tests against new Kotlin versions can help you catch compatibility issues early.
To maintain flexibility, specify API version fields in your rules. This allows them to support both older and newer Kotlin features, reducing the risk of breaking projects that haven’t yet upgraded.
For smoother updates, consider a modular approach. Update individual rules incrementally rather than overhauling everything at once. This minimizes the chances of introducing breaking changes and makes it easier to roll back updates if something goes wrong.
Staying on top of updates ensures your lint rules remain aligned with Kotlin's progress, keeping your code quality efforts running smoothly.
How Expert Teams Like Zee Palm Use Custom Linting
Expert teams use custom linting to tackle challenges unique to their domains. Take Zee Palm, for example. With over 100 projects completed in fields like healthcare, AI, and blockchain, they rely on custom lint rules to maintain high-quality code in complex environments.
In healthcare applications, for instance, custom rules enforce strict naming conventions for patient data models and flag patterns that could expose sensitive data. In blockchain projects, specialized rules help identify security risks, such as reentrancy attacks or improper access controls in smart contracts.
AI and SaaS applications also benefit from custom linting. Rules can enforce architectural standards - like ensuring proper use of dependency injection - or validate that machine learning model inputs meet expected formats. These rules promote consistency across large, interconnected codebases with multiple contributors.
To make enforcement seamless, teams integrate these rules into CI/CD pipelines. This automates the process, reducing the burden of manual code reviews for style or standard violations. Many teams start by introducing new rules in a warning mode to give developers time to adjust. Once the rules are well understood, they switch to error mode. Regular audits of rule effectiveness ensure the linting system continues to provide value without slowing down development.
Conclusion
Creating custom lint rules for Kotlin can transform how you maintain code quality across your projects. It involves setting up tools, crafting logic using Android Lint, ktlint, or detekt, and seamlessly integrating these rules into your development workflow. While the initial setup takes effort, the long-term advantages make it worthwhile.
Custom linting offers tangible benefits. Teams that adopt automated linting with tailored rules report up to a 30% reduction in code review time and a 20% drop in post-release bugs. These gains are even more pronounced in specialized fields where code quality directly affects user safety or compliance with regulations. Such measurable outcomes highlight how automation can elevate your development process.
Automation plays a pivotal role here. As Zee Palm aptly puts it:
"You don't have to hire project managers, or expensive seniors to make sure others code well."
This kind of automation is indispensable in fast-paced environments where catching issues early can prevent costly delays and bugs. Custom lint rules ensure problems are identified during development, saving both time and resources.
For industries like healthcare or blockchain, the advantages go beyond error detection. Custom lint rules can enforce domain-specific requirements that generic tools might overlook. For instance, a fintech company in 2024 implemented custom ktlint rules to enhance secure logging practices, leading to a 40% reduction in security-related code issues within six months.
As your codebase grows, investing in custom linting becomes even more valuable. These rules not only uphold standards and catch errors but also ensure consistency throughout your projects. With regular updates to align with Kotlin's evolution, custom linting can become a cornerstone of your development infrastructure, maintaining quality without slowing down your team.
Start by addressing the most pressing issues and expand your ruleset as patterns emerge. Over time, your team - and your future self - will appreciate the consistency and reliability that custom linting brings to your Kotlin projects.
FAQs
What are the advantages of creating custom lint rules for your Kotlin project?
Custom lint rules in Kotlin provide customized code quality checks that cater to the unique needs of your project. They ensure adherence to coding standards, catch potential problems early, and encourage uniformity throughout your codebase.
Creating your own lint rules allows you to handle specific cases that generic linters might overlook - like enforcing project-specific architectural patterns or naming rules. This approach not only keeps your code easier to manage but also minimizes mistakes, ultimately saving both time and effort.
How can I make sure my custom lint rules stay compatible with future Kotlin versions?
To keep your custom lint rules working smoothly with future Kotlin updates, it's crucial to stick to best practices and keep an eye on Kotlin's evolution. Make a habit of checking Kotlin's release notes and official documentation to stay informed about updates that could impact your rules. Steer clear of hardcoding dependencies tied to specific Kotlin internals - opt for stable APIs instead whenever you can.
On top of that, make sure to thoroughly test your lint rules with every new Kotlin version. This proactive approach will help you catch and fix compatibility issues early. By staying on top of updates and being flexible in your approach, you can ensure your lint rules remain reliable as Kotlin continues to grow and change.
How can I seamlessly add custom lint rules to my CI/CD pipeline?
To include custom lint rules in your CI/CD pipeline effectively, you’ll first need to ensure the pipeline is set up correctly. Incorporate the custom lint rules into the build process, usually during the static code analysis stage.
Then, adjust your CI/CD tool to stop the build whenever linting issues are found. This step guarantees that code quality standards are automatically enforced. Afterward, conduct thorough testing to verify that the lint rules function consistently across all builds and environments.
Automating lint checks helps keep your codebase cleaner and allows you to catch potential issues early in development.
Related Blog Posts

How Event-Driven Patterns Improve Scalability
Event-driven architecture (EDA) is a system design that processes events asynchronously, enabling applications to handle massive workloads and scale efficiently. Unlike request-response systems, EDA decouples components, allowing them to operate independently. This design is crucial for industries like healthcare, IoT, and social media, where real-time processing and traffic surges are common.
Key Benefits:
- Scalability: Components scale independently to handle high loads.
- Fault Tolerance: Isolated failures don’t disrupt the entire system.
- Real-Time Processing: Immediate responses to events without delays.
Core Patterns:
- Competing Consumers: Distributes tasks across multiple consumers for balanced processing.
- Publish-Subscribe (Pub/Sub): Broadcasts events to multiple subscribers for parallel processing.
- Event Sourcing & CQRS: Stores all changes as events and separates read/write operations for better scalability.
Tools:
- Apache Kafka: High throughput and durable event storage.
- RabbitMQ: Reliable delivery with complex routing.
- AWS EventBridge: Serverless, elastic event routing.
While EDA offers scalability and flexibility, it requires careful planning for event schemas, monitoring, and fault tolerance. For high-demand applications, it’s a powerful way to build systems that can grow and evolve seamlessly.
Patterns of Event Driven Architecture - Mark Richards
Core Event-Driven Patterns for Scalability
When it comes to building systems that can handle massive workloads efficiently, three event-driven patterns stand out. These patterns are the backbone of high-performance systems across various industries, from healthcare to social media.
Competing Consumers Pattern
In this pattern, multiple consumers subscribe to an event queue and process events as they arrive. Each event is handled by one of the many consumers, ensuring the workload is evenly distributed and processing remains uninterrupted.
This approach is especially useful for managing large volumes of similar tasks. For instance, in a ride-sharing platform, incoming ride requests are queued and then processed by multiple backend services at the same time. During peak hours, the system can handle thousands of ride requests by simply scaling up the number of consumer instances, preventing any single service from becoming a bottleneck.
The pattern relies on horizontal scaling. When event traffic spikes, additional consumers can be spun up automatically. If one consumer fails, the others continue processing without disruption. Microsoft highlights that well-designed systems using this pattern can handle millions of events per second. This makes it a great fit for applications like financial trading platforms or processing data from IoT devices.
Now, let’s look at how the Pub/Sub pattern takes decoupling and scalability to the next level.
Publish-Subscribe Pattern
The Publish-Subscribe (Pub/Sub) pattern allows a single event to be broadcast to multiple subscribers at the same time. Each subscriber processes the event independently based on its specific requirements.
This pattern is excellent for decoupling producers and consumers while scaling horizontally. Take a social media app as an example: when a user posts an update, the event triggers multiple services. The notification service alerts followers, while other services handle tasks like updating feeds or analyzing trends. Each service scales independently, depending on its workload.
A 2023 report by Ably found that companies using Pub/Sub patterns in event-driven architectures experienced a 30–50% boost in system throughput compared to traditional request-response models. This improvement comes from the ease of adding new subscribers without affecting existing ones. The system can grow seamlessly as new subscribers join, without disrupting ongoing operations.
That said, implementing this pattern does come with challenges. Managing subscriber state, ensuring reliable event delivery, and handling issues like message duplication or subscriber failures require robust infrastructure. Features like retries, dead-letter queues, and ordering guarantees are essential to address these challenges.
Next, we’ll explore how Event Sourcing and CQRS enhance scalability and reliability by offering better state management and workload distribution.
Event Sourcing and CQRS
Event Sourcing and CQRS (Command Query Responsibility Segregation) work together to create systems that are both scalable and reliable. Instead of storing just the current state, Event Sourcing records every change as a sequence of immutable events.
CQRS complements this by splitting read and write operations into separate models. Commands (write operations) generate events that update the state, while queries (read operations) use pre-optimized views built from those events. This separation allows each model to scale independently, using storage solutions tailored to their specific needs.
This combination is particularly valuable in financial systems. For example, every transaction is stored as an immutable event, ensuring auditability. Meanwhile, optimized read views - like account balances or transaction histories - can scale independently based on demand. Similarly, in healthcare, this approach ensures that every update to a patient record is logged, meeting compliance requirements and enabling easy rollbacks when needed.
Another advantage is the support for real-time analytics. Multiple read models can process the same event stream, enabling up-to-the-minute insights. According to AWS, event-driven architectures using these patterns can also cut infrastructure costs. Resources can scale dynamically based on event volume, avoiding the overhead of constant polling or batch processing.
Together, these three patterns - Competing Consumers, Publish-Subscribe, and Event Sourcing with CQRS - form the foundation of scalable event-driven systems. They allow for efficient parallel processing, flexible multi-service architectures, and reliable state management, all while keeping costs and complexity in check.
Message Brokers and Middleware in Event-Driven Architecture
At the core of any scalable event-driven system is the ability to efficiently manage and route events between components. This is where message brokers and middleware come into play, acting as the backbone that enables smooth communication across the architecture. Together, they ensure that event-driven patterns can operate effectively on a large scale.
Message Brokers: Managing Event Flow
Message brokers like Apache Kafka and RabbitMQ play a pivotal role in event-driven systems by serving as intermediaries between producers and consumers. They create a decoupled setup, allowing different components to scale independently while ensuring reliable event delivery - even when some parts of the system are temporarily unavailable.
- Apache Kafka shines in high-throughput scenarios, capable of managing millions of events per second with its partitioning and replication features. By storing events on disk, Kafka offers durability, enabling consumers to replay events from any point in time. This is especially useful for systems needing detailed audit trails or historical data analysis.
- RabbitMQ, on the other hand, emphasizes transactional messaging and complex routing. Its use of acknowledgments and persistent queues ensures messages are delivered reliably, even if consumers fail temporarily. Features like dead-letter queues enhance fault tolerance, gracefully handling errors. RabbitMQ's architecture also supports horizontal scaling by adding more consumers without disrupting existing producers.
Middleware for System Integration
While message brokers focus on delivering events, middleware takes a broader role in connecting diverse systems. Middleware handles tasks like protocol translation, orchestration, and interoperability, creating a seamless integration layer for legacy systems, cloud services, and modern microservices.
For instance, tools like enterprise service buses (ESBs) and API gateways standardize event formats and translate between protocols. Middleware can convert HTTP REST calls into MQTT messages for IoT devices or transform JSON payloads into AMQP messages for enterprise systems. Additionally, built-in services for tasks like authentication, monitoring, and data transformation ensure security and consistency across the architecture.
Selecting the Right Tools
Choosing the best message broker or middleware depends on various factors, such as scalability, performance, fault tolerance, and how well they integrate into your existing ecosystem. Here's a quick comparison of some popular options:
FeatureApache KafkaRabbitMQAWS EventBridgeThroughputVery highModerateHighPersistenceDurable logPersistent queuesManaged, persistentScalabilityHorizontal, clusterVertical/horizontalServerless, elasticUse CaseStream processingTask queuesEvent routingIntegrationMany connectorsMany pluginsAWS ecosystem
For real-time streaming applications or scenarios requiring massive event volumes - like log aggregation or IoT data processing - Kafka is often the go-to choice. However, it requires more operational expertise to manage. RabbitMQ is better suited for environments that need reliable delivery and complex routing, particularly when event volumes are smaller but transactional guarantees are critical.
Cloud-native solutions like AWS EventBridge, Azure Event Grid, and Google Pub/Sub simplify scalability and infrastructure management by offering serverless, elastic scaling. These managed services handle scaling, durability, and monitoring automatically, letting teams focus on business logic rather than infrastructure. For example, AWS services like Lambda, EventBridge, and SQS can process thousands of concurrent events without manual provisioning, reducing complexity while maintaining high reliability.
When evaluating options, consider factors like support for specific data formats (e.g., JSON, Avro, Protocol Buffers), security features, and monitoring capabilities. Whether you opt for managed or self-hosted solutions will depend on your budget, compliance needs, and existing infrastructure. The right tools will ensure your event-driven architecture is prepared to handle growth and adapt to future demands.
How to Implement Event-Driven Patterns: Step-by-Step Guide
Creating a scalable event-driven system takes thoughtful planning across three key areas: crafting effective event schemas, setting up reliable asynchronous queues, and ensuring fault tolerance with robust monitoring. These steps build on your message broker and middleware to create a system that can handle growth seamlessly.
Designing Event Schemas
A well-designed event schema is the backbone of smooth communication between services. It ensures your system can scale without breaking down. The schema you design today will determine how easily your system adapts to changes tomorrow.
Start by using standardized formats like JSON or Avro. JSON is simple, human-readable, and works for most scenarios. If you're dealing with high-throughput systems, Avro might be a better fit because it offers better performance and built-in schema evolution.
Let’s take an example: an "OrderCreated" event. This event could include fields like order ID, item details, and a timestamp. With this structure, services like inventory management, shipping, and billing can process the same event independently - no extra API calls required .
Versioning is another critical piece. Add a version field to every schema to ensure backward compatibility. Minor updates, like adding optional fields, can stick with the same version. But for breaking changes? You’ll need to increment the version. Using a schema registry can help keep everything consistent and make collaboration between teams smoother .
Don’t forget metadata. Fields like correlationId, source, and eventType improve traceability, making debugging and monitoring much easier. They also provide an audit trail, helping you track the journey of each event.
Setting Up Asynchronous Queues
Asynchronous queues are the workhorses of event-driven systems, allowing them to handle large volumes of events without compromising on performance. Setting them up right is crucial.
Start by configuring queues for durability. For instance, if you’re using Kafka, enable persistent storage and configure partitioning for parallel processing. RabbitMQ users should set up durable queues and clustering to ensure high availability.
Next, focus on making your consumers idempotent. Distributed systems often deliver duplicate messages, so your consumers need to handle these gracefully. You could, for example, use unique identifiers to track which events have already been processed.
Monitoring is another must. Keep an eye on queue lengths and processing times to catch bottlenecks before they become a problem. Tools like Prometheus can help by collecting metrics directly from your message brokers.
Dead-letter queues are also a lifesaver. They catch messages that can’t be processed, allowing you to reprocess them later instead of letting them clog up the system.
Some common challenges include message duplication, out-of-order delivery, and queue backlogs. You can address these with strategies like backpressure to slow down producers when consumers lag, enabling message ordering (if supported), and designing your system to handle eventual consistency .
Once your queues are solid, it’s time to focus on resilience and monitoring.
Building Fault Tolerance and Monitoring
With your schemas and queues in place, the next step is to ensure your system can handle failures gracefully. This involves both preventing issues and recovering quickly when they occur.
Start by logging events persistently. This creates an audit trail and allows for event replay, which is crucial for recovering from failures or initializing new services with historical data. Make sure your replay system can handle large volumes efficiently .
Comprehensive monitoring is non-negotiable. Tools like Prometheus and Grafana can provide insights into metrics like event throughput, processing latency, error rates, and queue lengths. Cloud-native options like AWS CloudWatch or Azure Monitor are also great if you prefer less operational complexity .
Set up alerts for critical metrics - such as error rates or consumer lag - so you can address issues before they escalate.
Finally, test your fault tolerance regularly. Use chaos engineering to simulate failures, like a service going down or a network partition. This helps you uncover weaknesses in your system before they affect production .
For industries like healthcare or IoT, where compliance and security are paramount, bringing in domain experts can make a big difference. Teams like Zee Palm (https://zeepalm.com) specialize in these areas and can help you implement event-driven patterns tailored to your needs.
sbb-itb-8abf120
Benefits and Challenges of Event-Driven Patterns
Event-driven patterns are known for enhancing application scalability, but they come with their own set of trade-offs that demand careful consideration. By weighing both the advantages and challenges, you can make more informed decisions about when and how to use these patterns effectively.
One of the standout benefits is dynamic scalability. These systems allow individual components to scale independently, meaning a traffic surge in one service won’t ripple across and overwhelm others. Another advantage is fault tolerance - even if one service fails, the rest of the system can continue operating without interruption.
Event-driven architectures also shine in real-time responsiveness. Events trigger immediate actions, enabling instant notifications, live updates, and smooth user interactions. This is particularly critical in sectors like healthcare, where systems monitoring patients must respond to changes in real time.
However, these benefits come with challenges. Architectural complexity is a significant hurdle. Asynchronous communication requires careful design, and debugging becomes more complicated when tracking events across multiple services. Additionally, ensuring event consistency and maintaining proper ordering can be tricky, potentially impacting data integrity.
Comparison Table: Benefits vs Challenges
BenefitsChallengesScalability – Independent scaling of componentsComplexity – Designing and debugging is more demandingFlexibility – Easier to add or modify featuresData consistency – Maintaining integrity is challengingFault tolerance – Failures are isolated to individual componentsMonitoring/debugging – Asynchronous flows are harder to traceReal-time responsiveness – Immediate reactions to eventsOperational effort – Requires robust event brokers and toolsLoose coupling – Independent development and deployment of servicesEvent schema/versioning – Careful planning for contracts is neededEfficient resource use – Resources allocated on demandPotential latency – Network or processing delays may occur
This table highlights the trade-offs involved, helping you weigh the benefits against the challenges.
Trade-Offs to Consider
The main trade-off lies between complexity and capability. While event-driven systems provide exceptional scalability and flexibility, they demand advanced tools and operational practices. Teams need expertise in observability, error handling, and event schema management - skills that are less critical in traditional request-response models.
Monitoring becomes a key area of focus. Specialized tools are necessary to track event flows, identify bottlenecks, and ensure reliable delivery across distributed services. Although these systems enhance fault tolerance by isolating failures, they also introduce operational overhead. Components like event storage, replay mechanisms, and dead-letter queues must be managed to handle edge cases effectively.
Additionally, the learning curve for development teams can be steep. Adapting to asynchronous workflows, eventual consistency models, and distributed debugging requires significant training and adjustments to existing processes.
For industries with high scalability demands and real-time processing needs, the benefits often outweigh the challenges. For example, healthcare applications rely on real-time patient monitoring, even though strict data consistency is required. Similarly, IoT systems manage millions of device events asynchronously, despite the need for robust event processing and monitoring tools.
In such demanding environments, working with experts like Zee Palm (https://zeepalm.com) can simplify the adoption of event-driven architectures. Whether for AI health apps, IoT solutions, or social platforms, they help ensure high performance and scalability.
Ultimately, the decision to implement event-driven patterns depends on your system's specific requirements. If you’re building a straightforward CRUD application, traditional architectures may be a better fit. But for systems with high traffic, real-time demands, or complex integrations, event-driven patterns can be a game-changer.
Event-Driven Patterns in Different Industries
Event-driven patterns allow industries to handle massive data flows and enable real-time processing. Whether it’s healthcare systems tracking patient conditions 24/7 or IoT networks managing millions of devices, these architectures provide the flexibility and speed modern applications demand.
Healthcare Applications
Healthcare systems face unique challenges when it comes to scaling and real-time operations. From patient monitoring to electronic health record (EHR) integration and clinical decision-making, these systems need to respond instantly to critical events while adhering to strict regulations.
For example, sensors in healthcare settings can emit events when a patient’s vital signs change, triggering immediate alerts to care teams. Event-driven architecture ensures these updates reach clinicians without delay, enhancing response times. One hospital network implemented an event-driven integration platform that pulled patient data from various sources. When a patient’s vitals crossed critical thresholds, the system automatically sent alerts to clinicians’ mobile devices. This reduced response times and improved outcomes.
Additionally, these patterns allow for seamless integration across hospital systems and third-party providers. New medical devices or software can be added by simply subscribing to relevant event streams, making it easier to scale and adapt to evolving needs.
IoT and Smart Technology
The Internet of Things (IoT) is one of the most demanding environments for event-driven architectures. IoT systems process massive amounts of sensor data in real time, often exceeding 1 million events per second in large-scale deployments.
Take smart home platforms, for example. These systems manage events from thousands of devices - such as sensors, smart locks, and lighting controls - triggering instant actions like adjusting thermostats or sending security alerts. Event-driven architecture supports horizontal scaling, allowing new devices to integrate effortlessly.
In smart cities, traffic management systems rely on event-driven patterns to process data from thousands of sensors. These systems optimize traffic signal timing, coordinate emergency responses, and ensure smooth operations even when parts of the network face issues. A major advantage here is the ability to dynamically adjust resources based on demand, scaling up during peak hours and scaling down during quieter times.
Beyond IoT, event-driven architectures also power smart environments and platforms in other fields like education.
EdTech and Social Platforms
Educational technology (EdTech) and social media platforms depend on event-driven patterns to create engaging, real-time experiences. These systems must handle sudden spikes in activity, such as students accessing materials before exams or users reacting to viral content.
EdTech platforms leverage event-driven patterns for real-time notifications, adaptive learning, and scalable content delivery. For instance, when a student completes a quiz, the system emits an event that triggers multiple actions: instant feedback for the student, leaderboard updates, and notifications for instructors. This approach allows the platform to handle large numbers of users simultaneously while keeping latency low.
Social media platforms use similar architectures to manage notifications, messaging, and activity feeds. For example, when a user posts content or sends a message, the system publishes events that power various services, such as notifications, analytics, and recommendation engines. This setup ensures platforms can scale effectively while processing high volumes of concurrent events and delivering updates instantly.
IndustryEvent-Driven Use CaseScalability BenefitReal-Time CapabilityHealthcarePatient monitoring, data integrationIndependent scaling of servicesReal-time alerts and monitoringIoT/Smart TechSensor data, device communicationHandles millions of events/secondInstant device feedbackEdTechE-learning, live collaborationSupports thousands/millions of usersReal-time notificationsSocial PlatformsMessaging, notifications, activity feedsElastic scaling with user activityInstant updates and engagement
These examples demonstrate how event-driven patterns provide practical solutions for scalability and responsiveness. For businesses aiming to implement these architectures in complex environments, partnering with experienced teams like Zee Palm (https://zeepalm.com) can help ensure high performance and tailored solutions that meet industry-specific needs.
Summary and Best Practices
Key Takeaways
Event-driven patterns are reshaping the way applications handle scalability and adapt to fluctuating demands. By decoupling services, these patterns allow systems to scale independently, avoiding the bottlenecks often seen in traditional request-response setups. This approach also optimizes resource usage by dynamically allocating them based on actual needs.
Asynchronous processing ensures smooth performance, even during high-traffic periods, by eliminating the need to wait for synchronous responses. This keeps systems responsive and efficient under heavy loads.
Fault tolerance plays a critical role in maintaining system stability. Isolated failures are contained, preventing a domino effect across the application. For instance, if payment processing faces an issue, other functions like browsing or cart management can continue operating without interruption.
These principles provide a strong foundation for implementing event-driven architectures effectively. The following best practices outline how to bring these concepts to life.
Implementation Best Practices
To harness the full potential of event-driven systems, consider these practical recommendations:
- Define clear event schemas and contracts. Document the contents of each event, when it is triggered, and which services consume it. This ensures consistency and minimizes integration challenges down the line.
- Focus on loose coupling. Design services to operate independently and use event streams for integration. This makes the system easier to maintain and extend as requirements evolve.
- Set up robust monitoring. Track key metrics like event throughput, latency, and error rates in real time. Automated alerts for delays or error spikes provide critical visibility and simplify troubleshooting.
- Simulate peak loads. Test your system under high traffic to identify bottlenecks before going live. Metrics such as events per second and latency can highlight areas for improvement.
- Incorporate retry mechanisms and dead-letter queues. Ensure failed events are retried automatically using strategies like exponential backoff. Persistent failures should be redirected to dead-letter queues for manual review, preventing them from disrupting overall processing.
- Choose the right technology stack. Evaluate message brokers and event streaming platforms based on your system’s event volume, integration needs, and reliability requirements. The tools you select should align with your infrastructure and scale effectively.
- Continuously refine your architecture. Use real-world performance data to monitor and adjust your system as it grows. What works for a small user base may require adjustments as the application scales.
For organizations tackling complex event-driven solutions - whether in fields like healthcare, IoT, or EdTech - collaborating with experienced teams, such as those at Zee Palm, can simplify the path to creating scalable, event-driven architectures.
FAQs
What makes event-driven architectures more scalable and flexible than traditional request-response systems?
Event-driven architectures stand out for their ability to scale and adapt with ease. By decoupling components, these systems process events asynchronously, reducing bottlenecks and efficiently managing higher workloads. This makes them a strong choice for dynamic environments where high performance is crucial.
At Zee Palm, our team excels in crafting event-driven solutions tailored to industries such as healthcare, edtech, and IoT. With years of hands-on experience, we design applications that effortlessly handle increasing demands while delivering reliable, top-tier performance.
What challenges can arise when implementing event-driven patterns, and how can they be addressed?
Implementing event-driven patterns isn’t without its hurdles. Common challenges include maintaining event consistency, managing the added complexity of the system, and ensuring reliable communication between different components. However, with thoughtful strategies and proper tools, these obstacles can be effectively managed.
To tackle these issues, consider using idempotent event processing to prevent duplicate events from causing problems. Incorporate strong monitoring and logging systems to track event flows and identify issues quickly. Adding retry mechanisms can help address temporary failures, ensuring events are processed successfully. Designing a well-defined event schema and utilizing tools like message brokers can further simplify communication and maintain consistency across the system.
How do tools like Apache Kafka, RabbitMQ, and AWS EventBridge enhance the scalability of event-driven systems?
Tools like Apache Kafka, RabbitMQ, and AWS EventBridge are essential for boosting the scalability of event-driven systems. They serve as intermediaries, enabling services to communicate asynchronously without the need for tight integration.
Take Apache Kafka, for instance. It's designed to handle massive, real-time data streams, making it a go-to option for large-scale systems that demand high throughput. Meanwhile, RabbitMQ specializes in message queuing, ensuring messages are delivered reliably - even in applications with varied workloads. Then there's AWS EventBridge, which streamlines event routing between AWS services and custom applications, offering smooth scalability for cloud-based setups.
By enabling asynchronous communication and decoupling system components, these tools empower applications to manage growing workloads effectively. They are key players in building scalable, high-performance systems that can adapt to increasing demands.
Related Blog Posts

Design Systems vs. Style Guides: Key Differences
When building mobile apps, design systems and style guides are two tools often confused but serve different purposes. Here's the key takeaway:
- Style guides focus on visual branding - colors, fonts, logos, and tone. They help maintain a consistent look and feel across platforms but don’t address functionality or technical details.
- Design systems go further. They include style guides but also provide reusable UI components, coding standards, and interaction patterns. This makes them ideal for large, complex projects requiring cross-platform consistency and scalability.
Quick Overview:
- Style guides are static references for visual consistency, often used by external teams like agencies or freelancers.
- Design systems are dynamic frameworks that integrate design and development, enabling better collaboration and faster updates.
Key Differences:
FeatureDesign SystemsStyle GuidesScopeIncludes style guides, components, and coding standardsFocuses on visual branding onlyUsersDesigners, developers, product teamsDesigners, agencies, marketing teamsFlexibilityUpdates automatically across platformsRequires manual updatesBest forComplex, multi-platform projectsSmall, branding-focused projects
For small teams or early-stage apps, start with a style guide. For larger teams or apps with complex functionality, invest in a design system. Both tools ensure consistency, but choosing the right one depends on your project's scale and goals.
Design Systems vs. Style Guides
What Is a Style Guide?
A style guide is a document that lays out the visual and editorial standards for a brand or product. It specifies elements like colors, typography, iconography, and logo usage to maintain a consistent brand identity across all platforms. This consistency is crucial for teamwork and is especially helpful when collaborating with agencies or freelancers who need clear direction.
Definition and Purpose
The core purpose of a style guide is to keep a brand's identity consistent in both design and content. It serves as a rulebook for designers and content creators, ensuring that every piece of work reflects the brand’s personality and values.
In mobile app development, style guides play a key role in creating a cohesive user interface (UI) across platforms like iOS and Android. By establishing clear visual and editorial standards, these guides make it easier for teams and external collaborators to produce assets that align with the brand’s established look and feel.
Key Features of Style Guides
Style guides typically cover several essential elements, including:
- Color Palettes: Defines the exact color codes for primary, secondary, and accent colors.
- Typography: Specifies font families, sizes, and weights for different text elements.
- Logo Guidelines: Details proper usage, spacing, and placement rules for logos.
- Tone of Voice: Sets the editorial style and messaging approach to reflect the brand’s personality.
- Iconography and Imagery: Provides approved styles and examples for icons and visuals.
These components act as a go-to reference, simplifying design and content decisions for both internal teams and external partners.
Limitations of Style Guides
While style guides are excellent for maintaining visual consistency, they do have their shortcomings, especially in complex or large-scale projects. They often lack details about functional or interactive elements, such as how a button should behave when tapped. They also don’t typically address UI behaviors, code implementation, or accessibility standards.
Another limitation is that style guides rarely include guidance for responsive design or cross-platform functionality. Since they are usually updated only during major brand overhauls, they can struggle to keep up with evolving technologies and design needs. These gaps often highlight the need for design systems, which combine functional components with visual guidelines to address these challenges.
What Is a Design System?
A design system goes beyond the basics of style guides by offering a detailed framework that includes UI components, design tokens, and thorough documentation for both design and development. It combines visual, interactive, and technical elements to create a unified approach.
Unlike traditional style guides, design systems bring together visual and technical standards, bridging the gap between design and development. This cohesive structure makes app development more scalable and easier to manage.
Definition and Core Components
At its heart, a design system is made up of several key elements that work together to streamline the development process. The component library is central, containing reusable UI elements like buttons, forms, navigation menus, and input fields. These components come with clear instructions and ready-to-use code snippets, making implementation straightforward.
Design tokens are like the building blocks of the system. They define variables for things like colors, spacing, and typography. For example, if you update a primary color or a font size, those changes automatically apply across all components and platforms, saving time and effort.
Documentation is another vital part of a design system. It provides detailed usage guidelines, accessibility standards, and best practices. This helps designers understand how components should behave and gives developers the technical details they need to implement them. Many design systems also include interaction patterns to define how users navigate, how animations function, and how feedback is provided during interactions. This ensures consistency not just in design but also in user experience.
How Design Systems Support Scalability
Design systems are a game-changer when it comes to scalability. By offering a unified set of reusable components and guidelines, they eliminate the need to recreate basic design elements for every new platform or feature. This saves time and ensures consistency across products.
For instance, standardized UI components help apps look and behave the same way across iOS, Android, and web platforms. This consistency not only builds user trust but also makes it easier for users to switch between different versions of an app without confusion.
Another big advantage is the way design systems improve collaboration. They provide a shared language for designers and developers, reducing misunderstandings and speeding up workflows. Tools like Figma and Storybook allow teams to update and view changes in real-time, further streamlining the process.
The impact on efficiency is significant. Mature design systems can cut design-to-development time by up to 50% and reduce repetitive design work by 30%. This allows teams to focus on solving user challenges rather than reworking basic interface elements.
Dynamic and Evolving Nature
Design systems aren’t static - they grow and adapt as technologies and user needs change. With mobile app requirements and user expectations evolving so quickly, a design system needs to keep up. Regular updates to components and guidelines are essential as products expand.
However, these updates aren’t handled haphazardly. Teams follow structured processes to propose, test, and implement changes. For example, when major platforms like iOS or Material Design release updates, the design system can incorporate these changes systematically.
As companies launch new features or enter new markets, the design system evolves to include new components and interaction patterns. A 2022 UXPin survey found that over 70% of enterprise product teams rely on a design system to manage large-scale design efforts. This highlights how crucial these evolving systems are for modern app development.
sbb-itb-8abf120
Key Differences Between Design Systems and Style Guides
Building on the earlier definitions, let's dive into how design systems and style guides differ. While both are essential tools for creating digital products, they serve distinct purposes and vary in depth. Knowing these differences helps teams pick the right approach for their mobile app development projects.
The biggest contrast lies in scope and coverage. Design systems include everything a style guide offers - like colors, fonts, and imagery - but go much further. They add interactive components, coding standards, accessibility guidelines, and in-depth documentation for both designers and developers. Style guides, on the other hand, focus primarily on visual branding. This broader scope in design systems enhances collaboration and simplifies implementation.
Collaboration patterns also set them apart. Design systems foster real-time teamwork between designers, developers, and product managers, using shared tools and detailed documentation. This setup encourages seamless collaboration. In contrast, style guides act as static references, which team members consult individually.
The level of detail is another key difference. Design systems provide exhaustive documentation that explains not only how things should look but also how they should function, how users will interact with them, and how developers should build them. Style guides stick to visual and brand consistency, without delving into technical implementation or user interaction.
Comparison Table: Design Systems vs. Style Guides
Here’s a quick breakdown of how the two compare:
AspectDesign SystemsStyle GuidesScopeComprehensive framework: includes style guides, components, and technical standardsFocuses on visual branding and identityDetail LevelCovers interactive behaviors, accessibility, and code snippetsDocuments visual and written brand elements onlyPrimary UsersDesigners, developers, product managers, and cross-functional teamsDesigners, content creators, marketing teams, and agenciesFlexibility & ScalabilityModular and evolves with product needsStatic and less adaptable to changeCollaborationEnables real-time, cross-functional teamworkServes as a one-directional referenceImplementationIncludes technical guidelines and code examplesProvides visual specs without technical details
Summary of Differences
Style guides are all about maintaining brand consistency. They work well for ensuring that logos, colors, fonts, and tone are consistent across marketing materials, content, and external communications. They’re perfect for helping everyone stay on-brand visually and tonally.
Design systems, however, are designed for scalable product development. Research from UXPin shows that organizations with mature design systems can speed up product development by 47% and reduce design-related errors by 33% compared to those using only style guides. Additionally, a 2022 Supernova survey revealed that 78% of product teams using design systems reported better collaboration and product consistency.
For mobile app development, these differences are critical as apps become more complex. Style guides ensure visual consistency across screens but don’t address technical aspects like navigation, animations, or platform-specific adaptations for iOS and Android. Design systems handle all of these, while still maintaining the visual cohesion style guides provide.
Finally, the way they’re maintained also differs. Style guides require manual updates when brand elements change, and those updates must be communicated across projects. Design systems, however, use design tokens and modular components that can be updated centrally, automatically syncing changes across all connected projects and platforms.
When to Use a Design System vs. a Style Guide in Mobile App Development
Choosing between a style guide and a design system depends on your project's scope, complexity, and goals. This decision can influence everything from how quickly you can develop your app to how much effort it will take to maintain it over time. Let’s break down when each approach works best.
When to Use a Style Guide
Style guides are all about visual consistency. They focus on elements like colors, typography, and logos, making them a great choice when technical implementation isn’t a major concern. Here’s when they make sense:
- Early-stage products: If you’re just starting out and need to establish your brand identity, a style guide is a simple and effective tool. It’s especially helpful for small teams or startups where resources are tight.
- Small teams: For teams of 2-5 people working on their first app, a style guide offers clear direction without adding unnecessary complexity. It’s easy to set up, maintain, and reference.
- Limited-scope projects: If your app has straightforward functionality - like a basic productivity tool or informational app - a style guide ensures visual cohesion without the overhead of a full design system.
- External collaboration: If you’re working with freelancers, marketing agencies, or contractors, a concise style guide helps them align with your brand without requiring deep technical knowledge. They can quickly grasp your visual standards and deliver work that fits seamlessly with your app.
When to Use a Design System
Design systems go beyond visual elements to include technical standards, making them ideal for complex and scalable projects. Here’s when you’ll need one:
- Multi-platform development: If your app needs to work seamlessly across iOS, Android, and web platforms, a design system ensures consistency while accommodating platform-specific requirements.
- Larger teams: When multiple designers and developers are involved, a design system becomes essential. It provides shared components, coding standards, and detailed documentation, reducing miscommunication and inconsistencies.
- Complex apps: For apps with intricate navigation, multiple user roles, or advanced features - like banking platforms or enterprise software - a design system offers the standardized patterns and reusable components needed to handle that complexity.
- Long-term projects: If your app will have ongoing updates or new features over the years, investing in a design system early on saves time and ensures consistent user experiences in the long run.
Spotify’s growth is a great example. In its early days, Spotify relied on style guides to establish brand consistency. But as the app and team expanded, they transitioned to a design system to manage reusable components and maintain consistency across platforms and teams.
Practical Considerations
Several factors can help you decide which approach is right for your project:
- Team size: Smaller teams (fewer than 5 people) often find style guides sufficient. Larger teams (10+ members) typically require design systems to stay coordinated.
- Resources: Design systems need ongoing maintenance - someone has to update components, manage documentation, and ensure team adoption. If you lack the resources for this, a style guide might be a better fit for now.
- Timeline: Style guides can be put together in days or weeks, while a fully developed design system can take months. If you’re in a rush to launch, start with a style guide and plan to expand later.
- Growth plans: If you expect your team to grow, expand to new platforms, or add complexity to your app, consider investing in a design system early. Transitioning from a style guide to a design system becomes harder and more expensive as your project scales.
- Collaboration style: Design systems work best for teams with integrated workflows, while style guides are better suited for independent or external collaborators.
Ultimately, the choice between a style guide and a design system isn’t set in stone. Many successful apps begin with a style guide and evolve into a design system as they grow. The key is knowing when it’s time to adapt your approach to meet your team’s changing needs.
Conclusion
The difference between design systems and style guides plays a key role in shaping your mobile app's development, scalability, and overall consistency. Design systems offer a robust framework of reusable components, interaction patterns, and technical documentation, making them well-suited for complex and evolving products. On the other hand, style guides focus on static elements like typography, colors, and logos, emphasizing visual brand identity.
The numbers speak for themselves: research shows that implementing design systems can speed up product development by up to 47%, cut design inconsistencies by 30%, and improve user satisfaction by 25%.
Final Thoughts
As your mobile app project grows in complexity, understanding and adopting the right tools becomes essential. Planning for the transition early can make all the difference.
- Design systems are ideal for projects requiring cross-platform consistency, collaboration among multiple team members, or ongoing product evolution.
- Style guides are better suited for smaller projects, early-stage products, or cases where visual branding is the main focus without the need for intricate technical requirements.
Choosing the right framework doesn’t just save time - it enhances user experience and simplifies maintenance. Companies like IBM saw a 40% reduction in design-to-development handoff time after implementing their Carbon Design System across mobile and web platforms in 2022. Similarly, Shopify's adoption of their Polaris design system in January 2023 helped their mobile app team launch new features 30% faster while cutting UI bugs by 22%.
Zee Palm's Expertise
Selecting the right design framework is a critical step for scalable and efficient app development. At Zee Palm, we bring over a decade of experience and a team of 13 dedicated experts to deliver tailored solutions - whether you need a focused style guide or a comprehensive design system.
Our approach incorporates the latest in UI/UX design, accessibility standards, and development workflows. With a portfolio spanning over 100 completed projects and 70+ satisfied clients across industries like healthcare, EdTech, and IoT, we know how to align design frameworks with your business goals. The result? Mobile apps that perform consistently and scale seamlessly.
The foundation you choose today will shape your app’s future. With the right framework, you’ll enjoy faster development cycles, consistent performance, and a user experience that evolves alongside your business. Let us help you make the right choice.
FAQs
Should I use a style guide or a design system for my mobile app project?
When deciding between a style guide and a design system, it all comes down to the size and complexity of your project. If your app is relatively small or you're aiming to quickly establish a consistent look and feel, a style guide might be the way to go. It focuses on the essentials - like fonts, colors, and basic design elements - to ensure your app maintains visual harmony.
On the other hand, if you're working on a larger, more intricate project or planning for significant growth, a design system offers a more robust solution. It delivers a detailed framework complete with reusable components, interaction patterns, and guidelines designed to support scalability and teamwork.
The team at Zee Palm, with over ten years of expertise, is ready to guide you. Whether you need a straightforward style guide or a comprehensive design system, they can create a solution tailored specifically to your app's requirements.
What are the main advantages of moving from a style guide to a design system as my app scales?
Transitioning from a style guide to a design system can make a big difference as your app evolves. While a style guide focuses on visual basics like colors, fonts, and branding, a design system goes further. It combines reusable components, clear design principles, and detailed development guidelines into one cohesive framework.
Using a design system brings several advantages. It helps maintain consistency throughout your app, speeds up the development process, and simplifies collaboration within your team. By reducing repetitive work, it ensures a smoother workflow and a seamless user experience - even as you add new features. Plus, design systems grow with your app, making them a smart choice for handling the increasing complexity of larger projects or expanding teams.
How does a design system enhance collaboration between designers and developers in large teams?
A design system acts as a common ground for designers and developers, offering a structured collection of reusable components, design patterns, and guidelines. This shared framework helps maintain consistency in both appearance and functionality, cutting down on miscommunication and reducing the need for constant back-and-forth adjustments.
By defining standards for elements like typography, colors, and UI components, a design system streamlines workflows, reduces mistakes, and frees up teams to focus on creating new ideas instead of redoing existing ones. For larger teams, it enhances collaboration, speeds up the development process, and ensures a seamless and unified user experience throughout the product.
Related Blog Posts

How AI Enhances Approval Workflow Tools
AI is transforming approval workflows by automating repetitive tasks, analyzing complex data, and enabling smarter decision-making. Traditional workflow tools rely on rigid, rule-based automation, which struggles with exceptions and unstructured data. AI-powered systems overcome these limitations by offering dynamic task routing, document analysis, and predictive analytics to identify bottlenecks before they occur.
Key benefits include:
- Faster approvals: AI automates routine tasks, reducing turnaround times by up to 50%.
- Improved accuracy: Error rates drop by 30–40% as AI handles data validation and compliance checks.
- Smarter decisions: AI evaluates trends and historical data for better task assignments and approvals.
- Scalability: Easily manages growing volumes and complex workflows.
Examples like Microsoft Copilot Studio and PageProof Intelligence™ show how AI saves hours per task, speeds up processes, and reduces costs. By combining AI with human oversight, businesses can focus on high-impact decisions while maintaining control and efficiency.
How To Use AI Workflows to Automate ANYTHING (Beginner Friendly Method)
Main AI Features in Approval Workflow Tools
AI has revolutionized workflow automation, and its capabilities in approval tools showcase just how impactful it can be. These tools aren't just about streamlining processes - they're designed to adapt, learn, and evolve alongside your business, offering smarter solutions that go beyond simple automation.
Automated Task Assignment and Routing
Gone are the days of manually deciding who should handle what. AI steps in to analyze user roles, workloads, expertise, and past performance, ensuring tasks are assigned to the right person at the right time. For example, a $3,000 software purchase might be routed to the IT director for their technical insight, while a $7,000 furniture request heads to facilities management.
If an approver is unavailable, AI automatically reroutes tasks, keeping things moving smoothly. It monitors approval queues in real time, distributing tasks evenly to prevent bottlenecks and ensure faster processing. Over time, the system learns from patterns - if a specific type of request consistently goes to one individual, AI adjusts to route similar tasks directly to them, cutting down on delays and errors.
Smart Document and Data Analysis
AI takes the heavy lifting out of document review. It extracts key details, flags potential issues, and even suggests actions, saving countless hours of manual effort. Whether it's scanning a contract for compliance, summarizing lengthy documents, or highlighting critical terms, AI ensures decision-makers can focus on what truly matters.
Unstructured data like emails, PDFs, and scanned files are no problem for AI. Tools like PageProof Intelligence™ showcase this with features like Smart Tags, allowing users to search for creative content by describing it rather than relying on file names or manual tagging. This makes locating specific documents or assets quick and painless.
By summarizing content, AI helps decision-makers zero in on essential details, avoiding the need to wade through repetitive or boilerplate language. This not only simplifies document review but also speeds up the entire approval process.
Predictive Analytics for Bottleneck Detection
AI doesn’t just react to problems - it anticipates them. With predictive analytics, organizations can shift from fixing issues after the fact to proactively addressing potential delays and inefficiencies.
The system analyzes patterns to forecast resource needs based on upcoming deadlines and historical trends. It highlights high-performing processes and pinpoints areas that need improvement. Additionally, risk assessments uncover links between approval patterns and potential future challenges.
As the system processes more data, its predictions become sharper, creating a cycle of continuous improvement. Organizations can refine their workflows based on AI-driven insights, leading to smoother operations and better overall performance.
Steps to Set Up AI-Powered Approval Workflows
Harnessing AI to streamline approval workflows can transform how your organization operates. By automating repetitive tasks and analyzing data in real time, you can create a system that’s not only efficient but also adaptable to your evolving needs. Here’s how to set up an AI-powered approval workflow step by step.
Review Current Workflow Processes
Start by taking a close look at your existing approval processes. Map out each step, noting who’s involved, how long each stage takes, and where delays or errors tend to occur. This documentation will serve as the blueprint for identifying areas where AI can step in.
Focus on tasks that are repetitive and follow clear rules - these are the easiest to automate. Examples include routing documents, validating data, approving routine expenses, or reviewing standard contracts. If you notice certain types of requests consistently follow the same decision-making path, those are prime candidates for automation.
Gather baseline metrics from your current system. Track things like average turnaround times, error rates, and how often bottlenecks occur. For instance, if approvals are frequently delayed due to manual checks or unavailable decision-makers, you’ll have a clear benchmark to measure improvements once AI is implemented.
Pay attention to feedback from users. Are there common pain points, like delays caused by document formatting errors or prolonged wait times for key approvals? Understanding these issues will help you prioritize which parts of the workflow to automate first. With this foundation in place, you can move on to selecting the right AI platform.
Choose the Right AI-Enabled Platform
The platform you choose will play a critical role in the success of your workflow. Look for one that can scale with your organization, handling current demands while being flexible enough to accommodate future growth.
Integration is another key factor. Your AI tool should work seamlessly with existing systems like CRM software, accounting platforms, or project management tools. This ensures data flows smoothly across your organization, reducing manual input and maintaining consistency.
Evaluate features that align with your business needs, such as:
- Customizable workflows to reflect your specific rules.
- Role-based permissions to ensure security.
- Real-time notifications to keep everyone in the loop.
- Comprehensive audit trails for compliance purposes.
Make sure the platform adheres to US standards, such as date formats (MM/DD/YYYY) and currency notations ($). Security should also be a top priority - look for encryption, strong access controls, and compliance with industry regulations.
Once you’ve selected and integrated the platform, test its performance and refine it through controlled trials.
Test and Improve AI-Driven Workflows
The implementation phase doesn’t end when the system goes live. In fact, this is where the real work begins - testing and refining the workflow to ensure it performs as expected. Start with a pilot program involving a small team to identify any issues without disrupting your entire operation.
Compare the system’s performance against your baseline metrics. Many organizations report productivity gains of 20–30% and error reductions of up to 30% after adopting automated workflows.
Collect feedback from users during the testing phase. Their input can highlight usability problems, missing features, or areas where the workflow could be adjusted.
"We test by ourselves and deliver a working bug-free solution." – Zee Palm
"We also use AI + Human resources heavily for code quality standards." – Zee Palm
Use this feedback to iterate and improve. Regularly review AI decision patterns, tweak rules where necessary, and fine-tune algorithms based on actual performance. Over time, this continuous improvement will make your system more accurate and efficient.
If your organization has unique needs, consider partnering with specialized development teams. Companies like Zee Palm, which focus on AI, SaaS, and custom app development, can create tailored solutions that align with industry requirements and local standards.
Finally, establish a routine for reviewing the system’s performance. As your business grows and changes, your AI workflows should evolve too, ensuring they continue to meet your needs while maintaining peak efficiency. By staying proactive, you’ll keep your approval processes running smoothly and effectively.
sbb-itb-8abf120
Key Benefits of AI-Powered Approval Workflows
AI doesn't just simplify processes - it reshapes how teams work together and get things done. By combining automation with intelligent decision-making, AI-powered workflows bring clear, measurable improvements to team efficiency and project execution.
Faster Turnaround Times
One of the standout advantages of AI is its ability to eliminate delays that plague manual workflows. Tasks that once took days - due to missed notifications, delayed handoffs, or waiting for approvals - are now handled almost instantly. Automated systems route requests immediately and even process routine approvals during off-hours, ensuring nothing gets stuck in limbo.
Organizations often report up to a 50% reduction in turnaround times compared to manual processes. For app development teams, this speed can be a game-changer. Features that used to take weeks to greenlight can now move through the pipeline in a matter of days. Leading AI platforms show how hours are saved on every approval, cutting costs and accelerating project timelines.
These time savings ripple across entire projects. Routine tasks like code reviews, design approvals, and budget sign-offs no longer require constant oversight, allowing teams to focus on innovation. The result? More predictable development cycles and faster delivery of projects to clients.
Better Collaboration and Communication
AI-powered workflows bring a level of clarity that manual processes simply can't match. Every team member knows exactly where an approval stands, who needs to act next, and when decisions are due. This transparency eliminates the confusion, miscommunication, and finger-pointing that can derail progress.
Real-time notifications ensure that the right people are always in the loop. For example, when a design requires feedback, only the relevant reviewers are notified. Once approval is granted, the entire project team is updated immediately. No more blanket emails or unnecessary distractions - just focused, efficient communication.
This visibility also fosters accountability. Delays are immediately noticeable, encouraging faster responses without the need for constant managerial oversight. For distributed teams working across time zones, AI workflows enable seamless collaboration. Work progresses overnight, and team members can review updates first thing in the morning, keeping projects on track regardless of location.
Scalability and Flexibility
As organizations grow, traditional approval systems often struggle to keep up. What works for a small team can quickly become unmanageable with larger groups or more complex projects. AI-powered workflows, however, scale effortlessly. Whether you're handling a handful of approvals or thousands, the system maintains the same level of efficiency and reliability.
This adaptability goes beyond just volume. AI workflows can adjust to evolving business needs without requiring a complete system overhaul. If approval hierarchies shift or compliance rules change, the workflow logic can be updated without retraining your entire team.
For specialized industries, this scalability is particularly important. Whether it's healthcare apps that require strict compliance or EdTech platforms that demand rapid iteration, AI workflows support complex, fast-paced environments. Some teams have even managed to build and release features within a week, showcasing how AI enables them to meet tight deadlines and ambitious goals.
Manual Approval WorkflowAI-Powered Approval WorkflowFrequent delays and bottlenecksQuick, streamlined processingRequires manual routing and follow-upsAutomated routing and notificationsStruggles to scale with team growthHandles increased volume effortlesslyLimited compliance trackingMaintains detailed audit trails
The Future of AI in Approval Workflows
The future of AI in approval workflows is shaping up to be transformative, with advancements expected to redefine how tasks are managed. Over the next 3–5 years, AI is set to tackle more complex decision-making by analyzing unstructured data and learning from historical outcomes. This evolution paves the way for smarter, more efficient workflows.
Industries like healthcare, edtech, and SaaS stand to gain the most from these changes. Automated workflows not only cut delays and reduce errors but also ensure compliance. By taking over routine approvals, AI allows teams to focus on more strategic, high-impact tasks.
Emerging technologies are further enhancing AI's potential. Large Language Models (LLMs) bring advanced natural language processing and intelligent document analysis into the mix. Meanwhile, agent-based frameworks are streamlining multi-step approval processes. These tools amplify the predictive capabilities and smart document analysis mentioned earlier, and early implementations are already showing significant efficiency improvements.
A hybrid approach, where AI and humans collaborate, is also gaining traction. AI takes care of routine, data-heavy decisions, while humans oversee more complex cases. This partnership ensures efficiency and compliance without compromising on strategic judgment.
Organizations creating custom AI-powered workflows are turning to experts like Zee Palm. With over a decade of experience and a portfolio of more than 100 projects, they address challenges across industries - from HIPAA-compliant healthcare approvals to adaptive content approvals in edtech and secure smart contract approvals in Web3.
Early adopters of these workflows are already seeing impressive results, with productivity boosts of up to 30% and error reductions ranging from 25–40%. As AI continues to evolve, these benefits are expected to grow, making intelligent workflow automation a key driver of business success.
FAQs
How does AI process unstructured data in approval workflows, and what are the benefits compared to traditional methods?
AI handles unstructured data in approval workflows by leveraging tools like natural language processing (NLP) and machine learning (ML). These technologies sift through information from emails, documents, and other non-standard formats, transforming it into usable insights. The result? Decisions are made faster and with greater accuracy, cutting down on the need for manual effort.
Unlike traditional methods, AI streamlines processes by automating repetitive tasks, reducing errors, and maintaining consistency. It also empowers businesses to manage massive amounts of data effortlessly, saving both time and resources while boosting overall productivity.
What should I look for in an AI-powered approval workflow tool?
When choosing an AI-driven approval workflow tool, prioritize features that simplify decision-making and minimize manual work. Key aspects to consider include automation tools for handling repetitive tasks, smart analytics to enhance decision accuracy, and flexibility to adapt to your business's unique requirements.
It’s also crucial to select a platform that integrates smoothly with your current systems and offers strong data protection measures to safeguard sensitive information. Collaborating with skilled developers, such as the team at Zee Palm, can ensure the solution is tailored to meet your specific needs efficiently.
What steps should businesses take to transition from manual to AI-powered approval workflows, and how can they test and refine these systems effectively?
To integrate AI-powered approval workflows effectively, businesses should begin by pinpointing repetitive tasks and decision-making processes that are ideal candidates for automation. Partnering with seasoned experts, such as the team at Zee Palm, can help ensure the system is customized to fit your unique requirements.
The process of testing and improving these workflows requires careful initial testing, continuous performance tracking, and regular updates based on user feedback. Blending AI-generated insights with human supervision not only enhances precision but also ensures the system stays aligned with your business objectives.
Related Blog Posts

Cluster Communication vs. Synchronization
Cluster communication and synchronization are the backbone of distributed systems, ensuring reliability and efficiency in modern applications. While they work together, they serve distinct purposes:
- Cluster Communication: The exchange of messages between nodes to coordinate tasks, share resources, and detect failures.
- Synchronization: Ensures all nodes maintain a consistent state, preventing data mismatches and conflicts.
Key Differences:
- Communication focuses on message flow for coordination.
- Synchronization aligns configurations and data across nodes.
Both are critical for high-availability systems like SaaS platforms, IoT networks, and healthcare solutions. Communication drives node interactions, while synchronization ensures consistency. Together, they create systems that handle failures, scale efficiently, and meet performance demands.
AspectCluster CommunicationSynchronizationPurposeMessage exchange for coordinationConsistent state across nodesExamplesHeartbeats, message passing, service meshesData replication, configuration updatesFailure ImpactConnectivity issues, degraded performanceData corruption, mismatched configurations
Understanding both ensures reliable, scalable systems for industries where uptime and accuracy are critical.
How Clusters Work in Distributed Systems: A Deep Dive
Cluster Communication: How It Works
Cluster communication is the backbone of how systems maintain smooth and uninterrupted operations. It relies on several methods working in harmony to ensure system integrity and performance. Let’s dive into the key methods and their roles in enabling efficient communication.
Communication Methods
- Heartbeat signals: These are periodic status messages that confirm a node is operational. If a node stops sending heartbeats, it triggers an immediate failover to maintain system functionality.
- Message passing: This method facilitates data exchange, workload delegation, and overall system coordination.
- Communication protocols: Protocols like TCP/IP handle network interactions, ensuring reliable data transfer and optimizing routing to manage latency.
The choice of communication method often depends on the application's needs. For instance, real-time systems may prioritize low-latency protocols, while data-heavy applications focus on high-throughput channels to manage large message volumes effectively.
Main Functions of Communication
Building on these methods, cluster communication enables critical functions that keep systems running smoothly:
- Node awareness: Each node maintains a real-time understanding of the cluster's health and capacity. This awareness allows for intelligent decisions about workload distribution and resource allocation.
- Failover support: Proactive communication detects node failures and coordinates recovery. If a node becomes unresponsive, the system immediately notifies other nodes, redistributing workloads within seconds to avoid service interruptions.
- Dynamic load balancing: Continuous communication between nodes ensures workloads are evenly distributed, enhancing performance and preventing bottlenecks.
- Distributed workflows: Collaborative workflows across nodes are streamlined through constant inter-node communication.
Communication Examples in Practice
These methods are integral to various real-world systems, showcasing their versatility and importance:
- Message queues: Tools like RabbitMQ and Kafka are vital for SaaS platforms, enabling reliable asynchronous messaging. Producers and consumers operate independently, ensuring message delivery while supporting scalability and resilience.
- Service meshes: Platforms like Istio and Linkerd manage communication within Kubernetes clusters. They handle traffic routing, load balancing, and security enforcement, creating a robust communication layer for complex distributed applications.
- IoT platforms: Lightweight protocols such as MQTT and CoAP are designed for efficient device-server communication, especially in bandwidth-constrained environments.
In NetScaler clusters, communication mechanisms adapt dynamically. For instance, when configuration differences exceed 255 commands, the system initiates full synchronization to ensure consistency. Smaller updates, however, use incremental synchronization to minimize system disruption.
A quorum-based approach is another critical example. By requiring a majority (n/2 + 1) of active nodes, this method prevents split-brain scenarios and ensures consistent decision-making.
Modern systems also use data sharding with cluster affinity, which processes data close to its storage location. This reduces latency and boosts performance, though it introduces additional complexity for cross-cluster communication requirements.
Synchronization: Methods and Objectives
After discussing effective node communication, let’s delve into how synchronization keeps a distributed system functioning as a unified whole. While cluster communication focuses on messaging between nodes, synchronization ensures that all nodes operate with the same state. This is crucial for avoiding instability when nodes go offline, receive updates, or join the cluster for the first time.
Types of Synchronization
There are two main approaches to synchronization: full synchronization and incremental synchronization.
- Full synchronization is used when the changes between nodes surpass a certain threshold. It ensures complete consistency but requires the node to go offline temporarily during the process.
- Incremental synchronization, on the other hand, deals only with minimal updates, allowing nodes to stay operational throughout. This makes it the preferred choice for production environments where uptime is critical.
Configuration synchronization relies on a central coordinator, often the cluster’s IP address, to distribute updates to all nodes. Before any changes are propagated, quorum rules demand that a majority of nodes are active. This prevents issues like split-brain scenarios, where different parts of the cluster might make conflicting decisions.
State and data synchronization extends beyond configuration updates to ensure consistent application states. This includes elements like user sessions, database transactions, and real-time data. For instance, in healthcare systems, patient monitoring data must remain synchronized across all nodes so that medical staff always have access to the most current information, no matter which server they use.
Synchronization Objectives
The key goal of synchronization is to maintain data consistency across all nodes, ensuring users receive the same information regardless of the server handling their requests. It also supports cluster recovery by allowing failed nodes to automatically sync with the latest configurations and data upon rejoining. Additionally, synchronization facilitates smooth scaling by ensuring new nodes are fully updated before they begin handling traffic. These processes are essential for maintaining high availability and fault tolerance in systems where reliability is non-negotiable.
Synchronization Technologies
Several technologies and strategies are used to achieve effective synchronization:
- Distributed file systems such as NFS and GlusterFS provide shared storage solutions. These systems ensure that updates to files are instantly visible across all nodes, making them ideal for applications reliant on shared configurations or document storage.
- Consensus algorithms like Raft and Paxos are widely used to ensure agreement on state changes across distributed systems. These algorithms manage the complexities of decision-making when nodes fail or become temporarily unreachable. Raft, in particular, is favored for its simplicity compared to Paxos while still delivering strong consistency guarantees.
- Replication techniques involve copying data across multiple nodes to enhance redundancy and availability. Master-slave replication sends all changes from a primary node to secondary nodes, while master-master replication allows multiple nodes to handle writes simultaneously. The choice between these methods depends on whether consistency or availability is the higher priority for your application.
In 2023, organizations running Kubernetes clusters with Istio service mesh adopted federated synchronization strategies to manage session data across clusters. This approach improved the scalability and reliability of microservices-based applications but also introduced additional complexity in maintaining cross-cluster data consistency.
sbb-itb-8abf120
Communication vs. Synchronization: Key Differences
Understanding the distinction between cluster communication and synchronization is essential for building reliable distributed systems. While these two concepts often work together, they serve unique purposes and rely on different mechanisms.
How Communication and Synchronization Differ
Cluster communication is all about the exchange of information between nodes - sending messages and data to coordinate tasks across the system. On the other hand, synchronization ensures that all nodes are aligned in terms of configuration and data, preventing conflicts and maintaining consistency.
The key difference lies in their focus: communication facilitates the flow of information, while synchronization ensures that all nodes remain in a consistent state. While communication can sometimes be stateless (like simple message exchanges), synchronization always depends on communication to share and apply state changes effectively.
How They Work Together
Communication and synchronization are interconnected, forming the backbone of cluster reliability. Communication enables the exchange of updates, while synchronization ensures that these updates result in a consistent system state. Without reliable communication, updates can't propagate. On the flip side, synchronized states make future communication more dependable.
Take AWS CloudHSM clusters as an example: communication happens when a client tool sends commands to HSM nodes, while synchronization replicates keys, users, and policies across nodes to maintain consistent cryptographic operations. Similarly, in Kubernetes multi-cluster setups, service meshes like Istio handle cross-cluster communication, but synchronization mechanisms are needed to ensure consistent data and configurations.
This interplay between information exchange and state alignment is critical for creating high-availability systems.
Side-by-Side Comparison
AspectCluster CommunicationSynchronizationDefinitionExchange of information/messagesEnsuring consistent state/configurationPurposeCoordination and resource sharingData consistency and reliabilityProtocols/TechnologiesService meshes, APIs, messagingState synchronization, configuration management, replicationImpact of FailureConnectivity issues, degraded performanceData loss, configuration drift, outagesExample ScenariosAPI calls, service discoveryConfiguration synchronization, data replication, failover
Failures in communication often lead to connectivity issues or reduced performance, as nodes struggle to exchange information. Synchronization failures, however, can have more severe consequences, like data corruption, mismatched configurations, or even security vulnerabilities that threaten the cluster's integrity.
For instance, in Citrix ADC clusters, nodes returning to the cluster are first detected via communication. Then, synchronization occurs - either fully if significant differences exist or incrementally for minor updates. This example underscores how synchronization directly influences system availability and resilience.
Best Practices for Implementation
Implementing effective cluster communication and synchronization demands strategic planning and a thoughtful approach to system design. The aim is to build systems that remain reliable under pressure, handle failures gracefully, and perform efficiently.
Building High-Availability Systems
To ensure a system can handle high demand, clusters should be designed to balance communication and synchronization effectively. Techniques like load balancing combined with data sharding help distribute workloads evenly, reducing the strain on individual clusters and minimizing cross-cluster traffic. Using asynchronous messaging can further improve responsiveness by decoupling components.
When it comes to synchronization, you have two main options: full synchronization and incremental synchronization. Full synchronization guarantees strong consistency but can lead to downtime during large updates. Incremental synchronization, on the other hand, is faster and less disruptive but may introduce brief inconsistencies. Choosing the right approach depends on your system's tolerance for inconsistency versus downtime.
Service mesh architectures, such as Istio, can simplify the management of routing, load balancing, and security policies across clusters. However, while service meshes streamline communication, they don’t inherently solve data consistency issues. Additional mechanisms are required to ensure robust synchronization. These strategies naturally set the stage for effective failure management, which is vital for maintaining system health.
Handling System Failures
A robust system design must account for failures, ensuring data integrity and continuous operation. Failures in communication can lead to problems like data inconsistencies, missed updates, or even split-brain scenarios. To mitigate these risks, implement redundant communication paths and use heartbeat mechanisms to enable automatic failover and recovery.
Real-time monitoring is essential for identifying and addressing issues quickly. Tools like Prometheus and Grafana offer a detailed view of cluster health, while log aggregation platforms like the ELK stack provide critical insights. For synchronization tasks, solutions like etcd and Zookeeper are widely used to manage distributed coordination and key-value storage.
When a failed node rejoins the cluster, it’s crucial to perform a configuration comparison to identify discrepancies. Depending on the level of divergence, you can choose between full synchronization or incremental updates. To prevent inconsistent states from impacting the cluster, ensure that nodes are fully synchronized before they become operational again.
Applications in SaaS, IoT, and Healthcare
The principles of communication and synchronization are critical across industries. SaaS platforms rely on APIs for microservice interactions and distributed caches for managing session data. IoT systems require seamless coordination between edge clusters and central servers. Meanwhile, healthcare applications demand secure, real-time synchronization to manage sensitive data.
In healthcare, the stakes are particularly high. Systems managing patient data must ensure both security and reliability, whether for telemedicine platforms or electronic health record (EHR) systems. Compliance with regulations like HIPAA adds layers of complexity, requiring encrypted communication and rigorous synchronization protocols.
One example of these principles in action is Zee Palm’s work in healthcare technology. With over 100 projects delivered, their team has developed high-availability solutions for healthcare and AI-driven medical apps. By leveraging redundant cluster architectures and secure synchronization protocols, they’ve achieved 99.99% uptime while meeting strict regulatory standards. Their approach uses multi-region clusters with encrypted communication and real-time data synchronization, ensuring both performance and compliance.
As systems grow to span multiple data centers or geographic regions, the interplay between communication and synchronization becomes even more critical. Increased network latency and data consistency challenges demand advanced conflict resolution mechanisms, making these best practices essential for scalable, high-availability systems.
Key Takeaways
Grasping the concepts of cluster communication and synchronization is crucial for creating reliable distributed systems that can meet the challenges of modern applications. Here's a quick recap of their roles and relationship.
Main Differences and Connections
Cluster communication is all about exchanging messages between nodes, while synchronization focuses on keeping their data states aligned. Think of communication as the delivery system and synchronization as the process that ensures everything runs smoothly and consistently.
These two elements are closely tied together. Strong communication channels are the backbone of synchronization, enabling nodes to coordinate actions and update shared states. Without reliable communication, synchronization falls apart. On the flip side, even flawless communication without proper synchronization can lead to data inconsistencies and system breakdowns.
Impact on Modern App Development
With the rise of multi-cluster and multi-cloud architectures, understanding both communication and synchronization has become even more critical. Today’s applications, especially in SaaS, IoT, and healthcare, demand systems that can achieve near-perfect uptime - 99.99% or more. These high standards make mastering these concepts a must for building systems that can scale and perform reliably.
Deploying systems across different geographic regions adds another layer of complexity. Challenges like network latency and maintaining data consistency require advanced conflict resolution strategies. This is where expertise in both communication and synchronization becomes indispensable for designing systems that can handle global demands.
Zee Palm's High-Availability System Experience
A great example of these principles in action is the work done by Zee Palm, a company with a proven track record in distributed systems. With over 100 projects and 70+ clients, their 13-person team - led by 10+ expert developers, each with more than a decade of experience - has tackled some of the toughest challenges in the industry.
Zee Palm specializes in creating high-availability systems by combining established technologies with custom solutions tailored to specific industries. Their projects span AI platforms, SaaS applications, healthcare systems, and IoT technologies, all of which rely heavily on effective communication and synchronization to ensure reliability and meet strict regulatory standards.
Their expertise includes deploying service meshes for smooth communication, using distributed databases to maintain data consistency, and designing custom synchronization protocols that scale and tolerate faults. With this well-rounded skill set, Zee Palm consistently delivers systems that meet the exacting demands of modern distributed applications.
FAQs
How do cluster communication and synchronization work together to improve system reliability and performance?
Cluster communication and synchronization are the backbone of distributed systems, working together to ensure reliability and smooth operation. Cluster communication allows nodes within the system to exchange data and messages, enabling them to collaborate and efficiently share tasks. Meanwhile, synchronization keeps all nodes aligned, ensuring consistency and avoiding conflicts or data loss.
When communication and synchronization are seamlessly integrated, systems can manage complex workloads, stay highly available, and perform well even under heavy pressure. These two processes depend on each other: without reliable communication, synchronization falters, and without proper synchronization, communication can lead to inconsistencies. Together, they form the foundation of scalable and fault-tolerant systems.
What factors should you consider when deciding between full synchronization and incremental synchronization in distributed systems?
When deciding between full synchronization and incremental synchronization in distributed systems, it's important to weigh your system's unique needs and limitations.
Full synchronization involves transferring the entire dataset, ensuring complete consistency across systems. This method is ideal when accuracy is paramount, but it can be resource-heavy and time-consuming. In contrast, incremental synchronization updates only the changes made since the last sync. This approach is faster and more efficient, though it may not provide the same level of thoroughness.
Here are some key factors to consider:
- Data volume and update frequency: For systems handling large datasets with frequent updates, incremental synchronization can be a more practical choice.
- Network bandwidth and system capacity: Full synchronization can demand significant bandwidth and processing power, while incremental synchronization is less taxing on resources.
- Consistency needs: If maintaining absolute consistency is non-negotiable, full synchronization might be the better fit.
By carefully evaluating these aspects, you can choose the synchronization method that best supports your system's performance and reliability goals.
How do protocols like TCP/IP and tools like service meshes improve cluster communication efficiency?
Protocols like TCP/IP and tools like service meshes are essential for ensuring smooth and efficient communication within clusters. TCP/IP serves as the backbone, providing a reliable framework for transferring data packets between nodes. This ensures that even in complex network setups, information is exchanged accurately and efficiently.
Service meshes take things a step further by optimizing communication between microservices within a cluster. They handle critical tasks such as load balancing, service discovery, and security measures like encryption and authentication. By doing so, they reduce latency and maintain seamless interactions between services. Together, TCP/IP and service meshes create a powerful communication system that supports the high performance and scalability required for cluster operations.
Related Blog Posts
Ready to Build Your Product, the Fast, AI-Optimized Way?
Let’s turn your idea into a high-performance product that launches faster and grows stronger.