Insights from Zee Palm's Team
We talk about products, app development, and next-generation apps.

Using Feedback Loops to Perfect Your SaaS Product
After developing your MVP or prototype and gathering initial feedback, the next step is to refine your product based on what users are telling you. Feedback loops help you refine and perfect your SaaS product. Let’s dive into “How” you can make the most of this feedback
Define your Feedback Goals
Start by clarifying what you want to achieve with your feedback. Are you trying to gauge the usability of a new feature, or are you testing the core functionality of your product?
For instance, if you’ve introduced a new dashboard, your goal might be to see if users find it intuitive. This clarity will help you craft precise questions and target the feedback you need. Think of it like setting a roadmap—knowing where you want to go makes it easier to get there.
Set Up Feedback Channels
Make it easy for users to share their thoughts. Integrate feedback options directly into your product, such as a feedback button or a quick survey after a key interaction. You can also use email or community forums to gather insights. The key is to make it simple and non-intrusive. For example, a quick pop-up asking users to rate their experience after using a feature can be very effective.
Ways users can provide feedback:
- In-app feedback buttons
- Quick surveys
- post-interaction
- Email feedback requests
- Community forums
- Social media polls
- Beta testing programs
- User interviews and focus groups
Consistency is key when collecting feedback. Set up regular intervals for feedback collection, and be specific about what you’re asking. For example, if you’ve released a new feature, ask users targeted questions about that feature’s ease of use, effectiveness, and any issues they encountered. Regular feedback helps you build a clearer picture of user satisfaction and pain points over time.
Effective Ways to Use Feedback at Early Stages
Prototyping Stage: Test Assumptions and Design
Start by sharing your prototype with a small group of users. Watch how they use it—are they finding it intuitive? Do they get stuck anywhere? Use their feedback to iron out any wrinkles and make sure your design makes sense to them. Another fun way to get feedback is through interactive demos. These demos show off your key features without being fully functional. Seeing how users react to these demos can help you spot design flaws or usability issues early on.
MVP Stage: Validate Functionality and Market Fit
Roll out your MVP to a wider group of users. This is where you get to see how well your product really works. Gather feedback on usability, features, and overall satisfaction. This will help you understand what’s working and what’s not. Keep an eye on how users are interacting with your MVP. Analytics tools can show you which features are popular, how users navigate your product, and where they’re running into issues. There are lots of analytic tools available off the shelf such as Google Analytics and Mixpanel.
Implement Changes
Once you’ve gathered feedback, it’s time to act on it. Prioritize the issues and suggestions based on their impact on user experience and business goals. Start with the most critical problems that affect user satisfaction or hinder functionality. Implement changes incrementally and test each update thoroughly before rolling it out. This iterative approach helps you avoid major disruptions and ensures that each change positively impacts the product.
Keep your users in the loop about the changes you’re making. Communicate updates regularly through release notes, emails, or in-app notifications. Let users know that their feedback is valued and directly influencing the product's development. Transparency builds trust and encourages more users to participate in the feedback process. For example, a brief update message highlighting the new features or fixes based on user feedback can make users feel more connected and appreciated.
Example
Instagram regularly updates users about new features and changes through in-app notifications and blog posts. They often highlight how user feedback has led to specific updates, such as new filters or editing tools, making users feel connected to the product's evolution.
Continuous Feedback Loop
Feedback isn’t a one-time thing. Keep the loop going by regularly collecting, analyzing, and acting on new feedback. This continuous process helps you keep improving and ensures your product stays aligned with user needs. By maintaining a strong feedback loop, you’ll not only enhance your product but also build a loyal user base that feels heard and valued. Keep iterating, stay responsive, and watch your SaaS product evolve.

Analyzing Market Trends to Validate Your SaaS Idea
Now that you've done the groundwork—market research, competitor analysis, identified your target audience, and understanding their pain points. The next crucial step is to validate your SaaS idea by diving into market trends. This helps you ensure your idea not only fits current needs but also aligns with future opportunities.
Fake Door Test:
Think of the fake door test as a sneak peek into how much people might want your SaaS before you even build it. Set up a simple landing page or an ad that talks about your idea and see how many people show interest.
1. Create a webpage: Describes your SaaS product and includes a way for visitors to express interest—like signing up for a waitlist.
2. Measure Interest: Check how many sign-ups or clicks you get to see if people are actually excited about what you’re offering.
Example
Dropbox created a simple video explaining their product and set up a landing page to capture email sign-ups. This approach validated user interest and helped them build a substantial waiting list before the official launch.
Identifying Key Trends
Understanding and identifying key trends is crucial for validating your SaaS idea. It helps you stay relevant and seize opportunities that can make your product stand out.
AI and Machine Learning
- AI is popping up everywhere and SaaS products are no exception. Integrating AI into your offering can seriously boost how personalized and automated your service is.
- In fact, 87% of SaaS companies have seen growth thanks to AI-driven personalization. It’s a game-changer for keeping customers engaged and happy.
- You don't have to invest in building AI models from scratch, OpenAI API and similar models including Gemini, etc can be time-saving and extremely beneficial.
Boosting Data Security and Privacy
- With cyber threats getting trickier every day, there's a big push for better data security and privacy in SaaS.
- Companies are really stepping up their game, investing in top-notch security measures and making sure they’re up to date with regulations like GDPR.
- It’s all about making sure customer data is safe and handled responsibly. After all, building trust with your users means ensuring their information is secure and protected.
Video and Interactive Content
- Videos capture attention better than text, making them ideal for explaining complex features.
- Tutorials, demos, and walkthroughs can help users grasp your product’s functionality more easily.
- Videos improve your search engine rankings, attracting more visitors.
Analyze Competitors and Substitutes
To get a good grip on your market, start by checking out what your competitors are up to.
Identify Competitors: Make a list of who’s directly competing with you and who’s indirectly in the same space. This includes other SaaS products or services that tackle similar issues.
Evaluate Your Competition: See what your competitors do well and where they’re lacking. Check their customer reviews, features, pricing, and how they’re positioned in the market.
Find Gaps in the Market: Look for gaps in what they offer that you can fill. Maybe they’re missing a key feature, or their user experience could use a boost—these are chances for you to shine.
Consider Substitutes
It’s also smart to consider substitutes—other solutions people might use instead of your SaaS product:
- Find other products or services that solve the same problem as your SaaS.
- Check how well these alternatives meet customer needs. Are they falling short in any way?
- Use what you learn to position your product as a better choice. Showcase the unique benefits your SaaS offers that these substitutes don’t.
By diving into both competitor and substitute analysis, you’ll gather the insights needed to fine-tune your idea and ensure it stands out in the market.

Creating MVPs and Prototypes: The First Step in Bringing Your SaaS to Life
You've got your SaaS idea and pinpointed the core problem it solves. Now it's time to move from concept to reality, How do you begin without investing too much time and money upfront? That's where creating a Minimum Viable Product (MVP) and a prototype comes in, they let you test your concept without committing too much time or money. Here’s how they help validate your idea
It's a smart, straightforward way to test your idea and get real user feedback. In this section, we'll break down the steps to build an MVP and a prototype, focusing on practical tips to help you get started. Let's turn your idea into a real product, one easy step at a time.
Understand the Difference Between an MVP and a Prototype
Minimum Viable product is a fully functional version of your product with just enough features to solve the core problem and gather user feedback. It’s meant to test how well your idea works in the real world and usually requires more development time and resources.
A prototype is a preliminary model that looks and feels like the final product but doesn’t have full functionality. It’s used to test assumptions and visualize how your MVP will function. Prototypes are quicker and cheaper to make, helping you get early feedback on your concept.
When to use an MVP vs Prototype?
Use a prototype during the idea validation phase to explore and test your product concepts and design. It helps you visualize how your product might look and feel and allows you to gather early feedback on usability and design. This initial testing can guide adjustments and improvements before committing to full development.
Once your idea has been refined with a prototype, use an MVP to validate its functionality and market fit. An MVP is a working version of your product with just enough features to solve the core problem and gather real user feedback. It helps you assess how well your solution performs in the real world and determine if there’s demand for it, reducing the risk before investing further.
Prioritize Key Features:
You have already identified your target audience’s pain points, now highlight the top 3-5 features that are necessary to address the issue.
How to prioritize?
“The best product teams are those that focus on outcomes, not outputs. They prioritize features that will deliver the most value to the user”
- Marty Cagan, Founder Silicon Valley Product Group
Writing user stories is a popular technique, Write user stories for each feature to ensure they align with user needs. Validate these stories with potential users to confirm their relevance and importance.
There are lots of other frameworks, such as RICE, urgent vs important matrix, ICE scoring, etc. You can explore these frameworks further here. Remember, the framework you choose is a tool to help you make decisions—it’s okay to switch if you find that another method works better for your needs.
Develop a Prototype
A tangible prototype helps you validate your idea; it helps you visualize how your MVP will function and allows you to gather early feedback before full development.
Build a clickable prototype that demonstrates the core features of your MVP. This will help you test and refine your concept based on real user interactions.
Conduct Beta Testing
Beta testing involves releasing your MVP to a select group of users to gather detailed feedback and identify any issues.
- Distribute your MVP to beta testers who represent your target audience. Collect their feedback on usability, functionality, and overall experience.
- Analyze the feedback to identify common issues or suggestions for improvement.
Refine Based on Feedback
Now, take a close look at what users are saying and spot any recurring issues. Focus on fixing the big problems that affect user experience first. Make changes gradually and test each update to ensure it’s hitting the mark. Keep looping through this process: test, tweak, and test again. This way, you’ll steadily improve your product and show users that you’re listening and evolving based on their needs.
Example
Buffer, initially validated its idea by creating a simple landing page that described the product and allowed users to sign up for updates. After receiving significant interest, the team developed a basic version of the app with essential scheduling features. They engaged early adopters in beta testing, gathering valuable feedback that informed iterative improvements to usability and functionality. This approach enabled Buffer to refine its product based on real user needs, ultimately leading to its success in the market.

Conducting SWOT Analysis for Your SaaS Business
The world of Software-as-a-Service (SaaS) is a fiercely competitive landscape. Conducting a SWOT analysis is crucial for any SaaS (Software as a Service) business that wants to understand its competitive position and plan strategically. You can make informed decisions that drive growth and mitigate risks by evaluating your strengths, weaknesses, opportunities, and threats. This guide will equip you to conduct a thorough SWOT analysis for your SaaS business.
"A SWOT analysis is a useful methodological tool designed to help evaluate the strengths, weaknesses, opportunities, and threats of a business venture"
- Planning For Growth6: How To Scale Up Using A SWOT Analysis, Winnie Huang, FormSwift
Understanding the SWOT Framework
SWOT is a structured framework for analyzing your internal capabilities and external factors that influence your business. It stands for:
Strengths
Internal attributes that give your SaaS business an advantage. Could be your innovative technology, exceptional customer support, a strong brand reputation, or a cost-effective pricing model.
Weaknesses
Internal factors that disadvantage your business, such as limited development resources, a complex user interface, or a lack of marketing expertise.
Opportunities
External factors that your business could exploit to its advantage, such as Emerging market trends, potential partnerships, or competitor weaknesses.
Threats
External factors that could cause trouble for your business, such as increased competition, a changing regulatory landscape, or a potential economic downturn.
For a deeper understanding of the SWOT framework, Read here.
Conducting Your SWOT Analysis
Preparation
Begin by gathering a diverse group of stakeholders familiar with different aspects of your business. This could include product developers, marketing specialists, customer support representatives, and sales personnel. Define what you aim to achieve with this analysis. It could be entering a new market, launching a new product, or improving customer retention. Use internal data such as sales reports, customer feedback, and performance metrics. Supplement this with external data from market research, industry reports, and competitor analysis.
Brainstorming
Strengths & Weaknesses: Facilitate a brainstorming session to identify internal factors. Ask questions like: "What sets us apart from the competition?" or "What areas can we improve?" For instance, Salesforce’s diverse portfolio and strong revenue growth are significant strengths that have contributed to its market leadership , and despite its strengths, faces challenges like high marketing expenses and employee turnover.
Opportunities & Threats: Shift the focus to external factors. Prompt your team with questions like: "What emerging trends can we leverage?" or "What external factors could disrupt our business?" For example, the rising demand for AI presents numerous opportunities for SaaS businesses focused on AI solutions but SaaS companies often face threats from rapid technological changes and competitive pressures.
Prioritization
Once you’ve listed various factors, prioritize each element based on their potential impact on your business. Not all strengths are created equal, and some threats might be more pressing than others. Use a scoring system or ranking method to determine which factors hold the most weight for your business.
"By focusing on our most critical strengths and addressing the most significant threats, we can strategically position ourselves for success"
- Sarah Lee, Sales Director
Analyzing Your Findings
Strengths vs. Weaknesses
Leverage strengths to address weaknesses. For example, if your strength is outstanding customer support, leverage that expertise to create training materials and improve onboarding for new users, addressing a potential weakness in user experience. This comparison helps you understand what internal attributes you can rely on and what areas need improvement.
Opportunities vs. Threats
Develop strategies to exploit opportunities while mitigating threats. If there is a growing market demand for cloud solutions, you could invest in expanding your cloud services while simultaneously developing strategies to counteract threats like increased competition
Additional Considerations
Conduct SWOT analyses regularly to stay updated on your business's evolving position within the market. Based on your SWOT analysis, develop actionable strategies. For instance, if you identify a strong opportunity in a new market, create a detailed market entry plan. Engage with stakeholders, including employees, investors, and customers, to gather diverse perspectives and ensure buy-in for your strategic initiatives.
For a deeper understanding of additional consideration and how to present a SWOT analysis, Read here.
Case Study
Zoom
Zoom's video conferencing platform emerged as a clear leader during the COVID-19 pandemic. A key strength of Zoom was its user-friendly interface and reliable performance (Strength). However, as the demand surged, Zoom faced challenges in scaling its infrastructure to accommodate the influx of users (Weakness). Recognizing this, Zoom prioritized investing in server capacity and security protocols to address this weakness. Additionally, Zoom capitalized on the opportunity presented by the shift to remote work by expanding its marketing efforts and developing integrations with popular productivity tools (Opportunity). To Read a more detailed SWOT analysis of Zoom: Zoom SWOT Analysis.

The Importance of Surveys and Questionnaires in Validating Your SaaS Idea
In the fast-paced world of software as a service (SaaS), validating your idea before entering into development is crucial. This ensures that your product meets the needs of the market and stands a higher chance of success. This is where surveys and questionnaires come in – powerful tools to validate your SaaS idea before you invest significant time and resources.
"Building a SaaS product without validating your idea is like building a house without a blueprint. You might end up with something functional, but it may not be what people actually want or need."
- Rob Fitzpatrick, author of "The Mom Test"
Understanding the Market: Why Validation Matters
The SaaS landscape is filled with competition. To stand out, you need a product that solves a real problem for a specific target audience. But how do you know there's a problem worth solving and that your solution resonates? As Bill Gates famously said, “If you don't understand your customers, you won't have a business long.”
Here's where market understanding comes in. Traditionally, market research involved poring over data and industry reports. However, these often paint a broad picture that doesn't capture the nuances of customer needs and desires. This is where surveys and questionnaires step in. They allow you to directly engage with your target audience and unearth valuable insights you won't find in a report.
The Power of Surveys and Questionnaires
Surveys and questionnaires are your direct line to the minds of your potential customers. Through carefully crafted questions, you can:
Gauge interest
Is there a real need for your proposed solution? Surveys can help you understand how widespread the problem you're targeting is and if people are actively seeking a solution.
Identify pain points
What are your target customers struggling with? Surveys can reveal the specific frustrations and challenges they face, allowing you to mature your product to address them directly.
Refine your value proposition
What features matter most? Surveys can help you prioritize features and functionalities based on what resonates with your audience.
Price sensitivity
How much are people willing to pay? Surveys can provide valuable insights into customer willingness to pay, helping you develop a sustainable pricing model.
Crafting Effective Surveys and Questionnaires
"Not all surveys are created equal," says SurveyMonkey, a popular survey creation platform. To get the most out of your research, you need to craft effective surveys and questionnaires.
Target the right audience
Ensure your survey reaches the people who would actually benefit from your product. Look for online communities or social media groups relevant to your target market.
For example, if you're developing a new fitness app, target social media groups or forums frequented by fitness enthusiasts. This way, you'll gather feedback from people who are genuinely interested in your product and can provide valuable insights.
Keep it concise
People are busy. Aim for surveys that take no more than 3-5 minutes to complete. According to Pew Research Center, lengthy surveys can lead to respondent fatigue and decrease completion rates.
Mix question types
Balance multiple-choice questions with open-ended ones to gather both quantitative and qualitative data. Open-ended questions allow for richer insights and customer pain points in their own words.
Avoid leading questions
Don't phrase questions in a way that pushes respondents towards a specific answer.
Here's an example of a biased question: "Do you think our amazing new product will revolutionize the industry?"
A better question would be, "How do you see this new product impacting the industry?"
Test your survey
Before distributing your survey to a wider audience, run a pilot test with a small group to ensure the questions are clear and easy to understand.
Distributing and Analyzing Your Survey
Distributing your survey effectively is crucial to reaching the right audience. Consider promoting your survey on relevant social media groups and forums, leveraging an existing email list through email marketing, and posting it in online communities that allow survey submissions. Additionally, using survey platforms like SurveyMonkey or Typeform can streamline the creation, distribution, and analysis of your surveys. Once data is collected, analyze it for trends, identify common pain points, and gauge interest in your proposed solution. Pay close attention to open-ended responses to understand the "why" behind the data. Data visualization tools can help present your findings clearly and compellingly.
Combining Surveys with Other Techniques
While surveys provide quantitative data, combining them with other validation techniques can offer a more comprehensive view. For example, conducting user interviews and usability tests can provide qualitative insights that surveys might miss. Pre-selling your product through a landing page can also validate demand and gather early feedback. This approach ensures that your SaaS idea is validated from multiple angles, reducing the risk of failure.
Turning Insights into Action
The insights gathered from surveys and other validation methods should guide your development process. Prioritize features that address the most significant pain points and consider iterative development to incorporate user feedback continuously. For instance, Basecamp developed their project management tool based on their frustrations with existing solutions, iterating on user feedback to refine their product. Building a successful SaaS product is an iterative process. Use surveys and other validation techniques throughout the development cycle to ensure you're on the right track.
Case Studies
Zapier
Overview: Zapier, a tool that automates workflows by connecting different apps, successfully validated its SaaS idea by closely engaging with potential users.
Validation Process: The founders conducted informal surveys and interviews to understand the challenges users faced with integrating various web applications. They created a landing page to pre-sell the concept and gauge interest, collecting emails from interested users as a preliminary validation step. During beta testing, Zapier invited early users to test the product and continuously gathered feedback through surveys and user interviews.
Outcome: The initial validation efforts helped Zapier identify the most critical integrations and features. This user-centric approach allowed Zapier to refine its product effectively, leading to its success. Today, Zapier supports over 2,000 app integrations and serves millions of users worldwide.
Slack
Overview: Slack, a business communication platform, is a prime example of using surveys and feedback to validate and refine their SaaS product.
Validation Process: Initially, the founders identified a gap in the market for a professional communication tool that could replace emails and integrate various work tools. They conducted market research and used surveys to gather feedback from early users about their pain points with existing communication tools and their desired features in a new product. Slack's iterative development process, continuously refining the product based on user feedback, played a crucial role in its success. Features like searchable message archives and app integrations were added in response to user needs.
Outcome: Slack's approach to incorporating user feedback through surveys and direct communication led to a product that quickly gained popularity. The platform grew rapidly, and by 2021, Slack reported having over 12 million daily active users and was acquired by Salesforce for $27.7 billion.

How To Conduct Market Research For Your SaaS Idea
So, you’ve got a brilliant SaaS idea and are eager to bring it to life. But you don't jump straight to developing your product, You need to understand the market first. This means figuring out who your potential customers are, what they need, and who your competitors are.
Is Your Idea Trending or Drowning?
Check if your SaaS idea is aligned with current market trends. Are you tapping into a growing need or a hot new technology? Use tools like Google Trends or industry reports to see if interest in your niche is on the rise.
If the trend is moving away from what you’re offering or if there’s declining interest, Maybe its time to reassess. Look for reasons why interest might be waning and consider pivoting or enhancing your idea to better fit evolving demands
Types of Market Research
Let’s break it down into two main types of market research.
Primary Research is about getting information straight from the source– your potential customers. Here’s how you do it:
1- Conduct one-on-one interviews with your potential customers, you can start with your peers who fit your target audience, leverage your network, and use platforms like LinkedIn to reach professionals in your industry.
2- Join online communities and forums related to your SaaS niche on Reddit, Product Hunt, or specialized Slack channels. Look for groups focused on SaaS, startups, or your specific industry, Members often share valuable insights and opinions.
3- Surveys can also help you connect with your target audience, make interactive and user-friendly forms to gather insights about customers’ needs and opinions. There are plenty of free tools available in the market such as Google Forms, Typeform, and SurveyMonkey etc.
Secondary Research involves collecting data that is already out there, it's inexpensive and time-saving. Secondary research can be done by:
1- Analyze industry reports and studies produced by research organizations. They offer valuable insights into the competitive landscape and consumer behavior. Check out platforms like Gartner, IBISWorld, etc.
2- Check out existing analyses and statistics to understand market trends, consumer preferences, economic indicators, etc. We’ll discuss this further in later chapters.
3- See what your competitors are up to, and review their case studies, articles, and other publically available information. While it’s helpful to know your competitors, always make sure that you are following ethical ways to do it.
Identifying Your Target Audience
Define your ideal customer
Think about who you want to reach with your SaaS product. This means getting specific about demographics like age, gender, and income, as well as their job roles and the specific challenges they face.
Determine content preferences
What kind of content does your audience love? Are they into podcasts, articles, webinars, or something else? Knowing this helps you create content that they’ll actually engage with.
Find their online hangouts
Figure out where your audience spends their time online. Are they active on social media platforms like LinkedIn and Instagram, or do they prefer forums like Reddit and Quora? Maybe they’re part of specific professional networks. This will help you target your outreach strategy effectively.
By nailing down these details, you can create a solid foundation of research that will inform your product development and strategy, ensuring you’re meeting the real needs of your market.
For instance, if your product is a business solution, you might find that your target audience is primarily young professionals. In this case, LinkedIn would be a key platform to reach them, along with targeted groups on Reddit and specialized forums. By focusing your research on these channels, you can gather valuable insights about your audience's needs, preferences, and behaviors.
Collect and Analyze Data
Now that you’ve gathered information through primary and secondary research, it’s time to collect it all in one place. This includes:
1- Compile the responses from your surveys. Tools like Google Forms or SurveyMonkey can help you easily organize and export the data.
2- Summarize the key points from your one-on-one interviews. Look for common themes or concerns that your potential customers mentioned.
3- Gather all the relevant industry reports, market analyses, and competitor information you’ve found. Keep track of your sources for easy reference.
Data Analysis
With your data collected, the next step is to analyze it.
1- Use Analytical Tools, tools like Excel, Google Sheets, or more advanced software like Tableau can help you sort through the data and visualize trends.
2- Identify Trends and look for patterns in customer feedback. Are there recurring pain points or common needs? Understanding these trends will help you prioritize features for your product.
3- Beyond the numbers, try to understand the underlying reasons behind customer behaviors and preferences. To figure out why people love or don’t love your idea, dig into their specific reasons and contexts, and use that feedback to tweak and improve your idea by fixing issues and adding what they suggest.
By following these steps, you’ll not only validate your SaaS idea but also refine it to better meet market demands.

How to Identify Competitors in the SaaS Market
In the rapidly evolving SaaS market, identifying competitors is crucial for developing strategies that ensure your product stands out. Who are the other players in your game? What are their strengths and weaknesses? Effectively identifying your competitors allows you to anticipate market trends, refine your offerings, and ultimately, secure a stronger position and stand out from the crowd.
"73% of B2B buyers research competitor solutions before making a purchase decision."
- Decoding the B2B Buying Process, LeadGenius
Identifying Your Market Landscape
Before identifying competitors, you must understand the market landscape, like G2 Crowd and TrustRadius, to gather insights about the market's current state and future direction. This involves:
Define Your Value Proposition
What core problem does your SaaS solve? Who are your ideal customers? Having a clear understanding of your value proposition helps you identify competitors offering similar solutions to the same target audience.
Research Industry Trends
Look at industry reports and publications to understand your market's size and growth potential. This will give you a sense of how much competition you can expect.
Analyze Market Leaders
Who are the established players in your space? Familiarize yourself with their products, pricing models, and marketing strategies. This will give you valuable benchmarks for your own SaaS.
For a deeper dive into identifying your target audience in SaaS marketing, check out this helpful resource: Identifying Your Target Audience: A SaaS Marketing Essential.
Finding Your Direct Competitors
Direct competitors offer similar products or services and target the same customer base. To find them, Use tools like Google Keyword Planner or SEMrush to identify keywords relevant to your product and services. E Platforms like G2 Crowd, Capterra, and TrustRadius also list software solutions across various industries. Search for your target market and see which SaaS products pop up. These platforms often have user reviews that can provide valuable insights into competitor strengths and weaknesses. And most importantly, visit the websites of your identified competitors. Analyze their features, pricing plans, target audience messaging, and overall brand positioning.
If you’re launching a new CRM tool, direct competitors might include Salesforce, HubSpot, and Zoho CRM. These are established players with similar features and target markets.
Going Beyond the Obvious
Indirect competitors may offer different products but can fulfill the exact customer needs. Identifying these competitors requires a broader view of the market and customer behavior. Attend industry events and conferences to network with potential customers; follow industry influencers and thought leaders on social media and get a feel for the competitive landscape. Look at products that your potential customers might use as alternatives.
"63% of new businesses fail due to a lack of understanding of customer needs."
- The Innovator's Dilemma, Harvard Business Review
Time-tracking software might face indirect competition from project management tools like Trello or Asana, which offer integrated time-tracking features.
Analyzing Your Competitors
A thorough competitor analysis involves evaluating their strengths, weaknesses, opportunities, and threats (SWOT). Analyze your competitors' pricing models. Are they offering freemium plans, tiered subscriptions, or enterprise-level pricing? How does their pricing compare to yours? Look at your competitors' marketing channels. Do they focus on content marketing, social media advertising, or partner programs? Tools like Crunchbase and Owler provide insights into competitors’ financial health and business strategies.
For example, suppose a competitor offers a strong feature set but has a complex user interface. In that case, you can focus on creating a user-friendly experience with a slightly pared-down feature list.
For more competitor research in the SaaS industry, check out: Kicking off B2B SaaS Competitor Research
Building a Competitive Advantage
Use the insights gained from competitor analysis to build a unique value proposition (USP). Focus on differentiating factors such as superior customer service, innovative features, or better pricing models. Ensure your marketing strategies clearly highlight these advantages.
Zoom differentiated itself in a crowded video conferencing market by focusing on ease of use, reliability, and high-quality video, setting it apart from competitors like Skype and Google Hangouts.
In a real-world scenario, a Reddit user discovered that the SaaS product they were building had a direct competitor already established in the market:
Veljkoza [u/veljkoza]. r/SaaS on Reddit: I just found out that the saas that I'm building already exists, Reddit, 9 mo. ago.
Staying Ahead of the Curve
The SaaS landscape is constantly evolving. Here's how to stay ahead of the curve:
Monitor Industry Trends
Keep yourself updated on industry trends and emerging technologies. This will help you identify potential threats and opportunities to innovate your SaaS.
Track Competitor Updates
Regularly monitor your competitors' websites, social media channels, and press releases to stay informed about their latest developments.
Customer Feedback Loop
Actively solicit feedback from your customers. Use this feedback to improve your product and ensure it remains competitive continuously.
Adobe continuously evolves its Creative Cloud suite, adding new features and integrating emerging technologies like AI to stay ahead of competitors like Corel and Affinity. (Adobe (ADBE): Porter’s Five Forces Industry and Competition Analysis)
Bonus Section: Tools and Resources
Several tools can assist in competitive analysis:


Understanding Customer Pain Points: A Guide for SaaS Founders
Building a successful SaaS product involves more than just a brilliant product. It necessitates a deep understanding of your customer's pain points—those specific problems or challenges your product aims to solve.
"Nobody cares about your product. They care about their problem and how you solve it.”
- Aaron Levie, CEO of Box
What Are Customer Pain Points?
Customer pain points are the specific problems your potential customers face in their business operations. These can range from process inefficiencies to financial constraints or even dissatisfaction with existing solutions. Understanding these pain points is crucial because it enables you to mutate your product or service to meet actual needs rather than perceived ones.
Types of Customer Pain Points
Customer pain points typically fall into several categories:
Financial Pain Points
Cost issues, such as high subscription fees or unpredictable pricing models, require SaaS companies to offer transparent and flexible pricing to mitigate these concerns. For example, when Binary Stream Software faced customer complaints about its complex pricing, it introduced a more straightforward, tiered pricing model, significantly reducing churn rates.
Understanding these concerns is echoed in online communities like SaaS subreddits, where discussions about pricing models and finding the right value for customers are ongoing:
deleted [u/deleted]. r/SaaS on Reddit: Is it better to initially over-price or under-price your SaaS? B2B and B2C, Reddit, 1 yr. ago.
Productivity Pain Points
Problems that hinder efficiency, such as cumbersome software interfaces or a lack of integration with other tools. For instance, Slack identified that team communication was fragmented across different platforms. By offering an integrated, real-time messaging solution, they addressed a significant productivity pain point for many businesses.
Process Pain Points
Complicated or time-consuming processes that frustrate users. Companies like HubSpot have streamlined their onboarding processes to ensure new users can quickly and easily understand how to use their software.
Support Pain Points
Issues arise from inadequate customer support, such as slow response times or insufficient help resources. Offering comprehensive support options, including live chat and detailed FAQs, can significantly improve user satisfaction.
Identifying Customer Pain Points
Identifying these pain points involves a mix of data analysis and direct customer engagement:
Review Data Points
Analyze data from customer interactions, sales, and support tickets to identify common issues. For example, Salesforce uses customer feedback and support data to refine their offerings and address common pain points continually.
Conduct Surveys and Interviews
Directly ask your customers about their challenges. Offering incentives can increase response rates. Companies like Dropbox regularly survey their users to understand pain points and improve their products. For instance, a Quora discussion highlights how Dropbox leveraged user feedback and a referral program to grow its customer base rapidly.
Quora Prompt Generator (2023, Feb 21). How did Dropbox acquire so many customers in the beginning? In Quora.
Leverage Social Media
Monitor social media platforms and forums where customers discuss their challenges. This can provide real-time insights into emerging pain points. LinkedIn groups, for instance, are a valuable resource for understanding B2B customer needs.
Addressing Customer Pain Points
Once identified, addressing these pain points involves several strategies:
Iterative Development
Use the feedback to make continuous improvements to your product. This agile approach allows you to adapt quickly to changing customer needs. For instance, Atlassian constantly updates Jira based on user feedback to ensure it remains a leading project management tool.
Enhance Customer Support
Provide multiple support channels and resources. Zendesk, for example, excels in offering extensive support options, including live chat, email support, and a comprehensive help center.
Simplify Pricing
Offer transparent and flexible pricing plans. Netflix’s success can be partly attributed to its straightforward pricing model, which is easy for customers to understand and manage. Explores how SaaS and tech businesses can learn from Netflix’s pricing changes: What can SaaS tech business learn from Netflix’s pricing changes? How to develop your pricing over time?
Streamline Onboarding
Ensure that new users can quickly grasp how to use your product. This reduces initial frustration and increases the likelihood of long-term adoption. Companies like Canva have mastered this with intuitive tutorials and easy-to-navigate interfaces .
Real-Life Examples
Slack
Recognized the struggle in team communication tools and built an integrated platform that simplified collaboration. By addressing this central productivity pain point, Slack quickly became a go-to tool for teams worldwide. Read more about Slack's journey from a Startup to Unicorn.
Dropbox
Faced with the pain point of file sharing and storage inefficiencies, Dropbox provided a simple, user-friendly solution that allowed seamless file sharing and storage across devices. Their constant iteration based on user feedback has kept them ahead in the competitive SaaS market.
As highlighted in a Forbes article How Dropbox Solved a Huge Problem for Consumers, Dropbox's focus on user experience and adaptability has been instrumental in their success.

Hiring Your First Developer as a Non-tech Founder
Having a brilliant idea for a product is a good start, but you need more than just the idea to bring it to life. You need technical expertise and a solid execution plan to get something out of it. As a non-technical founder, this might sound daunting, but you're in good company. Stewart Butterfield, the founder of Slack, had no software engineering experience—he graduated with a psychology degree! Yet, by assembling a technical team with coding expertise, he successfully built Slack, a company valued at around $9 billion when Amazon explored acquiring it.
Other successful tech-based businesses founded by non-technical people include Pinterest, founded by Ben Silbermann, who studied political science, and Airbnb, co-founded by Brian Chesky and Joe Gebbia, both of whom had backgrounds in design. Even Alibaba, the global e-commerce giant, was founded by Jack Ma, an English teacher before becoming an entrepreneur. These examples show that with the right team and a clear vision, non-technical founders can build highly successful tech companies.
This guide aims to simplify the process for you, offering clear steps and practical advice to help you navigate each stage effectively, just like these successful founders did.
1. When is the Right Time to Hire?
Timing is critical when hiring your first developer. Here are key indicators:
MVP Validation: If your Minimum Viable Product (MVP) has been validated through user feedback and initial testing, it's time to hire a developer to refine and expand your product.As this article from Entrepreneur explains, "Once you have validated your MVP, it's time to bring on a technical co-founder or hire a developer to help you build out the full product."
Growth Bottlenecks: If your growth is hampered by technical limitations that you can't overcome, it's a clear sign you need a developer's expertise.
Consistent Demand: A steady stream of users or customers necessitates scaling your operations, requiring a developer to build the necessary infrastructure.
Strategic Advantage: When competitors are advancing technologically and you need to innovate to stay competitive, bringing in a developer is crucial.
2. Should You Hire?
Before deciding to hire a developer, consider these factors:
Budget Constraints: Assess your financial situation. Hiring a full-time developer can be costly, so ensure you have the budget to sustain this expense.
Alternative Solutions: Explore alternatives like no-code/low-code platforms, which might suffice for your initial needs without the complexity of hiring a developer.
Freelancers and Consultants: For short-term or specific projects, freelancers or consultants might be a more cost-effective and flexible option.
Outsourcing: Evaluate the potential of outsourcing development to specialized agencies, which can offer a range of skills and scalability without the overhead of in-house staff.
3. Who to Hire: Developer or Agency?
Once you've decided to hire, the next step is to determine whether to bring on an in-house developer or partner with a development agency.
Hiring an in-house developer gives you full control over the development process. You'll have someone who aligns with your company culture and is committed to your long-term vision. This can lead to a more cohesive team and a deeper understanding of your product. However, this option comes with higher upfront costs and the responsibility of managing an employee, which can be challenging if you lack technical expertise. Check out this guide on how to collaborate effectively with developers as a non technical founder.
On the other hand, partnering with a development agency can provide several advantages. Agencies offer access to a diverse range of skills and can scale their services according to your needs. This can result in faster turnaround times and the ability to tackle more complex projects. However, you might have less control over the development process, and communication can sometimes be a challenge. If you're considering this route, Zeepalm is an excellent option for outsourcing development work. They offer a comprehensive range of services and can help you bring your vision to life efficiently and effectively.
By carefully considering these options, you can make an informed decision that aligns with your startup's goals and resources.
4. How to Hire
Define Your Needs:
- Project Scope: Is it a simple MVP (Minimum Viable Product) or a complex, feature-rich application?
- Technical Skills: What programming languages and technologies are needed for your project (e.g., front-end, back-end, full-stack)?
- Budget: Can you afford a full-time employee, a part-time contractor, or a project-based freelancer? Consider freelance platforms like Upwork or Fiverr for individual developers, or Toptal or Gun.io for pre-vetted talent.
- Team Culture: What kind of work environment are you aiming to create? Remote or in-house? Look for someone who aligns with your company culture and values.
Writing a Job Description: Clearly outline the project requirements, technical skills needed, experience level, and desired qualities. Platforms like Stack Overflow offer templates for writing effective developer job descriptions.
Finding Candidates:
- Your Network: Reach out to your network of friends, colleagues, or advisors. Someone you trust might have a great recommendation.
- Online Job Boards: Utilize platforms like Stack Overflow Jobs, AngelList, or LinkedIn to find developers with the specific skillset you need.
- Technical Recruiters: Consider working with a recruiter specializing in finding tech talent.
The Interview Process
- Technical Screening: While a deep technical assessment might be difficult for a non-technical founder, consider online coding tests on platforms like HackerRank or Codility to gauge basic skills.
- Focus on Soft Skills: Assess communication skills, problem-solving abilities, cultural fit, and their ability to understand your vision. Prepare questions that delve into their thought process and approach to challenges.
- Trial Project: Consider a paid test project to evaluate not just technical skills, but also their ability to meet deadlines and follow your instructions.
Making the Offer: Once you've identified the best candidate, present a competitive offer with clear compensation details, benefits (if applicable), and project expectations. Equity might be an attractive option to incentivize your first developer, especially for startups.
5. How to Manage
Clear Communication: Clearly articulate the project vision, goals, and priorities. Break down tasks into manageable chunks and set realistic deadlines. Regular check-in meetings help ensure everyone's on the same page.
Embrace Agile Development: Consider Agile methodologies like Scrum, which promotes iterative development with short cycles of planning, development, testing, and feedback. This allows for flexibility and adaptation as the project progresses.
Utilize Project Management Tools: Platforms like Trello, Asana, or Jira help you visualize tasks, track progress, and manage deadlines effectively.
Invest in Learning: While a deep technical understanding is not essential, familiarize yourself with basic software development terminology and processes. This will help you communicate better with your developer and make informed decisions.
6. How to Keep Ownership
Document Everything: Document your vision, project requirements, and technical specifications. This will help avoid misunderstandings and ensure everyone is aligned.
Code Reviews (Partner Up): While you might need help understanding the code, partner with your developer to review high-level functionalities and architecture. This helps you maintain a basic understanding of how the system works and identify potential issues.
Learn the Basics of Code Version Control: Systems like Git allows you to track changes to your codebase. Understanding version control basics helps you maintain a clear history of the development process.
Conclusion:
Hiring your first developer can be challenging yet incredibly rewarding. By carefully assessing the time to hire, evaluating whether you need an in-house developer or an agency, and making informed decisions based on your startup’s needs and resources you can set your business on a path to success.

No-Code vs Code for Your Startup
Choosing between no-code platforms and traditional coding is a crucial decision for any startup. No-code platforms, with their user-friendly drag-and-drop interfaces, enable non-technical founders to quickly build and launch products. They are cost-effective and ideal for prototyping and MVPs. On the other hand, traditional coding offers flexibility and control, making it the go-to choice for highly customized and scalable solutions.
This post will serve as a framework to help you decide what approach caters best to your business.
Popular No-Code Platforms
- Bubble: Ideal for building web applications with complex workflows.
- Webflow: A powerful platform for designing and developing responsive websites.
- Airtable: Combines the functionality of spreadsheets and databases for versatile data management.
- Zapier: Automates workflows by connecting different apps and services.
- Adalo: Allows users to build mobile apps with a visual editor.
- Thunkable: Enables the creation of native mobile apps for both iOS and Android.
Picking the Right Solution:
Criteria
No-Code
Traditional Coding
Learning Curve
- Built for non-technical users with intuitive drag-and-drop features
- No programming skills are needed.
- Requires learning programming languages and frameworks
- May need to hire a developer
Development Speed and
Time to Market
- Rapid Development and Deployment
- Quick prototyping and launching of MVPs
- Longer development cycles
- Delayed time to market but ensures precise specifications
Flexibility
- Limited customization and scalability
- Difficult to implement specific features beyond platform capabilities
- Unparalleled flexibility and control
- Ideal for complex projects requiring unique features and extensive integrations
Scalability
- Get your product up and running quickly with pre-built functionalities.
- Scaling might be restricted or expensive for significant user/data increases
- to handle growing demands efficiently through code optimization and infrastructure scaling.
- Requires more time and resources
Performance
- Suitable for basic applications with pre-built functionality.
- Limited control over code can hinder performance optimization for complex features.
- Full control over code allows for optimization for peak performance even under heavy loads.
- Coding skills and performance optimization knowledge are necessary.
Maintainance
- The platform automatically handles bug fixes and security updates.
- May lack control over specific maintenance tasks or customization options.
- Your development team shoulders the responsibility for ongoing maintenance.
- Requires dedicated resources from your development team
Compliance with long-term vision
- May not support specific regulations or integrate with highly customized systems.
- May be sufficient for less stringent regulations.
- Allows for adapting to strict regulations and integrating with complex systems.
- May require additional resources for navigating complex regulations.
Integration complexity
- Connects easily with widely used tools and services through built-in connectors.
- Integrating with niche or custom systems might be challenging.
- Seamless integration with any system using APIs (Application Programming Interfaces).
- Coding knowledge is necessary for building and maintaining integrations.
Case Studies:
1. Comet, a freelancing marketplace built using the no-code platform Bubble, has raised €14 million in venture capital within 3 years and delivers over $800,000 in monthly recurring revenue. Read more about successful no-code startup companies.
2. Typeform's Journey from No-Code to Custom Coding
Typeform is an online form and survey-building platform. While it initially used a no-code platform to quickly build and launch its MVP, gathering user feedback without needing to write code from scratch.
Limitations:
As Typeform grew, the no-code platform couldn't handle the increasing number of users and data, limiting its ability to create advanced features and integrate with external services.
Transition to Custom Coding:
Typeform transitioned to custom coding, retaining their no-code built UI while migrating critical features to custom code. This hybrid approach allowed them to maintain user experience and achieve the scalability, flexibility, and performance needed for growth.
The custom codebase enabled advanced features, and better integrations, and supported Typeform's expanding user base, ensuring long-term success.
3. Streamify a live-streaming platform capable of handling millions of concurrent viewers and delivering high-definition, low-latency streams.
Why Code?
Streamify's founders understood that achieving their vision demanded complete control and optimization. No-code platforms, with their pre-built functionalities, wouldn't offer the flexibility and fine-tuning needed to ensure:
- Unparalleled Performance: Custom code lets you optimize for smooth, high-definition streams, even with many viewers.
- Massive Scalability: Build a foundation to handle millions of concurrent viewers without performance drops.
- Seamless Customization: Integrate with any platform and create unique features exactly as you envision them.
Traditional coding offers ultimate control for performance-critical apps (live streaming) but requires a skilled team and ongoing maintenance. Ideal for complex, high-growth startups.
Conclusion
The choice between no-code and code development depends on your startup's goals. No-code excels for rapid prototyping and user testing, while code offers control and scalability for complex features and long-term vision. Consider a hybrid approach, leveraging no-code for the initial launch and transitioning to custom code for critical features as your startup scales.
References:
Learn more about No-code technologies at:
https://www.zeepalm.com/blog/no-code-is-going-to-be-the-next-big-thing-heres-how
https://www.zeepalm.com/blog/onboarding-with-no-code-automation
Read about the rise of low-code and no-code platforms at:
https://medium.com/zee-palm/the-rise-of-no-code-and-low-code-platforms-695edf0374c9
How to Get Your First SaaS Customer
Ok, so you have successfully launched your initial product. Now the question is, How do you get your first customer?
First, you need to understand who your ideal customer is, think about your target market, and create detailed personas. Check out who your competitors are targeting too. With this information, you can build a beta program by recruiting testers who fit this profile. Gather their feedback and make improvements. Once your product is refined, you are ready to start getting those first paying customers.
Acquiring your first paying customers
1- Accessible pricing
Let's start by talking about pricing. Setting a price that's both competitive and attractive can be a game changer. Start by researching what your competitors are charging and then decide on a price point that offers value without underselling yourself. It’s important to consider what most people can afford, especially when you’re trying to build your initial customer base. Offering discounts for early adopters can also create buzz and bring in those first few customers who are willing to take a chance on your product.
Consider implementing a freemium model, where you offer a basic version of your product for free and charge for premium features. Alternatively, a free trial period can allow potential customers to experience your full product before committing to a purchase.
It's also smart to have different pricing tiers to cater to various customer needs. Think about a basic tier for those who just need the essentials and a premium tier for those who want all the bells and whistles.
HubSpot has a free CRM plan, then charges for their Starter, Professional, and Enterprise marketing, sales, and service hubs
2- Emphasizing Customer Experience
Dharmesh Shah, CTO of HubSpot, tweets:
❝Founders should obsess over the customer experience, which includes the product experience, brand experience, purchasing experience, community experience, and content experience. ❞
This means thinking about every way a customer interacts with your SaaS and making sure it’s all top-notch.
3- Manual Outreach
Actively reaching out to potential customers and building relationships is crucial for acquiring your first SaaS clients. Leverage your personal and professional network to get warm introductions to your target audience.
Building genuine relationships with potential customers will make them more receptive to your offering and more likely to become early advocates for your brand.
When Acme SaaS launched their project management platform, they complemented digital marketing with targeted manual outreach. The founders researched their ideal customers in tech, crafted personalized emails highlighting their pain points, and made direct calls to build rapport. This personal, multi-channel approach paid off, with several prospects agreeing to try Acme's platform.
The early customers acquired through manual outreach not only provided crucial product feedback, but also became advocates driving additional signups. By combining digital and manual outreach, Acme was able to land their first customers and lay the foundation for growth. The personal connections built through this process proved invaluable.
4- Engaging Online Communities
Online communities are like Walmart for finding your ideal customers. They're places where people with shared interests gather to discuss problems, share solutions, and seek advice. It's your job to be there, listening, learning, and adding value.
How to do it:
- Identify your target communities: Where do your ideal customers hang out? Is it Reddit, Facebook groups, LinkedIn groups, or specialized forums? Do some research to find out. A great resource to start with is this list of top SaaS communities: Top SaaS communities for networking and inspiration
- Become a valuable member: Don't just show up and start pitching. Contribute to discussions, answer questions, and offer helpful insights. Build trust and relationships.
"Focus on building relationships first, sales will follow."
- Jason Lemkin, Founder of SaaStr
- Share your knowledge: Position yourself as an expert. Create valuable content, such as tutorials, guides, or tips that address your target audience's pain points.
- Build relationships: Engage with other members. Comment on their posts, reply to their questions, and connect with them on a personal level.
- Find beta testers: If you're still in the development phase, look for opportunities to recruit beta testers from these communities. Offer early access in exchange for feedback. For a comprehensive guide on finding beta testers, check out this resource.
Remember, it's about building genuine connections, not just spamming your product. Be patient, and consistent, and focus on providing value first. As Nir Eyal, author of "Hooked," emphasizes, "People don't buy products, they buy better versions of themselves."
5- Referral Incentives
Word-of-mouth is one of the most powerful marketing tools out there. Happy customers are your best salespeople. So, why not incentivize them to spread the word?
“Word of mouth is the most effective marketing channel, but more importantly, it is the only thing that really shows that what you are building has any true value.”
- Lanai Moliterno, founder of Sozy
How to create a successful referral program:
- Offer attractive rewards: What will motivate your customers to refer their friends? Consider offering discounts, free upgrades, or exclusive perks.
- Make it easy to refer: Simplify the referral process. Provide clear instructions and make it easy for customers to share their referral link.
- Track referrals effectively: Use a referral tracking tool to monitor the performance of your program and attribute new customers to referrals.
- Promote your program: Don't assume customers will automatically know about your referral program. Promote it through email, social media, and in-app messages.
Looking for more info on starting a strong SaaS referral program? Check out this resource: How to Build a Winning SaaS Referral Program.
Bonus Tips:
To truly succeed, you need to listen to your customers and build a strong community around your product.
- Gather early feedback: Use surveys, interviews, and feedback forms to collect insights from your early customers. What do they love? What do they hate? What are their biggest challenges? Use this feedback to improve your product and marketing. A fantastic resource for gathering feedback on best practices is this Reddit thread:
nooj23 [u/nooj23]. R/SAAS on Reddit: Best Practices for Collecting Feedback from Your First Users? Reddit, 2 yr. ago.
- Foster community engagement: Create a space for your customers to connect with each other. A community forum or social media group can be a great place for customers to share tips, ask questions, and build relationships.
For a deep dive into building a community-driven SaaS, check out this insightful article: SaaS Communities: Fostering a Sense of Belonging to Drive Growth

How To Scale Your Business Organically
Once your startup is sustainable, it’s time to focus on scaling it. But what does scaling really mean? Unlike just growing, which typically involves pouring in more money and resources, scaling is about boosting your revenue without a comparable increase in costs. Understanding this difference is important so you can evaluate your business needs and choose accordingly.
Growth usually means expanding rapidly, but it comes with higher risks. Scaling, on the other hand, ensures that your business operations go smoothly. When you scale organically, you're setting your business up for lasting success. It's about smart, sustainable growth that prepares you for future challenges and keeps your operations running smoothly.
What is Organic Scaling?
Imagine you're tending to a garden. You don't rush to buy exotic plants or use chemical fertilizers. Instead, you focus on nurturing the soil, understanding your plants' needs, and creating an environment where they can thrive naturally. That's what organic scaling is for a business.
Organic scaling is about growing your business without relying on external factors like heavy advertising, aggressive sales tactics, or hefty investments. It's about maximizing your existing resources, strengthening your core competencies, and building a loyal customer base. Think of it as cultivating a thriving ecosystem for your business.
“Organic growth is about leveraging the existing customer base to acquire new customers through word-of-mouth and referrals.”
- Geoffrey Moore, author of "Crossing the Chasm”
When you scale organically, you're building a solid foundation that can weather storms. It's about sustainable growth, where the increased revenue naturally follows improved operations and a stronger brand. It’s a slower, steadier approach, but the results are often more enduring. For practical guidance on organic scaling, check out these six tips on organically scaling your business.
Key Strategies for Organic Scaling
Building a Strong Foundation
Building a thriving business starts with a solid foundation. Really know your customers – their likes, dislikes, and what keeps them up at night. Clearly communicate what sets your business apart and why people should choose you. Streamline your operations to deliver products or services efficiently and delight your customers. Finally, invest in your team, empowering them to innovate and excel. This strong base is where sustainable growth takes root.
Ever wondered how long it takes to build a solid foundation for your business? Check out this Reddit thread:
deleted [u/deleted]. r/Entrepreneur on Reddit: How long did it take you to build the foundation of your business? Reddit, 2 yr. ago.
Grow with Content & Social
Content is king in today's digital world. It's not just about selling; it's about building genuine connections. Content marketing means creating stuff that your audience loves, shares, and talks about. It's about giving value, becoming a trusted resource, and growing your fanbase.
- Developing a Content Strategy: Before diving into content creation, define your target audience, identify their pain points, and determine the type of content that will resonate with them.
“Commit to a niche; try to stop being everything to everyone.”
- Andrew Davis, Bestselling Author
Whether it's blog posts, videos, infographics, or podcasts, consistency is key.
- Leveraging Social Media: Social media platforms are powerful tools for distributing your content and building a community around your brand. Identify the platforms where your target audience hangs out, and create engaging content tailored to each platform.
“With so much attention paid to social media, it doesn’t matter if you’re a B2B firm targeting top executives or a B2C brand chasing Gen Z consumers—your audience is online.”
- 10 Ways to Leverage Social Media to Drive Results for Your Business, Quinn Schwartz
- Search Engine Optimization (SEO): Optimizing your content for search engines can help you reach a wider audience. You can improve your search engine rankings by using relevant keywords and optimizing your website structure. For a deeper dive into the importance of SEO for your business, check out: The Importance of SEO for Your Business
- Building Relationships: Content marketing is about building relationships. Engage with your audience, respond to comments, and foster a sense of community. Strong relationships can lead to loyal customers and advocates.
“As your audience’s trust of your brand increases, your content consumers begin to connect with your brand. They develop loyalty, and you develop a following. They share pieces that resonate with them and invite their friends, family members, and associates to follow you. You become a valuable resource..”
- How content marketing builds real relationships in the digital world, Anna Taylor
Maintaining a Good PR
“Publicity is absolutely critical. A good PR story is infinitely more effective than a front-page ad”
- Richard Branson, Co-Founder Virgin Group
A well-rounded strategy that combines traditional and digital marketing methods, along with maintaining good PR, is handy for businesses looking to scale organically. Traditional marketing channels like print advertising, direct mail, and local events effectively build brand awareness and reach specific markets. Digital techniques such as social media, email, and SEO offer global reach, targeted engagement, and measurable results.
Taking Calculated Risks
Scaling your business isn’t just about playing it safe—it’s about making smart moves that drive growth. As Neil Patel tweets:
❝ There may be harm in risk but there also regret in doing nothing. ❞
Scaling your business means making smart moves that drive growth. Expanding into new markets requires homework and adapting your approach, but it can boost your scalability. Investing in technology can streamline process and enhance customer experiences, despite upfront costs. It’s about pushing efficiency and staying competitive.
Evaluate the pros and cons, do your research, and always have backup plans. It’s about making bold moves that set you on the path to success, and even if you encounter minor setbacks, take them as teachable moments and keep moving forward.
Partnerships, Mergers and Acquisitions
Forming partnerships and engaging in mergers or acquisitions can be powerful strategies for scaling your business.
Example: A great example of using partnerships and acquisitions to grow organically is Microsoft. To break into the cloud computing market and compete with giants like AWS and Google, Microsoft didn't just sit back. They bought companies like Acompli and LinkedIn and teamed up with big names like Adobe, SAP, and Oracle. This let customers use their apps on Microsoft Azure. With this mix of strategies, Microsoft quickly beefed up its cloud services, got more customers on board, and turned cloud computing into a major moneymaker. It was a big part of Microsoft's overall growth story.
Scaling your business organically is about making smart, sustainable choices that foster long-term growth. By blending traditional and digital marketing, maintaining good PR, and taking calculated risks, you build credibility and expand your reach. Strategic partnerships can further enhance your scalability. Focus on nurturing your existing resources and making strategic moves to set your business up for lasting success.

How To Lead a Team of Developers as a Non-Technical Founder
If you can't write code, you might call yourself a "non-technical founder." That label is only partly true. In the business world, being "technical" isn't just about coding or having a fancy degree. It’s more about having a good grasp of your product or service. This post will help you learn how to manage a technical team even if you don’t have a coding background.
Many people get overwhelmed by the idea of managing a technical team, and it’s understandable— you don't speak the same language, their jargon is completely different and you might end up singing off on something you don’t really understand or need.
Technical Co-Founders
Having a technical co-founder can be a huge asset for any non-technical entrepreneur. Their expertise breathes life into your vision, but as Reid Hoffman, co-founder of LinkedIn, once said,
"No matter how good the idea, it takes a team to make it reality."
A successful partnership requires careful consideration from the get-go.
Balancing Equity and Decision-Making
Think of companies like Apple (Steve Jobs and Steve Wozniak) or Ben & Jerry's (Ben Cohen and Jerry Greenfield). Both highlight the importance of complementary skill sets. Equity (ownership stake) should reflect each co-founder's contribution. As Forbes advises, have an open discussion about a fair split that incentivizes both of you.
Decision-making should also be clear. Will it be a collaborative effort, or will certain areas be each co-founder's domain? Defining these roles upfront helps avoid conflicts down the line.
As Frederik Bussler writes in Forbes,
"A transparent conversation about decision-making rights upfront can save a lot of headaches down the line."
Avoiding Misalignment
Disagreements are inevitable, but as Sheryl Sandberg, COO of Meta Platforms, advises,
"The most important thing in communication is hearing what isn't being said."
Regularly discuss expectations, goals, and your long-term vision. Airbnb's co-founders, Brian Chesky and Joe Gebbia, maintained a strong partnership because they focused on finding solutions that benefitted the company, even when they disagreed.
Building a Lasting Partnership
Respect, trust, and open communication are the cornerstones of a successful technical co-founder relationship. Celebrate each other's wins, support each other through challenges, and remember the shared vision that brought you together.
How Much Do You Need To Know?
What matters the most is having a solid grasp of the big picture. Additionally, having a foundational understanding of development practices would make a world of difference.
Dan Martell, founder of SaaS academy suggests learning about these three concepts:
1- Source Code Management: you need to know what platform your team is using to store and manage code and get yourself admin access.
2- CI/CD pipeline: Ask your developers about how often are the code bases being deployed, and ideally bring it up to at least once a week.
3- Agile Development: Define clear user stories, work in time-boxed sprints, and provide continuous feedback to empower Agile implementation.
Leading the Dev Team
Leading a team of developers can be intimidating for non-technical founders, but it's all about effective leadership, not coding skills.
"The best CEOs I know are not the smartest people in the room. They are the people who can assemble the smartest people in the room."
- Tobi Lutke, CEO of Shopify
Focus on the "Why"
Your developers are the technical wizards, but you're the business strategist. Clearly communicate the “why” behind your product or service. What problem are you solving, and for whom? When your team understands the bigger picture, they can translate your vision into technical solutions.
Understanding the Basics
You don't need to be a programmer, but familiarizing yourself with basic development terms fosters stronger communication. Learn about common programming languages, development methodologies (like Agile), and the development process stages. This shows your team you're invested in their work. For a deeper dive, check out: 20 Expert Tips for Running a Tech Company as a Non-Tech Founder.
Building Trust and Transparency
Your developers are talented and creative. Create an environment where they feel comfortable sharing ideas, raising concerns, and even making mistakes (within reason). Regular team meetings and one-on-ones are crucial for building trust and keeping everyone aligned.
"Trust is the foundation of creating a truly cohesive team."
- Patrick Lencioni, Author of "Five Dysfunctions of a Team”
Empowerment, Not Micromanagement
Let your developers do what they do best – develop! Set clear deadlines and expectations, but empower them to find creative solutions. Happy, trusted developers create better products.
"Micromanagement can stifle innovation and creativity, decrease employee morale, and ultimately, hurt the bottom line."
- How to Stop Micromanaging and Start Empowering, Lia Garvin
Other Responsibilities
Although you cannot code, doesn't mean you cannot directly contribute to the production process, you can help your team by giving direct feedback, speeding up the process rather than being vague, and you can critically evaluate their performance. Be clear and direct
Familiarize yourself with the productivity tools your tech team uses. Whenever you come across a bug, rather than calling a meeting or sending an email, you create a user story and put it in Trello (if that’s what your team is using), it’ll put your feedback into the team’s existing workflow.
Engaging a Technical Advisor
John Teel, founder of Predictable Designs, talks about the importance of having a technical advisor in this podcast, he specifically highlights the importance of quality assurance and design review for the success of your business.
Some startups opt to work with Technical Advisors or Consultants, which gives the founder more control over the business. Instead of hiring a full-time employee, you can establish a contract-based relationship and arrange weekly or bi-weekly meetings. A technical advisor offers guidance, reviews strategies, and helps solve specific technical challenges. They aren’t involved in the day-to-day operations or management, allowing you to benefit from their expertise without the commitment of a full-time hire. You can find technical advisors on platforms like Upwork, Fiverr, and other freelance marketplaces.
.png)
What to do in the first 30 days of marketing your MVP
The first 30 days after your MVP goes live are packed with opportunities and essential actions. It’s during this critical time that you set the tone for your product’s future, capturing the interest of early adopters and building a solid foundation for growth In this guide, we'll explore a roadmap designed to enhance your brand, leverage data effectively, and foster a loyal user base. By the end, you'll have actionable insights to help you navigate these crucial early days and set the stage for long-term success.
Welcome to your first 30 days of marketing!
Creating a brand Identity (Day 1-7)
In the first 7 days after your MVP launch, focus on establishing a strong brand identity to attract and engage your target audience.
- Identify your target audience through market research to deeply understand your ideal customer
Develop detailed buyer personas that capture their demographics, behaviors, pain points, and preferences. This will inform all of your branding and marketing decisions going forward.
- Clearly define what sets your product or service apart from the competition, create a compelling brand identity. Develop an elevator pitch that succinctly communicates your unique value proposition in a compelling way.
- Establish a consistent brand voice, tone, and style in your messaging, and develop key messages, taglines, and content that resonate emotionally with your customers.
- Create initial content, generate a social media presence, and use it to bring your brand to life.
Example
Airbnb, the popular home-sharing platform, has grown tremendously since its founding in 2008. A key factor in their success has been their strategic approach to identifying and targeting their ideal customer segments. They highlighted their focus on providing unique, local experiences rather than just basic accommodations. For more insights on target market segmentation, read more about Airbnb's strategy here.
Boosting presence and Generating Traffic (Day 8-14)
For Day 8-21, Boosting your online presence and generating traffic is crucial in the days following your MVP launch. Take inspiration from successful brands that have effectively built their brand identity.
- Launch announcements including press releases and targeted email campaigns to create buzz and attract initial interest.
When Dropbox was ready to launch its private beta, they strategically posted the signup link on popular sites like Digg and Reddit. These online communities, known for their tech-savvy and influential users, helped drive massive traffic and 70,000 waitlist sign-ups in just the first 24 hours.
- Implement influencer marketing by identifying and collaborating with influencers who resonate with your target demographic, amplifying your reach and credibility.
Airbnb partnered with popular travel bloggers and Instagrammers to showcase their accommodations.
- Embrace content marketing through informative blog posts, guest blogging on relevant platforms, and producing compelling video content or webinars that highlight your expertise
- Search Engine Optimization (SEO) is a critical component of any comprehensive digital marketing strategy. By optimizing your website and content for search engines, you can significantly boost your online visibility.
Some popular SEO tools include:
Boosting Presence and Generating Traffic (Day 15-21)
The next phase focuses on amplifying your brand message and driving targeted traffic to your MVP. Here's what you should achieve on days 15-21:
- Create engaging content by showcasing your product's value through blog posts, infographics, videos, or guides. Share this content across social media and relevant online communities.
- Implement basic SEO practices like keyword research, on-page optimization, and link building to improve your website's search rankings, making it easier for users to find your product.
- Establish a strong presence on the social media platforms your target audience frequents. Share content, engage in conversations, and run targeted ads. Consider influencer partnerships if relevant. Social Media Marketing for Dummies dives into effective social media tactics.
- Reach out to journalists, bloggers, and industry publications. Offer exclusive interviews, product demonstrations, or guest blog posts to generate media coverage.
- Run paid advertising campaigns on social media, search engines, or relevant websites. This is a powerful way to reach a targeted audience quickly and drive traffic to your MVP.
Pro Tip: Track the performance of your marketing efforts using analytics tools. This will help you identify what's working and what's not, allowing you to optimize your campaigns for maximum impact.
Retaining Users (Day 22-30)
Days 22-30 are crucial for converting those initial visitors into loyal users who keep coming back for more. Here's how to focus on user retention:
- Ensure your onboarding process is smooth and informative, guiding new users through your MVP's core functionalities. Offer interactive tutorials or personalized recommendations.
- Actively seek user feedback through surveys, in-app chat, or email campaigns. Understand their pain points, suggestions, and feature requests to inform future product development.
- Foster a sense of community around your product. Create forums, online groups, or social media communities for users to interact, share experiences, and provide mutual support.
- Implement features or gamification elements that encourage regular use and interaction with your MVP. Consider loyalty programs or reward systems to incentivize engagement.
- Offer timely and helpful customer support to address user queries and resolve issues efficiently. A positive customer service experience builds trust and loyalty. Zendesk has a comprehensive guide on building a strong customer support strategy.
Remember: Retaining users is crucial for long-term success. By focusing on their needs and providing a valuable, engaging experience, you can cultivate a loyal user base that fuels the growth of your product.
Conclusion
The first 30 days after your MVP goes live are critical for setting the foundation for your product's success. By creating a strong brand identity, boosting your online presence, generating traffic, and focusing on user retention, you can attract early adopters and build a loyal user base. These efforts will help you navigate the early stages effectively and position your product for long-term growth.

How to raise funding for your start-ups
Raising funds for your startup is a crucial step that can make or break your entrepreneurial journey. Understanding how to navigate the funding landscape, preparing effectively, and choosing the right strategies are key to securing the capital you need. As Rachelle Hare, a senior commercial lawyer and business advisor, notes, "Being able to secure adequate capital is often the key to transforming your innovative ideas into a thriving business."
Discover how the funding process works, get expert tips on preparation, explore different funding options, and gain valuable advice for success. Whether you're a first-time founder or looking to grow your business, this guide will help you understand what it takes to get the funding you need to bring your vision to life.
Understanding the Funding Process
The fundraising process for startups typically involves several key steps:
Identifying Funding Needs
Define your startup's funding requirements by analyzing your business model, expenses, growth plans, and financial projections.
Choosing Funding Sources
Research and evaluate different funding options like crowdfunding, angel investors, venture capitalists, bank loans, or government grants.
Preparing Your Pitch
Craft a compelling pitch that communicates your startup's value proposition, competitive advantages, growth potential, and financial projections.
Negotiating Terms
If you attract investor interest, negotiate the investment terms, including valuation, equity stake, control rights, and exit strategies.
Closing the Deal
Complete the legal and financial paperwork to close the funding round, including issuing new shares and setting up shareholder agreements.
Throughout this process, effective communication, transparency, and persistence are key. Startups that navigate the fundraising landscape strategically and build strong relationships with investors are more likely to secure the funding they need to turn their vision into a successful reality. For a deeper dive into the funding process for startups, check out this informative resource.
Funding Strategies
Choosing the right funding strategies is pivotal for your startup’s success, below are some common options to consider:
1. Bootstrapping
Funding your startup through your own savings, revenue, or loans allows you to maintain full control and avoid diluting equity. However, this approach may limit your growth potential. As Entrepreneur advises, "Bootstrapping requires patience, discipline, and creativity to make the most of limited resources." Read more about bootstrapping your startup here.
Jason Cohen, the founder of WP Engine, shared his experience on Twitter about bootstrapping his company for the first two years
❝ I bootstrapped WP Engine for the first two years, raising (very modest) funds only after gaining substantial traction with around 1000 paying customers.
Most companies shouldn’t raise money, but if you do, this approach positions you for favorable terms. ❞
By relying on personal savings and revenue to fund growth, bootstrapped startups are forced to focus on profitability from day one, reducing the risk of burning through large amounts of investor capital on unproven ideas and ultimately minimizing potential losses if the business doesn't scale as quickly as anticipated.
2. Angel Investors
To attract angel investors, start by researching and targeting those who specialize in your industry. This is where your pitch comes in handy. Build relationships through networking events, industry conferences, and online platforms such as AngelList and SeedInvest. Be transparent and prepared to discuss your financials and business plan in detail. Leverage resources like this guide from Digital Ocean to find and connect with potential angel investors.
Airbnb raised $600,000 in seed funding from angel investors in 2009, including Paul Graham and Y Combinator. This early angel funding helped Airbnb gain traction and scale into the global home-sharing giant it is today
3. Venture Capital (VC) Funding
Venture capitalists (VCs) are firms or individuals who invest in high-growth startups with the potential for significant returns. You can connect to VCs by Researching firms that invest in your industry and attending relevant conferences.
They typically come in at later stages when a startup has already demonstrated traction and market fit. Prematurely securing venture capital funding can be a double-edged sword for startups. While it provides immediate capital for growth, it often comes with significant drawbacks, including dilution of ownership, increased pressure for rapid scaling, and potential misalignment between founder and investor goals.
Harry Stebbings, founder of 20VC, expressed concern about this trend, tweeting:
❝ My biggest concern in VC right now is that a generation of would be successful companies are getting stuffed with VC cash prematurely.
I recently interviewed founders of @UiPath, @ServiceNow and @Klaviyo with @abialecki all admit it would have not been so successful had they raised more earlier.
‘Don’t take more capital than you need. Constraint breeds creativity.
In my early days, I’d log into our help desk and answer customer questions.’ ❞
4. Bank Loans
Banks offer traditional loan options for businesses, which can be a good option for startups with strong credit history and a proven business model. However, loan repayments can strain your cash flow, and banks may require collateral. Approaching banks you have a business relationship with or those known to support startups can be a good starting point. The U.S. Small Business Administration (SBA) offers a variety of loan programs to help small businesses get funding. These loans are typically guaranteed by the SBA, which reduces the risk for lenders and makes it easier for startups to qualify for a loan.
Beyond Meat, a producer of plant-based meat alternatives, secured a loan from JPMorgan Chase to fund its expansion into new markets.
5. Government Grants
Government agencies may offer grants or subsidies for startups in specific industries or those developing innovative technologies. These grants often come with specific requirements and eligibility criteria. Researching government websites or contacting your local business development center can help you find relevant grant opportunities.
Tesla, a manufacturer of electric vehicles and clean energy solutions, has benefited from government grants to support research and development of sustainable transportation technologies.
6. Crowdfunding
Crowdfunding platforms allow you to raise capital from a large pool of individual investors. This can be a good way to validate your concept and generate early buzz, but it may not be suitable for raising large amounts of capital. Popular crowdfunding platforms include Kickstarter, Indiegogo, and GoFundMe. Each platform has its own fees and requirements, so be sure to research them carefully before launching a campaign
Oculus, a virtual reality technology company, raised over $2 million on Kickstarter to fund the development of its first virtual reality headset.
Tips for Success
So, you've got a brilliant idea. That's fantastic! But let’s be real: securing funding is about more than just having a lightbulb moment. It’s about convincing others to believe in your vision as much as you do.
Practice Makes Perfect
"Your pitch is your story, It’s the first impression that can make or break a deal."
-Mark Cuban
Nail your elevator pitch. It’s not just about summarizing your business; it's about capturing hearts and minds. Practice until you can deliver it confidently, even if you're interrupted. Remember, you're selling a dream.
Network Your Way to Success
Networking is about more than just collecting business cards. It's about building genuine relationships. Attend industry events, connect with other entrepreneurs, and seek mentors.
"Your network is your net worth."
- Reid Hoffman, co-founder LinkedIn
Be Grounded, Not Overinflated
Overvaluing your startup is a quick way to lose credibility. Focus on your business's strengths, growth potential, and the market opportunity.
Show, Don’t Tell
"The proof is in the pudding."
Highlight your achievements, customer traction, or early successes.
Expect the Unexpected
Investors are rightfully curious. They'll dig deep. Be prepared to answer tough questions about your business model, competition, and financial projections.
"If you can’t explain your business model on a cocktail napkin, you don’t have a business model”
-Ben Horowitz, co-founder Andreessen Horowitz
For additional tips from experts, read Raising Startup Capital: 15 Founders And Investors Share Their Top Fundraising Tips by Forbes.
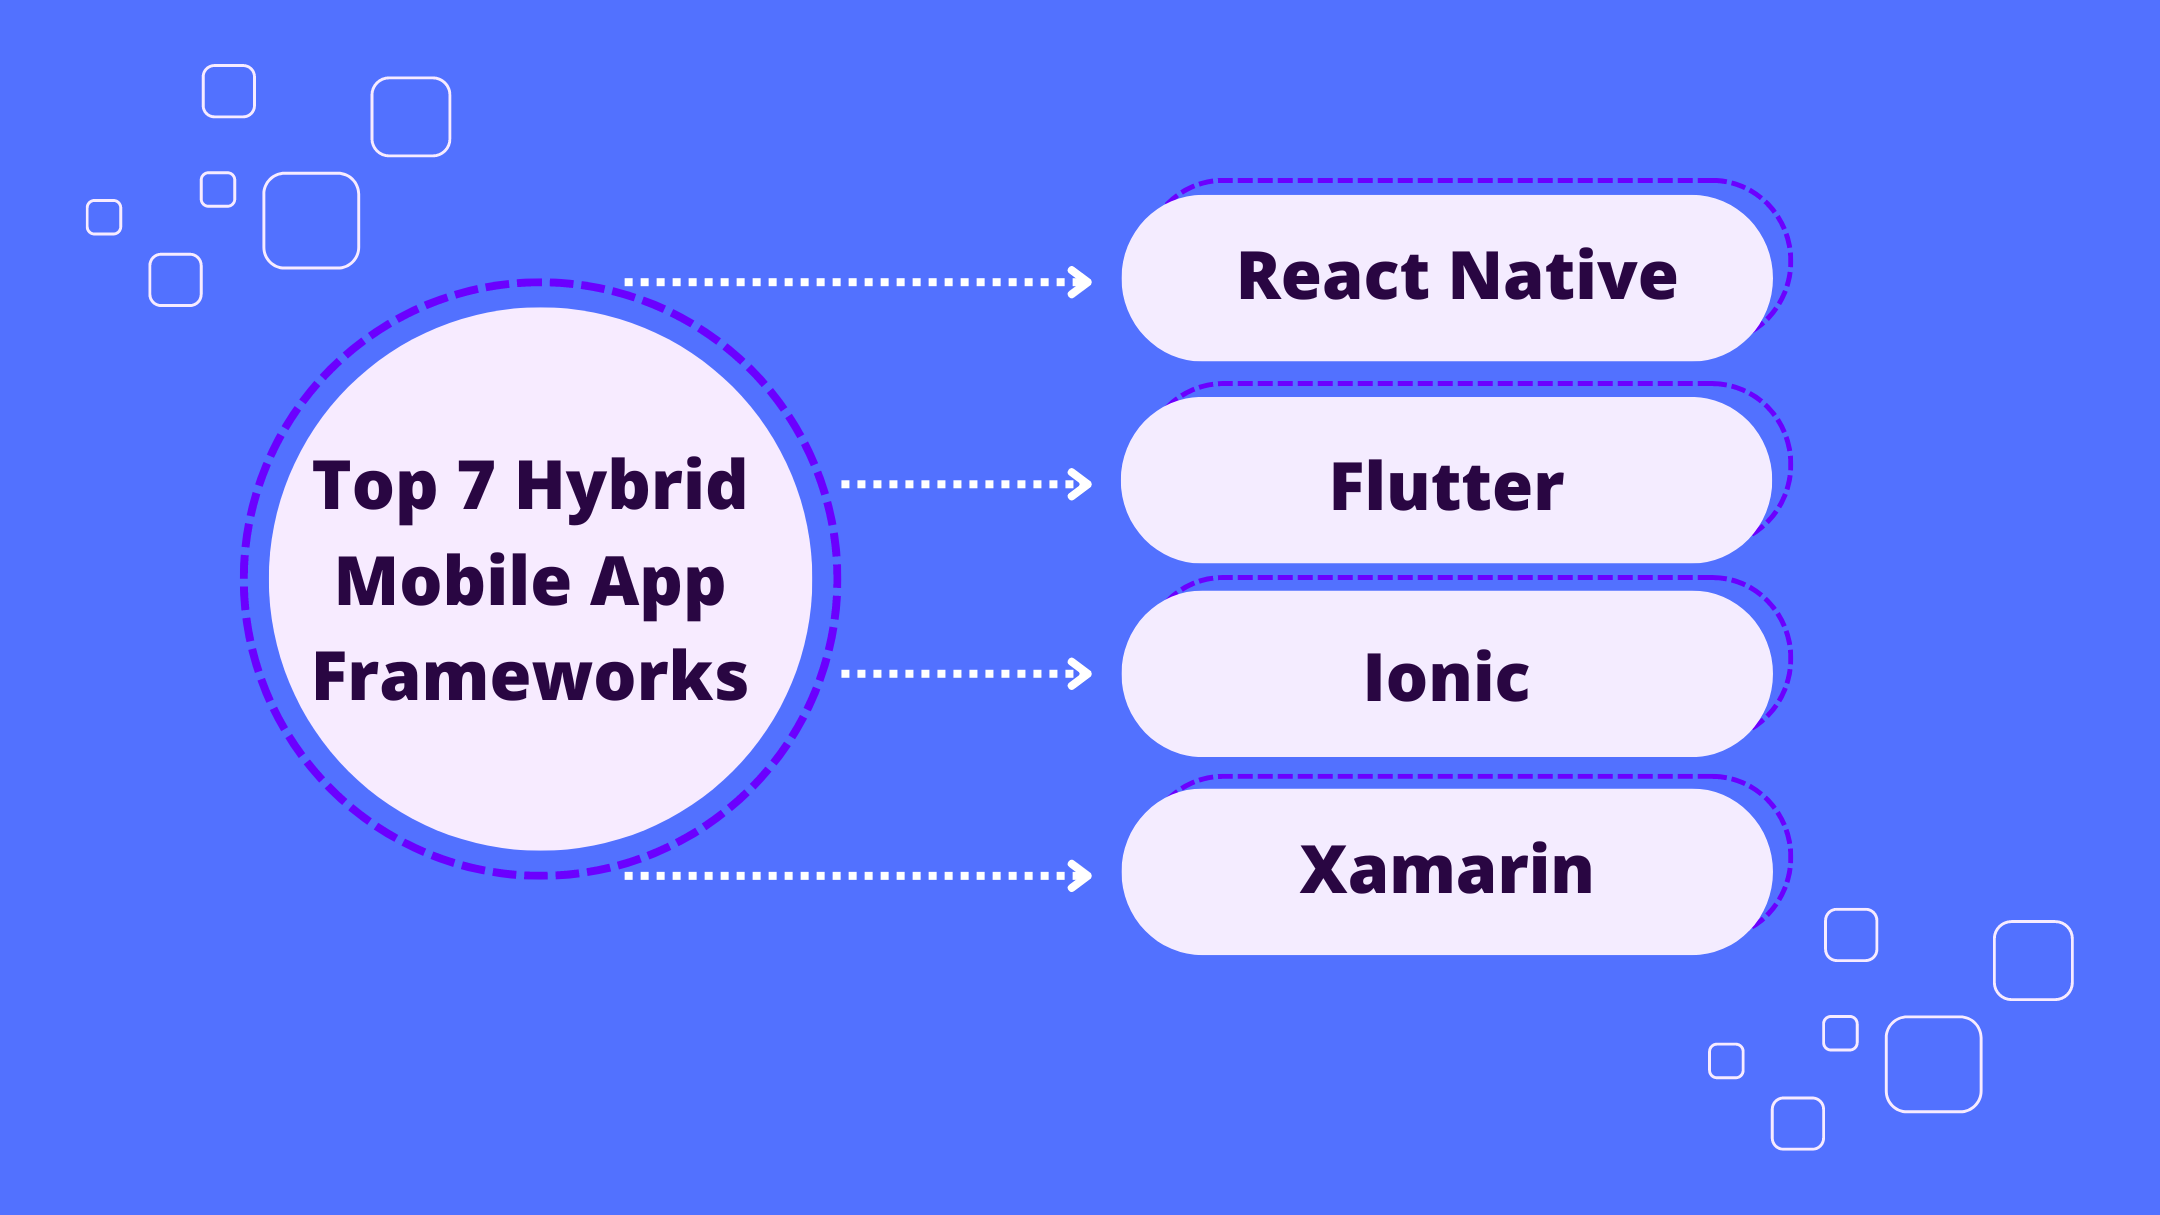
Top 7 Hybrid Mobile App Frameworks Compared
Hybrid mobile apps combine web technologies like HTML, CSS, and JavaScript with native app features, allowing cross-platform deployment. Choosing the right framework is crucial for performance, UI/UX, development ease, and scalability.
Here are the top 7 hybrid app frameworks and their key strengths:
- React Native: High performance close to native apps, code reusability, large community, but requires some native knowledge.
- Flutter: Excellent performance on par with native apps, beautiful consistent UI, hot reload, but smaller ecosystem and requires Dart.
- Ionic: Familiar web technologies, large community, rapid development, but suboptimal performance and limited native APIs.
- Xamarin: Native UI and performance, shared C# codebase, Visual Studio integration, but expensive for larger teams and complex setup.
- NativeScript: Native performance, hot reload, direct native API access, but smaller community and paid UI components.
- Framework7: High performance, smooth animations, familiar web tech, but limited native APIs and smaller community.
- Apache Cordova: Cost-effective for simple apps, familiar web tech, large community, but slower performance and less native feel.
FrameworkBest ForKey StrengthsKey WeaknessesReact NativeHigh performance, native-like experienceCode reusability, large communityRequires some native knowledgeFlutterBeautiful, consistent UIExcellent performance, hot reloadSmaller ecosystem, requires DartIonicRapid development, prototypingFamiliar web technologies, large communitySuboptimal performance, limited native APIsXamarinNative UI, performance, shared codebaseNative performance, Visual Studio integrationExpensive for larger teams, complex setupNativeScriptDirect access to native APIsNative performance, hot reloadSmaller community, paid UI componentsFramework7Familiar web technologiesHigh performance, smooth animationsLimited native APIs, smaller communityApache CordovaCost-effective for simple appsFamiliar web technologies, large communitySlower performance, less native feel
Evaluate your project needs, team skills, and priorities like performance, UI/UX, and budget to choose the best hybrid mobile app framework.
Related video from YouTube
1. React Native

React Native is a popular framework developed by Facebook. It lets developers build mobile apps using JavaScript and React.
Performance
React Native compiles to native components, ensuring smooth animations, quick load times, and a responsive user interface.
UI/UX
React Native uses reusable components, making the codebase more organized. Its declarative syntax simplifies development and improves code readability.
Development Ease
React Native's hot reloading feature allows developers to see changes instantly, reducing development time. The large community provides extensive support through documentation, tutorials, and forums.
Community Support
React Native has a large community of developers who contribute to its growth and provide support through various resources.
Scalability
React Native's architecture supports complex and scalable apps. Its ability to reuse code across platforms helps in building efficient apps for a growing user base.
2. Flutter

Flutter is an open-source framework by Google. It lets developers build apps for mobile, web, and desktop from one codebase.
Performance
Flutter uses the Skia rendering engine for fast performance and smooth animations. The hot reload feature shows changes instantly, speeding up development.
UI/UX
Flutter's UI is built with widgets, which are reusable and customizable. It offers many pre-built widgets for creating complex UIs. The declarative syntax makes development simpler and code easier to read.
Development Ease
Flutter's hot reload feature shows changes instantly, reducing development time. The large community offers support through documentation, tutorials, and forums. Flutter also provides tools and libraries for easy app development, testing, and deployment.
Community Support
Flutter has a large, active community. They offer extensive documentation, tutorials, and forums to help developers.
Scalability
Flutter supports complex and scalable apps. Its modular design makes it easy to maintain and update apps, ensuring they stay efficient over time.
FeatureDescriptionPerformanceUses Skia engine for fast performance and smooth animations.UI/UXBuilt with customizable widgets; offers many pre-built options.DevelopmentHot reload feature; large community support; tools and libraries available.CommunityLarge, active community with extensive resources.ScalabilitySupports complex apps; modular design for easy maintenance and updates.
3. Ionic

Ionic is an open-source framework for building hybrid apps. It uses web technologies like HTML, CSS, and JavaScript, making it easy for web developers to create mobile apps.
Performance
Ionic uses Cordova plugins to access native device features, which can affect performance. However, recent updates have improved its speed and smoothness.
UI/UX
Ionic offers a wide range of UI components and tools to create native-like apps. Its web components work with any JavaScript framework, such as Angular, React, or Vue.
Development Ease
Ionic provides many plugins, APIs, and tools to simplify development. It also has a large community that offers support through documentation, tutorials, and forums.
FeatureDescriptionPerformanceUses Cordova plugins for native device access; performance has improved.UI/UXWide range of UI components; works with any JavaScript framework.DevelopmentMany plugins, APIs, and tools; large community support.
4. Xamarin
Xamarin is an open-source framework for building cross-platform apps. It allows developers to share code between Android, iOS, and Windows platforms using C# and the .NET framework.
Performance
Xamarin provides native performance with its Ahead-of-Time (AOT) and Just-in-Time (JIT) compilation, ensuring efficient code execution.
UI/UX
Xamarin offers native UI components for a consistent user experience across platforms. With Xamarin.Forms, developers can share UI code between platforms.
Development Ease
Xamarin provides tools and APIs for building, testing, and deploying apps. It integrates with Visual Studio, offering a familiar environment for developers.
FeatureDescriptionPerformanceNative performance with AOT and JIT compilation.UI/UXNative UI components and Xamarin.Forms for shared UI code.DevelopmentTools and APIs with Visual Studio integration.
sbb-itb-8abf120
5. NativeScript
NativeScript is an open-source framework for building cross-platform apps with JavaScript, TypeScript, or Angular. It allows developers to share code between Android, iOS, and web platforms.
Performance
NativeScript provides native performance with its Ahead-of-Time (AOT) compilation, ensuring efficient code execution. It also uses a unique architecture that allows for better performance and memory management.
UI/UX
NativeScript offers native UI components for a consistent user experience across platforms. With its built-in support for CSS, developers can create visually appealing and responsive UIs.
Development Ease
NativeScript provides a comprehensive set of tools and APIs for building, testing, and deploying apps. It integrates with popular development tools like Visual Studio Code and Android Studio, offering a familiar environment for developers.
Community Support
NativeScript has an active community of developers and contributors, ensuring continuous support and updates. It also has a comprehensive documentation and a wide range of plugins and libraries available.
FeatureDescriptionPerformanceNative performance with AOT compilation.UI/UXNative UI components and CSS support for responsive UIs.DevelopmentComprehensive tools and APIs with popular IDE integrations.Community SupportActive community and comprehensive documentation.
6. Framework7
Framework7 is an open-source framework for building hybrid apps using HTML, CSS, and JavaScript. It offers a variety of UI components and customization options.
Performance
Framework7 uses web technologies, which can make it easy to build apps. However, the performance may not always match that of native apps.
UI/UX
Framework7 includes many UI elements like dialog windows, tabs, and buttons. The app's theme comes from the framework, not the OS, which might lead to a less consistent user experience.
Development Ease
Framework7 provides template projects to help you get started. It also supports other frameworks like React and Angular.
Community Support
Framework7 has a community of developers and several apps built with it, such as Lasso, Hichat, and Sprint Social.
FeatureDescriptionPerformanceUses web technologies; may not match native app performance.UI/UXIncludes many UI elements; theme comes from the framework, not the OS.Development EaseProvides template projects; supports React, Angular, etc.Community SupportActive community; several apps built with it.
7. Apache Cordova
Apache Cordova is a well-known framework for building hybrid mobile apps using HTML, CSS, and JavaScript. It allows developers to deploy apps on multiple platforms like iOS and Android.
Performance
Cordova apps often have slower performance compared to native apps, especially with complex animations and heavy processing tasks. This is because Cordova apps are web applications wrapped in a native shell, which can slow down execution and rendering.
UI/UX
Cordova uses plugins to access native device features, helping create apps with a native-like user experience. However, the UI components are not as polished as native apps, and the app's theme comes from the framework, not the OS, which might lead to a less consistent user experience.
Development Ease
Cordova offers a straightforward development process for web developers familiar with HTML, CSS, and JavaScript. It supports rapid development and cross-platform compatibility, making it a good choice for quick deployment on multiple platforms.
Community Support
Cordova has a large and active community of developers. There is extensive documentation and many plugins available to extend the framework's functionality.
FeatureDescriptionPerformanceSlower compared to native apps.UI/UXNative-like experience through plugins; less consistent UI.Development EaseSimple for web developers; supports rapid and cross-platform development.Community SupportLarge, active community with extensive documentation and plugins.
Pros and Cons
Hybrid mobile app frameworks have their own sets of advantages and disadvantages. Here's a comparison of the top frameworks:
React Native
ProsCons🚀 High performance close to native apps🔍 Requires some native development knowledge💻 Code reusability across platforms🔧 Complex setup and build process🌐 Large community support📱 UI may not perfectly match native apps🔄 Hot reloading for faster development🛡️ Potential security vulnerabilities
Flutter
ProsCons⚡ Excellent performance on par with native apps📚 Smaller ecosystem and community🎨 Beautiful and consistent UI across platforms👥 Fewer experts available for hire🔄 Hot reload for quick iteration💻 Requires learning Dart programming language🔧 Comprehensive tooling and documentation🆕 Relatively new framework
Ionic
ProsCons🌐 Large community and extensive plugins📉 Suboptimal performance compared to native apps💻 Familiar web technologies (HTML, CSS, JS)🖥️ UI may not feel truly native🚀 Rapid development and prototyping🔍 Limited access to native APIs and features💰 Cost-effective for simple apps🔄 No hot reloading
Xamarin
ProsCons🖥️ Native UI and performance💰 Expensive licensing for larger teams💻 Uses C# (.NET) for shared codebase🔧 Complex setup and build process🔄 Hot reloading and live reloading📚 Smaller community compared to others🛡️ Strong security and data protection🆕 Steep learning curve for web developers
NativeScript
ProsCons🖥️ Native UI and performance📚 Smaller community and documentation💻 Uses JavaScript, TypeScript, or Angular💰 Paid UI components for advanced features🔄 Hot reloading and live reloading🔍 Requires some native development knowledge🔓 Direct access to native APIs🛠️ Limited third-party plugins and libraries
Framework7
ProsCons🚀 High performance and smooth animations📚 Smaller community compared to others💻 Familiar web technologies (HTML, CSS, JS)🔍 Limited access to native APIs and features🔄 Hot module replacement for faster development🖥️ UI may not feel truly native💰 Free and open-source📖 Lacking comprehensive documentation
Apache Cordova
ProsCons💻 Familiar web technologies (HTML, CSS, JS)📉 Slower performance compared to native apps🌐 Large community and extensive plugins🖥️ UI may not feel truly native💰 Cost-effective for simple apps🔍 Limited access to advanced native features🚀 Rapid development and prototyping🔄 No hot reloading or live reloading
When choosing a hybrid mobile app framework, consider the pros and cons based on your project needs, such as performance, UI/UX, team skills, and budget. While hybrid frameworks offer cross-platform benefits, native development may still be better for complex or performance-critical apps.
Final Thoughts
Choosing the right hybrid mobile app framework is key to your project's success. Each framework has its own strengths and weaknesses. Evaluate them based on your needs and priorities, such as performance, UI/UX, team skills, and budget.
Hybrid app development offers benefits like cross-platform compatibility, faster development, and cost savings. However, it's important to weigh the pros and cons of each framework to make the best choice for your project.
Key Considerations
- React Native: Best for high performance and a native-like experience.
- Flutter: Ideal for a beautiful, consistent UI across platforms.
- Ionic: Suitable for rapid development and prototyping.
- Xamarin: Good for native UI and performance with a shared codebase.
- NativeScript, Framework7, and Apache Cordova: Viable options depending on specific needs.
Summary Table
FrameworkBest ForKey StrengthsKey WeaknessesReact NativeHigh performance, native-like experienceCode reusability, large communityRequires some native knowledgeFlutterBeautiful, consistent UIExcellent performance, hot reloadSmaller ecosystem, requires DartIonicRapid development, prototypingFamiliar web technologies, large communitySuboptimal performance, limited native APIsXamarinNative UI, performance, shared codebaseNative performance, Visual Studio integrationExpensive for larger teams, complex setupNativeScriptDirect access to native APIsNative performance, hot reloadSmaller community, paid UI componentsFramework7Familiar web technologiesHigh performance, smooth animationsLimited native APIs, smaller communityApache CordovaCost-effective for simple appsFamiliar web technologies, large communitySlower performance, less native feel
Understand your project requirements and choose a framework that aligns with your goals. This will help you create a high-quality, user-friendly app that meets your users' needs and expectations.
FAQs
What is the most used mobile app framework?
React Native and Flutter are the most popular cross-platform mobile app development frameworks.
- React Native: Developed by Facebook, it uses JavaScript and React. It has a large community and many third-party libraries.
- Flutter: Created by Google, it uses Dart and offers tools for building high-performance, visually appealing apps for mobile, web, and desktop. Despite being newer, it has gained significant popularity.
What is the difference between React Native, Flutter, and Ionic?
FeatureReact NativeFlutterIonicLanguageJavaScriptDartAngular, TypeScriptPerformanceCompiles to native codeCompiles to native codeUses web technologiesUINative-likeNative-likeWeb-basedCommunityLarge, matureRapidly growingStrong, web-focused
Which is the best hybrid mobile app development framework?
The best framework depends on your project needs, team skills, and preferences. Here are some popular options:
FrameworkBest ForStrengthsWeaknessesReact NativeHigh performance, native-like experienceCode reusability, large communityRequires some native knowledgeFlutterVisually appealing, high-performance appsExcellent performance, hot reloadSmaller ecosystem, requires DartIonicRapid development, prototypingFamiliar web technologies, large communitySuboptimal performance, limited native APIsXamarinNative UI, performance, shared codebaseNative performance, Visual Studio integrationExpensive for larger teams, complex setup
Evaluate each framework's strengths and weaknesses to choose the one that aligns with your project goals.
Related posts
.png)
7 Tips for Writing Effective Mobile App Microcopy
Microcopy is the brief text in user interfaces that guides users through tasks and provides context. Effective microcopy enhances the user experience by reducing confusion, boosting confidence, and improving engagement. Here are 7 key tips for writing great microcopy:
- Understand the Component and Its Behavior: Know the purpose, user interaction, and context of each UI element to write relevant microcopy.
- Revise Your Draft Multiple Times: Refine your words to ensure clarity, consistency with the app's tone, and helpfulness to the user.
- Solicit Feedback from Team Members: Get input from designers, developers, and product managers to align microcopy with app goals.
- Keep Microcopy Concise and Clear: Use simple language, brief phrasing, and avoid ambiguity to ensure users can quickly understand instructions.
- Maintain Consistency in Tone and Language: Follow a style guide to create a cohesive brand voice and familiar experience.
- Provide Context and Guidance: Use placeholder text, explain purposes, and offer helpful hints to guide users through tasks.
- Test and Iterate Based on User Feedback: Conduct user research, analyze feedback, and refine microcopy to improve the user experience.
Common Microcopy TypesExamplesCTAs (Calls to Action)"Sign Up," "Buy Now"Error Messages"Invalid email address"Placeholders"Enter your name"In-App Guidance"Swipe left to see more"New Feature Announcements"Check out our new dark mode!"Confirmation Messages"Your order has been placed"
Related video from YouTube
Why Good Microcopy Matters
Microcopy helps users navigate your app, making their experience smoother and more enjoyable. Good microcopy can:
- Reduce confusion
- Increase user satisfaction
- Help users complete tasks easily
Benefits of Good Microcopy
BenefitDescriptionReduces FrictionClear instructions help users move through tasks without getting stuck.Boosts ConfidenceReassuring messages make users feel secure in their actions.Improves EngagementUsers are more likely to interact with an app that communicates well.
Consequences of Poor Microcopy
IssueDescriptionUser FrustrationConfusing text can leave users annoyed and unsure of what to do next.Task AbandonmentUsers may give up if they can't understand how to proceed.Negative PerceptionPoor microcopy can make your app seem unprofessional and unreliable.
Good microcopy guides users, reduces errors, and makes the app experience more pleasant. Every word counts in helping users feel confident and engaged. Conversely, bad microcopy can lead to frustration and a poor user experience. Clear, concise text is key to keeping users happy and engaged with your app.
1. Understand the Component and Its Behavior
To write effective microcopy, you need to understand the component and how it works. This means knowing its function, purpose, and how users interact with it. For example, a "Tap to enter" bubble in a game app like Swordigo guides the user with simple words and short sentences.
Consider these factors:
- Component purpose: What does the element do? What action does it prompt?
- User behavior: How do users interact with it? What confuses them?
- Context: Where is the component used? How does it fit into the overall experience?
By understanding these, you can create clear and helpful microcopy that improves the user experience.
For instance, in an e-commerce app, a "Complete payment" button should clearly indicate the action. The microcopy could say, "You're one step away from completing your purchase," helping users understand and feel confident in their actions.
2. Revise Your Draft Multiple Times
Revising your draft several times is key to writing effective microcopy. It's important to refine your words to ensure they are clear, concise, and communicate the app's value. Editing is not just about fixing grammar and spelling; it's about making your message stronger.
When revising, ask yourself:
- Is the language simple and easy to understand?
- Does the microcopy match the app's tone and voice?
- Is the message clear and free of confusion?
- Does the microcopy help the user?
By revising your draft multiple times, you can ensure your microcopy is polished and effective. Good microcopy isn't just a few words; it's a message that engages users.
For example, if you're writing microcopy for a fitness app, your first draft might say: "Get fit in just 10 minutes a day!" While this is catchy, it might not be accurate. After revising, you could change it to: "Start your fitness journey with 10-minute daily workouts." This is clearer and more accurate, making it more effective in engaging users.
3. Solicit Feedback from Team Members
Getting feedback from your team is key to writing good microcopy. Input from designers, developers, and product managers helps ensure your microcopy fits the app's goals.
Why Feedback Matters
Feedback helps you:
- Spot areas that need improvement
- Clear up any confusing points
- Make sure your microcopy connects with users
How to Get Feedback
Follow these steps to get useful feedback:
StepDescriptionShare Your DraftSend your microcopy draft to team members.Ask Specific QuestionsRequest feedback on clarity, tone, and consistency.Be Open to CriticismAccept constructive criticism and be ready to make changes.
sbb-itb-8abf120
4. Keep Microcopy Concise and Clear
Effective microcopy should be short and easy to understand. Users often scan interfaces quickly, so your text needs to be straightforward and free of jargon.
Guidelines for Concise and Clear Microcopy
GuidelineDescriptionUse simple languageAvoid complex words and technical terms. Use plain language that everyone can understand.Keep it briefAim for a few words or a short sentence. Long text can confuse users.Avoid ambiguityMake sure your text is clear and has only one meaning. Avoid words that can be interpreted in different ways.
5. Maintain Consistency in Tone and Language
Consistency is key to creating a smooth user experience. Keeping a consistent tone and language in your microcopy helps build trust and shows your brand's personality. Inconsistent microcopy can confuse users and make the app feel disjointed.
The Importance of Consistency
Consistency in microcopy helps to:
- Build a clear brand voice and tone
- Create familiarity and trust with users
- Make interactions easier and more intuitive
- Improve the overall user experience
Tips for Maintaining Consistency
To keep your tone and language consistent, follow these tips:
TipDescriptionDefine your brand voiceSet a clear brand voice and tone guide for all microcopy.Use a style guideCreate a style guide with language, tone, and formatting rules.Use consistent languageStick to the same terms and phrases throughout your app.Review and reviseRegularly check and update microcopy for consistency and accuracy.
6. Provide Context and Guidance
When writing microcopy, it's important to give users context and guidance. This helps them understand what to do, why they need to do it, and what to expect next. Effective microcopy should answer questions like "What's next?" or "Why am I seeing this?" and provide reassurance when users are unsure.
Contextualizing Microcopy
To provide context and guidance, consider these strategies:
StrategyDescriptionUse placeholder textIn forms or input fields, use placeholder text that explains what users should enter. For example, "Enter your email address" or "Write a short description."Explain the purposeBriefly explain why a particular action is required or what the benefits are. For example, "Enter your password to secure your account" or "Provide your phone number to receive exclusive offers."Offer helpful hintsProvide subtle hints or tips that help users complete a task or understand the process. For example, "Remember to use at least 8 characters for your password" or "You can upload files up to 10MB in size."
7. Test and Iterate Based on User Feedback
Testing and updating your microcopy based on user feedback is key to its success. This process helps you find areas to improve, clear up confusing parts, and make sure your microcopy works well for your users.
Conducting User Research
To get useful feedback, do user research through usability tests, surveys, or interviews. Ask users to complete tasks, think aloud, or give feedback on your microcopy. This will help you find pain points, confusing areas, and ways to improve.
Analyzing Feedback and Iterating
Look at the feedback you get and find common themes or areas to improve. Use this info to refine your microcopy, making it clearer and more engaging. Keep updating your microcopy until you get the desired result: better user experience and higher engagement.
Example: Usability Testing for Microcopy
For example, during usability testing, you might find that users often misunderstand a certain piece of microcopy. By updating that microcopy and testing again, you can improve the language to better communicate the intended message, leading to a smoother user experience.
Conclusion
Effective mobile app microcopy is key to improving user engagement and satisfaction. By understanding components, revising drafts, getting feedback, keeping messages clear, maintaining consistency, providing context, and iterating based on user feedback, you can create microcopy that enhances the user experience.
Writing good microcopy is as important as having a functional app and an easy-to-use interface. These examples of effective microcopy should inspire you to view your product in a new light.
FAQs
What is an example of a microcopy?
Microcopy includes short text elements like:
TypeExampleCTAs (Call to Actions)"Sign Up," "Buy Now"Error Messages"Invalid email address"Placeholders"Enter your name"In-App Guidance"Swipe left to see more"New Feature Announcements"Check out our new dark mode!"Confirmation Messages"Your order has been placed"
Microcopy helps guide users, making their experience smoother and more intuitive.
Related posts
.png)
10 Best Knowledge Base Software Platforms Compared (2024)
A knowledge base is a centralized repository where businesses store information to help customers and employees find answers easily. This article compares the top 10 knowledge base software platforms to assist you in selecting the best solution for your needs:
- Document360 - Intuitive editor, versioning tools, customizable categories, robust search
- Zendesk - Knowledge capture app, AI-powered search, versioning tools, customizable categories
- Confluence - Content creation with templates, structured organization, search functionality
- Helpjuice - Google-like search, user-friendly design, customization options, intelligent analytics
- Freshdesk - Easy content creation, customization and branding, categorization, searchability
- HubSpot Service Hub - Ticketing system, knowledge base, live chat, customer feedback
- Guru - Centralized knowledge base, AI search, integrations, security with Trust Scores
- Help Scout - Customizable design, three-tiered organization, search functionality, Beacon integration
- Notion - Modular structure, ease of use, collaboration, integration capabilities
- Bloomfire - User-friendly interface, powerful search, customization options
SoftwareDeploymentKey FeaturesPricing (per month)Document360CloudEditor, versioning, categories, search$49 - $299ZendeskCloudKnowledge capture, AI search, versioning, categories€79 per agentConfluenceCloudContent creation, organization, search$5.75 - $11 per userHelpjuiceCloudSearch, design, customization, analytics$99 - $299FreshdeskCloudContent creation, customization, categorization, search$0 - $49HubSpot Service HubCloudTicketing, knowledge base, chat, feedback$45 - $1,200GuruCloudKnowledge base, AI search, integrations, security$5 - $20 per userHelp ScoutCloudDesign, organization, search, Beacon$20 - $65 per userNotionCloudModularity, ease of use, collaboration, integrations$0 - $15 per userBloomfireCloudUser-friendly, search, customizationCustom pricing
Consider your team's needs, budget, and priorities to select the best knowledge base software that meets your requirements.
Related video from YouTube
1. Document360

Document360 is a knowledge base software that helps businesses create, manage, and share knowledge with customers and employees. It offers features that make it a good choice for creating a self-service knowledge base.
Key Features
- Intuitive Editor: Easy-to-use editor similar to Microsoft Word. Allows adding images, videos, and callout boxes.
- Versioning Tools: Track changes and revert to previous versions if needed.
- Customizable Categories: Create up to six levels of categories for easy organization.
- Search Functionality: Robust search to quickly find information.
Pricing
PlanCost (per month)User AccountsStorageKnowledge BasesStartup$49 (billed annually)25 GB1Business$149550 GB2Enterprise$29915150 GB6
Deployment Options
Document360 is cloud-based, accessible from anywhere, anytime.
Integrations
Integrates with tools like GitHub, GitLab, and Slack.
Customer Support
Offers 24/7 support via email, phone, and live chat. Also provides a knowledge base with tutorials, guides, and FAQs.
2. Zendesk

Zendesk is a well-known knowledge base software that helps businesses create, manage, and share knowledge with customers and employees. It offers a range of features for creating a self-service knowledge base.
Key Features
- Knowledge Capture App: Convert tickets into knowledge base articles easily.
- AI-powered Search: Advanced search to quickly find information.
- Customizable Categories: Create up to six levels of categories for easy organization.
- Versioning Tools: Track changes and revert to previous versions if needed.
Pricing
PlanCost (per agent per month)Features IncludedSuite Growth€79 (billed annually)Knowledge base software, ticketing software, multichannel customer support softwareSuite ProfessionalVariesAdditional features and higher limitsSuite EnterpriseVariesAdvanced features and support
Deployment Options
Zendesk is cloud-based, accessible from anywhere, anytime.
Integrations
Integrates with tools like GitHub, GitLab, and Slack.
Customer Support
Zendesk offers 24/7 support via email, phone, and live chat. It also provides a knowledge base with tutorials, guides, and FAQs.
Zendesk is a flexible knowledge base software suitable for businesses of all sizes.
3. Confluence

Confluence is a knowledge base software that helps teams work together and share information. It has many features for creating and managing a knowledge base.
Key Features
- Content Creation: Create and publish articles using templates. Update easily with a content library and automatic versioning.
- Search Functionality: Organize articles in a structured hierarchy. Use a powerful search engine with suggested results.
- Integrations: Works with other Atlassian products like Jira and Jira Service Management.
Pricing
PlanCost (per user per month)Features IncludedFree$0Basic featuresStandard$5.75More featuresPremium$11Advanced featuresEnterpriseCustom pricingAll features
Deployment Options
Confluence is cloud-based, accessible from anywhere.
Integrations
Integrates with other Atlassian products like Jira and Jira Service Management.
Customer Support
Confluence offers 24/7 support via email, phone, and live chat. It also has a knowledge base with tutorials, guides, and FAQs.
Confluence helps teams work together and share information. Its features, pricing plans, and integrations make it a good choice for businesses of all sizes.
4. Helpjuice

Helpjuice is a knowledge base software platform designed to help teams and businesses scale their customer support and collaboration. It offers a range of features to create, manage, and share knowledge bases.
Key Features
- Instant Google-like search: Quickly find the information you need.
- Simple, user-friendly design: No technical knowledge required.
- Fully customizable: Free customization options to meet branding needs.
- Intelligent analytics: Data-driven insights for knowledge management.
- Collaboration features: Real-time commenting and AI-powered subtitling.
Pricing
Helpjuice offers a 14-day free trial for each plan. The pricing plans are:
PlanCost (per month)Features IncludedBusiness$99-$299Varies by project requirements
Deployment Options
Helpjuice is a cloud-based platform, accessible from anywhere.
Integrations
Helpjuice integrates with over 1000 tools and platforms, including Intercom, Shopify, and WordPress.
Customer Support
Helpjuice offers 24/7 support via phone, email, and live chat, as well as a comprehensive knowledge base with tutorials, guides, and FAQs.
5. Freshdesk

Freshdesk is a customer support software with a strong knowledge base feature to help businesses create, manage, and share information easily.
Key Features
- Easy Content Creation: User-friendly interface for creating and organizing articles. No coding needed.
- Customization and Branding: Customize articles to match your business style with various templates and themes.
- Categorization and Organization: Organize articles into sections and sub-sections for easy navigation.
- Searchability: Powerful search function to help customers find answers quickly.
- Version Control: Track changes and revert to previous versions if needed.
Pricing
PlanCost (per month)Features IncludedFree$0Basic featuresGrowth$15More featuresPro$49Advanced features
Deployment Options
Freshdesk is cloud-based, accessible from anywhere.
Integrations
Freshdesk integrates with various third-party apps and tools, including:
- Slack
- Mailchimp
- Google Workspace
Customer Support
Freshdesk offers:
- 24/7 email support
- Phone and chat support for higher-tier plans
- A comprehensive knowledge base with tutorials, guides, and FAQs
sbb-itb-8abf120
6. HubSpot Service Hub

HubSpot Service Hub is a customer service software that helps businesses manage their customer support. It includes a knowledge base feature for creating, managing, and sharing information with customers.
Key Features
- Ticketing System: Manage customer inquiries and support requests efficiently. Create, assign, and track tickets to ensure all concerns are addressed.
- Knowledge Base: Create a repository of helpful articles, FAQs, and resources for customers to find answers quickly.
- Live Chat: Engage with customers directly on your website. Set up conversational bots to automate responses to common questions.
- Customer Feedback: Collect insights and measure customer satisfaction with feedback and survey tools.
Pricing
PlanCost (per month)User SeatsFeatures IncludedFree$01Basic featuresStarter$452More featuresProfessional$3605Advanced featuresEnterprise$1,20010All features
Deployment Options
HubSpot Service Hub is cloud-based, accessible from anywhere.
Integrations
HubSpot Service Hub integrates with various third-party applications, including:
- Social media tools
- Ecommerce platforms
- Analytics tools
- Lead generation tools
- Sales tools
- Project management tools
Customer Support
HubSpot Service Hub offers:
- 24/7 email support
- Phone and chat support for higher-tier plans
- A comprehensive knowledge base with tutorials, guides, and FAQs
7. Guru

Guru is a cloud-based knowledge management platform for organizations. It centralizes important information, making it easier for teams to share and access knowledge. Guru integrates well with tools like Slack, Google Workspace, and Microsoft Teams.
Key Features
- Centralized Knowledge Base: Store and manage all your organization's knowledge in one place.
- AI-Powered Search: Quickly find information with AI-powered search.
- Integrations: Works with your existing workflow tools.
- Security: Ensure the security and accuracy of your knowledge base with Trust Scores.
Pricing
PlanCost (per user per month)Features IncludedStarter$5 (billed annually)Basic featuresBuilder$10More featuresExpert$20All features
Deployment Options
Guru is cloud-based, accessible from anywhere.
Integrations
Guru integrates with:
- Slack
- Google Sheets
- Airtable
- More
Customer Support
Guru offers:
- Phone support
- Online support
- Knowledge base with tutorials and guides
- Video tutorials
8. Help Scout

Help Scout is a knowledge base software that helps teams create a media-rich help center without coding. It offers a WYSIWYG editor, AI-powered tools, and customization options.
Key Features
- Customizable Site Design: Match your Docs site with your main site’s color palette and style.
- Three-Tiered Organization System: Use collections, categories, and articles to organize content.
- Search Functionality: A prominent search bar with suggested articles.
- Integration with Beacon: Connect site visitors with support using the Beacon tool.
Pricing
Help Scout offers three pricing plans:
PlanCost (per month per user)Features IncludedStandard$20Two mailboxes, one Docs site, up to 25 users, live chat, in-app messaging, beacon help widget, custom reports, automated workflows, customer properties, API, and more than 50 integrations.Plus$40All Standard features, plus five mailboxes, two Docs sites, no user limit, 25 free light users, custom fields, teams, advanced permissions, unlimited reporting history, advanced API access, and more.Pro$65All Plus features, plus 25 mailboxes, 10 Docs sites, 50 free light users, tiered discounts, enterprise security, HIPAA compliance, API rate limit increase, concierge onboarding, dedicated account manager, and more.
Customer Support
Help Scout offers:
- 24/6 live chat or email support
- Dedicated account manager and quarterly team training for premium plans
- Extensive knowledge base with help articles on various topics, including Reporting, Account Management, Mobile Apps, and Integrations.
9. Notion

Notion is a knowledge base platform that combines knowledge management, task management, databases, and note-taking. Its flexible environment allows teams to create a customized workspace.
Key Features
- Modularity: Information is structured in blocks that can be rearranged and linked.
- Ease of Use: Clean, intuitive interface.
- Collaboration: Real-time collaboration for sharing knowledge and working together.
- Integration Capabilities: Integrates with various tools, making it a central hub for work.
Pricing
PlanCost (per month per user)Features IncludedPersonalFreeUnlimited pages and blocks, file uploads up to 100MB, and version history.Plus$8All Personal features, plus unlimited file uploads, advanced collaboration, and API access.Business$15All Plus features, plus advanced security and support, and a dedicated success manager.EnterpriseCustomAll Business features, plus custom onboarding, dedicated support, and advanced security.
Customer Support
Notion offers 24/7 support via chat, email, and phone, along with a comprehensive knowledge base with tutorials and guides.
10. Bloomfire

Bloomfire is a knowledge management platform that helps teams organize and access information easily. It is designed to make knowledge sharing simple and efficient.
Key Features
- User-Friendly Interface: Clean and easy to navigate.
- Search Functionality: Powerful search engine to find content quickly.
- Customization: Customize the home page and set up approval flows for content.
Pricing
Bloomfire's pricing is not publicly available. They offer a free trial, and you can contact them for a custom quote.
Customer Support
Bloomfire provides responsive customer support. Users praise the support team for being helpful and quick to respond. The platform also includes a knowledge base with tutorials and guides.
Bloomfire is a useful tool for teams looking to improve knowledge management and collaboration. Its user-friendly interface and strong search capabilities make it a valuable asset for any organization.
Pros and Cons
When choosing a knowledge base software, it's essential to weigh the pros and cons of each option. Here's a summary of the advantages and disadvantages of each platform:
Document360
ProsConsWide range of features, including creating backups and restores, role-based access control, and a well-featured text editorAI function needs improvementEasy information sharing through discussion platforms and advanced search functionalityCostly subscriptionSimple article management for easy updates and creationsLack of language support beyond English
Zendesk
ProsCons24/7 availability for customersTechnical expertise required for customizationImproves customer experience and reduces support team workloadLimited customization optionsOffers a free plan with basic featuresPricing can be high for large teams
Confluence
ProsConsUser-friendly interfaceCentral KBs may lack version history trackingExcellent search functionalityCan be expensive for large teamsSupports version history and tracking
Helpjuice
ProsConsEasy to use and set upLimited customization optionsOffers a free plan with basic featuresLimited integrations with other toolsGood customer support
Freshdesk
ProsConsOffers a free plan with basic featuresLimited customization optionsGood customer supportPricing can be high for large teamsEasy to use and set up
HubSpot Service Hub
ProsConsOffers a free plan with basic featuresLimited customization optionsGood customer supportPricing can be high for large teamsEasy to use and set up
Guru
ProsConsOffers a free plan with basic featuresLimited customization optionsGood customer supportLimited integrations with other toolsEasy to use and set up
Help Scout
ProsConsOffers a free plan with basic featuresLimited customization optionsGood customer supportLimited integrations with other toolsEasy to use and set up
Notion
ProsConsOffers a free plan with basic featuresLimited customization optionsGood customer supportLimited integrations with other toolsEasy to use and set up
Bloomfire
ProsConsUser-friendly interfacePricing is not publicly availableExcellent search functionalityLimited customization optionsSupports version history and tracking
When evaluating a knowledge base software, consider your team's specific needs and priorities. Weigh the pros and cons of each option carefully to ensure you choose the best fit for your organization.
Final Thoughts
Choosing the right knowledge base software is important for your organization. With many options available, it's essential to evaluate your team's needs and priorities. Consider the pros and cons of each platform, and weigh the importance of features like search functionality, customization options, and integrations with other tools.
A good knowledge base software should help your team access information quickly and efficiently, leading to better productivity and customer satisfaction. By selecting the right platform, you can create a central hub of knowledge that benefits your organization.
Take the time to assess your requirements, and explore the features and benefits of each option. With the right knowledge base software, you can improve your team's performance and drive business success.
Related posts

PWA Resource Pre-fetching & Caching with Service Workers
Progressive Web Apps (PWAs) use pre-fetching and caching techniques with Service Workers to improve performance and provide a faster, more reliable user experience. Here's what you need to know:
What is Pre-fetching and Caching?
- Pre-fetching downloads resources like images, stylesheets, and scripts in the background before they're needed, ensuring faster page loads.
- Caching stores frequently-used resources on the user's device, reducing network requests and enabling offline use.
- Service Workers are scripts that manage pre-fetching and caching, acting as a middleman between the app and network.
Pre-fetching Resources
TechniqueAdvantagesDisadvantages<link rel="prefetch">Easy to implementLimited caching controlService WorkersMore control and flexibilityMore complex implementation
Caching Strategies
StrategyBest Use CaseProsConsCache-FirstStatic assetsFast, offline supportPotential stale contentNetwork-FirstDynamic contentUp-to-date dataSlower, no offline supportStale-While-RevalidateMixed contentSpeed and freshnessComplexity, potential stale content
Using Workbox for Caching
- Workbox is a set of tools from Google that simplifies caching in PWAs.
- It offers features like precaching, runtime caching, and cache management.
- Workbox supports various caching strategies and helps manage cache updates and deletions.
Performance Impact
- Key metrics: Load Time, Time to First Byte (TTFB), First Contentful Paint (FCP), DOMContentLoaded, Resource Utilization.
- Balance caching with the need for up-to-date content through cache invalidation, expiration, and versioning.
- Optimize cache storage through compression, partitioning, and pruning.
- Monitor and analyze performance metrics regularly.
Best Practices
- Avoid common mistakes like incorrect cache headers, inadequate cache invalidation, and over-caching.
- Handle edge cases like network failures, cache misses, and device limitations.
- Ensure cache consistency through versioning, expiration, and invalidation.
- Test and debug your caching strategy thoroughly.
By implementing pre-fetching and caching with Service Workers, you can create faster, more reliable PWAs that provide a better user experience.
Related video from YouTube
Getting Started
PWA Basics
Progressive Web Apps (PWAs) are web apps that feel like native apps. They use modern web technologies like HTML, CSS, and JavaScript. PWAs offer features such as offline support, push notifications, and home screen installation. They work well on different devices and platforms, providing a fast and reliable user experience.
Service Worker Fundamentals
A Service Worker is a script that runs in the background. It helps manage network requests, cache resources, and provide offline support. The Service Worker lifecycle has three stages:
- Registration: The Service Worker is registered with the browser.
- Installation: Resources are cached.
- Activation: Cache updates and deletions are managed.
Web Caching Concepts
Web caching stores frequently-used resources on the user's device. This reduces network requests and improves page load times. The Cache API allows you to:
- Cache resources
- Manage cache updates
- Delete cache entries
Understanding these basics will help you use resource pre-fetching and caching with Service Workers to create a fast and reliable PWA.
Pre-fetching Resources
Pre-fetching resources speeds up web page loading by downloading and caching resources in the background before they are needed. This improves the user experience, especially for those with slow internet connections.
Pre-fetching with <link rel="prefetch">
Using the <link rel="prefetch"> tag hints to the browser that a resource will be needed soon. The browser downloads the resource in the background and stores it in the cache for later use. This method is easy to implement but offers limited control over caching.
Example:
<head>
  <link rel="prefetch" href="script.js">
</head>
Pre-fetching with Service Workers
Service Workers provide more control and flexibility for pre-fetching resources. During the install event, you can precache static assets like images and stylesheets to ensure they are available offline. You can also use Service Worker events to prefetch resources that might be needed later.
Example:
self.addEventListener('install', function(event) {
  event.waitUntil(
    caches.open(cacheName).then(function(cache) {
      return cache.addAll([
        '/style.css',
        '/image.jpg',
        '/script.js'
      ]);
    })
  );
});
Comparing Pre-fetching Methods
TechniqueAdvantagesDisadvantages<link rel="prefetch">Easy to implementLimited control over cachingService WorkersMore control and flexibilityMore complex to implement
Caching Strategies
Caching strategies help manage resource requests and responses in Progressive Web Apps (PWAs). Using the right strategy can boost performance and user experience.
Cache-First Strategy
The Cache-First strategy serves resources from the cache first. If the resource is not in the cache, it falls back to the network. This is good for static assets like images, stylesheets, and JavaScript files.
Network-First Strategy
The Network-First strategy fetches resources from the network first. If the network is unavailable, it serves the resource from the cache. This is ideal for content that needs to be up-to-date, like API responses or dynamic content.
Stale-While-Revalidate Strategy
The Stale-While-Revalidate strategy serves resources from the cache first and updates the cache with new data in the background. This balances speed and freshness, making it suitable for mixed content.
Choosing a Caching Strategy
Consider the type of resource, how often it updates, and user needs when choosing a strategy. Here's a comparison table to help you decide:
StrategyBest Use CaseProsConsCache-FirstStatic assetsFast, offline supportPotential stale contentNetwork-FirstDynamic contentUp-to-date dataSlower, no offline supportStale-While-RevalidateMixed contentSpeed and freshnessComplexity, potential stale content
Using Workbox for Caching
What is Workbox?
Workbox is a set of tools from Google that makes caching in PWAs easier. It helps you manage caching so you can focus on building your app. Workbox offers features like precaching, runtime caching, and cache management.
Precaching Assets
Precaching means caching resources during the service worker's install phase. Workbox's workbox.precaching.precacheAndRoute method helps you do this. You need a precache manifest, a list of resources to cache, which you can create using workbox-webpack-plugin or workbox-build.
Example using workbox-webpack-plugin:
// webpack.config.js
const WorkboxWebpackPlugin = require('workbox-webpack-plugin');

module.exports = {
  //...
  plugins: [
    new WorkboxWebpackPlugin.InjectManifest({
      swSrc: './src/sw.js',
      swDest: 'sw.js',
    }),
  ],
};
Implementing Caching Strategies
Workbox supports various caching strategies like Cache-First, Network-First, and Stale-While-Revalidate. Use workbox.routing.registerRoute to set a caching strategy for a route.
Example of Cache-First strategy:
// sw.js
workbox.routing.registerRoute(
  /\.(?:js|css|webp|png|svg)$/,
  new workbox.strategies.CacheFirst(),
);
Managing Cache Updates and Deletions
Workbox helps manage cache updates and deletions with features like cache expiration and pruning. Use workbox.cacheExpiration to set cache expiration.
Example:
// sw.js
workbox.cacheExpiration({
  maxAgeSeconds: 3600, // 1 hour
});
Debugging and Testing Caching
Workbox offers tools for debugging and testing, like workbox.debug and workbox.testing. Use these to test your caching strategy and debug issues.
Example:
// sw.js
workbox.debug.logLevel = 'debug';
This enables debug logging for your caching strategy, showing what's happening behind the scenes.
sbb-itb-8abf120
Advanced Caching Techniques
Partitioning and Managing Caches
Partitioning caches means separating different types of resources (like images, scripts, and HTML) into their own caches. This helps manage each cache better and keeps things organized.
To create separate caches, use the caches.open() method:
caches.open('image-cache').then(cache => {
  // Add image resources to the cache
});

caches.open('script-cache').then(cache => {
  // Add JavaScript resources to the cache
});
Cache Expiration and Pruning
Cache expiration sets a time limit for cached resources, so they are removed after a certain period. This keeps the cache from getting too full and ensures users get fresh content.
To set cache expiration, use the cacheExpiration method:
caches.open('image-cache').then(cache => {
  cacheExpiration({
    maxAgeSeconds: 3600, // 1 hour
  });
});
Cache pruning removes unused or outdated resources to free up space. Use cache.keys() to list cached items and cache.delete() to remove them.
Caching Cross-Origin Resources
Caching resources from other origins can be tricky due to browser security rules. Here are two ways to handle it:
- Use the
Access-Control-Allow-Originheader:
Access-Control-Allow-Origin: https://example.com
- Use a proxy server to cache and serve the resource, bypassing cross-origin restrictions.
Network-Based Cache Responses
You can serve different cached resources based on the user's network speed. Use the Network Information API to detect network conditions:
navigator.connection.addEventListener('change', () => {
  if (navigator.connection.downlink > 10) {
    // Serve high-quality cached resources for fast connections
  } else {
    // Serve low-quality cached resources for slow connections
  }
});
Performance Impact
Performance Metrics
To measure the impact of pre-fetching and caching, focus on these key metrics:
- Load Time: Time for the page to fully load.
- Time to First Byte (TTFB): Time for the browser to get the first byte from the server.
- First Contentful Paint (FCP): Time for the browser to show the first piece of content.
- DOMContentLoaded: Time for the browser to finish parsing the initial HTML.
- Resource Utilization: CPU, memory, and network resources used by the page.
Monitoring these metrics helps understand how pre-fetching and caching affect performance.
Balancing Caching and Freshness
Balancing caching with the need for up-to-date content is crucial. Here are some strategies:
- Cache Invalidation: Periodically update cached resources.
- Cache Expiration: Set a time limit for cached resources.
- Content Versioning: Use version numbers or timestamps to ensure users get the latest content.
Optimizing Cache Storage
Optimizing cache storage ensures caching doesn't hurt performance. Techniques include:
- Cache Compression: Compress cached resources to reduce size.
- Cache Partitioning: Separate cached resources into smaller chunks.
- Cache Pruning: Remove unused or outdated cached resources.
Monitoring and Analyzing Performance
Regularly monitor and analyze performance metrics to ensure caching strategies are effective. Useful tools include:
- Lighthouse: Provides detailed performance metrics and recommendations.
- PageSpeed Insights: Analyzes page performance and offers improvement tips.
- WebPageTest: Offers detailed performance metrics and waterfall charts to identify bottlenecks.
Best Practices and Common Pitfalls
Common Mistakes and Pitfalls
Avoid these common mistakes when implementing caching strategies:
- Incorrect cache headers: Misconfigured headers can lead to stale content, cache misses, or security issues.
- Inadequate cache invalidation: Not updating cached resources can result in users seeing outdated content.
- Over-caching: Caching too many resources can increase storage needs and slow performance.
Handling Edge Cases and Fallbacks
Consider these scenarios when planning your caching strategy:
- Network failures: Plan how your app will handle network issues.
- Cache misses: Decide what happens when a resource isn't cached or has expired.
- Device limitations: Ensure your app works on devices with limited storage or processing power.
Ensuring Cache Consistency
Keep your cache consistent to provide the latest content:
- Cache versioning: Use version numbers or timestamps to ensure users get the latest content.
- Cache expiration: Set time limits for cached resources to keep them updated.
- Cache invalidation: Regularly update cached resources.
Testing and Debugging
Thorough testing and debugging are crucial:
- Use developer tools: Inspect cache headers, resource timings, and network requests with browser tools.
- Test edge cases: Check your app under various network conditions and device limitations.
- Monitor performance metrics: Track load time, TTFB, and resource use to ensure effective caching.
Conclusion
Benefits Summary
Using resource pre-fetching and caching with service workers can make PWAs faster, more reliable, and better for users. This leads to quicker page loads, fewer network requests, and offline use, which can increase user engagement and satisfaction.
Key Takeaways
When building a PWA, remember to:
- Understand service workers, caching, and pre-fetching basics
- Choose the right caching strategy for your app
- Implement caching and pre-fetching correctly to avoid common mistakes
- Test and debug your caching strategy thoroughly
- Continuously monitor and optimize your app's performance
Further Learning
For more information on PWAs and caching, check out these resources:
- Service Worker API documentation
- Google's Web Fundamentals guide to caching and pre-fetching
- Workbox library for caching and routing
- Online courses and tutorials on PWA development and caching strategies
FAQs
How to cache with a service worker?
To cache resources with a service worker, use a cache-first strategy. This means:
- Check if the resource is in the cache.
- If it is, serve it from the cache.
- If not, fetch it from the network, store the response in the cache, and return the network response.
How to cache data using a service worker?
To cache data using a service worker:
- Check the request's destination property to see if it's an image request.
- If the image is in the cache, serve it from there.
- If not, fetch the image from the network, store the response in the cache, and return the network response.
This ensures your app can load resources efficiently, even with a slow or unavailable network.
Related posts
.png)
10 Real-World Serverless Architecture Examples
Serverless architecture is a cloud computing model that automatically scales resources based on demand, reducing costs and infrastructure management overhead. This article showcases 10 real-world examples of serverless architecture implementations across various industries, highlighting the key benefits achieved.
Related video from YouTube
Key Benefits of Serverless Architecture
- Cost Savings: Pay only for the resources used, eliminating idle capacity costs.
- Scalability: Automatically scales to handle traffic spikes without manual intervention.
- Faster Development: Developers focus on coding instead of infrastructure management.
Quick Comparison
ExampleCloud ProviderPrimary Use CaseMarbot the Serverless Slack BotAWSChatbot integration for AWS notificationsAudiobooks With Amazon PollyAWSText-to-speech conversion for audiobooksRainmaker GamesCockroachDB ServerlessGaming platform with NFT supportTIMU Collaboration PlatformCockroachDB ServerlessReal-time collaboration toolsThomson Reuters Usage AnalyticsAWSReal-time usage analytics processingiRobot Smart Home PlatformAWSSmart home automation and monitoringFINRA Market Event AnalysisAWSReal-time market event data processingAutodesk Tailor ToolAWSAutomated account creation and updatesFinancial Engines Core PlatformAWSPersonalized investment advice and portfolio managementMLB Advanced Media Data ProcessingGoogle CloudAutomated game notes generation
These examples demonstrate how serverless architecture can be leveraged across various domains, from chatbots and audiobooks to financial services and sports analytics, providing cost savings, scalability, and faster development cycles.
1. Marbot the Serverless Slack Bot
Marbot is a Slack bot that works with various cloud applications like CloudWatch Events, Auto Scaling Notifications, and CloudWatch Alarms. It sends AWS notifications to teams via Slack.
Cloud Provider
Marbot uses Amazon Web Services (AWS).
Serverless Services Used
Marbot uses AWS Lambda functions to handle events and notifications.
Primary Use Case
Marbot helps teams monitor AWS and manage alerts through Slack.
Key Benefits
BenefitDescriptionEasy setupIntegrates smoothly with AWS and third-party services.Real-time alertsSends instant notifications to teams.Better teamworkHelps team members stay informed and work together on issues.
2. Audiobooks With Amazon Polly
Audiobooks With Amazon Polly is a service that turns written text into speech using Amazon Web Services (AWS).
Cloud Provider
Audiobooks With Amazon Polly uses Amazon Web Services (AWS).
Serverless Services Used
This service uses Amazon Polly, a serverless AI service for text-to-speech conversion, and AWS CloudFormation.
Primary Use Case
It helps create audiobooks from written content, offering a cost-effective way to produce audiobooks without hiring voice actors.
Key Benefits
BenefitDescriptionCost-EffectiveCheaper than hiring voice actors.Lifelike SpeechProduces natural-sounding speech.Time-SavingQuickly converts text to speech.Language and Voice OptionsOffers various languages and voices to suit different needs.
3. Rainmaker Games

Cloud Provider
Rainmaker Games uses CockroachDB Serverless.
Serverless Services Used
The platform uses NodeJS, Prisma, and CockroachDB Serverless.
Primary Use Case
Rainmaker Games is a site where users can find and discuss games and NFTs. It also has a blog for new game introductions and allows users to submit new games and NFTs.
Key Benefits
BenefitDescriptionCost SavingsCuts IT infrastructure costs by up to 65%.ScalabilityAutomatically scales to handle traffic changes.Faster DevelopmentDevelopers can focus on building the platform instead of managing infrastructure.
4. TIMU Collaboration Platform
Cloud Provider
TIMU uses CockroachDB Serverless.
Serverless Services Used
The platform uses CockroachDB Serverless.
Primary Use Case
TIMU is a collaboration platform offering video conferencing, chat, project management dashboards, and file sharing.
Key Benefits
BenefitDescriptionCost SavingsCuts costs by avoiding overprovisioning, especially during the beta phase.ScalabilityAutomatically adjusts to traffic changes, saving time and resources.Faster DevelopmentDevelopers can focus on building the platform instead of managing infrastructure.
Jesse Ezell, CTO and Co-Founder of TIMU, says, "CockroachDB Serverless eliminated a lot of manual scaling work, saving us time and reducing costs since we don't have to overprovision, especially in beta."
5. Thomson Reuters Usage Analytics
Cloud Provider
Thomson Reuters uses AWS (Amazon Web Services).
Serverless Services Used
The company uses AWS Lambda, Amazon Kinesis, and Amazon S3 to process up to 4,000 events per second.
Primary Use Case
Thomson Reuters' usage analytics service handles traffic spikes and ensures high durability. The service was deployed into production in just five months using AWS.
Key Benefits
BenefitDescriptionScalabilityHandles spikes of twice its normal traffic.High DurabilityEnsures high uptime and reliability.Faster DevelopmentDeployed into production in only five months.
Thomson Reuters' usage analytics service shows how serverless architecture can process large amounts of data in real-time, offering scalability, high durability, and faster development.
sbb-itb-8abf120
6. iRobot Smart Home Platform
iRobot, known for its home robots, uses serverless architecture for its smart home platform. Their goal is to create homes that clean themselves and are smart.
Cloud Provider
iRobot uses Amazon Web Services (AWS).
Serverless Services Used
iRobot uses:
- AWS Lambda: For function-based compute services.
- Amazon Kinesis: For real-time data streams from robots.
- AWS IoT Core: For connectivity between robots and the cloud platform.
Primary Use Case
The platform handles large user traffic and provides a unified experience across products. Serverless architecture allows iRobot to focus on coding and customer needs, reducing costs and increasing efficiency.
Key Benefits
BenefitDescriptionScalabilityManages large user traffic and offers a unified experience.Cost EfficiencyLowers costs by avoiding subscription services and reducing operational efforts.Increased EfficiencyFocuses on coding and customer needs instead of operations.
7. FINRA Market Event Analysis

FINRA, a financial regulatory organization, uses serverless architecture for its data processing. This approach has cut costs by over 50% and sped up processing times.
Cloud Provider
FINRA uses Amazon Web Services (AWS).
Serverless Services Used
FINRA uses:
- AWS Lambda: For function-based compute services.
Primary Use Case
FINRA's serverless setup processes large volumes of market event data, providing real-time insights and analytics for regulatory needs.
Key Benefits
BenefitDescriptionCost EfficiencyReduced costs by over 50%.ScalabilityHandles large volumes of data easily.Faster ProcessingSpeeds up processing times, allowing quick responses to market events.
8. Autodesk Tailor Tool

Autodesk, a leading software company, uses a serverless architecture for its Tailor tool, which automates account creation and updates. This has cut costs, improved security, and made development faster.
Cloud Provider
Autodesk uses Amazon Web Services (AWS).
Serverless Services Used
- AWS Lambda: For running code.
- Amazon DynamoDB: For storing data.
- Amazon API Gateway: For API endpoints.
Primary Use Case
The Tailor tool automates account creation and updates, ensuring uniform configurations and controls. It also provides visibility into account security profiles and helps the SecOps Team identify vulnerabilities.
Key Benefits
BenefitDescriptionCost EfficiencyReduced costs from $500 to $6 per account.Faster ProvisioningNew accounts are available in 10 minutes, down from two weeks.Improved SecurityEnsures uniform configurations and helps identify vulnerabilities.Increased AgilityEnables faster development with automated account creation and updates.
9. Financial Engines Core Platform

Financial Engines, a top investment advisor in the U.S., uses a serverless setup for its Core Platform. This platform offers portfolio management, financial planning, and investment advice to millions.
Cloud Provider
Financial Engines uses Amazon Web Services (AWS).
Serverless Services Used
- AWS Lambda: For running code.
- Amazon API Gateway: For API endpoints.
Primary Use Case
The Core Platform automates financial services, giving customers personalized investment advice and portfolio management.
Key Benefits
BenefitDescriptionCost EfficiencyCuts costs by removing the need for capacity planning and infrastructure management.ScalabilityEasily handles large traffic spikes and variable workloads.Improved SecurityOffers advanced security features to protect customer data.Faster Time-to-MarketSpeeds up the development and deployment of new features and services.
10. MLB Advanced Media Data Processing
Cloud Provider
MLB Advanced Media uses Google Cloud.
Serverless Services Used
- Google Cloud Smart Analytics platform: For scaling data insights.
- Dataflow: For processing Statcast event data.
- BigQuery: For computing statistics and creating textual notes.
- Cloud Composer: For managing the daily data pipeline.
Primary Use Case
MLB Advanced Media uses serverless architecture to create automated game notes quickly and at scale. This involves processing Statcast event data, computing statistics, and adding context to create textual notes.
Key Benefits
BenefitDescriptionImproved Fan ExperienceProvides fans with real-time insights and smarter stats.ScalabilityHandles large amounts of data and meets the demands of millions of fans.Cost EfficiencyReduces costs by eliminating the need for capacity planning and infrastructure management.Faster Time-to-MarketSpeeds up the development and deployment of new features and services.
Comparison of Examples
To help you understand the differences and similarities between the serverless architecture examples, we've created a comparison table below:
ExampleCloud ProviderServerless Services UsedPrimary Use CaseKey BenefitsMarbot the Serverless Slack BotAWSLambda, API Gateway, S3Chatbot integrationScalability, Cost Efficiency, Faster Time-to-MarketAudiobooks With Amazon PollyAWSLambda, Polly, S3Text-to-speech conversionImproved User Experience, Scalability, Cost EfficiencyRainmaker GamesAWSLambda, API Gateway, S3Real-time gaming platformScalability, Cost Efficiency, Faster Time-to-MarketTIMU Collaboration PlatformAWSLambda, API Gateway, S3Real-time collaborationScalability, Cost Efficiency, Improved User ExperienceThomson Reuters Usage AnalyticsAWSLambda, API Gateway, S3Usage analyticsScalability, Cost Efficiency, Faster Time-to-MarketiRobot Smart Home PlatformAWSLambda, API Gateway, S3Smart home automationScalability, Cost Efficiency, Improved User ExperienceFINRA Market Event AnalysisAWSLambda, API Gateway, S3Market event analysisScalability, Cost Efficiency, Faster Time-to-MarketAutodesk Tailor ToolAWSLambda, API Gateway, S3Customizable workflowsScalability, Cost Efficiency, Improved User ExperienceFinancial Engines Core PlatformAWSLambda, API Gateway, S3Financial planningScalability, Cost Efficiency, Improved User ExperienceMLB Advanced Media Data ProcessingGoogle CloudCloud Smart Analytics, Dataflow, BigQuery, Cloud ComposerAutomated game notesImproved Fan Experience, Scalability, Cost Efficiency, Faster Time-to-Market
This table highlights the cloud provider, serverless services used, primary use case, and key benefits for each example. By comparing these examples, you can see how serverless architecture can be applied to different industries and use cases.
Summary
In this article, we've looked at 10 real-world examples of serverless architecture. From chatbots and audiobooks to smart home automation and financial planning, these examples show the range and benefits of serverless computing. Here are the key advantages:
- Scalability: Handles sudden traffic spikes without manual scaling.
- Cost efficiency: Pay only for the computing resources you use.
- Faster time-to-market: Developers focus on writing code, not managing infrastructure.
- Improved user experience: Faster and more responsive applications.
These benefits apply to many industries and use cases. Serverless architecture can be used for real-time analytics, IoT device management, and more. The examples in this article show how serverless computing helps build scalable, efficient, and cost-effective applications.
If you're thinking about using serverless architecture for your next project, we hope these examples have given you useful insights. For more information, check out the resources and references provided throughout this article.
FAQs
What are some examples of real world products that run on serverless platforms?
Serverless architecture is used in many industries and applications. Here are some examples:
ProductDescriptionServerless Services UsedCoca-Cola: IoT-Powered Vending MachinesCoca-Cola's Freestyle vending machines let customers order and pay for drinks online.AWS Lambda, API GatewayHootsuite: Social Media ManagementHootsuite Insights uses serverless architecture for real-time social media analytics.AWS Lambda, API GatewayiRobot: Smart Home AutomationiRobot's platform controls and monitors Roomba vacuums and Braava mop robots.AWS Lambda, API GatewayFannie Mae: Loan Quality ConnectThis platform helps lenders streamline loan submissions and reduce errors.AWS Lambda, API Gateway
These examples show how serverless architecture can handle different tasks efficiently and cost-effectively.
Related posts
.png)
SOC 2 Compliance for SaaS: 2024 Guide
SOC 2 compliance is a rigorous auditing standard that ensures SaaS companies securely manage and protect customer data. By achieving SOC 2 certification, SaaS providers demonstrate their commitment to data security, privacy, and integrity, building trust with customers and partners.
Related video from YouTube
Key Benefits of SOC 2 Compliance

- Data Security and Privacy: SOC 2 helps SaaS companies identify and mitigate security risks, protecting customer data from unauthorized access, breaches, and misuse.
- Regulatory Compliance: SOC 2 aligns with regulations like HIPAA and GDPR, ensuring SaaS providers meet industry standards and legal requirements.
- Competitive Advantage: SOC 2 certification sets SaaS companies apart, establishing a reputation as a reliable and trustworthy partner.
SOC 2 Compliance Process
- Define Scope and Objectives: Identify systems, processes, services, and Trust Service Criteria (TSC) to be audited.
- Risk Assessment: Conduct a risk assessment to identify potential security threats and implement controls to mitigate risks.
- Implement Controls: Establish security policies, access controls, encryption, incident response plans, and other necessary controls.
- Document Policies and Procedures: Clearly document all security-related policies, procedures, and practices.
- Engage an Auditor: Hire an independent auditor to evaluate the effectiveness of your controls and provide a SOC 2 report.
- Maintain Compliance: Continuously monitor, review, and update controls, undergo periodic audits, and adapt to changing regulations.
SOC 2 Trust Service Criteria
CriteriaDescriptionSecurityProtect systems and data from unauthorized accessAvailabilityEnsure system reliability and availability for usersProcessing IntegrityEnsure systems operate as intended without errors or issuesConfidentialityLimit access and use of confidential dataPrivacySafeguard personal information from unauthorized access or misuse
Achieving SOC 2 Compliance
While challenging, achieving SOC 2 compliance is crucial for SaaS companies to build customer trust, meet regulatory requirements, and gain a competitive edge. By following the SOC 2 framework, implementing robust security controls, and undergoing regular audits, SaaS providers can demonstrate their commitment to data security and privacy.
Understanding SOC 2
SOC 2 is a well-known auditing standard that ensures service organizations, like SaaS companies, manage and protect customer data securely. To achieve SOC 2 compliance, organizations must undergo a detailed audit of their internal controls and procedures related to security, availability, processing integrity, confidentiality, and privacy.
SOC 2 Framework Overview
The SOC 2 framework is based on the Trust Services Criteria (TSC), which are standards for managing and protecting customer data. The TSC consists of five categories: Security, Availability, Processing Integrity, Confidentiality, and Privacy. These categories ensure that service organizations have the necessary controls to protect customer data and maintain customer trust.
Five Trust Service Criteria
The five Trust Service Criteria are the foundation of the SOC 2 framework. They are:
- Security: Protects data from unauthorized access.
- Availability: Ensures system reliability for user access.
- Processing Integrity: Confirms systems operate as intended.
- Confidentiality: Limits access and use of stored confidential data.
- Privacy: Safeguards personal information from unauthorized access.
Type 1 vs. Type 2 Reports
There are two types of SOC 2 reports: Type 1 and Type 2. The main difference between them is the scope of the audit.
Report TypeDescriptionSOC 2 Type 1Evaluates the design of controls at a specific point in time. It provides a snapshot of the organization's controls and is often used as a preliminary assessment.SOC 2 Type 2Assesses the effectiveness of controls over a period of time (typically 3-12 months). It provides a more comprehensive evaluation of the organization's controls and is often required by stakeholders.
Understanding the differences between SOC 2 Type 1 and Type 2 reports helps service organizations determine which report suits their needs and stakeholders' requirements.
Why SOC 2 Matters for SaaS
Data Security and Privacy
SOC 2 compliance is crucial for SaaS companies as they handle sensitive customer data. With the rise in cyberattacks and data breaches, customers are more cautious about sharing their data. Achieving SOC 2 compliance shows that a SaaS company is committed to protecting customer data and maintaining high security standards.
A data breach can cause reputational damage, financial losses, and legal issues. SOC 2 compliance helps SaaS companies identify and reduce security risks, ensuring customer data is protected from unauthorized access, use, or disclosure.
Regulations and Standards
SOC 2 compliance helps SaaS companies meet regulatory obligations and industry standards. Many industries, like healthcare and finance, require compliance with regulations such as HIPAA and GDPR. SOC 2 provides a framework for SaaS companies to meet these requirements.
SOC 2 compliance also shows that a SaaS company follows industry best practices and standards, like the AICPA Trust Services Criteria. This builds trust with customers, partners, and stakeholders, and can be a market advantage.
Building Customer Trust
SOC 2 compliance builds customer trust and credibility. By achieving SOC 2 compliance, SaaS companies show their commitment to protecting customer data and maintaining high security standards. This helps build trust with customers, who are more likely to choose a SaaS company that has undergone a rigorous audit and met the necessary security standards.
SOC 2 compliance can also help SaaS companies stand out from competitors and establish a reputation as a reliable partner. This can lead to increased customer loyalty, retention, and revenue growth.
sbb-itb-8abf120
Preparing for SOC 2 Compliance
Getting ready for SOC 2 compliance involves understanding the process and planning well. Here are the key steps to help you prepare.
Define Scope and Objectives
Start by defining the scope and objectives of your SOC 2 compliance efforts. This means identifying the systems, processes, and services to be audited, as well as the Trust Service Criteria (TSC) to be evaluated. Decide whether you need a Type 1 or Type 2 report.
Questions to ask:
- What systems, processes, and services will be included in the audit?
- Which TSC will be evaluated?
- What is the objective of the SOC 2 audit?
- What type of SOC 2 report do you need?
Risk Assessment
Conduct a risk assessment to identify potential security and privacy risks and implement controls to mitigate them.
Steps for risk assessment:
- Identify potential risks: Look for risks related to data breaches, unauthorized access, and system failures.
- Assess the risks: Determine the likelihood and impact of each risk.
- Implement controls: Use measures like encryption, access controls, and incident response plans to mitigate risks.
Implement Controls
Identify security gaps and implement necessary controls to mitigate risks.
Steps to implement controls:
- Identify security gaps: Find gaps in your systems, processes, and services.
- Implement controls: Use measures like encryption, access controls, and incident response plans.
- Monitor and review: Continuously check the effectiveness of the controls.
Document Policies and Procedures
Document all security-related policies, procedures, and practices to show compliance with the TSC.
Steps to document policies and procedures:
- Identify policies and procedures: List all security-related policies and procedures.
- Document them: Write them down clearly and concisely.
- Review and update: Regularly update the documents to keep them relevant and effective.
The SOC 2 Compliance Process
The SOC 2 compliance process involves several steps to help organizations meet the Trust Services Criteria (TSC). Here's a simple guide to achieving SOC 2 compliance:
Step-by-Step Guide
The SOC 2 compliance process starts with preparation. Organizations define the scope and objectives of their compliance efforts. This includes identifying the systems, processes, and services to be audited, as well as the TSC to be evaluated. Next, organizations conduct a risk assessment to identify potential security and privacy risks and implement controls to mitigate them.
Selecting Trust Service Criteria
Choosing the right TSC is key to the SOC 2 compliance process. Organizations must select the TSC that align with their business goals and risk profile. The five TSC categories are:
- Security
- Availability
- Processing Integrity
- Confidentiality
- Privacy
Organizations may choose one or multiple TSC categories based on their needs.
Engaging an Auditor
Hiring an independent auditor is an important step. The auditor will evaluate the organization's controls and provide an objective assessment of their compliance with the TSC. When selecting an auditor, consider their experience, reputation, and qualifications.
The Audit Process
The audit process involves reviewing the organization's controls, policies, and procedures. The auditor will evaluate the design and effectiveness of the controls and identify any gaps or weaknesses. The audit may include on-site visits, interviews with staff, and a review of documentation and evidence.
Obtaining and Maintaining the Report
After the audit, the organization will receive a SOC 2 report that confirms their compliance with the TSC. To maintain compliance, organizations must continue to monitor and review their controls and undergo periodic audits and re-certification. This ensures that the controls remain effective and aligned with the TSC.
SOC 2 Controls and Best Practices
SOC 2 compliance requires effective controls to meet the Trust Services Criteria (TSC). This section covers common and specific criteria, best practices for implementing controls, and the importance of continuous monitoring.
Common and Specific Criteria
The common criteria for SOC 2 compliance include:
- Control Environment (CC1)
- Communication and Information (CC2)
- Risk Assessment (CC3)
- Monitoring Activities (CC4)
- Control Activities (CC5)
- Logical and Physical Access Controls (CC6)
- System Operations (CC7)
- Change Management (CC8)
Each TSC category has specific criteria. For example, the Security TSC includes:
- Implementing strong infosec policies
- Setting technical security controls
- Setting up anomaly alerts
- Performing audit trails
- Making forensic data actionable
Implementing Controls
To implement effective controls, organizations should:
- Develop a clear security policy
- Establish roles and responsibilities
- Implement technical security controls like encryption and access controls
- Conduct regular risk assessments and vulnerability testing
- Develop an incident response plan
Best practices include:
- Assigning a leader for SOC 2 readiness
- Involving stakeholders, including executive management
- Understanding weaknesses and reporting any data breaches during the audit period
- Knowing where customer data resides and how it is protected
Continuous Monitoring
Continuous monitoring is key to maintaining SOC 2 compliance. Organizations should:
- Implement a continuous monitoring program
- Monitor for both known and unknown malicious activity
- Establish a baseline of normal activity in the cloud environment
- Receive alerts for unauthorized access to customer data
- Perform detailed audit trails for data security incidents
Challenges and Considerations
Achieving SOC 2 compliance can be complex for SaaS companies. This section covers common challenges, growth stage considerations, and balancing security with usability.
Common Challenges
Implementing SOC 2 compliance can be tough, especially for smaller SaaS startups. Common challenges include:
- Outdated Tools: Old hardware and security software can make it hard to spot and fix security issues.
- High Costs: Compliance can be expensive, including costs for audits, tech upgrades, and staff training.
- Continuous Compliance: Keeping up with SOC 2 standards requires regular reviews, audits, and updates to security protocols.
To tackle these challenges, SaaS companies can work with compliance consultants and use automation platforms to ease the compliance process.
Growth Stage Considerations
SOC 2 compliance needs can vary based on a company's size and growth stage:
Company StageFocus AreasStartupsDevelop a security program and basic controls.Established CompaniesRefine and scale security protocols.High-Growth CompaniesEnsure security solutions can handle rapid expansion.
It's important for SaaS companies to align their compliance strategy with their growth stage and business model.
Security vs. Usability
Balancing security and usability is key for SOC 2 compliance. SaaS companies need strong security measures that don't hinder user experience.
To achieve this balance, companies can:
- Use Intuitive Security Protocols: Make security measures easy to understand and follow.
- Conduct User Testing: Regularly test and get feedback to ensure security measures aren't too restrictive.
- Develop Scalable Security Solutions: Ensure security measures can grow with the business.
Maintaining SOC 2 Compliance
Keeping up with SOC 2 standards is crucial for ongoing compliance. This section explains the importance of regular audits, re-certification, and staying updated with changing regulations.
Continuous Compliance Program
A continuous compliance program helps ensure your organization stays compliant with SOC 2 standards. This involves:
- Regularly checking and updating security controls, policies, and procedures
- Identifying and fixing security gaps
- Ensuring security controls work effectively
- Providing ongoing training for employees
- Keeping accurate documentation
By maintaining a continuous compliance program, you can reduce the risk of non-compliance and maintain trust with your customers.
Periodic Audits and Re-certification
Regular audits and re-certification are key to maintaining SOC 2 compliance. These audits ensure your security controls and procedures are effective and up-to-date.
Recommended Frequency:
- Annual audits and re-certification
Adapting to Changing Regulations
Staying updated with changing regulations and industry standards is essential. This includes:
- Monitoring updates to SOC 2 standards
- Staying informed about new threats and vulnerabilities
- Adapting to changes in industry regulations
- Updating security controls and procedures
Resources and Tools
In this section, we'll look at the recommended resources, tools, and software for achieving and maintaining SOC 2 compliance.
Recommended Resources
Having the right resources can make SOC 2 compliance easier. Here are some useful resources:
- SOC 2 compliance checklists: Use checklists to ensure you meet all SOC 2 requirements.
- Compliance automation tools: Tools like Vanta, Drata, and Secureframe can streamline your compliance process.
- SOC 2 policy templates: Pre-built templates can help you create and implement policies and procedures.
- Online courses and training: Online courses can educate you and your team on SOC 2 compliance.
Tool Comparison
When choosing a SOC 2 compliance tool, it's important to compare their pros and cons. Here's a comparison table to help you decide:
ToolAdvantagesDisadvantagesVantaAutomates compliance workflows, integrates with popular toolsSteeper learning curve, limited customization optionsDrataOffers a comprehensive control library, provides real-time compliance visibilityCan be expensive for larger organizations, limited scalabilitySecureframeSimplifies compliance for startups, offers a user-friendly interfaceLimited features for larger organizations, limited customization options
Conclusion
Key Takeaways
SOC 2 compliance is important for SaaS companies to ensure the security and integrity of customer data. Here's a summary of what we've covered:
- SOC 2 Compliance: While not mandatory, it's highly recommended for SaaS companies to build trust with customers and partners.
- SOC 2 Framework: Consists of five trust service criteria: security, availability, processing integrity, confidentiality, and privacy.
- Preparation: Involves defining scope and objectives, risk assessment, implementing controls, and documenting policies and procedures.
- Maintenance: Requires continuous monitoring, periodic audits, and staying updated with changing regulations.
FAQs
Why is SOC 2 compliance important for SaaS providers?
SOC 2 compliance shows that a SaaS provider follows security best practices and protects customer data. It helps build trust with customers, gives a competitive edge, and addresses security concerns by following recognized standards.
What are the trust service criteria in SOC 2?
The trust service criteria in SOC 2 cover five areas: security, availability, processing integrity, confidentiality, and privacy. These criteria guide how organizations should manage and protect sensitive data.
How do internal controls affect SOC 2 compliance?
Internal controls are key for SOC 2 compliance. They ensure that an organization’s operations meet the standards for design and effectiveness. These controls help manage risks related to the security, availability, and integrity of systems and data.
What is the role of a licensed CPA firm in the SOC 2 audit process?
A licensed CPA firm independently assesses the service organization’s compliance with the trust service criteria. The CPA firm evaluates whether the organization’s controls are designed and operating effectively to meet the criteria.
How does SOC 2 address physical access controls?
SOC 2 requires organizations to secure their facilities and data with physical access controls. This includes measures like security guards, surveillance systems, and controlled access points to prevent unauthorized entry.
What should a SaaS provider include in their risk assessment for SOC 2?
A SaaS provider’s risk assessment should identify potential security threats and vulnerabilities, evaluate their impact, and determine the necessary controls to mitigate these risks. This assessment is crucial for designing effective security and privacy controls.
How can SOC 2 compliance give a SaaS provider a competitive advantage?
SOC 2 compliance can give SaaS providers an edge by showing potential customers that the provider meets high standards for security and privacy. This assurance can be a deciding factor for customers when choosing between competing SaaS offerings.
What does a SOC 2 report contain?
A SOC 2 report includes details about the auditing standards met by the SaaS provider, the scope of the audit, the service organization’s system description, and the auditor’s findings on the effectiveness of internal controls. The report provides assurance about the provider’s compliance with SOC 2 criteria.
What is the difference between SOC 2 Type 1 and Type 2 reports?
SOC 2 Type 1 reports evaluate the design of internal controls at a specific point in time. SOC 2 Type 2 reports assess the operating effectiveness of internal controls over a period of time (typically 3-12 months). Type 2 reports provide more assurance about the effectiveness of controls over time.
How do I get SOC 2 compliance?
To get SOC 2 compliance, an organization must undergo a third-party audit of their system and organization controls. They need to provide auditors with evidence and documentation to show that internal controls are properly represented by management.
Related posts
.png)
Top 10 Scaled Agile Framework (SAFe) Tools 2024
The Scaled Agile Framework (SAFe) helps organizations apply agile practices at scale. This article covers the top 10 SAFe tools to manage agile practices effectively:
- ServiceNow - Provides dependency visualization, collaboration features, and integrates with agile development tools.
- Rally Software - Offers portfolio management, collaboration tools, metric charts, capacity planning, and strategic alignment.
- SpiraPlan - Supports portfolio management, task management, risk management, planning boards, and reporting.
- Targetprocess - Visualizes dependencies, supports PI planning, and offers portfolio and product management features.
- Planview - Includes lean portfolio management, financial planning, agile delivery, and enterprise architecture modules.
- Digital.ai - Provides visual planning, collaboration, execution tracking, and flexible SAFe configurations.
- Atlassian Suite - Offers tools like Confluence, JIRA Software, JIRA Align, and Roadmaps for collaboration and portfolio management.
- SwiftEASe - Supports visual planning, lean execution, and collaboration across SAFe levels.
- Clarizen - Offers task management, project finances, and roadmaps for project management and collaboration.
- Jira Align - Provides sprint analysis, team metrics, quality management, and sprint progress tracking.
Related video from YouTube
Quick Comparison
ToolPortfolio ManagementCollaboration FeaturesSprint AnalysisQuality ManagementSprint Progress TrackingServiceNow✅✅✅✅✅Rally Software✅✅✅✅✅SpiraPlan✅✅✅✅✅Targetprocess✅✅✅✅✅Planview✅✅✅✅✅Digital.ai✅✅✅✅✅Atlassian Suite✅✅✅✅✅SwiftEASe✅✅✅✅✅Clarizen✅✅✅✅✅Jira Align✅✅✅✅✅
This table compares the key features of each SAFe tool, allowing you to quickly identify the strengths and weaknesses of each option based on your specific needs.
1. ServiceNow
ServiceNow is a tool that helps manage digital workflows for large organizations. It combines various features to provide visibility into dependencies, sprint capacity, and workload.
Dependency Visualization
ServiceNow offers a unified backlog to manage all agile work in one place. This helps teams see dependencies, track work items, and collaborate across groups.
Collaboration Features
The tool provides agile/scrum planning boards for product owners and scrum masters to plan work, manage stories, and tasks. It also integrates with project portfolio management and performance analytics to help project managers build and run complex projects.
ServiceNow's IntegrationHub connects agile development tools like Jira and VersionOne with broader IT workflows. This single source of truth increases visibility and alignment, helping teams deliver software products faster and with higher quality.
2. Rally Software

Rally Software is an enterprise Agile planning tool designed to align work with business goals. It supports real-time iterative work for teams using various Agile methods, including SAFe and Value Stream Management (VSM).
Portfolio Management
Rally Software offers portfolio management, allowing users to link and view the entire hierarchy from themes to tasks. This helps product management see all product features and manage tasks effectively.
Collaboration Features
Rally Software connects teams, increasing collaboration and using data to boost productivity. It serves as a central hub for teams to plan, prioritize, and track work, which can be visualized in lists, boards, or timeline views. The tool also provides roll-ups of progress, dependencies, alignment, and plans, helping teams make informed decisions and stay focused on delivering value.
Key Features:
FeatureDescriptionMetric ChartsVisualize key metrics to track progress and performance.Capacity PlanningManage team capacity to ensure balanced workloads.Strategic AlignmentAlign work with business goals and strategies.Cumulative Flow DiagramsTrack work in progress and identify bottlenecks.Custom DashboardsCreate personalized dashboards to monitor key metrics and progress.
Notable brands such as Verizon and Honda use Rally Software, showing its effectiveness in large-scale Agile development and collaboration.
3. SpiraPlan

SpiraPlan supports various agile methods, including SAFe. It offers a rich set of tools for both product and team levels. Its visualization and mind mapping features help understand how release trains link to product releases and team iterations.
Portfolio Management
SpiraPlan provides a program and portfolio management module. This lets you manage solution trains, programs, solution backlogs, and deliver increments of functionality based on features, epics, and enablers.
Collaboration Features
SpiraPlan offers Agile tools, automations, and reporting features. It supports task management, requirements management, and risk management. All features are available regardless of the plan you choose.
Key Features:
FeatureDescriptionPlanning BoardVisualize projects and track progress.Kanban BoardManage tasks and workflow.Gantt ChartsView project schedules and timelines.Workload PlanningManage team capacity and workload.Long-term PlanningPlan and track project progress over time.Reporting FeaturesGenerate reports to track progress and performance.
SpiraPlan is a useful tool for agile portfolio and risk management, offering a complete solution for managing and tracking multi-team agile software development.
4. Targetprocess
Targetprocess is a visual platform that connects Portfolio, Products, and Teams. It helps companies scale agile across the enterprise with pre-built templates for SAFe, LeSS, Nexus, and other frameworks. The tool is customizable to fit your project management needs.
Portfolio Management
Targetprocess supports creating iteration plans for teams. The Kanban board shows the status and progress of work. The Cumulative Flow Diagram (CFD) displays the amount of work in different Kanban stages. Burn-down and Burn-up charts provide visibility into team progress.
PI Planning
Targetprocess supports PI Planning for Teams in the ART. The visual Program Board shows dependencies between teams. The dashboard offers insight into the Program Predictability Measure. Features can be prioritized using the WSJF method. The RTE can manage cadence and milestones visually.
Dependency Visualization
Targetprocess supports online planning, communication, and execution of a Planning Interval (PI).
Collaboration Features
Targetprocess is useful for large-scale product management. It helps manage work, resources, and portfolios while aligning them to the strategy. The tool is configurable and can be used for SAFe implementations.
5. Planview

Planview is a cloud-based tool for managing work and resources. It helps companies move from planning to delivery, making it easier to handle changes and focus on delivering value.
Portfolio Management
Planview's Lean Portfolio Management helps adjust planning and funding to match market and customer changes. It includes modules for innovation, portfolios, lean management, financial planning, agile delivery, and enterprise architecture.
Collaboration Features
Planview supports various work methods, allowing teams to use tools like Jira and ADO. It connects strategic plans to costs and delivery, helping organizations plan, fund, and deliver value. The tool offers financial management features to explore different funding, cost, and capacity scenarios, keeping the focus on key outcomes and objectives.
Planview's Enterprise Agile Planning supports distributed Agile teams in planning, coordinating, and delivering business value. It offers:
- End-to-end visibility
- Dynamic Agile planning and prioritization at team, program, and portfolio levels
- Support for both traditional and Agile portfolios
- Support for Objectives and Key Results (OKRs)
sbb-itb-8abf120
6. Digital.ai
Digital.ai is a tool that helps organizations scale agile practices with value stream management software and services. It offers features for release planning, reporting, collaboration, and delivery predictability.
Portfolio Management
Digital.ai's VersionOne/CollabNet provides a centralized environment to simplify the adoption and implementation of the Scaled Agile Framework. It supports key constructs, practices, and metrics defined by SAFe, including Communities of Practice and DevOps.
Collaboration Features
The tool is used for visual planning, collaboration, and execution. It allows instant visibility of the strategy and investment across portfolios. Digital.ai's flexible planning hierarchy makes it easy to use any mix of configurations, from Essential to Full SAFe.
Key Features:
FeatureDescriptionVisual PlanningPlan and track work visually.CollaborationEnhance team collaboration and communication.ExecutionManage and execute tasks efficiently.Strategy VisibilitySee strategy and investment across portfolios.Flexible PlanningUse various configurations for different SAFe levels.
Digital.ai's VersionOne/CollabNet helps organizations align strategy with execution, enabling teams to deliver maximum impact and optimize ROI.
7. Atlassian Suite

Atlassian Suite offers a range of tools to support Scaled Agile Framework (SAFe) implementation. It includes Confluence, JIRA Software, Easy Agile for JIRA, JIRA Align, BigPicture, and Roadmaps.
Collaboration Features
Atlassian Suite helps teams work together on requirements, documentation, decisions, and risks.
- Confluence: Teams can collaborate on content.
- JIRA Software: Offers scalable workflows and fields.
- Easy Agile Programs for JIRA: Enhances cross-team planning and management of dependencies.
Portfolio Management
JIRA Align helps large teams align their work with top-level goals. It includes dashboards, reports, and retrospective modules for flexibility in large organizations. Advanced Roadmaps assist in long-term planning and keeping stakeholders informed.
Key Tools:
ToolPurposeConfluenceContent collaborationJIRA SoftwareScalable workflowsEasy Agile Programs for JIRACross-team planningJIRA AlignAlign work with goalsBigPictureProject managementRoadmapsLong-term planning
Atlassian Suite provides a flexible solution for scaled agile transformation, making it a good choice for organizations implementing SAFe.
8. SwiftEASe
Portfolio Management
SwiftEASe is a visual tool for planning, execution, and collaboration in Lean/Agile software development using SAFe. It supports all 4 levels of SAFe and focuses on visual management and ease of use. SwiftEASe links strategic themes to business and architectural Epics, tracking both high-level Epics and team-level tasks.
PI Planning
SwiftEASe helps track risks and how they are addressed. It provides SAFe metrics to support IT governance and continuous improvement.
Collaboration Features
SwiftEASe allows business owners and leaders to track high-level goals alongside ground-level tasks. It offers a comprehensive view, enabling effective team collaboration.
Key Features:
FeaturePurposeVisual PlanningSupports all 4 levels of SAFeLean ExecutionFocuses on visual management and ease of useCollaborationTracks high-level goals and ground-level implementation
SwiftEASe is a useful tool for software development teams, providing visibility and detail for team, program, solution, and portfolio levels. It integrates with other project management tools, making it a good choice for organizations using SAFe.
9. Clarizen
Portfolio Management
Clarizen is a cloud-based tool for managing projects, programs, and resources. It helps businesses keep track of multiple projects, providing visibility over workflows, resources, budgets, and timelines.
Collaboration Features
Clarizen makes it easy for teams to work together and align their tasks with business goals. It offers:
- Task Management: Manage tasks, track time, and integrate applications.
- Project Finances: Monitor project budgets and profitability.
- Project Roadmaps: Plan and manage project timelines.
Key Features:
FeaturePurposeTask ManagementManage tasks, track time, integrate appsProject FinancesMonitor budgets and profitabilityProject RoadmapsPlan and manage project timelines
Clarizen is a solid choice for project management and team collaboration, offering tools to help businesses manage their projects effectively.
10. Jira Align

Portfolio Management
Jira Align is a software tool for managing agile practices at scale. It supports various agile frameworks, including custom ones, making it suitable for large organizations.
Collaboration Features
Jira Align offers several features to help teams work together:
- Sprint Analysis: Provides a report comparing the team plan at the start of the sprint with the results.
- Sprint Team Metrics: Displays statistics like velocity, story splits, team emotion, and sprint goals across all sprints.
- Quality Management: Shows a visual snapshot of quality for each product line, including defect and test case breakdowns.
- Sprint Progress Tracking: Offers a detailed view of sprint progress per story, including the status of acceptance criteria and task breakdowns.
Key Features:
FeaturePurposeSprint AnalysisReport for sprint planning and reviewSprint Team MetricsTrack team performance and velocityQuality ManagementVisualize quality metrics for product linesSprint Progress TrackingMonitor sprint progress and story completion
Jira Align is a strong tool for scaling agile practices across an organization, providing features for portfolio management, collaboration, and reporting.
Feature Comparison
Here is a comparison table of the key features of each tool listed in the article:
ToolPortfolio ManagementCollaboration FeaturesSprint AnalysisQuality ManagementSprint Progress TrackingServiceNow✅✅✅✅✅Rally Software✅✅✅✅✅SpiraPlan✅✅✅✅✅Targetprocess✅✅✅✅✅Planview✅✅✅✅✅Digital.ai✅✅✅✅✅Atlassian Suite✅✅✅✅✅SwiftEASe✅✅✅✅✅Clarizen✅✅✅✅✅Jira Align✅✅✅✅✅
Note: ✅ indicates that the tool has the feature. ❌ indicates that the tool does not have the feature.
This table provides a clear comparison of the key features of each tool, allowing readers to quickly identify the strengths and weaknesses of each tool.
Final Thoughts
Choosing the right SAFe tool for your organization can be challenging. By understanding your specific needs, you can narrow down the options and select the tool that best fits your business goals. The top 10 SAFe tools listed in this article offer various features to help you scale agile practices effectively.
Consider the following factors when evaluating SAFe tools:
- Portfolio Management
- Collaboration Features
- Sprint Analysis
- Quality Management
- Sprint Progress Tracking
By focusing on these aspects, you can ensure that your chosen tool aligns with your organization's needs and helps you achieve business agility.
We hope this article has provided useful insights to help you make an informed decision when selecting a SAFe tool. Happy exploring!
Related posts
.png)
Scalable Enterprise App Design: 10 Best Practices
Building scalable enterprise applications is crucial for businesses to handle growth and meet increasing user demands. This article outlines 10 key practices to achieve scalability:
- Modular Architecture: Break down the application into smaller, independent modules that can scale individually.
- Cloud Technologies: Leverage cloud platforms to easily adjust resources based on needs.
- Caching Strategies: Implement caching to reuse data, improving performance and reducing costs.
- Database Performance: Optimize queries, indexing, and caching for faster data retrieval.
- Asynchronous Processing: Run multiple tasks simultaneously for better responsiveness.
- Load Balancing: Distribute traffic across multiple servers to prevent overloading.
- Automated Deployment and Monitoring: Ensure consistency and reduce errors through automation.
- Performance Testing: Simulate real-world scenarios to identify and address bottlenecks.
- Fault Tolerance and Resilience: Keep the system running even if components fail.
- Continuous Improvement: Foster a culture of innovation and learning to stay competitive.
By following these practices, enterprises can build applications that can withstand the challenges of growth, meet changing user needs, and stay ahead of competitors.
Related video from YouTube
1. Adopt a Modular Architecture
Adopting a modular architecture is a key practice for designing scalable enterprise apps. This approach involves breaking down the application into smaller, independent modules that can be developed, tested, and deployed separately. Each module focuses on a specific functionality or feature, making it easier to maintain, update, and scale individual components without affecting the entire system.
Benefits of Modular Architecture
BenefitDescriptionImproved scalabilityScale individual modules independently, allowing efficient resource allocation.Faster developmentParallel development and deployment of modules reduce overall development time.Enhanced maintainabilitySmaller, independent modules make it easier to identify and fix issues.Better reusabilityPromotes code reusability, reducing the need to duplicate code.
Tips for Implementing Modular Architecture
- Define clear module boundaries: Identify the specific functionality or feature each module will provide and ensure that each module has a clear, well-defined interface.
- Encapsulate module dependencies: Minimize dependencies between modules to reduce coupling and improve scalability.
- Use standardized interfaces: Establish standardized interfaces between modules to ensure seamless communication and reduce integration complexity.
2. Leverage Cloud Technologies
Using cloud technologies is key for building scalable enterprise apps. Cloud platforms offer resources like virtual servers, networking, storage, and runtime environments. This allows developers to scale up or down based on business needs, ensuring smooth growth and consistent user experiences.
Benefits of Cloud Technologies
BenefitDescriptionEaseAdjust capacity with a few clicks.SpeedQuickly configure infrastructure to meet changing demands.Cost-effectivenessPay only for the resources used.ReliabilityHandle sudden demand changes, ensuring high performance.
3. Implement Caching Strategies
Implementing caching strategies is key for building scalable enterprise applications. Caching allows you to reuse previously retrieved or computed data, reducing the need to access slower storage layers. This results in better performance, lower database costs, and higher read throughput.
Benefits of Caching
BenefitDescriptionImproved PerformanceFaster data retrieval and reduced latencyReduced Database CostsLower database load and reduced costsIncreased Read ThroughputHandle higher traffic and user loads
Caching Strategies
- In-Memory Caching: Use systems like Redis or Memcached to store frequently accessed data.
- Cache Expiration: Set a time-to-live (TTL) for cached data to keep it up-to-date.
- Cache Invalidation: Remove cached data when the underlying data changes.
- Cache Fallback Strategies: Handle cache misses or failures with fallback plans.
- Distributed Caching: Scale caching across multiple nodes using distributed systems.
4. Optimize Database Performance
Optimizing database performance is key for scalable enterprise applications. A well-performing database ensures faster data retrieval, reduced latency, and better system responsiveness. Here are some strategies to optimize database performance:
Optimize Database Queries
Improving database queries is essential for better performance. This involves refining queries to reduce execution time and resource use. Techniques like query caching, indexing, and optimizing SQL statements can help.
Use Efficient Database Indexing
Database indexing helps in faster data retrieval. By creating efficient indexes, you can reduce query execution time and improve overall database performance.
Implement Database Caching
Database caching stores frequently accessed data in memory or other fast storage. This reduces the load on the database server and improves response times. Strategies like query result caching, fragment caching, and full-page caching can help.
Monitor and Analyze Database Performance
Monitoring and analyzing database performance helps identify bottlenecks. Track key performance indicators like query execution time, CPU usage, and disk I/O. Analyzing these metrics can highlight areas for improvement.
Regularly Update and Maintain the Database
Regular updates and maintenance are crucial for optimal performance. This includes updating database software, applying security patches, and performing regular backups. Keeping the database up-to-date helps prevent performance issues.
Summary of Strategies
StrategyDescriptionOptimize QueriesRefine queries to reduce execution time and resource use.Efficient IndexingCreate indexes for faster data retrieval.Database CachingStore frequently accessed data in memory.Monitor PerformanceTrack and analyze key performance indicators.Regular MaintenanceUpdate software, apply patches, and perform backups.
5. Embrace Asynchronous Processing
Asynchronous processing is important for designing scalable enterprise applications. It allows multiple tasks to run at the same time, improving system responsiveness and reducing delays. By using asynchronous processing, your application can handle many requests without losing performance.
Benefits of Asynchronous Processing
BenefitDescriptionImproved PerformanceMultiple tasks run at the same time, leading to faster response times.Better Resource UseThe CPU can work on other tasks while waiting for I/O operations to complete.Enhanced User ExperienceThe UI remains responsive even while background tasks are running.ScalabilityCan handle many concurrent operations without overwhelming the system.
Real-World Example
In an e-commerce application, when a user places an order, the system can process the payment, update the inventory, and send a confirmation email all at the same time. This keeps the user interface responsive and allows the system to handle multiple orders without delays.
sbb-itb-8abf120
6. Implement Load Balancing
Implementing load balancing is key for designing scalable enterprise applications. Load balancing distributes incoming traffic across multiple servers, ensuring no single server becomes overwhelmed and improving application performance and availability.
Benefits of Load Balancing
BenefitDescriptionImproved ScalabilityEasily add or remove servers without disrupting the application.Enhanced AvailabilityAutomatically route traffic to healthy servers if others fail.Increased PerformanceDistribute traffic efficiently, reducing the burden on individual servers.
Load Balancing Algorithms
AlgorithmDescriptionRound RobinEach request is sent to the next available server in sequence.Weighted Round RobinRequests are distributed based on server weights.Least ConnectionsRequests are sent to the server with the fewest active connections.RandomRequests are randomly distributed across available servers.
7. Automate Deployment and Monitoring
Automating deployment and monitoring is key for designing scalable enterprise applications. Manual deployments can be error-prone, time-consuming, and may lead to inconsistencies across different environments. By automating deployment and monitoring, you can ensure consistency, reduce errors, and increase productivity.
Benefits of Automated Deployment and Monitoring
BenefitDescriptionConsistencyAutomated deployments ensure consistency across different environments.Reduced ErrorsAutomated deployments minimize the risk of human error.Increased ProductivityAutomated deployments free up resources, allowing teams to focus on development.
Automated Deployment Strategies
Automated deployment strategies can be categorized into two main types: Continuous Delivery and Continuous Deployment. Continuous Delivery allows for manual control over when changes are deployed, while Continuous Deployment automatically deploys successful changes to production. The choice of strategy depends on factors such as the organization's requirements, risk tolerance, team maturity, and the nature of the software being developed.
8. Conduct Performance Testing
Conducting performance testing is a key step in designing scalable enterprise applications. It helps find bottlenecks, ensures the system can handle expected loads, and provides insights for optimization. Performance testing involves simulating real-world scenarios to evaluate the system's response time, throughput, and resource use.
Types of Performance Testing
TypeDescriptionLoad TestingChecks the system's behavior under normal and peak loads.Stress TestingPushes the system beyond its limits to find breaking points.Soak TestingAssesses the system's performance over a long period.Spike TestingSimulates sudden increases in load to see how the system responds.
Best Practices for Performance Testing
To get the most out of performance testing, follow these best practices:
- Change one variable at a time: Ensure accurate results by only changing one variable at a time.
- Reset the system between tests: Avoid skewed results by resetting the system between test runs.
- Run multiple tests: Ensure consistency and identify trends by running multiple tests.
- Set realistic benchmarks: Establish achievable goals based on business needs.
- Think like a user: Evaluate performance from the user's perspective to meet their expectations.
9. Implement Fault Tolerance and Resilience
Implementing fault tolerance and resilience is crucial for scalable enterprise applications. Fault tolerance means a system can keep working even if some parts fail. This is done by having backup components that can take over instantly.
Strategies for Fault Tolerance
StrategyDescriptionLoad BalancingDistribute traffic across multiple servers to avoid overloading any single server.RedundancyKeep identical copies of critical components, like databases or servers, to take over if one fails.Error Detection and CorrectionDetect and fix errors in real-time to minimize the impact of failures.
10. Foster a Culture of Continuous Improvement
Creating a culture of continuous improvement is key for scalable enterprise applications. This means encouraging innovation, experimentation, and learning. By doing this, organizations can stay competitive, meet changing user needs, and grow.
How to Foster Continuous Improvement
ActionDescriptionEncourage CreativitySet aside time for brainstorming and exploring new ideas.Embrace FailureView failures as learning opportunities and not setbacks.Promote CollaborationFoster teamwork and open communication.Provide ResourcesOffer tools and support for new projects and ideas.Recognize ContributionsReward and acknowledge innovative efforts.
Benefits of Continuous Improvement
BenefitDescriptionCompetitive EdgeStay ahead of competitors by constantly improving.User SatisfactionMeet and exceed user expectations.Business GrowthDrive growth through continuous enhancements.
Summary
Scalable enterprise app design is crucial for businesses to handle growth and increased user demands. By following the 10 best practices outlined in this article, enterprises can build applications that can withstand the challenges of the digital age. From adopting a modular architecture to encouraging continuous improvement, these strategies will help businesses stay competitive, meet changing user needs, and grow.
PracticeKey PointsModular ArchitectureBreak down the app into smaller, independent modules.Cloud TechnologiesUse cloud platforms for flexible resource management.Caching StrategiesReuse data to improve performance and reduce costs.Database PerformanceOptimize queries, indexing, and caching.Asynchronous ProcessingRun multiple tasks simultaneously for better responsiveness.Load BalancingDistribute traffic across multiple servers.Automated Deployment and MonitoringEnsure consistency and reduce errors.Performance TestingSimulate real-world scenarios to find bottlenecks.Fault Tolerance and ResilienceKeep the system running even if parts fail.Continuous ImprovementEncourage innovation and learning to stay competitive.
FAQs
Which architecture pattern is used to achieve high scalability?
Scalable enterprise applications often use a microservices architecture pattern. This pattern breaks the application into smaller, independent services that can be developed, deployed, and scaled separately. Microservices architecture offers flexibility, resilience, and scalability, making it a popular choice for large-scale enterprise applications.
Other architecture patterns like event-driven, layered, and microkernel can also help achieve scalability, depending on the application's needs. However, microservices are widely favored for their ability to provide high scalability and maintainability.
Choosing the right architecture pattern depends on various factors, including the application's requirements, the team's expertise, and the organization's goals. It's important to evaluate the pros and cons of each pattern before making a decision.
Related posts
.png)
9 Steps to Create Data-Driven User Personas
User personas help businesses understand their target audience and create tailored experiences. Data-driven personas provide a detailed understanding of the audience, enabling informed decisions and personalized solutions.
Here are the 9 steps to create data-driven user personas:
- Set Your Goals: Define your objectives and identify key areas where personas will be useful.
- Gather Data: Collect data from website analytics, CRM systems, social media, and online surveys.
- Qualitative Research: Conduct user interviews, focus groups, and observation studies.
- Group Your Audience: Segment your audience into distinct groups with shared characteristics and behaviors.
- Build Persona Profiles: Create detailed profiles for each segment, including demographics, behavior patterns, goals, motivations, pain points, and visual representations.
- Test and Refine: Validate your personas through user testing and feedback, iterating with new data.
- Use Personas in Your Work: Integrate personas into team communication, decision-making processes, and create a persona-centric culture.
- Keep Personas Updated: Regularly review and update personas to reflect changes in user behavior and market trends.
- Conclusion: Creating data-driven user personas helps you understand your audience and create experiences that meet their needs. Start by setting your goals, gathering data, and doing qualitative research. Keep refining your personas and use them to make informed decisions.
Related video from YouTube
Step 1: Set Your Goals
Define Your Objectives
Before you start creating user personas, it's important to know what you want to achieve. This could be improving user experience, targeting marketing efforts, or refining product features. Ask yourself: What do you want your personas to help you with? Are you aiming to boost customer engagement, increase sales, or make users happier?
Identify Key Areas
Figure out where in your business personas will be most useful. This could be for a new product, a website update, or a marketing campaign. By knowing where you'll use the personas, you can make sure they are relevant and helpful.
Step 2: Gather Data
Collect data from different sources like website analytics, CRM systems, social media, and online surveys. Analyze this data to find patterns and preferences of your audience.
Website Analytics
Use tools like Google Analytics to track user behavior, session duration, bounce rates, and popular pages. This helps identify pain points and popular features.
CRM Data

Extract data from CRM systems to learn about customer interactions and buying habits. This helps understand customer needs and preferences.
Social Media Insights
Collect demographic and behavioral data from social media. Analyze engagement metrics like likes, shares, and comments to find popular topics and trends.
Online Surveys
Use surveys to get direct feedback from users about their preferences and pain points. Analyze the results to find patterns and trends.
Step 3: Qualitative Research
In this step, we'll gather detailed information about our users through various research methods. This helps us understand their motivations, pain points, goals, and decision-making processes.
User Interviews
Conduct interviews with users to learn about their motivations, challenges, and goals. This method allows you to ask open-ended questions and get detailed information about their experiences. Interviews can be done in person, over the phone, or via video calls.
Focus Groups
Organize focus group sessions to discuss user experiences. Focus groups involve a small group of users who share their thoughts on a topic or product. This method helps identify common themes in user feedback.
Observation Studies
Watch users in their natural environment to see how they interact with your product or service. Observation studies can be done in person or remotely using screen recording tools. This method helps you spot usability issues and areas for improvement.
Step 4: Group Your Audience
Based on the collected data, segment your audience into distinct groups with shared characteristics, behaviors, and preferences. Determine the optimal number of personas to create, typically ranging from 3 to 7.
Identify Key Segments
Use clustering techniques and data analysis to group users with similar behaviors and characteristics. This helps to identify patterns and commonalities among your target audience. For instance, you can segment users by demographic, psychographic, and behavioral characteristics, such as age, occupation, interests, and goals.
Decide on Persona Count
Decide on the number of personas that effectively represent your target audience, ideally between 3 to 7. Having too many personas can make it difficult to focus on specific needs, while too few may not accurately represent the diversity of your audience. Consider the following factors when determining the optimal number of personas:
- Data analysis: Analyze the data to identify natural clusters and patterns.
- Business goals: Align the number of personas with your business objectives and priorities.
- Resource constraints: Consider the resources required to create and maintain each persona.
- User diversity: Ensure that the selected personas accurately represent the diversity of your target audience.
sbb-itb-8abf120
Step 5: Build Persona Profiles
For each identified segment, create a detailed persona profile that includes demographic information, behavior patterns, goals, motivations, pain points, and a representative image or avatar.
Demographics
Include key details like age, gender, location, and occupation. These help you understand your target audience better.
Behavior Patterns
Describe typical behaviors and preferences, such as online activities, purchasing habits, and engagement with similar products or services.
Goals and Motivations
Outline what the persona aims to achieve and what drives their actions.
Pain Points
Document common issues and obstacles the persona faces. Identify their challenges and how your product or service can help.
Visual Representation
Add a visual element like a photo, illustration, or avatar to make the persona more relatable.
Step 6: Test and Refine
Validate Your Personas
Now that you have created your personas, it's important to check if they truly represent your target audience. This involves doing more research or user testing.
User Testing
Test your personas with real users. Use surveys, interviews, or usability tests to gather feedback. This helps you see if your personas match your audience.
Gather Feedback
Ask team members and stakeholders for their input. They can help spot any biases or mistakes in your personas. Their feedback can also provide new insights.
Iterate with New Data
Update your personas with the latest data and feedback. As you get new information, make sure to adjust your personas to keep them accurate and useful. This ongoing process helps keep your personas relevant.
Step 7: Use Personas in Your Work
Now that you have created your personas, it's time to integrate them into your work. This involves introducing the personas to your team and stakeholders, ensuring a shared understanding of their characteristics and intended use. Incorporate personas into decision-making processes, such as product design, content creation, and marketing strategies.
Team Communication
Ensure all team members understand the personas and how to use them. This can be achieved through workshops, training sessions, or regular meetings where personas are discussed and applied to real-world scenarios. By doing so, you'll create a shared understanding of your target audience, ensuring everyone is on the same page.
Decision-Making
Use personas to inform decisions in design, marketing, and content creation. For instance, when designing a new feature, ask yourself, "How would this benefit our primary persona, Sarah?" or "Would this feature align with John's goals and motivations?" By putting your personas at the forefront of decision-making, you'll create solutions that cater to their needs, increasing the likelihood of success.
Persona-Centric Culture
Encourage a culture where personas are regularly referenced and used to guide decisions. This can be achieved by displaying personas in common areas, such as meeting rooms or break rooms, or by incorporating them into your company's values and mission statement. By doing so, you'll create a persona-centric culture that prioritizes user needs and goals.
Step 8: Keep Personas Updated
Regularly review and update your personas to reflect changes in user behavior, market trends, or new data sources. Establish a process for ongoing data collection and persona refinement.
Review Schedule
Determine how often you will review and update your personas. This could be quarterly, bi-annually, or annually, depending on your industry and the pace of change. Regular reviews ensure your personas remain relevant and aligned with your target audience's evolving needs.
Ongoing Data Collection
Continue gathering data to keep your personas current. This can be achieved through various means, such as:
- Conducting user interviews and surveys
- Analyzing website analytics and CRM data
- Monitoring social media insights and online reviews
- Gathering feedback from customer support and sales teams
Refine with New Insights
Modify personas as necessary to reflect new insights and trends. This may involve updating demographics, behavior patterns, goals, pain points, or visual representations. By refining your personas, you'll ensure they remain accurate and effective in guiding your product development, marketing strategies, and customer engagement initiatives.
Conclusion
Key Takeaways
Creating user personas based on data helps you understand your audience and create experiences that meet their needs. Follow these 9 steps to build accurate personas that guide your product development, marketing, and customer engagement. Regularly update your personas to keep them relevant.
Call to Action
Now that you know how to create data-driven user personas, start by setting your goals, gathering data, and doing qualitative research. Keep refining your personas and use them to make informed decisions. This will help you create user experiences that connect with your audience and set your business apart.
FAQs
How do you create personas for user research results?
Creating personas involves these steps:
- Identify research touchpoints.
- Build user research questions.
- Send out questions.
- Collect and segment data.
- Identify how many personas you need.
- Lock down a persona template.
- Create your user personas.
- Prioritize your user or marketing personas.
What should be considered when analyzing the collected data for persona development?
To understand your target audience, find out what they do, who they are, their motivations, and behaviors. Use both qualitative and quantitative data from various sources for more refined information.
What are data-driven personas?
A data-driven persona is a detailed representation of your target audience, built using real-time data from sources like web analytics, surveys, and social media insights. They are constantly updated and help you understand consumer behavior, attitudes, trends, and preferences.
Related posts
.png)
10 SaaS UX Design Best Practices 2024
In 2024, designing a great user experience (UX) for SaaS applications is crucial for success. A well-designed UX boosts user engagement, reduces churn, and increases revenue. Here are the 10 best practices for SaaS UX design:
- Streamlined Onboarding: Simplify the signup process, provide clear instructions, and use interactive elements to guide users through onboarding quickly and smoothly.
- Personalization: Tailor the experience to each user's needs and preferences using data, machine learning, and AI tools.
- Intuitive Navigation: Keep navigation simple, consistent, and familiar, with clear labels, user-friendly search, and common design patterns.
- Accessibility: Ensure content is perceivable, navigation is operable, content is understandable, and compatibility with assistive technologies.
- Responsive Design: Implement mobile-first design, flexible layouts, prioritized content and functionality, and optimize performance for all devices.
- Performance Optimization: Focus on fast loading times, optimized server response, caching, CDNs, minimized HTTP requests, and compressed files and images.
- Feedback-driven Iteration: Collect user feedback regularly, analyze and prioritize it, make iterative improvements, and close the feedback loop.
- Security and Privacy: Implement strong authentication, access controls, data encryption, and regular security audits and risk assessments.
- Thorough UX Research: Conduct user interviews and surveys, analyze competitors and trends, and create user personas and journey maps.
- Effective Search Capabilities: Include efficient search options, filters, AI-powered suggestions, and analytics to reduce user frustration and improve engagement.
By focusing on user-centered design and following these best practices, you can create a smooth, engaging, and secure user experience for your SaaS application, leading to increased customer loyalty, a positive brand image, and business growth.
Related video from YouTube
1. Streamlined Onboarding
Streamlined onboarding is key for SaaS applications. It sets the tone for the user's entire experience and can influence their decision to keep using the product. A good onboarding process should be simple, clear, and easy to follow.
To achieve this, focus on reducing friction in the onboarding process. This can be done by:
- Simplifying the signup process to reduce the number of steps required to get started
- Providing clear and concise instructions to guide users through the process
- Using interactive elements such as tooltips, modals, and banners to offer helpful hints and tips
- Offering personalized demos or support to address specific pain points
- Implementing user onboarding checklists to drive activation and feature adoption
By streamlining the onboarding process, you can increase user engagement, reduce churn, and improve overall customer satisfaction. The goal of onboarding is to get users to experience the value of your product as quickly as possible.
For example, Canva's onboarding process is highly effective because it allows users to choose their own adventure. By asking new signups what they plan to use the tool for, Canva can tailor the onboarding experience to their specific needs and goals. This approach not only increases user engagement but also helps to reduce churn by ensuring users see the value of the product early on.
2. Personalization
Personalization helps SaaS companies meet the specific needs of their users. By using data and machine learning, companies can create experiences that feel unique to each user. This goes beyond basic information and tailors the experience based on individual preferences or even mood.
For example, a fitness app might suggest different workouts depending on whether a user wants to relax or get energized. The goal is to treat each customer as an individual, not just a number.
To personalize your SaaS product effectively, follow these best practices:
- Update user data regularly: Keep your user information current to provide relevant experiences.
- Incorporate user feedback: Use feedback to improve features and content.
- Use AI tools: Implement AI for dynamic personalization.
3. Intuitive Navigation
Intuitive navigation keeps users engaged and satisfied with your app. Poor navigation can lead to frustration and user churn. By using clear navigation patterns, you help users find content, complete tasks, and reach their goals.
To improve navigation, follow these tips:
- Keep it simple: Avoid too many navigation options. Use a clear menu structure to guide users to key sections.
- Consistent layout: Use the same layout across all screens to help users navigate easily.
- Familiar design patterns: Use common patterns like tab bars, side menus, and bottom navigation bars.
- User-friendly search: Include a search feature for users to quickly find content, especially in large apps.
- Clear labels: Use descriptive labels for navigation items so users know where each link leads.
4. Accessibility
Accessibility ensures that users with disabilities can use your application. By adding accessibility features, you improve the user experience for everyone. Here are some key points for designing accessible SaaS products:
Perceivable Content
Make sure all content, including images, videos, and audio files, can be perceived by users with disabilities. Use alternative text for images, captions for videos, and transcripts for audio files. This helps users with visual or hearing impairments understand your content.
Operable Navigation
Design navigation that users with disabilities can operate. Ensure all interactive elements, like buttons and links, can be accessed using a keyboard. This is crucial for users who rely on assistive technologies, such as screen readers.
Understandable Content
Ensure your content is easy to understand for users with disabilities. Use clear and simple language, and explain technical terms. Avoid complex layouts or confusing icons.
Compatibility with Assistive Technologies
Make sure your SaaS application works well with assistive technologies, such as screen readers and magnifiers. This allows users with disabilities to use your application smoothly.
5. Responsive Design
Responsive design is crucial for SaaS UX, ensuring your app works well on all devices and screen sizes. With more users accessing SaaS apps on mobile, responsive design is a must.
Mobile-First Design
Start by designing for mobile devices. This ensures your product works well on smaller screens and with touch interactions.
Flexible Layouts
Use flexible grids and breakpoints instead of fixed-width layouts. This helps your SaaS product look good on any screen size.
Prioritize Content and Functionality
For smaller screens, focus on essential content and features. Guide users to their goals without clutter.
Optimize Performance
Speed is important, especially on mobile. Minimize file sizes, optimize images, and reduce unnecessary animations and scripts. A fast-loading product keeps users engaged.
sbb-itb-8abf120
6. Performance Optimization
Performance optimization is key for SaaS UX design. A slow application can frustrate users and lead to customer churn. A fast, responsive app can boost user satisfaction and business success.
The Critical Role of Performance
Performance affects user satisfaction and business outcomes. Users expect quick, smooth interactions. Delays can lead to negative experiences. Optimizing performance ensures your SaaS app meets user expectations and stands out in the market.
Strategies for Performance Optimization
To improve performance, focus on these strategies:
- Fast Loading Times: Ensure your app loads quickly, even on slow internet connections.
- Optimize Server Response: Reduce server response times to enhance overall performance.
- Use Caching and CDNs: Leverage caching and content delivery networks to reduce server load and improve speed.
- Minimize HTTP Requests: Reduce the number of HTTP requests to speed up page loading.
- Compress Files and Images: Compress files and images to reduce their size and improve loading times.
7. Feedback-driven Iteration
Feedback-driven iteration is key for SaaS UX design. It means gathering user feedback, analyzing it, and making improvements based on that feedback. This helps refine the user experience and fix issues.
The Importance of User Feedback
User feedback gives insights into user behavior, preferences, and pain points. This information helps make design decisions that improve the application.
Strategies for Feedback-driven Iteration
To use feedback-driven iteration effectively, follow these strategies:
- Collect User Feedback Regularly: Use surveys, user testing, and analytics tools to gather feedback.
- Analyze and Prioritize Feedback: Look for patterns in the feedback and prioritize changes based on user needs and business goals.
- Make Iterative Improvements: Continuously make small improvements and test them.
- Close the Feedback Loop: Inform users about the changes made based on their feedback and show that their input is valued.
8. Security and Privacy
Security and privacy are key for SaaS UX design. A secure and private user experience builds trust and confidence in your application, leading to increased user adoption and retention.
Implementing Strong Authentication and Access Controls
Strong authentication and access controls are essential for protecting user data and preventing unauthorized access. Implement multi-factor authentication (MFA) to add an extra layer of security, and ensure that access controls are role-based and least privileged.
Encrypting Sensitive Data
Encrypting sensitive data both in transit and at rest ensures that even if data is intercepted or accessed by unauthorized parties, it remains unreadable and secure.
Conducting Regular Security Audits and Risk Assessments
Regular security audits and risk assessments help identify vulnerabilities and weaknesses in your application, allowing you to fix them before they can be exploited.
9. Thorough UX Research
Thorough UX research helps you understand your users, their needs, and their pain points. This ensures your SaaS application meets their expectations and reduces the risk of low adoption and high churn.
Conducting User Interviews and Surveys
User interviews and surveys provide insights into user behaviors, motivations, and goals. These insights guide your design decisions, making your solution user-focused.
Analyzing Competitors and Industry Trends
Studying competitors and industry trends helps you find market gaps and opportunities. This research shows what works and what doesn't, helping you design a standout solution.
Creating User Personas and Journey Maps
User personas and journey maps help you visualize user experiences and identify areas for improvement. These tools ensure your design meets user needs and addresses their pain points.
10. Effective Search Capabilities
Effective search capabilities are crucial in SaaS applications, as they enable users to access information and features without having to navigate through the entire website or application. A well-designed search function can significantly improve user engagement and overall user experience.
Efficient Search Options
A powerful search tool should be included in the SaaS UX design. This tool should cover all the bases, providing answers to all user queries. Additionally, features like filters, AI-powered suggestions, multiple languages, data collection, and search data analytics can enhance search capabilities, making navigation even more seamless.
Reducing User Frustration
When users are unable to find the information they need, they can become frustrated, leading to a negative user experience. By providing an effective search function, you can reduce user frustration and increase the chances of users finding what they need quickly and efficiently.
Improving User Engagement
An effective search function can also improve user engagement, as users are more likely to explore the application and discover new features and functionalities. This, in turn, can lead to increased user adoption and retention, ultimately benefiting your SaaS business.
Conclusion
In conclusion, designing a great user experience for SaaS applications is crucial in today's digital world. By following the 10 SaaS UX design best practices outlined in this article, you can greatly improve your product's usability, engagement, and overall user satisfaction. From streamlined onboarding and personalization to intuitive navigation and effective search capabilities, each practice plays a key role in creating a smooth user experience.
By focusing on user-centered design, you can reduce user frustration, improve engagement, and increase user adoption and retention. A well-designed SaaS application can lead to increased customer loyalty, a positive brand image, and business growth.
Related posts
.png)
Serverless Real-Time Analytics: Implementation Guide
Serverless real-time analytics allows you to process data instantly without managing servers. It combines serverless computing (no server management) and real-time analytics (processing data as it arrives).
Related video from YouTube
Key Benefits:
- Faster insights by processing data instantly
- Cost savings by eliminating server management
- Scalability to handle large data volumes
- Better decisions using real-time data
Steps Covered:
- Requirements: AWS services (Kinesis, Lambda, S3, DynamoDB, Elasticsearch) and tools (AWS CLI, SAM CLI, Docker)
- Setup: Creating IAM roles, Kinesis Data Streams, S3 buckets, DynamoDB tables
- Data Ingestion: Methods to ingest data into Kinesis Data Streams
- Data Processing: Using AWS Lambda for real-time data processing
- Data Storage: Choosing the right storage solution (DynamoDB, Redshift, Athena)
- Data Visualization: Integrating with visualization tools (QuickSight, Grafana, Tableau)
- Security: Best practices for securing your application (IAM roles, encryption)
- Monitoring: Using AWS CloudWatch for monitoring and logging
- Cost Optimization: Techniques to save costs (right-sizing, design patterns)
This guide covers setting up a scalable, cost-effective, and high-performance serverless real-time analytics solution on AWS. It walks you through the key steps, from ingesting data to visualizing insights, while ensuring security, monitoring, and cost optimization.
Requirements
To set up a serverless real-time analytics platform, you'll need the following AWS services and tools:
AWS Services

ServicePurposeAmazon Kinesis Data StreamsData ingestionAWS LambdaServerless data processingAmazon S3Durable storageAmazon DynamoDBReal-time data accessAmazon Elasticsearch ServiceSearch and analytics
Tools
ToolPurposeAWS CLIManaging AWS servicesSAM CLIBuilding and deploying serverless applicationsDocker (optional)Containerization
Programming Knowledge
- Familiarity with Python, Java, or Node.js
- Understanding of serverless computing concepts and AWS services
Additional Software or Dependencies
- AWS SDKs for your chosen programming language
- Any additional libraries or dependencies required for your specific use case
Note: Ensure you have the necessary permissions and access to create and manage AWS resources.
Setting Up the AWS Environment
To set up the AWS environment for your serverless real-time analytics platform, follow these steps:
Create an IAM Role
Create an IAM role for your AWS Lambda function to access other AWS services. This role should have permissions to read from Amazon Kinesis Data Streams, write to Amazon S3, and access Amazon DynamoDB.
Create an Amazon Kinesis Data Stream
Set up an Amazon Kinesis Data Stream to ingest data from your data producers. Configure the stream with the necessary number of shards based on your expected data volume.
Create an Amazon S3 Bucket
Create an Amazon S3 bucket to store your processed data. This bucket will serve as a durable storage solution for your analytics platform.
Create an Amazon DynamoDB Table

Set up an Amazon DynamoDB table to provide real-time access to your processed data. This table will store and retrieve data quickly and efficiently.
Deploy Your Serverless Application
Deploy your serverless application using AWS SAM or CDK. This will create the necessary AWS resources, including your AWS Lambda function, Amazon Kinesis Data Stream, Amazon S3 bucket, and Amazon DynamoDB table.
Ingesting Data
Ingesting data is a key step in building a serverless real-time analytics platform. Here, we will look at how to ingest data into Amazon Kinesis Data Streams, a service that helps you collect, process, and analyze real-time data.
You can ingest data into Kinesis Data Streams using various methods, including the AWS CLI, SDKs, and the Kinesis Producer Library. Each method has its own advantages and disadvantages.
Ingestion Method Comparison
MethodProsConsAWS CLIEasy to use, flexibleLimited scalability, not suitable for high-volume data ingestionSDKsProgrammable, scalableRequires coding skills, may need extra infrastructureKinesis Producer LibraryHigh-performance, scalableNeeds extra infrastructure, may need coding skills
When choosing an ingestion method, consider the volume and speed of your data, as well as your team's technical skills. For example, if you need to ingest large volumes of data quickly, the Kinesis Producer Library may be the best choice. If you need a simple, flexible solution, the AWS CLI may be more suitable.
In the next section, we will discuss how to process data streams in real-time using AWS Lambda and Amazon Kinesis Data Analytics.
Processing Data Streams
Processing data streams in real-time is a key step in building a serverless real-time analytics platform. Here, we will look at how to set up AWS Lambda functions as event sources for Kinesis Data Streams, implement business logic for data transformation, and handle errors and retries.
Configuring Lambda Functions as Event Sources
To process data streams in real-time, configure an AWS Lambda function as an event source for your Kinesis Data Stream. This setup allows the Lambda function to trigger automatically when new data arrives in the stream. The function can then process the data in real-time, transforming and enriching it as needed.
Implementing Business Logic
When implementing business logic for data transformation and enrichment, consider the specific needs of your use case. This may involve:
- Filtering out irrelevant data
- Aggregating data
- Performing complex calculations
You can use AWS Lambda's support for Node.js, Python, or Java to write your business logic.
Error Handling and Retries
Error handling and retries are important in serverless stream processing. If an error occurs, you need to ensure that the data is not lost and that the process can recover. AWS Lambda provides built-in support for error handling and retries, allowing you to configure the number of retries and the retry interval.
Here is an example of how you can implement error handling and retries in a Lambda function:
import boto3

def lambda_handler(event, context):
    try:
        # Process the data stream
        process_data(event)
    except Exception as e:
        # Handle the error and retry
        print(f"Error: {e}")
        context.retry()
In this example, the Lambda function tries to process the data stream. If an error occurs, the function catches the exception, logs the error, and retries the processing using the context.retry() method.
sbb-itb-8abf120
Storing and Analyzing Data
Storing and analyzing data is a key step in building a serverless real-time analytics platform. After processing data streams, you need to store the processed data in a suitable storage solution and analyze it to gain insights.
Storage Solution Comparison
When choosing a storage solution, consider the specific needs of your use case. Here's a comparison of popular storage solutions:
Storage SolutionAdvantagesDisadvantagesUse CasesDynamoDBHigh performance, scalable, low latencyLimited querying capabilities, expensive for large datasetsReal-time analytics, IoT data processingAmazon RedshiftFast querying, supports complex analytics, scalableRequires data warehousing expertise, expensive for large datasetsData warehousing, business intelligenceAmazon AthenaFast querying, serverless, cost-effectiveLimited data processing capabilities, not suitable for real-time analyticsAd-hoc analytics, data exploration
When selecting a storage solution, consider factors such as data volume, querying needs, and cost. For example, if you need to perform complex analytics on large datasets, Amazon Redshift may be a suitable choice. If you require fast querying and cost-effectiveness, Amazon Athena may be a better option.
Once you've chosen a storage solution, you can analyze the stored data using SQL or NoSQL queries. This enables you to gain insights into your data, identify trends, and make data-driven decisions.
In the next section, we'll look at how to visualize and report data to stakeholders.
Visualizing and Reporting Data
Visualizing and reporting data is a key step in building a serverless real-time analytics platform. After storing and analyzing data, you need to present insights to stakeholders clearly and actionably.
Integrating with Visualization Tools
To create interactive dashboards and reports, integrate your serverless analytics solution with tools like Amazon QuickSight, Grafana, or Tableau. These tools offer features for data exploration, visualization, and reporting.
For example, Amazon QuickSight can connect to your storage solution, create visualizations, and publish dashboards. Its fast query performance and scalability make it suitable for real-time analytics.
Creating Dashboards and Reports
When creating dashboards and reports, follow these best practices:
- Keep it simple: Use clear visualizations and labels.
- Focus on key metrics: Highlight important metrics and KPIs.
- Use real-time data: Ensure dashboards and reports reflect the latest data.
Configuring Alerts and Notifications
To keep stakeholders informed of critical events or threshold breaches, set up alerts and notifications based on defined conditions. For example, you can set up alerts for unusual spikes in website traffic or notifications for changes in the sales pipeline.
Monitoring and Logging
Monitoring and logging are key parts of a serverless real-time analytics platform. They help you track performance, find issues, and fix problems quickly. In this section, we'll see how to use AWS CloudWatch for monitoring and log management.
Monitoring Serverless Components with AWS CloudWatch

AWS CloudWatch gives you a unified view of your AWS resources and applications. It helps you monitor performance, latency, and errors. For serverless applications, CloudWatch provides metrics for Lambda functions, API Gateway, and other services.
Best Practices for Monitoring with CloudWatch:
- Track Key Metrics: Monitor metrics like invocation count, error rate, and latency.
- Set Alarms: Configure alarms to notify you of threshold breaches or anomalies.
- Use Dashboards: Create custom dashboards to visualize your metrics over time.
Configuring Log Aggregation and Analysis with CloudWatch Logs
CloudWatch Logs is a centralized service for collecting, storing, and analyzing log data from your AWS resources.
Best Practices for Log Management with CloudWatch Logs:
- Configure Log Groups: Organize your log data by application, service, or environment.
- Set Up Log Streams: Collect log data from your serverless components.
- Use Log Insights: Analyze and visualize your log data to find trends and patterns.
Securing the Application
Securing a serverless real-time analytics application is key to protecting sensitive data and preventing access by unauthorized users. Here, we'll cover best practices for securing your serverless application.
IAM Roles and Policies
AWS Identity and Access Management (IAM) helps manage access to your AWS resources. To secure your serverless application, create IAM roles and policies that define permissions and access levels for your Lambda functions, API Gateway, and other resources.
Best Practices for IAM Roles and Policies:
PracticeDescriptionUse Least Privilege AccessGrant only the necessary permissions to your Lambda functions and resources.Create Separate Roles for Each FunctionIsolate each function's permissions to prevent unauthorized access.Use Policy ConditionsDefine conditions to restrict access based on specific attributes, such as IP addresses or user identities.
Encrypting Data
Encrypting data at rest and in transit is crucial to protect sensitive information. AWS provides built-in encryption capabilities for serverless applications.
Best Practices for Encrypting Data:
PracticeDescriptionUse AWS Key Management Service (KMS)Manage encryption keys securely using KMS.Enable Encryption at RestEncrypt data stored in S3, DynamoDB, and other AWS services.Use SSL/TLS for Data in TransitEnsure secure communication between your application and AWS services.
Optimizing Costs
Optimizing costs is key to making your serverless real-time analytics efficient and cost-effective. This section covers how to monitor and analyze costs, use cost-saving techniques, and apply serverless-specific design patterns.
Monitoring and Analyzing Costs
AWS Cost Explorer helps you track your AWS spending. By regularly checking your costs, you can:
- Find underused resources and adjust them to save money
- Optimize Lambda function execution times and memory use
- Set data retention policies to lower storage costs
- Use reserved and spot instances to cut costs
Cost-Saving Techniques
Here are some ways to save costs in a serverless setup:
- Right-sizing resources: Match resources to actual usage, not peak demand.
- Optimizing Lambda functions: Reduce execution times and memory use.
- Data retention policies: Set data retention periods to lower storage costs.
- Serverless design patterns: Use event-driven architectures and microservices.
Serverless-Specific Design Patterns
These patterns help reduce resource use and take advantage of serverless scalability:
PatternDescriptionEvent-driven architecturesRespond to events instead of running constantly.MicroservicesBreak down applications into smaller, independent services.Request aggregationCombine requests to reduce the number of function calls.
Summary
This guide has covered the steps to set up a serverless real-time analytics platform on AWS. Using serverless technologies, you can build a scalable, cost-effective, and high-performance analytics solution that processes large data volumes in real-time.
Key Benefits
BenefitDescriptionScalabilityAutomatically handles large data volumes.Cost-EffectivenessPay only for what you use.Faster DeploymentQuickly set up and deploy.Real-Time ProcessingProcess data as it arrives.
Steps Covered
- Requirements: AWS services and tools needed.
- Setup: Creating IAM roles, Kinesis Data Streams, S3 buckets, and DynamoDB tables.
- Data Ingestion: Methods to ingest data into Kinesis Data Streams.
- Data Processing: Using AWS Lambda for real-time data processing.
- Data Storage: Choosing the right storage solution.
- Data Visualization: Integrating with visualization tools.
- Security: Best practices for securing your application.
- Monitoring: Using AWS CloudWatch for monitoring and logging.
- Cost Optimization: Techniques to save costs.
Next Steps
Consider additional use cases and improvements, such as:
- Integrating machine learning models
- Leveraging edge computing
- Implementing advanced data visualization tools
For more information, refer to AWS's official documentation and tutorials on serverless real-time analytics. Explore case studies from companies that have successfully implemented similar solutions.
Related posts
![UX Design Documentation Guide [2024]](https://cdn.prod.website-files.com/6398f0e8fa9fd060d0c39626/693ab8e865f725437b8b413e_6684048c8fc3a33c97eb1650_Modern%2520UIUX%2520Design%2520Facebook%2520Ads%2520.png)
UX Design Documentation Guide [2024]
Effective UX design documentation is crucial for collaboration, consistency, and knowledge sharing within teams. This guide covers:
- Why Document UX Design?
- Organizational memory
- Onboarding and handovers
- Single source of truth
- Better communication
- Benefits of Documentation
BenefitDescriptionImproves CollaborationEnhances teamwork and communicationEnsures ConsistencyMaintains uniformity across the productAids Future ProjectsProvides insights for future projects and developmentIntellectual PropertyDescribes a product's research and development
- What to Document
- Project goals and scope
- User research findings
- User personas and journey maps
- Ideation, concepts, and wireframes
- Visual design guidelines and style guides
- Usability testing and feedback
- Best Practices
- Consistent structure and templates
- Version control
- Accessibility and readability
- Collaboration and feedback
- Documentation Tools
By following this guide, you can create comprehensive UX design documentation that facilitates teamwork, ensures consistency, and improves the overall user experience.
Related video from YouTube
Planning and Research
Planning and research are the first steps in UX design. This stage involves setting project goals, conducting user research, and analyzing the market. Here’s how to document these elements clearly.
Documenting Project Goals
Recording project goals gives clear direction from the start. It includes the project's objectives, scope, and vision. This helps everyone understand what needs to be achieved and who is responsible for what.
To document project goals:
- Define the project's objectives and scope
- Identify key stakeholders and their roles
- Establish a project vision and mission statement
- Note any assumptions or constraints
User Research Findings
User research is key in UX design. Documenting its findings helps in understanding the target audience and their needs.
To document user research findings:
- Create user personas to represent the target audience
- Develop user journey maps to show the user's experience
- Create empathy maps to understand user pain points and motivations
- Record research methods and findings, including surveys, interviews, and usability tests
Market Analysis and Competition
Understanding the market and competition is crucial. Documenting these findings helps in understanding market trends and competitors.
To document market analysis and competition:
- Conduct market research to understand the target audience and trends
- Analyze competitors to identify their strengths and weaknesses
- Record market analysis findings, including market size and growth
- Identify opportunities for differentiation and innovation
Documenting the Design Process
Documenting the design process ensures transparency, teamwork, and clear communication among team members and stakeholders. This stage involves recording ideation, concepts, wireframes, prototypes, visual design, and usability testing.
Ideation and Concepts
Documenting brainstorming sessions, initial sketches, and the reasons behind design decisions helps to:
- Track the evolution of ideas
- Identify key design decisions and their reasons
- Facilitate teamwork and feedback
- Provide a clear understanding of the design direction
To document ideation and concepts:
- Take notes and photos during brainstorming sessions
- Create concept sketches and wireframes to visualize ideas
- Record design decisions and their reasons
- Develop a design vision and mission statement
Wireframes and Prototypes
Recording wireframes, user flows, and prototypes, along with explanations of design choices and iterations, helps to:
- Communicate design ideas clearly
- Identify usability issues and areas for improvement
- Facilitate feedback and iteration
- Develop a functional and user-friendly product
To document wireframes and prototypes:
- Create low-fidelity wireframes to visualize the product's structure
- Develop high-fidelity prototypes to test usability and functionality
- Record design choices and their reasons
- Document user feedback and iteration
Visual Design and Branding
Covering the importance of documenting visual elements, including color schemes, typography, and creating a style guide and design system, helps to:
- Establish a consistent visual identity
- Ensure brand consistency across all touchpoints
- Facilitate teamwork and feedback
- Develop a scalable and maintainable design system
To document visual design and branding:
- Create a style guide outlining color schemes, typography, and imagery
- Develop a design system to ensure consistency and scalability
- Record design decisions and their reasons
- Document brand guidelines and assets
Usability Testing and Feedback
Detailing the documentation of usability testing plans, scripts, findings, user feedback, and iterative design changes helps to:
- Identify usability issues and areas for improvement
- Develop a user-friendly and functional product
- Facilitate feedback and iteration
- Improve the overall user experience
To document usability testing and feedback:
- Develop a usability testing plan and script
- Record user feedback and findings
- Document iterative design changes and their reasons
- Create a report outlining usability testing results and recommendations
Best Practices for Documentation
Consistent Structure
Keep your UX design documentation clear and easy to read. Use a consistent format with headings, short paragraphs, and logical sections. Create a standard template to use for all projects.
Version Control
Track changes and updates in your documentation to avoid confusion. Use tools like Git or Google Docs to manage versions. Always include version numbers or dates to keep a record of updates.
Accessibility and Readability
Make sure your documentation is easy to read and accessible to everyone:
- Use simple language and avoid technical jargon.
- Organize content with headings and sections.
- Use bullet points and numbered lists to break up text.
- Ensure compatibility with assistive technologies like screen readers.
Collaboration and Feedback
Encourage team members and stakeholders to give feedback on your documentation. Document all input and changes to keep everyone aligned. Use tools like Slack or Trello to facilitate communication and feedback.
sbb-itb-8abf120
Documentation Tools and Templates
Effective UX documentation requires the right tools and templates to help with collaboration, communication, and consistency. Here, we'll look at popular documentation tools and provide templates for common UX documentation artifacts.
Documentation Tools
There are many tools available for UX documentation. Here are some popular ones:
ToolDescriptionConfluenceA platform for teams to create, share, and store knowledge in one place.NotionAn all-in-one workspace for notes, databases, and real-time collaboration.FigmaA cloud-based design tool for creating, prototyping, and collaborating on UI designs.
These tools offer features like version control, commenting, and real-time collaboration, making it easier to manage and maintain your UX documentation.
Documentation Templates
To help you get started, here are some downloadable templates for common UX documentation artifacts:
TemplateDescriptionUser Persona TemplateHelps create detailed user personas, including demographics, goals, behaviors, and pain points.User Flow TemplateVisualizes user flows, including steps, actions, and decision points.Style Guide TemplateDocuments your design system, including typography, color, imagery, and layout guidelines.
These templates are designed to be flexible and customizable, allowing you to tailor them to your specific needs and projects.
Integrating Documentation into Workflow
Integrating documentation into your workflow ensures it remains useful throughout the design process. Here are strategies to incorporate documentation smoothly and keep it relevant.
Seamless Integration
Identify key moments in your design process where documentation adds value, such as user research findings, design decisions, or testing results. Incorporate documentation at these points to make it a natural part of your workflow.
Use tools that integrate with your design tools, like Figma or Sketch, to streamline your workflow and reduce the need to switch between different tools.
Building a Documentation Culture
Encourage your team to prioritize and update documentation regularly. Set clear expectations and make documentation part of your team's workflow.
Assign a documentation lead to oversee the process and ensure it remains a priority. Recognize and reward team members who contribute to documentation to build a sense of ownership.
Keeping Documentation Current
Establish a regular review and update process to keep documentation current. Schedule review sessions or set reminders to update documentation at key milestones.
Use version control tools to track changes and ensure all team members are working with the latest version. This helps reduce confusion and keeps everyone aligned.
Conclusion
Key Points
In this guide, we've covered the importance of UX design documentation, its benefits, and best practices for integrating it into your workflow. We discussed planning and research, documenting the design process, and using the right tools and templates. By following these guidelines, you can create effective UX design documentation that improves collaboration, project outcomes, and continuous improvement.
Continuous Improvement
UX design documentation is an ongoing task that needs regular updates. As your project changes, so should your documentation. Encourage your team to give feedback and suggest improvements. This helps identify gaps and keeps your documentation useful.
Documentation for Collaboration
Good UX design documentation is key for teamwork and knowledge sharing. By documenting your design process, you create a single source of truth. This ensures everyone is on the same page, improves communication, and reduces misunderstandings. Remember, documentation is about creating a shared understanding that helps your team work better together.
FAQs
How to write a UX design document?
When creating a UX design document, include these elements:
- Introduction: Summarize the project's goals, objectives, and vision.
- User Personas and User Journeys: Document user personas and their journeys to show how users interact with your product.
- Wireframes and Prototypes: Include wireframes and prototypes to visualize the design process.
- Visual Design Guidelines and Style Guides: Provide guidelines to ensure design consistency.
- Design System Components and Patterns: Document components and patterns for reuse and consistency.
- Accessibility Considerations: Ensure your design is accessible to all users.
How to write UX design documentation?
To write effective UX design documentation, follow these principles:
- Know Your Audience: Tailor the documentation to the needs of your readers.
- Define Purpose and Scope: Clearly state the purpose and scope of your documentation.
- Use a Consistent Structure: Make your documentation easy to follow with a consistent format.
- Provide Context: Explain the reasoning behind your design decisions.
- Use Visuals: Include diagrams, flowcharts, and images to illustrate complex concepts.
- Keep It Concise: Be brief and to the point.
- Be Clear and Precise: Use straightforward language to avoid confusion.
- Include References and Links: Provide additional resources for further reading.
Related posts
.png)
10 Code Obfuscation Techniques for Software Protection
Code obfuscation transforms software code into a version that's harder to understand while still functioning the same. This protects intellectual property and prevents unauthorized access by making it difficult for attackers to reverse-engineer the code.
Here are 10 effective code obfuscation techniques:
- Rename Obfuscation: Changes variable, method, and class names to make the code less readable.
- String Encryption: Encrypts sensitive strings in the code to hide important data.
- Control Flow Obfuscation: Alters the program execution order with unnecessary code to confuse attackers.
- Anti-debugging: Detects and responds to debugging attempts, preventing code analysis.
- Code Packing: Compresses and encrypts executable code to prevent reverse-engineering.
- Polymorphism: Changes the code during each compilation to invalidate previous analysis.
- Metamorphism: Constantly changes the code structure and appearance to stay ahead of attackers.
- Virtualization: Transforms code into instructions for virtual machines, obscuring the original logic.
- Data Flow Obfuscation: Complicates data structures and transformations to hide program intent.
- Debug Obfuscation: Hides debug information like identifiers and line numbers.
TechniqueEffectivenessPerformance ImpactEase of ImplementationCompatibilityRename ObfuscationMediumLowEasyHighString EncryptionHighLowMediumHighControl Flow ObfuscationHighMediumMediumMediumAnti-debuggingHighLowMediumHighCode PackingHighMediumMediumMediumPolymorphismHighMediumHardMediumMetamorphismVery HighMediumHardMediumVirtualizationVery HighHighHardLowData Flow ObfuscationMediumLowMediumHighDebug ObfuscationMediumLowEasyHigh
No single technique offers complete protection, so using a combination of methods is recommended for robust software security.
Related video from YouTube
1. Rename Obfuscation
Rename obfuscation involves changing the names of variables, methods, and classes to make the code harder to understand. This helps protect software from being reverse-engineered.
Effectiveness against reverse-engineering
Rename obfuscation makes it tough for attackers to understand the code. By changing names, the code becomes less readable, making it hard to figure out the logic and functionality.
Performance impact
Rename obfuscation has little impact on performance. It only changes names, so it doesn't affect how the code runs. This makes it suitable for high-performance applications.
Ease of implementation
Rename obfuscation is easy to implement. It can be done manually or with automated tools. Many programming languages and development environments have built-in features for renaming.
Compatibility
Rename obfuscation works with most programming languages and development environments. It can be used in mobile apps, web applications, and desktop applications.
AspectDetailsEffectivenessMakes code less readable, hard to reverse-engineerPerformance ImpactMinimal, does not affect code executionEase of ImplementationEasy, can be done manually or with toolsCompatibilityWorks with most programming languages and environments
2. String Encryption
Effectiveness against reverse-engineering
String encryption hides sensitive data in your code. By encrypting strings, attackers find it hard to read and misuse your data. This is useful for protecting secrets and important information.
Performance impact
String encryption has a small impact on performance. The process is quick and doesn't slow down your code much. This makes it good for apps that need to run fast.
Ease of implementation
String encryption is easy to set up. Many programming languages have built-in tools for encryption. You can also find libraries to help with this task.
Compatibility
String encryption works with most programming languages and environments. You can use it in mobile apps, web apps, and desktop apps.
AspectDetailsEffectivenessHides sensitive data from attackersPerformance ImpactSmall, doesn't slow down code muchEase of ImplementationEasy, with built-in tools and librariesCompatibilityWorks with most languages and environments
3. Control Flow Obfuscation
Control flow obfuscation changes the order of program execution to confuse hackers. It adds unnecessary case-switch statements, also known as dead code, that are never executed. These statements only serve to confuse potential hackers.
Effectiveness against reverse-engineering
Control flow obfuscation is effective in protecting your code from reverse-engineering. By altering the control flow, it becomes challenging for attackers to understand how the code works, making it harder for them to exploit vulnerabilities or steal sensitive information.
Performance impact
The performance impact of control flow obfuscation is minimal. The added complexity does not significantly affect execution speed or memory usage, making it a viable option for protecting your code without compromising performance.
Ease of implementation
Implementing control flow obfuscation can be complex, especially for large codebases. However, many programming languages and development tools provide built-in support for code obfuscation, making it easier to implement. Additionally, there are various libraries and tools available that can help simplify the process.
AspectDetailsEffectivenessMakes it difficult for hackers to understand code intentPerformance ImpactMinimal, does not significantly affect execution speed or memory usageEase of ImplementationCan be complex, but many languages and tools provide built-in support
4. Anti-debugging
Anti-debugging is a technique that detects and responds to debugging attempts. This makes it hard for hackers to analyze the code using debugging tools, protecting the software's intellectual property.
Effectiveness against reverse-engineering
Anti-debugging is very effective in stopping reverse-engineering. By detecting and responding to debugging attempts, it makes it hard for hackers to understand the code's behavior, making it difficult for them to find vulnerabilities or steal information.
Performance impact
The performance impact of anti-debugging is minimal. The added complexity does not significantly affect execution speed or memory usage, making it a good option for protecting your code without slowing it down.
Ease of implementation
Implementing anti-debugging techniques can be complex, especially for large codebases. However, many programming languages and development tools provide built-in support for anti-debugging, making it easier to implement. Additionally, there are various libraries and tools available that can help simplify the process.
AspectDetailsEffectivenessVery effective in stopping reverse-engineeringPerformance ImpactMinimal, does not significantly affect execution speed or memory usageEase of ImplementationCan be complex, but many languages and tools provide built-in support
5. Code Packing
Code packing compresses and encrypts executable code, making it hard for hackers to reverse-engineer or analyze it. This helps protect software and prevent unauthorized access.
Effectiveness against reverse-engineering
Code packing is very effective in stopping reverse-engineering. By compressing and encrypting the code, it becomes hard for hackers to understand its behavior, making it tough to find weaknesses or steal information.
Performance impact
The performance impact of code packing is minimal. The added complexity does not significantly affect execution speed or memory usage, making it a good option for protecting your code without slowing it down.
Ease of implementation
Implementing code packing can be complex, especially for large codebases. However, many programming languages and development tools provide built-in support for code packing, making it easier to implement. Additionally, there are various libraries and tools available that can help simplify the process.
AspectDetailsEffectivenessVery effective in preventing reverse-engineeringPerformance ImpactMinimal, does not significantly affect execution speed or memory usageEase of ImplementationCan be complex, but many languages and tools provide built-in support
6. Polymorphism
Effectiveness against reverse-engineering
Polymorphism makes it hard for attackers to use gathered information. By changing the code during each compilation, the result is different every time, even if the source code stays the same. This forces attackers to start from scratch for every build.
Performance impact
Polymorphism has minimal impact on performance. Since the code changes during compilation, execution speed and memory usage remain unaffected.
Ease of implementation
Implementing polymorphism can be complex, especially for large codebases. However, using a mix of techniques like code encryption, compression, and anti-debugging can help. Many development tools and programming languages also support polymorphism.
AspectDetailsEffectivenessMakes it hard for attackers to use gathered informationPerformance ImpactMinimal, does not affect execution speed or memory usageEase of ImplementationCan be complex, but many tools and languages support it
sbb-itb-8abf120
7. Metamorphism
Effectiveness against reverse-engineering
Metamorphic code is very effective against reverse-engineering. It constantly changes its structure and appearance, making it hard for attackers to analyze and understand. Even if an attacker manages to reverse-engineer the code, the information will be outdated and useless, as the code will have already changed.
Performance impact
The performance impact of metamorphism is minimal. The code changes occur during compilation, so execution speed and memory usage remain unaffected. This makes metamorphism a good technique for protecting code without slowing it down.
Ease of implementation
Implementing metamorphism can be complex, especially for large codebases. However, using a combination of techniques like code encryption, compression, and anti-debugging can help. Many development tools and programming languages also support metamorphism, making it easier to implement.
AspectDetailsEffectivenessVery effective against reverse-engineeringPerformance ImpactMinimal, does not affect execution speed or memory usageEase of ImplementationCan be complex, but many tools and languages support it
8. Virtualization
What is Code Virtualization?
Code virtualization is a technique that protects software by transforming code into instructions for virtual machines. Unlike other methods, it doesn't restore the original code in memory.
Effectiveness against Reverse-Engineering
Code virtualization is very effective against reverse-engineering. The virtual machine instructions are unique and randomized, making it hard for attackers to understand the code.
Performance Impact
The performance impact is minimal. The transformation happens during compilation, so execution speed and memory usage are not affected.
Ease of Implementation
Implementing code virtualization can be complex, especially for large codebases. However, many tools and programming languages support it, making the process easier.
AspectDetailsEffectivenessVery effective against reverse-engineeringPerformance ImpactMinimal, does not affect execution speed or memory usageEase of ImplementationCan be complex, but many tools and languages support it
9. Data Flow Obfuscation
Data flow obfuscation targets the data structures in the code, making it hard for hackers to understand the program's intent. This technique changes how data is stored, interpreted, and transformed within the program.
Effectiveness against Reverse-Engineering
Data flow obfuscation is effective because it complicates the relationships between different parts of the code. By altering data structures and transformations, attackers face a complex web of data flows that are hard to decipher.
Performance Impact
The performance impact is minimal. Since the obfuscation happens at the code level, the program's execution speed and memory usage remain unaffected.
Ease of Implementation
Implementing data flow obfuscation can be complex, especially for large codebases. However, many tools and programming languages support this technique, making it easier to apply.
AspectDetailsEffectivenessEffective against reverse-engineeringPerformance ImpactMinimal, does not affect execution speed or memory usageEase of ImplementationCan be complex, but many tools and languages support it
10. Debug Obfuscation
Effectiveness against Reverse-Engineering
Debug obfuscation hides debug information like identifiers and line numbers. This makes it harder for attackers to understand the program flow and find vulnerabilities.
Performance Impact
The performance impact is minimal. The obfuscation process may add a slight overhead, but it doesn't affect the core execution logic.
Ease of Implementation
Implementing debug obfuscation can vary. Many modern tools support it, making it easier to apply. However, some cases may require manual changes to the code or build process.
Compatibility
Debug obfuscation works with many programming languages and platforms. However, ensure it doesn't interfere with debugging or diagnostic tools needed during development or maintenance.
AspectDetailsEffectivenessHides debug information, making reverse-engineering harderPerformance ImpactMinimal, slight overhead but no effect on core logicEase of ImplementationVaries, many tools support it but may need manual changesCompatibilityWorks with many languages and platforms, ensure it doesn't break debugging tools
Comparing Obfuscation Methods
Code obfuscation techniques differ in how well they protect, their impact on performance, ease of use, and compatibility. Here's a comparison of the 10 techniques discussed:
TechniqueEffectivenessPerformance ImpactEase of ImplementationCompatibilityRename ObfuscationMediumLowEasyHighString EncryptionHighLowMediumHighControl Flow ObfuscationHighMediumMediumMediumAnti-debuggingHighLowMediumHighCode PackingHighMediumMediumMediumPolymorphismHighMediumHardMediumMetamorphismVery HighMediumHardMediumVirtualizationVery HighHighHardLowData Flow ObfuscationMediumLowMediumHighDebug ObfuscationMediumLowEasyHigh
Effectiveness: How well the technique protects against reverse-engineering.
Performance Impact: The overhead added to code execution.
Ease of Implementation: The difficulty of integrating the technique.
Compatibility: How well the technique works with different programming languages and frameworks.
This table helps developers pick the best obfuscation method based on security, performance, and ease of use.
Summary
Code obfuscation is a way to protect software from being reverse-engineered or accessed without permission. By using a mix of the 10 techniques discussed, developers can make their software more secure. No single method can offer complete protection, so using multiple techniques together is key.
In this article, we covered:
- Rename obfuscation
- String encryption
- Control flow obfuscation
- Anti-debugging
- Code packing
- Polymorphism
- Metamorphism
- Virtualization
- Data flow obfuscation
- Debug obfuscation
Each technique has its pros and cons. Developers should choose based on their project's needs.
Benefits of Code Obfuscation
By using code obfuscation, developers can:
- Protect their intellectual property
- Prevent reverse-engineering
- Improve software security
- Meet industry standards
Comparison of Techniques
Here's a quick comparison of the techniques:
TechniqueEffectivenessPerformance ImpactEase of ImplementationCompatibilityRename ObfuscationMediumLowEasyHighString EncryptionHighLowMediumHighControl Flow ObfuscationHighMediumMediumMediumAnti-debuggingHighLowMediumHighCode PackingHighMediumMediumMediumPolymorphismHighMediumHardMediumMetamorphismVery HighMediumHardMediumVirtualizationVery HighHighHardLowData Flow ObfuscationMediumLowMediumHighDebug ObfuscationMediumLowEasyHigh
Effectiveness: How well the technique protects against reverse-engineering.
Performance Impact: The overhead added to code execution.
Ease of Implementation: The difficulty of integrating the technique.
Compatibility: How well the technique works with different programming languages and frameworks.
This table helps developers pick the best obfuscation method based on security, performance, and ease of use.
FAQs
What is general method of program code obfuscation?
Code obfuscation hides a program's details from attackers. It transforms the code into a version that is harder to understand but still works the same. This makes it difficult for hackers to reverse-engineer the code, protecting intellectual property and preventing unauthorized access.
What is the disadvantage of code obfuscation?
Code obfuscation can make code harder to read and debug. For example, string encryption requires decrypting strings at runtime, which can slow performance. Additionally, obfuscated code can be challenging for developers to understand and debug.
AspectDisadvantageReadabilityMakes code harder to readPerformanceDecryption at runtime can slow performanceDebuggingHarder for developers to debug obfuscated code
Related posts
.png)
Background Sync in PWAs: Service Worker Guide
Background sync allows web apps to defer network requests until the user has a stable internet connection, ensuring reliable data transfer and a seamless offline experience. With service workers, Progressive Web Apps (PWAs) can:
- Defer Network Requests: Wait for a stable connection to send data
- Ensure Data Integrity: Prevent data loss when offline
- Seamless Syncing: Automatically sync with the server once online
This guide covers:
- Setting up service workers for background sync
- Implementing one-time and periodic background sync
- Debugging and testing background sync
- Best practices for handling sync failures, coalescing events, optimizing performance, and fallbacks
By leveraging background sync, you can provide a better user experience, increase user retention, and improve app performance, even in areas with poor connectivity.
Related video from YouTube
Getting Started
Web Development Basics
Before diving into service workers and background sync, it's important to understand web development basics. This includes HTML, CSS, and JavaScript. Make sure you're familiar with these technologies to follow along smoothly.
Service Worker Concepts
Service workers are key to Progressive Web Apps. To use background sync, you need to know:
- Registration: Registering a service worker with the browser
- Installation: Installing a service worker and caching resources
- Activation: Activating a service worker to control pages
- Lifecycle: Understanding the service worker lifecycle, including updates and uninstallation
Setting Up Your Environment
To develop and test service workers, you'll need:
ToolExamplesCode EditorVisual Studio Code, AtomBrowser ToolsChrome DevTools, Firefox Developer EditionLocal Development Serverhttp-server, live-server
With these basics covered, you're ready to dive into service workers and background sync. In the next section, we'll look at the concept of background sync and its benefits in PWAs.
Understanding Background Sync
What is Background Sync?
Background sync lets web apps delay network requests until the user has a stable internet connection. This is useful for Progressive Web Apps (PWAs) that need to work well even with poor or spotty connectivity. With background sync, PWAs can make sure important data gets sent to the server, even if the user is offline or has a slow connection.
Challenges of Web Apps Without Background Sync
Web apps without background sync often fail to provide a smooth user experience in areas with poor internet. If a user tries to send data but loses connection, the request usually fails, leaving the user with an error message. This can be frustrating, especially when sending important data like forms or messages.
Benefits of Background Sync
Background sync solves these problems by ensuring data gets sent to the server reliably. Here are the key benefits:
BenefitDescriptionBetter user experienceEnsures important data is sent, even if the user is offline or has a slow connection.Reliable data transferGuarantees data reaches the server, reducing the chance of data loss or corruption.Offline capabilitiesAllows users to keep using the app without an internet connection.
Setting Up Service Workers
Registering a Service Worker
To set up a service worker, you need to register it in your application. This involves creating a JavaScript file that will act as the service worker and then registering it using the navigator.serviceWorker.register() method.
Here's an example of how to register a service worker:
if ("serviceWorker" in navigator) {
  navigator.serviceWorker.register("/serviceworker.js")
   .then(registration => {
      console.log("Service worker registered:", registration);
    })
   .catch(error => {
      console.error("Service worker registration failed:", error);
    });
}
In this example, we first check if the browser supports service workers by checking if the serviceWorker property exists in the navigator object. If it does, we then register the service worker using the register() method, passing in the URL of the JavaScript file that will act as the service worker.
Service Worker Lifecycle
The service worker lifecycle consists of several stages, including installation, activation, and termination. Understanding these stages is crucial to effectively using service workers in your application.
Here's an overview of the service worker lifecycle:
- Installation: The service worker is installed when the browser downloads and parses the service worker JavaScript file.
- Activation: The service worker is activated when the browser determines that it's ready to take control of the page.
- Idle: The service worker is idle when it's not actively handling requests or performing tasks.
- Termination: The service worker is terminated when the browser decides to stop it, usually due to memory constraints or other reasons.
Caching for Offline Use
One of the key benefits of service workers is the ability to cache resources for offline use. This allows your application to continue functioning even when the user doesn't have an internet connection.
Here's an example of how to cache resources using a service worker:
self.addEventListener("install", event => {
  event.waitUntil(
    caches.open("my-cache").then(cache => {
      return cache.addAll([
        "/index.html",
        "/styles.css",
        "/script.js"
      ]);
    })
  );
});
In this example, we're caching several resources, including an HTML file, a CSS file, and a JavaScript file, using the caches.open() method. We're then adding these resources to the cache using the addAll() method.
Implementing Background Sync
Background sync lets your PWA run tasks in the background, even when the user is offline or has closed the app. Here's how to set it up.
Checking Browser Support
First, check if the user's browser supports background sync.
if ("serviceWorker" in navigator && "sync" in navigator.serviceWorker) {
  console.log("Background sync is supported.");
} else {
  console.log("Background sync is not supported.");
}
Requesting User Permission
You need to ask the user for permission to use background sync.
Notification.requestPermission().then(permission => {
  if (permission === "granted") {
    console.log("Permission granted.");
  } else {
    console.log("Permission denied.");
  }
});
Registering Sync Events
Register a sync event using the registration.sync.register() method.
navigator.serviceWorker.ready.then(registration => {
  registration.sync.register("sync-example");
});
Handling Sync Events
Listen for the sync event in your service worker and handle it.
self.addEventListener("sync", event => {
  if (event.tag === "sync-example") {
    event.waitUntil(syncExample());
  }
});

async function syncExample() {
  // Perform tasks here
  console.log("Sync event handled.");
}
In this example, the service worker listens for the sync event and calls the syncExample() function to perform tasks when the event is triggered.
sbb-itb-8abf120
One-time Background Sync
One-time background sync defers actions until the user is back online. This is useful when the user is offline and can't send requests to the server. By registering a one-time sync event, the service worker waits until the user is online again to perform the deferred action.
Deferring Actions Offline
When the user is offline, the service worker can register a one-time sync event to defer actions. This is helpful for tasks like sending form data or uploading files. The user can keep using the app offline, and the service worker will send the requests when the user is back online.
Registering One-time Syncs
To register a one-time sync event, use the registration.sync.register() method. This method takes a unique tag to identify the sync event. Here's an example:
navigator.serviceWorker.ready.then(registration => {
  registration.sync.register('sync-form-data');
});
In this example, the service worker registers a one-time sync event with the tag sync-form-data. When the user is back online, the service worker will trigger the sync event and perform the deferred action.
Handling One-time Syncs
To handle a one-time sync event, listen for the sync event in your service worker and check the event tag. Here's an example:
self.addEventListener('sync', event => {
  if (event.tag === 'sync-form-data') {
    event.waitUntil(sendFormData());
  }
});

async function sendFormData() {
  // Send form data to the server
  console.log('Form data sent successfully!');
}
In this example, the service worker listens for the sync event and checks if the event tag is sync-form-data. If it is, the service worker calls the sendFormData() function to send the form data to the server.
Periodic Background Sync
Periodic background sync lets web apps update data in the background at regular intervals. This helps users get updated content even without an internet connection.
Requesting Periodic Sync Permission
First, ask the user for permission to use periodic background sync:
const status = await navigator.permissions.query({ name: 'periodic-background-sync' });
if (status.state === 'granted') {
  // Permission granted, proceed with periodic sync
} else {
  // Permission denied, handle error
}
Registering Periodic Syncs
Next, register a periodic sync event using the registration.periodicSync.register() method. This method needs a unique tag and an interval:
navigator.serviceWorker.ready.then(registration => {
  registration.periodicSync.register('sync-news', {
    minInterval: 24 * 60 * 60 * 1000, // 1 day in milliseconds
  });
});
Handling Periodic Syncs
To handle a periodic sync event, listen for the periodicsync event in your service worker and check the event tag:
self.addEventListener('periodicsync', event => {
  if (event.tag === 'sync-news') {
    event.waitUntil(syncNews());
  }
});

async function syncNews() {
  // Fetch and update news data
  console.log('News data updated successfully!');
}
In this example, the service worker listens for the periodicsync event and calls the syncNews() function to update the news data.
Debugging and Testing
Debugging and testing are key steps to ensure your background sync works as expected. Let's look at the tools and methods you can use.
Using Browser Dev Tools
Browser dev tools are great for debugging service workers. Use the Application tab in Chrome DevTools to:
- Inspect registered service workers
- Check their lifecycle and events
- Manually trigger lifecycle events like install and activate
- Send push notifications for testing
You can also use the Console tab to log messages at different stages of the service worker lifecycle. For example:
self.addEventListener('install', function(event) {
  console.log('[Service Worker] Installing...', event);
});

self.addEventListener('activate', function(event) {
  console.log('[Service Worker] Activating...', event);
  return self.clients.claim();
});

self.addEventListener('fetch', function(event) {
  console.log('[Service Worker] Fetching...', event);
  event.respondWith(fetch(event.request));
});
Simulating Offline Scenarios
To test your background sync, simulate offline scenarios:
- Go to the Network tab in Chrome DevTools
- Select "Offline" from the dropdown menu
This helps you see how your service worker behaves when the device is offline. Tools like Workbox or Lighthouse can also simulate different network conditions.
Cross-Browser and Device Testing
Ensure your background sync works across different browsers and devices:
- Use tools like BrowserStack or Sauce Labs to test on multiple platforms
- Use Lighthouse to audit your PWA for performance, accessibility, and best practices
Lighthouse provides a detailed report that can help you identify issues with your background sync.
Best Practices
Handling Sync Failures and Retries
When using background sync, it's important to manage failures and retries. Syncs can fail due to network issues, server problems, or conflicts. Implementing a retry system ensures data is eventually synced.
Strategies for managing sync failures:
StrategyDescriptionExponential backoffRetry syncing at longer intervals to avoid overwhelming the server.Limited retriesSet a retry limit to prevent infinite loops and save resources. Notify the user or log the error if the limit is reached.Sync queuingStore failed syncs in a queue and retry them later.
Coalescing Sync Events
Combining multiple sync events into one can improve performance and reduce server load. This is useful for frequent data updates.
Ways to coalesce sync events:
MethodDescriptionDebouncingWait for a short period before triggering a sync event to combine multiple updates.ThrottlingLimit the frequency of sync events to avoid overwhelming the server.
Optimizing Performance and Battery
Optimizing background sync tasks helps save battery life and improve performance.
Tips for optimization:
TipDescriptionEfficient data storageUse a storage method that minimizes data transfer during syncs.Optimize sync frequencyAdjust sync frequency based on app needs to balance battery life and data freshness.Lazy loadingLoad data only when needed to reduce data transfer during syncs.
Fallback for Unsupported Browsers
Not all browsers support background sync. Provide fallback options for these cases.
Fallback strategies:
StrategyDescriptionPolyfillsUse polyfills to mimic background sync in unsupported browsers.Alternative sync methodsImplement periodic or manual syncing for unsupported browsers.
Conclusion
Benefits Summary
In this guide, we've covered how background sync in Progressive Web Apps (PWAs) using service workers can improve user experience. Background sync allows users to keep using your app even when they lose internet connection. We discussed one-time and periodic syncs and how to set them up with service workers.
Using background sync, you can:
- Provide a more reliable user experience
- Increase user retention
- Improve app performance
Background sync also helps manage sync failures, combine sync events, and optimize performance and battery life.
Future Improvements
As web technology advances, background sync will continue to improve. Future updates may include better support for periodic sync, enhanced performance, and new features for offline experiences.
Stay updated with the latest developments and follow best practices for smooth implementation in your PWAs.
Further Learning Resources
For more information on background sync and service workers, check out these resources:
These resources offer detailed information on service workers, background sync, and related technologies to help you stay current with best practices.
FAQs
What is background sync in service worker?
Background sync lets a web app delay tasks until the user has a stable network connection. This allows users to keep using your app even when they lose internet connection.
What is background sync permission?
The Background Synchronization API allows a web app to delay tasks until the user has a stable network connection. This permission is needed for the app to sync data in the background.
Can PWA run in the background?
Yes, PWAs can run in the background using service workers. This means the app can continue tasks and update data even when the user is not actively using it.
Related posts

10 Tips to Reduce iOS & Android App Size
Reducing the size of your mobile app is crucial for providing a better user experience. Smaller apps download faster, require less storage space, and perform better - leading to more installations and fewer uninstalls due to storage issues.
Here are the key tips to make your iOS and Android apps smaller:
- Remove Unused Resources
- Use tools like FengNiao (iOS) and lint (Android) to detect and remove unused resources
- Leverage Android App Bundles to optimize resources for different devices
- Optimize Images and Media
- Use efficient image formats like WebP and HEIC
- Compress images with lossless or lossy tools like Imagify, TinyPNG, and ImageOptim
- Resize images to optimal sizes for each platform and device
- Compress and use efficient video formats like H.264 and H.265
- Shrink and Obfuscate Code
- Use ProGuard (Android) and Link-Time Optimization (iOS) to remove unused code
- Optimize remaining code by renaming classes, removing debug info, and compressing
- Leverage App Thinning and App Bundles
- Use App Thinning (iOS) to deliver optimized assets based on device
- Use Android App Bundles to generate optimized APKs for different devices
- Implement On-Demand Resources and Dynamic Delivery
- Use On-Demand Resources (iOS) to download resources only when needed
- Use Dynamic Delivery (Android) to create modular apps with downloadable modules
- Optimize Third-Party Libraries
- Evaluate library necessity and choose lightweight alternatives
- Use tree shaking to remove unused library code
- Monitor library performance with tools like ProGuard, Firebase, and LeakCanary
- Enable Bitcode and Runtime Optimizations (iOS)
- Bitcode allows Apple to recompile your app for specific devices
- Use whole-module optimization and the
swiftccompiler
- Modularize and Lazy Load
- Break your app into smaller modules or frameworks
- Lazy load modules or features only when needed
- Optimize Updates and Network Transfers
- Use delta updates to send only changes made to the app
- Compress content and optimize network requests
- Continuous Optimization
-   Regularly monitor and analyze app size
-   Use automated testing, CI pipelines, and analytics tools
-   Conduct code reviews and refactoring to maintain a lean codebase
By following these tips, you can significantly reduce the size of your iOS and Android apps, leading to faster downloads, better performance, and an improved user experience.
Related video from YouTube
Getting Started
Before you start reducing your app size, it's important to know the basics of mobile app development for both iOS and Android. Understanding the build tools and optimization methods for each platform is key to making your app smaller.
Understanding the Build Process
The build process for mobile apps includes:
- Compiling code
- Packaging resources
- Creating the final app bundle
Both iOS and Android have ways to make this process more efficient, which can help reduce the app size.
Identifying Areas for Optimization
To start optimizing your app size, look at these areas:
- Unused resources and code
- Inefficient image and media compression
- Unoptimized code and libraries
- Ineffective use of app bundles and thinning
By focusing on these areas, you can make your app smaller and improve the user experience.
Tools and Techniques
Get to know the tools and techniques for app size optimization:
- iOS: Use Xcode's tools like App Thinning and Bitcode.
- Android: Use tools like ProGuard and the Android Asset Packaging Tool.
These tools can help you reduce the size of your app effectively.
Remove Unused Resources
Removing unused resources is a key step in reducing the size of your iOS and Android app. As you update your app, some features may become obsolete, and some layouts, colors, strings, etc., may no longer be used. Removing these unused resources will help keep your app size small.
Remove Unused Resources in iOS
- Open your app in Xcode to see all the resources in the resource list.
- Use a tool like FengNiao to detect unused resources. This tool helps you find and remove unused resources from the IPA file.
Remove Unused Resources in Android
- Use the lint tool to detect unused resources in your APK file. The lint tool shows warnings about unused resources, which you can then remove.
Use Android App Bundle for Android
The Android App Bundle is a pre-APK publishing format that contains all of your app's resources and code. Google Play uses it to create multiple APKs, each optimized for different devices.
PlatformToolDescriptioniOSFengNiaoDetects and removes unused resources from the IPA fileAndroidlintDetects unused resources in the APK fileAndroidAndroid App BundlePre-APK format that optimizes resources for different devices
Optimize Images and Media
Optimizing images and media is key to reducing the size of your iOS and Android app. Large image files can make your app bigger, leading to slower downloads and more storage use. Here are some ways to optimize image and media assets for both platforms.
Efficient Image Formats
Using efficient image formats can help reduce image size:
FormatDeveloperSize ReductionWebPGoogleUp to 25% compared to JPEGHEICMPEG GroupUp to 50% compared to JPEG
Compression Tools
Compression tools can further reduce image sizes without losing quality. Here are some tools you can use:
ToolTypeDescriptionImagifyLossless/LossyReduces image sizesTinyPNGLossless/LossyCompresses PNG and JPEG imagesImageOptimLosslessOptimizes images without losing quality
Best Practices
Follow these best practices when optimizing images and media:
- Use vector graphics for icons and logos.
- Resize images to the optimal size for each platform and device.
- Compress images using lossless or lossy compression tools.
- Use lazy loading to load images only when needed.
- Optimize video content by compressing videos and using efficient formats like H.264 and H.265.
Shrink and Obfuscate Code
Shrinking and obfuscating code helps reduce the size of your iOS and Android app. This involves removing unused code, optimizing the remaining code, and making it harder for others to reverse-engineer your app.
Code Shrinking Tools
PlatformToolDescriptionAndroidProGuardRemoves unused classes, methods, and fields; obfuscates codeiOSLink-Time Optimization (LTO)Removes unused functions and data
How Code Shrinking Works
Code shrinking tools analyze your code to find and remove unused elements, a process known as "tree shaking." They also optimize the remaining code by:
- Renaming classes, methods, and fields to shorter names
- Removing debug information
- Compressing code using algorithms like Huffman coding
Benefits of Code Shrinking
BenefitDescriptionSmaller File SizesReduces APK and IPA file sizesBetter PerformanceImproves app performanceIncreased SecurityMakes code harder to reverse-engineerFaster LoadingSpeeds up app loading times
App Thinning and App Bundles
App Thinning and App Bundles help optimize app delivery based on device configuration, reducing app size for faster downloads and installations.
App Thinning for iOS
App Thinning, introduced in iOS 9, allows developers to create apps optimized for specific devices. It includes three processes: Slicing, On-Demand Resources, and BitCode.
ProcessDescriptionSlicingPacks assets based on the device, so users only install relevant assets.On-Demand ResourcesDivides app resources into packages downloaded only when needed.BitCodeIntermediate representation of a compiled program, allowing Apple to recompile the app for specific devices.
Android App Bundles
Android App Bundles package and distribute Android apps efficiently. They create a single bundle with all necessary resources for different device configurations. When a user downloads the app, the Google Play Store generates an optimized APK for their specific device.
FeatureDescriptionModular DownloadDivides the app into modules downloaded only when needed.Device-Specific APKsGenerates optimized APKs for different devices, reducing app size.
On-Demand Resources and Dynamic Delivery
On-Demand Resources and Dynamic Delivery help reduce the initial app size, making it more user-friendly.
On-Demand Resources for iOS
On-Demand Resources, introduced in iOS 9, let developers tag resources that can be hosted on the App Store. These resources are downloaded only when needed, reducing the initial app size. This is useful for apps with large resources, like games or educational apps.
To use On-Demand Resources:
- Tag the resources in your app.
- The App Store hosts these resources.
- Resources are downloaded in the background as needed.
Dynamic Delivery for Android
Dynamic Delivery, introduced in Android 10, allows developers to create modular apps. Users only download the modules they need, reducing the initial app size.
Dynamic Delivery uses Android App Bundles to package and distribute apps. When a user downloads the app, the Google Play Store generates an optimized APK for their device.
To use Dynamic Delivery:
- Create a modular app architecture.
- Use the Android App Bundle to package and distribute your app.
Benefits of On-Demand Resources and Dynamic Delivery
BenefitDescriptionReduced App SizeSmaller initial download sizeFaster DownloadsQuicker installation timesImproved User ExperienceUsers download only what they needEfficient Storage UseSaves space on devicesEasier MaintenanceSupports modular app architecture
sbb-itb-8abf120
Optimize Third-Party Libraries
Optimizing third-party libraries is key to reducing app size. These libraries can add value but also increase size, loading time, and memory use. Here's how to minimize their impact:
Evaluate Library Necessity
Before adding a library, ask if it's truly needed. Consider if the functionality can be achieved through native code or alternative libraries. Remove any unnecessary libraries to reduce size and improve performance.
Choose Lightweight Libraries
Opt for smaller, specialized libraries over large, comprehensive ones. Smaller libraries contribute less to the overall app size and often provide specific functionalities without extras. Use mobile-friendly libraries optimized for mobile devices.
Use Tree Shaking
Tree shaking removes dead code during the build process, ensuring only necessary code is included in the final bundle. Implement tree shaking to reduce library size and improve performance.
Monitor Library Performance
Use tools to shrink and obfuscate code, track errors, and measure performance:
ToolPurposeDescriptionProGuard/R8Code ShrinkingReduces size and complexityFirebase/CrashlyticsError TrackingReports errors and crashesLeakCanary/InstrumentsMemory Leak DetectionDetects and prevents memory leaksLighthouse/Android StudioPerformance MonitoringMeasures performance impact
Bitcode and Runtime Optimizations (iOS)
Bitcode helps make iOS apps smaller and faster. When you enable Bitcode, Apple can recompile your app's code to use the latest optimizations and improvements. This means your app will be smaller and perform better.
Benefits of Bitcode
BenefitDescriptionSmaller App SizeApple creates separate versions for each device architecture, reducing the overall size.Improved PerformanceUses the latest compiler optimizations for better performance.
Important Notes
- Bitcode is no longer required for watchOS and tvOS apps.
- The App Store does not accept Bitcode submissions from Xcode 14.
Runtime Optimizations
Apple has introduced runtime optimizations in recent iOS versions to help reduce app size and improve performance. These include whole-module optimization, which allows the compiler to optimize the entire module.
How to Enable
- Use the Latest Xcode: Ensure you're using the latest version of Xcode.
- Enable Whole-Module Optimization: Go to your project settings and enable whole-module optimization.
- Use
swiftcCompiler: Compile your Swift code with theswiftccompiler for better optimization and size reduction.
Modularize and Lazy Load
Breaking your app into smaller parts and loading them only when needed can help reduce app size and improve performance.
Modularization in iOS
In iOS, you can create separate frameworks for each feature of your app. This helps you optimize each part separately.
Steps to modularize your iOS app:
- Identify features that can be modularized.
- Create a framework for each feature.
- Optimize each framework using code shrinking and obfuscation.
Modularization in Android
In Android, you can create separate modules for each feature. This allows you to optimize each part independently.
Steps to modularize your Android app:
- Identify features that can be modularized.
- Create a module for each feature.
- Optimize each module using code shrinking and obfuscation.
Lazy Loading
Lazy loading means loading parts of your app only when they are needed. This reduces the initial app size and improves performance.
Steps to implement lazy loading:
- Identify parts of your app that can be lazy loaded.
- Create a mechanism to load these parts only when needed.
- Optimize the loading mechanism to keep the app size small.
Optimize Updates and Network Transfers
Optimizing app updates and network transfers helps reduce app size and improve user experience. Here are some strategies:
Delta Updates
Delta updates send only the changes made to the app instead of the entire app package. This reduces update sizes, making them faster to download and install. Google’s file-by-file patching reduces update sizes by an average of 65%.
Content Compression
Compressing content reduces the size of network transfers. Use lossless and lossy compression to minimize image sizes without losing quality. Algorithms like Run Length Encoding (RLE) and Quite OK Image format can achieve lossless compression.
Optimize Network Requests
Optimizing network requests reduces the size of network transfers. Techniques like caching, lazy loading, and reducing the number of requests help minimize data transfer. This improves app performance, reduces latency, and enhances user experience.
StrategyDescriptionDelta UpdatesSend only changes made to the app, reducing update sizes.Content CompressionUse lossless and lossy compression to minimize image sizes.Optimize Network RequestsUse caching, lazy loading, and reduce the number of requests.
Continuous Optimization
Continuous optimization is key to keeping your app's size manageable throughout its development. Regularly monitor and analyze your app's size to find areas for improvement. Track changes in app size over time, identify trends, and make data-driven decisions to optimize resources.
Use various tools and processes to achieve continuous optimization. Automated testing and continuous integration (CI) pipelines can detect size increases early, allowing you to address issues promptly. Analytics tools can track user behavior and highlight areas where optimization can enhance the user experience.
Regular code reviews and refactoring help maintain a lean codebase. This involves removing unused code, optimizing algorithms, and improving resource use. By making optimization a continuous process, you can ensure your app remains efficient, fast, and user-friendly.
Tool/ProcessDescriptionAutomated TestingDetect size increases early and take corrective actionCI PipelinesIntegrate size monitoring into your development workflowAnalytics ToolsTrack user behavior and identify areas for optimizationCode ReviewsRegularly review code to remove unused code and optimize resourcesRefactoringImprove code efficiency and reduce size
Final Thoughts
By following these 10 tips, you can make your iOS and Android apps smaller, leading to a better user experience, improved app store visibility, and more downloads. Remember, reducing app size is a continuous process that needs regular attention.
Key Takeaways:
- Regularly check and optimize your app's resources, code, and media to keep the size down and improve performance.
- Use tools like automated testing, CI pipelines, and analytics to spot size increases and find areas to improve.
- Stay proactive in reducing app size to stay competitive and meet user expectations.
FAQs
How do I reduce and optimize iOS app size?
To reduce and optimize your iOS app size, create an App Size Report by archiving your app in Xcode, exporting it as an Ad Hoc, Development, or Enterprise build, and choosing "All compatible device variants" for app thinning. Sign your app and export it to your Mac. This will help you identify areas to optimize and reduce your app's size.
How to decrease the app size in Android?
To decrease the app size in Android, upload your app with Android App Bundles, understand the APK structure, reduce resource count and size, remove unused resources, minimize resource use from libraries, reduce native and Java code, and maintain multiple lean APKs.
Can using R8 Proguard help reduce app size?

Yes, using R8 Proguard can help reduce app size. Proguard and R8 are code shrinkers that can significantly reduce the size of your APK by removing unused code, renaming classes, and making your code more compact. They are integrated into Android Studio and are easy to use.
How to do app thinning?
To do app thinning, create an App Size Report by archiving your app in Xcode, exporting it as an Ad Hoc, Development, or Enterprise build, and choosing "All compatible device variants" for app thinning. Sign your app and export it to your Mac. This will help you reduce your app's size by removing unnecessary resources and code.
How to reduce IPA file size?
To reduce IPA file size, inspect your app's IPA file and identify areas to optimize. Consider using asset files instead of putting data into your code. For example, use a property list for bundling any data with your app instead of using strings in code. This will help reduce the size of your IPA file and improve your app's performance.
Related posts
Ready to Build Your Product, the Fast, AI-Optimized Way?
Let’s turn your idea into a high-performance product that launches faster and grows stronger.