Insights from Zee Palm's Team
We talk about products, app development, and next-generation apps.

10 Cross-Promotion Strategies to Boost App Visibility
Cross-promotion is a cost-effective marketing strategy where apps or brands collaborate to reach new users, increase visibility, and drive growth. By partnering with other apps or brands, you can tap into existing user bases and overcome challenges like app discovery, user acquisition, and retention.
Here are 10 effective cross-promotion strategies:
- Social Media Collaborations: Partner with influencers, brands, or other apps to create engaging content, leverage user-generated content, run contests, and utilize paid advertising.
- In-App Advertising Exchanges: Exchange ads with other app developers to reach a wider audience and increase visibility cost-effectively.
- Guest Appearances on Podcasts and Webinars: Share your knowledge and insights as a guest on relevant podcasts and webinars to establish authority and reach a targeted audience.
- Influencer-Driven Content Features: Collaborate with influencers to create sponsored posts, product reviews, tutorials, and user-generated content showcasing your app.
- Strategic Brand Partnerships: Team up with complementary brands to co-create products, run joint marketing campaigns, and implement referral programs.
- Shared Content Marketing Initiatives: Collaborate with other brands or influencers to create user-generated content contests, limited-time offers, and mystery or countdown campaigns.
- Cross-Promotional Referral Programs: Incentivize users to refer friends and family in exchange for rewards or discounts, driving user acquisition and loyalty.
- Co-Created Promotional Events: Partner with other brands to create unique experiences for your target audience, increasing brand awareness and user engagement.
- Bundled Offers and Discounts: Collaborate with other companies to offer exclusive deals, incentivizing users to try your app and providing a unique experience.
- User-Generated Content Campaigns: Encourage users to create and share content related to your app, fostering engagement, credibility, and cost-effective promotion.
By experimenting with these cross-promotion strategies and building strong partnerships, you can increase your app's visibility, drive more downloads, and build a loyal community of users.
1. Social Media Collaborations
Social media collaborations are a great way to increase your app's visibility through cross-promotion. By partnering with influencers, brands, or other apps, you can reach new users and grow your audience. Here's how to make the most of social media collaborations:
Identify Relevant Partners
Find influencers, brands, or apps that align with your target audience and niche. Look at their content, engagement, and audience demographics to ensure they're a good fit for your app.
Collaboration Strategies
StrategyDescriptionCollaborate on ContentCreate engaging content that showcases your app's features and benefits.Leverage User-Generated ContentEncourage partners to share user-generated content that features your app.Run Social Media ContestsHost contests or giveaways that incentivize users to share your app with their followers.Utilize Paid AdvertisingUse paid social media advertising to reach a wider audience and drive traffic to your app's page.
By leveraging social media collaborations, you can increase your app's visibility, drive user acquisition, and stay ahead of the competition.
2. In-App Advertising Exchange
In-app advertising exchanges are a powerful way to cross-promote your app and increase visibility. This strategy involves partnering with other app developers to exchange ads and grow your user base.
How In-App Advertising Exchanges Work
In-app advertising exchanges allow you to show ads from other apps in your own app, and in return, your ads are shown in other participating apps. This creates a win-win situation where both parties benefit from increased visibility and user acquisition.
Benefits of In-App Advertising Exchanges
Here are the benefits of in-app advertising exchanges:
BenefitsDescriptionIncreased visibilityReach a wider audience and increase your app's visibility through cross-promotion.Cost-effectiveExchange ads with other app developers without incurring additional costs.Targeted audienceReach users who are already interested in similar apps and services.
Real-Life Examples of Successful In-App Advertising Campaigns
Several apps have seen significant success with in-app advertising exchanges. For example:
- 5-letter-words.com improved site speed and saw a 49% revenue uplift in just one month by reducing ad units and exchanging ads with other apps.
- ScrumPoker-online.org saw a 195% revenue uplift within the first week by improving misaligned and unresponsive ads.
By leveraging in-app advertising exchanges, you can increase your app's visibility, drive user acquisition, and stay ahead of the competition.
3. Guest Appearances on Podcasts and Webinars
Guest appearances on podcasts and webinars are a great way to increase your app's visibility and reach a wider audience. This strategy involves partnering with influencers, thought leaders, or industry experts to share your knowledge and insights.
Benefits of Guest Appearances
Here are the benefits of guest appearances on podcasts and webinars:
BenefitsDescriptionIncreased visibilityReach a wider audience and increase your app's visibility.Establish authorityPosition yourself as an expert in your industry.Targeted audienceReach users who are already interested in similar topics and services.
Finding Relevant Podcasts and Webinars
To find relevant podcasts and webinars, research popular shows in your industry and identify those that align with your app's niche. You can use online directories like Feedspot or Podcasters to discover top podcasts and webinars in your category.
For example, if your app is related to mobile app development, search for podcasts like "Mobile Dev Memo Podcast" or "The raywenderlich.com Podcast: For App Developers and Gamers". Reach out to the podcasters or webinar hosts and propose a guest appearance to discuss topics related to your app.
Preparing for a Guest Appearance
Before appearing as a guest on a podcast or webinar, prepare by:
- Researching the show's format and audience
- Preparing relevant topics and insights to share
- Ensuring your app's key features and benefits are highlighted
- Being ready to engage with the audience and answer questions
By leveraging guest appearances on podcasts and webinars, you can increase your app's visibility, establish authority, and reach a targeted audience.
4. Influencer-Driven Content Features
Influencer-driven content features are a great way to increase your app's visibility and reach a wider audience. This strategy involves partnering with influencers to create sponsored content that showcases your app's features and benefits.
Benefits of Influencer-Driven Content Features
Here are the benefits of influencer-driven content features:
BenefitsDescriptionIncreased reachReach a wider audience and increase your app's visibility.CredibilityInfluencers provide credibility to your app.Targeted audienceReach users who are already interested in similar topics and services.
Types of Influencer-Driven Content Features
There are several types of influencer-driven content features that you can use to promote your app:
- Sponsored posts: Partner with influencers to create sponsored posts on social media platforms like Instagram, TikTok, or YouTube.
- Product reviews: Collaborate with influencers to review your app and share their honest opinions with their followers.
- Tutorials and walkthroughs: Partner with influencers to create tutorials and walkthroughs that showcase your app's features and benefits.
- User-generated content: Encourage influencers to create user-generated content that showcases your app in action.
Finding the Right Influencers
To find the right influencers for your app, research popular influencers in your niche and identify those who align with your app's values and target audience. You can use online directories like Crunchbase or Ahrefs to discover top influencers in your category.
By partnering with influencers, you can increase your app's visibility, reach a wider audience, and drive more downloads and engagement.
5. Strategic Brand Partnerships
Strategic brand partnerships can help boost your app's visibility by teaming up with complementary brands. This approach allows you to expand your reach, increase credibility, and drive more downloads and engagement.
Benefits of Strategic Brand Partnerships
Here are the benefits of forming strategic brand partnerships:
BenefitsDescriptionIncreased ReachTap into new audiences and markets through your partner's existing customer base.CredibilityPartnering with a reputable brand can enhance your app's credibility and trustworthiness.Resource SharingShare resources, expertise, and knowledge to create a more robust and effective marketing strategy.
Types of Strategic Brand Partnerships
There are several types of strategic brand partnerships you can explore:
- Co-branded Products or Services: Develop a joint product or service that combines the strengths of both brands.
- Joint Marketing Campaigns: Collaborate on marketing initiatives, such as social media promotions, webinars, or events.
- Referral Programs: Implement a referral program that rewards customers for referring friends and family to your partner's brand.
Finding the Right Partners
To find the right partners for your app, research companies that share your target audience and values. Look for brands that complement your app's features and benefits, and consider partnering with companies that have a strong online presence and reputation.
By forming strategic brand partnerships, you can create a win-win situation that drives growth, increases visibility, and enhances your app's reputation.
6. Shared Content Marketing Initiatives
Shared content marketing initiatives involve collaborating with other brands or influencers to create and promote content that benefits both parties. This strategy can help increase your app's visibility, credibility, and reach new audiences.
Benefits of Shared Content Marketing Initiatives
BenefitsDescriptionIncreased ReachTap into new audiences and markets through your partner's existing customer base.CredibilityPartnering with a reputable brand or influencer can enhance your app's credibility.Resource SharingShare resources, expertise, and knowledge to create a more effective marketing strategy.
Examples of Shared Content Marketing Initiatives
- User-Generated Content (UGC) Contests: Collaborate with influencers or users to create content that showcases your app's features and benefits.
- Limited-Time Offers: Partner with other brands to create limited-time offers that drive conversions and increase engagement.
- Mystery and Countdown Campaigns: Create a sense of anticipation and excitement by collaborating with influencers or other brands to launch a mystery or countdown campaign.
By leveraging shared content marketing initiatives, you can create a win-win situation that drives growth, increases visibility, and enhances your app's reputation.
sbb-itb-8abf120
7. Cross-Promotional Referral Programs
Cross-promotional referral programs are a great way to increase your app's visibility by encouraging users to refer friends and family in exchange for rewards or discounts. This approach not only drives user acquisition but also increases customer loyalty and retention.
How Referral Programs Work
Referral programs incentivize users to share your app with others. When a user refers someone, they receive a reward or discount. This encourages users to continue using your app and share it with others.
Benefits of Referral Programs
BenefitsDescriptionMore UsersReferrals increase your app's visibility and user base.Loyal CustomersRewarding users for referrals encourages them to continue using your app.Cost-EffectiveReferral programs can be more cost-effective than traditional marketing strategies.
Examples of Referral Programs
- TaskRabbit's Referral Program: TaskRabbit offers a discount to both the referrer and the new user, encouraging users to share the app with friends and family.
- Tesla's Multi-Tiered Referral Program: Tesla's program rewards referrers with supercharging miles and entries into a sweepstakes, incentivizing users to refer others to the app.
By implementing a cross-promotional referral program, you can create a win-win situation that drives growth, increases visibility, and enhances your app's reputation.
8. Co-Created Promotional Events
Co-created promotional events are a great way to boost your app's visibility by partnering with other brands or companies to create unique experiences for your target audience. This cross-promotion strategy can help increase brand awareness, drive user engagement, and generate buzz around your app.
Benefits of Co-Created Promotional Events
BenefitsDescriptionIncreased Brand AwarenessPartnering with other brands can expand your reach and expose your app to new audiences.Unique ExperiencesCo-created events can provide users with memorable experiences that set your app apart from others.Enhanced User EngagementCollaborative events can encourage users to interact with your app in new and innovative ways.
Examples of Co-Created Promotional Events
- GoPro and Red Bull's "Stratos" Event: GoPro and Red Bull partnered to create a record-breaking skydiving event, capturing the experience with GoPro cameras and promoting it through Red Bull's channels.
- Airbnb and Flipboard's "One Less Stranger" Campaign: Airbnb and Flipboard collaborated on a campaign that encouraged users to share their travel experiences and connect with others, promoting both brands' services.
By co-creating promotional events with other brands, you can create a win-win situation that drives growth, increases visibility, and enhances your app's reputation.
9. Bundled Offers and Discounts
Bundled offers and discounts are a powerful way to boost your app's visibility. By partnering with other brands or companies, you can create exclusive deals that incentivize users to try your app.
Benefits of Bundled Offers and Discounts
BenefitsDescriptionMore ConversionsBundled offers can encourage users to take action and try your app.Better User ExperienceExclusive deals can provide users with a unique experience that sets your app apart from others.Improved ReputationCollaborative promotions can help build trust and credibility with your target audience.
Examples of Bundled Offers and Discounts
- Spotify and Uber's Partnership: Spotify and Uber partnered to offer users a discounted ride fare when they listened to music on Spotify during their ride.
- Starbucks and Lyft's Deal: Starbucks and Lyft collaborated on a promotion that rewarded users with a free coffee when they took a Lyft ride to a Starbucks location.
By offering bundled deals and discounts, you can create a win-win situation that drives growth, increases visibility, and enhances your app's reputation.
10. User-Generated Content Campaigns
User-Generated Content (UGC) campaigns are a great way to increase your app's visibility and engagement. By encouraging users to create and share content related to your app, you can tap into their creativity and enthusiasm.
Benefits of UGC Campaigns
BenefitsDescriptionMore EngagementUGC campaigns encourage users to interact with your app in new ways.Improved CredibilityReal customer experiences and feedback build trust with potential users.Cost-EffectiveUGC campaigns are a cost-effective way to generate content and promote your app.
Tips for a Successful UGC Campaign
- Design a campaign that resonates with users: Create a campaign that is engaging, relevant, and easy to participate in.
- Make it easy to share: Provide a platform or mechanism for users to easily share their content with others.
- Provide incentives: Offer rewards or recognition to users who participate in your campaign.
By leveraging user-generated content, you can create a loyal community of users who will help promote your app and drive growth.
Boosting App Visibility Through Cross-Promotion
Cross-promotion is a powerful strategy for app growth that helps developers increase their app's visibility, acquire new users, and retain existing ones. By partnering with other apps, developers can create a loyal community of users who will help promote their apps and drive growth.
Why Cross-Promotion Works
Cross-promotion is effective because it allows developers to tap into an existing user base. By partnering with apps that share similar target audiences, interests, or demographics, developers can increase the effectiveness of their cross-promotion efforts and drive more conversions.
Experimenting with Cross-Promotion Strategies
To get the most out of cross-promotion, it's essential to experiment with various tactics and strategies. This can include:
StrategyDescriptionSocial Media CollaborationsPartner with influencers or brands to create engaging content that showcases your app's features and benefits.In-App Advertising ExchangesExchange ads with other app developers to reach a wider audience and increase visibility.Guest AppearancesPartner with influencers, thought leaders, or industry experts to share your knowledge and insights.Influencer-Driven Content FeaturesCollaborate with influencers to create sponsored content that showcases your app's features and benefits.
Building Strong Partnerships
Remember, cross-promotion is a two-way street. It's not just about promoting your app to another app's audience; it's also about providing value to that audience and creating a mutually beneficial partnership. By doing so, developers can build strong relationships with their partners and create a network of apps that work together to drive growth and success.
By incorporating cross-promotion into your app growth strategy, you can increase your app's visibility, drive more downloads, and build a loyal community of users. So, don't be afraid to think outside the box and explore new and creative ways to cross-promote your app.
FAQs
What is an example of partnership marketing?
Partnership marketing is when two companies work together to create a new product or service. Here's an example:
PartnersProduct/ServiceNike and AppleApple Watch Nike+
In this example, Nike and Apple collaborated to create a special edition of the Apple Watch, targeting customers from both brands' loyal fanbases.
Related posts

Redundancy vs Failover: Key Differences, Use Cases
Redundancy duplicates critical components to ensure continued operation in case of a failure. Failover automatically switches to a backup system or component when the primary one fails.
When to Use Redundancy:
- For critical data storage and retrieval requiring near-100% uptime
- Real-time analytics and monitoring where high reliability is essential
- High-availability databases and transactional systems with minimal downtime tolerance
- Systems with low tolerance for downtime (e.g., healthcare, financial services)
When to Use Failover:
- For high-traffic or variable workloads requiring rapid recovery from failures
- Distributed networks or load-balanced applications needing dynamic response
- E-commerce platforms or online services where business continuity is critical
Quick Comparison:
FeatureRedundancyFailoverPurposeDuplicates components for reliabilitySwitches to backup in case of failureActivationAlways available as a preventive measureTriggered by a failure eventComplexityIncreases with system scaleCenters around contingency planningUse CasesIdeal for critical data and servicesSuits high-traffic, dynamic environments
How Failover Works
Failover for High Availability
Failover is a critical mechanism that ensures high availability in systems by automatically switching operations to a standby system in the event of a failure. This process minimizes downtime and data loss, ensuring that systems remain operational and accessible to users.
When Failover Occurs
When a failover event occurs, the system automatically switches to a backup system or component, ensuring that operations continue uninterrupted. This process involves redistributing processing tasks from the failed component to its secondary backup component.
Cloud Failover Techniques
In cloud computing, failover techniques play a crucial role in ensuring high availability and minimizing downtime. Cloud providers employ various failover techniques to ensure that services remain accessible even in the event of a failure.
Automated Failover Orchestration
Automated failover orchestration involves using software tools to detect failures and automatically switch operations to a backup system or component. This process eliminates the need for manual intervention, reducing downtime and ensuring that services remain operational.
Load Balancing and Traffic Routing
Cloud providers use load balancing and traffic routing techniques to distribute incoming traffic across multiple servers or data centers. This ensures that if one server or data center fails, traffic can be redirected to other available resources, minimizing the impact on users.
Failover TechniqueDescriptionAutomated Failover OrchestrationUses software tools to detect failures and switch to a backup system or component.Load Balancing and Traffic RoutingDistributes incoming traffic across multiple servers or data centers to minimize downtime.
By employing these failover techniques, cloud providers can ensure high availability and minimize downtime, providing users with a reliable and accessible experience.
Redundancy vs Failover
Redundancy and failover are two strategies used to ensure high availability and minimize downtime in systems. While they share a common goal, they differ in their approach, purpose, and activation.
Key Differences
FeatureRedundancyFailoverPurposeDuplicates components for reliabilitySwitches to a backup in case of failureActivationAlways available as a preventive measureTriggered by a failure eventComplexityIncreases with system scaleCenters around contingency planningUse CasesIdeal for critical data and servicesSuits high-traffic, dynamic environments
In summary, redundancy focuses on duplicating components to enhance reliability, whereas failover ensures continuity by switching to a backup system in the event of a failure. Understanding the key differences between these two strategies is crucial in designing and implementing high-availability systems that meet specific business needs.
sbb-itb-8abf120
When to Use Each Technique
When deciding between redundancy and failover, it's essential to understand the specific needs of your application development project. Both techniques have their strengths and weaknesses, and choosing the right one depends on the demands and challenges of your system.
Choosing Redundancy
Redundancy is ideal for systems that require:
System TypeDescriptionCritical data storage and retrievalNear-100% uptime is crucialReal-time analytics and monitoringHigh reliability is essentialHigh-availability databases and transactional systemsMinimal downtime is requiredSystems with low tolerance for downtimeHealthcare or financial services, for example
In these scenarios, redundancy provides an added layer of reliability, ensuring that critical components are always available, even in the event of a failure.
Opting for Failover
Failover solutions are better suited for systems that:
System TypeDescriptionHigh-traffic or variable workloadsRapid recovery from failures is necessaryDistributed networks or load-balanced applicationsDynamic response to changing conditions is requiredE-commerce platforms or online servicesBusiness continuity is critical in the event of a disaster or outage
In these cases, failover provides a more dynamic and responsive approach to maintaining service availability, allowing your system to quickly recover from failures and minimize downtime.
By understanding the strengths and weaknesses of each technique, you can make informed decisions about which approach best fits your application development needs, ensuring that your system is always available and reliable when it matters most.
Summary
Key Takeaways
In this article, we explored the differences between redundancy and failover, two essential techniques for ensuring high availability and reliability in app development. Here's a quick recap:
- Redundancy duplicates critical components to ensure continued operation in case of a failure.
- Failover automatically switches to a backup system or component in case of a failure.
- Understanding the strengths and weaknesses of each technique is crucial for choosing the right approach for your application development project.
TechniqueIdeal ForRedundancySystems requiring near-100% uptime, high reliability, and minimal downtimeFailoverSystems requiring rapid recovery from failures, dynamic response to changing conditions, and business continuity in case of a disaster or outage
By grasping the fundamental differences between redundancy and failover, entrepreneurs and developers can make informed decisions about which technique to employ, ultimately enhancing the reliability and user experience of their applications.
FAQs
What is the difference between failover and redundancy?
Failover is the process of switching to a backup system or component when the primary one fails. Redundancy is having extra components available in case the primary one fails. Think of redundancy as having a spare tire in your car, and failover as the process of changing to that spare tire when you get a flat.
TermDescriptionRedundancyHaving extra components available in case of a failureFailoverSwitching to a backup system or component when the primary one fails
In summary, redundancy ensures that there are backup components in place, while failover is the process of switching to those backups in case of a failure.
Related posts

11 Best Enterprise Mobile App Platforms 2024
In 2024, the top enterprise mobile app platforms will prioritize AI integration, cross-platform development, robust app security, seamless user experiences, and future-proof functionality. Key trends include:
- AI Integration: Automate tasks, provide personalized experiences, and leverage predictive analytics.
- Cross-Platform Development: Create apps that run seamlessly across multiple platforms.
- App Security: Protect sensitive user data from cyber threats.
- User Experience: Provide intuitive interfaces, seamless performance, and engaging features.
- Future-Proof Functionality: Integrate emerging technologies like 5G, blockchain, and IoT into apps.
Quick Comparison
PlatformCross-PlatformIntegrationSecurityScalabilityCost-EffectiveAppian✓Robust✓✓✓CB Insights EMAP Alternatives✓Robust✓✓✓Mendix✓Robust✓✓✓OutSystems✓Robust✓✓✓Salesforce Platform✓Robust✓✓✓Microsoft Power Apps✓Robust✓✓✓Oracle APEX✓Robust✓✓✓Quickbase✓Robust✓✓✓Zoho Creator✓Robust✓✓✓Pega Platform✓Robust✓✓✓ServiceNow Now Platform✓Robust✓✓✓
When selecting an enterprise mobile app platform, businesses should prioritize these key trends and capabilities to stay ahead of the curve and offer cutting-edge experiences to their users.
1. Appian
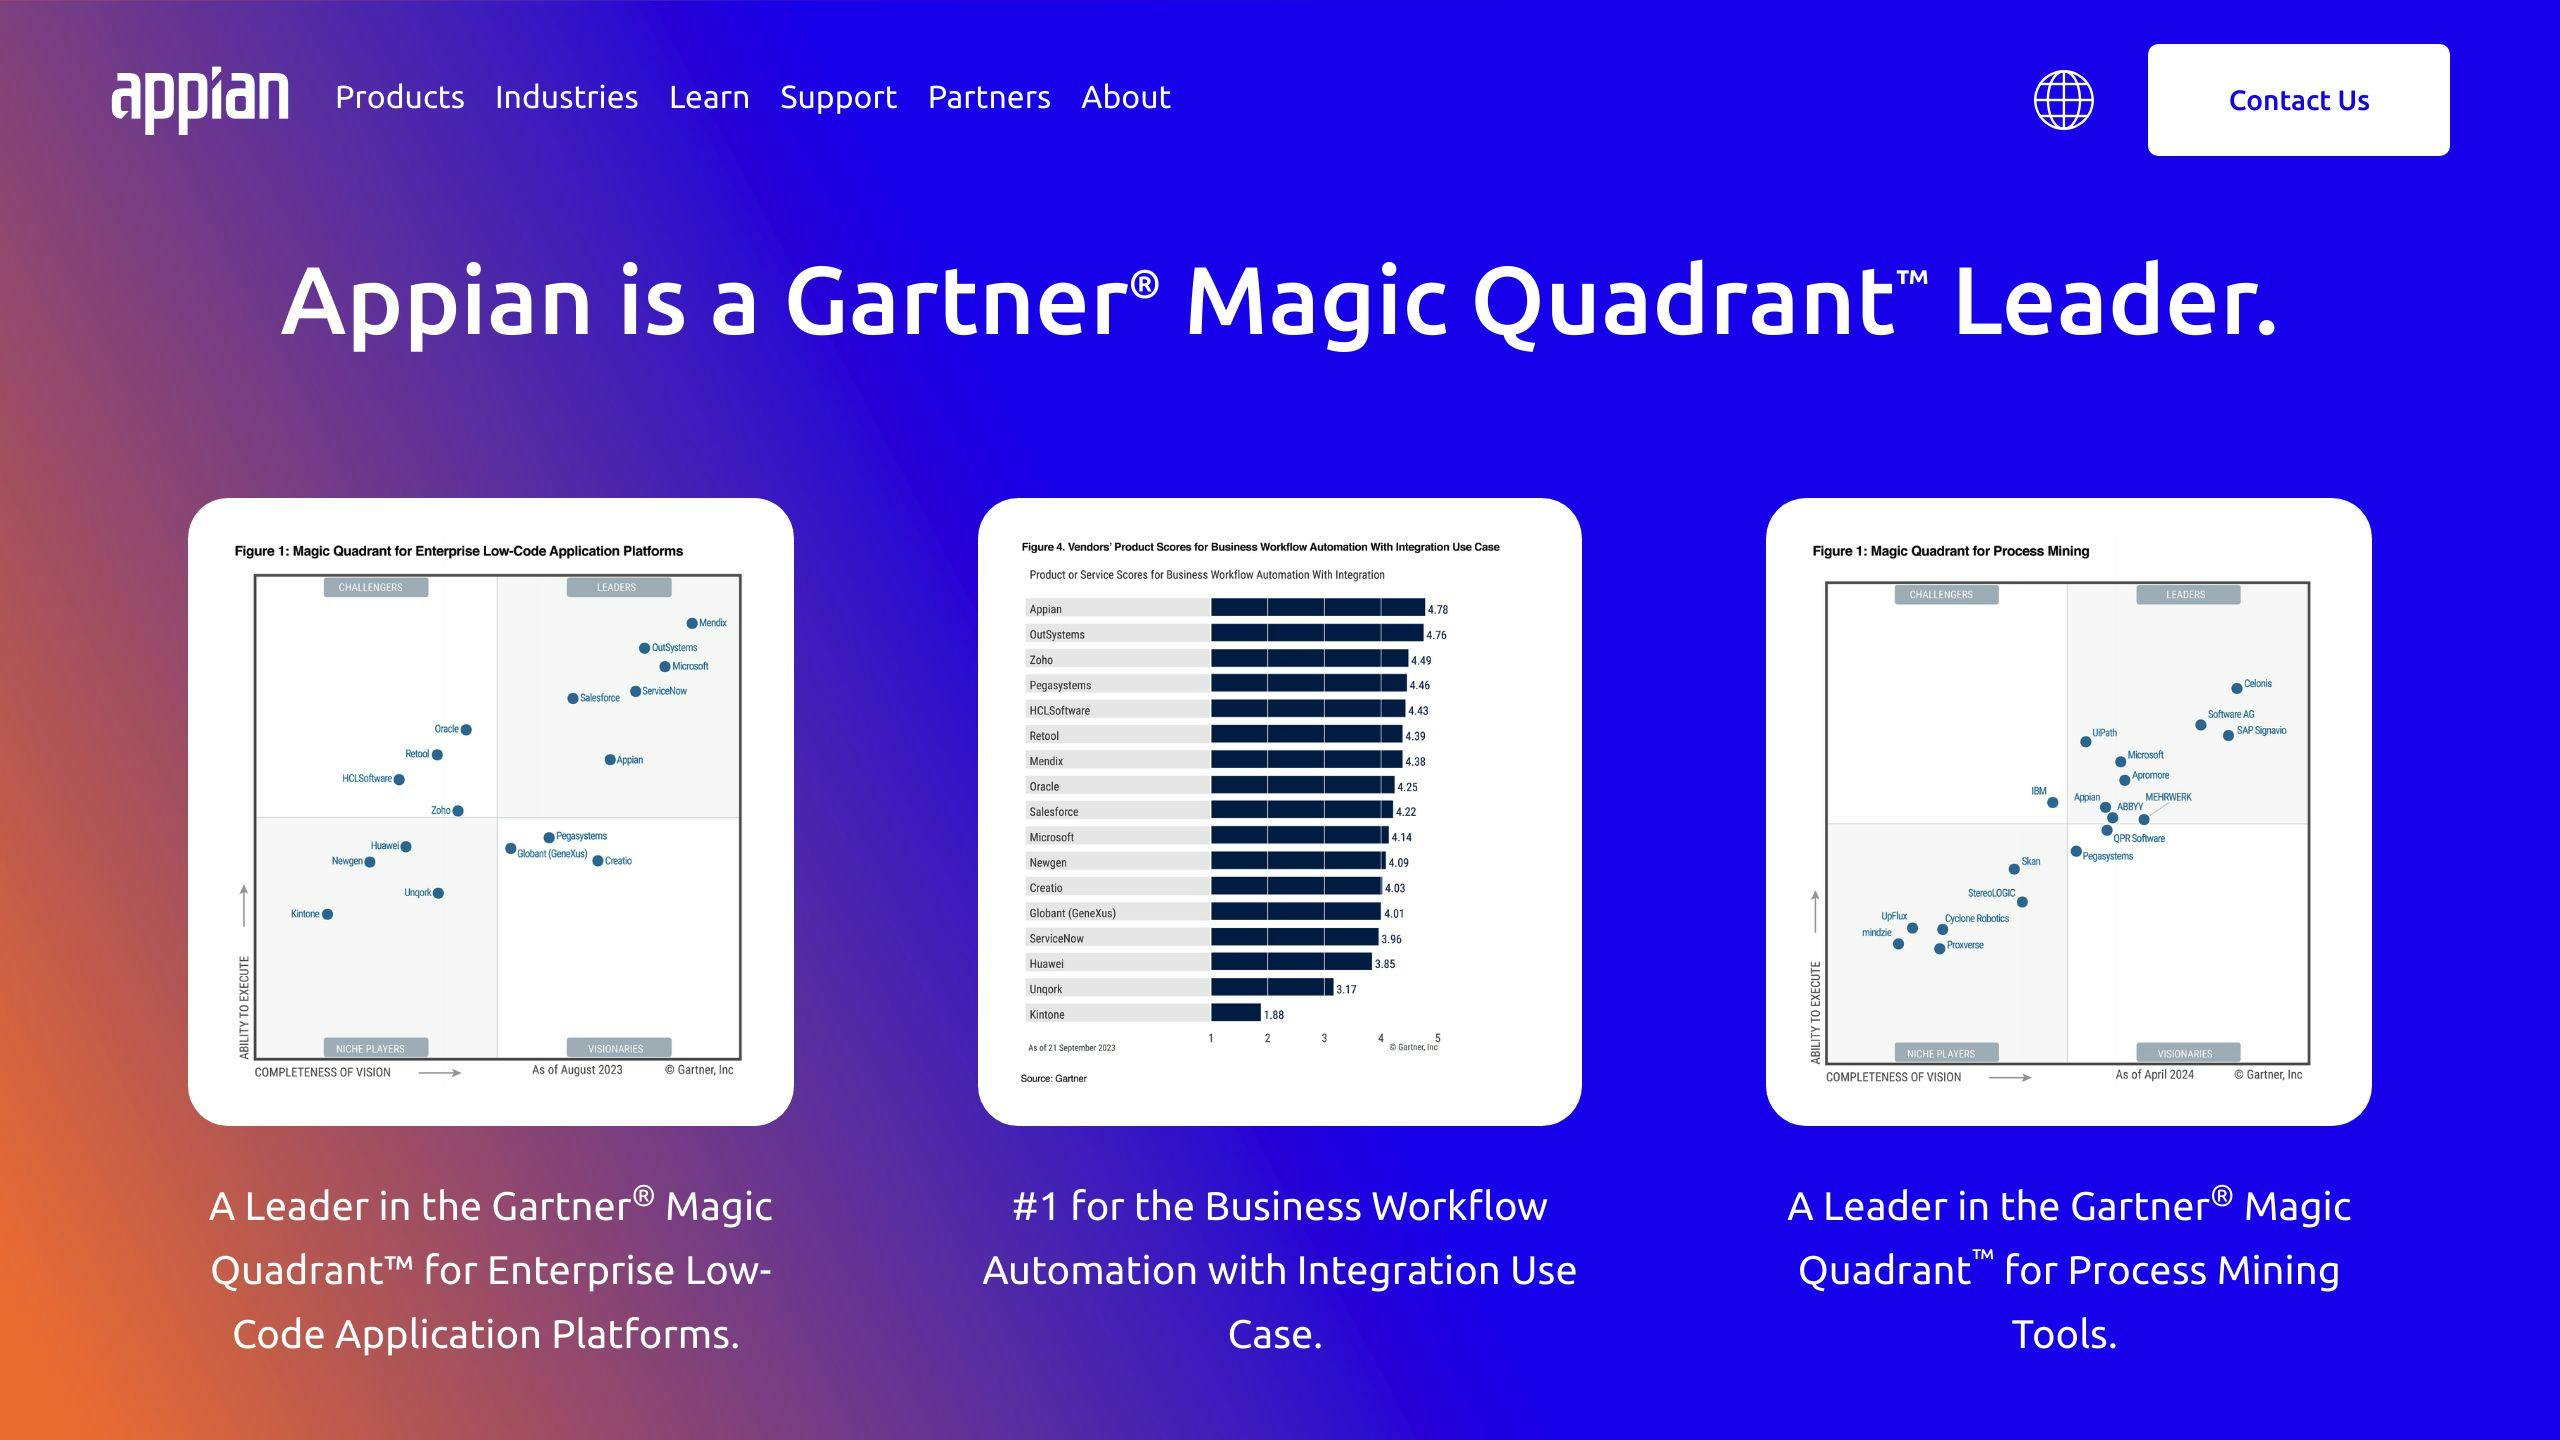
Cross-Platform Compatibility
Appian offers a low-code platform that allows developers to build mobile applications that can run on multiple platforms, including iOS, Android, and web. This feature enables businesses to reach a broader audience and provide a seamless user experience across different devices.
Integration Capabilities
Appian provides robust integration capabilities, enabling developers to connect with various systems, services, and data sources. The platform offers pre-built connectors to popular platforms like Salesforce, Google, Microsoft SharePoint, DocuSign, and AWS.
IntegrationDescriptionSalesforceConnect with Salesforce to leverage customer data and insightsGoogleIntegrate with Google services to enhance collaboration and productivityMicrosoft SharePointConnect with Microsoft SharePoint to access and manage enterprise contentDocuSignIntegrate with DocuSign to automate electronic signatures and agreementsAWSLeverage AWS services to build scalable and secure applications
Security Features
Appian prioritizes security, offering a range of features to ensure the protection of sensitive data and applications.
Security FeatureDescriptionAutomatic Mobile Feature UpgradesEnsure applications are always up-to-date and secureData FabricDiscover, unify, secure, and optimize enterprise data for robust security
Scalability
Appian's low-code platform is designed to scale with growing businesses, providing a flexible solution for mobile application development. The platform's cloud-native architecture enables easy deployment and management of applications.
Cost-Effectiveness
Appian's low-code platform offers a cost-effective solution for mobile application development, reducing the need for extensive coding and minimizing the time and resources required to build and deploy applications.
BenefitDescriptionRapid DevelopmentAccelerate digital transformation with rapid development capabilitiesReusable ComponentsReduce development time and costs with reusable componentsLow-Code PlatformMinimize coding requirements and reduce development costs
2. CB Insights EMAP Alternatives
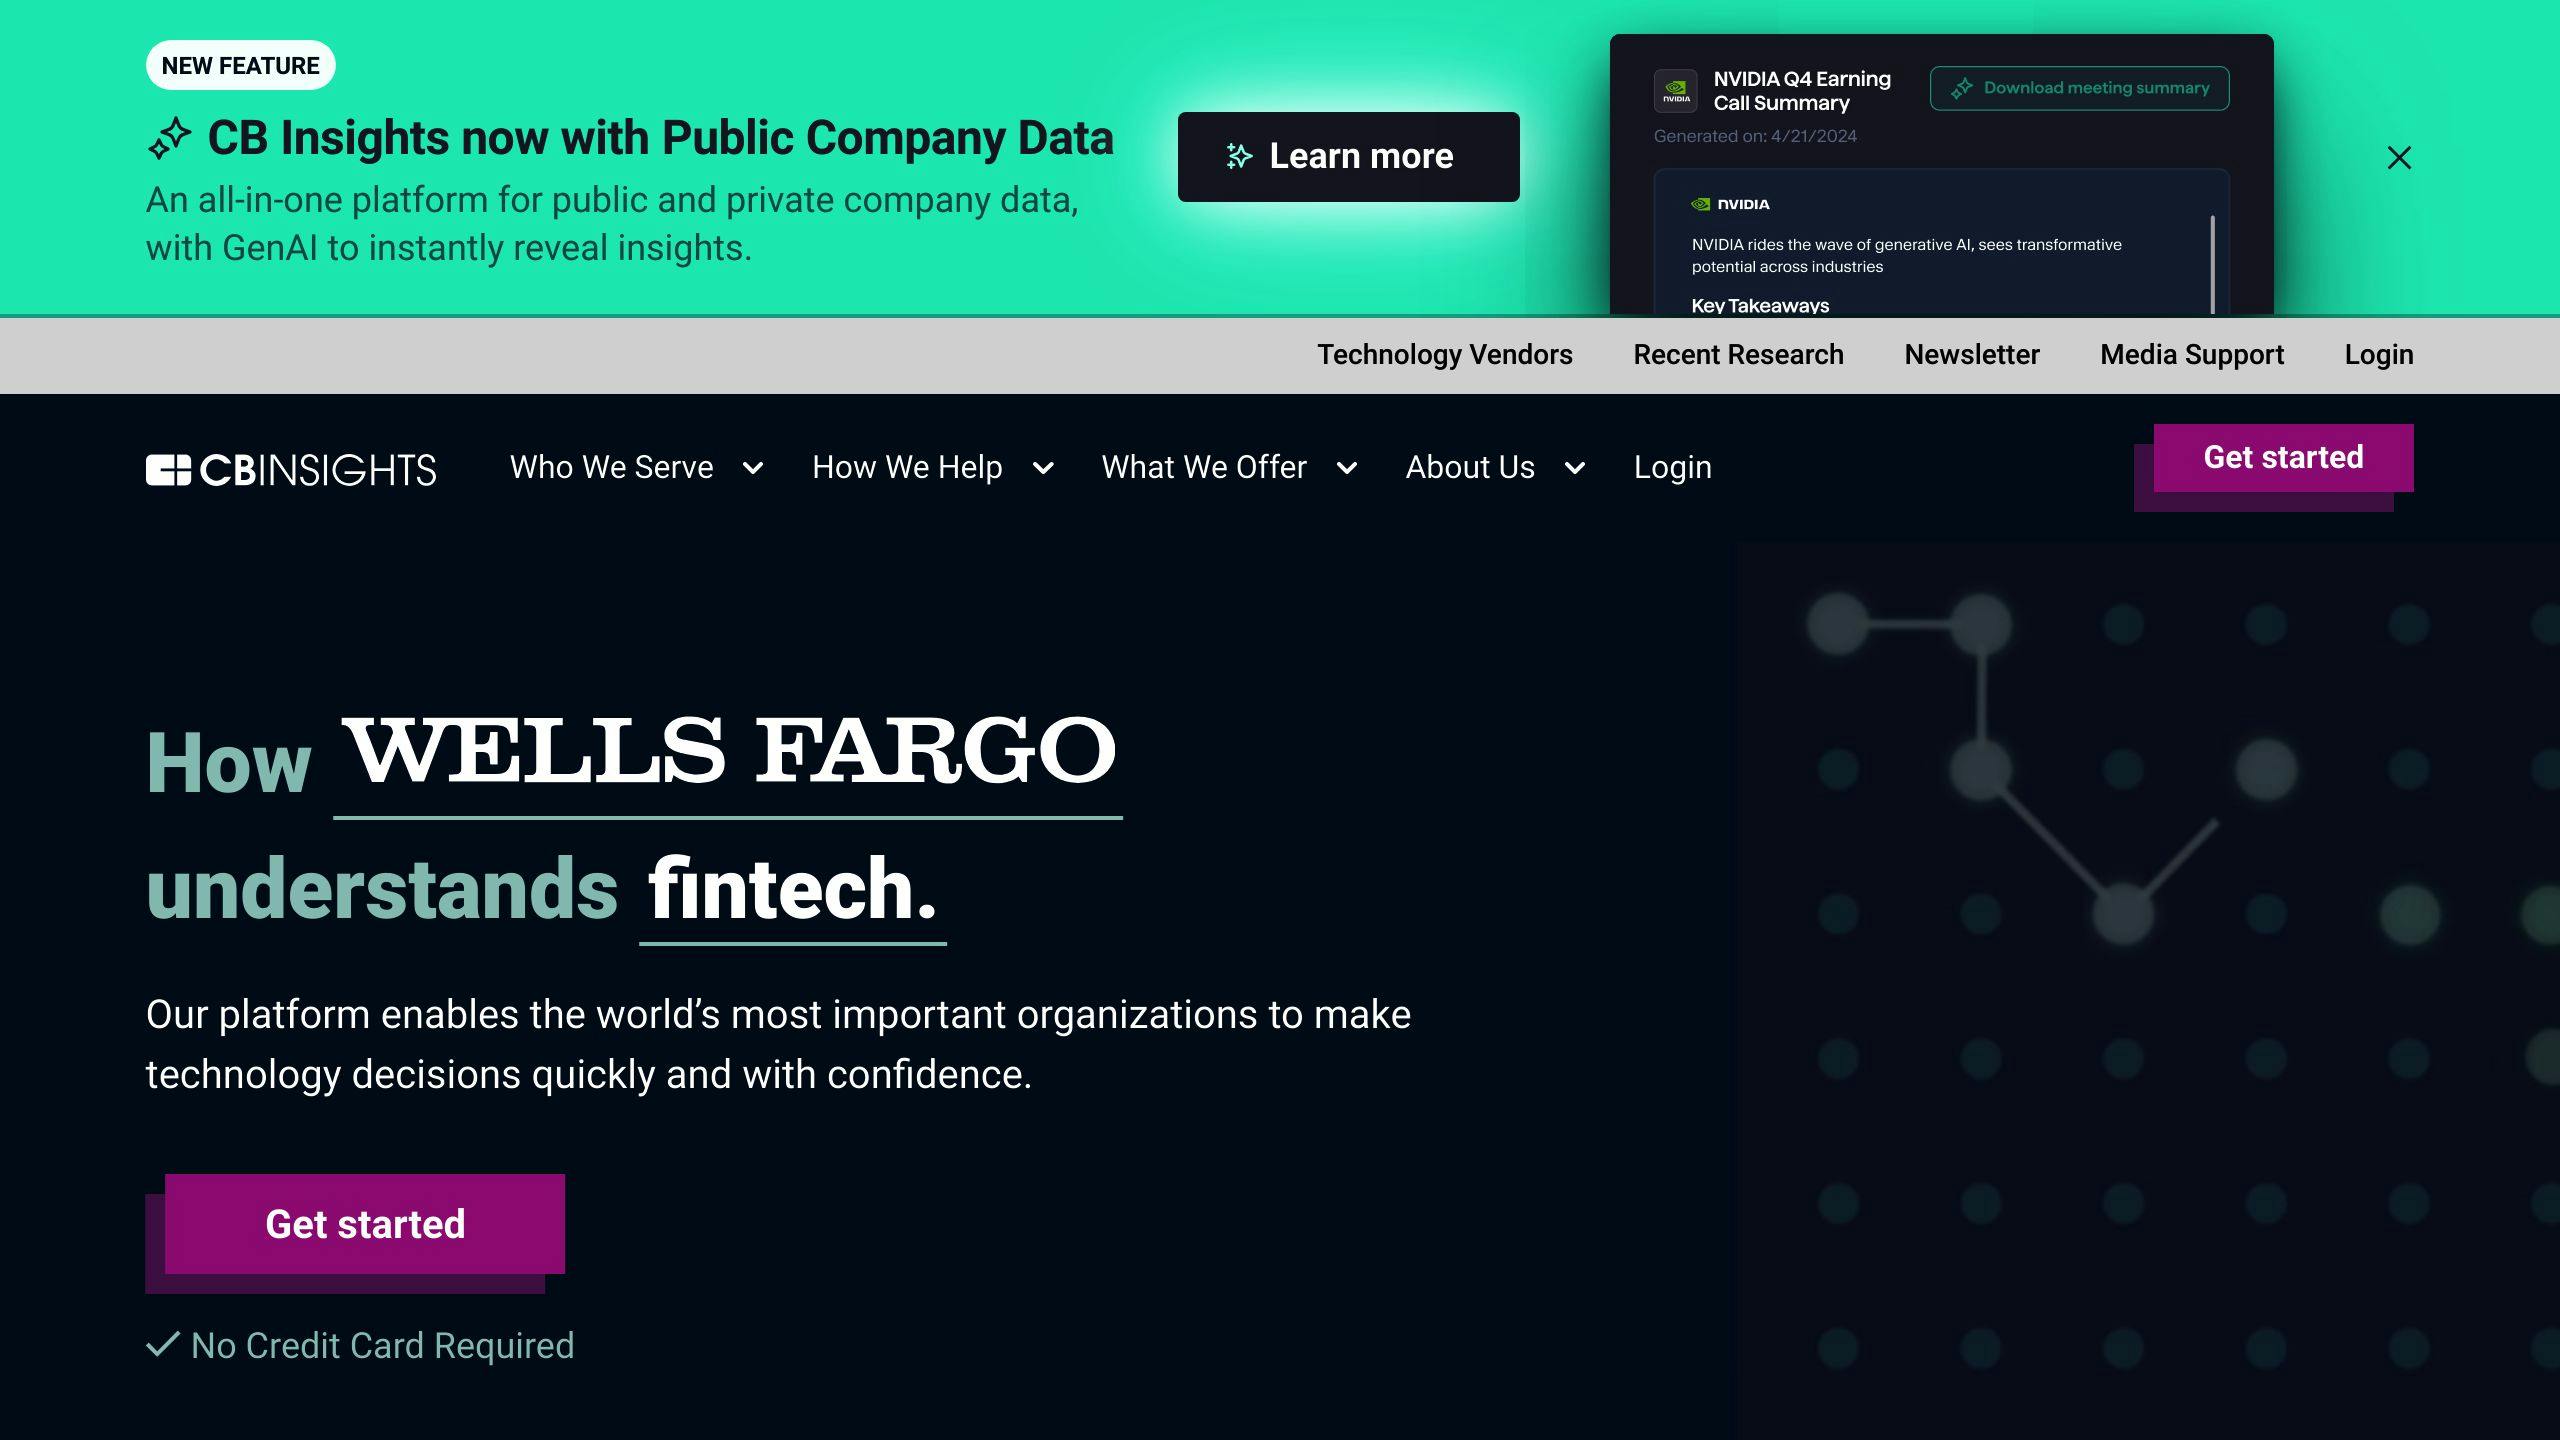
Cross-Platform Compatibility
CB Insights EMAP Alternatives offer a range of mobile application development platforms that allow developers to build applications that can run on multiple platforms, including iOS, Android, and web. This feature enables businesses to reach a broader audience and provide a seamless user experience across different devices.
Integration Capabilities
CB Insights EMAP Alternatives provide robust integration capabilities, enabling developers to connect with various systems, services, and data sources. Some popular platforms that can be integrated with these alternatives include:
PlatformDescriptionSalesforceConnect with Salesforce to leverage customer data and insightsGoogleIntegrate with Google services to enhance collaboration and productivityMicrosoft SharePointConnect with Microsoft SharePoint to access and manage enterprise contentDocuSignIntegrate with DocuSign to automate electronic signatures and agreementsAWSLeverage AWS services to build scalable and secure applications
Security Features
CB Insights EMAP Alternatives prioritize security, offering a range of features to ensure the protection of sensitive data and applications. Some of the security features include:
Security FeatureDescriptionAutomatic Mobile Feature UpgradesEnsure applications are always up-to-date and secureData FabricDiscover, unify, secure, and optimize enterprise data for robust securityEncryptionProtect sensitive data with encryption
Scalability
CB Insights EMAP Alternatives are designed to scale with growing businesses, providing a flexible solution for mobile application development. The cloud-native architecture of these platforms enables easy deployment and management of applications.
Cost-Effectiveness
CB Insights EMAP Alternatives offer a cost-effective solution for mobile application development, reducing the need for extensive coding and minimizing the time and resources required to build and deploy applications. Some benefits include:
BenefitDescriptionRapid DevelopmentAccelerate digital transformation with rapid development capabilitiesReusable ComponentsReduce development time and costs with reusable componentsLow-Code PlatformMinimize coding requirements and reduce development costs
Some popular CB Insights EMAP Alternatives include Flutter, Xamarin, React Native, Ionic, Sencha, Mendix, and Apache Cordova. Each of these alternatives offers a unique set of features, benefits, and use cases, making them suitable for different business needs and requirements.
3. Mendix
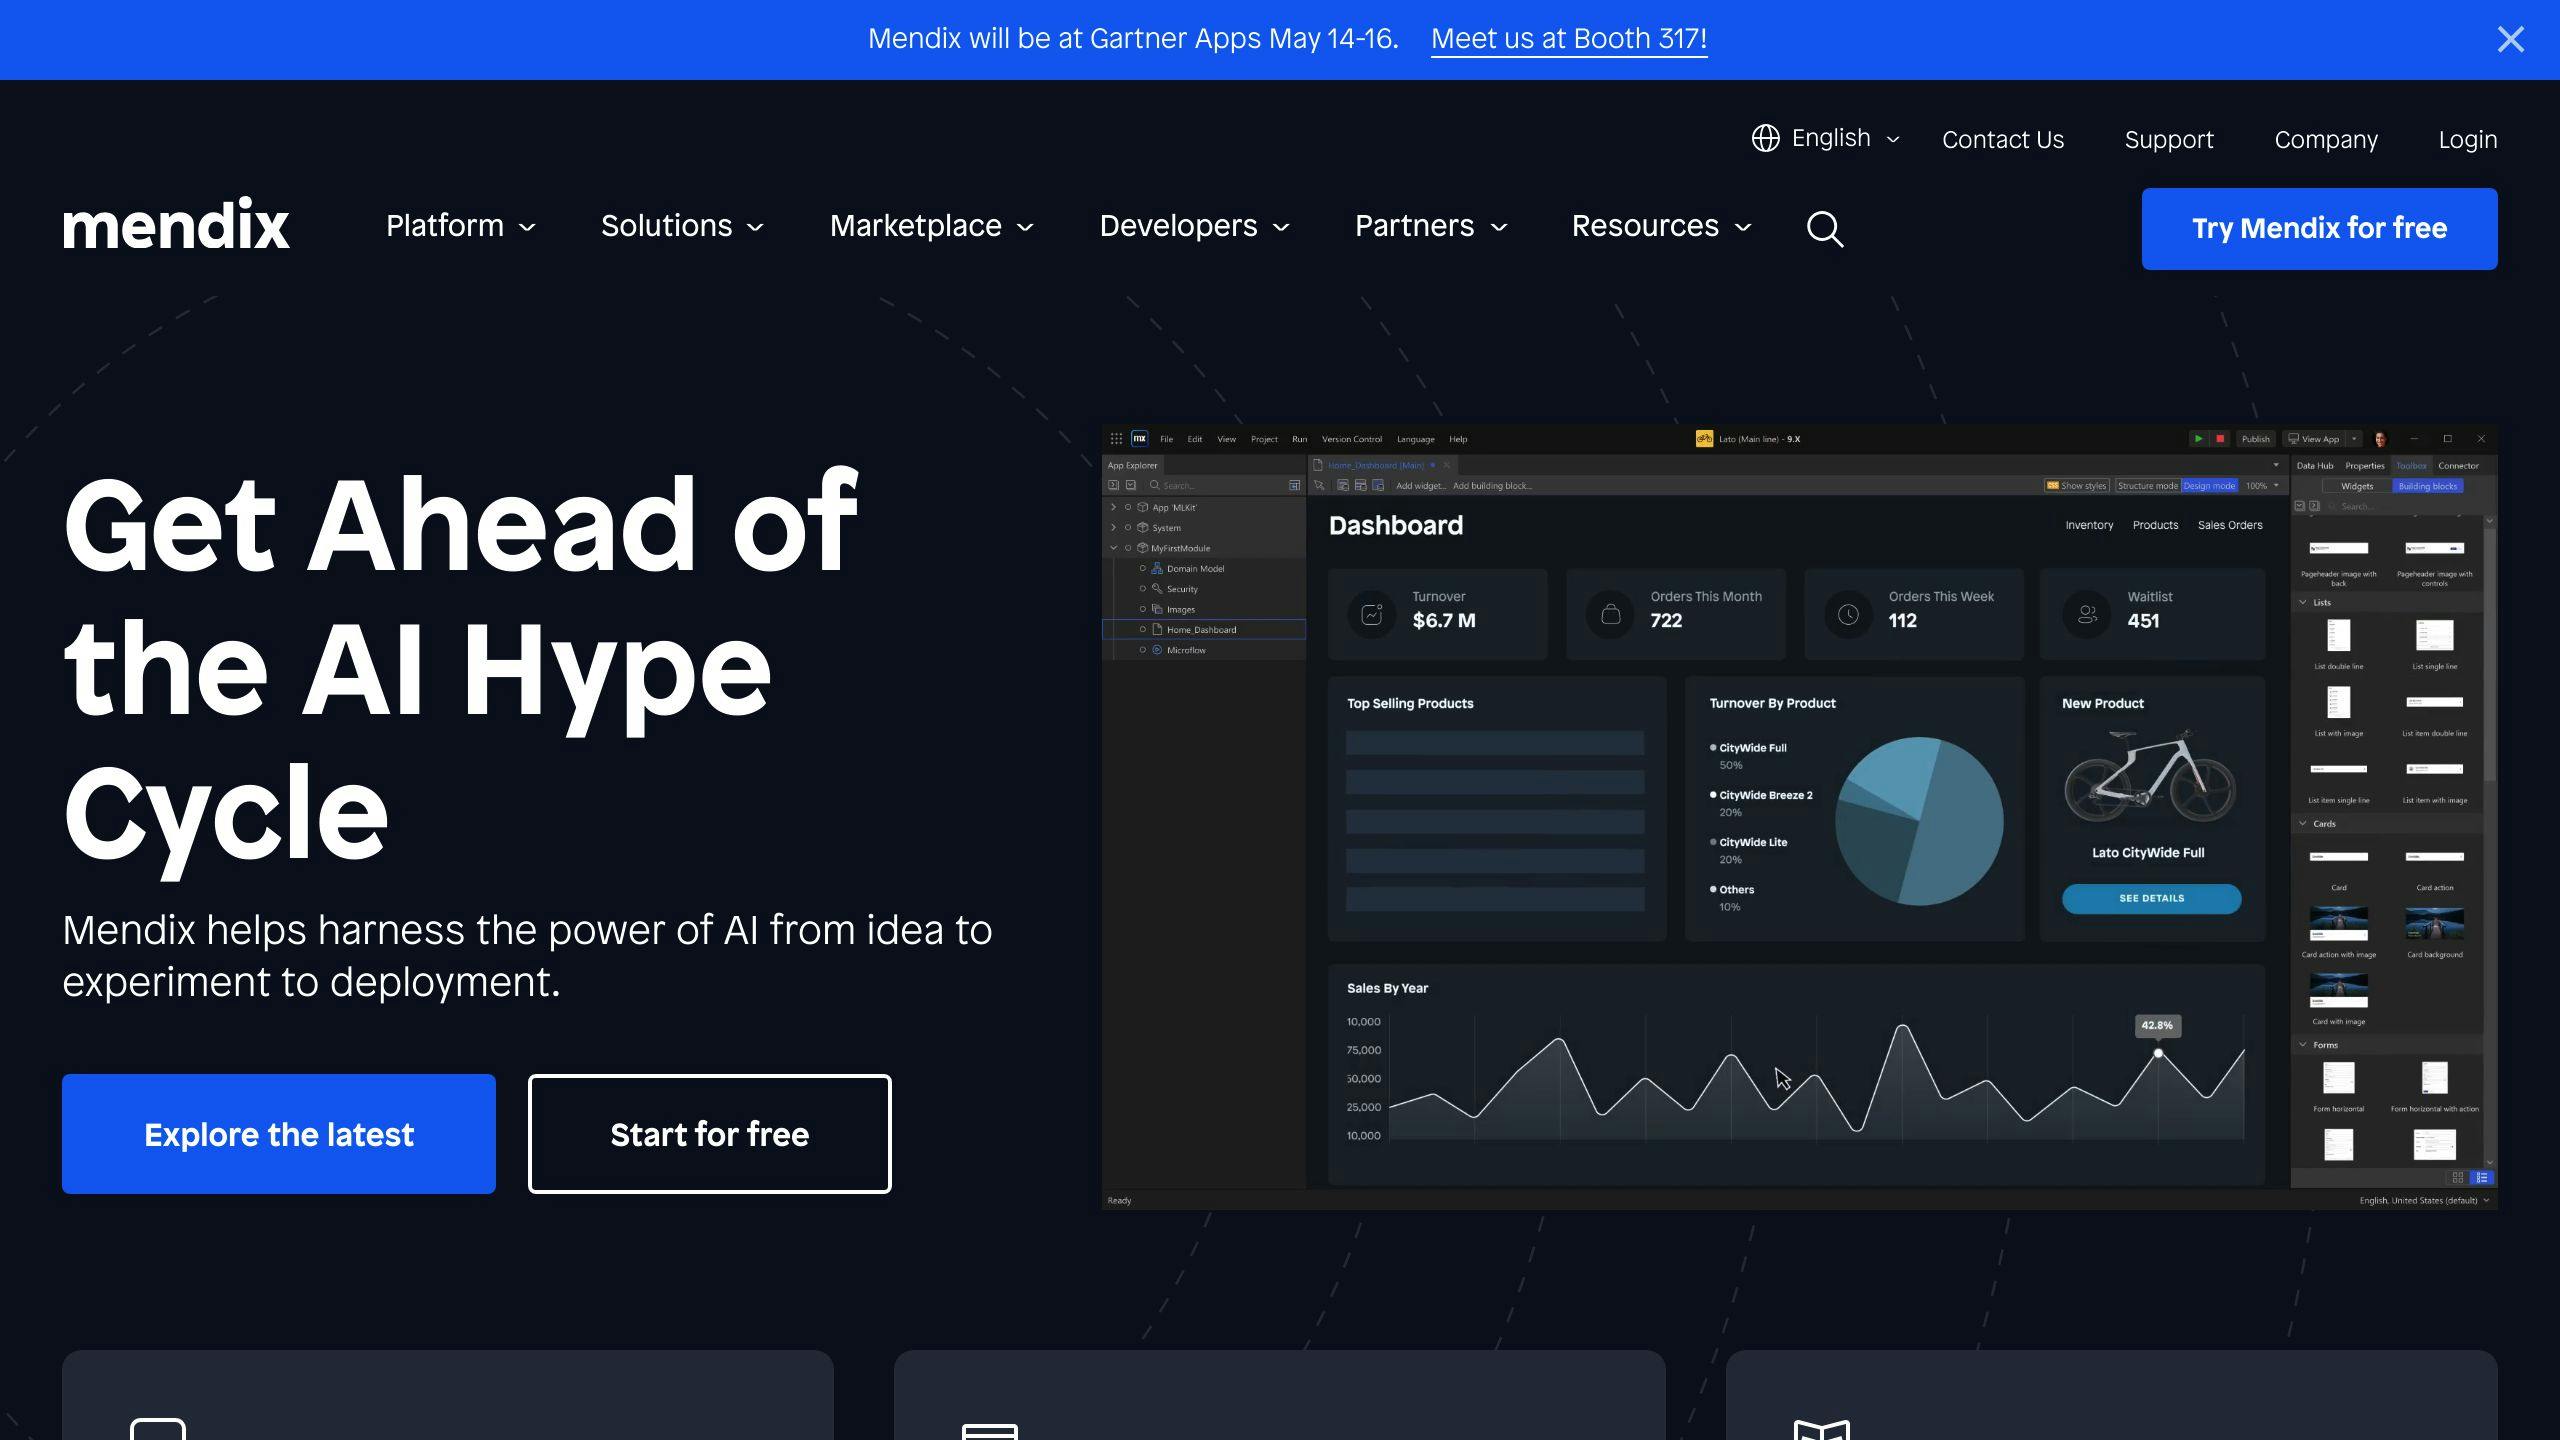
Cross-Platform Compatibility
Mendix is a low-code development platform that allows developers to build applications that can run on multiple platforms, including iOS, Android, and web. This feature enables businesses to reach a broader audience and provide a seamless user experience across different devices. Mendix integrates with React Native, enabling developers to create mobile, offline-first applications with native-like performance and user experiences.
Integration Capabilities
Mendix provides robust integration capabilities, enabling developers to connect with various systems, services, and data sources. Developers can leverage RESTful APIs and integrate with external services, databases, and systems.
IntegrationDescriptionRESTful APIsIntegrate with external services, databases, and systemsExternal ServicesConnect with external services to enhance application functionalityDatabasesIntegrate with databases to access and manage dataSystemsConnect with systems to leverage their capabilities
Security Features
Mendix prioritizes security, offering features to ensure the protection of sensitive data and applications. Developers can build secure applications with offline capabilities and automated syncs back to the server when a device's connection is restored. Additionally, Mendix provides features such as data encryption and access controls to protect sensitive data.
Security FeatureDescriptionOffline CapabilitiesEnsure secure data storage and syncs when devices are offlineData EncryptionProtect sensitive data with encryptionAccess ControlsControl access to sensitive data and applications
Scalability
Mendix is designed to scale with growing businesses, providing a flexible solution for mobile application development. Developers can build applications that can handle large volumes of data and user traffic, ensuring the application remains responsive and efficient.
Cost-Effectiveness
Mendix offers a cost-effective solution for mobile application development, reducing the need for extensive coding and minimizing the time and resources required to build and deploy applications. With Mendix, developers can build applications quickly and efficiently, reducing the overall cost of development and deployment.
BenefitDescriptionRapid DevelopmentBuild applications quickly and efficientlyReduced CodingMinimize coding requirements and reduce development costsEfficient DeploymentDeploy applications quickly and efficiently, reducing costs
4. OutSystems
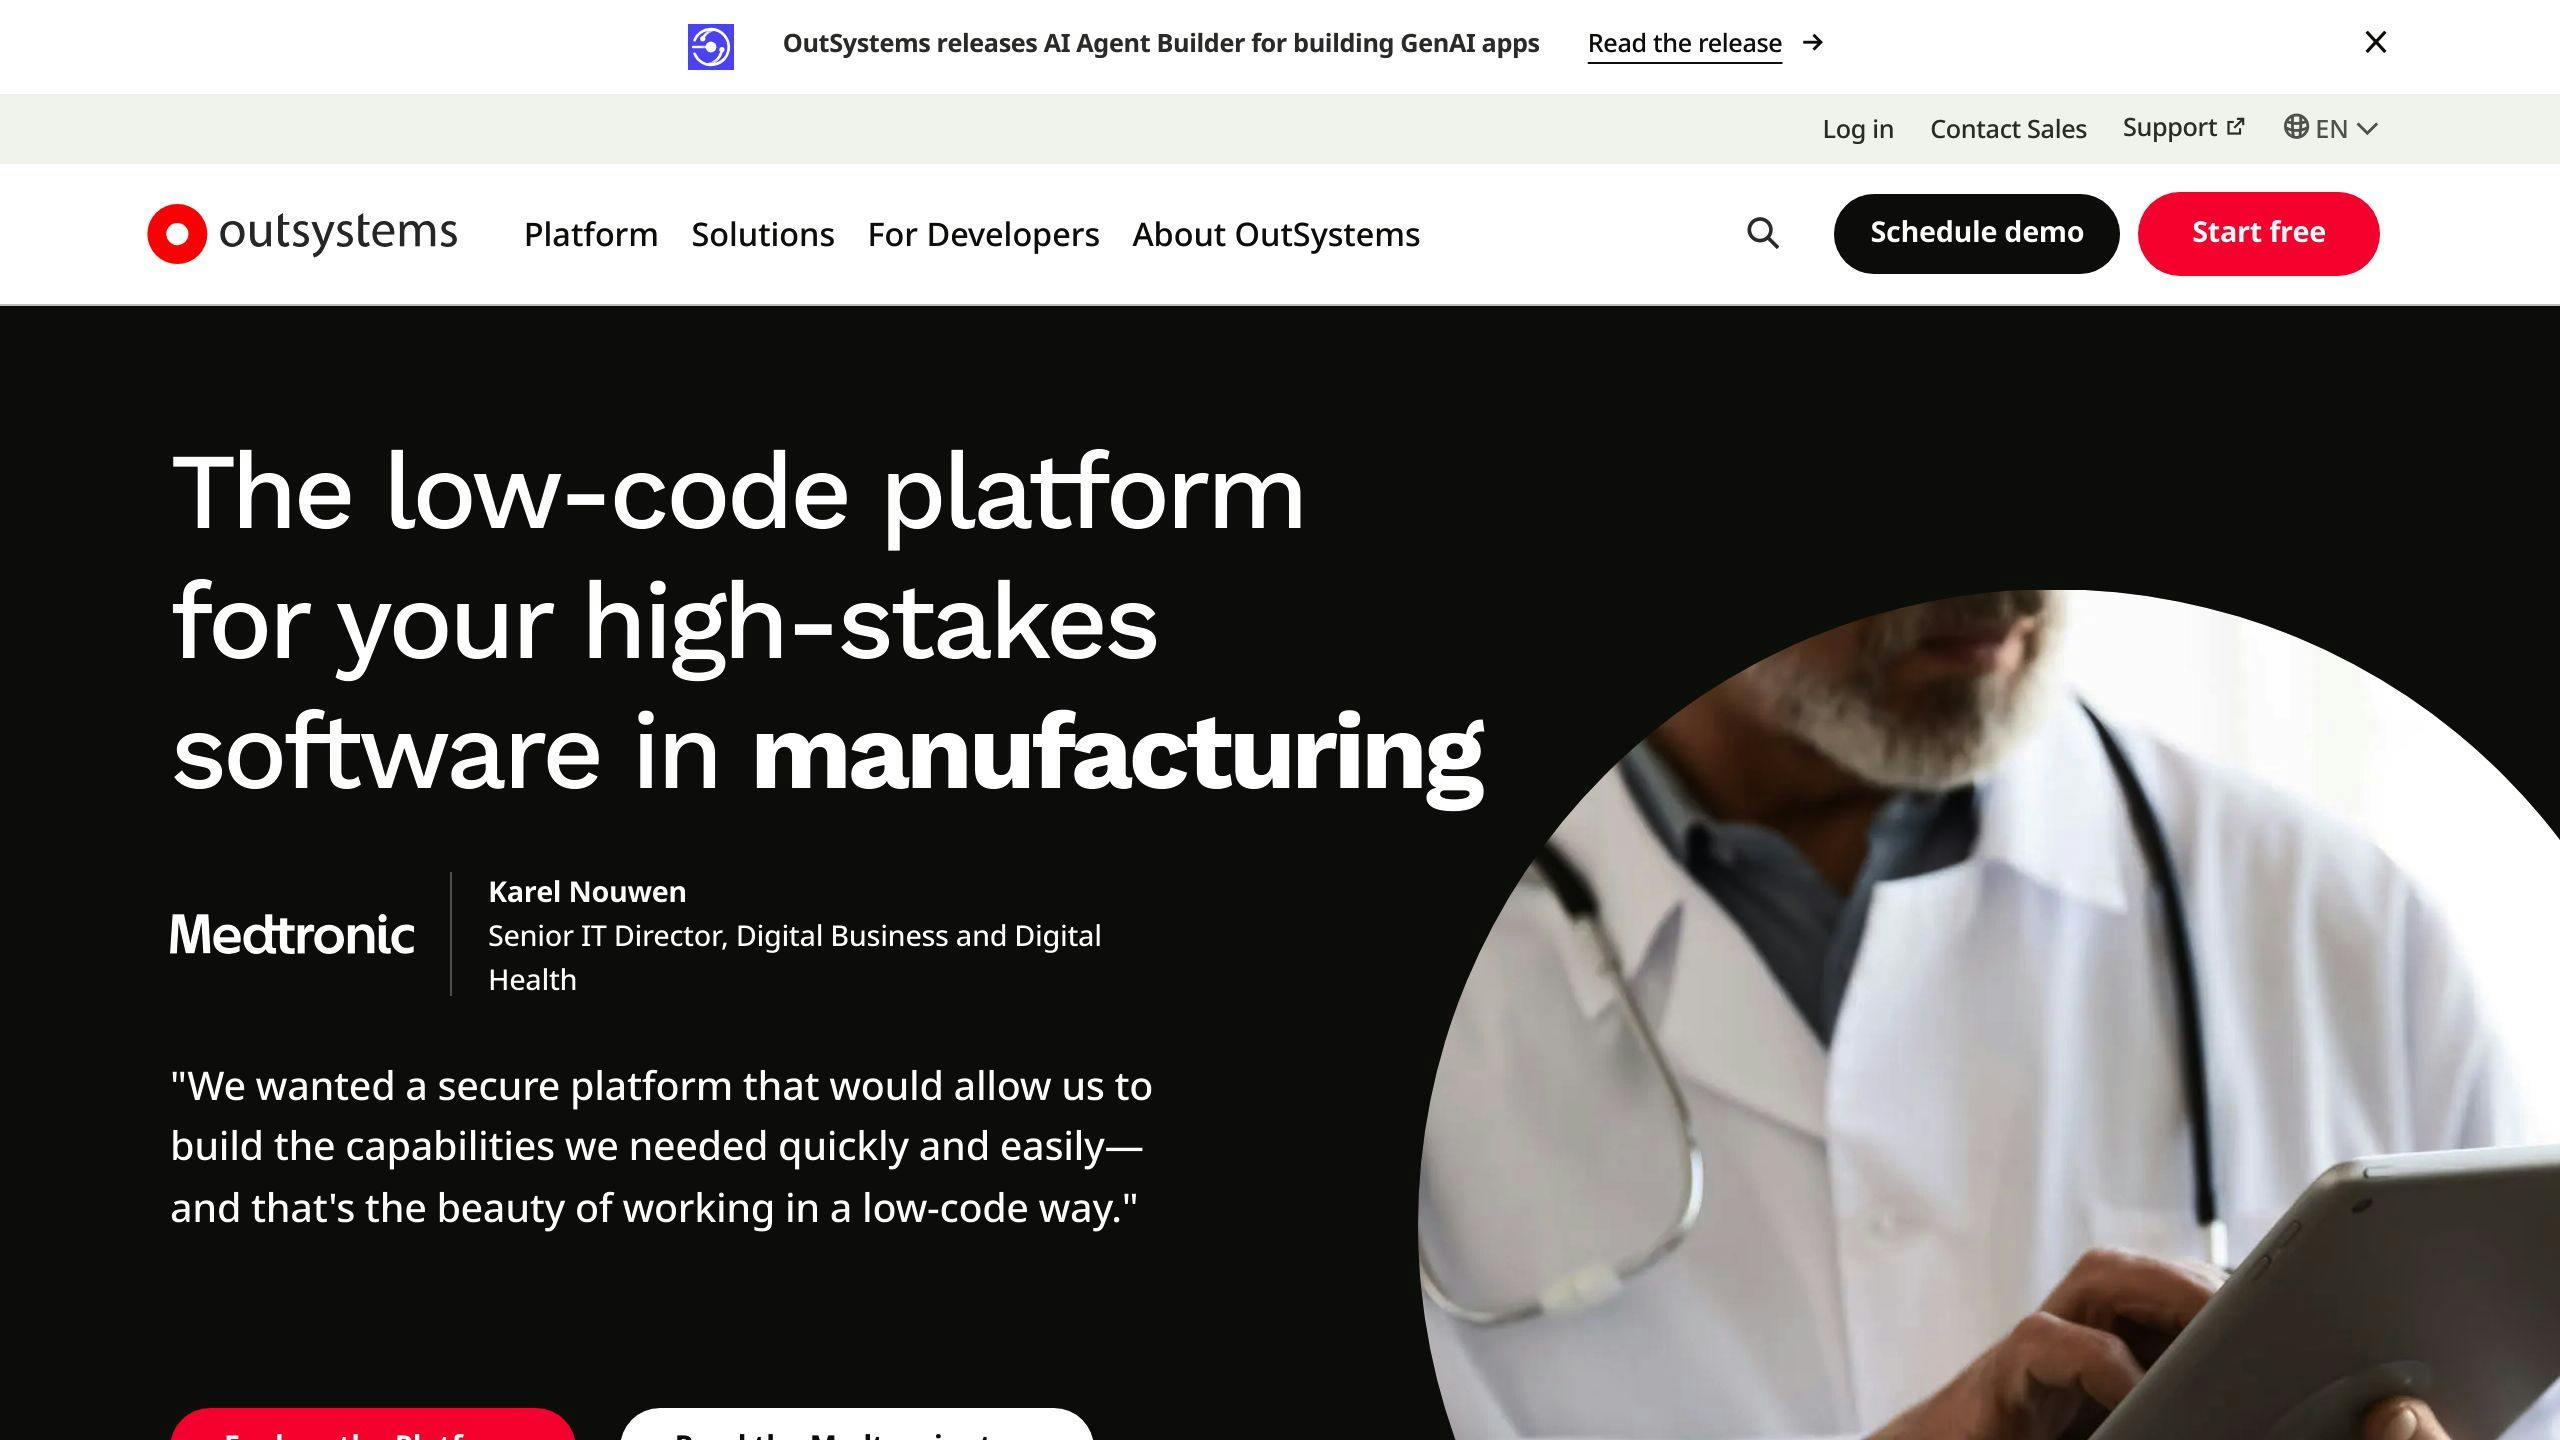
Cross-Platform Compatibility
OutSystems is a low-code development platform that allows developers to build mobile applications that can run on multiple platforms, including iOS and Android. This feature enables businesses to reach a broader audience and provide a seamless user experience across different devices.
Integration Capabilities
OutSystems provides robust integration capabilities, enabling developers to connect with various systems, services, and data sources. The platform offers a wide range of pre-built connectors and seamless integration with existing systems.
IntegrationDescriptionRESTful APIsIntegrate with external services, databases, and systemsExternal ServicesConnect with external services to enhance application functionalityDatabasesIntegrate with databases to access and manage dataSystemsConnect with systems to leverage their capabilities
Mobile App Development
OutSystems excels in mobile app development, providing a visual development environment for building native mobile applications. It offers extensive support for device-specific features, such as camera access and push notifications.
Scalability
OutSystems is designed to scale with growing businesses, providing a flexible solution for mobile application development. The platform's scalability features enable developers to build applications that can handle large volumes of data and user traffic.
Cost-Effectiveness
OutSystems offers a cost-effective solution for mobile application development, reducing the need for extensive coding and minimizing the time and resources required to build and deploy applications.
BenefitDescriptionRapid DevelopmentBuild applications quickly and efficientlyReduced CodingMinimize coding requirements and reduce development costsEfficient DeploymentDeploy applications quickly and efficiently, reducing costs
Overall, OutSystems is a powerful low-code development platform that enables businesses to build and deploy mobile applications quickly and efficiently, while ensuring scalability and cost-effectiveness.
5. Salesforce Platform
Cross-Platform Compatibility
Salesforce Platform allows developers to build mobile applications that can run on multiple platforms, including iOS and Android. This feature enables businesses to reach a broader audience and provide a seamless user experience across different devices.
Integration Capabilities
Salesforce Platform provides robust integration capabilities, enabling developers to connect with various systems, services, and data sources. The platform offers a wide range of pre-built connectors and seamless integration with existing systems.
Mobile App Development
Salesforce Platform excels in mobile app development, providing a visual development environment for building native mobile applications. It offers support for device-specific features, such as camera access and push notifications.
Scalability
Salesforce Platform is designed to scale with growing businesses, providing a flexible solution for mobile application development. The platform's scalability features enable developers to build applications that can handle large volumes of data and user traffic.
Cost-Effectiveness
Salesforce Platform offers a cost-effective solution for mobile application development, reducing the need for extensive coding and minimizing the time and resources required to build and deploy applications.
BenefitDescriptionRapid DevelopmentBuild applications quickly and efficientlyReduced CodingMinimize coding requirements and reduce development costsEfficient DeploymentDeploy applications quickly and efficiently, reducing costs
Overall, Salesforce Platform is a powerful low-code development platform that enables businesses to build and deploy mobile applications quickly and efficiently, while ensuring scalability and cost-effectiveness.
6. Microsoft Power Apps
Cross-Platform Compatibility
Microsoft Power Apps allows developers to build mobile applications that can run on multiple platforms, including iOS and Android. This feature enables businesses to reach a broader audience and provide a seamless user experience across different devices.
Integration Capabilities
Power Apps provides robust integration capabilities, enabling developers to connect with various systems, services, and data sources. The platform offers a wide range of pre-built connectors and seamless integration with existing systems, including Microsoft products such as SharePoint, Office 365, and Dynamics 365.
Mobile App Development
Power Apps excels in mobile app development, providing a visual development environment for building native mobile applications. It offers support for device-specific features, such as camera access and push notifications. With Power Apps, developers can create custom business applications without extensive coding knowledge.
Cost-Effectiveness
Power Apps offers a cost-effective solution for mobile application development, reducing the need for extensive coding and minimizing the time and resources required to build and deploy applications.
BenefitDescriptionRapid DevelopmentBuild applications quicklyReduced CodingMinimize coding requirementsEfficient DeploymentDeploy applications quickly and efficiently
Overall, Microsoft Power Apps is a powerful low-code development platform that enables businesses to build and deploy mobile applications quickly and efficiently, while ensuring scalability and cost-effectiveness.
sbb-itb-8abf120
7. Oracle APEX
Rapid Application Development
Oracle APEX is a low-code development platform that enables developers to build web-based applications quickly. With its intuitive interface and declarative features, APEX streamlines the development process, reducing the time and resources required to build and deploy applications.
Integration with Oracle Database
Oracle APEX seamlessly integrates with the Oracle Database, providing developers with powerful data management capabilities. APEX allows developers to easily create forms, reports, and charts that interact with the database.
Interactive Reporting and Data Visualization
Oracle APEX offers advanced reporting and data visualization features that empower developers to create interactive and visually compelling reports and charts. Developers can design custom reports with interactive sorting, filtering, and drilling capabilities.
Cost-Effective Solution
Oracle APEX provides a cost-effective solution for application development, reducing the need for extensive coding and minimizing the time and resources required to build and deploy applications.
BenefitDescriptionRapid DevelopmentBuild applications quicklyReduced CodingMinimize coding requirementsEfficient DeploymentDeploy applications quickly and efficiently
Overall, Oracle APEX is a powerful low-code development platform that enables businesses to build and deploy applications quickly and efficiently, while ensuring scalability and cost-effectiveness.
8. Quickbase
Collaborative Work Management
Quickbase is a no-code platform that enables users to create custom applications and manage data without extensive technical expertise. Its intuitive interface and drag-and-drop features simplify the development process, reducing the time and resources required to build and deploy applications.
Customization and Integration
Quickbase offers high customization options, allowing users to create custom forms, reports, and asset management libraries. It also integrates seamlessly with various tools and systems, automating the process of collecting and analyzing ideas from the business.
Ease of Use and Scalability
Quickbase is known for its ease of use, making it accessible to users without technical experience. It is also highly scalable, suitable for businesses of all sizes.
FeatureDescriptionNo-Code DevelopmentBuild applications without codingCustomizationCreate custom forms, reports, and librariesScalabilitySuitable for businesses of all sizesEase of UseAccessible to users without technical experience
Overall, Quickbase is a powerful no-code platform that enables businesses to build custom applications, manage data, and improve operations efficiently and effectively.
9. Zoho Creator
Low-Code Development Platform
Zoho Creator is a low-code development platform that allows users to build custom mobile-ready business apps without extensive technical expertise. Its intuitive interface and drag-and-drop features simplify the development process, reducing the time and resources required to build and deploy applications.
Cross-Platform Compatibility
Zoho Creator offers cross-platform compatibility, enabling users to access applications on various devices, including desktops, laptops, tablets, and mobile phones.
Integration Capabilities
Zoho Creator provides robust integration capabilities, allowing users to integrate their applications with various third-party tools and systems.
Scalability
Zoho Creator is highly scalable, making it suitable for businesses of all sizes. Its cloud-based infrastructure ensures that applications can handle large volumes of data and user traffic.
Cost-Effectiveness
Zoho Creator offers a cost-effective solution for building custom business applications. Its low-code development approach reduces the need for extensive coding, resulting in lower development costs and faster time-to-market.
FeatureDescriptionLow-Code DevelopmentBuild applications without extensive codingCross-Platform CompatibilityAccess applications on various devicesIntegration CapabilitiesIntegrate with third-party tools and systemsScalabilitySuitable for businesses of all sizesCost-EffectivenessReduce development costs and time-to-market
Overall, Zoho Creator is a powerful low-code development platform that enables businesses to build custom applications, improve operations, and enhance customer experiences efficiently and effectively.
10. Pega Platform

Low-Code Development Platform
Pega Platform is a business process management software that helps organizations in various industries enhance customer loyalty, generate new business, and improve productivity. It manages and automates business processes, offering features like self-service portals, analytics, workflow automation, and document management.
Cross-Platform Compatibility
Pega Platform provides cross-platform compatibility, allowing users to access applications on various devices, including desktops, laptops, tablets, and mobile phones. Pega Mobile enables users to create and manage mobile apps quickly and easily.
Integration Capabilities
Pega Platform offers robust integration capabilities, allowing users to integrate their applications with various third-party tools and systems. It features advanced social media skills, enabling companies to process customer service requests directly from social networks like LinkedIn and Facebook.
Scalability
Pega Platform is highly scalable, making it suitable for businesses of all sizes. Its cloud-based infrastructure ensures that applications can handle large volumes of data and user traffic.
Cost-Effectiveness
Pega Platform offers a cost-effective solution for building custom business applications. Its low-code development approach reduces the need for extensive coding, resulting in lower development costs and faster time-to-market. The platform's pricing starts at $90, with a free trial available.
FeatureDescriptionLow-Code DevelopmentBuild applications with minimal codingCross-Platform CompatibilityAccess applications on various devicesIntegration CapabilitiesIntegrate with third-party tools and systemsScalabilitySuitable for businesses of all sizesCost-EffectivenessReduce development costs and time-to-market
Overall, Pega Platform is a powerful low-code development platform that enables businesses to build custom applications, improve operations, and enhance customer experiences efficiently and effectively.
11. ServiceNow Now Platform
Low-Code Development Platform
ServiceNow Now Platform is a low-code development platform that helps organizations build and deploy mobile-first experiences quickly. The platform provides a suite of mobile apps and development tools that allow users to create native, engaging experiences for iOS and Android without extensive coding.
Cross-Platform Compatibility
The Now Mobile app is designed to provide access to information and workflows on-the-go. The app is available for download from the iOS App Store and Google Play Store, and administrators can also distribute the app through mobile device management (MDM) solutions.
Security Features
The ServiceNow Mobile Apps have enterprise-grade security features, including:
FeatureDescriptionMobile PublishingPublish mobile apps securelyUser Experience AnalyticsAnalyze user behavior and preferencesEnterprise-grade securityDeployable in any environmentDomain SeparationSeparate domains for enhanced securityEdge EncryptionEncrypt data at the edgeFedRAMP complianceCompliant with FedRAMP standards
Scalability
The Now Platform is highly scalable, making it suitable for businesses of all sizes. The platform's cloud-based infrastructure ensures that applications can handle large volumes of data and user traffic.
Cost-Effectiveness
The ServiceNow Mobile Apps offer a cost-effective solution for building custom mobile applications. The platform's low-code development approach reduces the need for extensive coding, resulting in lower development costs and faster time-to-market.
BenefitDescriptionRapid DevelopmentBuild applications quicklyReduced CodingMinimize coding requirementsEfficient DeploymentDeploy applications quickly and efficiently
Overall, ServiceNow Now Platform is a powerful low-code development platform that enables businesses to build custom mobile applications, improve operations, and enhance customer experiences efficiently and effectively.
Platform Strengths and Weaknesses
When choosing an enterprise mobile app platform, it's essential to consider the strengths and weaknesses of each option. Here, we'll discuss the pros and cons of each platform, highlighting their unique features, benefits, and limitations.
Platform Comparison Table
PlatformStrengthsWeaknessesAppianFast deployment, scalableLimited customization options, steep learning curveCB Insights EMAP AlternativesRobust analytics, user-friendlyLimited integration with existing systems, high costMendixFast deployment, scalableLimited control over UI, high cost for large-scale projectsOutSystemsFast deployment, scalableLimited customization options, high cost for large-scale projectsSalesforce PlatformRobust customer relationship management, scalable, user-friendlyLimited customization options, high cost for large-scale projectsMicrosoft Power AppsFast deployment, scalableLimited customization options, high cost for large-scale projectsOracle APEXRobust database management, scalable, user-friendlyLimited customization options, high cost for large-scale projectsQuickbaseFast deployment, scalableLimited customization options, high cost for large-scale projectsZoho CreatorFast deployment, scalableLimited customization options, high cost for large-scale projectsPega PlatformRobust business process management, scalable, user-friendlyLimited customization options, high cost for large-scale projectsServiceNow Now PlatformFast deployment, scalableLimited customization options, high cost for large-scale projects
Key Takeaways
When evaluating enterprise mobile app platforms, consider the following key factors:
- Scalability: Can the platform handle large volumes of data and user traffic?
- Customization: How much control do you have over the UI and functionality?
- Cost: What are the costs associated with development, deployment, and maintenance?
- Integration: How easily can the platform integrate with existing systems and databases?
- User experience: How user-friendly is the platform, and what kind of support does it offer?
By considering these factors, you can choose the best enterprise mobile app platform for your organization.
Market and User Insights
The enterprise mobile app development market is constantly evolving, driven by emerging trends and user needs. Understanding these insights is crucial for businesses to make informed decisions when choosing an enterprise mobile app platform.
AI Integration and Cross-Platform Development
The market is shifting towards AI integration and cross-platform development. According to a report, the global AI market is expected to reach $190 billion by 2025, growing at a CAGR of 38.1% from 2020 to 2025. Cross-platform development is also gaining popularity, with 71% of mobile app developers using cross-platform frameworks in 2020.
App Security and User Experience
App security and user experience are critical factors in the market. With the increasing number of cyber-attacks and data breaches, businesses are prioritizing app security to protect sensitive user data. A report found that the average cost of a data breach is around $3.92 million. User experience is also essential, with users expecting intuitive and engaging app experiences. A study found that 53% of users abandon apps that take more than 3 seconds to load.
Future-Proof Functionality
The future of enterprise mobile app development lies in future-proof functionality, with businesses seeking to integrate emerging technologies like 5G, blockchain, and IoT into their apps. A report predicts that the 5G market will grow from $5.5 billion in 2020 to $65.4 billion by 2025, at a CAGR of 122.9%.
TrendDescriptionGrowth RateAI IntegrationIntegration of AI-powered apps to automate tasks and enhance user experiences38.1% (2020-2025)Cross-Platform DevelopmentDevelopment of apps that can run seamlessly across multiple platforms71% of mobile app developers (2020)App SecurityPrioritization of app security to protect sensitive user data$3.92 million (average cost of a data breach)User ExperienceExpectation of intuitive and engaging app experiences53% of users abandon apps that take more than 3 seconds to loadFuture-Proof FunctionalityIntegration of emerging technologies like 5G, blockchain, and IoT into apps122.9% (2020-2025)
By understanding these market trends and user insights, businesses can make informed decisions when choosing an enterprise mobile app platform, ensuring they stay ahead of the curve and meet the evolving needs of their users.
Conclusion
Choosing the right mobile app platform is crucial for businesses in today's fast-paced mobile landscape. In 2024, key trends will shape the market, including AI integration, cross-platform development, app security, user experience, and future-proof functionality.
Key Trends
TrendDescriptionAI IntegrationAutomate tasks, provide personalized experiences, and leverage predictive analyticsCross-Platform DevelopmentCreate apps that run seamlessly across multiple platformsApp SecurityProtect sensitive user data from cyber threatsUser ExperienceProvide intuitive interfaces, seamless performance, and engaging featuresFuture-Proof FunctionalityIntegrate emerging technologies like 5G, blockchain, and IoT into apps
When selecting a mobile app platform, businesses should consider these trends and prioritize platforms that offer robust AI capabilities, cross-platform development, enhanced app security, seamless user experiences, and future-proof functionality.
By making informed decisions, businesses can stay ahead of the curve and offer cutting-edge experiences to their users.
Related posts

PWA Manifest Cheat Sheet 2024
A Progressive Web App (PWA) manifest is a JSON file that provides essential information about a web application, enabling it to be installed and accessed like a native app. This cheat sheet covers the key elements required to create an effective PWA manifest:
Essential Manifest Properties
PropertyDescriptionnameThe full name of the web appshort_nameA shorter app name for limited spacesiconsAn array of icons in various sizesstart_urlThe URL that launches the web appdisplayThe preferred display mode (e.g., fullscreen, standalone)theme_colorThe theme color of the web app
Best Practices
- Validate your manifest file using Chrome DevTools
- Link the manifest correctly in your HTML:
<link rel="manifest" href="manifest.json"> - Use consistent naming conventions (e.g.,
manifest.json) - Avoid incorrect manifest file formats, missing properties, and incorrect icon sizes
Debugging with Chrome DevTools
- Use the Manifest tab to view and debug your manifest file
- Check for errors and warnings
- Test your PWA to identify issues during installation or runtime
By following this cheat sheet, you can create a well-crafted PWA manifest that enhances the installability and user experience of your Progressive Web App.
Manifest File Structure
A PWA manifest file is a JSON file that provides essential information about the web application. It's a crucial file that allows users to install the web app on their devices and access it offline.
The manifest file is typically named manifest.json and is served from the root of the website. It's linked in the HTML document using a <link> tag with a rel attribute set to manifest. For example:
<link rel="manifest" href="manifest.json">
The manifest file consists of several key-value pairs that define the PWA. These keys are crucial for defining the PWA and include:
Manifest File Keys
KeyDescriptionnameThe name of the web applicationshort_nameA shorter name of the web application (optional)iconsAn array of icon objects that represent the web applicationstart_urlThe URL that launches the web applicationdisplayThe preferred display mode for the web applicationbackground_colorThe background color of the web applicationtheme_colorThe theme color of the web application
These keys will be discussed in more detail in subsequent sections.
sbb-itb-8abf120
Key Manifest Settings
App Name
The name property specifies the full name of your web application. This is the name that will be displayed when users install the app on their devices. You can also provide a short_name property, which is a shorter version of the app name. This is useful for space-limited contexts, such as the home screen.
App Icons
The icons property is an array of icon objects that represent your web application. It's essential to provide icons in various sizes to cater to different devices and use cases. The recommended sizes include:
SizeDescription192x192Small icon size384x384Medium icon size512x512Large icon size1024x1024Extra large icon size
You can also provide a maskable icon, which is a square image with a "safe zone" that allows devices to adapt the icon to different shapes and sizes.
Start Page
The start_url property specifies the URL that launches your web application. This is the page that will be displayed when users open the app from their devices. Ensure that the start page is optimized for user engagement.
Background Color
The background_color property defines the background color of your web application. This color is displayed when the app is launched, creating a visually appealing splash screen.
Display Mode
The display property specifies the preferred display mode for your web application. The available options include:
ModeDescriptionfullscreenThe app will be displayed in full screen modestandaloneThe app will be displayed in a standalone windowminimal-uiThe app will be displayed with a minimal user interfacebrowserThe app will be displayed in a browser window
Each mode affects the presentation of the PWA within the user interface, allowing you to customize the app's behavior to suit your needs.
Theme Color
The theme_color property defines the theme color of your web application. This color is used to integrate the app with the device's operating system, such as changing the toolbar color. Choose a theme color that aligns with your app's branding and visual identity.
Other Manifest Settings
App Description
The description property provides a brief summary of your Progressive Web App's (PWA) function or purpose. This description helps users understand the app's capabilities and what they can expect from it. Ensure that your description is clear, concise, and within the recommended character limit.
Screenshots
Including screenshots in your web app manifest allows you to visually demonstrate your app's features or interface. This provides users with a better understanding of what your app offers, making them more likely to install and engage with it. When adding screenshots, ensure they meet the recommended requirements, such as size and format.
Shortcuts
Defining shortcuts in your web app manifest enables users to access key app features directly, improving their overall experience and engagement. A shortcut is a URL definition that loads when a user activates the shortcut. You can add multiple shortcuts to your PWA by adding an object with a name, description, and URL for each one.
Shortcut Properties
PropertyDescriptionnameA human-readable label for the app shortcut.urlThe URL that loads when the user activates the shortcut.descriptionA brief description of what the shortcut does.iconsAn array of image-resource objects, each with src, sizes, and type properties.
By incorporating these additional manifest settings, you can enhance the user experience, provide more context about your app, and offer quick access to key features.
Best Practices and Troubleshooting
When creating a PWA manifest, it's essential to follow best practices to ensure a seamless user experience and troubleshoot common issues that may arise. Here are some tips to keep in mind:
Manifest Creation and Linking
Best PracticeDescriptionValidate your manifestUse Chrome DevTools to validate your manifest file and identify any errors or warnings.Link your manifest correctlyEnsure that your manifest file is linked correctly in your HTML file using the <link rel="manifest" href="manifest.json"> tag.Use a consistent naming conventionUse a consistent naming convention for your manifest file, such as manifest.json or pwamanifest.json.
Common Pitfalls to Avoid
PitfallDescriptionIncorrect manifest file formatEnsure that your manifest file is in JSON format and follows the correct syntax.Missing or incorrect manifest propertiesVerify that all required properties, such as name, short_name, and start_url, are present and correctly formatted.Incorrect icon sizesEnsure that your icon sizes match the recommended sizes specified in the manifest file.
Debugging with Chrome DevTools
Debugging TipDescriptionUse the Manifest tabIn Chrome DevTools, navigate to the Manifest tab to view and debug your manifest file.Check for errors and warningsLook for any errors or warnings in the Manifest tab to identify issues with your manifest file.Test your PWAUse Chrome DevTools to test your PWA and identify any issues that may arise during installation or runtime.
By following these best practices and troubleshooting tips, you can ensure that your PWA manifest is correctly configured and provides a seamless user experience.
Summary
In this PWA Manifest Cheat Sheet, we've covered the essential elements and best practices for creating a web app manifest that enhances the installability and user experience of your Progressive Web App.
Key Takeaways
To create a successful PWA, you need a well-crafted manifest file that provides the necessary metadata for the browser to install and display your app correctly. Here are the key elements to include:
ElementDescriptionnameThe full name of your web applicationshort_nameA shorter version of the app nameiconsAn array of icon objects that represent your web applicationstart_urlThe URL that launches your web applicationdisplayThe preferred display mode for your web applicationtheme_colorThe theme color of your web application
Avoid Common Pitfalls
When creating a PWA manifest, make sure to avoid common mistakes such as:
PitfallDescriptionIncorrect manifest file formatEnsure that your manifest file is in JSON format and follows the correct syntaxMissing or incorrect manifest propertiesVerify that all required properties are present and correctly formattedIncorrect icon sizesEnsure that your icon sizes match the recommended sizes specified in the manifest file
Debugging Tips
Use Chrome DevTools to debug your PWA manifest and identify any issues that may arise during installation or runtime. Look for errors and warnings in the Manifest tab and test your PWA to ensure a seamless user experience.
By following these guidelines and best practices, you can create a high-quality PWA that provides an exceptional user experience and sets your app apart from the competition.
FAQs
What is a web manifest file?
A web manifest file is a JSON document that contains startup parameters and application defaults for when a web application is launched.
What are the basic attributes required in manifest.JSON to make the app installable?
The basic attributes required in manifest.JSON to make the app installable are:
AttributeDescriptionnameThe name of the web applicationiconsAn array of icon objects that represent the web applicationstart_urlThe URL that launches the web application
What is a PWA manifest?
A PWA manifest is a JSON file that tells the browser how your Progressive Web App (PWA) should behave when installed on the user's desktop or mobile device.
What is manifest in PWA?
The manifest in PWA is a JSON file that provides information about the web application, such as its name, icons, and start URL, which is required for the browser to install the PWA on a device.
Related posts

5 Steps for Mobile App Compliance: HIPAA, GDPR, ADA
Developing mobile apps that handle sensitive user data requires strict compliance with regulations like HIPAA, GDPR, and ADA. Failure to comply can result in severe penalties and loss of customer trust. Here are the 5 key steps to ensure your mobile app meets compliance standards:
- Identify Relevant Regulations
RegulationDescriptionApplies toHIPAAProtects sensitive health informationApps handling Protected Health Information (PHI)GDPRProtects personal data of EU citizensApps targeting EU usersADAEnsures accessibility for users with disabilitiesApps providing public services or goods
- Conduct a Compliance Audit
Perform an audit to identify gaps in data protection, security, and accessibility:
- Review app functionality for vulnerabilities
- Assess data protection measures (encryption, access controls)
- Evaluate security measures (authentication, authorization)
- Test accessibility features (screen reader compatibility)
- Document findings and recommendations
- Implement Technical Safeguards
- Encrypt data with HTTPS and use role-based access controls
- Integrate assistive technologies like screen readers and closed captions
- Establish incident response plans for security breaches
- Plan for Incident Response
- Identify potential risks through risk assessments
- Establish an incident response team and communication plan
- Create a checklist for incident response steps (detection, containment, eradication, recovery)
- Maintain Ongoing Compliance
- Stay informed about regulatory changes
- Conduct regular audits and risk assessments
- Provide ongoing training and education
- Continuously monitor and evaluate compliance
- Adapt to emerging technologies and threats
Compliance is an ongoing process that requires continuous effort to protect user data, maintain trust, and avoid penalties. Stay vigilant, regularly audit your app, and implement robust security measures.
Step 1: Identify Relevant Regulations
When developing a mobile app, it's crucial to comply with regulatory standards. In the United States, for instance, mobile apps must comply with regulations such as HIPAA (Health Insurance Portability and Accountability Act), GDPR (General Data Protection Regulation), and ADA (Americans with Disabilities Act). Failure to comply with these regulations can result in severe penalties, damage to reputation, and loss of customer trust.
To identify relevant regulations, developers must determine which laws apply to their mobile app. Here are some key considerations:
Regulations Overview
RegulationDescriptionApplies toHIPAAProtects sensitive health informationMobile apps handling Protected Health Information (PHI)GDPRProtects personal data of EU citizensMobile apps targeting EU usersADAEnsures accessibility for users with disabilitiesMobile apps providing services or goods to the public
By identifying which regulations apply to your mobile app, you can take the necessary steps to ensure compliance and avoid potential penalties and reputational damage. In the next section, we will discuss how to conduct a compliance audit to identify potential vulnerabilities in your app.
Step 2: Conduct a Compliance Audit
Conducting a compliance audit is a crucial step in ensuring your mobile app meets regulatory standards. This audit helps identify gaps in data protection, security measures, and accessibility features.
Why Conduct a Compliance Audit?
A compliance audit is essential to identify areas of non-compliance and implement necessary measures to address them. It helps you:
- Identify gaps in data protection and security measures
- Ensure accessibility features are in place for users with disabilities
- Avoid penalties and reputational damage
- Maintain customer trust and confidence
How to Conduct a Compliance Audit
To conduct an effective compliance audit, follow these steps:
Audit Steps
StepDescription1Identify relevant regulations (e.g., HIPAA, GDPR, ADA)2Review app functionality to identify potential vulnerabilities3Assess data protection measures (e.g., encryption, access controls)4Evaluate security measures (e.g., authentication, authorization)5Test accessibility features (e.g., screen reader compatibility)6Document findings and recommendations for improvement
By conducting a thorough compliance audit, you can identify and address potential vulnerabilities, ensuring your mobile app meets regulatory standards and maintains customer trust. In the next section, we will discuss how to implement technical safeguards to protect your app and its users.
Step 3: Implement Technical Safeguards
Implementing technical safeguards is crucial to ensure your mobile app meets compliance standards. This section provides actionable advice on establishing robust technical safeguards to protect your app and its users.
Encryption and Access Controls
To protect sensitive data, implement the following measures:
MeasureDescriptionEncryptionEncrypt all data transmitted between the app and your servers using industry-standard protocols like HTTPS (TLS/SSL).Role-Based Access Control (RBAC)Limit access to sensitive data based on user roles and responsibilities.Multi-Factor Authentication (MFA)Require users to provide additional verification factors, such as biometrics or one-time passwords, to access sensitive data.
Integrating Assistive Technologies
To ensure your app is accessible to users with disabilities, integrate the following assistive technologies:
TechnologyDescriptionScreen Reader CompatibilityEnsure your app is compatible with popular screen readers, such as VoiceOver or TalkBack.Closed CaptionsProvide closed captions for audio and video content to assist users with hearing impairments.
Implementing Incident Response Plans
In the event of a security incident, having an incident response plan in place can help minimize the damage. Ensure your plan includes:
StepDescriptionIncident DetectionEstablish procedures for detecting security incidents, such as monitoring system logs and user reports.Incident ResponseDevelop a response plan that outlines the steps to take in the event of a security incident, including containment, eradication, recovery, and post-incident activities.
By implementing these technical safeguards, you can significantly reduce the risk of security breaches and ensure your app meets compliance standards. In the next section, we will discuss how to plan for incident response and maintain ongoing compliance.
sbb-itb-8abf120
Step 4: Plan for Incident Response
Preparing for potential data breaches or security incidents is crucial. This section outlines how to create a responsive plan that meets the stringent requirements of HIPAA and GDPR.
Identify Potential Risks: Conduct a thorough risk assessment to identify potential vulnerabilities in your app's infrastructure, data storage, and transmission.
Establish an Incident Response Team: Assemble a team of experts responsible for responding to security incidents. This team should include representatives from various departments, such as IT, legal, and customer support.
Develop a Communication Plan: Establish a communication plan that outlines how to notify stakeholders, including users, regulatory bodies, and law enforcement agencies, in the event of a security incident.
Create an Incident Response Checklist: Develop a checklist that outlines the steps to take in response to a security incident:
StepDescriptionIncident DetectionIdentify and report security incidents to the incident response team.Incident ContainmentIsolate affected systems and data to prevent further damage.Incident EradicationRemove the root cause of the incident, such as malware or unauthorized access.Incident RecoveryRestore affected systems and data to a secure state.Post-Incident ActivitiesConduct a post-incident analysis to identify areas for improvement and implement additional security measures.
By having a comprehensive incident response plan in place, you can ensure that your app is prepared to respond quickly and effectively in the event of a security incident, minimizing the risk of non-compliance with HIPAA and GDPR regulations.
Step 5: Maintain Ongoing Compliance
Maintaining ongoing compliance is crucial to ensure your mobile app meets the requirements of HIPAA, GDPR, and ADA. Compliance is an ongoing process that requires continuous monitoring, evaluation, and improvement.
Stay Informed about Regulatory Changes
Regulatory requirements are constantly changing. Allocate resources to monitor updates to HIPAA, GDPR, and ADA, and adjust your compliance strategy accordingly.
Regular Audits and Risk Assessments
Regular audits and risk assessments help identify vulnerabilities and ensure your app remains compliant. Conduct thorough risk assessments to identify potential risks and implement measures to mitigate them.
Ongoing Training and Education
Ensure your development team and stakeholders receive ongoing training and education on compliance regulations and best practices. This will help them stay up-to-date with the latest requirements and implement them effectively.
Continuous Monitoring and Evaluation
Establish a culture of continuous monitoring and evaluation to ensure your app remains compliant. Regularly review your compliance strategy, identify areas for improvement, and implement changes as needed.
Emerging Technologies and Threats
Emerging technologies and threats can impact your app's compliance. Stay ahead of these changes by continuously monitoring the landscape and adapting your compliance strategy to address new risks and challenges.
By maintaining ongoing compliance, you can ensure your mobile app remains secure, trustworthy, and compliant with regulatory requirements. Remember, compliance is an ongoing process that requires continuous effort and attention to detail.
Compliance Best PracticesDescriptionStay informed about regulatory changesMonitor updates to HIPAA, GDPR, and ADAConduct regular audits and risk assessmentsIdentify vulnerabilities and implement measures to mitigate themProvide ongoing training and educationEnsure development team and stakeholders stay up-to-date with compliance regulationsContinuously monitor and evaluate complianceRegularly review compliance strategy and implement changes as neededAdapt to emerging technologies and threatsStay ahead of changes and adapt compliance strategy to address new risks and challenges
Conclusion: Compliance is Ongoing
In mobile app development, compliance is an ongoing process that requires continuous effort and attention to detail. By following the 5 steps outlined in this article, you can ensure your mobile app meets the requirements of HIPAA, GDPR, and ADA, and maintains a strong reputation in the market.
Why Compliance Matters
Compliance is about more than just avoiding legal repercussions. It's about building trust with your users, protecting their sensitive information, and demonstrating a commitment to excellence.
Key Takeaways
Compliance RemindersDescriptionCompliance is ongoingContinuously monitor and evaluate your compliance strategyPrioritize user trustProtect sensitive information to build trust with your usersStay informedMonitor updates to HIPAA, GDPR, and ADARegular auditsIdentify vulnerabilities and implement measures to mitigate themOngoing trainingEnsure your development team and stakeholders stay up-to-date with compliance regulations
By making compliance a core part of your mobile app development strategy, you can ensure your app remains secure, trustworthy, and compliant with regulatory requirements. In today's competitive mobile landscape, compliance is a key differentiator that sets your app apart from the rest.
Compliance Resources for Developers
As a developer, staying up-to-date with the latest compliance regulations and best practices is crucial to ensure your mobile app meets the requirements of HIPAA, GDPR, and ADA. Here are some valuable resources to aid in your compliance journey:
Compliance Resources by Regulation
RegulationResourcesHIPAAHIPAA Developer Portal, Summary of the HIPAA Security Rule, HIPAA Compliance Checklist for Mobile App DevelopmentGDPROfficial GDPR Website, GDPR Compliance Checklist for Mobile App Development, EU's Data Protection Authority GuidelinesADAAmericans with Disabilities Act (ADA) Website, ADA Compliance Checklist for Mobile App Development, Web Content Accessibility Guidelines (WCAG 2.1)
Additional Resources
ResourceDescriptionNowSecureA comprehensive platform for mobile app security and compliance testingRedBlinkA mobile app development agency specializing in HIPAA-compliant app developmentOWASP Mobile Security ProjectA resource for mobile app security best practices and guidelines
Remember to regularly review and update your compliance strategy to ensure your mobile app remains secure, trustworthy, and compliant with regulatory requirements.
Related posts
iOS App Store Keyword Optimization Guide 2024
Keyword optimization is crucial for improving your iOS app's visibility and downloads in the App Store. This guide covers:
- Understanding how the App Store ranking algorithm works and the key factors that influence app visibility, including keyword relevance, user engagement, and metadata optimization
- Effectively using the 100-character keyword field to specify relevant keywords and phrases that describe your app
- Finding the right keywords by analyzing current trends, evaluating competitors, identifying market gaps, and incorporating user feedback
- Strategically integrating keywords into your app's title, subtitle, description, and metadata while following best practices
- Measuring and improving keyword performance through tracking systems, regular metadata updates, and utilizing Apple Search Ads
- Reaching global markets by localizing your app's metadata, including keywords, to adapt to various regional markets
- Common keyword optimization mistakes to avoid, such as keyword stuffing, ignoring long-tail keywords, and failing to update keywords regularly
- Essential ASO tools for keyword research, optimization, and tracking, including App Radar, Keywordtool.io, SearchMan, and Apple's App Store Connect
- Future-proofing your keyword strategy by monitoring performance, keeping your keywords fresh, and balancing optimization with user experience
By following the tactics outlined in this guide, you can optimize your app's keywords, improve visibility in the App Store, and drive more downloads for your iOS app.
How the App Store Ranking Works
The App Store ranking is a complex algorithm that determines the visibility and order of apps in search results and top charts. While Apple keeps the exact formula a secret, experts have identified several key factors that influence app ranking.
Relevance to User Queries
The App Store algorithm prioritizes apps that closely match a user's search query. This includes:
- Keyword relevance: How well do the app's keywords match the search query?
- App name and subtitle: Does the app's name and subtitle contain relevant keywords?
- Description and metadata: Does the app's description and metadata accurately reflect its functionality and features?
User Interaction and Engagement
User behavior plays a significant role in app ranking. The algorithm considers:
- Downloads and installs: How many users are downloading and installing the app?
- Ratings and reviews: What are users saying about the app, and how many ratings and reviews does it have?
- User retention: How long do users keep the app installed, and how often do they use it?
Metadata Optimization
The way an app presents itself in the App Store also impacts its ranking. This includes:
FactorDescriptionKeyword optimizationAre the app's keywords strategically placed in its metadata?App icon and screenshotsDo the app's visuals effectively communicate its value and functionality?Category and subcategoryIs the app correctly categorized, and does it target a specific niche or audience?
By understanding these factors, developers can optimize their app's visibility and ranking in the App Store, increasing its chances of success.
Using the Keyword Field Effectively
The iOS keyword field is a crucial component of App Store Optimization (ASO), allowing developers to specify relevant keywords or phrases that describe their app. These keywords help the App Store's search algorithm understand the nature and purpose of the app, improving its discoverability when users search for related terms.
Understanding the iOS Keyword Field
The keyword field is a section in App Store Connect where developers can input up to 100 alphanumeric characters, including spaces and commas. Note that this field is not visible to users, but it's used by the App Store's search algorithm to index and rank apps.
Best Practices for Using the Keyword Field
To maximize the effectiveness of the keyword field, follow these guidelines:
- Choose relevant and descriptive keywords: Select keywords that accurately describe your app's functionality, features, and purpose.
- Avoid keyword duplication: Don't repeat keywords within the field, as this won't improve your app's ranking.
- Use commas to separate keywords: Separate each keyword or phrase with a comma, without using spaces.
- Avoid special characters and punctuation: Refrain from using special characters, punctuation, or trademarked terms, unless they're essential to your app's functionality or branding.
- Don't use brand names or trademarks: Avoid using brand names or trademarks that aren't directly related to your app.
Common Mistakes to Avoid
Some common mistakes to avoid when using the keyword field include:
MistakeDescriptionKeyword stuffingAvoid overloading the keyword field with irrelevant or repeated keywords.Using banned termsRefrain from using keywords that are prohibited by Apple's guidelines.Not updating keywordsFailing to regularly update and refine your keywords can lead to stagnation in app ranking and visibility.
By understanding the iOS keyword field and following these guidelines, you can optimize your app's visibility and ranking in the App Store.
Finding the Right Keywords for iOS Apps
Finding the right keywords for your iOS app is crucial for App Store Optimization (ASO). It involves identifying relevant and high-potential keywords that accurately describe your app's functionality, features, and purpose.
Analyzing Current Trends
Stay up-to-date with the latest trends in the App Store. Analyze the keywords used by top-performing apps in your category, as well as emerging trends and popular search terms. You can use tools like Google Trends, Keyword Tool, or App Radar to identify trending keywords and phrases.
Evaluating Competitor Keywords
Analyze your competitors' keywords to gain insights into their ASO strategies. Identify your top competitors and analyze their keyword fields, app descriptions, and titles. You can use tools like App Annie, Sensor Tower, or Ahrefs to analyze your competitors' keywords and identify gaps in the market.
Identifying Market Gaps
Identify areas where there is a lack of competition or unmet user needs. Analyze user reviews, ratings, and feedback to identify areas where your competitors are falling short. You can also use tools like Google Keyword Planner or Ahrefs to identify keywords with low competition and high search volume.
Incorporating User Feedback
Incorporate user feedback to identify the right keywords for your iOS app. Analyze user reviews, ratings, and feedback to identify common themes and pain points. This can help you identify keywords that are relevant to your target audience and optimize your app's metadata accordingly.
MethodologyDescriptionAnalyzing Current TrendsIdentify trending keywords and phrases using tools like Google Trends, Keyword Tool, or App Radar.Evaluating Competitor KeywordsAnalyze competitors' keywords using tools like App Annie, Sensor Tower, or Ahrefs.Identifying Market GapsIdentify areas with low competition and high search volume using tools like Google Keyword Planner or Ahrefs.Incorporating User FeedbackAnalyze user reviews, ratings, and feedback to identify common themes and pain points.
By following these methodologies, you can identify the right keywords for your iOS app and optimize your App Store listing for maximum visibility and discoverability. Remember to regularly update and refine your keywords to stay ahead of the competition and adapt to changing user needs.
Integrating Keywords into App Metadata
Integrating keywords into your app's metadata is a crucial step in App Store Optimization (ASO). This process involves strategically placing relevant keywords in your app's title, subtitle, keyword field, and long description to improve visibility and drive more downloads.
Understanding the App Store Algorithm
The App Store algorithm uses a combination of factors to rank apps, including keyword relevance, search volume, and user behavior. To optimize your app's metadata, you need to understand how the algorithm works and how to leverage keywords to improve your app's visibility.
Keyword Placement Strategies
When integrating keywords into your app's metadata, follow these strategies:
- Use high-potential keywords: Identify keywords with high search volume and low competition to increase your app's visibility.
- Optimize your title and subtitle: Place your most important keywords in your title and subtitle to maximize visibility.
- Use the keyword field effectively: Use the 100-character keyword field to target specific keywords and phrases.
- Write a keyword-rich long description: Include relevant keywords in your long description to improve your app's visibility in search results.
Best Practices for Keyword Integration
To get the most out of your keyword integration strategy, follow these best practices:
Best PracticeDescriptionUse relevant and descriptive keywordsChoose keywords that accurately describe your app's functionality and features.Avoid keyword stuffingDon't overuse keywords in your metadata, as this can lead to penalties from the App Store.Use a mix of generic and specific keywordsTarget both broad and specific keywords to appeal to a wider audience.Regularly update and refine your keywordsMonitor your app's performance and adjust your keywords accordingly to stay ahead of the competition.
By following these strategies and best practices, you can effectively integrate keywords into your app's metadata and improve your visibility in the App Store. Remember to stay up-to-date with the latest ASO trends and algorithm updates to ensure maximum success.
Measuring and Improving Keyword Performance
Measuring and improving keyword performance is crucial for App Store Optimization (ASO). By tracking your keywords' effectiveness, you can refine your strategy, increase your app's visibility, and drive more downloads.
Setting Up a Keyword Tracking System
To measure your keyword performance, set up a tracking system using tools like App Radar, Sensor Tower, or Google Analytics. These tools provide valuable insights into your app's performance, helping you identify areas for improvement.
The Importance of Regular Metadata Updates
Regularly update your app's metadata to ensure it remains relevant and visible to your target audience. As your app evolves, your target audience and keywords may change.
Utilizing Apple Search Ads
Apple Search Ads can help you increase your app's visibility, drive more downloads, and reach a wider audience. With Apple Search Ads, you can also track your ad performance, providing valuable insights into your keyword strategy.
Tips for Improving Keyword Performance
Here are some tips for improving your keyword performance:
TipDescriptionMonitor keyword rankingsTrack your keyword rankings regularly to identify areas for improvement.Analyze search volumeAnalyze your search volume to identify keywords with high potential.Refine your keyword listRefine your keyword list regularly to ensure it remains relevant and effective.Use long-tail keywordsUse long-tail keywords to target specific search queries and reduce competition.Optimize app metadataOptimize your app's metadata regularly to ensure it remains relevant and visible to your target audience.
By following these tips and setting up a keyword tracking system, you can improve your keyword performance, increase your app's visibility, and drive more downloads.
sbb-itb-8abf120
Reaching Global Markets with App Localization
Reaching global markets with app localization is crucial for expanding your app's visibility and downloads. By adapting your app to various regional markets within the App Store, you can tap into new audiences and increase your app's global reach.
Why App Localization Matters
App localization is more than just translating your app's content. It involves understanding the cultural, social, and linguistic nuances of each target market and adapting your app's metadata, keywords, and graphics to resonate with local users.
Benefits of App Localization
By localizing your app, you can:
BenefitDescriptionIncrease visibility and downloadsReach new audiences in different regionsImprove relevance and appealAdapt your app to local user preferences and behaviorsEnhance competitivenessStand out in global marketsExpand global reach and user baseTap into new markets and grow your user baseIncrease revenue and profitBenefit from in-app purchases and ads in new markets
Best Practices for App Localization
To successfully localize your app, follow these best practices:
PracticeDescriptionResearch target marketsUnderstand local user preferences and behaviorsAdapt metadata, keywords, and graphicsMake your app resonate with local usersUse native speakers for translation and reviewEnsure cultural and linguistic accuracyTest and iterateContinuously monitor and optimize your app's performance in different markets
By following these best practices and prioritizing app localization, you can effectively reach global markets and expand your app's visibility and downloads.
Common Keyword Optimization Mistakes to Avoid
Keyword optimization is a crucial aspect of App Store Optimization (ASO). However, many developers make mistakes that can negatively impact their app's visibility and downloads. Here are some common keyword optimization mistakes to avoid:
Neglecting Keyword Optimization
Many developers assume that their app will be discovered organically, but without strategically incorporating relevant keywords into the app's title, description, and metadata, it becomes challenging for users to find the app.
Overstuffing Keywords
Including too many keywords in the app's metadata can lead to penalties from Apple. Instead, focus on using relevant and high-volume keywords that accurately describe your app's features and functionality.
Ignoring Long-Tail Keywords
Long-tail keywords are phrases with lower search volumes, but they're also less competitive and more targeted to specific user searches. Ignoring long-tail keywords can mean missing out on potential downloads and visibility.
Failing to Localize App Metadata
App localization is essential for reaching global markets, but many developers fail to translate their app's metadata, including keywords, into multiple languages. This can limit the app's visibility and appeal in different regions.
Not Updating Keywords Regularly
Keyword optimization is not a one-time task. User search behavior and trends change over time, and it's essential to update your app's keywords regularly to stay relevant and competitive.
MistakeDescriptionNeglecting Keyword OptimizationFailing to incorporate relevant keywords into the app's title, description, and metadataOverstuffing KeywordsIncluding too many keywords in the app's metadataIgnoring Long-Tail KeywordsFailing to target specific user searches with long-tail keywordsFailing to Localize App MetadataNot translating app metadata, including keywords, into multiple languagesNot Updating Keywords RegularlyFailing to update keywords regularly to stay relevant and competitive
By avoiding these common keyword optimization mistakes, you can improve your app's visibility, drive more downloads, and stay ahead of the competition. Remember to always prioritize relevance, accuracy, and user experience when optimizing your app's keywords.
Tools for Keyword Optimization
Keyword optimization requires the right tools to refine your app's keyword strategy. Here, we'll explore essential ASO tools for keyword optimization.
Keyword Research Tools
These tools help you identify relevant keywords, analyze search volume, and track competitors. Some popular keyword research tools include:
ToolDescriptionApp RadarOffers keyword research capabilities to identify relevant keywords and analyze search volumeKeywordtool.ioProvides keyword research features to help you brainstorm new keyword ideas and track competitorsSearchManAllows you to analyze keyword performance and competition
Apple's App Store Connect
App Store Connect is a powerful tool provided by Apple, offering insights into your app's performance, including keyword optimization. With App Store Connect, you can:
- Track your app's keyword rankings
- Analyze search volume and competition
- Identify opportunities for improvement
- Optimize your app's metadata for better visibility
Other ASO Tools
In addition to keyword research tools and App Store Connect, there are other ASO tools available to help with keyword optimization. These tools include:
- ASO Widgets: Offers keyword tracking and optimization features
- AppRanking: Provides keyword performance tracking and competitor analysis
- Sensor Tower: Offers keyword research and optimization capabilities
By leveraging these essential ASO tools, you can refine your keyword optimization strategy, improve your app's visibility, and drive more downloads.
Future-Proofing Your Keyword Strategy
To stay ahead of the competition in the iOS App Store, it's essential to future-proof your keyword strategy. This means adapting to changes in the algorithm, user behavior, and market trends.
Monitor and Adjust
Regularly track your keyword performance and adjust your strategy accordingly. Analyze your app's ranking, search volume, and competition to identify areas for improvement. Use tools like App Radar, Keywordtool.io, and SearchMan to refine your keyword research and optimization.
Keep Your Keywords Fresh
Update your keyword list periodically to reflect changes in your app's features, target audience, and market trends. Remove underperforming keywords and replace them with new, relevant terms. This ensures your app remains visible and attractive to potential users.
Balance Keyword Optimization with User Experience
While keyword optimization is crucial, don't compromise user experience. Ensure your app's metadata, including the title, subtitle, and description, accurately represent your app's features and benefits. This balance will help drive downloads and retain users.
By staying flexible and adapting to changes in the iOS App Store landscape, you'll be better equipped to drive long-term success for your app.
Best PracticeDescriptionMonitor keyword performanceRegularly track your app's keyword performance and adjust your strategy accordinglyKeep your keyword list freshUpdate your keyword list periodically to reflect changes in your app's features, target audience, and market trendsBalance keyword optimization with user experienceEnsure your app's metadata accurately represents your app's features and benefits while optimizing for keywords
By following these best practices, you'll be able to future-proof your keyword strategy and drive long-term success for your app.
FAQs
How to Choose Keywords for App Store Optimization?
Choose keywords that describe your app's features and functionality. Think about what words your target audience would use to find an app like yours.
What is the Keyword Limit on the Apple App Store?
The Apple App Store allows up to 100 characters for keywords, separated by commas with no spaces.
What is the Apple ASO Algorithm?
The Apple App Store search algorithm indexes keywords based on a hierarchy. It also mixes and matches keywords from the title, subtitle, and keyword list to determine search visibility.
How to Get Keywords from the App Store?
Use Search Match to find new keywords. Search Match automatically matches your ad to relevant searches on the App Store using resources like your App Store product page, similar apps, and search data.
Related posts

iOS vs Android: 9 Key UI Design Differences
Quick Summary:
iOS and Android have distinct design philosophies that shape the user experience. Here are the key differences:
- Design Styles: iOS favors a flat, minimalist aesthetic, while Android embraces layered visuals with shadows and depth.
- Navigation: iOS uses a bottom tab bar, while Android employs a navigation drawer.
- Icons and Buttons: iOS icons are simple and flat, with title-cased buttons. Android icons are flat with alpha channels, and buttons are uppercase.
- Typography: iOS uses the San Francisco font, while Android uses Roboto.
- Color Usage: iOS colors are more subdued, while Android embraces vibrant and dynamic colors.
- Screen Size Handling: Both platforms require responsive design strategies to adapt to different screen sizes and resolutions.
- Text Input and Fonts: iOS integrates search bars into tabs or top navigation, while Android uses top bar actions. iOS uses San Francisco font, and Android uses Roboto.
- Depth and Layers: Android uses prominent shadows and distinct layers to create depth, while iOS takes a more subtle approach.
Quick Comparison:
CriteriaiOSAndroidDesign StyleFlat, minimalistLayered visuals with shadowsNavigationBottom tab barNavigation drawerIcon DesignSimple, flatFlat with alpha channelButton StyleTitle caseUppercaseTypographySan Francisco fontRoboto fontColor UsageSubduedVibrant and dynamicScreen Size HandlingResponsive design strategiesResponsive design strategiesText InputSearch bars in tabs/top navTop bar actionsSystem FontSan FranciscoRobotoDepth and LayersSubtleProminent shadows and distinct layers
By understanding these key differences, developers and designers can create intuitive and engaging apps tailored to each platform's unique design principles.
1. Design Styles: Looks and Functions
This section explores the fundamental design principles of iOS's Human Interface Guidelines and Android's Material Design, highlighting their distinct approaches to user interface design.
Visual Design Differences
Design StyleDescriptioniOSFlat design style, removing skeuomorphic featuresAndroidUses shadows to show hierarchy, resembling layers of paper
UI Controls and Button Styles
PlatformTitle AlignmentButton StyleiOSCenterTitle cased textAndroidLeftUppercased text
Typography and Iconography
PlatformTypographyIcon DesigniOSSan FranciscoSimple, flat iconsAndroidRobotoMore detailed, layered icons
By understanding these fundamental design principles, developers can create apps that feel native to each platform, enhancing the overall user experience.
2. Navigation: Tab Bars vs. Drawers
Analyzing the differences in navigation design between iOS and Android, focusing on iOS's bottom tab bars and Android's navigation drawers, and their impact on user experience.
Navigation Patterns
iOS and Android have distinct approaches to navigation. iOS uses a bottom tab bar, while Android employs a navigation drawer.
Tab Bars in iOS
In iOS, the tab bar is a fundamental component of the navigation system. It's usually located at the bottom of the screen and contains 3-5 tabs, each representing a distinct section of the app.
PlatformTab Bar LocationNumber of TabsiOSBottom of the screen3-5
When a user taps a tab, the app transitions to the corresponding section, and the tab bar remains at the bottom of the screen.
Navigation Drawers in Android
In Android, the navigation drawer is a versatile component that provides access to the app's main sections, as well as additional features and settings.
PlatformNavigation Drawer AccessDrawer ContentAndroidSwipe from left edge or tap hamburger menu iconList of items, including headings, subheadings, and icons
When opened, the drawer slides in from the left, covering the main content area.
Impact on User Experience
The choice of navigation pattern has a significant impact on the user experience. iOS's tab bar provides a simple and intuitive way to navigate between sections, making it ideal for apps with a small number of main sections. Android's navigation drawer provides a more flexible and customizable way to navigate, making it suitable for apps with a larger number of sections or complex navigation hierarchies.
By understanding the strengths and weaknesses of each navigation pattern, developers can create apps that feel native to each platform, enhancing the overall user experience.
3. Icons and Buttons: A Comparison
Let's examine the differences in icon and button design between iOS and Android platforms, and how these affect usability and design coherence.
Icon Design Guidelines
When designing icons for iOS and Android, consider each platform's unique guidelines. Here are the key differences:
PlatformIcon DesignRecommended SizeFile FormatiOSSimple, flat512 x 512 pixels or 1024 x 1024 pixelsJPG or PNGAndroidSimple, flat with alpha channel512 x 512 pixelsPNG with alpha channel
Button Styles
Button styles also differ between iOS and Android:
PlatformButton StyleText CaseiOSFlatTitle caseAndroidMaterial DesignUppercase
Placement and Consistency
The placement of icons and buttons is crucial for usability. Here's where you can find them on each platform:
PlatformIcon PlacementButton PlacementiOSTab barTop-right cornerAndroidNavigation drawerVarious locations
By understanding these differences, developers can create apps that are visually appealing, intuitive, and native-like, ultimately enhancing the user experience.
4. Typography: Font Choices
Typography plays a vital role in the overall user experience of an app. When it comes to iOS and Android, each platform has its own set of typography guidelines that designers should follow to create a native-like experience.
Font Families
iOS: The San Francisco font family is used primarily in iOS, providing a clear and legible look and feel across all devices.
Android: The Roboto font family is used in Android, designed to be modern and highly legible.
Font Sizes and Styles
PlatformFont SizesFont StylesiOS10-64 points (recommended: 17 points)Regular, Bold, ItalicAndroid12sp-34sp (default: 16sp)Regular, Bold, Medium
Custom Fonts
While both platforms provide default font families, designers can use custom fonts to create a unique brand identity. However, it's essential to ensure that custom fonts are legible and consistent with the platform's design guidelines.
By understanding the typography guidelines for each platform, designers can create apps that are visually appealing, intuitive, and native-like, ultimately enhancing the user experience.
5. Color Usage: Subtle vs. Vibrant
Colors play a crucial role in an app's UI, conveying brand identity and influencing the overall aesthetic. When it comes to iOS and Android, each platform has its own distinct approach to color usage, which designers should understand to create a native-like experience.
Color Philosophies
PlatformColor ApproachDescriptionAndroidVibrantBold contrasts, dynamic, and playfuliOSSubduedSimple, elegant, and sophisticated
Android: Vibrant Colors
Android's Material Design guidelines encourage the use of vibrant colors to create a dynamic and engaging user interface. This approach helps grab attention and is ideal for apps that require a high level of interactivity.
iOS: Subdued Colors
In contrast, Apple's HIG color guidelines adopt a more subdued color palette, favoring simplicity and sophistication. iOS apps typically feature a more muted color scheme, creating a clean and modern appearance. This approach helps create a sense of calmness and professionalism, making it suitable for apps that require a more subtle and refined user interface.
By understanding the color philosophies of each platform, designers can create apps that are visually appealing, intuitive, and native-like, ultimately enhancing the user experience.
sbb-itb-8abf120
6. Screen Size Handling
Designing for different screen sizes and resolutions is crucial for a consistent user experience. With various devices available, designers must adapt their designs to accommodate different screen dimensions.
Understanding Screen Sizes and Resolutions
When designing for mobile apps, consider the physical size of the screen, resolution, and pixel density. Pixels are the smallest units on a display device, while screen sizes refer to the physical area where images are displayed. Resolutions denote the number of pixels in each dimension.
Designing for Multiple Screen Sizes
To ensure a consistent user experience, designers should use responsive design strategies that adapt to different screen sizes and resolutions. This can be achieved by:
StrategyDescriptionUsing constraint rulesDefine content rules for an appManually exporting imagesEnsure crisp images at higher screen resolutionsDesigning for the smallest base screen resolutionUse responsive layouts to scale up or down
Key Takeaways
- Understand physical screen size, resolution, and pixel density
- Use responsive design strategies to adapt to different screen sizes and resolutions
- Employ constraint rules, manually export images, and design for the smallest base screen resolution to ensure a consistent user experience
7. Text Input and Fonts
When designing mobile apps, understanding the differences in text input and fonts between iOS and Android is crucial for a seamless user experience.
Text Input Fields
iOS and Android have different approaches to search bars. On iOS, search bars are often integrated into the primary tabs or appear as an action in the top navigation bar. In contrast, Android typically displays search bars in the contextual actions on the top bar.
System Fonts
iOS uses the San Francisco font, providing a unified look and feel across multiple applications. Android, on the other hand, offers more font and style customization options, with Roboto being the standard system typeface.
Font Sizes and Layout
Here's a comparison of font sizes and layout between iOS and Android:
PlatformFont SizeLayoutiOSSimilar basic font sizesRelies on bold type to create a text hierarchyAndroidSimilar basic font sizesUses more white space between texts
By understanding these differences, developers can create apps that are optimized for each platform, providing a more intuitive and engaging user experience.
8. Depth: Shadows and Layers
Understanding how iOS and Android use visual elements like shadows and layers to create depth and hierarchy within their user interfaces.
Shadows in Android and iOS
Both platforms use shadows to create a sense of depth, but they differ in their approach.
PlatformShadow StyleDescriptionAndroidProminentShadows are used to indicate elevation, creating a layered effectiOSSubtleShadows are used sparingly to add a touch of depth, creating a cleaner aesthetic
Layers and Elevation
Both platforms use layers and elevation to create a sense of hierarchy and organization. However, Android's use of shadows and elevation creates a more dramatic, 3D-like effect, while iOS's approach is more restrained.
PlatformLayer StyleDescriptionAndroidPronouncedLayers are more distinct, with clear distinctions between different levels of elevationiOSSubtleLayers are blended together, creating a seamless experience
By understanding the differences in how iOS and Android use shadows and layers, designers can create apps that are optimized for each platform, providing a more intuitive and engaging user experience.
Conclusion: Improving Usability
In conclusion, understanding the key UI design differences between iOS and Android is crucial for developing intuitive and accessible applications. By recognizing the distinct design principles, guidelines, and patterns of each platform, designers can create apps that cater to the unique needs and preferences of their users.
Key Takeaways
To improve usability, consider the following:
TakeawayDescriptionPlatform-specific designDesigners should prioritize platform-specific design elements, such as typography, icons, and navigation, to ensure a seamless user experience.Consistency and coherenceConsistency in design elements and patterns is vital for creating an intuitive interface. Designers should strive to create a coherent design language that aligns with the platform's guidelines.User-centered approachDesigners should focus on creating user-centered designs that address the unique needs and behaviors of iOS and Android users.
By following these principles, designers can craft applications that meet user expectations, ultimately driving engagement, retention, and overall success.
Remember, staying up-to-date with the latest design trends, guidelines, and best practices is essential for creating exceptional user experiences.
FAQs
What are the principles of iOS and Android design?
iOS Design Principles: Apple's Human Interface Guidelines focus on simplicity, minimalism, and consistency to create an intuitive navigation experience.
Android Design Principles: Google's Material Design guidelines introduce flexibility, using responsive interactions and visually appealing interfaces.
Why is Apple UI better than Android?
Apple's design approach prioritizes minimalism, using crisp elements and focusing on typography and flat colors. This creates a clean and simple user interface.
What is the difference between Google and Apple UI?
Apple: Simple, minimalistic design with a focus on typography and flat colors. Android: Flexible design with responsive interactions and visually appealing interfaces.
What is the difference between iOS and Android design guidelines?
iOS: Flat Design guidelines with minimal shadowing, creating a layered feel. Android: Material Design, an upgraded version of Flat design with a hint of skeuomorphism.
Related posts
12 Best Practices for Stateless Cloud-Native Apps
Building stateless, scalable cloud-native applications is crucial for businesses to thrive in today's digital landscape. This article outlines 12 key best practices:
- Externalize Application State: Store session data in a stateful backing service like a database to improve scalability and reliability.
- Embrace Stateless Protocols: Use protocols like HTTP and UDP that don't store session data on the server for better scalability and reliability.
- Design for Horizontal Scaling: Add or remove instances to match changing demand, improving scalability and reliability.
- Adopt Immutable Infrastructure: Replace components instead of updating them for simplified deployments and consistency.
- Manage Environment Configuration: Use tools like Docker, Kubernetes, or Ansible to ensure consistent configurations across environments.
- Use Backing Services Effectively: Design backing services to be stateless, loosely coupled, and external to the application.
- Maintain Build, Release, Run Separation: Use CI/CD tools to automate the build and deployment process, ensuring consistency and predictability.
- Implement Concurrency through Process Model: Design your application to handle multiple requests concurrently, improving responsiveness and throughput.
- Ensure Fast Startup and Graceful Shutdown: Implement fast startup and shutdown to maintain high performance and scalability.
- Achieve Dev/Prod Environment Parity: Ensure development, staging, and production environments are similar to reduce errors and inconsistencies.
- Streamline Log Management: Use structured logging, centralize log management, and avoid logging sensitive data for better troubleshooting.
- Isolate Admin and Management Tasks: Separate admin and management tasks from the main application workflow to prevent interference and bottlenecks.
By following these best practices, you can create cloud-native applications that are scalable, maintainable, and reliable.
1. Externalize Application State
When building cloud-native applications, it's crucial to externalize application state to ensure scalability and high performance. Stateful applications, which save client data from one session for use in the next session, can be challenging to scale and maintain. In contrast, stateless applications, which do not store session data on the server, are more suitable for cloud-native environments.
To externalize application state, you can use a stateful backing service, such as a database, to store and manage session data. This approach allows you to decouple your application from the underlying infrastructure and scale more efficiently.
Here are some benefits of externalizing application state:
BenefitsDescriptionImproved ScalabilityExternalizing application state allows your application to scale more efficiently.Enhanced ReliabilityBy storing session data in a stateful backing service, you can reduce the risk of data loss and corruption.Simplified ManagementExternalizing application state simplifies application management and deployment.Reduced RiskYou can reduce the risk of data loss and corruption by storing session data in a secure location.
For example, you can use a token-based authentication system, where user authentication and session data are stored in a secure token, such as a JSON Web Token (JWT). This approach allows you to maintain user sessions without storing sensitive data on the server, making it easier to scale and maintain your application.
In the next section, we'll explore the importance of embracing stateless protocols in cloud-native applications.
2. Embrace Stateless Protocols
When building cloud-native applications, it's essential to use stateless protocols to ensure scalability, reliability, and high performance. Stateless protocols, such as HTTP and UDP, don't store session data on the server, making them ideal for cloud-native environments.
Characteristics of Stateless Protocols
Stateless protocols have the following characteristics:
CharacteristicDescriptionNo session trackingThey don't track session data, making them more scalable and reliable.Self-contained requestsEach request contains all the necessary information, eliminating the need for server-side session management.No dependency on previous requestsThey don't rely on previous requests, making them more fault-tolerant and resilient.
Benefits of Stateless Protocols
Using stateless protocols in cloud-native applications offers the following benefits:
BenefitDescriptionImproved ScalabilityThey allow for easier scaling and load balancing.Enhanced ReliabilityThey reduce the risk of data loss and corruption.Simplified ManagementThey simplify application management and deployment.
In the next section, we'll explore the importance of designing for horizontal scaling in cloud-native applications.
3. Design for Horizontal Scaling
When building cloud-native applications, designing for horizontal scaling is crucial to ensure high performance, reliability, and scalability. Horizontal scaling, also known as scaling out, involves adding more instances or nodes to a system to handle increased traffic or demand.
Benefits of Horizontal Scaling
Here are the benefits of horizontal scaling:
BenefitDescriptionScalabilityEasily add or remove instances to match changing demand.ReliabilityDistribute workload across multiple instances to reduce the risk of single-point failures.FlexibilityScale individual components or services independently to optimize resource utilization.
To design for horizontal scaling, follow these best practices:
- Decouple components: Break down your application into smaller, independent components that can be scaled separately.
- Use load balancing: Distribute incoming traffic across multiple instances to ensure efficient resource utilization.
- Implement auto-scaling: Automatically add or remove instances based on predefined scaling policies to optimize resource allocation.
By designing your application with horizontal scaling in mind, you can ensure that it remains scalable, reliable, and performant, even in the face of rapid growth or unexpected traffic spikes. In the next section, we'll explore the importance of adopting immutable infrastructure in cloud-native applications.
4. Adopt Immutable Infrastructure
Immutable infrastructure is a software management approach where components are replaced instead of updated. This ensures consistency, reliability, and ease of management.
Advantages of Immutable Infrastructure
Immutable infrastructure offers several benefits:
AdvantageDescriptionSimplified DeploymentsDeployments are atomic, reducing the risk of partial failures.ReliabilityImmutable infrastructure ensures that the state of every server is always known, reducing unexpected issues.ConsistencyImmutable infrastructure prevents configuration drift, ensuring all servers are identical and consistent.
To implement immutable infrastructure, create new servers with updated configurations and then switch traffic to the new servers. This approach allows you to easily roll back to a previous version if issues arise.
By adopting immutable infrastructure, you can ensure that your cloud-native application remains scalable, reliable, and performant, even in the face of rapid growth or unexpected traffic spikes. In the next section, we'll explore the importance of environment configuration management in cloud-native applications.
5. Environment Configuration Management
Environment configuration management is essential for maintaining statelessness in cloud-native applications. It involves managing the configuration of your application's environment, including settings, dependencies, and external services.
Why Environment Configuration Management Matters
Environment configuration management ensures:
BenefitDescriptionConsistencyAll environments (development, testing, production) have consistent configurations.ReusabilityConfigurations can be reused across different environments, reducing errors and inconsistencies.Version ControlEnvironment configurations can be version-controlled, allowing for easy tracking of changes and rollbacks.
To implement effective environment configuration management, consider using tools like Docker, Kubernetes, or Ansible. These tools allow you to define and manage your application's environment configuration in a consistent, reusable, and version-controlled manner.
By doing so, you can ensure that your cloud-native application remains stateless, scalable, and performant. In the next section, we'll explore the importance of using backing services effectively in cloud-native applications.
6. Use Backing Services Effectively
When building stateless cloud-native applications, it's essential to use backing services effectively. Backing services are external services that provide functionality to your application, such as databases, message queues, and caching layers.
Characteristics of Backing Services
Backing services should have the following characteristics:
CharacteristicDescriptionStatelessBacking services should not store any state information about your application.Loosely CoupledYour application should be decoupled from the backing service, allowing for easy substitution or scaling.ExternalBacking services should be external to your application, providing a clear separation of concerns.
Best Practices for Using Backing Services
To use backing services effectively, follow these best practices:
- Use RESTful APIs: Design your backing services to use RESTful APIs, which are stateless and cacheable.
- Avoid Session Storage: Ensure that your backing services do not store session information about your application.
- Use Caching Mechanisms: Implement caching mechanisms, such as HTTP caching headers or in-memory caches like Redis, to improve performance and reduce the load on your application.
- Design for Horizontal Scaling: Design your backing services to scale horizontally, allowing for easy addition or removal of resources as needed.
By following these best practices and characteristics, you can ensure that your backing services are used effectively in your stateless cloud-native application. In the next section, we'll explore the importance of maintaining strict build, release, run separation in cloud-native applications.
7. Maintain Strict Build, Release, Run Separation
To ensure consistency, traceability, and efficiency in the application development process, it's crucial to maintain strict build, release, run separation. This separation is essential for stateless cloud-native applications, as it allows for a clear distinction between the different stages of the application lifecycle.
Stages of the Application Lifecycle
The application lifecycle consists of three stages:
StageDescriptionBuildTransform source code into an executable bundle.ReleaseCombine the build with the current configuration to create a release.RunRun the application in the execution environment.
Importance of Separation
By strictly separating these stages, you can ensure that the application is constructed, deployed, and executed in a controlled and repeatable manner. This separation also allows for predictability, traceability, and efficiency in the deployment process.
Best Practices
To maintain strict build, release, run separation, use CI/CD tools to automate the builds and deployment process. Ensure that the entire process is ephemeral, and all artifacts and environments can be completely rebuilt from scratch if something in the pipeline is destroyed. This approach enables a one-directional flow from code to release, ensuring that the application is always in a consistent and predictable state.
sbb-itb-8abf120
8. Implement Concurrency through Process Model
To achieve high performance and scalability in stateless cloud-native applications, it's essential to implement concurrency through a process model. Concurrency allows your application to handle multiple requests simultaneously, improving responsiveness and throughput.
Understanding Concurrency
In a stateless application, each request is handled independently, without assumptions about the contents of memory prior to or after handling the request. This independence enables concurrency, as multiple requests can be processed simultaneously without interfering with each other.
Process Model for Concurrency
To implement concurrency, design your application to consist of a single, stateless process. This process should be able to handle multiple requests concurrently, using a process model that supports parallel execution.
Benefits of Concurrency
Implementing concurrency through a process model offers several benefits:
BenefitDescriptionImproved ResponsivenessHandle multiple requests simultaneously, improving application responsiveness.Increased ThroughputProcess multiple requests in parallel, increasing overall throughput.Better Resource UtilizationEfficiently utilize system resources, reducing idle time and improving system performance.
To implement concurrency effectively, consider using CI/CD tools to automate the build and deployment process, ensuring that the entire process is ephemeral and can be completely rebuilt from scratch if necessary. This approach enables a one-directional flow from code to release, ensuring that the application is always in a consistent and predictable state.
9. Ensure Fast Startup and Graceful Shutdown
Fast startup and graceful shutdown are crucial for stateless cloud-native applications to maintain high performance and scalability. A fast startup enables your application to quickly respond to requests, while a graceful shutdown prevents data corruption, ensures resource cleanup, and provides a better user experience.
Understanding Shutdown
In cloud-native environments, instances are created and destroyed frequently. A graceful shutdown ensures that your application can shut down cleanly, releasing resources, and preventing data corruption or loss. This also allows for a better user experience, as it prevents partially loaded pages or unexpected errors.
Implementing Fast Startup and Graceful Shutdown
To implement fast startup and graceful shutdown, design your application to have a single, stateless process that can quickly start and shut down. This process should be able to handle multiple requests concurrently.
Here are some benefits of fast startup and graceful shutdown:
BenefitDescriptionImproved ResponsivenessQuickly respond to requests, improving application responsiveness.Prevents Data CorruptionPrevents data corruption or loss during shutdown.Better User ExperienceProvides a better user experience by preventing partially loaded pages or unexpected errors.
By ensuring fast startup and graceful shutdown, you can maintain high performance and scalability in your stateless cloud-native application, while also providing a better user experience and preventing data corruption or loss.
10. Achieve Dev/Prod Environment Parity
To ensure high performance and scalability in stateless cloud-native applications, it's crucial to achieve Dev/Prod Environment Parity. This principle ensures that the development, staging, and production environments are as similar as possible, reducing the differences between them.
Why Parity Matters
Traditionally, there have been significant gaps between the development and production environments. These gaps can lead to inconsistencies, errors, and difficulties in deploying applications. By achieving Dev/Prod parity, you can minimize these gaps and ensure a seamless transition from development to production.
Strategies for Achieving Parity
To achieve Dev/Prod parity, you can adopt the following strategies:
StrategyDescriptionUse Domain-Driven Design (DDD)Encapsulate business logic and externalize dependencies.Implement Configuration ManagementManage environment-specific dependencies.Use Containerization and OrchestrationMaintain consistency across environments using tools like Kubernetes, Docker, and Argo.Establish a CI/CD PipelineAutomate testing, deployment, and monitoring across environments.
By implementing these strategies, you can ensure that your development, staging, and production environments are similar, reducing errors, and improving the overall efficiency of your application.
Benefits of Parity
BenefitDescriptionImproved ConsistencyReduces errors and inconsistencies between environments.Faster DeploymentEnables faster deployment and rollout of new features.Better TestingImproves testing efficiency and accuracy by mimicking production environments.Enhanced CollaborationFosters collaboration between development, staging, and production teams.
11. Streamline Log Management
Effective log management is crucial for maintaining high-performance and scalable stateless cloud-native applications. Logs provide valuable insights into application behavior, helping developers troubleshoot issues, identify performance bottlenecks, and optimize system resources.
Why Log Management Matters
Logs help developers understand how their application is performing, identify issues, and optimize system resources. Without effective log management, it can be challenging to troubleshoot problems, leading to downtime and poor user experiences.
Best Practices for Log Management
To streamline log management, follow these best practices:
Best PracticeDescriptionUse structured loggingOrganize log data in a standardized format, making it easier to search and analyze.Centralize log managementUse a centralized logging service to collect, store, and analyze log data from multiple sources.Avoid logging sensitive dataRefrain from logging personally identifiable information (PII) or sensitive data to maintain user privacy and security.Provide informative application logsInclude all necessary information in log entries to facilitate effective troubleshooting and debugging.
By implementing these best practices, you can streamline log management, reduce the complexity of troubleshooting, and improve the overall efficiency of your stateless cloud-native application.
12. Isolate Admin and Management Tasks
To ensure the scalability and performance of stateless cloud-native applications, it's essential to separate admin and management tasks from the main application workflow. This practice helps prevent unnecessary complexity and potential bottlenecks in the system.
Why Separate Admin and Management Tasks?
Admin and management tasks, such as backups, updates, and maintenance, can introduce additional load and complexity to the application. By separating these tasks, you can prevent them from interfering with the normal operation of the application and ensure that they do not impact user experience.
Best Practices for Separating Admin and Management Tasks
To separate admin and management tasks effectively, follow these best practices:
Best PracticeDescriptionUse separate environmentsRun admin and management tasks in separate environments or containers to prevent interference with the main application.Schedule tasksSchedule admin and management tasks to run during off-peak hours or maintenance windows to minimize impact on the application.Use queuing mechanismsUse queuing mechanisms, such as message queues, to decouple admin and management tasks from the main application workflow.Monitor and log tasksMonitor and log admin and management tasks to ensure they are running correctly and to identify potential issues.
By separating admin and management tasks, you can ensure the reliability, scalability, and performance of your stateless cloud-native application.
Conclusion
By following these 12 best practices, you can develop stateless, scalable, and maintainable cloud-native applications. This approach helps you create systems that are well-suited for modern cloud infrastructures and capable of handling the dynamic nature of cloud computing.
Key Takeaways
Here are the main points to remember:
Best PracticeDescriptionExternalize application stateStore session data in a stateful backing service.Embrace stateless protocolsUse protocols like HTTP and UDP that don't store session data on the server.Design for horizontal scalingAdd or remove instances to match changing demand.Adopt immutable infrastructureReplace components instead of updating them.Manage environment configurationUse tools like Docker, Kubernetes, or Ansible to manage environment configuration.Use backing services effectivelyDesign backing services to be stateless, loosely coupled, and external.Maintain strict build, release, run separationUse CI/CD tools to automate the build and deployment process.Implement concurrency through process modelDesign your application to handle multiple requests concurrently.Ensure fast startup and graceful shutdownImplement fast startup and shutdown to maintain high performance and scalability.Achieve Dev/Prod environment parityEnsure development, staging, and production environments are similar.Streamline log managementUse structured logging, centralize log management, and avoid logging sensitive data.Isolate admin and management tasksSeparate admin and management tasks from the main application workflow.
By following these guidelines, you can create cloud-native applications that are scalable, maintainable, and reliable.
FAQs
What is stateless in 12 factor apps?
In 12 factor apps, stateless means each instance of the application is independent and doesn't store any user-specific data or state.
What are two characteristics of stateless applications?
CharacteristicDescriptionScalabilityStateless apps scale better because each request is processed separately.Easier MaintenanceThey require less state management logic, making them easier to design, create, and maintain.
What are the advantages of stateless applications?
AdvantageDescriptionBetter ScalabilityAdding more application instances improves load balancing and horizontal scaling.Easier MaintenanceStateless applications require less state management logic, making them easier to design, create, and maintain.
Related posts

10 Steps to Choose the Best Low-Code Platform in 2024
In today's fast-paced digital world, businesses need to respond quickly to changing market demands. Low-code platforms offer a solution by providing a visual, drag-and-drop interface for building applications faster than traditional development methods, accelerating application development and reducing coding efforts.
Here are the 10 key steps to choose the best low-code platform for your business in 2024:
- Identify Your Goals: Determine what you want to achieve with a low-code platform, such as speeding up application development, reducing costs, improving customer experiences, or empowering non-technical users.
- Research Options: Explore online resources, vendor websites, and industry reports to evaluate different low-code platforms, their features, pricing models, and case studies.
- Evaluate User Experience: Assess the platform's customization options, onboarding support, and user interface design to ensure it is accessible and user-friendly for both developers and business users.
- Check Customization: Evaluate the platform's customization capabilities, such as drag-and-drop functionality, user interface design, personalization, custom business logic, and third-party integrations.
- Review Integration: Ensure the platform offers robust integration capabilities, including APIs, out-of-the-box connectors, custom connectors, and data synchronization tools.
- Assess Scalability: Evaluate the platform's ability to handle increasing user loads and demands, including automated scaling, cloud infrastructure, load balancing, elastic resources, caching, and database scaling.
- Evaluate Security: Check the platform's security features, such as authentication, access control, data protection, vulnerability management, and compliance with industry regulations like GDPR, HIPAA, and SOC2.
- Check Support: Assess the platform's support options, including online documentation, community forums, email and phone support, and knowledge bases, as well as the engagement level of its user community.
- Compare Costs: Understand and compare the different pricing models, such as subscription-based, pay-per-use, and licensing, considering factors like user count, application complexity, features, support, and scalability.
- Test the Platform: Try out the platform through free trials or proof-of-concept projects to evaluate its features, user experience, integration, scalability, performance, and support services.
By following these 10 steps, you can make an informed decision and choose a low-code platform that aligns with your business strategies, streamlines your development workflow, and drives success.
Step 1: Identify Your Goals
When selecting a low-code platform, it's crucial to start by identifying your business objectives. This step ensures that the platform you choose aligns with your organization's needs and helps you achieve your desired outcomes.
Clarify What You Want to Achieve
Determine what you want to accomplish with a low-code platform. Are you looking to:
- Speed up application development?
- Reduce costs?
- Improve customer experiences?
- Empower non-technical users?
- Streamline your development workflow?
Be specific about your goals and prioritize them accordingly.
Consider Your Organization's Broader Application Delivery Strategy
Think about the role of low-code in your organization's overall application delivery strategy. Will it be a strategic solution to drive business growth or a point solution to solve a specific problem? Understanding the scope of low-code in your organization will help you determine the type of platform you need and its potential impact on your business.
Evaluate Your Current Pain Points and Challenges
Identify the pain points and challenges you're currently facing in your development workflow. Are there specific bottlenecks or inefficiencies that you'd like to address with a low-code platform? By understanding your current challenges, you'll be better equipped to select a platform that addresses your specific needs and helps you overcome these obstacles.
By following these steps, you'll be able to clearly articulate your business goals and determine the critical features required from a low-code platform to meet these objectives. This will set you up for success in the subsequent steps of choosing the best low-code platform for your organization.
Step 2: Research Options
Now that you have a clear understanding of your goals and objectives, it's time to research low-code platform options. This step is crucial in finding the best fit for your organization.
Explore Online Resources
Start by researching online resources:
- Review websites: Websites like Gartner, Forrester, and Capterra provide in-depth reviews and comparisons of low-code platforms.
- Industry reports: Reports from reputable firms like IDC, Gartner, and Forrester offer insights into the low-code market and its trends.
- Blogs and forums: Follow industry blogs, forums, and social media groups to stay updated on the latest developments and trends in low-code development.
Evaluate Vendor Websites
Visit the websites of low-code platform vendors to gather information on:
FeatureDescriptionFeatures and functionalitiesUnderstand the capabilities of each platform and how they align with your goals.Pricing modelsCompare pricing plans and calculate the total cost of ownership.Case studies and success storiesReview real-life examples of how the platform has helped other organizations achieve their goals.
Reach Out to Vendors
Contact low-code platform vendors directly to:
- Request demos: Schedule demos to see the platform in action and ask questions.
- Ask about support: Inquire about the level of support provided, including documentation, training, and customer service.
- Get references: Request references from existing customers to gain insights into their experiences.
Stay Up-to-Date with Market Trends
Stay informed about the latest market trends and advancements in low-code development. This will help you make an informed decision and ensure the platform you choose is future-proof.
By following these strategies, you'll be able to research and compare different low-code platforms effectively, setting yourself up for success in the next steps of the selection process.
Step 3: Evaluate User Experience
When choosing a low-code platform, it's crucial to evaluate the user experience to ensure the platform is accessible and user-friendly for both developers and business users. A platform with an intuitive user interface can significantly reduce the learning curve, increase productivity, and enhance collaboration between technical and non-technical stakeholders.
Assess Customization Options
Evaluate the platform's customization options to ensure they meet your organization's specific needs. Consider the following factors:
Customization OptionDescriptionDrag-and-drop functionalityCan users visually design and arrange components without manual coding?User interface designIs the interface intuitive, modern, and responsive?PersonalizationCan users tailor the platform to their preferences, such as customizing workflows or dashboards?
Evaluate Onboarding Support
A platform's onboarding support can significantly impact the user experience. Look for the following:
- Training resources: Are there online tutorials, webinars, user forums, and dedicated customer support teams available?
- Personalized onboarding programs: Does the platform offer customized onboarding programs to ensure users can quickly become proficient?
Test the Platform
Conduct a trial or pilot project to test the platform's user experience. This will give you a hands-on understanding of the platform's ease of use, performance, and scalability. Pay attention to factors such as response times, resource utilization, and the ease of scaling up or down as needed.
By evaluating the user experience, you can ensure that the chosen low-code platform meets the needs of your organization and users, ultimately leading to increased productivity, collaboration, and success.
Step 4: Check Customization
When evaluating a low-code platform, it's essential to assess its customization capabilities to ensure it can adapt to your organization's specific needs.
Types of Customization
Low-code platforms offer various customization options:
Customization TypeDescriptionDrag-and-drop functionalityVisual design and arrangement of components without manual coding.User interface designCustomizable interface to meet your organization's brand and style guidelines.PersonalizationAbility to tailor the platform to individual user preferences, such as customizing workflows or dashboards.Custom business logicIntegration of custom code or rules to meet specific business requirements.Third-party integrationsAbility to integrate with external systems, APIs, or services to extend the platform's functionality.
Evaluating Customization Options
When evaluating a low-code platform's customization options, consider the following factors:
FactorDescriptionEase of customizationHow easily can you customize the platform without requiring extensive coding knowledge?FlexibilityCan the platform adapt to changing business requirements and processes?ScalabilityDoes the platform's customization options scale with your organization's growth?SecurityAre the customization options secure, and do they meet your organization's security requirements?
By carefully evaluating a low-code platform's customization options, you can ensure that it meets your organization's specific needs and requirements, ultimately leading to increased productivity, efficiency, and success.
Step 5: Review Integration
When choosing a low-code platform, it's essential to evaluate its integration capabilities to ensure seamless connectivity with existing systems and tools. This step is vital in workflow automation and overall efficiency.
Integration Capabilities
A low-code platform should offer robust integration capabilities, including APIs and connectors. These integrations enable users to connect their applications with various databases, third-party services, or APIs.
Types of Integration
Here are the types of integration options:
Integration TypeDescriptionAPI IntegrationEnables communication between applications using APIs.Out-of-the-Box ConnectorsPre-built connectors for popular enterprise systems, such as CRM or ERP.Custom ConnectorsAllows users to build custom connectors for niche or specialized systems.Data Synchronization ToolsEnsures data consistency across systems through real-time or scheduled synchronization.
Evaluating Integration Options
When evaluating a low-code platform's integration options, consider the following factors:
FactorDescriptionEase of IntegrationHow easily can you integrate the platform with existing systems and tools?FlexibilityCan the platform adapt to changing business requirements and processes?ScalabilityDoes the platform's integration options scale with your organization's growth?SecurityAre the integration options secure, and do they meet your organization's security requirements?
By carefully evaluating a low-code platform's integration capabilities, you can ensure that it meets your organization's specific needs and requirements, ultimately leading to increased productivity, efficiency, and success.
Step 6: Assess Scalability
When choosing a low-code platform, it's essential to evaluate its scalability to ensure it can handle increasing loads and user demands without affecting performance and user experience.
What is Scalability?
Scalability refers to a platform's ability to grow and adapt to changing demands without compromising performance. There are two types of scalability:
Scalability TypeDescriptionRuntime ScalabilityHandles increasing user loads and compute-intensive operations.Platform ScalabilityManages large, interconnected portfolios of applications.
How to Measure Scalability
To measure scalability, consider the following factors:
FactorDescriptionAutomated ScalingCan the platform dynamically allocate more resources when user loads increase?Cloud InfrastructureDoes the platform leverage cloud infrastructure to scale horizontally and handle increased user demands?Load BalancingCan the platform distribute workload across multiple servers to ensure optimal performance?Elastic ResourcesCan the platform scale up or down to match changing user demands?CachingDoes the platform use caching to reduce the load on the application and improve performance?Database ScalingCan the platform scale its database to handle large amounts of data and user traffic?
By assessing a low-code platform's scalability, you can ensure it can handle your organization's growing needs and provide a seamless user experience.
sbb-itb-8abf120
Step 7: Evaluate Security
When choosing a low-code platform, security is a top priority. This section will guide you through the key aspects to evaluate when assessing a platform's security features and compliance with industry regulations.
Authentication and Access Control
Check if the platform provides:
FeatureDescriptionMulti-factor authenticationPrevents unauthorized access with additional verification steps.Role-based access controlRestricts access to sensitive data and features based on user roles.
Data Protection
Ensure the platform offers:
FeatureDescriptionEnd-to-end data encryptionProtects data both in transit and at rest.Data backup and recoverySafeguards against data loss and ensures business continuity.
Vulnerability Management
Look for a platform with:
FeatureDescriptionRegular security auditsIdentifies and addresses potential vulnerabilities.Prompt patchingFixes identified vulnerabilities to prevent exploitation.
Compliance with Industry Regulations
Verify the platform's compliance with relevant regulations, such as:
RegulationDescriptionGDPREnsures data protection and privacy for EU citizens.HIPAAProtects sensitive healthcare information.SOC2Ensures secure data storage and processing.
By carefully evaluating a low-code platform's security features and compliance, you can ensure your organization's applications and data remain secure and protected.
Step 8: Check Support
When choosing a low-code platform, it's essential to evaluate the quality of its support services and user community. This will help you overcome challenges and achieve your development goals.
Evaluating Support Options
Here are the key factors to consider when evaluating a low-code platform's support:
Support OptionDescriptionOnline DocumentationComprehensive guides, tutorials, and API references.Community ForumActive community-driven forum for discussion, feedback, and support.Email SupportTimely and responsive email support for technical issues and inquiries.Phone SupportDedicated phone support for critical issues and priority assistance.Knowledge BaseCentralized repository of FAQs, troubleshooting guides, and best practices.
Assessing Community Engagement
A strong and engaged community is vital for a low-code platform's success. Look for:
Community AspectDescriptionActive User BaseA large and active user base contributes to the platform's growth and stability.Regular UpdatesFrequent updates with new features, bug fixes, and security patches.Community EventsWebinars, meetups, and conferences that foster collaboration and knowledge sharing.User-Generated ContentTutorials, blog posts, and other resources created by the community.
By carefully evaluating a low-code platform's support options and community engagement, you can ensure that you have the necessary resources to overcome challenges and achieve your development goals.
Step 9: Compare Costs
When selecting a low-code platform, cost is a critical factor to consider. Different platforms offer various pricing models, and it's essential to understand and compare these costs to make an informed decision.
Pricing Models
Low-code platforms typically offer one of the following pricing models:
- Subscription-based: A recurring monthly or annual fee, often based on the number of users, applications, or features.
- Pay-per-use: A usage-based model, where you only pay for the resources or services used.
- Licensing: A one-time fee for a perpetual license, often with additional costs for support and updates.
Factors Affecting Cost
When evaluating costs, consider the following factors:
FactorDescriptionUser countThe number of users, developers, or administrators who will be using the platform.Application complexityThe complexity and number of applications you plan to build and deploy.Features and functionalityThe specific features and functionalities required, such as integrations, APIs, or advanced analytics.Support and maintenanceThe level of support and maintenance required, including training, documentation, and priority assistance.ScalabilityThe platform's ability to scale with your growing needs, including additional resources, storage, or bandwidth.
Comparative Analysis
To effectively compare costs, create a table or spreadsheet to outline the pricing models, features, and costs of each low-code platform you're considering. This will help you visualize the differences and make a more informed decision.
PlatformPricing ModelUser CountApplication ComplexityFeatures and FunctionalitySupport and MaintenanceScalabilityCostPlatform ASubscription-based10MediumBasic featuresStandard supportLimited scalability$500/monthPlatform BPay-per-use20HighAdvanced featuresPriority supportHigh scalability$0.05/transactionPlatform CLicensing5LowBasic featuresLimited supportLimited scalability$10,000/license
By carefully evaluating the costs and pricing models of each low-code platform, you can make an informed decision that aligns with your budget and development needs.
Step 10: Test the Platform
Testing a low-code platform is a crucial step in ensuring it meets your business requirements. Before making a final decision, try out the platform through trials or demos. This step will help you evaluate the platform's features, user experience, and performance.
Why Testing is Important
Testing a low-code platform helps you:
- Identify potential issues and limitations
- Evaluate the platform's scalability and performance
- Assess the user experience and ease of use
- Determine if the platform integrates with your existing systems and tools
- Get a feel for the platform's support and maintenance services
Types of Testing
You can conduct two primary types of testing:
Testing TypeDescriptionFree TrialA free trial or demo version of the platform to test its features and functionality.Proof of Concept (POC)A more in-depth testing process that involves building a small-scale project or prototype to evaluate the platform's capabilities.
What to Test
When testing a low-code platform, consider the following factors:
FactorDescriptionUser ExperienceHow easy is it to use the platform? Is the interface intuitive and user-friendly?Features and FunctionalityDoes the platform offer the features and functionality you need to build and deploy your applications?IntegrationDoes the platform integrate with your existing systems and tools?Scalability and PerformanceHow does the platform perform under heavy loads or with large amounts of data?Support and MaintenanceWhat kind of support and maintenance services does the vendor offer?
By testing a low-code platform, you can make an informed decision and ensure that the platform meets your business requirements.
Final Thoughts
Choosing the right low-code platform for your business can be a challenging task. However, by following the 10 steps outlined in this article, you can make an informed decision that aligns with your business strategies.
Key Takeaways
Here are the main points to remember when selecting a low-code platform:
StepDescription1Identify your goals2Research options3Evaluate user experience4Check customization5Review integration6Assess scalability7Evaluate security8Check support9Compare costs10Test the platform
By considering these factors, you can ensure that you choose a low-code platform that meets your business requirements and helps you achieve success.
The Benefits of Low-Code Platforms
Low-code platforms can help you:
- Reduce costs
- Increase productivity
- Improve customer satisfaction
- Stay competitive in the market
By empowering your developers and non-technical users to build and deploy applications quickly, you can achieve these benefits and more.
Conclusion
In conclusion, selecting the right low-code platform is a critical decision that can have a significant impact on your business. By following the steps outlined in this article, you can make an informed decision that helps you achieve your goals and stay ahead of the competition.
FAQs
How do low-code platforms work?
Low-code platforms are software development tools that require little to no coding to build applications and processes. They use visual interfaces with basic logic and drag-and-drop capabilities to make development easier and faster.
What is the best low-code development platform?
Here are some popular low-code development platforms:
PlatformDescriptionBlupA comprehensive solution for building powerful applicationsOutSystemsA low-code platform for building enterprise-grade applicationsMendixA low-code platform for building custom applicationsMicrosoft Power AppsA low-code platform for building custom business applications
Each platform has its strengths and weaknesses, and the best one for you will depend on your specific needs and goals.
Related posts

Xamarin vs. Unity: C# Frameworks for Cross-Platform Apps
Xamarin is an open-source framework for building native mobile apps for iOS, Android, and Windows using C#. It allows code sharing across platforms, reducing development time and costs. Xamarin is ideal for businesses and developers who need a unified presence across multiple mobile platforms.
Unity is a powerful game engine for creating immersive, interactive 2D and 3D games and applications with high-performance graphics and physics. It supports deployment across desktop, console, and mobile devices. Unity is perfect for developers who need to create engaging, interactive experiences with advanced graphics and gameplay mechanics.
Quick Comparison
FeatureXamarinUnityPrimary UseNative mobile appsGames and interactive experiencesCode SharingAcross mobile platformsLimitedGraphics & PerformanceOptimized for mobileHigh-performance graphics and physicsCross-Platform SupportiOS, Android, WindowsDesktop, console, mobileDevelopment ToolsIDE for mobile appsGame engine
Choose Xamarin when you need to develop native-like mobile apps with a unified presence across iOS, Android, and Windows platforms, leveraging code sharing and C# skills.
Choose Unity when you need to create immersive, interactive games or applications with high-performance graphics, physics, and gameplay mechanics, targeting multiple platforms including desktop, console, and mobile.
What are Xamarin and Unity?
Xamarin and Unity are two popular C# frameworks used for cross-platform development. Understanding their origins, roles, and primary use cases is essential to harness their capabilities effectively.
Xamarin: Mobile App Development
Xamarin is an open-source framework for building cross-platform mobile applications. It allows developers to share code between iOS, Android, and Windows platforms using C# and.NET. Xamarin's primary focus is on facilitating the development of mobile apps with native performance.
Key Features:
FeatureDescriptionCross-platform developmentShare code between iOS, Android, and Windows platformsNative performanceDevelop mobile apps with native performanceCode sharingReuse business logic and backend code
Unity: Game Engine
Unity, on the other hand, is a game engine that supports C# scripting. It is widely used for creating immersive 2D and 3D games and applications across various platforms, including mobile, desktop, and consoles. Unity's strengths lie in its ability to create engaging, interactive experiences with high-performance graphics and physics.
Key Features:
FeatureDescriptionGame engineCreate immersive 2D and 3D games and applicationsCross-platform supportDeploy games and applications across various platformsHigh-performance graphicsCreate engaging, interactive experiences with high-performance graphics and physics
Primary Uses
Xamarin for Mobile Apps
Xamarin is ideal for developing non-game, utility mobile apps that require a consistent user experience across multiple mobile platforms. Its strength lies in sharing code between iOS, Android, and Windows platforms, allowing developers to create native-performing mobile apps with ease.
Primary Use Cases:
Use CaseDescriptionProductivity ToolsDevelop mobile apps for tasks, notes, and organizationSocial Media AppsCreate social media apps with native performanceE-commerce PlatformsBuild e-commerce apps with a consistent user experience
Xamarin's cross-platform support enables developers to reuse business logic and backend code, reducing development time and costs. Its ability to create native-performing mobile apps ensures a seamless user experience.
Unity for Games
Unity is the preferred choice for developers creating interactive games, virtual reality experiences, and simulations. Its game engine capabilities make it an ideal platform for building immersive, engaging, and interactive experiences.
Primary Use Cases:
Use CaseDescription2D and 3D GamesDevelop interactive games for various platformsVirtual Reality ExperiencesCreate immersive virtual reality experiencesSimulationsBuild interactive simulations for training and education
Unity's strengths lie in its ability to create engaging, interactive experiences with high-performance graphics and physics, making it an excellent choice for game developers and creators of interactive experiences.
Feature Comparison
Development Tools
Xamarin and Unity offer different development tools that cater to their respective strengths. Xamarin provides an integrated development environment (IDE) for creating, testing, and deploying mobile apps across multiple platforms. This IDE includes features like code completion, debugging, and project templates.
Unity, on the other hand, offers a game engine that provides a comprehensive set of tools for creating interactive games, virtual reality experiences, and simulations. Unity's game engine includes features like physics, graphics, and animation tools.
Cross-Platform Support
Xamarin and Unity approach cross-platform support differently. Xamarin simplifies the sharing of business logic across mobile platforms, allowing developers to create native-performing mobile apps with ease. This enables developers to reuse business logic and backend code, reducing development time and costs.
Unity, on the other hand, offers broad deployment options for games, allowing developers to deploy their games across multiple platforms, including mobile, desktop, and consoles.
Performance and Graphics
Xamarin and Unity differ in their performance and graphics capabilities. Xamarin's application performance is optimized for mobile apps, providing a seamless user experience across multiple platforms.
Unity, on the other hand, is optimized for real-time rendering and graphics capabilities, making it an excellent choice for game developers and creators of interactive experiences.
FeatureXamarinUnityDevelopment ToolsIDE for mobile app developmentGame engine for game developmentCross-Platform SupportSimplifies sharing of business logic across mobile platformsOffers broad deployment options for games across multiple platformsPerformance and GraphicsOptimized for mobile app performanceOptimized for real-time rendering and graphics capabilities
By understanding the differences in development tools, cross-platform support, and performance and graphics capabilities, developers can choose the framework that best suits their project requirements.
sbb-itb-8abf120
User Feedback and Community
User Reviews
Both Xamarin and Unity have received positive feedback from users. Here's a summary of their ratings and reviews:
FrameworkRating (out of 5)Number of ReviewsXamarin4.3760Unity4.62831
Xamarin users praise its ease of use, good built-in support for both Android and iOS application development, and cross-platform support. However, some users have expressed frustration with the UI code being platform-specific and the Visual Studio emulator being slow and resource-intensive.
Unity users rave about its powerful and visually stunning capabilities, as well as its brilliant pricing model for bootstrapped game developers. However, some users have mentioned limitations with multiplayer games and large project sizes.
Community Resources
Both Xamarin and Unity have active and supportive communities, with a wealth of resources available to help developers troubleshoot and master the frameworks.
Here's a summary of the community resources available for each framework:
FrameworkCommunity ResourcesXamarinExtensive documentation library, open-source projects, tutorials, samples, and guidesUnityUnity Asset Store, Unity Answers, Unity Forums, tutorials, documentation, and guides
Overall, both Xamarin and Unity have strong user feedback and community support, with each framework having its unique strengths and weaknesses. By understanding the pros and cons of each framework, developers can make informed decisions about which one to use for their projects.
When to Use Each Framework
When deciding between Xamarin and Unity, consider the specific requirements of your project and the strengths of each framework. Here are some guidelines to help you choose the right framework for your needs.
Choosing Xamarin
Use Xamarin when:
ReasonDescriptionCross-platform mobile appsDevelop native-like mobile apps for iOS, Android, and WindowsCode sharingShare code between platforms, reducing development time and costsFamiliarity with C#Leverage your existing C# knowledge and skillsCustomization and integrationIntegrate with native platform features and customize your appLine-of-business applicationsDevelop enterprise apps, productivity tools, or other business-focused apps
Xamarin is ideal for businesses and developers who need to create mobile apps with a unified presence across multiple platforms.
Choosing Unity
Use Unity when:
ReasonDescriptionGame developmentCreate immersive, interactive games with 2D or 3D graphicsGraphics-intensive applicationsDevelop applications with high-performance graphics and physicsMulti-platform deploymentDeploy your application across desktop, console, and mobile devicesCustomization and controlControl graphics, physics, and gameplay mechanicsGame engine requirementsNeed a powerful and flexible game engine with a large community and resources
Unity is perfect for developers who need to create engaging, interactive experiences with high-performance graphics and gameplay mechanics.
By understanding the strengths and weaknesses of each framework, you can make an informed decision about which one to use for your project, ensuring you choose the best tool for the job.
Conclusion
In conclusion, Xamarin and Unity are two powerful C# frameworks that cater to different needs in cross-platform app development. Here's a summary of their strengths:
Xamarin
- Ideal for creating native-like mobile apps for iOS, Android, and Windows
- Focuses on code sharing, customization, and integration
- Suitable for businesses and developers who need a unified presence across multiple platforms
Unity
- A game engine that excels in creating immersive, interactive experiences with high-performance graphics and gameplay mechanics
- Perfect for developers who need to create engaging, interactive experiences with 2D or 3D graphics
When deciding between Xamarin and Unity, consider the specific requirements of your project. Ask yourself:
- Do you need to create a mobile app with a unified presence across multiple platforms? Choose Xamarin.
- Do you need to create an immersive, interactive experience with high-performance graphics and gameplay mechanics? Choose Unity.
By understanding the strengths of each framework, you can make an informed decision about which one to use for your project.
Related posts

7 Payment Gateway Integration Mistakes to Avoid
Integrating a payment gateway is crucial for online businesses, but it can be complex with costly mistakes. This article highlights common challenges and solutions:
- Inadequate Security Measures
- Prioritize security by complying with standards like PCI DSS
- Implement encryption, access controls, and regular security assessments
- Educate staff on security best practices
- Poor Integration Processes
- Thoroughly test the integration across devices, browsers, and platforms
- Ensure clear documentation and responsive support from the provider
- Limited Payment Options
- Offer multiple payment methods like credit cards, digital wallets, and bank transfers
- Benefits include backup plans, better exchange rates, lower fees, and enhanced security
- Inadequate Error Handling
- Provide clear error messages and solutions for customers
- Log errors, implement retry mechanisms, and monitor performance
- Insufficient Mobile Optimization
- Ensure a responsive design, fast loading times, and simple UI for mobile
- Optimize for different screen sizes and devices
- Ignoring Compliance and Regulations
- Inadequate Testing and Quality Assurance
- Conduct functional, security, performance, and integration testing
- Use a sandbox environment and test data for comprehensive testing
By avoiding these mistakes, you can provide a secure, reliable, and efficient payment experience for your customers, protecting your business and driving growth.
1. Inadequate Security Measures
Failure to Prioritize Security
When integrating a payment gateway, security is a top concern. Neglecting it can lead to financial losses, damage to customer trust, and legal issues.
Ensuring Robust Security
To avoid this mistake, prioritize security measures:
Security MeasureDescriptionCompliance with industry standardsEnsure compliance with standards like PCI DSS, which outlines security requirements, including encryption, access controls, and regular security assessments.Regular updates and patch managementImplement regular updates and patch management to protect your system against emerging vulnerabilities.Staff educationEducate your staff about security best practices to prevent human error, such as recognizing phishing attempts, password hygiene, and handling sensitive customer data.
By prioritizing security measures, you can safeguard sensitive payment data and ensure a secure payment experience for your customers.
2. Poor Integration Processes
A smooth payment gateway integration is crucial for a positive customer experience. Complex or unreliable integration processes can lead to customer frustration and cart abandonment.
Thorough Testing is Essential
Thorough testing of the integration is critical. It's not enough for the payment gateway to work correctly in isolation; it must seamlessly function on websites or apps, across various devices and browsers. Testing helps identify any compatibility issues and ensures a consistent payment process for all users.
Clear Documentation and Support
Having access to responsive and knowledgeable support from the payment gateway provider is invaluable if any issues or questions arise during the integration. Clear documentation that outlines the necessary steps for integration, as well as troubleshooting guides, can also help developers overcome obstacles.
Key Considerations for a Smooth Integration
ConsiderationDescriptionStraightforward integration optionsEnsure the payment gateway provides clear documentation and easy-to-follow integration steps.Thorough testingTest the integration on various devices, browsers, and platforms to ensure a seamless payment experience.Responsive supportHave access to knowledgeable support from the payment gateway provider to address any integration issues.
By prioritizing a smooth and reliable integration process, you can ensure a seamless payment experience for your customers, reducing the likelihood of cart abandonment and increasing customer satisfaction.
3. Limited Payment Options
Offering limited payment options can lead to frustrated customers and abandoned carts. When customers don't see their preferred payment method, they are more likely to leave your site and shop elsewhere.
Provide Flexibility and Convenience
To avoid losing customers, it's essential to offer multiple payment gateways that cater to different customer preferences. This includes:
- Credit and debit cards
- Digital wallets like PayPal and Apple Pay
- Alternative payment methods like bank transfers and e-wallets
By providing a range of payment options, you can:
- Increase customer satisfaction and loyalty
- Reduce cart abandonment rates
- Expand your customer base to include international customers
- Stay competitive in the market
Benefits of Multiple Payment Gateways
BenefitDescriptionBackup planIn case one gateway experiences downtime or technical issues, multiple gateways ensure customers can still complete transactions.Better exchange ratesMultiple gateways can offer better exchange rates, reducing costs for international transactions.Lower transaction feesYou can negotiate lower transaction fees with multiple gateways, increasing your revenue.Enhanced securityMultiple gateways can provide enhanced security features, protecting your customers' sensitive payment data.
By prioritizing flexibility and convenience in payment options, you can create a seamless and enjoyable shopping experience for your customers, setting your business up for success.
4. Inadequate Error Handling
Error handling is crucial in payment gateway integration. When errors occur during payment processing, it's essential to provide clear and concise error messages to help customers resolve the issue quickly.
Common Payment Gateway Errors
Payment gateway errors can occur due to various reasons, including:
- Insufficient funds
- Invalid card details
- Expired cards
- Payment gateway downtime
- Server resource limitations
Handling Errors Effectively
To handle errors effectively, consider the following:
Error Handling StepDescriptionProvide clear error messagesHelp customers understand the issue and how to resolve it.Offer solutionsSuggest alternative payment methods or contacting their bank.Log errorsRecord errors for debugging and analysis purposes.Implement retry mechanismsHandle temporary errors by retrying the payment process.Monitor payment gateway performanceMinimize errors by monitoring the payment gateway's uptime and performance.
Benefits of Effective Error Handling
Effective error handling can:
- Reduce cart abandonment rates
- Improve customer satisfaction and loyalty
- Increase revenue by minimizing lost sales
- Enhance the overall payment experience
By prioritizing error handling, you can create a seamless and enjoyable payment experience for your customers, setting your business up for success.
sbb-itb-8abf120
5. Insufficient Mobile Optimization
In today's mobile-first world, it's crucial to ensure that your payment gateway is optimized for mobile devices. A seamless payment experience on mobile is essential to reduce cart abandonment rates and increase conversions.
Why Mobile Optimization Matters
Mobile devices account for over 50% of all online transactions. If your payment gateway is not optimized for mobile, you're likely to lose out on a significant number of sales.
Common Mobile Optimization Mistakes
Here are some common mistakes to avoid when it comes to mobile optimization:
MistakeDescriptionNon-responsive designFailing to adapt to different screen sizes and devices.Slow loading timesTaking too long to load, leading to frustrated customers.Cluttered UIOverwhelming users with too much information, making it hard to complete payments.Inadequate error handlingFailing to provide clear error messages, leading to confusion and frustration.
Best Practices for Mobile Optimization
To ensure a seamless mobile payment experience, follow these best practices:
- Design a responsive and intuitive UI that works well on different screen sizes and devices.
- Optimize for fast loading times to reduce friction and improve user experience.
- Keep the payment process simple and straightforward, minimizing the number of steps required to complete a transaction.
- Provide clear and concise error messages to help users resolve issues quickly.
By prioritizing mobile optimization, you can create a seamless payment experience that drives conversions and revenue.
6. Ignoring Compliance and Regulations
When integrating a payment gateway, it's crucial to ensure compliance with relevant regulations and standards. Ignoring compliance can lead to severe consequences, including fines, penalties, and damage to your reputation.
The Importance of PCI DSS Compliance

The Payment Card Industry Data Security Standard (PCI DSS) is a set of security standards designed to protect cardholder data. PCI DSS compliance is mandatory for any business that processes credit or debit card transactions. Failure to comply with PCI DSS can result in fines of up to $500,000 per incident.
PCI DSS Compliance Requirements
RequirementDescriptionUse validated softwareUse software that is validated by the PCI Security Standards Council.Do not store sensitive dataDo not store sensitive customer data on computers or servers.Encrypt transmissionEncrypt the transmission of customer data across open public networks.Use firewallsUse firewalls on computers and networks to protect against unauthorized access.Teach employeesEducate employees about data security measures to protect cardholder data.
Other Regulations to Consider
In addition to PCI DSS, there are other regulations you should consider when integrating a payment gateway. These include:
- General Data Protection Regulation (GDPR)
- Revised Payment Services Directive (PSD2)
- Anti-Money Laundering (AML) and Combating the Financing of Terrorism (CFT) regulations
Best Practices for Compliance
To ensure compliance with regulations and standards, follow these best practices:
- Conduct regular security audits and penetration testing
- Implement a secure network architecture
- Use strong access controls and authentication
- Monitor and log all transactions
- Train your employees on compliance and security measures
By prioritizing compliance and regulations, you can protect your business and customers from fraud and data breaches.
7. Inadequate Testing and Quality Assurance
Inadequate testing and quality assurance can lead to payment gateway integration mistakes that can be costly and damaging to your business. Thorough testing is crucial to ensure that your payment gateway is secure, reliable, and efficient.
The Importance of Testing
Testing your payment gateway is essential to identify and fix errors, vulnerabilities, and compatibility issues before they affect your customers. Inadequate testing can result in:
- Security breaches: Hackers can exploit unidentified vulnerabilities, leading to data breaches and financial losses.
- Transaction failures: Errors in the payment process can lead to failed transactions, lost sales, and frustrated customers.
- Reputation damage: Payment gateway issues can damage your reputation and erode customer trust.
Types of Testing
To ensure comprehensive testing, you should conduct:
Test TypeDescriptionFunctional testingVerify that the payment gateway processes transactions correctly and integrates seamlessly with your website or application.Security testingIdentify vulnerabilities and ensure that sensitive customer data is protected.Performance testingTest the payment gateway's ability to handle high volumes of transactions and traffic.Integration testingVerify that the payment gateway integrates correctly with third-party services and systems.
Best Practices for Testing
To ensure thorough testing, follow these best practices:
Best PracticeDescriptionUse a sandbox environmentTest your payment gateway in a sandbox environment to simulate real-world scenarios without affecting live transactions.Use test dataUse test data to simulate transactions and test different scenarios.Conduct regular testingRegularly test your payment gateway to ensure it remains secure and efficient.Involve stakeholdersInvolve stakeholders, including developers, QA teams, and business owners, in the testing process to ensure comprehensive coverage.
By prioritizing testing and quality assurance, you can ensure that your payment gateway is secure, reliable, and efficient, providing a better experience for your customers and protecting your business from potential risks.
Conclusion
Integrating a payment gateway into your mobile app or website is crucial for providing a seamless and secure payment experience for your customers. However, it's essential to avoid common mistakes that can lead to security breaches, transaction failures, and reputational damage.
Key Takeaways
To ensure a secure and efficient payment gateway, remember to:
Best PracticeDescriptionPrioritize security measuresImplement robust security measures to protect sensitive customer data.Conduct thorough testingTest your payment gateway to identify and fix errors, vulnerabilities, and compatibility issues.Ensure compliance with regulationsComply with relevant regulations and standards, such as PCI DSS, GDPR, and PSD2.
By following these best practices, you can protect your customers' sensitive data, reduce the risk of fraud and errors, and provide a better overall experience for your users.
The Importance of Payment Gateway Integration
A payment gateway is not just a means of processing payments; it's a critical component of your business's online presence. By integrating your payment gateway correctly, you can build trust with your customers, increase conversions, and drive business growth.
In today's digital age, a secure and efficient payment gateway is no longer a luxury; it's a necessity. By avoiding common mistakes and prioritizing security, testing, and quality assurance, you can ensure that your payment gateway is a valuable asset to your business, rather than a liability.
Related posts

PHP & MySQL: Building Dynamic Web Apps
PHP and MySQL are a powerful combination for creating dynamic web applications. Here's a concise overview:
Why Use PHP and MySQL?
- Open-source and free to use
- Cross-platform compatibility
- Cost-effective with no licensing fees
- Large community for support and resources
Required Knowledge
- Basic understanding of HTML, CSS, PHP, and MySQL
Setting Up Development Environment
- Choose an IDE or text editor (Visual Studio Code, Sublime Text, PHPStorm, Atom)
- Install PHP and MySQL for your operating system (Windows, macOS, Linux)
- Set up a local server using XAMPP or similar
Creating the Database
- Understand database normalization (1NF, 2NF, 3NF)
- Create databases and tables using MySQL commands or phpMyAdmin
- Secure your database (strong passwords, limit privileges, use SSL, update regularly)
Connecting PHP to MySQL
- Choose between MySQLi or PDO for connecting
- Create a database connection and handle errors
Building Core App Functions
- Handle user input and sanitize data
- Perform CRUD (Create, Read, Update, Delete) operations
- Display dynamic content from the database
Securing Your App
- Prevent SQL injection with prepared statements and input validation
- Use data encryption and secure connections (HTTPS)
- Implement secure session management and file handling
Deploying Your App
- Choose a hosting environment (shared, VPS, dedicated, cloud)
- Comply with app store guidelines for mobile deployment
- Test and optimize for performance
Further Learning Resources
- Online courses (Udemy, Coursera, edX)
- Books ("PHP and MySQL Web Development", "MySQL Cookbook")
- Community forums (Reddit, Stack Overflow)
- Tutorials and blogs (SitePoint, Tuts+, PHPMaster)
Setting Up Your Dev Environment
Choosing an IDE or Text Editor
When developing with PHP and MySQL, a reliable Integrated Development Environment (IDE) or text editor is essential. Here are some popular options:
IDE/Text EditorDescriptionVisual Studio CodeA lightweight, open-source code editor with extensive PHP and MySQL supportSublime TextA feature-rich text editor with a wide range of plugins for PHP and MySQL developmentPHPStormA powerful, commercial IDE specifically designed for PHP developmentAtomA customizable, open-source text editor with a large community of developers
Select an IDE or text editor that suits your needs, and familiarize yourself with its features and shortcuts to improve your development workflow.
Installing PHP and MySQL

To set up your development environment, you'll need to install PHP and MySQL on your local machine. Here are the general steps for each operating system:
Windows
- Download the latest version of PHP from the official website.
- Install PHP using the provided installer.
- Download and install MySQL Community Server from the official website.
- Configure PHP and MySQL to work together by updating the PHP configuration file (php.ini) and setting up a MySQL user account.
macOS (using Homebrew)
- Install PHP using Homebrew:
brew install php - Install MySQL using Homebrew:
brew install mysql - Configure PHP and MySQL to work together by updating the PHP configuration file (php.ini) and setting up a MySQL user account.
Linux (Ubuntu-based)
- Install PHP using the package manager:
sudo apt-get install php - Install MySQL using the package manager:
sudo apt-get install mysql-server - Configure PHP and MySQL to work together by updating the PHP configuration file (php.ini) and setting up a MySQL user account.
Setting Up a Local Server
To create a local development environment, you'll need to set up a local server using XAMPP or a similar solution. XAMPP provides an easy-to-use interface for managing your local server, including starting and stopping services, configuring PHP and MySQL, and accessing your projects.
Here's how to set up XAMPP:
- Download and install XAMPP from the official website.
- Start the XAMPP control panel and start the Apache and MySQL services.
- Create a new folder for your project in the XAMPP
htdocsdirectory. - Create a new PHP file in your project folder and test it using your local server.
By following these steps, you'll have a fully functional development environment set up for building dynamic web applications with PHP and MySQL.
Creating the Database
Database Design Basics
When designing a database for a dynamic web app, it's crucial to understand database normalization. Normalization helps minimize data redundancy and improve data integrity. A well-normalized database ensures that each piece of data is stored in one place, making it easier to maintain and update.
Here are the three main normalization rules:
Normalization RuleDescriptionFirst Normal Form (1NF)Each table cell must contain a single value.Second Normal Form (2NF)Each non-key attribute in a table must depend on the entire primary key.Third Normal Form (3NF)If a table is in 2NF, and a non-key attribute depends on another non-key attribute, then it should be moved to a separate table.
Creating Databases and Tables
To create a database and tables, you can use MySQL commands or phpMyAdmin. Here's an example of how to create a database and table using MySQL commands:
CREATE DATABASE test_db;
USE test_db;

CREATE TABLE employee (
  emp_id INT NOT NULL AUTO_INCREMENT,
  emp_name VARCHAR(20) NOT NULL,
  emp_address VARCHAR(20) NOT NULL,
  emp_salary INT NOT NULL,
  join_date TIMESTAMP(14) NOT NULL,
  PRIMARY KEY (emp_id)
);
Alternatively, you can use phpMyAdmin to create a database and table through a graphical interface.
Securing Your Database
Securing your database is vital to prevent unauthorized access and data breaches. Here are some best practices to secure your MySQL database:
Security MeasureDescriptionUse strong passwordsChoose strong, unique passwords for your database users.Limit user privilegesGrant only necessary privileges to each user to prevent unauthorized access.Use SSL encryptionEnable SSL encryption to protect data transmitted between the client and server.Regularly update MySQLKeep your MySQL version up-to-date to ensure you have the latest security patches.Monitor database activityRegularly monitor database activity to detect and respond to potential security threats.
By following these best practices, you can ensure the security and integrity of your MySQL database.
Connecting PHP to MySQL
Choosing a Connection Method
When connecting PHP to MySQL, you have two popular options: MySQLi (MySQL Improved) and PDO (PHP Data Objects). Both extensions allow you to interact with MySQL databases, but they have different design goals and use cases.
Here's a brief comparison of MySQLi and PDO:
FeatureMySQLiPDODatabase supportMySQL onlyMultiple databases (MySQL, PostgreSQL, SQLite, etc.)API styleProcedural and object-orientedObject-orientedPerformanceOptimized for MySQLGeneral-purpose, may not be optimized for specific databasesPrepared statementsSupportedSupportedError handlingImproved error handlingStandardized error handling
Creating a Database Connection
To create a database connection using MySQLi, use the following code:
$host = 'localhost';
$username = 'your_username';
$password = 'your_password';
$dbname = 'your_database';

$conn = new mysqli($host, $username, $password, $dbname);

if ($conn->connect_error) {
    die("Connection failed: ". $conn->connect_error);
}
To create a database connection using PDO, use the following code:
$dsn = 'mysql:host=localhost;dbname=your_database';
$username = 'your_username';
$password = 'your_password';

try {
    $conn = new PDO($dsn, $username, $password);
} catch (PDOException $e) {
    echo 'Connection failed: '. $e->getMessage();
}
Handling Connection Errors
When creating a database connection, it's essential to handle connection errors gracefully. Both MySQLi and PDO provide mechanisms for error handling.
With MySQLi, you can use the connect_error property to check for connection errors:
if ($conn->connect_error) {
    die("Connection failed: ". $conn->connect_error);
}
With PDO, you can use a try-catch block to catch PDOException instances:
try {
    $conn = new PDO($dsn, $username, $password);
} catch (PDOException $e) {
    echo 'Connection failed: '. $e->getMessage();
}
By handling connection errors effectively, you can ensure that your application remains robust and reliable.
Building Core App Functions
In this section, we'll focus on creating the core functions of your web application using PHP and MySQL. These functions will enable your app to interact with the database, perform CRUD (Create, Read, Update, Delete) operations, and display dynamic content.
Handling User Input
When building a web application, it's essential to handle user input securely and efficiently. This involves capturing user input from HTML forms, sanitizing the data, and validating it against a set of rules.
Here's an example of how to sanitize user input:
$name = $_POST['name'];
$email = $_POST['email'];

$name = filter_var($name, FILTER_SANITIZE_STRING);
$email = filter_var($email, FILTER_VALIDATE_EMAIL);

if ($name && $email) {
    // Process the user input
} else {
    // Display an error message
}
Performing CRUD Operations
CRUD operations are the backbone of any web application. They enable you to create, read, update, and delete records in your database.
Here's an example of how to perform a CRUD operation using MySQLi:
Create
$query = "INSERT INTO users (name, email) VALUES ('$name', '$email')";
$result = mysqli_query($conn, $query);
Read
$query = "SELECT * FROM users WHERE id = '$id'";
$result = mysqli_query($conn, $query);
$row = mysqli_fetch_assoc($result);
Update
$query = "UPDATE users SET name = '$name', email = '$email' WHERE id = '$id'";
$result = mysqli_query($conn, $query);
Delete
$query = "DELETE FROM users WHERE id = '$id'";
$result = mysqli_query($conn, $query);
Displaying Dynamic Content
Displaying dynamic content is a crucial aspect of building a web application. You can use PHP to fetch data from your database and integrate it into your HTML templates.
Here's an example of how to display dynamic content:
// Fetch data from the database
$query = "SELECT * FROM users";
$result = mysqli_query($conn, $query);

// Display the data in an HTML table
echo "<table>";
while ($row = mysqli_fetch_assoc($result)) {
    echo "<tr>";
    echo "<td>". $row['name']. "</td>";
    echo "<td>". $row['email']. "</td>";
    echo "</tr>";
}
echo "</table>";
By following these guidelines, you can create a robust and scalable web application using PHP and MySQL. Remember to always prioritize security, performance, and usability when building your app.
sbb-itb-8abf120
Advanced PHP & MySQL Techniques
In this section, we'll explore more advanced capabilities and best practices for PHP & MySQL development. These techniques will help you create more robust, scalable, and secure web applications.
User Authentication
Creating a secure login system is crucial in web development. PHP sessions and password hashing are essential tools in this process. Here's an example of how to implement user authentication using PHP sessions:
session_start();

// Check if the user is already logged in
if (isset($_SESSION['username'])) {
    // Redirect to the dashboard or profile page
    header('Location: dashboard.php');
    exit;
}

// Handle login form submission
if (isset($_POST['username']) && isset($_POST['password'])) {
    $username = $_POST['username'];
    $password = $_POST['password'];

    // Hash the password using a secure algorithm like bcrypt
    $hashed_password = password_hash($password, PASSWORD_BCRYPT);

    // Query the database to verify the user credentials
    $query = "SELECT * FROM users WHERE username = '$username' AND password = '$hashed_password'";
    $result = mysqli_query($conn, $query);

    if (mysqli_num_rows($result) > 0) {
        // Login successful, set the session variables
        $_SESSION['username'] = $username;
        $_SESSION['logged_in'] = true;

        // Redirect to the dashboard or profile page
        header('Location: dashboard.php');
        exit;
    } else {
        // Login failed, display an error message
        echo "Invalid username or password";
    }
}
Error Handling and Debugging
Error handling and debugging are critical aspects of PHP development. Here are some techniques for identifying and resolving issues in PHP scripts:
TechniqueDescriptionError ReportingUse the error_reporting() function to enable error reporting and specify the level of errors to report.Debugging ToolsUtilize debugging tools like Xdebug, Zend Debugger, or PHPStorm's built-in debugger to step through your code and identify issues.Log FilesUse log files to track errors and debug messages. You can use the error_log() function to log errors to a file.
Optimizing Performance
Optimizing PHP code and MySQL queries is essential for improving the performance and scalability of your web application. Here are some tips for optimizing performance:
TipDescriptionUse Efficient MySQL QueriesOptimize your MySQL queries by using indexes, limiting the number of queries, and using efficient query structures.Use PHP CachingUse PHP caching mechanisms like APCu or Memcached to reduce the load on your server and improve response times.Optimize PHP CodeOptimize your PHP code by reducing the number of database queries, using efficient algorithms, and minimizing unnecessary computations.
By following these guidelines, you can create a more robust, scalable, and secure web application using PHP and MySQL. Remember to always prioritize security, performance, and usability when building your app.
Securing Your App
Protecting your PHP & MySQL application from common web security threats is crucial.
Preventing SQL Injection
To prevent SQL injection, use prepared statements and input validation.
SQL injection attacks can have devastating consequences, including unauthorized access, data tampering, and deletion. Here's how to prevent them:
Prevention MethodDescriptionPrepared StatementsSeparate SQL code from data using parameterized queries.Input ValidationValidate user input using whitelisting, blacklisting, and escaping techniques.
Here's an example of using prepared statements in PHP:
$stmt = $conn->prepare("SELECT * FROM users WHERE username =?");
$stmt->bind_param("s", $username);
$stmt->execute();
Data Encryption and Secure Connections
Data encryption ensures sensitive data remains protected from unauthorized access. In PHP, you can use:
Encryption TechniqueDescriptionSymmetric EncryptionUses the same key for encryption and decryption.Asymmetric EncryptionUses a pair of keys, one for encryption and another for decryption.
To implement secure connections, use HTTPS (Hypertext Transfer Protocol Secure) protocol, which encrypts data transmitted between the client and server.
Here's an example of creating a secure connection using HTTPS:
$ssl_context = array(
    'ssl' => array(
        'verify_peer' => true,
        'verify_peer_name' => true,
        'allow_self_signed' => false
    )
);

$fp = stream_socket_client("ssl://example.com:443", $errno, $errstr, 30, STREAM_CLIENT_CONNECT, $ssl_context);
Session and File Security
Best practices for managing user sessions securely and handling file uploads and downloads:
Security MeasureDescriptionSecure Session StorageStore session data in a secure location, such as a database or secure file storage system.Regenerate Session IDsRegenerate session IDs after a user logs in or out to prevent session fixation attacks.Secure File UploadsValidate file uploads and store them in a secure location.Secure File DownloadsValidate file downloads and ensure they are transmitted securely using HTTPS.
By following these best practices, you can ensure your application's user sessions and file handling are secure and protected from unauthorized access.
Deploying Your App
Choosing a Hosting Environment
When you've built and secured your PHP & MySQL application, it's time to deploy it to a hosting environment. The choice of hosting environment depends on several factors, including the type of application, expected traffic, and scalability requirements.
Here are some popular hosting options for PHP & MySQL apps:
Hosting OptionDescriptionShared HostingSuitable for small to medium-sized applications with low to moderate traffic.VPS (Virtual Private Server)Ideal for applications requiring more resources and control, with medium to high traffic.Dedicated ServerBest for large-scale applications with high traffic and specific server requirements.Cloud HostingScalable and flexible, suitable for applications with variable traffic and resource requirements.
App Store Deployment
If you're building a web application that will be deployed in various app stores or platforms, such as Google Play Store or Apple App Store, there are additional considerations to keep in mind.
Here are some key requirements for app store deployment:
RequirementDescriptionCompliance with app store guidelinesEnsure your application complies with the app store's guidelines and policies.Optimization for mobile devicesOptimize your application for mobile devices, including responsive design and performance optimization.Security and data protectionImplement robust security measures to protect user data and ensure compliance with app store security requirements.Testing and debuggingThoroughly test and debug your application to ensure it meets app store quality standards.
By following these guidelines, you can successfully deploy your PHP & MySQL application to a hosting environment or app store, ensuring a seamless user experience and optimal performance.
Conclusion
Key Takeaways
In this tutorial, we've covered the essential steps to build dynamic web applications using PHP and MySQL. Here's a quick recap of what we've learned:
- Set up a development environment to write and test your code efficiently
- Create a database to store and manage your application's data
- Connect PHP to MySQL to interact with your database
- Build core app functions to perform CRUD (Create, Read, Update, Delete) operations
- Secure your app to protect user data and prevent common web attacks
Further Learning Resources
Now that you've completed this tutorial, you're ready to take your PHP and MySQL skills to the next level. Here are some additional resources to help you continue learning:
ResourceDescriptionOnline coursesUdemy, Coursera, and edX offer a wide range of courses on PHP and MySQL developmentBooks"PHP and MySQL Web Development" by Luke Welling and Laura Thomson, "MySQL Cookbook" by Paul DuBoisCommunity forumsParticipate in online forums, such as Reddit's r/learnprogramming and r/webdev, to connect with other developers and get help with any challenges you faceTutorials and blogsWebsites like SitePoint, Tuts+, and PHPMaster offer a wealth of tutorials, articles, and resources on PHP and MySQL development
Remember, practice is key to mastering PHP and MySQL. Continue to build projects, experiment with new techniques, and stay up-to-date with the latest developments in the field. Happy coding!
FAQs
Can I make an app using PHP and MySQL?
Yes, you can create a web application using PHP and MySQL. PHP is a server-side scripting language, and MySQL is a relational database management system. Together, they form a powerful combination for building dynamic web applications.
Is MySQL good for web development?
Yes, MySQL is a popular choice for web development. It efficiently stores and manages data, making it ideal for web applications that require a robust database management system.
Here's a summary of why MySQL is a good choice:
ReasonDescriptionEfficient data storageMySQL efficiently stores and manages data.Robust database managementIt provides a robust database management system for web applications.Popular choiceMySQL is a popular choice among web developers.
Related posts

PWA Offline Capabilities: Service Workers & Web API Integration
Progressive Web Apps (PWAs) allow users to access core app functionalities even without an internet connection by leveraging service workers to cache resources like images, stylesheets, and JavaScript files.
Key Benefits of PWA Offline Use:
- Enhanced User Experience: Provides a reliable and fast experience in areas with poor connectivity.
- Increased Engagement: Enables users to continue using the app while offline, boosting satisfaction and retention.
Service Workers Enable Offline Capabilities:
- Lifecycle Events:
- Installation: Cache resources for offline use
- Activation: Take control of the page
- Fetch: Intercept network requests and serve cached responses
- Registration: Register the service worker script to control the app
Web API Integration Enhances Offline Experience:
- Cache API: Cache resources for instant offline access
- Fetch API: Intercept requests and respond with cached data
- Background Sync API: Synchronize data when back online
- Push Notifications: Re-engage users with timely updates
Caching Strategies for Offline Data:
StrategyUse CaseCache-FirstStatic assets like images, styles, scriptsStale-While-RevalidateContent that's relatively static but updated occasionally
Best Practices:
- Security: Serve over HTTPS, validate cached data, obtain user consent
- Performance Optimization: Implement intelligent caching, cache-first approach
- Testing: Simulate offline scenarios, inspect caches, debug errors
PWAs with robust offline capabilities powered by service workers and Web APIs provide a seamless, fast, and engaging experience regardless of network conditions.
Service Workers in PWAs
Service workers are a crucial part of Progressive Web Apps (PWAs), enabling offline capabilities and managing network requests, caching, and push notifications. In this section, we'll explore the role of service workers in PWAs, their lifecycle events, and the process of registering a service worker.
Service Worker Lifecycle
The service worker lifecycle consists of three primary events: installation, activation, and fetch. Here's a breakdown of each event:
EventDescriptionInstallationThe service worker is downloaded and parsed. If successful, the install event is fired, allowing the service worker to cache resources and prepare for offline use.ActivationThe service worker is ready to take control of the page, and the activate event is fired.FetchThe service worker intercepts a network request, enabling it to respond with cached resources or handle the request accordingly.
Here's an example of how you can handle these events in your code:
self.addEventListener('install', event => {
  console.log('Service worker installed');
  // Cache resources and prepare for offline use
});

self.addEventListener('activate', event => {
  console.log('Service worker activated');
  // Take control of the page and manage caching
});

self.addEventListener('fetch', event => {
  console.log('Service worker fetching');
  // Respond with cached resources or handle the request
});
Registering a Service Worker
To register a service worker, you need to specify the scope of the worker and the location of the service worker script. Here's how to do it:
- Create a JavaScript file that will serve as the service worker script.
- In your main JavaScript file, use the
navigator.serviceWorker.register()method to register the service worker, passing in the URL of the service worker script and the scope.
Here's an example of how to register a service worker:
if ('serviceWorker' in navigator) {
  window.addEventListener('load', () => {
    navigator.serviceWorker.register('/service-worker.js', { scope: '/' })
    .then(registration => {
        console.log('Service worker registered:', registration);
      })
    .catch(error => {
        console.error('Service worker registration failed:', error);
      });
  });
}
In the next section, we'll explore the integration of service workers with Web APIs, enabling offline capabilities and enhancing the overall user experience.
Web APIs and Service Worker Integration
Service workers can integrate with various Web APIs to enable offline capabilities in Progressive Web Apps (PWAs). This integration allows developers to create a seamless user experience even when the app is offline.
Cache API for Offline Content
The Cache API is a crucial Web API that enables service workers to manage offline content availability. By caching resources, service workers can provide instant access to content even when the device is offline.
Here's how to use the Cache API:
StepDescription1Create a cache instance and add resources to it.2Access the cache instance through the caches property in the service worker's global scope.
Example code:
const cacheName = 'my-cache';
const urlsToCache = [
  '/',
  '/styles.css',
  '/script.js',
];

self.addEventListener('install', (event) => {
  event.waitUntil(
    caches.open(cacheName)
    .then((cache) => {
        console.log('Opened cache');
        return cache.addAll(urlsToCache);
      })
  );
});
Fetch API for Network Requests
The Fetch API plays a vital role in the service worker's network request interception and response strategy. When a network request is made, the service worker can intercept it and respond with cached resources or handle the request accordingly.
Here's how to use the Fetch API:
StepDescription1Listen for the fetch event in the service worker.2Respond with a cached resource or a network request.
Example code:
self.addEventListener('fetch', (event) => {
  event.respondWith(
    caches.open(cacheName)
    .then((cache) => {
        return cache.match(event.request)
        .then((response) => {
            return response || fetch(event.request);
          })
      })
  );
});
By integrating service workers with the Cache API and Fetch API, developers can create a robust offline experience for their PWA users. In the next section, we'll explore caching strategies for offline data.
Caching Strategies for Offline Data
Caching strategies are crucial for enabling offline capabilities in Progressive Web Apps (PWAs). By using the right caching strategy, developers can ensure a seamless user experience even when the device is offline. In this section, we'll explore different caching strategies, including cache-first, network-first, and stale-while-revalidate, and explain when and why each should be used for offline PWAs.
Cache-First Approach
The cache-first approach prioritizes serving content from the cache, only falling back to the network when the requested content is not available in the cache. This strategy is suitable for static assets, such as images, stylesheets, and scripts, which don't change frequently.
Cache-First StrategyDescription1. Check cache for requested contentIf available, serve from cache2. If not available, fetch from networkCache the response for future requests
Here's an example of how to implement a cache-first strategy:
async function cacheFirst(request) {
  const cachedResponse = await caches.match(request);
  if (cachedResponse) {
    return cachedResponse;
  }
  try {
    const networkResponse = await fetch(request);
    if (networkResponse.ok) {
      const cache = await caches.open("MyCache_1");
      cache.put(request, networkResponse.clone());
    }
    return networkResponse;
  } catch (error) {
    return Response.error();
  }
}
Stale-While-Revalidate Strategy
The stale-while-revalidate strategy serves content from the cache while simultaneously updating the cache with the latest content from the network. This approach provides a balance between speed and freshness, making it suitable for content that is relatively static but occasionally updated.
Stale-While-Revalidate StrategyDescription1. Serve cached content immediatelyProvide a fast response2. Update cache with latest content from networkEnsure freshness
Here's an example of how to implement a stale-while-revalidate strategy:
async function staleWhileRevalidate(request) {
  const cache = await caches.open("MyCache_1");
  const cachedResponse = await cache.match(request);
  const fetchPromise = fetch(request);
  if (cachedResponse) {
    fetchPromise.then((networkResponse) => {
      cache.put(request, networkResponse.clone());
    });
    return cachedResponse;
  } else {
    return fetchPromise;
  }
}
By understanding the different caching strategies and when to apply them, developers can create a robust offline experience for their PWA users. In the next section, we'll explore enhancing the offline experience with background sync and notifications.
Enhancing Offline Experience with Background Sync and Notifications
Enhancing the offline experience of Progressive Web Apps (PWAs) is crucial for providing a seamless user experience. In this section, we'll explore how to achieve this using Background Sync and Push APIs.
Background Sync API for Data Sync
The Background Sync API allows PWAs to synchronize data in the background when the device is online. This ensures that users can continue to use the app even when they don't have a network connection.
Here's how it works:
StepDescription1. User initiates an actionThe service worker intercepts the request and stores it in a queue.2. Device comes onlineThe service worker processes the queued tasks in the sync queue.
Push Notifications for User Engagement
Push notifications are an effective way to maintain user engagement and drive retention. By sending timely and relevant notifications, developers can encourage users to return to the app and continue using it.
To enable push notifications in a PWA, developers need to:
StepDescription1. Register a service workerRequest permission from the user to send notifications.2. Receive push eventsDisplay notifications to the user.
By combining Background Sync and Push APIs, developers can create a seamless offline experience for their PWA users. Users can continue to use the app even when they don't have a network connection, and can be notified of updates and events when they come online.
sbb-itb-8abf120
Debugging and Testing Service Workers
Debugging and testing service workers are crucial steps in ensuring that your Progressive Web App (PWA) provides a seamless offline experience. In this section, we'll explore the importance of debugging and testing service workers and provide a step-by-step approach to rigorously testing service worker caching and error handling in different network conditions.
Testing Service Worker Reliability
To test service worker reliability, follow these steps:
StepDescription1. Register a service workerRegister a service worker in your PWA and ensure it's installed correctly.2. Inspect service workerUse browser developer tools to inspect the service worker and verify its status.3. Test cachingTest the service worker's caching behavior by simulating different network conditions (e.g., offline, online, slow network).4. Test error handlingTest the service worker's error handling by simulating errors (e.g., network errors, cache errors).5. Verify functionalityVerify that the service worker functions correctly in different scenarios, including offline and online modes.
By following these steps, you can ensure that your service worker is reliable and provides a seamless offline experience for your PWA users.
Using Chrome DevTools for Debugging
Chrome DevTools provides a range of features to debug and test your service worker:
FeatureDescriptionService worker inspectionInspect the service worker and verify its status.Cache inspectionInspect the cache and verify that resources are cached correctly.Network request inspectionInspect network requests and verify that they're handled correctly by the service worker.Error debuggingDebug errors and verify that the service worker handles them correctly.
By using these tools and following the steps outlined above, you can ensure that your service worker is thoroughly tested and provides a reliable offline experience for your PWA users.
Best Practices for Deploying Service Workers
When deploying service workers, it's crucial to follow best practices to ensure a seamless offline experience for your Progressive Web App (PWA) users. In this section, we'll explore the importance of service worker security, performance optimization, and handling updates.
Service Worker Security
Service worker security is vital to prevent malicious attacks and ensure user trust. Here are some key considerations:
Security MeasureDescriptionHTTPS RequirementsEnsure your website is served over a secure connection.User ConsentObtain user consent for features like push notifications.Validate DataValidate data stored in the cache to prevent tampering.
By following these security best practices, you can ensure that your service worker is secure and trustworthy.
Optimizing Service Worker Performance
Optimizing service worker performance is essential to provide a fast and seamless offline experience. Here are some tips:
Optimization TechniqueDescriptionIntelligent CachingImplement caching strategies to minimize network requests.Cache-First ApproachServe cached resources instead of fetching them from the network.Performance TuningOptimize caching strategy, minimize network requests, and reduce cached resource size.
By optimizing your service worker's performance, you can significantly improve the user experience and reduce the load on your servers.
In the next section, we'll explore the importance of caching strategies for offline data and how to implement them effectively.
Conclusion: Offline-Ready PWAs
In this article, we've explored how Progressive Web Apps (PWAs) can provide a seamless experience even when users are offline. By using service workers and Web API integration, developers can create robust offline capabilities that enhance user satisfaction and increase engagement.
Key Takeaways
Here are the main points to remember:
Key PointDescriptionService workers enable offline capabilitiesService workers manage network requests, caching, and push notifications.Caching strategies are crucialImplement caching strategies to minimize network requests and provide a fast user experience.Performance optimization is essentialOptimize caching strategy, minimize network requests, and reduce cached resource size.Security considerations are vitalEnsure your website is served over a secure connection, obtain user consent, and validate data stored in the cache.
The Future of PWAs
As PWAs continue to evolve, we can expect to see further enhancements in offline capabilities. With the rise of IoT devices and wearables, the demand for offline-first experiences will only continue to grow.
By embracing the power of service workers and Web API integration, developers can create PWAs that provide a seamless, fast, and engaging experience, even in the most challenging network conditions.
In the world of PWAs, the future is offline-first, and it's up to us to create experiences that are both delightful and reliable, no matter the network conditions.
FAQs
What are service workers in PWA?
Service workers are scripts that run in the background, separate from the main JavaScript code of a page. They act as a proxy between the browser and the network, allowing for proper caching of website assets and making them available offline.
What does a service worker do in PWA?
A service worker can handle network requests, modify them, serve custom responses from the cache, or synthesize responses completely. They can also handle notifications and perform heavy calculations.
How to cache with service worker?
Here's a simple caching strategy:
StepDescription1. Check cacheIf the resource is in the cache, serve it from there.2. Fetch from networkIf not, fetch the resource from the network, store the response in the cache, and return the network response.
Can PWA be used offline?
Yes, PWAs can work offline by using service workers, which cache necessary assets and resources. This enables the app to continue functioning even when there is no internet connection.
Related posts

DOJ's New Web & App Accessibility Rule: What to Know
The Department of Justice (DOJ) has introduced new regulations requiring state and local governments to make their websites and mobile apps accessible to people with disabilities. These new rules mandate compliance with the Web Content Accessibility Guidelines (WCAG) 2.1 Level AA standards.
Key Points:
- Websites and apps must be perceivable, operable, understandable, and robust for assistive technologies.
- Compliance deadlines are April 24, 2026 for governments with a population of 50,000 or more, and April 26, 2027 for smaller governments and special districts.
- The rule sets a precedent for private businesses, particularly those that are public accommodations or receive federal funding, to ensure digital accessibility.
To comply, entities should:
- Use automated tools and manual evaluations to identify accessibility issues.
- Implement accessibility management platforms to track and manage efforts.
- Gather feedback from users with disabilities.
- Use semantic HTML and ARIA attributes.
- Ensure consistent layout and navigation.
Entity TypeDescriptionState and Local GovernmentsOffices providing benefits, services, schools, police, courts, hospitals, parks, libraries, transit, etc.Special District GovernmentsWater, sewer, fire, library districts, and other special districts.Educational InstitutionsUniversities and colleges, part of state and local government entity type.
Exceptions:
- Archived content meeting specific conditions.
- Preexisting conventional documents not needed for current purposes.
- Third-party content not pursuant to contractual arrangements.
- Individualized, password-protected conventional documents.
By understanding the key points and taking proactive steps, you can ensure your digital services are inclusive, accessible, and compliant with the DOJ's new regulations.
Standards for Following the Rules
The Department of Justice (DOJ) has set specific standards for state and local governments to follow when making their websites and mobile applications accessible. These standards are based on the Web Content Accessibility Guidelines (WCAG) 2.1 Level AA.
What are the WCAG 2.1 Level AA standards?
WCAG 2.1 Level AA is an internationally recognized standard that outlines criteria for making digital content more accessible to individuals with disabilities. The standard is divided into four main principles:
PrincipleDescriptionPerceivableContent must be presentable to users in ways they can perceive. This includes providing text alternatives for non-text content, creating captions and audio descriptions for multimedia, and ensuring information and user interface components have adequate contrast.OperableUser interface components and navigation must be operable. This involves making all functionality available from a keyboard, providing users enough time to read and use content, and helping users navigate and find content.UnderstandableContent and user interface operations must be understandable. This requires making text readable and understandable, making web pages appear and operate in predictable ways, and helping users avoid and correct mistakes.RobustContent must be robust enough to be interpreted reliably by a wide variety of user agents, including assistive technologies. This involves maximizing compatibility with current and future user agents.
What about WCAG 2.2?
While the DOJ has referenced WCAG 2.1 in this rule, it acknowledges that WCAG 2.2 is the latest version. However, due to the extensive educational resources available for WCAG 2.1 and the rulemaking process requiring a specific version reference, WCAG 2.1 Level AA remains the current requirement.
Exceptions and Allowances
The DOJ has clarified that while full conformance to WCAG 2.1 Level AA is expected, minor instances of non-conformance may be permissible if it can be demonstrated that they do not impact the ability of individuals with disabilities to access and use the content or functionality. Additionally, the rule provides allowances for specific situations where an alternative conforming version can be provided when making the original content accessible is not possible.
Deadlines for Following the Rules
The Department of Justice (DOJ) has set specific deadlines for state and local governments to comply with the new web and app accessibility rules. These deadlines vary based on the population size of the government entity.
Compliance Timelines
The following deadlines apply:
Population SizeDeadline50,000 or moreApril 24, 2026Less than 50,000, and special district governmentsApril 26, 2027
These deadlines provide a clear timeline for governments to ensure their websites and mobile applications meet the WCAG 2.1 Level AA standards. It's essential for developers and businesses to understand these deadlines and plan accordingly to ensure compliance.
What do these deadlines mean for developers and businesses?
These deadlines mean that developers and businesses working with state and local governments must:
- Ensure all new websites and mobile applications meet the WCAG 2.1 Level AA standards from the outset.
- Retrofit existing websites and mobile applications to meet these standards within the specified deadlines.
By understanding these deadlines and requirements, developers and businesses can proactively plan and budget for accessibility compliance, avoiding potential legal issues and ensuring equal access to government services for individuals with disabilities.
Entity Types and Requirements
The Department of Justice's (DOJ) new web and app accessibility rule applies to various entity types, classified based on population size. Understanding these entity types and their requirements is crucial for developers, businesses, and governments to ensure compliance with the Americans with Disabilities Act (ADA).
Entity Types
The following entity types are subject to the rule:
Entity TypeDescriptionState and Local GovernmentsOffices that provide benefits and/or social services, public schools, community colleges, public universities, police departments, courts, elections offices, public hospitals, public healthcare clinics, public parks, recreation programs, public libraries, and public transit agencies.Special District GovernmentsWater and sewer districts, fire districts, library districts, and other special districts.Educational InstitutionsUniversities and colleges, considered part of state and local government entity type.
Requirements
All entity types must ensure their websites and mobile applications meet the WCAG 2.1 Level AA standards. Deadlines for compliance vary based on population size.
It is essential for developers, businesses, and governments to understand the entity types and requirements outlined in the DOJ's new web and app accessibility rule. By doing so, they can ensure compliance with the ADA and provide equal access to government services for individuals with disabilities.
Exceptions to Following the Rules
The DOJ's new web and app accessibility rule provides exceptions for certain types of content, reducing the burden on state and local governments to make all their digital assets accessible. These exceptions are crucial to understand, as they can impact the scope of accessibility efforts.
Archived Content
The rule exempts archived web content that meets specific conditions. To qualify, the content must:
- Have been created before the compliance date
- Be retained exclusively for reference, research, or recordkeeping
- Not be altered or updated after archiving
- Be stored and organized in a dedicated area clearly identified as archival
This exception acknowledges that archived content is not regularly used or updated, making it less critical to prioritize accessibility.
Preexisting Conventional Documents
The rule also exempts preexisting "conventional electronic documents," such as PDFs, word processing documents, presentation format documents, and spreadsheet file formats. These documents are exempt if:
ConditionDescriptionCreated before compliance deadlineDocuments created before the compliance deadline are exemptNot needed for current purposesDocuments not necessary for current government programs, services, or activities are exempt
However, if these documents are still necessary for current purposes, they must be made accessible.
Content Posted by Third Parties
Third-party website content is also exempt, unless it is posted pursuant to contractual, licensing, or other arrangements with a covered entity. For example:
- A government entity's social media account may have user-generated content that is not accessible, but this content is exempt from the rule.
- If the government entity links to third-party content that is necessary to participate in their programs, services, or activities, that content must be made accessible.
Individualized, Password-Protected, Conventional Documents
Conventional electronic documents that are personalized about a specific individual or specific property and not of general interest to users of the government entity's services are exempt if they are password-protected or otherwise secured. While these documents are exempt, the public entity may still need to convert them to an accessible format based on a disabled user's request.
Understanding these exceptions is vital to ensure that state and local governments prioritize accessibility efforts effectively, focusing on the most critical digital assets and minimizing unnecessary burdens.
sbb-itb-8abf120
Strategies for Following the Rules
To comply with the new web and app accessibility regulations, it's crucial to implement practical strategies that prioritize accessibility. Here are some effective approaches to consider:
Automated Tools and Manual Evaluations
Use automated tools, such as accessibility scanners and auditing software, to identify potential accessibility issues in your digital assets. These tools can help you detect issues related to color contrast, image alt text, and keyboard navigation, among others. However, it's essential to supplement automated testing with manual evaluations to ensure a comprehensive assessment.
Accessibility Management Platforms
Invest in accessibility management platforms that provide a centralized dashboard to track and manage accessibility efforts across your organization. These platforms can help you identify areas of improvement, assign tasks, and monitor progress.
Feedback from Users with Disabilities
Gather feedback from users with disabilities to gain valuable insights into the accessibility of your digital assets. This feedback can help you identify issues that may not be caught through automated testing or manual evaluations.
Semantic HTML and ARIA Attributes
Use semantic HTML and ARIA (Accessible Rich Internet Applications) attributes to ensure that your digital assets are accessible to users with disabilities. Semantic HTML provides a clear structure to your content, making it easier for assistive technologies to interpret, while ARIA attributes provide additional information about dynamic content and interactive elements.
Consistent Layout and Navigation
Implement a consistent layout and navigation across your digital assets to ensure that users with disabilities can easily navigate and find the information they need.
By incorporating these strategies into your accessibility efforts, you can ensure that your digital assets are accessible to users with disabilities and comply with the new regulations.
Key Takeaways
StrategyDescriptionAutomated Tools and Manual EvaluationsIdentify accessibility issues using automated tools and manual evaluationsAccessibility Management PlatformsTrack and manage accessibility efforts across your organizationFeedback from Users with DisabilitiesGather feedback to identify accessibility issuesSemantic HTML and ARIA AttributesEnsure accessibility using semantic HTML and ARIA attributesConsistent Layout and NavigationImplement consistent layout and navigation for easy navigation
By following these strategies, you can ensure that your digital assets are accessible to users with disabilities and comply with the new web and app accessibility regulations.
Impact on Private Businesses
The Department of Justice's (DOJ) new web and app accessibility rule is expected to have a broader impact beyond state and local governments, influencing website accessibility requirements for private-sector businesses and entities receiving federal funding.
Private Businesses Should Take Note
Although the regulation is limited to state and local governments, it sets a precedent for private businesses, particularly those that are public accommodations or recipients of federal funding. Industries such as higher education and healthcare, which are filled with private entities that are recipients of federal financial assistance, can expect the DOJ to soon make this regulation applicable to recipients under the Rehabilitation Act.
Preparing for Accessibility
Private businesses should prepare to ensure their websites and mobile apps are accessible to people with disabilities. This may involve:
- Using automated tools and manual evaluations to identify accessibility issues
- Implementing accessibility management platforms to track and manage accessibility efforts
- Gathering feedback from users with disabilities to identify areas of improvement
- Using semantic HTML and ARIA attributes to ensure accessibility
By understanding the implications of the DOJ's new web and app accessibility rule, private businesses can proactively take steps to ensure their digital assets are accessible and compliant with the regulations, ultimately providing equal access to their goods, services, and programs for people with disabilities.
Key Points and Getting Ready
The Department of Justice's (DOJ) new web and app accessibility rule is a significant step towards ensuring equal access to digital services for people with disabilities. As state and local governments, private businesses, and recipients of federal funding prepare to comply with the regulations, it's essential to understand the key takeaways and implications.
Key Takeaways
- The DOJ's new rule requires state and local governments to make their websites and mobile apps accessible to people with disabilities, following the technical standards outlined in WCAG 2.1 AA.
- The rule sets a precedent for private businesses, particularly those that are public accommodations or recipients of federal funding, to ensure their digital assets are accessible and compliant.
- The regulation emphasizes the importance of proactive measures to ensure inclusivity and compliance in the tech industry.
Getting Ready
To stay ahead of the curve, it's crucial to:
StepAction1Familiarize yourself with the WCAG 2.1 AA guidelines and technical standards.2Conduct accessibility audits and identify areas of improvement for your website and mobile app.3Develop a plan to implement accessibility features and ensure ongoing compliance.4Stay informed about updates and developments in web and app accessibility regulations.
By understanding the key points and taking proactive steps, you can ensure your digital services are inclusive, accessible, and compliant with the DOJ's new regulations.
FAQs
How do I ensure ADA compliance on my website?
To ensure ADA compliance on your website, follow these steps:
Conduct an Accessibility Audit
Use tools like WAVE Web Accessibility Tool or AXE to identify areas of improvement on your website.
Make Your Website Visuals Accessible
- Ensure sufficient color contrast
- Use clear and consistent navigation
- Make interactive elements accessible
Write Accessible Content
- Write clear and concise content
- Use headings and subheadings
- Make acronyms and abbreviations accessible
Ensure Website Code Meets ADA Standards
Review and refine your website's backend code to ensure it adheres to accessibility standards.
By following these steps, you can make your website more inclusive and accessible to users with disabilities, while also avoiding potential legal issues.
Related posts

App Maintenance Costs 2024: Strategies to Balance Quality
Regular app maintenance is crucial to ensure a seamless user experience, prevent security vulnerabilities, and stay ahead of the competition. Neglecting app upkeep can lead to:
- User Experience Deterioration: Decline in user engagement, retention, and revenue
- Security Risks: Data breaches, identity theft, financial losses, and damage to brand reputation
- App Instability and Crashes: Frustrated users, negative reviews, and loss of revenue
- Loss of Competitive Advantage: Falling behind competitors, losing market share, and decreased revenue
To maintain high-quality apps while managing costs, consider these strategies:
StrategyBenefitsCross-Platform AppsReduced maintenance costs, saved time and resourcesMVP FirstPrioritized essential features, reduced unnecessary updatesAgile DevelopmentEarly user feedback, continuous improvementMonitor App PerformanceIdentified areas for improvement, fixed bugs, optimized user experienceRegular System MaintenanceSecure, stable, and up-to-date app, avoided downtime and security breaches
By prioritizing tasks, implementing proactive updates, optimizing app performance, outsourcing, and fostering a continuous improvement culture, entrepreneurs can balance quality and costs effectively.
Costs of Keeping Apps Running
Expense Breakdown
App maintenance costs can be broken down into several key categories. Here's a breakdown of the typical expenses:
CategoryDescriptionServer feesHosting and maintaining your app's servers, including storage, bandwidth, and security.Monitoring and loggingTools and services used to monitor app performance, track user behavior, and log errors.Licensing and royaltiesLicensing third-party software, APIs, or intellectual property used in your app.Emergency interventionUrgent fixes, patches, or updates required to address critical issues or security vulnerabilities.Software updatesUpdating your app to ensure compatibility with new operating systems, devices, or browsers.Security patchesImplementing security patches and updates to protect user data and prevent breaches.User supportProviding customer support, including helpdesk software, staff salaries, and training.
Cost Factors
Several factors can influence the overall cost of app maintenance. Here are some key considerations:
- App complexity: The more complex your app, the higher the maintenance costs.
- User base growth: As your user base grows, so do the demands on your app's infrastructure.
- Platform choice: The choice of platform (e.g., iOS, Android, web) can impact maintenance costs.
- Rate of technological change: The rapid pace of technological change in the mobile app industry can drive up maintenance costs.
By understanding these cost factors, you can better plan and budget for app maintenance, ensuring your app remains competitive, secure, and user-friendly.
Risks of Skipping App Upkeep
Neglecting app maintenance can have severe consequences on user experience, security, app stability, and overall business reputation. Here are some of the risks you may face:
User Experience Deterioration
If you don't maintain your app, users may encounter slow performance, bugs, and errors. This can lead to a decline in user engagement, retention, and ultimately, a loss of customers. According to a Statista report, more than 70% of app users uninstall apps within 90 days of installing them on their smartphones. Regular maintenance helps ensure a seamless user experience, keeping your users happy and loyal.
Security Vulnerabilities
Failing to update your app's security patches and fixes can expose your users' sensitive data to cyber threats. This can lead to data breaches, identity theft, and financial losses. Moreover, a security breach can damage your brand's reputation and erode user trust.
App Instability and Crashes
An unmaintained app is more likely to crash or become unstable, leading to frustrated users and negative reviews. This can also result in a loss of revenue, as users may abandon your app and switch to a competitor's.
Loss of Competitive Advantage
In today's fast-paced digital landscape, staying ahead of the competition is crucial. Neglecting app maintenance can cause your app to fall behind, losing its competitive edge. Regular updates and improvements help you stay ahead of the curve, offering new features and functionalities that keep your users engaged and attract new ones.
Here's a summary of the risks of skipping app upkeep:
RiskConsequenceUser Experience DeteriorationDecline in user engagement, retention, and revenueSecurity VulnerabilitiesData breaches, identity theft, financial losses, and damage to brand reputationApp Instability and CrashesFrustrated users, negative reviews, and loss of revenueLoss of Competitive AdvantageFalling behind competitors, losing market share, and decreased revenue
By neglecting app maintenance, you risk damaging your brand's reputation, losing users, and compromising security. Regular maintenance is essential to ensure your app remains competitive, secure, and user-friendly.
sbb-itb-8abf120
Cost-Effective Quality Strategies
To maintain high-quality apps while managing costs, entrepreneurs can adopt various strategic approaches. Here are some cost-effective quality strategies to ensure your app remains competitive without breaking the bank.
Prioritizing Tasks
Effective task prioritization is crucial to maximize efficiency and minimize costs. Assess and rank maintenance tasks based on urgency, value to the user, and available resources. Focus on high-priority tasks that address critical issues, improve user experience, or enhance security.
Task PriorityDescriptionHighCritical issues, user experience, securityMediumPerformance optimization, feature updatesLowCosmetic changes, minor bug fixes
Proactive Updates
A proactive maintenance strategy involves regular software updates, quality assurance testing, and monitoring to pre-empt issues. This approach helps identify and fix problems before they escalate, reducing the likelihood of costly rework, downtime, or security breaches.
App Optimization
Optimizing app performance can significantly reduce server load and infrastructure costs. Analyze user feedback, monitor app performance, and identify areas for improvement. Implementing efficient coding practices, caching, and content delivery networks (CDNs) can help reduce server load and improve response times.
Outsourcing and Partnerships
Entrusting certain maintenance tasks to external experts can be a cost-effective strategy. Collaborate with development agencies or freelancers who specialize in specific areas, such as security audits, performance optimization, or UI/UX design.
Continuous Improvement Culture
Inspire a maintenance-focused mindset in your development team by embracing ongoing learning, innovation, and knowledge sharing. Encourage team members to share best practices, participate in training and workshops, and stay updated with the latest technologies and trends.
By adopting these cost-effective quality strategies, entrepreneurs can maintain high-quality apps while managing costs, ensuring a competitive edge in the market.
Effective App Upkeep Strategies
To keep your app competitive and user-friendly while controlling maintenance costs, it's essential to adopt effective upkeep strategies. Here are some key approaches to help you achieve this balance:
Invest in Cross-Platform Apps
Developing cross-platform apps can reduce maintenance costs by allowing you to maintain a single codebase across multiple operating systems. This approach also saves time and resources, enabling you to focus on other critical aspects of your app.
Focus on Building an MVP First
Creating a minimum viable product (MVP) helps you prioritize essential features and functionalities, reducing the likelihood of unnecessary updates and maintenance tasks. This approach also enables you to gather user feedback and iterate on your app's development.
Implement Agile Development Methodology
Agile development involves delivering products in short cycles, allowing for early user feedback and reducing the need for major updates. This approach also promotes continuous improvement, ensuring your app remains up-to-date and aligned with user expectations.
Monitor App Performance and User Feedback
Regularly monitoring app performance and user feedback helps you identify areas for improvement, fix bugs, and optimize your app's overall user experience. This proactive approach enables you to address issues before they escalate, reducing maintenance costs and improving user satisfaction.
Schedule Regular System Maintenance
Scheduling regular system maintenance ensures that your app remains secure, stable, and up-to-date. This approach also helps you avoid unexpected downtime, data losses, or security breaches, which can be costly to rectify.
By incorporating these effective app upkeep strategies into your maintenance plan, you can ensure your app remains competitive, user-friendly, and cost-effective, ultimately driving business success.
StrategyBenefitsCross-Platform AppsReduced maintenance costs, saved time and resourcesMVP FirstPrioritized essential features, reduced unnecessary updatesAgile DevelopmentEarly user feedback, continuous improvementMonitor App PerformanceIdentified areas for improvement, fixed bugs, optimized user experienceRegular System MaintenanceSecure, stable, and up-to-date app, avoided downtime and security breaches
FAQs
What are application performance monitoring tools?
Application performance monitoring (APM) tools are software solutions that help monitor and manage the performance and availability of software applications. They provide real-time insights into the application's operations, helping to detect and resolve performance issues before they impact the user experience.
What do APM tools track?
APM tools track various metrics related to application performance, including:
MetricDescriptionResponse timesHow long it takes for the application to respond to user requestsError ratesThe number of errors that occur within the applicationThroughputThe amount of data processed by the application
Why are APM tools important?
APM tools are essential for developers and IT operations teams to:
- Identify bottlenecks and performance issues
- Understand dependencies within the application architecture
- Pinpoint the root causes of performance problems
By using APM tools, teams can ensure their applications are fast, reliable, and provide a great user experience.
Related posts

Mobile App ADA Compliance Checklist 2024
The Americans with Disabilities Act (ADA) ensures mobile apps are accessible and usable by individuals with disabilities. Nearly 50 million Americans have disabilities and rely on mobile apps. By following ADA guidelines, developers can create inclusive apps that provide equal access to all users, regardless of their abilities.
Key ADA Requirements for Mobile Apps
RequirementDescriptionWCAG 2.1Web Content Accessibility Guidelines for making web and mobile content accessibleCVAARequires accessible mobile apps with closed captions, audio descriptions, and accessible user interfacesPlatform AccessibilityiOS, Android, and web platforms have built-in accessibility features and guidelines
ADA Compliance Checklist
App Structure and Navigation
- Clear app title
- Proper heading hierarchy
- ARIA landmarks for navigation
- Proper touch event handling
Touch Targets and Interactive Elements
- Touch targets at least 9mm x 9mm
- Proper placement of interactive elements
- Single-finger operation
Color Contrast and Visual Accessibility
- Minimum color contrast ratio of 4.5:1
- Avoid problematic color combinations
- Alternative text for images and icons
Responsive Design
- Design for different screen sizes and orientations
- Adjust font sizes and layouts
- Optimize form fields and data presentation
Consistent User Experience
- Consistent content and layout
- Clear language
- Clear instructions and feedback
Simple Data Entry
- Select menus and checkboxes
- Autofill and dictation
- Clear labels and instructions
Accessible Content and Media
- Captions and visual aids
- Clear language
- Logical content organization
Screen Reader Compatibility
- Effective labeling
- Alternative text
- Screen reader functionality
Accessibility Testing
- Usability testing with users with disabilities
- Automated testing tools
- User feedback
By following this ADA compliance checklist, developers can create mobile apps that are accessible, usable, and beneficial to all users, including those with disabilities.
Legal Requirements for Accessible Mobile Apps
Mobile apps must comply with legal requirements for accessibility. In the United States, the Americans with Disabilities Act (ADA) and the 21st Century Communications and Video Accessibility Act (CVAA) govern mobile app accessibility.
Key Guidelines and Requirements
Guideline/RequirementDescriptionWCAG 2.1Web Content Accessibility Guidelines provide a framework for making web and mobile content accessible to people with disabilities.CVAARequires mobile apps and digital content to be accessible to individuals with disabilities, including closed captions for audio and video content, audio descriptions for visually impaired users, and accessible user interfaces.iOS, Android, and Web PlatformsBuilt-in accessibility features are available on iOS and Android, and web platforms have accessibility features and guidelines to ensure equal access to information and services.
By understanding and complying with these legal requirements, mobile app developers can create inclusive and accessible apps that provide equal opportunities for all users, regardless of their abilities.
sbb-itb-8abf120
Checklist for ADA Compliant Mobile App Design
App Structure and Navigation
To ensure ADA compliance, your mobile app's structure and navigation should be clear and easy to use. This includes:
- Clear App Title: Provide a title that describes the app's purpose.
- Proper Heading Hierarchy: Use headings to help screen readers and users with visual impairments.
- ARIA Landmarks: Use ARIA landmarks to facilitate easy navigation.
- Touch Events: Ensure touch events are handled correctly to accommodate users with motor impairments.
Touch Targets and Interactive Elements
When designing touch targets and interactive elements, consider the following best practices:
GuidelineDescriptionTouch Target SizeEnsure touch targets are at least 9 mm by 9 mm to accommodate users with motor impairments.Interactive Element PlacementPlace interactive elements to minimize accidental taps and allow for easy navigation.Single-Finger OperationEnsure interactive elements can be operated using a single finger or stylus.
Color Contrast and Visual Accessibility
To ensure visual accessibility, follow these guidelines:
GuidelineDescriptionColor Contrast RatioMaintain a minimum color contrast ratio of 4.5:1 for normal text and 3:1 for large text (18pt or larger).Problematic Color CombinationsAvoid using color combinations that can be difficult for color-blind users to distinguish.Alternative TextProvide alternative text descriptions for images and icons to assist users with visual impairments.
Responsive Design for Different Screen Sizes
To accommodate various screen sizes, consider the following strategies:
- Design for Different Screen Sizes: Design for different screen sizes and orientations to ensure content is easily accessible and usable.
- Adjust Font Sizes and Layouts: Adjust font sizes and layouts to accommodate different screen sizes and zoom levels.
- Form Fields and Data Presentation: Ensure form fields and data presentation are adjusted accordingly to prevent clutter and confusion.
Consistent User Experience and Navigation
Maintaining a consistent user experience and navigation is crucial for users with cognitive disabilities. This includes:
- Consistent Content and Layout: Consistently present content, layout, and navigation throughout the app.
- Clear Language: Use clear and concise language to facilitate easy understanding.
- Clear Instructions and Feedback: Provide clear instructions and feedback to help users navigate the app successfully.
Simple Data Entry Methods
To minimize manual text entry, consider the following methods:
- Select Menus and Checkboxes: Utilize select menus and checkboxes to reduce manual input.
- Autofill and Dictation: Implement autofill and dictation features to simplify data entry.
- Clear Labels and Instructions: Provide clear and concise labels and instructions to facilitate easy data entry.
Accessible Content and Media
To optimize app content for users with cognitive disabilities, consider the following:
- Captions and Visual Aids: Provide captions and visual aids for auditory and visual content.
- Clear Language: Use clear and concise language to facilitate easy understanding.
- Logical Content Organization: Organize content in a logical and consistent manner to facilitate easy navigation.
Screen Reader Compatibility
To ensure screen reader compatibility, consider the following:
- Effective Labeling: Label interactive elements effectively to facilitate easy navigation.
- Alternative Text: Provide alternative text descriptions for images and icons.
- Screen Reader Functionality: Ensure the app's functionality and content are accessible through third-party screen readers.
Accessibility Testing and User Feedback
Involving a diverse user base in the testing process is crucial for identifying and resolving accessibility issues. Consider the following:
- Usability Testing: Conduct usability testing with users with disabilities to identify accessibility issues.
- Automated Tools: Use automated tools to identify and resolve accessibility issues.
- User Feedback: Gather user feedback to improve the app's accessibility and usability.
Tools for Accessible Mobile App Development
Mobile app development involves various tools and services to ensure ADA compliance. Here, we'll review some essential tools and services that can assist in making mobile apps accessible.
iOS Accessibility Tools
For iOS app development, Apple provides several built-in accessibility tools to validate the app's accessibility. These include:
ToolDescriptionAccessibility InspectorShows all the actions that can be performed by selecting and interacting with the elements on the screen.VoiceOverA built-in screen reader that provides spoken descriptions of on-screen content and allows users to navigate through apps using gestures and voice commands.A11yToolsA suite of web accessibility testing tools that can be used to test mobile apps for accessibility.
Android Accessibility Tools
For Android app development, Google provides several accessibility tools to assist in making apps more accessible. These include:
ToolDescriptionAccessibility ScannerA free tool that analyzes the accessibility of an app and provides suggestions for improvement.Android Accessibility SuiteA collection of accessibility services that help users use their Android device eyes-free or with a switch device.TalkBackA built-in screen reader that provides similar functionality to VoiceOver.
AccessiBe for Compliance

AccessiBe is a popular service that provides WCAG, ADA, AODA, and Section 508 compliance services suitable for websites and mobile applications. It offers a comprehensive accessibility audit, remediation, and certification process to ensure your app meets the required accessibility standards.
By utilizing these tools and services, you can ensure that your mobile app is accessible to a wider audience, including users with disabilities. Remember to test your app regularly to identify and resolve any accessibility issues that may arise during development.
Conclusion: Accessibility as a Standard Practice
Creating mobile apps that comply with the Americans with Disabilities Act (ADA) is crucial for ensuring inclusivity and reaching a broader audience. By following the ADA compliance checklist, developers can ensure that their apps are accessible to users with disabilities, enhancing the user experience and promoting digital equality.
Why Accessibility Matters
- Over 1 billion people worldwide live with disabilities.
- Accessible apps can tap into a larger market and improve brand reputation.
- Accessibility promotes a more inclusive digital landscape.
Prioritizing Accessibility
The ADA compliance checklist is not a one-time task, but rather an ongoing process that requires regular testing, feedback, and improvement. By prioritizing accessibility, developers can create apps that are not only compliant with ADA regulations but also provide a seamless user experience for all users.
Making a Difference
Accessibility is not just a legal requirement, but a moral obligation to ensure that everyone has equal access to digital resources. By making accessibility a standard practice, we can create a more inclusive and equitable digital world.
FAQs
Do mobile apps need to be ADA compliant?
Yes, mobile apps must comply with the Americans with Disabilities Act (ADA) to ensure equal access to digital resources for users with disabilities.
What accessibility features should an app have?
Here are some essential accessibility features to include in your app:
FeatureDescriptionSimple GesturesUse simple tap or swipe gestures instead of complex ones to make it easy for users with motor or dexterity impairments.Ample FeedbackProvide clear and timely feedback to users when they interact with your app.
By incorporating these accessibility features, you can create a more inclusive and user-friendly app for everyone.
Related posts

Mobile App deployment: Best Practices 2024
Launching a mobile app in 2024? Here's what you need to know to stand out among millions. We'll cover:
- Key Deployment Steps: From app design and testing to making your app easy to find in stores.
- Best Practices for Deployment: Including code review, security audits, and performance testing.
- Deployment Strategies: Pros and cons of recreate, rolling, blue/green, canary, and shadow deployment.
- Automation: How CI/CD pipelines can streamline your deployment process.
- Post-Deployment: Importance of monitoring, analytics, and continuous improvement.
- Case Studies: Real-world examples of successful app deployments.
Whether it's your first launch or an update, this guide offers practical advice to increase downloads, user engagement, and revenue. Ready to make your app a success? Let's dive in.
What is Mobile App Deployment?
Mobile app deployment is about getting your app out there for people to use. It means putting your finished app into app stores like those for Android and iOS, so anyone can download and start using it. Here's what's involved:
- Setting up the support system and servers for your app so it can handle many users
- Preparing the app for different types of phones and operating systems
- Following all the rules set by app stores
- Submitting your app for review and waiting for it to be approved
- Finally, making your app available for people to find and download
It's the step that comes after all the designing and testing, letting your app meet its audience.
Importance of Deployment Stage
Getting your app into the hands of users is crucial. If it's not done right, your app might not:
- Be found by the people you want to reach
- Look appealing enough to download
- Work as users expect, making them happy
- Have all the cool features you've promised
And if these things don't happen, you might not see:
- Lots of downloads
- People sticking around and using the app
- The money you hoped to make
Doing deployment well means you can keep track of how many people are downloading your app, how many keep using it, and how much money you're making.
Deployment Environments
Before your app gets to the public, it goes through different stages:
- Development - Where the app is built and first tested
- Testing - Where the app is checked for any issues
- Staging - A final check in an environment that's just like the real deal
- Production - When your app is live and available for everyone
Each stage is important for making sure your app works perfectly when someone downloads it. By carefully moving your app through these stages, you make sure it's ready for the real world.
Pre-Deployment Checklist
Before you launch your app, it's super important to go through a checklist to catch any problems. This can help stop bad reviews and users getting upset if something's wrong. Here's what you should look at:
Code Review
- Go over your code carefully to find any bugs, stuff you don't need anymore, or things that could slow your app down.
- Make sure all the parts of your app look good and work right on different phone sizes.
- Update any old parts of your app that depend on other software to work.
- Set up tools to tell you when something crashes or goes wrong.
Security Audits
- Test your app to make sure it's safe from hackers.
- Check how your app keeps user data safe. Make sure it's encrypted and only the right people can see it, especially if it's sensitive info.
- Make sure your app follows the rules for protecting user data and making your app accessible to everyone, depending on where your users are.
Performance Testing
- Run tests to see how your app handles a lot of users at once.
- Make sure your app works well even on cheaper phones or slow internet.
- Look for any issues that cause your app to use too much memory, drain the battery quickly, or crash after being used for a while.
- Keep an eye on how often your app crashes during tests. You want this to happen less than 1% of the time.
Taking the time to really check and test your app before it goes live can make a big difference. Skipping this step can lead to big headaches later when you have to fix problems that make users unhappy. Plan your testing well to catch the biggest issues before anyone else does.
Deployment Strategies
Let's look at five common ways to release your app - recreate, rolling, blue/green, canary, and shadow. We'll talk about what's good and what's not so good about each one to help you decide which method fits your app and business best.
Recreate Deployment
With the recreate strategy, you turn off the old version of your app and start the new one from zero.
ProsConsKeeps code tidyYour app won't work for a bit during the switchEasy to see what's happeningOnly works one update at a time
This method is best for apps that are simple or don't have a lot of users yet.
Rolling Deployment
Rolling deployment gradually replaces parts of the old app with the new version. You can adjust how fast this happens.
ProsConsLess time when the app isn't workingSetting it up can be trickyYou can watch and adjust easilyGoing back to the old version takes time
It's good for important apps that need to keep running all the time.
Blue/Green Deployment
This method has two identical setups: one is called blue and the other green. You update one while the other one keeps running.
ProsConsSwitching doesn't stop your appNeeds twice the usual resourcesEasy to go back if neededSetting it up is complicated
It's great for making updates without any downtime.
Canary Deployment
Canary deployment first releases the new version to just a few users. If all goes well, everyone else gets it too.
ProsConsQuick feedback from usersTakes longer to reach everyoneLess riskyNeeds a complex setup
This method is perfect for testing how new features perform with real users before a full launch.
Shadow Deployment
Shadow deployment runs the old and new versions at the same time. The new one is in 'shadow mode'.
ProsConsEasy to go back if neededUses a lot of resourcesCan gradually introduce the new versionHard to analyze data from the new version
This way, you can compare the old and new versions under real conditions.
Picking the right way to release your software can make updates smoother. The best choice depends on your app, what your setup is like, who's on your team, and what you're aiming to achieve.
Automation in Deployment
Making app deployment automatic through CI/CD pipelines is a big deal for getting apps out quickly and efficiently in 2024. These pipelines set up a system where your app is automatically built, tested, and sent out every time you make changes to the code.
Benefits of Automated Deployment
Going automatic has lots of perks:
- Faster release cycles - You can push out new stuff or fixes super quickly because it's all done without manual work. This means you can make users happy by responding to their feedback swiftly.
- Fewer errors - The system checks for problems before they bother users. It looks at everything from how the app looks and works to security issues.
- Improved reliability and uptime - With automatic checks, if something goes wrong, it gets spotted and fixed faster.
- Consistency - Every release goes through the same steps, so there's less chance of mistakes.
- More time for innovation - Developers have more time to work on new ideas instead of boring, repetitive tasks.
CI/CD Tools
Here are some tools that help with automatic deployment:
- Jenkins - A very flexible tool that works well with others.
- CircleCI - Great for teams that use GitHub, it's all online.
- Travis CI - Another good choice for GitHub users, easy to start with.
- GitLab CI - Comes with GitLab, so no extra setup needed.
- GitHub Actions - Built into GitHub, making it super integrated.
These tools help run automatic checks, tests, and deployments when you change your code. You set up the rules for when and how this happens.
Tips for Automated Deployment
Here are some pointers for setting up automatic deployment:
- Start with small steps, add more automation as you go
- Test your automatic steps thoroughly before you rely on them
- Keep an eye on how well your setup is working and fix any issues
- Test changes in a separate area before going live
- Have a way to undo changes if something goes wrong
- Make sure your system checks for security issues on its own
- Set up alerts for important events
- Write down how things should work so everyone knows
Following these steps will help keep your app updates smooth and efficient.
Post-Deployment Best Practices
Monitoring and Analytics
After you launch your app, it's really important to keep an eye on how it's doing. Use tools that can show you stuff like:
- User engagement - Check how long people stay in your app, which parts they use the most, and what they like. This helps you see what's working and what's not.
- User retention - Keep track of how many people come back to your app after they've downloaded it. If lots of people keep using your app, that means they like it.
- Crash rate - Pay attention to how often your app stops working. You want this to happen very rarely. If your app crashes a lot, you need to figure out why and fix it.
- Revenue metrics - If your app makes money through sales or in-app purchases, watch how much you're earning. If you're not hitting your goals, think about why and what you can do about it.
Watching these things closely helps you make smart decisions on how to make your app better.
User Feedback Collection
Listening to what users say about your app is super important for making it better:
- In-app surveys - Ask users what they think while they're using your app. Make it short and sweet, and maybe offer a little thank you for their time.
- App store reviews - Encourage people to leave reviews and pay attention to what they say. Always reply nicely.
- Social listening - Keep an eye on what people are saying about your app on social media. Join in the conversation when it makes sense.
- Support tickets - Look at the questions and problems people have when they contact support. This can show you what needs fixing.
Take what people tell you seriously and use it to make your app even better.
Continuous Improvement
Launching your app is just the start. To really do well, you need to keep making it better:
- Plan regular releases - Decide on a schedule (like every month or every three months) to update your app. This helps you keep making small improvements.
- Prioritize user-centricity - Always think about making your users happy. This will help you build a loyal base of users.
- Monitor landscape changes - Stay up to date with new trends and technology that could affect your app. Be ready to change things up if you need to.
- Refine strategies - Keep looking at how your marketing and money-making strategies are doing. Put your effort and resources into what's working best.
Keeping your app fresh and up to date is key to staying ahead in the busy app market.
sbb-itb-8abf120
Choosing the Right Deployment Strategy
Picking the best way to launch your app updates might seem a bit daunting, but if you think about a few important things, it'll be easier to decide. Here's how to choose the right method based on what your app does, how many people use it, how often you update it, and a few other factors.
Key Selection Criteria
When choosing how to deploy your app, consider these points:
- App complexity - Simple apps can go with straightforward methods, while more complex ones need something more robust to lower risks.
- User base size - If not a lot of people use your app, you have more wiggle room. But with a lot of users, you want to avoid any downtime.
- Release frequency - If you update a lot, you'll want a quicker method. Less frequent updates can afford a slower approach.
- Team skills - Pick a method that your team can handle.
- Infrastructure - Some strategies need more tech power and resources than others.
- Costs - You'll have to balance how fast you want to go with how much you want to spend.
Deployment Selection Matrix
Here's a quick guide to help you pick a strategy based on different factors:
StrategyApp ComplexityUser Base SizeRelease FrequencyTeam SkillsInfrastructure NeedsCostRecreateSimpleAnyLowBasicLowLowRollingMediumSmall to mediumMediumIntermediateMediumMediumBlue/greenMedium to complexMedium to largeHighAdvancedHighHighCanaryMedium to complexLargeHighAdvancedHighHighShadowComplexLargeHighAdvancedVery highVery high
Key Recommendations
Based on what we've talked about, here are some suggestions:
- Recreate - Works well for simple apps that can afford a little downtime during updates.
- Rolling - A solid choice for apps that get updated often but don't need to be up 24/7.
- Blue/green - Great for very important apps that can't have any downtime.
- Canary - Good for slowly rolling out updates to complex apps to see how they do.
- Shadow - Best for testing new versions of very complex apps without affecting the current version.
Choosing the right way to update your app is crucial for smooth and efficient releases. Take a good look at your app and match it against the criteria we've laid out to pick the best strategy. Try the ones you're considering first before fully committing to them.
Case Studies
Here are two stories about companies that did a great job launching updates for their mobile apps using methods we've just talked about.
Food Delivery App Uses Canary Deployment
A company called Delicio, which delivers food, wanted to update their iPhone app. This update was a big deal because it changed how the app looked and added new things like group orders and tracking your delivery.
They decided to use a method called canary deployment. This means they first let a small group of users try the new version. They chose 5% of their users in one city to start. They watched closely to see how these users reacted, especially on older iPhone models where they noticed some problems.
After fixing these issues, they let 15% of their users try the updated app. They focused on places with lots of older iPhones. When everything seemed fine, they slowly made the update available to everyone over a month. This careful approach helped them avoid big problems when everyone started using the new version.
Blue/Green Deployment for Rideshare App
A company called Drivo, which offers rides on demand, was updating their Android app to make it 50% faster. They needed to do this without stopping their service, as lots of people use it every day.
They chose a method called blue/green deployment. They made two identical setups: one with the old app (blue) and one with the new app (green). Then, they slowly moved users from the blue setup to the green one, watching carefully to make sure everything worked well.
Once they were sure the green setup was working perfectly with all the users, they stopped using the blue setup. This way, they updated their app without any interruptions, and customers didn't even notice the change.
Both of these methods, canary and blue/green deployment, helped these companies update their apps smoothly without causing problems for their users.
Conclusion
When you're getting a mobile app ready to launch, you need to think and act smart from the start to the finish. You've got to make sure your app looks good, works well, and can be found easily. Here are the main points to remember:
- Make your app easy and fun to use, and make sure it looks great.
- Test your app a lot before you launch it, checking for any problems or glitches.
- Pick the right way to release your app based on how complex it is and how many people might use it.
- Use automation to help you release updates quickly and without too much hassle.
- After your app is out, keep an eye on how it's doing and listen to what users say to make it even better.
- Keep your app fresh with regular updates and fixes.
Putting in the work upfront can really help your app succeed in the long run. If you're finding it tough, think about working with a company that specializes in making apps. They know all the tricks and can help you avoid common mistakes.
Remember, launching your app is just the beginning. You've got to keep improving it based on what your users like and don't like. Also, stay up-to-date with new trends so you can keep your app interesting. If you stick with it, your app has a great chance of doing well in the busy world of mobile apps.
FAQs
Here are some common questions and straightforward answers about getting your mobile app ready and out there:
What are the main challenges with app deployment?
Some big hurdles include:
- Making sure your app works well on different phones and operating systems
- Following the rules of app stores
- Rolling out updates carefully to avoid big problems
- Keeping an eye on your app to spot any issues quickly
- Being ready to fix any crashes or problems fast
What tools do I need for deploying my app?
You'll need some key tools like:
- Android Studio or Xcode for building and checking your app
- Emulators to see how your app looks on different devices
- CI/CD tools for automatic testing and updates
- Tools to tell you when something goes wrong in your app
- Services that let you test your app with real users before fully launching
How much does it cost to deploy an app?
The cost varies based on:
- How complex your app is behind the scenes
- Any fees you need to pay to app stores
- Money you plan to spend on getting the word out
- Regular costs for things like hosting and customer support
A simple launch might cost a few thousand dollars, but more complex apps or those with a big marketing plan can cost a lot more.
How long does it take to deploy an app update?
With automatic tools (CI/CD), updates can be out in a few hours or days. Without these tools, it might take weeks or even months because of testing and waiting for app store approval. Fixing any crashes or problems can add more time.
How often you update depends on what your app needs and what your users want.
Related posts

7 Best Mobile App Automation Testing Tools 2024
Choosing the right mobile app automation testing tool in 2024 is crucial for ensuring your app's success across various devices and platforms. Here's a quick guide to help you make an informed decision:
- Appium: A free tool ideal for testing across iOS, Android, and Windows platforms using the same test scripts.
- Katalon Studio: Offers easy test creation for web, mobile, and API testing, suitable for beginners to advanced users.
- Espresso: Specifically designed for Android, providing fast and reliable UI testing.
- XCUI Test: Apple's tool for iOS app testing, integrating seamlessly with Xcode.
- Robotium: A user-friendly tool for Android app testing, perfect for those with limited coding knowledge.
- Kobiton: Focuses on real device testing over the cloud, offering access to a vast device library.
- LambdaTest: An online tool for testing websites and web apps across different browsers and devices.
Quick Comparison
ToolSupported PlatformsKey FeaturesPricingAppiumiOS, Android, WindowsFree, works with real and simulated devices, cross-platform testingFreeKatalon StudioWeb, iOS, Android, Windows, APIEasy test creation, both free and paid versionsFree and plans from $539/yearEspressoAndroidFast, reliable UI testing, integrates with Android StudioFreeXCUI TestiOSSeamless integration with Xcode, designed for iOS testingFreeRobotiumAndroidSimple for beginners, supports emulators and real devicesFreeKobitoniOS, Android, WindowsReal device testing over the cloud, extensive device libraryStarts at $50/monthLambdaTestWebsites, web appsOnline testing, no local setup needed, free and paid plansFree and plans from $15/month
By considering your specific needs, budget, and the platforms you're targeting, you can select the tool that best fits your project. Remember to consider the tool's ease of use, scalability, and how well it integrates with your existing processes.
How to Pick the Right Tool for Testing Mobile Apps
When you're looking for a tool to help test your mobile app automatically, here's what to keep in mind:
Compatibility
The testing tool should work with different mobile systems like iOS and Android, and also web apps. It's important that it can test on various browsers and devices. Being able to connect with CI/CD tools, which help automate steps in software delivery, makes things smoother.
Ease of Use
A tool that's easy to figure out helps testers make, run, and look at tests without needing to be coding wizards. Whether you like writing scripts or prefer not to, the tool should accommodate both. Also, having clear instructions or help guides is a big plus.
Functionality
Look for a tool that can handle different types of testing - like checking the user interface, API, how different parts work together, how fast the app runs, and keeping it secure. Features that let you record tests, run many tests at the same time, and easily find and fix problems are helpful. It should also let you test on both simulated devices and real ones.
Scalability
As your app and testing needs grow, your tool should be able to keep up. This means it can handle more tests, devices, and users without a hitch. Tools that let you test with many users at once and use cloud-based devices can grow with you.
Analytics
Tools that give you useful data and insights about your app's quality can be really helpful. Some tools use AI and machine learning to give you even smarter analysis.
Cost Effectiveness
There are free (open-source) and paid tools out there. Think about what you can afford and what you need from the tool. Cloud-based options often have flexible pricing. Make sure the cost makes sense for what you get out of it.
By considering these points, you can find a testing tool that fits what you need, works well, and doesn't break the bank. It's all about balancing what you need with what you can afford.
Top 7 Mobile App Automation Testing Tools
1. Appium

Overview
Appium is a free tool that helps you check if your mobile app works well on different devices like iPhones, Android phones, and Windows computers. It's good because you can use the same way to test on all these devices.
Key Features
- Lets you test on both fake devices (emulators and simulators) and real ones
- Uses a common web standard (WebDriver) to interact with apps
- You can test iOS, Android, and Windows apps using the same setup
- Works with many programming languages including Java, Python, and JavaScript
- Can be hooked up with tools that help automate app building and testing processes
- Offers a simple tool for visually checking what's going on in your test
Supported Platforms
- iOS
- Android
- Windows
Pros
- It's free
- Can test on iOS, Android, and Windows with the same tests
- You can use the same test code for different platforms
- Lots of people use and support it
- Works well with other software tools
Cons
- Might be hard to learn at first
- Setting it up can take some work
- Sometimes tests don't run the same way every time
- May not work well with very old versions of Android
Ideal Use Case
Appium is great for teams that want to check their app on different devices without writing different tests for each one. Since it's free, it's also a good choice for smaller teams or projects.
Pricing
Appium is free. However, if you want to run your tests on many devices over the internet, services like Sauce Labs offer Appium testing for a monthly charge.
2. Katalon Studio
Overview
Katalon Studio is a tool that helps you test your web, mobile, and API apps all in one spot. It's built on Selenium and Appium, which are tools that let you automatically check how well your app's user interface works across different platforms.
Key Features
- Works with web, iOS, Android, Windows, and API testing
- Has a feature to record actions and play them back to make tests easily
- Tools to help identify and work with elements in your app
- Can be linked with tools that manage the app building and testing process
- Offers customizable reports and data analysis
- Available in both free and paid versions
Supported Platforms
- Web apps
- iOS apps
- Android apps
- Windows apps
- API testing
Pros
- Easy to use for beginners in test automation
- Saves time in maintaining tests across different platforms
- Allows for more complex tests with scripting
- Has a supportive community for help
Cons
- Might be hard to learn for more complex scripting
- Free version has limited support
- Might not be the best fit for very big companies
Ideal Use Case
Katalon Studio is best for small to medium teams that need to test web apps on different browsers and mobile apps across iOS and Android. It's also good for people who aren't very technical because of its record and playback feature.
Pricing
Katalon Studio offers a free version with basic features. Paid plans start at $539 a year for individual users, and there are custom pricing options for larger businesses.
3. Espresso
Overview
Espresso is a free tool made by Google that helps check how Android apps look and work. It uses the app's own code to do this.
Key Features
- Built just for Android app testing
- Can mimic what a user does, like tapping, scrolling, and typing
- Good at testing apps that need to look right on different screens
- Makes it easy to check if the app looks and acts as it should
- Quick and dependable, whether tests are simple or complex
- Fits right into Android Studio
Supported Platforms
- Android apps
Pros
- It's free and anyone can use it
- Designed specifically for Android
- Tests run quickly
- Results are consistent and reliable
- Test reports are straightforward
- Google backs it up
Cons
- Only for Android apps
- Might take some time to learn how to write tests
- Not as many features as some paid tools
Ideal Use Case
Espresso is great for Android app developers who need a quick and cost-free way to make sure their apps work right. It works well with the tools they're already using.
Pricing
Espresso is free and open to everyone.
4. XCUI Test
Overview
XCUI Test is a tool from Apple for testing how well iOS apps work by simulating user actions. It's made to work perfectly with Xcode, which is the program developers use to create iOS apps. This tool is great because it's designed to work specifically with iOS, using the programming languages Swift and Objective-C.
Key Features
- Works directly with Xcode, making testing smoother
- Can test apps on iOS simulators (fake devices) and real devices
- Has a big set of tools to check if different parts of the app look and work right
- Can be part of the automated process for building and testing apps using Xcode Server
Supported Platforms
- iOS
Pros
- Works really well with Xcode, so it's easy for iOS developers to use
- Tests run fast and are reliable
- The tool is stable and has a lot of options for checking apps
- It can interact directly with the app, which helps in keeping tests up to date
Cons
- Can only be used for iOS apps, not Android or apps that work on both iOS and Android
- Some issues might pop up when running tests on actual devices
Ideal Use Case
XCUI Test is best for people making iOS apps who want a straightforward way to check their app's user interface and how it works overall. It's especially useful because it fits right into the normal app development process.
Pricing
XCUI Test is free because it's provided by Apple for iOS app development.
5. Robotium
Overview
Robotium is a free tool that helps you test Android apps. It's great for running tests on apps without needing to know a lot about them first. You can use it for apps made just for Android phones and for apps that work in web browsers too.
Key Features
- Lets you test how users see and interact with your app
- Good for different types of tests like checking if the app does what it should
- Easy to write tests even if you're not a coding expert
- Can run tests on both fake phones (emulators) and real ones
- Works well with Android Studio and tools that help automate testing
Supported Platforms
- Android (version 1.6 and up)
Pros
- It's free
- You don't need to be a pro coder to use it
- Can test on both emulators and real devices
- Fits right into Android Studio
- You can use the same tests for different Android projects
Cons
- Only for Android apps, not for iPhone apps
- Might be hard to find help or guides
- Not the best choice for apps that are part web and part app
- Might run slow on older Android versions
Ideal Use Case
Robotium is perfect for checking if your Android app looks and works the way it should, especially if you're not too familiar with coding. It's easy to start and you can test on both emulators and real devices.
Pricing
Robotium is free. You can download and start using it without paying anything.
6. Kobiton
Overview
Kobiton is a service that lets you test your mobile apps on real devices over the internet. It supports testing on a bunch of different smartphones and tablets, so you can make sure your app works well for everyone.
Key Features
- Tests on real devices like iPhones, Android phones, and Windows phones, as well as on emulators
- Has a huge list of more than 500 types of devices you can test on
- Lets you run tests on many devices at the same time
- Uses smart tech to give tips on making your tests better
- Works with tools that help automate the testing process
- Comes with ways to work together, like sharing videos of tests and linking to Jira
Supported Platforms
- iOS
- Android
- Windows
Pros
- You can test on lots of different real devices
- Works with the big mobile operating systems
- Lets you do a lot of testing at once and keep testing as you make changes
- Gives smart insights to help you improve
- Connects with other tools like Jira and Jenkins
Cons
- Might get pricey if you need lots of devices and users at the same time
- Not the best for apps that work on both mobile and web
- Might take some time to learn how to write tests
Ideal Use Case
Kobiton is great for teams that need to check their app on lots of different phones and tablets. It's especially good if you're doing a lot of testing to make sure everything's right.
Pricing
Kobiton lets you try it out for free. After that, prices start at $50 a month for one person. If you're a big company with special needs, they'll figure out a price just for you.
7. LambdaTest

Overview
LambdaTest is a tool that lets you check how your websites and web apps work on different browsers and devices without having to install anything on your computer. It uses a system called Selenium to do these tests online.
Key Features
- Works online, so you don't need to set anything up on your computer
- Tests your site on many browsers like Chrome, Firefox, and Safari
- Lets you do many tests at the same time on different systems
- Gives you detailed reports with pictures, videos, and notes
- Has access to over 2000 combinations of browsers and systems
- Fits into your workflow if you're using CI/CD pipelines
- Has both free and paid versions
Supported Platforms
- Websites
- Web apps
- Sites that adjust to your screen size
- Mobile websites
- Progressive web apps
Pros
- Simple to get started
- You don't have to keep up with testing tools on your computer
- Provides clear and detailed feedback
- Tests on actual browsers
- Can handle lots of tests at once
- Support is available all the time
Cons
- Can't test apps made specifically for phones
- The free version has some limits
- Recording videos costs extra
- Might be a bit tricky to learn how to write the tests
Ideal Use Case
LambdaTest is great for anyone who needs a straightforward way to make sure their websites or web apps work right on different browsers and systems. It's especially helpful if you're on a tight budget.
Pricing
LambdaTest has a free plan that lasts forever. Paid plans start at $15 a month. There are also custom plans for big teams.
Comparative Analysis
Let's look at how these mobile app testing tools stack up against each other in a simple table:
ToolSupported PlatformsKey FeaturesPricingAppiumiOS, Android, WindowsFree, works with real and simulated devices, can use the same tests for different systemsFreeKatalon StudioWeb, iOS, Android, Windows, APIEasy to record actions, detailed reports, both free and paid versionsFree and plans from $539/yearEspressoAndroidMade just for Android, copies user actions, part of Android StudioFreeXCUI TestiOSFits perfectly with Xcode, quick and reliable testing, lots of test optionsFreeRobotiumAndroid 1.6+Easy for beginners, tests on emulators and real devices, can reuse testsFreeKobitoniOS, Android, WindowsTests on actual devices, has over 500 device types, can do many tests at onceStarts at $50/monthLambdaTestWebsites, web apps, responsive sites, mobile web, PWAsOnline, no need for local setup, detailed feedback, free and paid plansFree and plans from $15/month
Here are some things to think about when choosing a tool:
Where It Works Best Tools like Espresso and XCUI Test are made just for Android or iOS. But Appium and Katalon Studio can be used for any system. Think about what devices you're making your app for.
Testing on Real Devices or Simulators Some tools let you test on both real devices and simulators. Real devices give you a better idea of how your app works in real life.
How Much Coding You Know Some tools are easier for beginners, like Katalon Studio. Others need you to write more code, like Appium. Think about your team's coding skills.
Working With Other Tools Tools like Espresso work well with Android Studio, and XCUI Test with Xcode. Appium is good if you're using other tools to help build and test your app. Think about what tools you already use.
Reports Katalon Studio and LambdaTest give you lots of details on your tests. This can help you understand how your app is doing.
Cost There are free tools like Appium and paid ones like Kobiton. Think about your budget and what you need from the tool.
Think about these points to pick the best tool for your app. It's all about finding a balance between what you need and what you can spend.
sbb-itb-8abf120
Trends in Mobile App Testing for 2024
Mobile app testing is changing quickly because mobile technology is getting better and people are using their phones differently. Here are some of the big trends in mobile app testing for 2024:
AI and Machine Learning Integration
Testing tools are getting smarter by using AI and machine learning. Here's what they can do:
- Intelligent test recommendations: AI looks at how people use apps and suggests new tests to make sure nothing is missed.
- Self-healing tests: If an app changes and breaks a test, the tool can fix the test by itself. This means less work fixing broken tests.
- Anomaly detection: Machine learning helps find weird app behavior that might be a problem. This can catch issues that people might not notice.
Increased Focus on Security Testing
With mobile apps dealing with important user info and money, keeping them safe is super important. Here's how testing tools are helping:
- Vulnerability scanning: Tools check the app for security problems and tell you how to fix them. This lowers the risk of issues.
- Penetration testing: Testers act like hackers to find weak spots in the app. This checks if the app's security is strong.
- Compliance testing: Tools make sure apps meet security rules like PCI DSS. This helps build trust with users.
Shift Towards Cloud Testing Environments
More teams are using the cloud to test apps because it's easier and better in many ways. Here's why:
- Scalability: The cloud can handle more tests and devices without slowing down. This means no waiting around.
- Flexibility: Testers can use exactly the devices and software they need from the cloud. No need to keep a bunch of devices around.
- Speed and cost: Testing on many devices at once in the cloud makes things go faster and costs less.
As more people use mobile apps all over the world, these testing trends help make sure apps work well for everyone, no matter where they are or what phone they use. Keeping up with these trends is key to making great mobile apps in 2024.
Conclusion
Picking the right tool to test your mobile app automatically is super important. It helps make sure your app works well on different devices and situations. Here's what to keep in mind when choosing a tool:
- Check if it works with your devices - Your tool should be able to test on the devices your app will run on, like iPhones, Android phones, or web browsers.
- Match it with your team's skills - Some tools are easy and don't need much coding, while others might need more technical know-how. Choose one that fits your team.
- Look at what it can do - Different tools can do different things. Some are great for checking how the app looks, others are better for seeing how fast it runs or if it works with other apps. Pick the tool that has what you need.
- Real devices vs. fake ones - Testing on real devices can show you more about how your app will work in real life compared to simulators or emulators.
- Think about the cost - Some tools are free, and others you have to pay for. Consider how much you can spend and what you're getting for the price.
- Can it grow with you? - Your tool should be able to handle more tests or more devices as your app gets bigger.
- Does it play well with others? - It's great if the tool can work with other systems you use, like code storage or issue tracking.
There's no perfect tool that works for everyone. But if you think carefully about what you need, you can find one that's just right for your app. Testing your app in lots of different conditions makes sure it's ready for users everywhere. So, take your time, choose wisely, and set your app up for success.
Final Recommendations
When you're picking a tool to help test your mobile app automatically, here are some important things to think about:
Align Tool Capabilities with Project Needs
- Think about what your app really needs to be tested properly. Make a list of the most important features like support for the devices you're targeting, how well it works with other tools you use, and the kind of reports it gives.
- Choose tools that check off all your must-haves. Extra features are a bonus but focus on what you really need first.
- If money is tight, look into free tools. If you're okay with spending, pick one that gives you good value for your money.
Validate Ease of Adoption and Use
- Keep in mind who will be using the tool. It should be easy enough for everyone involved, whether they're experts or not.
- A tool that lets you make tests without writing code, has a user-friendly design, or comes with clear guides is a good choice.
- Hearing that others found the tool easy to learn and use can also help you decide.
Confirm Scalability for Growth
- Make sure the tool can handle more tests, devices, and users as your app grows, without slowing down.
- Tools that use the cloud are usually better at handling growth.
- Try the tool with a lot of tests during a free trial to make sure it can keep up when you're really busy.
Check Integration with Existing Processes
- The tool should fit nicely with how you already make and test your app, like fitting into your CI/CD pipeline or working with your test management platform.
- It shouldn't be hard to start using the tool with your current setup.
- If the tool doesn't have everything you need, it should let you connect it to other systems with some coding.
By thinking about these points and how they match up with what you're trying to do, you can pick the right tool for testing your mobile app. And remember, what works now might need to change as your app and testing needs grow.
Related Questions
What is the best tool for mobile automation testing?
Some top tools for mobile automation testing include:
- Espresso - Made by Google for Android testing
- XCUI Test - Created by Apple to test iOS apps
- Robotium - Easy to use for testing Android apps
- Flutter - For testing apps built with Flutter
- Robot Framework - Supports iOS, Android, and web apps
- Selendroid - Good for testing native and hybrid Android apps
These tools make it easy to automate all kinds of tests for mobile apps.
Which framework is best for mobile app automation?
Appium is one of the most popular frameworks for mobile app test automation. Key advantages:
- Works with native, hybrid, and web apps on iOS and Android
- Supports test scripting in many languages like Java, Python, JavaScript, etc.
- Active community provides libraries and support
- Integrates well with CI/CD workflows
- Open source and free to use
Appium provides a robust set of capabilities to automate all types of mobile app testing.
Which tool is best for mobile app performance testing?
Top tools for testing mobile app performance and speed:
- Android Profiler - Checks CPU, memory, network usage
- Memory Profiler - Finds memory leaks causing slowdowns
- CPU Profiler - Checks which operations use the most CPU
- Network Inspector - Analyzes network requests and bandwidth
- Energy Profiler - Shows battery usage for optimization
- LeakCanary - Easy detection of memory leaks in Android apps
These Android developer tools help test and improve app performance.
What is better than Appium?
Some good Appium alternatives for mobile test automation include:
- Testgrid - Cloud platform for mobile test automation
- Calabash - Cross-platform automation framework
- Selendroid - Test automation for native Android apps
- Espresso - Google's Android UI testing framework
- Detox - React Native test automation
These provide options with specific strengths like cloud testing, integration with Android Studio, and more.
Related posts

8 Best Practices to Collect In-App Feedback
Gathering in-app feedback is essential for enhancing user experience and ensuring your app evolves according to user needs. Here's a straightforward guide to collecting valuable insights directly from your app users:
- Implement Intuitive Feedback Tools: Keep feedback mechanisms simple and accessible.
- Use Contextual Surveys: Timing is crucial; ask users for feedback when it's most relevant.
- Offer Incentives for Feedback: Rewards can motivate users to share their thoughts.
- Leverage Analytics for Passive Feedback: Analytics offer insights into user behavior without direct interaction.
- Prioritize User Privacy: Be transparent and secure with user data.
- Enable Real-Time Interactions: Utilize chat support and user testing for immediate feedback.
- Utilize Multi-Channel Feedback Collection: Gather feedback through various channels for a comprehensive view.
- Act on Feedback and Close the Loop: Show users their feedback is valued by making improvements.
By following these best practices, you can foster a culture of continuous improvement and keep your users engaged and satisfied.
1. Implement Intuitive Feedback Tools
When it comes to getting feedback from users right inside the app, it's all about keeping things easy for them. Here's how you can do that:
Keep it simple. Don't make users jump through hoops with complicated surveys. A simple thumbs up/down or a spot for quick comments works best.
Make it accessible. Put feedback options where users can easily find them without it getting in their way.
Personalize it. Let users decide if they want to leave feedback anonymously or put their name on it. This makes them feel more comfortable sharing their thoughts.
Respond and improve. Show users you're listening by taking action on their feedback. This makes them more likely to share their thoughts again.
Track and analyze. Look for patterns in the feedback you get. This helps you figure out what needs fixing or improving.
Test and optimize. Try out different ways of asking for feedback to see what works best. Use what you learn to get even better responses.
Reward participation. Think about giving points or rewards to users who often give helpful feedback. This can encourage more users to share their thoughts.
Getting feedback from users while they're using your app helps you understand what they like and what could be better. Keeping the process simple and straightforward is key to getting honest and helpful feedback.
2. Use Contextual Surveys
When you want to know what users think about your app, surveys can be really helpful. But, it's important to ask them at the right time so you don't bother them. Here's how to do it smartly:
Ask based on what they do. For instance, you could show a quick survey after they buy something or upload a picture. This way, you're asking them right after they've done something important.
Make sure it's about what they just did. Your survey questions should be about the feature they just used. This way, you're more likely to get useful answers.
Don't ask too often. If someone uses your app a lot, don't keep asking them to take surveys. But, if someone only pops in now and then, it's okay to ask them a bit more.
Try different times to ask. Experiment with asking for feedback at different times to see when you get the most responses. Find the sweet spots that don't interrupt what the user is doing.
Keep it quick. Make sure your surveys are short and to the point. If you need more detailed feedback, consider using email or a message within the app.
The trick is to ask for feedback without getting in the way of what the user is doing. By picking the right moments and keeping your questions focused, you can get valuable insights without annoying your users.
3. Offer Incentives for Feedback
Getting people to tell you what they think about your app can be tough. They're busy and might not see the point in spending time on feedback. A good way to get them interested is to offer something nice in return. Here are some simple ideas:
- Give in-app rewards: When users share their thoughts, give them something fun in the app, like extra points or a special bonus. This connects the reward to the app itself.
- Hold drawings or contests: You could let users who give feedback enter a draw to win cool stuff like gift cards or special items. Make sure to tell everyone who wins to get more people excited.
- Let them see new stuff first: If someone often gives feedback, let them check out new app features before anyone else. This makes them feel special and important.
- Say thanks publicly: If someone's feedback really helps, give them a shout-out in the app. You can even give them a special badge or title.
- Offer real things: Sometimes, sending physical thank you gifts like a coffee card or a T-shirt can make a big difference to your top feedback givers.
- Make it a choice: Let users decide if they want to join a feedback program. This way, you get insights from users who really want to help.
- Look for helpful feedback: It's not just about getting lots of comments. Focus on the feedback that gives you good ideas on how to make your app better.
Choosing the right thank-you can depend on what your app is about and who uses it. The main thing is to show you're grateful for their thoughts and to give them a reason to keep sharing.
4. Leverage Analytics for Passive Feedback
Using analytics is like having a superpower that lets you understand what users do in your app without them telling you directly. Here's how to make the most of this superpower:
Keep an eye on important activities. Watch how users sign up, buy stuff, or share things in your app. If many people leave without finishing, there's a problem to fix.
Watch who stays and who leaves. Pay attention to how many people come back to your app and how many stop using it. A sudden drop might mean something's wrong. Comparing different groups of users can also help spot issues.
See what users like doing. Look at which features are popular and where users spend their time. This can show you what's working well and what's not.
Read app store feedback. Keep an eye on what people say about your app in the app store. This can tell you what users love and what frustrates them.
Analyze in-app feedback numbers. Look at simple feedback like thumbs up/down and comments. Search for common themes.
Link changes to results. After updating your app, watch the numbers to see if things improve. This checks if your updates are hitting the mark.
Respect user privacy. Always be careful with user data. Collect only what you need, let users say no to tracking, and tell them what you're doing with their data.
By quietly watching how users interact with your app through analytics, you can get a clear picture of what's good and what needs work. Remember, it's not just about guessing; it's about understanding real actions and making smarter updates.
5. Prioritize User Privacy
When you're asking for feedback inside your app, it's super important to keep your users' privacy in mind. Here's how to do it right:
Be clear about what you're doing with their info. Tell users exactly what feedback you're collecting, how you plan to use it, and who gets to see it. Make sure they know you care about keeping their info safe.
Let them say no if they want. Users should be able to skip feedback requests or say no to being tracked. Don't make them share more than they're comfortable with.
Keep their feedback anonymous. Take away any details that could point back to them specifically and lump the data together to keep things private.
Protect their data. Make sure the feedback is stored safely, encrypt any sensitive stuff, and use extra security steps like multi-factor authentication.
Control who can see the feedback. Only let people who really need to know about the feedback have access to it, especially if they're working on making the app better.
Ask before changing things up. If you want to collect different types of feedback or use the data in new ways, make sure to get your users' okay first.
Stick to the rules. Follow privacy laws and the app store's guidelines on data. Regularly check to make sure you're doing everything right.
Let users delete their data if they ask. If someone wants their feedback and data gone, make it easy for them to have it wiped.
By being careful with your users' feedback and putting their privacy first, you'll build trust. This makes people more likely to share useful thoughts about your app.
6. Enable Real-Time Interactions
Talking to users right when they're using your app can give you a lot of insight into what they think. Here's how you can make this happen:
Chat support
- Put a chat feature in your app so users can quickly ask for help or point out problems.
- Make sure someone is there to answer these chats, whether it's your support team or the app creators. This way, issues can be fixed fast.
- Look through the chat history to spot common issues or suggestions.
User testing
- Ask some users to try out new parts of your app while you watch what they do.
- Encourage them to say what they're thinking out loud to understand their perspective better.
- This can help you see where they get stuck and what they like or don't like.
Co-browsing
- Let your support team see and control the user's screen with their permission. This helps understand the problem better.
- Work on fixing the issue together with the user, testing solutions in real-time.
- Watching how users move through the app can also show you where the design might be confusing.
Surveys
- Pop up a quick survey right after a user finishes a task to get their immediate thoughts.
- This way, you capture their fresh impressions before they forget or move on.
- Make sure your questions are about what they just did for more specific feedback.
Talking directly with your users while they're engaged with your app can give you valuable feedback. Use these real-time chats and tools to understand and improve their experience.
7. Utilize Multi-Channel Feedback Collection
Getting feedback from different places helps you get a fuller picture of what users think. Here's how to do it simply:
In-app surveys
- Directly ask users in the app to rate or review it. This way, you catch their immediate reactions.
Email surveys
- Use emails to ask for more in-depth feedback from users who are really into your app.
Social media
- Keep an eye on what folks are saying about your app on platforms like Twitter or Facebook. Look out for common issues or suggestions.
App store reviews
- Check out what people are saying in the app store, both good and bad, to see what makes users happy or frustrated.
User interviews
- Talk one-on-one with some users to dive deeper into their experiences and thoughts on how to make the app better.
Focus groups
- Get a group of users together to talk about specific things, like their thoughts on a future feature, to get varied perspectives.
Feedback buttons
- Put simple feedback buttons, like thumbs up or down, in various app sections to quickly see how users feel.
By gathering feedback from these different sources, you get a well-rounded view of what users like and don't like. Linking up what you learn from each source can give you deeper insights. Just make sure you're always careful with users' private information when you're collecting and looking at feedback.
8. Act on Feedback and Close the Loop
It's really important to let users know you're listening to their feedback. Here's how you can do it in a simple way:
Say thanks for the feedback
- Automatically send a thank you note when someone shares their thoughts
- For more detailed feedback, send a personal thank you message
Figure out what to tackle first
- Sort feedback by how much effort it'll take, how much it'll help users, and what your team thinks is most important
- Fix the big problems first
Keep users in the loop
- Share updates on how you've fixed things or added something new because of their suggestions
- Be honest if certain suggestions don't fit with where the app is headed
Ask for more thoughts
- Highlight users who give really helpful feedback
- Give small rewards or bonuses to users who often share their thoughts
Keep getting better
- Use tools to track how much and what kind of feedback you're getting
- Work on asking questions that get you the most useful answers
Make things run smoothly
- Use software like Zendesk to make sure feedback goes straight to the right team
- Create Slackbots to keep tabs on progress for important issues
By acting on what users tell you and keeping them updated, you turn their suggestions into real improvements. Quick responses and real changes make users more likely to keep sharing their ideas. When users see you value their input, they're more likely to stick around.
Conclusion
Getting feedback from people who use your app is super important if you want to make your app better and keep users happy. By using easy ways to get feedback, asking questions at the right time, giving little thank-yous, checking data, making sure users feel safe about their privacy, chatting in real time, and getting opinions from different places, app creators can really understand what users like and what they don't.
The most important thing is to actually do something with the feedback you get. Say thanks to people for their ideas, fix the big stuff first, tell users about the changes you've made, and keep looking for ways to get even better feedback. This shows users that you're listening to them, which makes them more likely to keep using your app.
By following these steps, you can make your app something that users really enjoy and find useful. Getting feedback and using it to make your app better means your app stays up-to-date and keeps users coming back. Plus, it helps you save money because you know exactly what needs work. In the end, both your users and your team are happier because you're making your app the best it can be based on what users tell you.
sbb-itb-8abf120
Related Questions
How do you collect user feedback on an app?
To get feedback from people using your app, you can try:
- Widgets that let users type out their thoughts
- Surveys to see if they're happy with the app
- NPS surveys to find out if they'd recommend your app
- Shake gestures that ask for feedback when users shake their device
- Simple buttons to quickly say if they like something or not
- Looking at how they use the app without them having to say anything
Pick easy options so people don't mind giving feedback.
What is the best practice in collecting customer feedback?
The smartest way to get good feedback is to use surveys that ask the right questions. You can use:
- CSAT surveys to see how satisfied customers are
- NPS surveys to check if they'd tell their friends about you
- CES surveys to understand how easy your service is to use
Make sure your surveys are short and ask important questions.
What are 5 methods of obtaining feedback from customers?
Five good ways to hear what customers think include:
- Talking to them directly in focus groups or interviews
- Sending out surveys for lots of answers
- Using forms on your website for quick comments
- Listening to what they say to customer service
- Watching what they post on social media
Mix and match these methods to get a full picture.
What's an effective method for gathering user feedback?
Here are 6 solid ways to find out what users think:
- Surveys for quick opinions
- Emailing them to ask for their thoughts
- One-on-one interviews for detailed feedback
- Paying attention to social media
- Reviewing analytics to see how they use your app
- Forms on your app or website for direct comments
Using several methods together gives you the best insight into how users feel.
Related posts

10 Essential Mobile App Survey Questions
Discover the top 10 essential questions you should be asking your mobile app users to enhance their experience and your app's success. This concise guide offers a straightforward overview of critical questions that can provide valuable insights into user satisfaction, feature preferences, improvements needed, and more.
By focusing on these questions, you can gather actionable feedback to continuously improve your app's user experience and overall performance.
1. How would you rate your overall experience with our app?
Asking people how they feel about using your app can tell you a lot about whether they like it or not.
You can ask them to give a simple score, like from 1 to 5, or use stars. It's also a good idea to ask them to share more about what they liked or didn't like right after they score.
Knowing how people feel about your app helps you figure out what's working well and what's not. If a lot of people aren't happy or have complaints, it means you might need to make some big changes.
But if most scores are high, it shows that your app is doing what it's supposed to do. Still, always look for little ways to make your app even better based on what people say.
Checking in with your users about how they feel after you update your app or add new things is smart. This way, you can see if people like the changes. If the scores start to drop, it's important to find out why and fix it.
Keeping an eye on how people rate their experience with your app is a simple way to see if they're happy. When you also listen to their detailed feedback, you get a clear picture of what's good and what could be better.
2. What features do you use the most?
Finding out which parts of the app people use a lot helps you see what they really like. This way, you know what to keep making better.
Here's how you can get clear answers:
By really understanding what parts of your app people use and enjoy, you can focus on making those parts even better. And by keeping tabs on how things change, you make sure your app stays interesting and useful.
3. What additional features would you like to see in future updates?
It's really helpful to know what new things you'd like in the app. This helps us plan updates that you'll enjoy. Here's what you can tell us:
We want to hear all your ideas, no matter how big or small. You can also look at a list of new features we're thinking about and tell us which ones you like best.
We really listen when lots of you ask for the same thing. It tells us that's what we should work on next.
We also really value what our most frequent users say. They often spot little things we missed or suggest cool improvements.
We keep track of all your suggestions for new stuff and look at them when planning updates. This way, we make sure we're giving you what you asked for.
When we add new things you suggested, we'll let you know. It's our way of saying thanks for helping us make the app better.
By letting you tell us what you want, we can make the app better suited to your needs. This helps the app get better and better over time.
4. Did you encounter any issues or bugs? Please describe.
If you've had any trouble with the app, telling us about it can really help. Here's what you might share:
The more you can tell us, the easier it is for us to understand and fix the problem. When you share details like:
This information helps us track down the bug and stop it from affecting you or anyone else. Thanks for taking the time to help us get better!
5. How easy is it to navigate our app?
We really want to know if you find it simple to move around our app. Here's what you can tell us:
Your specific experiences are super helpful. If you're having a hard time in a certain area, let us know what that feels like.
When we know where users are getting stuck, we can make those parts easier to use. We aim for you to feel like everything's right where you expect it to be.
Hearing from people who are new to the app is also really important. If they find it hard to navigate, we need to work on making it clearer.
By figuring out where and why users have trouble, we can fix those spots. This helps make sure the app is easy for everyone to use.
Thanks for sharing how you get around the app. Your feedback is key to making navigating our app feel smooth and natural.
6. How likely are you to recommend our app to others?
Finding out if you'd tell your friends about our app helps us understand if you really like it. Here's how we ask about it:
By understanding if you'd recommend our app, we get a clear picture of what you enjoy and what could be better. Asking more questions helps us dig into the details that matter to you. This way, we can make sure our app is something you value and want to share.
7. Why did you decide to download our app?
We're curious about what made you choose our app. Here's what we'd like to know:
Understanding why you downloaded the app in the first place helps us make sure it's doing what you hoped for. If there was a particular feature or promise that made you interested, we'll work on making that even better. If our app seemed like a solution to a problem you had, we want to ensure it's solving that problem well.
Knowing how you found out about the app also lets us reach more people who might like it for the same reasons. We can share what's useful about the app more effectively.
Your reasons for downloading give us a starting point to see if the app meets your needs or if there's more we can do. This helps us make the app better for you and others who downloaded it for similar reasons. Your input is valuable, and we're thankful when you share it.
8. How do you feel about the pricing of our in-app purchases?
We really want to get the price right for the extra stuff you can buy in our app. Here's what we're curious about:
Your honest thoughts about what you've bought (or decided not to buy) help us figure out where we might need to change our prices. Knowing how we compare to other apps also gives us a good idea of where we stand.
We really want the extras in our app to be worth it for you. If you think our prices are too high, tell us. Maybe we should think about discounts or bundles.
Your feedback on pricing is super important to us. It helps us find the right balance so buying extra stuff feels okay for you and still supports the work we do. Please share what you think. It makes a big difference.
9. Do you use any other apps like ours? Which ones and why?
We're curious if you're using other apps that do similar things to ours. Here's what we want to know:
Knowing why you might use other similar apps can teach us a lot. If we're missing important features or if there are areas where other apps are doing better, we want to know so we can make improvements.
Maybe you use different apps for different reasons or in different situations. Understanding that helps us figure out how to make our app fit better into your day.
We know our app might not be the only one you use, but we want it to be your favorite for what it does. Your honest feedback about other apps gives us great insights on how to make our app more useful for you.
10. Any other comments, questions, or concerns?
Thank you so much for sharing your thoughts with us. Your feedback helps us see what we're doing right and where we need to get better.
Here are a few more things we'd like to hear from you about:
We know we've asked you a lot, but feel free to tell us anything else that's on your mind. Even small details can help us come up with big improvements.
If there's nothing else you want to share right now, that's totally fine! But remember, you can always get in touch with us later if something comes up.
Thanks again for helping us get better. Listening to what you have to say is how we make sure our app keeps improving. We're really grateful for your time.
Conclusion
It's really important to ask your app users the right questions. This helps you figure out what they need and what problems they're facing. Here's what you should remember:
The main idea is to keep asking your users what they think so you can keep making your app better. Paying attention to what they say and making changes based on their feedback is key to keeping your app popular and useful.
sbb-itb-8abf120
Related Questions
What questions to ask in a survey for an app?
Here are some straightforward questions you might want to ask in an app survey:
Asking these questions helps you get to know why people use your app and what they're hoping to get out of it. This way, you can make your app more useful for them.
What are the 5 question survey questions?
The 5 basic types of survey questions are:
Thinking about these questions can help you make a better survey.
What is an example of a good survey question?
Here are some examples of good questions that give you detailed feedback:
Questions like these let people give more detailed and helpful answers.
Is 5 questions enough for a survey?
Surveys should be quick, ideally taking less than 5 minutes, which means you can have as few as 5 questions. However, having 5-10 questions is best. If it's too short, you might not get enough information. But if it's too long, people might not finish it.
Related posts

5 Clean Architecture Principles for Mobile Apps
If you're diving into mobile app development, grasping the 5 Clean Architecture Principles can set you up for success. Here's a quick rundown to get you started:
These principles help in building robust, adaptable, and maintainable mobile applications, crucial for both developers and businesses alike.
1. Separation of Concerns
The first big idea in clean architecture is called separation of concerns (SoC). This is just a fancy way of saying we should organize an app's code into clear, separate parts, each with its own job. Imagine you're organizing a toolbox - you wouldn't mix up screws with hammers, right? It's kind of like that.
Why it's good:
For mobile apps, the parts usually look like this:
By keeping these parts separate, apps are easier to handle, update, and make work across different devices. It might take a bit more time at the start, but it makes life easier in the long run, especially when you need to fix or change things.
2. Dependency Rule
The dependency rule is a big deal in clean architecture. It's like saying the core parts of your app (the main jobs it does) shouldn't need to know about the outer parts (like how it looks or where it stores data).
What's the big idea?
Think of your app as a target with rings. The middle (or domain) is where the app's main jobs are. The outer rings are things like the app's look or where it keeps data. The inside can be used by the outside, but not the other way around. This keeps the core jobs independent.
Why do it?
Making it work in mobile apps
By sticking to this rule, you make your app stronger and ready for changes. It might seem like extra work at first, but it saves a lot of trouble later on!
3. Abstraction Principle
The idea of abstraction is like making a clean, easy-to-follow map for how different parts of your app talk to each other. It's about keeping things simple and not letting them get all tangled up.
Why go for abstraction?
How to use abstraction in mobile apps
Here’s how to put abstraction to work in your mobile app:
Taking a little time to think about abstraction can make a big difference. It leads to apps that are easier to handle, update, and test. Plus, it sets you up for success as mobile technology keeps changing. It’s all about building a solid foundation for your app.
4. Domain-Driven Design
Domain-driven design (DDD) is a smart way to make mobile apps that really understand and fit into the business world. It's about making sure your app can handle complex business stuff by modeling it in a way that matches the real world.
Why go for DDD?
Putting DDD into practice
Here's how you can use DDD when making mobile apps:
Going with DDD from the start means more work at the beginning, but it leads to apps that really fit with business needs. Plus, it helps the app grow and change with the business over time.
5. Testability
Making your app easy to test is super important. It helps you make sure everything works like it's supposed to and find any issues quickly.
Here's how you can make your mobile app easier to test:
Keep the main app logic separate
Dependency injection
Facade pattern
Testing async logic
UI testing
Fast feedback
By focusing on these areas, you're building your app with testing in mind from the start. This approach helps you spot and fix issues quickly, ensuring your app is solid and reliable.
Separation of Concerns
Separation of concerns (SoC) is all about dividing up the work in an app so that each part does its own thing without stepping on the toes of the others. When you're making mobile apps, this principle helps a lot:
Overview
Think of SoC as organizing your app into neat little boxes, each with its own job:
Keeping these parts separate means the code is:
Starting with SoC makes it easier to handle changes and growth in your app.
Application in Mobile Development
For mobile apps on iOS, Android, and Flutter, SoC helps with:
Loosely-coupled architecture
Reusable business logic
Working together smoothly
Testing made easy
Keeping features tidy
Freshening up the look
By sticking to SoC from the start, you're setting up your app to be cleaner and more flexible, ready to grow and change as needed.
Dependency Rule
Overview
Imagine the parts of your app as a stack of pancakes. The bottom pancake (your app's core logic) shouldn't have to worry about what's on top (like the syrup or strawberries, which are the UI and database). This is what the dependency rule is all about. It keeps the core of your app safe and sound, no matter what changes on the outside.
Here's why this is cool:
In short, this rule helps keep your app easy to handle, even as it grows or changes.
Application in Mobile Development
When building mobile apps, here's how this rule makes things better:
Domain Layer Independence
The core part of your app, where all the big decisions happen, doesn't get tangled up with other stuff. This keeps it clean and easy to use elsewhere.
Abstraction
The core part talks to the rest of the app through a kind of secret code, so it doesn't need to know the details.
Repository Pattern
There's a middleman that handles all the chatter between the app's brain and where it keeps its data. This way, the brain doesn't need to know where the data is.
Dependency Injection
The app's parts get what they need handed to them, rather than having to go find it themselves. This keeps things flexible.
Uni-directional Data Flow
Information moves in just one direction, from the core outwards. This keeps the core clean.
By sticking to these ideas, you make an app that's easier to grow, fix, and understand. It's a bit of work upfront but makes life much easier down the line.
Abstraction Principle
Overview
The Abstraction Principle is all about keeping the main ideas of your app separate from the nitty-gritty details. Think of it like this: you want your app to do certain things without getting bogged down in how those things are done. This means your app can focus on its main jobs without worrying about the user interface (the part you see and touch), where the data is stored, or other outside tools.
Some key benefits of using abstraction in making mobile apps include:
Application in Mobile Development
Here’s how abstraction makes building mobile apps a bit smoother:
Repository pattern
View models
Dependency injection
Wrapping third party libraries
Facade pattern
Starting with these ideas helps make apps that are easier to change, test, and keep running smoothly as they grow. It’s a bit more work at the start but makes things much easier in the long run.
sbb-itb-8abf120
Domain-Driven Design
Overview
Domain-driven design (DDD) is all about making apps that really get what businesses need. It's like creating a mini version of the business inside your app, so it can handle real-life tasks and problems.
Here's the gist of DDD:
By doing this, your apps will:
Application in Mobile Development
When you're building mobile apps, here's how DDD can help:
Common language
Bounded contexts
Ubiquitous language
Domain model
Repository pattern
Test business logic
Iterative design
Using DDD might take a bit more time at the start, but it's worth it. Your app will be ready to grow with the business and focus on what's truly important.
Testability
Overview
Making sure your mobile app can be easily tested is super important. It's a big part of Clean Architecture, which helps keep different parts of your app separate and makes it easier to handle. Here's why it's great:
Isolated Components
Mocking Dependencies
Faster Feedback
Regression Testing
Documentation
Designing your app with testing in mind means it'll be stronger and easier to keep up.
Application in Mobile Development
Here's how you can apply these testing ideas to your mobile app:
Unit Testing
Focus on small parts:
Integration Testing
Make sure different parts work well together:
UI Testing
Check if the app looks and works right on phones:
Mocking
Pretend to have parts like databases to make testing simpler:
Test Doubles
Use simple versions of parts for testing:
Dependency Injection
Build your app with parts that can be swapped for testing:
By using these methods, Clean Architecture helps you thoroughly and automatically test your mobile app. This leads to better quality and makes developers more confident.
Conclusion
When we use Clean Architecture principles to build mobile apps, we get a bunch of cool benefits:
It's easier to keep the app working well over time
Testing becomes a breeze
We can use the same core app on different devices
Changing things up doesn't cost as much
Working together is smoother
By starting with these good habits, we make sure our apps are built on a strong foundation. This means we can easily adjust to new needs or technologies without starting from scratch. Even though it takes a bit more work at the beginning, it really pays off by making our apps better and our lives easier in the long run.
Related Questions
What is mobile application architecture 5 explain?
Mobile application architecture is all about the way a mobile app is designed and put together. There are 5 main types you might come across:
Choosing the right architecture depends on what you need, like how complex your app is or how big your team is.
What is clean architecture in mobile?
Clean architecture is a way of setting up software, especially in mobile apps, where everything is neatly organized into layers. The main ideas are:
This setup helps make apps that are easier to test, change, and maintain.
What is the appropriate architecture for mobile apps?
For bigger, more complex mobile apps, clean architecture is often the best choice because:
For simpler apps, MVC or MVVM might be enough. But for apps that need to handle a lot of data and changes, clean architecture is the way to go.
What are the principles of clean architecture in Android?
When building Android apps with clean architecture, keep these points in mind:
Using tools like RxJava, Dagger, and Android’s own components can help you stick to these principles.
Related posts

10 Mobile App Security Best Practices for Developers
Keeping mobile apps secure is crucial in today's digital world. Here's a quick rundown of the top 10 security practices every developer should follow:
By integrating these practices into your app development process, you can significantly enhance the security and reliability of your mobile applications, ensuring user data is well-protected.
1. Start with Secure Coding Practices
Making your mobile app secure begins with writing safe code from the start. Here are some easy ways to do that:
By following these simple steps from the beginning, you can make your mobile app much safer for everyone who uses it.
2. Implement Data Encryption
Making sure data is scrambled (encrypted) is key to keeping a mobile app safe. Here's how to do it right:
Stick to the best scrambling methods - Use well-known methods like AES for mixing up data so only certain people can read it, or RSA for sending secure messages. Make sure you're using the top scrambling standards.
Scramble data all the time - Whether data is moving (like over the internet) or sitting still (stored on a phone), it needs to be scrambled. For data moving, use SSL/TLS to keep it safe. For data sitting still, make sure it's also scrambled.
Be smart with keys - The 'keys' that lock and unlock scrambled data should be kept safe and only given to a few people. Places like Android Keystore or iOS Keychain are good spots to keep these keys.
Check certificates are real - When your app deals with important data, make sure the security certificates are legit to stop hackers from sneaking in. Using certificate pinning is another good move.
Make code hard to read - Mix up the code and any hints to sensitive data to make it tough for hackers to figure out.
Use containers for extra safety - Put parts of your app dealing with important data in a 'container' to protect it in case other parts get attacked.
By focusing on these steps, your app will be a safer place for user data. This not only keeps the information safe but also makes users trust your app more.
3. Exercise Caution with Third-party Libraries
Using code from other people or companies can make your app better, but it can also bring problems if you're not careful. Here's how to safely use third-party code:
With so many software problems reported in 2020, it's really important to use third-party code the right way. Being careful lets you take advantage of others' work without adding risks to your app.
4. Enforce Strong Authentication Mechanisms
Making sure only the right people can get into your mobile app is super important for keeping it safe. Here's how to make your app's login really secure:
Use more than one way to log in - Ask users to give two or more proofs when they sign in, like a password and a code sent to their phone, or a fingerprint. This makes it really tough for bad guys to sneak in.
Skip the password - Let users sign in with their fingerprint or face. It's easier for them and avoids weak passwords.
Ask for login info again sometimes - If someone hasn't used the app for a while or wants to do something important, make them sign in again. This helps keep out people who shouldn't be there.
Keep login secrets safe - Make sure things like session tokens or API keys are stored in a way that nobody can sneak a peek, both on the device and when sending them over the internet.
Double-check what users type in - Always check the info users provide for logging in to stop hackers from trying tricks like SQL injection or getting in without permission.
Use a built-in password manager - Use the password managers that come with phones, like keychain on iOS or keystore on Android, to keep user login info safe.
Watch out for tampered devices - Check if a phone has been jailbroken or rooted to keep such devices from using the app.
Work with SSO - Let users sign in through secure single sign-on options like OAuth 2.0 or OpenID Connect. It's both handy and safe.
Keep track of login attempts - Write down every time someone tries to log in to spot any strange behavior and look into it.
With more and more people trying to hack into accounts, making sure the login to your mobile app is secure is super important. These tips will help keep your users' accounts out of the wrong hands.
5. Secure API Integration
When you add external APIs to your mobile app to make it do more cool stuff, you also have to think about keeping things safe. Here's a simple guide to making sure your API connections don't open up risks:
Check who's asking
Make sure every time someone or something tries to use your API, they prove who they are. It's better to use modern methods like OAuth 2.0 or JSON Web Tokens than just sending API keys, which can be easily grabbed by hackers.
Make sure inputs are clean
Always check the data coming into your API to make sure it's in the right format and doesn't have anything nasty in it that could cause trouble, like SQL injection or buffer overflows. Think of it like making sure your food is clean before you eat it.
Stick to HTTPS
Use HTTPS for all your API stuff to keep the data safe as it moves. This is like sealing your letters in an envelope so no one can read them in transit. Using HTTPS Strict Transport Security and certificate pinning makes this even stronger.
Limit what APIs can see and do
Just like you wouldn't give your house keys to just anyone, don't let your APIs have access to everything. Only let them get to the data and resources they really need. This way, if someone does get in, they can't go everywhere.
Watch how your API is used
Keep an eye on how much your API is being used and look out for anything weird, like a lot of requests all at once, which could mean someone's trying to break in.
Keep APIs protected
Think of putting your APIs behind a security guard (like a reverse proxy or firewall) to check and control who gets in. Also, keep different API parts separate so if one part gets hit, the rest is still okay.
Change passwords and keys often
Change your API keys and access tokens regularly, like how you'd change your passwords, to keep things secure. The more often, the better.
Check for weak spots regularly
Just like you'd check your car before a long trip, test your API connections for any security weaknesses to fix them before hackers find them.
By following these simple steps, you're making it much harder for the bad guys to mess with your mobile app and the data it uses.
6. Apply the Principle of Least Privilege
The idea of "least privilege" is pretty straightforward in mobile app security. It's all about making sure that your app, the people using it, and any process it runs have only the bare minimum permissions needed to do their jobs. Here's how you can make this happen in your app:
By sticking to the least privilege rule, you make your app safer for everyone. It also shows users you respect their privacy and helps keep things running smoothly if something goes wrong.
7. Secure Backend Interactions
Keeping the path between your mobile app and its backend systems safe is super important. Here's how to do it in simple steps:
Use Safe Ways to Talk
Control Who Gets In
Check Everything Carefully
Watch for Weird Stuff
Update Everything Regularly
By making sure the communication between your app and its backend is locked down, you're keeping everyone's data safe from being stolen or messed with.
8. Regular Security Checks and Testing
It's really important to keep checking your mobile app for any security issues and to test it like a hacker would. This helps you find and fix problems before they can cause harm. Here's how to do it in simple steps:
Do security checks often
Test it like a hacker
Focus on the big problems first
Keep checking and watching
Get everyone involved
By making these security checks and hacker-like tests a regular thing, you can stay ahead of problems and keep your mobile app safe from attackers.
9. Teach Users How to Stay Safe Online
Teaching users how to be safe online is really important for keeping everyone's information secure. Here are some simple ways to help users understand how to protect themselves:
Walk them through the basics
Share safety tips regularly
Use clear warnings and reminders
Keep security options easy to find
Encourage good habits with rewards
Helping users understand how to protect themselves online is a big part of keeping everyone safe. Regular tips and easy-to-understand advice can build good habits over time.
10. Stay Updated on Security Trends and Threats
Keeping up with new security threats is a must as hackers and their tricks get smarter. Here are some easy ways to do this:
Keep learning
Automate where possible
Collaborate with the community
Make security improvements ongoing
Staying ahead of security threats means always being ready to learn and improve. By being proactive, you help keep your app and its users safe from the latest dangers.
sbb-itb-8abf120
Conclusion
It's really important to include these 10 security steps when you're making a mobile app. This helps keep the app safe from new and changing dangers. Companies like Zee Palm are leading the way in making apps that are not only great to use but also protect users' information.
Secure Coding Practices
Starting with smart coding, like checking all user inputs and using strong passwords, sets a solid base for a safe app.
Data Encryption
Vetting Third-Party Code
Make sure any code you borrow from others is safe and keep it up to date to avoid security holes.
Authentication Mechanisms
Adding extra steps like codes sent to your phone or using fingerprints makes it harder for the wrong people to get into the app.
API Security
Principle of Least Privilege
Only let your app do what it needs to do, nothing more. This keeps things safer by limiting what can go wrong.
Regular Security Assessments
Keep checking your app for any weak spots and fix them before they can be a problem. This means doing regular tests and updates.
By staying on top of these security practices all through making your app, you can help protect it against the latest cyber threats.
Related posts

10 Essential Mobile App Metrics to Track in 2024
In 2024, tracking key metrics for your mobile app is crucial for its success. Here's a quick guide to the essential stats you should monitor:
These metrics offer a comprehensive view of your app's performance, user preferences, and areas for improvement. Keeping an eye on these will help you make informed decisions, enhance user experience, and drive growth.
1. Daily Active Users (DAU) and Monthly Active Users (MAU)
Keeping track of how many people use your app every day and every month is really important. It tells you if people like your app enough to keep coming back.
Daily Active Users (DAU) is about counting the number of different people who use your app in one day. This number helps you understand if your app is the kind that people want to use every day. If more and more people use your app each day, it means you're doing something right.
Things to keep an eye on with DAU:
Monthly Active Users (MAU) counts how many different people open your app over a month. Watching MAU lets you see how big your user base is and predict future trends.
What to watch with MAU:
Looking at DAU and MAU together gives you a full picture of how your app is doing. A growing number of users who come back often is a good sign. By digging into these numbers, you can figure out what makes users come back or leave. This helps you make your app and your marketing better.
2. Retention Rate
The retention rate is about figuring out what chunk of users come back to your app after their first visit. It's super important because if folks keep coming back, it means they really like your app.
You figure this out by checking how many people who used your app at one point are still using it later on. For example, you might look at how many people who used the app this month were also around last month.
Here's how to keep an eye on your retention rate:
If your retention rate is dropping, it means your app might not be keeping folks interested. But if it stays high, it's a good sign that your app has what it takes to grow and make more money. Happy users are likely to spend more and tell their friends about your app, too.
3. Churn Rate
Churn rate is how many people stop using your app over a certain time. It's super important because if lots of people are leaving, it means you're losing users faster than you're getting new ones.
To figure out your churn rate, start with your retention rate. If you keep 50% of your users from one month to the next, it means your churn rate is 50%. That's because the other half stopped using your app.
Here’s how you can try to keep your churn rate low:
Keeping your churn rate low is key because it means more people keep using your app. Plus, it’s cheaper to keep an existing user than to find a new one.
Try to keep your churn rate below 5% each month. If you can do that, you’ll have a bunch of loyal users who stick around for a long time.
4. Conversion Rate
The conversion rate is all about how many people do something important in your app, like sign up, buy something, or share it with friends. It's a big deal because it tells you if your app is good at getting people to do what you want them to do.
Here's how to make your conversion rate better:
Working on your conversion rate can help you get more users to stick around and spend money. Even small changes can make a big difference in how much money your app makes and how fast it grows.
5. Average Revenue Per User (ARPU)
ARPU is short for Average Revenue Per User. It tells you how much money, on average, each person using your app brings in.
To figure out ARPU, just divide your app's total money made by the number of users.
Total Money Made ÷ Number of Users = ARPU
For instance, if your app earned $100,000 last year and you have 20,000 users, then your ARPU is $5 ($100,000 / 20,000 = $5). This means, on average, each user spends about $5 on your app.
Why ARPU Is Important
Keeping an eye on ARPU helps you see:
For example, if your ARPU is lower than other apps like yours, maybe you can add more things for users to buy or offer subscription options.
A higher ARPU means people really like your app and are happy to spend money on it.
How to Make ARPU Better
Here are some simple ways to help increase your ARPU:
Keeping track of and working on improving ARPU is key to making sure your app keeps making money. Knowing what makes users spend more lets you focus on the right things to boost your app's earnings.
6. Customer Lifetime Value (CLTV)
Customer Lifetime Value (CLTV) is all about figuring out how much money a user will bring in while they're using your app. It's super important for knowing how valuable your users are in the long run and helps you make smart choices for your business.
Here's a simple way to see what your app's CLTV is:
CLTV = Average Money Each User Brings In x How Long They Stick Around
For instance:
This means, on average, each user brings in $10 to your business over their time with your app.
Why CLTV Is Important
Keeping an eye on CLTV helps you:
You can make CLTV better by:
A high CLTV means you're likely to keep making money in the long run. It's good to compare CLTV with how much it costs to get new users (CAC) to see if you're on the right track. If CLTV is a lot higher than CAC, it means your user base is strong and growing.
Key Points
Keeping an eye on CLTV in 2024 is key as more apps come into the market. Focus on making users happy and use what you learn from the numbers to stand out.
7. Session Length
Session length tells you how long people use your app each time they open it. It's important because if people spend a lot of time on your app, it usually means they like it.
Here's what you should look at with session length:
Aiming for longer session times is key. If you notice the numbers dropping, it's a sign to check what's wrong. Using this info can help you fix issues before they push people away from your app.
8. Load Time
Load time is about how quickly your app starts up and shows stuff when someone opens it. It's really important because if your app takes too long to start, people might get annoyed and stop using it.
Here's what you should look at with load time:
If your app takes too long to load, people might not want to use it. Keeping an eye on how fast your app starts and fixing any delays quickly can help keep your users happy. Making sure your app works smoothly is key to standing out in a busy app world in 2024.
9. Cost Per Install (CPI) and Customer Acquisition Cost (CAC)
Cost Per Install (CPI) and Customer Acquisition Cost (CAC) are about figuring out how much money you spend to get new people to use your app. Keeping an eye on these numbers helps you spend your marketing money wisely and make sure you're making more money than you're spending.
Cost Per Install (CPI) tells you how much you're paying each time someone downloads your app because of your ads. Here's how you work it out:
CPI = Total Ad Spend / Number of Installs from Ads
So, if you spent $1,000 on ads and got 2,000 people to download your app, your CPI is $0.50 ($1,000 / 2,000 installs).
Customer Acquisition Cost (CAC) is about the total cost to get a new paying customer. This includes your ad costs and any other money you spend on sales and marketing. The calculation goes like this:
CAC = Total Acquisition Costs / Number of New Customers
For example, if you spent $5,000 on marketing and got 500 new customers, your CAC is $10 ($5,000 / 500).
Why Track CPI and CAC
You want your CPI and CAC to be lower than what you earn from each user. This means you're making money off each new download or customer. Keeping an eye on these numbers in 2024 will help you grow your user base without losing money.
10. App Store Ratings and Reviews
App store ratings and reviews are super important because they tell you exactly what people think about your app. Keeping an eye on these in 2024 is a must because they can help you make your app better.
Why App Ratings and Reviews Matter
Tips for Keeping Up with Ratings and Reviews
Paying attention to app store ratings and reviews gives you a direct line to what users think. By regularly checking and learning from this feedback, you can keep improving your app for everyone in 2024.
sbb-itb-8abf120
Conclusion
It's really important for anyone making or promoting an app to keep an eye on certain numbers. These numbers help you understand how well your app is doing and what you can do to make it better. We talked about 10 key numbers to watch in 2024:
By looking at these numbers, you can figure out what's working and what's not. For example, if people are spending less time on your app, you might want to find out why and fix it. Or if it's getting more expensive to get new users, you might want to try different ways to get people interested.
The main thing is to keep checking these numbers to see how they change when you make updates to your app. This way, you can do more of what makes people happy and less of what doesn't.
By paying attention to how your app is doing, you can make it better for your users. This means they'll enjoy using it more, keep coming back, and maybe even spend more money. Keeping an eye on these 10 key numbers will help you make your app the best it can be in 2024 and beyond.
Related posts

10 Virtual Team Building Games for App Developers
Looking for ways to boost team spirit and creativity among app developers working remotely? Here are 10 virtual team building games designed to enhance collaboration, creativity, and coding skills, all while having a blast:
These activities are not only fun, but they also help remote teams work better together, think creatively, and stay updated with technology. They offer a mix of coding challenges, creative thinking, and social bonding, making them perfect for app developer teams looking to improve their collaboration and output.
1. Coding Escape Rooms

Coding Escape Rooms are like online puzzle games for people who code. Teams have to solve puzzles and use their coding knowledge to 'escape' from a virtual room.
Here's why these games are good for app developers:
Some games you can try with your team include Codingame, CodeHunt, HackerHunt, and Python Escape by Kahoot. Playing these games together can help remote developer teams feel more connected by sharing wins and learning from losses in a fun setting.
2. Hackathon Challenges
Hackathons are like coding contests where developers team up to create apps, websites, or other software quickly, usually in 24-48 hours. It's a cool way for app developer teams to sharpen their skills and think outside the box.
Here are some simple hackathon ideas for app developers:
App Prototyping Sprints
Feature Integration Hacks
Accessibility Hackathons
App Reskins
Bug Smash Marathons
Hackathons are a fun way for developer teams to learn together. They bring a sense of team spirit and connection among remote developers. Plus, the quick learning helps improve their work on real projects.
3. App Development Trivia
Playing trivia games about app development is a cool way for teams to check how much they know about coding, tech stuff, and how apps are made. Here are some fun trivia topics:
App History Trivia
Ask simple questions about important moments in the world of apps, like:
Tech Company Trivia
Find out who knows the most about big tech companies:
Coding Language Trivia
Have fun with questions about popular coding languages:
Mobile OS Trivia
See who knows the most about mobile operating systems:
App Design Trivia
Test your design knowledge with questions about how apps look and work:
Trivia games are a great way to chat about app development and learn new stuff about it. They also help teams working from different places feel like they're together, all while having a bit of competitive fun.
4. Virtual Code Reviews
Checking each other's work is a key part of making good apps. It helps teams find mistakes, share know-how, and stick to the best ways of doing things. But when team members work from different places, checking work together isn't so straightforward.
Using online tools like GitHub and GitLab, remote teams can look over code and share their thoughts easily.
Here are some simple ways to make checking code from afar work well:
Use Code Review Checklists
A checklist makes sure you don't forget to check anything. Some things to include might be:
Checklists help everyone give the same high-quality feedback.
Review Small Code Changes
Don't overwhelm yourself with too much code at once. Focus on small parts, like new functions or sections. This makes giving feedback easier.
Use Built-In Review Tools
Platforms like GitHub, GitLab, and BitBucket have features for reviewing code. You can comment on specific parts of the code directly. This makes the process smoother.
Set Up A Video Call
Talking over video while you go through the code can help a lot. You can share your screen and even draw on it to show what you mean.
Review Regularly
Make checking code a regular thing, not just before you launch something. Doing it every week or so can help your team learn and make better apps.
Doing virtual code reviews well takes some work, but it's worth it for the better teamwork and code quality. It's a good habit for teams that aren't in the same place.
5. Online Gaming Night
Having an online gaming night is a great way for app developer teams who work from different places to have fun and get to know each other better outside of work. Here are some tips to make sure everyone has a good time:
Choose Games That Encourage Teamwork
Pick games where you have to work together to win, like Overcooked, Keep Talking and Nobody Explodes, or Minecraft. These games are fun because you have to talk and plan with your team to beat the challenges.
Set Up A Discord Server
Create a Discord server for your gaming nights. This gives you a place to talk and organize things. You can have different channels for talking and for different games.
Take Turns Choosing Games
Let everyone pick a game to play on different nights. This way, everyone gets to play something they like. Look for good multiplayer games that are fun to play over the internet.
Establish Some Friendly Competition
Make things a bit more exciting by having teams and keeping score. But remember, the main goal is to have fun together. Simple competitive games like Pictionary or Scribbl.io are perfect for this.
Keep The Games Short
Choose games that have short rounds, about 10-15 minutes each. This way, people can join in even if they don't have a lot of time. It makes gaming night easier for everyone to get into.
Online gaming nights are a relaxed way for teams that work remotely to connect. Planning nights that everyone can enjoy is key. Laughing and winning together can make your team feel closer.
6. Dev Virtual Summit
Think about setting up a dev virtual summit for a fun and useful team activity. It's like a mini online conference where your team members can share topics they're passionate about or skilled in.
You can use Zoom's Immersive View to make it look like everyone's in the same room, giving it a real conference feel.
Ask your team to pick something they want to share. This could be anything from a cool coding trick they've learned to a hobby they're really into.
The idea is to let everyone show what they're good at. This can make your team feel more valued and boost everyone's mood.
Here are some ideas for what people could talk about:
You could also make it a bit of a competition, where everyone votes for their favorite talk. But the main point is to learn from each other and have a good time.
A dev virtual summit is a great way for your remote team to share what they know. It brings people closer and helps everyone get better at what they do.
7. Virtual Pictionary: Code Edition
Virtual Pictionary with a twist for coding is a great way for teams of developers to have fun and connect.
Here's the simple way to do it:
Why this game is good for your team:
All you need is something to draw with, paper, and a way to video call like Zoom. This simple game can bring your team closer, even if you're all working from different places. Plus, you might come up with some great new ideas for coding while you're at it!
8. Remote Pair Programming
Pair programming is basically when two developers work on the same piece of code together. It's great for catching mistakes early, sharing what you know, and making teamwork better. But doing this remotely can be a bit of a challenge.
Here's how to make remote pair programming easier:
Use Screen Sharing
Seeing the same thing is crucial. Use video call tools like Zoom, Meet, or Teams to share your screen. This way, both of you can see the code you're working on.
Take Turns Driving
Decide who's typing first. Swap every 20-30 minutes. The person not typing watches, gives feedback, and thinks of ideas. Switching helps keep things clear.
Talk It Out
While coding, talk about what you're doing. This back-and-forth is what makes pair programming valuable. Don't just code quietly.
Use Familiar Tools
Stick to code editors both of you know well. This saves time because you won't have to learn new tools on the spot.
Try Remote Desktop Apps
Apps like TeamViewer let you control the other person's computer. This can make switching roles smoother. Just be careful not to get mixed up.
Set Up Rules
Agree on things like when to switch roles, how long to work, and when to take breaks. This makes things less awkward.
Pair programming from different places takes a bit of effort to get right, but it's worth it. With screen sharing, good communication, and some basic rules, you can make remote pair programming a success.
9. War of the Wizards: Programming Edition
War of the Wizards is a team game that's all about having fun and getting creative, which is great for app developers who work from home.
Here's the basic idea:
Why this game is good for developers:
This game is a lively way to encourage remote developer teams to think creatively and have a good laugh together. The fun and creativity can also make the team feel more connected.
10. Build Your Own App Game
Creating a simple app game as a team is a great way to have some fun and work on your coding at the same time. Here are a few game ideas you might like:
Simple Trivia App
2D Platformer
Geolocation Scavenger Hunt
Augmented Reality Treasure Hunt
Interactive Fiction App
Why making mini games is a good idea:
Letting your team create their own small games can make work more enjoyable and teamwork stronger. Plus, the creativity and fun you have can lead to great things in your actual projects.
sbb-itb-8abf120
Conclusion
Virtual team building games are a great way for app developers who work from home to feel more connected and work better together. By playing games like escape rooms, hackathons, and doing pair programming, developers can:
Overall, playing different types of games can make remote app developer teams stronger by improving how they work together, think, and learn. For managers looking to make their teams more collaborative, creative, and happy, virtual team building games are a good choice.
Related posts

7 Dev Best Practices for Mobile App Updates 2024
In 2024, updating mobile apps with a focus on user satisfaction, security, and efficiency is essential. Here's a quick guide to the best practices:
These strategies aim to improve app functionality, secure user data, and enhance the overall user experience.
1. Prioritize User Feedback and Analytics for Update Ideas
Listening to what users say is key when deciding what to update in an app. There are two main ways to know what they think:
By knowing what users like and don't like, developers can focus on making the right changes in the next update. If a lot of people are complaining about the same thing, fixing that should be a top priority. Analytics can also show hidden opportunities, like a feature that's not being used much and could be improved.
Making updates based on what users actually need makes sure the app gets better in ways that really matter to them. Missing out on this step could mean spending time and effort on changes that users don't really care about.
2. Implement Rigorous Testing Before Rollout
Testing thoroughly is super important before you let users see the new version of your app. This makes sure the app works well and doesn't annoy users with bugs. Here's how to do it right:
Manual Exploratory Testing
Automated Testing
Beta Testing
Post-Release Monitoring
Testing well is a lot of work but it's worth it. It makes your app better and keeps users happy. Make sure you plan enough time and resources to test properly.
3. Ensure Backward Compatibility
When you update your app, it's important to make sure it still works well for everyone, even if they haven't updated their phone or tablet in a while. If an update messes things up for people with older devices, you might end up with unhappy users and bad reviews. Here's how to keep everyone happy:
1. Keep old devices handy for testing - Save some older phones and tablets to check new updates. This helps you see if everything still works right. Try to get a variety of old devices as you can.
2. Look at who's using what - Before you stop supporting an older version of the operating system, see how many of your users are still on it. If a good number of people are, think about keeping support for a bit longer.
3. Be careful with old code - Sometimes, the tools you use to build your app get updated and the old way of doing things doesn't work anymore. Don't rush to get rid of the old code. Instead, find a way to keep things running smoothly for everyone for a while longer.
4. Test with slow internet - Some people still use slow internet connections. Make sure your app still works fine for them by testing how it does on a slow connection.
5. Get feedback from long-time users - Ask people who've been using your app for a long time to try out new updates. They can tell you if their favorite parts of the app are still working well.
6. Keep an eye on crashes - After you release an update, watch out for any increase in app crashes, especially from certain types of phones or operating systems. This might mean there's a problem with how the new update works on older devices.
7. Have a backup plan - If a new update causes big problems, be ready to take it back. This way, you can avoid making a lot of users unhappy.
Making sure your app works for everyone, even those on older devices, is really important. It might take some extra work, but it helps keep all your users happy.
4. Make Updates Smaller and Less Annoying
When you're updating your app, it's smart to make sure you're not bothering your users too much or using up a lot of their data. Here's how to do that in simple steps:
Make updates light
Don't update too often
Tell users what's changed
Roll out updates slowly
Let users choose when to update
By planning your updates carefully, you can keep making your app better without causing problems for your users.
5. Focus on Security Enhancements
Making sure your app is safe is super important when you update it. Here are some straightforward ways to keep things secure:
Check Your App’s Security
Add New Security Stuff
Teach Your Users
Keep Security Fresh
By focusing on keeping your app secure, you’re making sure user info stays safe and keeping your users’ trust.
6. Streamline the Update Process
When it's time to update your app, you want the process to be quick and smooth, not slow and frustrating. Here's how to make that happen:
Automate Testing and Deployment
Modularize Code
Standardize Environments
Create Rollback Plans
Communicate Changes Internally
By planning ahead and making some smart changes to how you handle updates, you can make the whole process easier for you and your users.
7. Plan for Future Scalability
As your app gets more popular and adds new stuff, you need to make sure it can handle the growth without any hiccups. Planning for scalability means your app won't slow down or crash as more people use it. Here's how to keep things running smoothly:
Design with growth in mind
Set clear goals
Use automation to your advantage
Test with more users in mind
Think about the cost
Planning for your app to scale is a smart move. It means you're ready for growth, and you won't run into problems just when things are getting good. Being prepared for more users keeps everyone happy and makes sure your app can keep up with its own success.
Conclusion
Keeping your app up-to-date with new features and better security is really important for making sure it works well for everyone in 2024. By using some smart practices for updating your app, you can make sure it's a smooth process for your users.
Listen to Users
The best way to make your app better is to listen to what your users are saying. Look at their feedback and how they use the app to figure out what needs fixing or adding. Showing that you're paying attention and making changes based on what they need can really make users happy.
Validate Extensively
Testing your app a lot helps catch any problems and makes sure it works on all devices. Mixing manual testing with automatic checks and letting a small group of users try it out first can help spot any issues. Keeping an eye on how the app is doing after you've updated it is also important.
Support All Users
Make sure your updates still work for people with older phones. This means not rushing to remove old code and testing on a variety of devices. Fixing any problems that pop up for these users keeps everyone able to use your app.
Iterate Intelligently
Don't annoy your users with too many updates. Plan your updates carefully, starting with a small group of users to catch any big issues. Always tell users what's new or fixed to help set their expectations right.
Hardening Security
Make sure your app is safe by checking how you handle user data and making sure your security measures are up to date. Helping users understand and use new security features can also make your app safer without making it harder to use.
Streamline Process
Using automated tests and organizing your code well can make updating your app faster and less likely to have mistakes. Working together across different teams can also help make the process smoother.
Scale Confidently
Be ready for more users by testing your app with larger numbers and using cloud services that can handle the extra load. Planning for growth means your app won't slow down or crash as more people use it.
By really focusing on these smart practices for updating your app, you can make sure your updates make users happy and keep your app running smoothly. This is how you make a great app even better over time.
sbb-itb-8abf120
Related Questions
What is the future of mobile app development 2024?
By 2024, making mobile apps will focus more on these areas:
How are app updates released?
When it comes to putting out app updates, developers can:
Does app development have a future?
Absolutely, the world of mobile apps is only going to grow. More businesses and people are using apps every day. This shows how important apps are now and will continue to be.
How often should you update software and apps?
Finding the right balance between adding new things and keeping the app running smoothly is key.
Related posts

Mobile App Design Specification: 7 Key Elements
Designing a mobile app requires a detailed plan that acts as a roadmap for development. Here are the 7 key elements you should include in your mobile app design specification:
This comprehensive approach ensures your app not only meets user needs but is also well-positioned for success in the competitive mobile app market.
7 Key Elements of Mobile App Design Specification
1. Project Overview
Think of the project overview as a quick snapshot of what your mobile app is all about. It's like giving someone a mini-tour of your app idea, what you hope to achieve with it, and how you plan to get there.
Here's what you should include:
Having a clear project overview helps everyone understand what you're aiming for with your app. It makes sure you're all on the same page about what's important, how much it might cost, and how long it could take. This helps keep the project on track and focused on the main goals.
2. User Stories and Personas
When we're making an app, understanding who's going to use it and what they need it to do is super important. Let's break down how we figure this out into two parts: user stories and personas.
User Stories
User stories are short sentences that tell us what someone using the app wants to do and why. They're like mini-goals. Here's the usual way to write them:
"As a \[type of user\], I want \[some goal\] so that \[reason\]."
For example:
Personas
Personas are made-up characters that represent the people who might use your app. They have names, pictures, and stories that help us understand them better. Good personas tell us things like:
Putting It All Together
Link your personas to the user stories that fit what they need. Try out your app ideas with people who are similar to your personas to see if they work well. Remember, making a great app means knowing both what it needs to do and who will use it. Keep your user stories and personas in mind all through the app-making process to make sure you're on the right track.
3. Wireframes and Mockups
When we're creating a mobile app, wireframes and mockups are super helpful steps to make sure our app looks good and works well. Let's dive into what these are and why they're important.
Wireframes
Think of wireframes as the skeleton of your app. They're simple drawings that show where everything goes on your app's screens, like buttons and text. They also show how users move from one screen to another. Wireframes are all about planning the layout without worrying about colors or designs yet. They help us:
Mockups
Mockups are like wireframes but dressed up. They show what the app will actually look like with colors, fonts, and images. They give everyone a clear picture of the final product before it's built. Mockups are great for:
Tools We Use
There are a bunch of tools out there for making wireframes and mockups, like Sketch, Adobe XD, and Figma. These tools make it easy to create and change designs until they're just right.
Some Tips
Having clear wireframes and mockups helps everyone understand what we're building. It's like having a map before you start a journey. This way, we can make sure our app is not only useful but also a joy to use on mobile devices.
4. Functional Specifications
The functional specifications part is where we get into the nitty-gritty of what your mobile app or website needs to do. Think of it as a detailed list of instructions that tells the developers exactly how your app should work, what it should do in different situations, and what it needs to talk to, like other websites or services.
Here's what you need to include in this part:
What Your App Does
Step-by-Step User Actions
Information Your App Needs and Uses
How Your App Reacts
Speed and Reliability
Connecting with Other Services
Keeping Things Safe
Writing down all these details helps everyone understand exactly what needs to be built. It makes planning easier, helps developers build the app correctly, and makes sure the app does what it's supposed to do.
5. Non-functional Specifications
Non-functional specifications are about the behind-the-scenes stuff that makes your app work well. Think of it like the quality and speed of your app. It's not just about what your app does, but how well it does it.
Ease of Use
Reliability
Speed
Security
Compatibility
Easy to Update
By focusing on these non-functional aspects, we make sure the app isn't just useful but also reliable, fast, and safe. This helps the team know exactly what to aim for and ensures users have a good experience.
6. Testing and Validation
Testing and validation are super important steps in making sure your mobile app works right and is easy for people to use. Here's what you need to keep in mind when you're checking your app:
Functionality Testing
UI/UX Testing
Accessibility Testing
Beta Testing
Having a good plan for testing, listening to what users say, and making changes along the way can really help make your app better. Putting time into testing makes sure your app is top-notch and that people will enjoy using it.
7. Additional Considerations
When you're putting together your plan for a mobile app, don't forget about a few extra things that really matter. These bits will help your app stay useful and keep people happy over time.
Ongoing Support and Maintenance
Think about how you'll keep your app running smoothly after it's out in the world. This means:
Planning for these things early on means your app can keep up with what users need.
Analytics and Performance Monitoring
Decide what info you want to keep an eye on to see how well your app is doing. This might include:
Pick tools that can watch these things for you and tell you when something's not right. Check this info often to make your app better.
Compliance Considerations
Remember to think about the rules, especially about:
Putting these requirements into your plan from the start helps you avoid trouble later.
Implementation Plan
Sketch out the big steps and timing for making your app. This includes:
Having a clear plan makes sure everything fits together well.
Taking time to consider these extra points makes sure your app doesn't just start strong but stays strong, keeping both users and app stores happy.
Why These Elements Matter
Each element in a mobile app design specification has its own role in making sure the app turns out great. Let's look at why these parts are so important for creating apps that do what they're supposed to do.
Sets Clear Direction
Laying out the project overview, what users need, and what the app should do gives everyone a clear roadmap. It makes sure everyone agrees on what the app is for, what problem it's solving, and what it needs to have. This way, the team can focus on making things that really matter to users.
Enables Collaboration
When you spell out how the app should look and work, it helps everyone work together better. Designers understand what can be done, and developers get why things need to look a certain way. Having a shared plan helps avoid mix-ups.
Drives Efficiency
Having a solid plan for testing helps find problems early, which makes them easier to fix. Making sure the app is fast and works well on mobile devices means users will like it more. Setting quality goals early helps make the whole process smoother.
Future-Proofs Investment
Thinking about how to keep the app working well in the future protects your effort. Planning for updates, how the app will work with other systems, and how to track success sets you up for long-term value. This big picture planning makes sure the first version is just the start.
Brings Vision to Life
In the end, all these parts of the plan work together to make the app just like you imagined. They guide the team in creating something that's not only easy to use but also really solves users' problems. With a detailed plan that covers all these key parts, teams can build apps that are ready to succeed.
sbb-itb-8abf120
Conclusion
Putting together a really good plan for your mobile app before you start building it is super important. This plan should cover everything from a quick summary of what your app is about, who it's for, how it looks, what it does, how to check if it works, and what you'll do after it's launched.
Having a clear plan makes sure everyone involved knows what the app is supposed to do and how. It helps the people making the app understand exactly what you want, which means they can create something that really helps your users.
Also, by setting clear goals and figuring out how to check if the app meets them, you can make sure your app is doing its job. Keeping an eye on how your app is doing after it's out there, like how many people are using it, helps you know what's working and what's not.
In short, spending time to make a detailed plan at the start helps everyone work better together, brings out new ideas, and makes sure your app does what it's meant to do. It turns your idea into a real app that people enjoy using. This plan is like a map that guides your team to build an amazing app experience.
Related Questions
What are the 7 stages of app development?
The 7 main stages of making a mobile app are:
What is mobile app design specifications?
A mobile app design specification is a detailed plan that helps guide how an app is built. It talks about what the app is for, what it should do, how it should look, the technology it uses, how you'll know if it's successful, and much more. It's like a roadmap for making the app.
What is the key factor to consider when designing for mobile apps?
The most important thing is making sure the app works well and is easy to use. If the main features don't work properly or if it's hard for people to figure out, they won't like using it. It's crucial that the app meets users' needs in a straightforward way.
How do you write a mobile app specification?
Related posts

5 Steps to Create Successful E-Learning Apps
Creating a successful e-learning app involves understanding your audience, selecting the right technology, designing an engaging interface, developing quality content, and continuously improving based on feedback. Here's a straightforward guide:
Follow these steps to create an e-learning app that meets the needs of your learners and stands out in the digital education landscape.
Conduct User Research
Map User Personas
Define Use Cases
Getting to know your users well from the start means your app will better meet their needs and give them a learning experience they’ll value. Doing this groundwork makes everything else easier as you build your app.
Step 2: Choose the Right Platform and Development Approach
When you're making an eLearning app, it's important to think about where it will be used and how you're going to build it. Here's a quick look at your options:
ApproachNativeHybridWebPWAPros- Best performance
- Uses all phone features
- Great user experience- Make once, use everywhere
- Quicker to make- Reaches everyone
- Cheaper to make- Feels like an app
- Can be used offlineCons- Needs different versions for iOS and Android
- More expensive- Might be slower
- Can't use all phone features- Less control over look
- Needs internet- Not as many features
- Still new
Native App Development
Native apps are made just for one type of phone, like an iPhone or an Android. They work really well and can use everything the phone has to offer, like the camera. But, you have to make a different version for each type of phone, which can be a lot of work.
Hybrid App Development
Hybrid apps are kind of a mix. They use common web stuff like HTML, but they act like they're made for your phone. They're easier to spread across different types of phones but might not work as smoothly.
Responsive Web Apps
Responsive web apps change size to fit any screen, like your phone or computer. They're quick to make and easy to get to, but you can't customize them a lot, and you always need the internet to use them.
Progressive Web Apps
PWAs are like web apps but better. They can send you notifications and work without the internet, making them feel more like a real app. However, they can't do everything a normal app can, and they're still kind of new.
Think about what your eLearning app needs to do and how much you can spend. Sometimes, making both a native app and a PWA is a good idea to reach more people. Testing on real phones is important to make sure everything works right. Working with a team that knows what they're doing can help you make the best choice.
Step 3: Design an Engaging User Interface
Creating a simple and engaging user interface is key for a successful eLearning app. Making sure your app is easy and fun to use will help more people want to use it.
Apply UX Best Practices
When you're working on the app's design, keep in mind:
Following these simple rules can make your eLearning platform or mobile eLearning app more user-friendly.
Plan Interaction Flows
Think about how learners will use the app by:
Planning this way helps avoid confusion later. It also makes sure the app works well for what users need, making their learning experience smooth and enjoyable.
Keeping the design simple and focusing on how people will use the app are important steps in creating an eLearning app that people will want to keep using.
Step 4: Develop High-Quality, Modular Content
Creating good content is key for a successful eLearning app. Work with experts to make content that keeps users interested and helps them learn.
Incorporate Multimedia
Use videos, animations, pictures, and other multimedia in your content. This helps different types of learners and makes learning more fun.
Here's why it's good:
Try to use different types of media to reach everyone.
Include Assessments
Add quizzes and exercises to your content now and then. This helps users see how much they've learned and gives them feedback.
Some types of quizzes to think about:
Explain why answers are right or wrong. This helps users learn from their mistakes.
Utilize Microlearning
Break down topics into small, 5-10 minute pieces. This makes learning easier to handle and remember compared to long lessons.
Why it's helpful:
Let users go through these small lessons at their own speed. Organize them in a way that makes sense for what they want to achieve.
By sticking to these best practices and working with experts, you'll create engaging courses that meet the needs of your learners. Keep your content mixed, interactive, and in small chunks to keep users coming back.
sbb-itb-8abf120
Step 5: Continuously Test, Update and Improve
To keep your e-learning app growing and useful, you need to always be checking it with real people, looking at important numbers, and using what you learn to make it better. This way, your app can change to better fit what your users need.
Conduct User Testing
Testing with real people helps you catch and fix problems early.
Analyze Metrics
Keep an eye on things like:
Looking at these numbers helps you understand if your courses are interesting and if people are learning.
If not many finish their courses, maybe the content is too hard or confusing. If test scores are low, maybe the tests don't match the courses well.
Numbers help you see what's working and what needs to be better.
Prioritize Enhancements
Use the feedback and numbers to decide what fixes or new features to work on first. These should be things that really help users.
Some ideas for improvements:
Focus on making changes that fix real problems and improve the app based on what users say. Skip the extra stuff that sounds cool but doesn't really help.
Always checking with users, looking at how engaged they are, and quickly making your app better based on what you find is key. This process helps keep your app relevant and makes sure it continues to meet your users' needs. This approach is what keeps people coming back.
Conclusion
To wrap things up, making a great e-learning app involves a few important steps:
Understand Your Users
Do your homework to really get who your learners are and what they need. This means asking them questions, making up profiles for different kinds of users, and thinking about how they'll use your app. It's all about making sure your app fits what your learners want to do.
Choose the Optimal Platform and Technologies
You have to decide if you're making an app just for iPhones or Androids, or if you want something that works on any device. Think about how fast it needs to run, how much you can spend, and if you need it to work without internet.
Design for Maximum Engagement
Make your app easy and fun to use. Stick to simple designs, keep things consistent, and make sure users know when they've done something right. Also, think about making your app accessible to everyone, including people who might need extra help.
Develop Modular, Multimedia Content
Work with experts to put together short lessons that use videos, pictures, and quizzes to keep things interesting. This helps learners stay focused and remember more.
Continuously Test and Improve
Keep checking your app with real users, see what they like and don't like, and keep making it better. Pay attention to how many people are using your app and finishing their courses, and use that info to make improvements.
By keeping these steps in mind and always thinking about what your users need, anyone can make a great e-learning app. If you're working on an e-learning platform or mobile eLearning app and need a hand, just let us know!
Related Questions
How do you build a successful eLearning platform?
To make a good eLearning platform, follow these steps:
Remember, the learner's experience is most important.
How do you create an eLearning app?
To make a good eLearning app:
Making it simple and engaging is key.
How do you create effective eLearning?
Here are some tips:
Mixing different methods and focusing on interaction works best.
What are the 4 stages of eLearning?
The 4 main steps in making eLearning are:
Knowing these steps helps make better eLearning.
Related posts

5 In-App Ad Models: Types & Best Practices
Choosing the right in-app ad model is crucial for app developers who want to earn revenue while maintaining a great user experience. Here's a quick overview of the five main types of in-app ads, each with its own set of advantages and best practices:
Understanding your app's genre, audience, and your own revenue goals can help you select the most appropriate ad model. Balancing revenue generation with user experience is key to maintaining a positive and engaging app environment. Below is a quick comparison to help you decide which ad model might be best for your app.
Quick Comparison
Ad ModelUser EngagementRevenue PotentialUser Experience ImpactBanner AdsLowLowMinimalInterstitial AdsMediumHighSignificantRewarded Video AdsHighMediumPositiveNative AdsHighMediumMinimalOffer WallsHighHighVariable
Choosing the right ad models requires balancing these factors to ensure both profitability and user satisfaction.
The Importance of In-App Ads
Here's why in-app ads are a big deal:
How In-App Advertising Works
In-app advertising involves a few key players:
Here's how it goes down:
This setup lets app makers keep making great apps, advertisers reach the right people, and us enjoy free or cheap apps.
In-App Ad Formats
There are a bunch of different ads app makers can use:
Choosing the right type of ad is about finding a balance. App makers need to make money, but they don't want to bug us too much. Trying out different ads to see what works best is a smart move.
In-app ads are a big part of why we can use so many apps for free or cheap. Understanding how these ads work and picking the right ones can help app makers keep their apps going strong.
Comparative Analysis of In-App Ad Models
1. Banner Ads
Description
Banner ads are simple ads that look like rectangles. You can find them at the top or bottom of the screen when you're using an app. They're pretty common and don't move around as you scroll through the app.
Advantages & Disadvantages
Advantages
Disadvantages
Best Practices
2. Interstitial Ads
Description
Interstitial ads are big ads that take up your whole screen. They pop up when you're moving from one part of an app to another, like finishing a level in a game. These ads usually last between 5 to 30 seconds and have a button you can press to close them sooner. They're meant to grab your attention because they're so big and you can't miss them.
Advantages & Disadvantages
Advantages
Disadvantages
Best Practices
3. Rewarded Video Ads
Description
Rewarded video ads are short videos that users can choose to watch to get something nice in the app, like extra game lives or special content. It's like trading a bit of your time to watch an ad for a fun bonus in the app.
Advantages & Disadvantages
Advantages
Disadvantages
Best Practices
4. Native Ads
Description
Native ads are ads that look like they belong in the app. They fit in with the app's design and content, so they don't stick out as much. You might see them as sponsored posts or suggestions that look like part of the app you're using.
Advantages & Disadvantages
Advantages
Disadvantages
Best Practices
5. Offer Walls
Description
Offer walls are special pages in an app where you can see lots of different deals or tasks you can do to earn rewards. For example, you might download a new app or answer some survey questions to get free game coins or extra tries in the game you're playing. These offers come from brands that work with the app developer.
When you complete an offer, you get a reward. This setup helps app makers earn more money and gives you more fun things to do in the app.
Advantages & Disadvantages
Advantages
Disadvantages
Best Practices
Choosing the Right Ad Model for Your App
When deciding how to make money from your mobile app with ads, think about a few important things:
Your App Genre and Audience
What your app does and who uses it should help you pick the best ad model.
Think about your users - what they like, how much they'll put up with ads, and what rewards they'd want.
Revenue Goals vs. User Experience
You need to balance making money with keeping your app nice to use.
Remember, if users get something in return for watching ads, they might not mind them as much.
Costs and Capabilities
Also, think about what you can afford, what you can do, and who you can work with.
Thinking about these things will help you choose the right ads for your app. Don't forget to try different things and see what works best!
sbb-itb-8abf120
Pros and Cons
Let's look at the good and bad sides of different types of ads you might see in apps:
Ad ModelAdvantagesDisadvantagesBanner Ads- Not too pushy
- Cheap to make
- Easy to start with- Easy to overlook
- Not much space for info
- Not many people click on themInterstitial Ads- Really catches your eye
- Makes people pay attention
- More people click on them- Can get in the way
- Might make users unhappy
- Costs moreRewarded Video Ads- Fun to watch
- You get to choose to watch
- Keeps you interested- Takes more work to set up
- Have to make sure rewards are worth itNative Ads- More people click on them
- Doesn't interrupt as much
- Helps people remember brands- Expensive to create
- Not as many places to put them
- Might seem sneakyOffer Walls- Makes the app more fun
- Shows off other apps
- Gives you bonuses- Can interrupt your app time
- Hard to make sure offers are good
- Might not grab your attention
As you can see, each type of ad has its own set of good and bad points.
Banner ads are easy and cheap but might not get noticed much. Big ads that cover your screen can really make you look, but they might also annoy you if there are too many.
Ads where you watch a video to get a reward and walls with offers can make the app more fun, but they need more effort to get right. Ads that look like they're part of the app are less annoying but cost more to make.
Figuring out the best kind of ad for your app means looking at these good and bad points. Trying different types of ads is a good way to find out what works best without making your users unhappy.
The best plan usually mixes a few different kinds of ads. You can balance things out - like using offer walls and rewarded ads to make up for more annoying ads.
Always watch how your users react and change your ad types and how often they show up. With the right approach, ads can make good money without ruining the app experience.
Conclusion
Putting ads in your app is a smart way to make some money while keeping your app free or cheap for users. But, if you don't do it right, ads can annoy your users. It's all about finding the right balance between making money and keeping your app fun to use.
Key takeaways when choosing an ad model:
Best practices for integrating ads:
In the end, take your time to figure out the best way to show ads in your app. Mix different types of ads, control how often they show up, and make sure users can interact with them easily. Keep testing and adjusting to find the best balance. You want to make money, but not at the cost of losing your users.
Related Questions
What are the different types of in-app ads?
There are a few common types of ads you might see in apps:
Each type has its own ups and downs when it comes to how much they're noticed, how they affect the user's experience, and how much money they can make. Trying out different kinds can help you find what works best.
What are popular advertising models?
Two common advertising models are:
These models help shape how ads talk to potential customers and guide them towards buying something.
What is IAA in marketing?
IAA stands for the International Advertising Association. It's a big group that includes companies and people from all over the advertising world, like agencies, marketers, and media companies.
What is the revenue of in-app ad?
How much money you make from in-app ads depends on a few things:
To figure out how much you might earn, you can:
Trying different types of ads and how often they show up can help you make more money.
Related posts

Cost Estimate for App Development: Key Factors
When planning to develop an app, understanding the cost is crucial for budgeting and ensuring your project includes all desired features without overspending. Here's a quick overview to help you estimate app development costs effectively:
By considering these factors, you can set a realistic budget and make informed decisions on app features, development team, and technologies to use. This approach helps in managing costs without compromising on quality.
Table 1: Estimated Cost Range by App Complexity
ComplexityCost RangeSimple$10,000 - $50,000Average$50,000 - $150,000Highly Complex$150,000+
So, the more complex your app, the more it will cost. But, the type of device it's for (platform choice), how much developers get paid (developer rates), and what features you want also play a big part in the final price. It's important to think carefully about what you really need and talk it over with developers to get a good idea of what your app will cost.
Key Factors Influencing App Development Costs
When you're planning to make a mobile app, it's important to think about several things that can change how much it will cost. Let's look at the main factors:
1. Platform Choice
Deciding whether your app is for iPhone (iOS), Android, or both can make a big difference in your budget. Making an app just for iOS or Android means you're creating two separate versions. But, if you use tools that let you make one app that works on both, you might save time and money in the long run.
Table 2: Cost Comparison by Platform
PlatformEstimated CostNative iOS$100,000-$150,000Native Android$100,000-$150,000Cross-Platform$125,000-$200,000
Cross-platform apps might cost more at first, but they can be cheaper to keep up over time because you're not updating two separate apps.
2. Complexity and Features
What your app does and how fancy it is also affects the price. Simple apps like timers or calculators are much cheaper than ones that use new tech like virtual reality or have their own special way of doing things.
3. Developer Rates and Team
The cost also depends on who makes your app. You can work with people in your own company, hire freelancers, or go with a digital agency.
Table 3: Average Rates by Developer Type
Developer TypeHourly RateIn-house$100Freelance$30-$60Agency$150
Having your own team can seem cheaper, but don't forget about extra costs like taxes and benefits. Agencies might charge more, but they take care of everything from start to finish.
4. Location of Development Team
Where your app makers are located can also make a big difference. Hiring people from places with lower living costs can save you a lot of money.
Table 4: Average Costs by Region
RegionHourly RateNorth America$150Western Europe$100Eastern Europe$50India$25
Choosing a team from Eastern Europe, Latin America, or Southeast Asia can cut costs. Just remember to think about time zones and how easy it is to talk with them.
In short, when you're figuring out how much it will cost to make your app, remember to think about the type of app, what it does, who's making it, and where they're located. Taking a close look at these things will help you set a good budget and plan for making your app a success.
Strategies for Reducing App Development Costs
Making an app for less money without losing quality needs smart planning and smart choices. Here are some good ways to save money while still making a great app:
Build a Minimum Viable Product (MVP)
Start by making a basic version of your app, called an MVP. This version only has the most important features. It helps you see if people like your app idea without spending a lot on extra features.
Use Open Source Code and Frameworks
Use free tools and code that others have shared. These can help you build common parts of your app without starting from scratch.
Some good free tools include:
Choose a Specialized Development Team
Work with a team that knows a lot about making the kind of app you want. They can build your app faster and use stuff they've already made.
Good things about this:
Simple Yet Intuitive Design
Keep your app's design simple and easy to use. Don't add fancy effects that don't help the user.
What to aim for:
Scale Development Team Dynamically
Change the size of your team based on what you're working on. This way, you don't spend too much on people you don't need all the time.
Bigger teams for:
Smaller team for:
By making smart choices about what your app really needs, using free tools, and adjusting your team size, you can make your app for less money without losing out on quality.
sbb-itb-8abf120
Leveraging Efficient Technologies
At Zee Palm, we focus on using smart tech like Flutter and React Native to create awesome apps more quickly and without spending a ton of money, especially when you compare it to making separate apps for iOS and Android.
The Benefits of Cross-Platform Tools
Using these tools means we can write code once and use it for both iPhone and Android apps:
Flutter and React Native are two top choices for this kind of work:
Flutter
React Native
Development Expertise
Our team is really good at using Flutter, React Native, and other important tech:
The Zee Palm Advantage
Choosing Zee Palm means you get:
We’re here to make sure you get a top-notch app without blowing your budget, using our expertise in smart development tech.
Conclusion and Key Takeaways
When it comes to figuring out how much it will cost to create an app, it's really important to think about a few key things. This helps you know how much money you'll need, choose the best team for the job, and decide what features your app should have. By considering factors like how complex the app is, which platforms it will run on, how much developers charge, and where your team is based, you can get a good idea of the overall cost.
Here are some simple points to keep in mind:
Creating an app requires careful thinking about what it needs to do, who will build it, and how much you can spend. Being clear about what you can really do with your budget helps make sure your project will be successful. Working with a team that knows how to use the right tools and strategies, like Zee Palm, can make the process smoother, keep the quality high, and help manage costs.
Related Questions
What are the costs of developing an app?
Making an app starts at $10,000-$15,000 for planning, about $10,000-$15,000 for designing it, and around $5,000 for basic features like messages and tracking how it's used. Testing and keeping the app running smoothly can cost an extra $5,000-$10,000.
What is the budget for building an app?
Your budget depends on a few things:
If we use an average rate of $40 per hour, simpler apps can cost about $40,000, while more complex ones for businesses might go over $300,000.
What are the variable costs for an app?
Variable costs include:
How much does it cost to hire an app developer?
Average hourly rates by region:
The cost can also change depending on how experienced the developer is and how complex your app is.
Related posts

Mobile App Development Using Kotlin: A Beginner's Guide
Kotlin has become the preferred language for Android app development, thanks to its simplicity, safety, and powerful features. If you're a beginner, this guide will walk you through setting up your development environment, creating your first Kotlin project, and introducing you to the basics of the Kotlin language. You'll learn how to:
By the end of this guide, you'll have a solid foundation for developing Android apps using Kotlin, and be ready to explore more advanced features and concepts.
Downloading and Installing Android Studio

To kick off making Android apps with Kotlin, the first step is getting Android Studio on your computer. It's the main tool that Google offers for Android app development. Here's how to do it:
When it's all done, Android Studio will open up, and you're ready to start building your first app with Kotlin.
Creating an Android Virtual Device (AVD)
An Android Virtual Device (AVD) lets you test your apps without needing a real Android phone. Setting one up is pretty straight forward:
Now, you've got a virtual phone in the AVD Manager ready to test your apps.
Creating Your First Kotlin Project

Creating a New Project
To start making your first app with Kotlin in Android Studio, follow these steps:
This step creates a new project where Kotlin is the main language, including some basic setup.
Touring the Default Project Files
Your new project will have several important files:
Take a moment to look through these to get a feel for the project layout.
Modifying the Default TextView
To change the initial screen text to "Hello World":
Running the App
To see your app in action, connect an emulator or a real device via USB and press the run button. You should see the "Hello World" text on the app's screen.
And that's it! You've just made a simple app with Kotlin in Android Studio.
Kotlin Language Basics
Let's dive into the basics of Kotlin, the language you'll use to create Android apps. We'll keep it simple and clear, so you can get a good start.
Key Features of Kotlin
Kotlin has some cool features that make it awesome for making Android apps:
These features help make your Android apps strong, simple, and fast.
Variables and Data Types
In Kotlin, you use var for things that can change and val for things that don't:
var mutableInt = 5 // This can change
val readOnlyString = "Hello" // This can't change
Kotlin uses common types like:
Control Flow Statements
Kotlin has easy ways to make decisions in your code:
Conditional - if/else
if(age < 18) {
  print("Underage")
}
else {
  print("Adult")
}
When expression - This is like choosing based on a condition. It's similar to switch/case in other languages.
when(color) {
  "Red" -> print("Stop")
  "Green" -> print("Go")
  else -> print("Slow down")
}
Loops - for/while
for(item in list) {
  print(item)
}

while(x > 5) {
  x--
}
These help you run code based on conditions or repeat actions.
Functions in Kotlin
To do something in Kotlin, you write functions. Here's how:
fun add(a: Int, b: Int): Int {
  return a + b
}
Getting these basics down is a great start to making your own Android apps with Kotlin.
Building a Simple User Interface
In this part, we'll show you how to make a simple screen with a button that you can press and a spot where text shows up. We'll use Android's design tools and some Kotlin code to do this.
Adding UI Elements in Layout XML
First, we'll layout our screen in an XML file. We'll use a LinearLayout that stacks our elements vertically, including a TextView for showing messages, and a Button for user clicks:
<LinearLayout
    android:orientation="vertical"
    android:layout_width="match_parent"
    android:layout_height="wrap_content">

    <TextView
        android:id="@+id/text_view"
        android:layout_width="wrap_content"
        android:layout_height="wrap_content"
        android:text="Hello World!" />

    <Button
        android:id="@+id/button"
        android:layout_width="wrap_content"
        android:layout_height="wrap_content"
        android:text="Click Me"/>

</LinearLayout>
Here, we're setting up how big each element is, what it says, and giving each one a unique ID.
Wiring Up Button Click Handler
Next, in our main activity Kotlin file, we find our button and tell it what to do when clicked:
val button = findViewById<Button>(R.id.button)
button.setOnClickListener {
    // Handle click
}
This code makes sure something happens when the button is pressed.
Updating Text when Button Clicked
Inside the block of code that handles clicks, we can change what our text view says:
val textView = findViewById<TextView>(R.id.text_view)

button.setOnClickListener {
    textView.text = "Button clicked!"
}
Now, whenever the button is clicked, the text on the screen will change to let the user know. It's a simple way to interact with your app.
sbb-itb-8abf120
Running and Testing Your App
Trying Out Your App
After you've built your app with Kotlin, it's time to see it in action. Here's how you can test it:
To run your Kotlin app:
Testing your app well, both by trying it yourself and using tests, is important before you share it with others.
Using Logcat for Debugging
Android Studio's Logcat tool lets you see messages from your app while it's running. This is super helpful for figuring out problems.
To add a message in your code, use:
Log.d("MainActivity", "Button clicked")
Then, when you run your app, you can see this message in Logcat. It's great for understanding what's happening in your app, especially when something goes wrong.
Running UI Tests
Espresso is a tool for testing how your app looks and works. You can write tests that check things like whether tapping a button changes the text on the screen.
Here's an example test:
@Test
fun button_click_updatesText() {

  // Pretend to tap the button
  onView(withId(R.id.button)).perform(click())

  // Check if the text changed correctly
  onView(withId(R.id.text_view)).check(matches(withText("Button clicked!")))

}
This test makes sure that when you tap the button, the text changes as expected. Adding tests like this for the main things your app does is a good way to make sure everything works right, even when you make changes later on.
Next Steps
After you've started with Kotlin and made your first Android app, there's much more you can learn and do. Here are some next steps to take in your journey of making Android apps:
Storing Data
Apps often need to keep track of information like what settings a user prefers or what content they've downloaded. Kotlin makes it easy to work with different ways of saving data:
Connecting to the Internet
Many apps get information from the internet. Kotlin works well with some popular tools for this:
Advanced Functionality
Kotlin lets you add cool features to your apps:
Architecture Patterns
When your app gets bigger, it's important to keep your code organized. Using patterns like:
Can help you manage more complex apps.
Kotlin and Android are always getting better. There's always something new to learn! By keeping up with Android's updates and reading about new features, you can make your apps better and do more cool things with them.
Related Questions
Is Kotlin good for mobile app development?
Yes, Kotlin is a top choice for making apps, especially for Android. It's made to fix common problems and make coding easier. Here's why Kotlin is great for app making:
Most Android developers prefer Kotlin because it makes their work better and easier.
Is Kotlin alone enough for Android development?
Yes, Kotlin has everything you need to make Android apps from start to finish. It includes:
Kotlin's rich set of tools and libraries means you can build complete, high-quality apps just with Kotlin.
How much time will it take to learn Kotlin for Android app development?
If you already know how to program, you can pick up the basics of Kotlin in 2-4 weeks. You might even start making simple apps in the first week. But to really get good at Kotlin and Android, you'll need 3-6 months if you practice by making apps.
The best way to learn fast is by actually building apps, not just reading about how to do it. This hands-on practice helps you learn quicker.
How do I create a mobile app using Kotlin?
Here's a quick guide to making your first Android app with Kotlin:
Look for courses or books on Kotlin Android app development for detailed steps. The more you practice making apps, the better you'll get.
Related posts
Ready to Build Your Product, the Fast, AI-Optimized Way?
Let’s turn your idea into a high-performance product that launches faster and grows stronger.