Insights from Zee Palm's Team
We talk about products, app development, and next-generation apps.

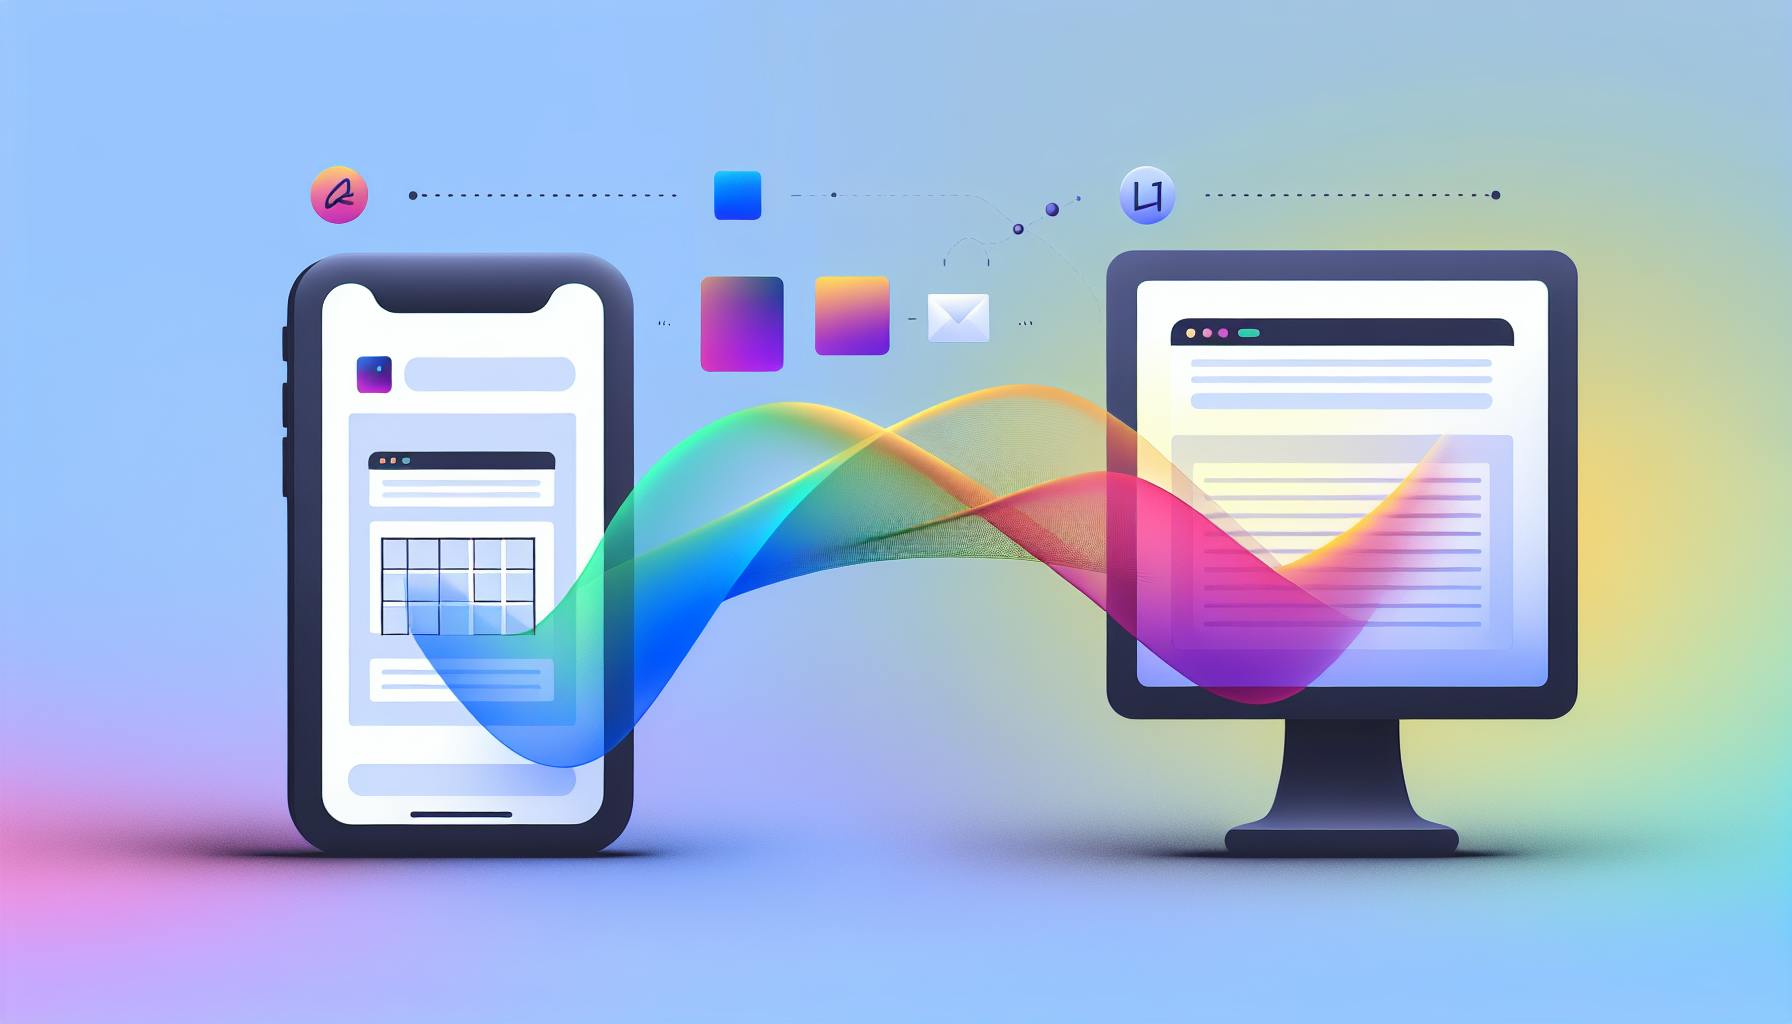
Mobile UI Design Services for Startups
If you're launching a startup, creating an engaging, user-friendly mobile app is crucial. Here's a quick guide to why mobile UI design services are indispensable for startups:
This article will also share successful case studies of startups that benefited from professional UI design services, driving home the point that investing in design can significantly impact your startup's success.
Common Mobile UI Design Challenges
Startups often don't have a lot of money or design experts, and they're rushing to get their app out. Here are some common issues they run into:
These problems can make an app hard to use, which isn't good for keeping users around.
Advantages of Custom Mobile UI Designs
But if a startup invests in custom designs for their app, there are lots of benefits:
Even though it costs more at the start, custom mobile UI design pays off by helping the startup do better in the long run.
How Specialized UI Design Services Can Help
Specialized UI design services made for startups can really help. Since startups have their own needs and limits, having a custom UI design makes them stand out, connect better with users, and get their app out there faster.
Customization for Brand Identity
Instead of using ready-made UI templates, startups should go for designs that show off their brand and what they stand for. Having a unique look and feel makes your app stand out and gives users something to remember. Things like colors, icons, and animations can show off what's special about your app.
Improved User Engagement
A simple and easy-to-use interface means people will like using your app more. Custom mobile UI thinks about who will use the app and how, making everything from the layout to how information is shown better. This makes users happy, keeps them coming back, and could even get them to tell their friends about the app.
Faster Time to Market
Specialized agencies can speed up design and development because they have experts and tools ready to go. This means startups can get their app out, test ideas, and make changes based on feedback more quickly. Getting your app to users faster can help you stand out.
Cost Effectiveness
Spending money on a good mobile UI design from the start can save money later. Apps that look and work well don't need as much money for marketing because people will want to use and share them. Also, getting more people to use the app and keeping them interested can lower costs in the long run. Using and building on existing designs can also save resources.
Choosing the Right UI Design Service
When you're picking a UI design service for your startup, you want to make sure they know their stuff about mobile apps, use the latest tech, and have a track record of great projects. Here's what to look for:
Specialized Expertise
Cutting-Edge Technology Proficiency
Impressive Portfolio
Reasonable Budgets
Seamless Collaboration
Picking the right mobile UI design services or mobile ux design agency means finding a team that fits what your startup needs. Working with experts who get the challenges startups face can lead to an app that people love to use, helps your company grow, and sets your brand apart.
sbb-itb-8abf120
Case Studies and Examples
Here are some real-life stories of new companies that got help with their app designs and saw awesome results:
Case Study 1: Finance App Startup
A new company making an app to help people handle their money better chose to work with experts in app design. They aimed for a simple and clean look that was easy for users to navigate.
Results:
Users liked coming back to the app because it was easy to use and looked nice. Investors were also impressed by the app's professional design.
Case Study 2: Food Delivery Startup
A company that delivers food decided to make their app better with the help of a mobile UI/UX design team. They focused on making it easier to:
Outcomes:
The new design used pictures and simple steps to make ordering food fun and easy, which led to more people using and joining the app.
Case Study 3: Event Management Startup
A company that helps people plan events and find vendors for them updated their app to make it easier to use. The new design helped users:
Benefits:
The changes made it simpler for users to find and book what they needed, leading to more bookings and more money for the company.
These stories show that spending money on good design for your app can really help your company grow by making users happier, keeping them coming back, and getting more people to use your app. This leads to more growth, funding, and success in the long run.
Conclusion
For startups, having a good-looking and easy-to-use mobile app is key. It helps them get noticed, keep users happy, and grow their business. To get there, they might need some help, especially if they're tight on money or don't know much about design.
Here's why a custom mobile app design is a big deal:
When looking for help, it's smart to choose someone who knows a lot about mobile apps. They can make changes quickly, design with your users in mind, work efficiently, and fit your budget.
Working with a mobile UI or UX design agency that understands startups can really make a difference. They can help your app please users, stand out, and support your business as it grows. Putting users first in your app's design is a smart move that can lead to better results.
FAQs
What are some key benefits of UI design services for startups?
Some big pluses include:
How can startups evaluate and select the right UI design partner?
What to look for in a partner:
What does the startup app design process involve?
The steps usually include:
This process is all about working together, focusing on your users, and what your business wants to achieve.
What are some examples of great startup app UI design?
The best examples show:
Good design helps startups connect with users, stand out, and grow smoothly.
Related posts
Flutter Mobile App to Web: Adapting UI for Web Users
Adapting your Flutter mobile app for web users involves considering differences in navigation, layout, and interactivity. Here's a quick guide to ensure a smooth transition:
This guide will help you adapt your Flutter mobile app to provide an optimal web user experience, ensuring your app is responsive, navigable, and interactive across all platforms.
Navigation and Page Structure
When you move your app from mobile to web, you'll notice that how people get around the app changes. On the web, people expect to:
This means your web app might work better with one long page that people scroll through, rather than separate screens.
You might want to:
This makes your web app feel more like what users expect.
Layout and Responsiveness
Unlike mobile apps that fit on one screen size, web apps need to look good on all sorts of screens, from small laptops to big monitors.
When changing your Flutter mobile app for the web, it's important to use tools like flex_color_scheme and widgets like Slider.adaptive that help your app adjust to different screen sizes.
Keep in mind:
Always test your app on different screens to make sure it looks right.
Interactivity and Inputs
Web apps are mostly used with a keyboard and mouse, which is different from touching and swiping on mobile. This affects:
Also, think about adding shortcuts on the keyboard for common tasks like moving around and filling out forms.
Adapting how people interact with your app means thinking about how they use a mouse and keyboard and making your app easy to use that way.
Adapting Navigation for Web
When you're making your Flutter mobile app work on the web, it's a good idea to switch from using many separate pages to just one big page that has everything. Here's how to do it:
Use Deep Links and In-Page Anchors
Instead of having many different pages, try to put all your content on one long page that people can scroll through. You can use:
This way, everything is on one page, which is what people using the web usually expect.
Consider Flutter Packages
There are some Flutter packages that can make changing your navigation easier, like:
These tools can help you deal with the tricky parts of changing how your app's navigation works.
Structure Layouts for Scrolling
Instead of having separate pages:
This makes scrolling through your app on the web more fun and engaging.
Consider Browser Capabilities
Don't forget to use what the web browser can do, like:
Supporting these features makes your app easier and more flexible to use.
By changing to a one-page layout with deep links and in-page anchors, you make your app's navigation feel more natural for people using the web. Packages like Beam can help make this change smoother.
Implementing Responsive Layouts
To make sure your Flutter app looks good on any device, like phones, tablets, or computers, here are some simple tricks:
Use LayoutBuilder
The LayoutBuilder tool helps your app fit the screen it's on. It checks how much space is available and picks the best layout for that screen size.
LayoutBuilder(
  builder: (context, constraints) {
    if (constraints.maxWidth < 480) {
      return MobileLayout();
    } else if (constraints.maxWidth < 800) {
      return TabletLayout();
    } else {
      return DesktopLayout();
    }
  }
)
This helps your app automatically switch between different looks depending on the screen size.
Configure Visual Density
Visual density is about how close or far apart things are on your screen. You can adjust this to make sure everything fits well, no matter the device:
VisualDensity(horizontal: 0.5, vertical: 0.5)
Changing the density can help make things look better on bigger screens.
Use MediaQuery Data
The MediaQuery tool tells you about the screen, like its size and how it's held. This info can help you adjust your layout to fit better:
MediaQuery.of(context).size.width
You can change your app's design based on things like screen width or if the device is in portrait or landscape mode.
Scale Font Sizes
Adjusting font sizes so they're easy to read on any screen is important. You can use a special setting to make fonts bigger or smaller based on the screen:
MediaQueryData.fromWindow(WidgetsBinding.instance.window).textScaleFactor
This makes sure text is always easy to read, no matter the device.
By using these tips, you can create a Flutter app that looks great and works well on all kinds of devices. Remember, the goal is to make your app flexible and responsive to any screen size.
Enhancing Interactivity
When you're changing your Flutter mobile app to work on the web, it's key to think about how users will interact with your app using a mouse and keyboard instead of touching the screen. Here are some tips to make your app more user-friendly for web users:
Add Hover Effects
You can use a package called Hovering to add effects that show up when the mouse is over a button or link. It looks like this:
Hovering(
  builder: (BuildContext context, bool isHovering) {
    return Container(
      color: isHovering ? Colors.blue[100] : Colors.blue,
      child: Text('Hover over me'),
    );
  }
)
This helps users know what they can click on.
Support Scrollbars
Make sure your app has scrollbars that work well, so people can easily move through your content:
Scrollbar(
  isAlwaysShown: true,
  controller: _scrollController,
  child: ListView(
    controller: _scrollController,
    children: [
      // long list of content
    ]
  )
)
You can change how fast the scrolling is and how the scrollbar looks.
Add Keyboard Shortcuts
Let users use keyboard shortcuts for quick actions or moving around your app:
Shortcuts(
  shortcuts: {
    LogicalKeySet(LogicalKeyboardKey.escape): ActivateIntent(),
  },
  child: Actions(
    actions: {
      ActivateIntent: CallbackAction(onInvoke: (intent) {
        // do something when the escape key is pressed
      }),
    }
  )
)
Pick shortcuts that make sense for common tasks.
Improve Click Targets
Make sure things like buttons and links are big enough to click easily. You can use padding and set minimum sizes.
Support Right-Click Context Menus
Think about adding menus that show up when users right-click on something. These can offer useful options.
By making these changes, your Flutter app for the web will be easier and more enjoyable to use on computers.
sbb-itb-8abf120
Additional Considerations
Styling and Assets
When you're moving your Flutter app from mobile to the web, you might run into a few problems like:
To fix these issues, make sure you:
Adjusting how your app looks helps make sure it's clear and good-looking on any device.
Performance and Accessibility
It's also key to see how your web app does on different computers and browsers. Make sure that:
And don't forget to check that features for users with disabilities are still working well, like:
Making your app fast and accessible to everyone is super important for a great web experience.
Conclusion
When you want your Flutter app to work great on the web, you need to think about how using a computer is different from using a phone. Here's how you can make your app work well for both:
Navigation and Page Structure
Layout and Responsiveness
Interactivity and Inputs
Moving your app to the web might seem tricky, but Flutter has lots of tools and tips to help. Testing your app on different devices and browsers is important to make sure it works well for everyone.
If you want to do even more with your app's design, check out tools like responsive_framework and learn about making your app adapt to different devices. The main goal is to make sure your app feels natural and easy to use, no matter how someone is accessing it.
Related Questions
How do I make my Flutter app responsive for mobile and web?
To make your Flutter app work well on both phones and computers, you can use:
The main idea is to use widgets that can change based on the device. Always check your app on different screens to make sure it looks and works great.
Can Flutter be used for web and mobile?
Yes, Flutter lets you make apps for phones, computers, and even more devices using just one set of code. You can switch to different platforms without needing to change your code much.
Can I convert Flutter app to web?
To change your Flutter app made for phones into a web app, you can:
You'll need to tweak some things, but a lot of your phone app's code can be used for the web too.
Why not use Flutter for web?
Some reasons you might think twice about using Flutter for web apps include:
Still, Flutter is getting better at handling web apps all the time. For many projects, being able to use the same code for different devices is a big plus.
Related posts

Node.js Mobile Development: A Comprehensive Guide
Node.js is a powerful tool for mobile app development, offering several advantages for building efficient, real-time applications. It's ideal for projects that require quick data processing and seamless user experiences across devices. Here's a quick overview:
This guide will explore Node.js mobile development, including its architecture, key benefits, setting up the development environment, choosing the right framework, and best practices. Whether you're targeting Android or iOS, Node.js can complement your mobile development toolkit, offering a path to create responsive and scalable applications.
Event Loop
Think of the event loop as a smart manager in Node.js. Even though Node.js can only do one thing at a time, this manager makes sure it doesn't just sit there waiting for a task to finish. Instead, it moves on to the next task. This way, Node.js can handle lots of requests without getting bogged down.
Non-Blocking I/O
Node.js uses something called the libuv library to make sure it can do many things at once, like sending a file or reading from a database, without having to wait for each task to finish before starting the next one. This is a big deal because it keeps things moving quickly.
V8 JavaScript Engine
The V8 JavaScript Engine is like the brain of Node.js. It's made by Google and turns JavaScript code into something the computer can understand directly, making everything run faster. This is one reason why Node.js is good for mobile app development.
Latest Release
The newest version of Node.js is v21.4.0. This version got better at helping developers understand and fix problems. Some of the improvements include:
Node.js is designed to handle lots of users and data without slowing down, which is why it's a great choice for making mobile apps that need to work quickly and smoothly. Its setup is perfect for managing many things at once, which is key for any Node.js development company or Node.js developer working on mobile app development.
Key Benefits of Using Node.js for Mobile Apps
Node.js has some big advantages when it comes to making mobile apps:
Faster Execution Speed
Node.js uses a tool made by Google that turns JavaScript into a language computers can understand really fast. This means it can run things quickly. Mobile apps made with Node.js can respond to users and load data quicker, making everything feel smooth.
Easy Scalability
Node.js works in a way that lets it handle a lot of users at the same time without getting bogged down. This is great for mobile apps that start small but grow big, needing to keep up with more users. Node.js can grow with your app easily.
Real-time Connectivity
Node.js lets your app talk back and forth with the server instantly, without having to refresh the page. This is perfect for apps where you chat, get live updates, or play games, making them responsive and fun.
Code Reuse
With Node.js, you can use the same JavaScript code for both the app and the server. This makes building the app quicker and reduces mistakes because you're not switching between different languages. It also helps keep things consistent.
Leverages JavaScript Skills
If you already know JavaScript, you can use those skills with Node.js to work on the server side of your app. This means you can build and take care of your app more easily, without having to learn a new language.
In short, Node.js makes building mobile apps faster and easier with its quick execution, ability to grow with your app, instant communication, code reuse, and use of JavaScript skills. All these points lead to less work in developing the app and a better experience for users.
Setting Up the Node.js Mobile Development Environment
Windows
To start using Node.js for making mobile apps on Windows, do this:
Now you're ready to build mobile apps on Windows with Node.js!
macOS
Here's how to get set up for Node.js mobile app development on a Mac:
Your Mac is now ready for Node.js mobile development!
Linux
To set up your Linux for Node.js mobile app development, follow these:
Now, your Linux setup is ready for building mobile apps with Node.js!
Choosing the Right Framework
When picking a framework for building mobile apps with Node.js, you'll likely consider React Native, Ionic, and Flutter. Here's a simple breakdown of what's good and not so good about each:
FrameworkProsConsReact Native- Easy for JavaScript folks because it uses React
React Native is great if you want to use the same logic for different platforms and know React. But, your app might be bigger and you might not get to use some phone features directly.
Ionic makes it easier to work across platforms using web tech. It's great for making a demo fast and has lots of design options. However, it might not run as smoothly for complex apps and relies on extra tools for some features.
Flutter is best for apps that need to run really well and look good. It has everything you need to make a great app, but you'll have to learn Dart, and it's still changing, which can be tricky.
Choosing depends on what your app needs to do, how it should look and feel, and what you're comfortable working with. Think about what's most important for your app, try out a few options, and see what works best. With Node.js for the server side, all three options work well for making apps that work on different devices.
Building Your First Node.js Mobile App
Starting your first Node.js mobile app might sound complicated, but if we break it down into smaller steps, it's quite doable. Here's a simple guide to making a basic Node.js mobile app from the ground up:
Set Up the Server
First off, you need a Node.js server. This is where your app will get its information from.
const express = require('express');
const app = express();

app.get('/', (req, res) => {
  res.send('Hello world!');
});

app.listen(3000);
Create API Endpoints
Now, let's make APIs that your app will use to get information.
const users = require('./users.json');

app.get('/users', (req, res) => {
  res.json(users);
});

app.get('/users/:id', (req, res) => {
  res.json(users[req.params.id]);
});
Connect a Frontend
Finally, let's show this data in a simple webpage.
Now, when you go to localhost:3000 in your web browser, you should see the user data from your API displayed on your webpage!
From here, you can add more features like profiles, logins, and more. With Node.js managing the back end and data, you can focus on creating a great user experience on the mobile app front end.
Node.js Mobile Development Best Practices
When working on Node.js mobile app development, it's smart to follow some best practices to make sure your code is easy to handle and your apps work well. Here's what to keep in mind:
Embrace Modularity
Split your code into smaller parts, each doing its own job. This makes it easier to manage, test, and reuse pieces of your code.
Handle Errors Properly
Use try/catch blocks to catch errors and have a plan for when things go wrong. Make sure to log errors and let users know what's happening in a way they can understand.
Follow Security Best Practices
Always check and clean your input data to avoid common attacks like SQL injection or XSS. Be careful about who can access what in your app and use standard security measures.
Monitor and Optimize Performance
Keep an eye on how fast your app responds, how much memory it uses, and how much data it sends and receives. Look for slow spots and fix them. Test your app with lots of users to see how well it handles the load.
Take Advantage of Asynchronous Coding
Use patterns like callbacks, promises, and async/await to keep your app running smoothly without waiting around for one thing to finish before starting another.
Implement Logging and Tracing
Keep track of what your app is doing and where problems might be happening. This can help you fix issues faster. Use tools to help you analyze your logs.
Standardize Code Formatting
Decide on a set style for writing code and stick to it across your project. This makes it easier for everyone to read and work on the code. You can use tools to help enforce these rules.
Use Containerization and CI/CD
Putting your app in containers can make it easier to set up and move around. Using continuous integration and continuous deployment can help you test and release updates more smoothly.
By sticking to these practices, you can make your Node.js mobile development process smoother and more efficient. This helps you create better apps and keep them running well as they grow.
sbb-itb-8abf120
Debugging Node.js Mobile Apps
Finding and fixing bugs in mobile apps made with Node.js can be tricky, but with the right tools and tips, it can get a lot easier. Here's how to do it:
Use Logging Statements
Adding console.log() in your code can help you see what's happening and find bugs. Some tips:
You can look at these logs in the command line or use services like LogDNA.
Leverage Source Maps
Source maps help you debug your original code instead of the compiled code. They connect the compiled code back to your original code.
Turn on source map generation when you build your code. Then, in debugger tools, choose the source map file to debug.
Take Advantage of Debugger Tools
Tools like Chrome DevTools or the VS Code Debugger let you go through your code step by step and check values.
Use debugger; in your code to stop it at certain points. You can also add breakpoints directly in the debugger UI.
Use a Simulator
Simulators like the Xcode iOS Simulator let you test your app in different mobile environments. Try out different OS versions and devices.
Look at console logs, network requests, and use debug tools while simulating.
Automate UI Testing
Tools like Detox can automatically test how users interact with your app and find bugs.
Create tests that go through important parts of your app to make sure everything works as it should. This helps find crashes early.
Monitor Performance
Use tools to check on things like how much CPU your app uses, if there are memory leaks, and how many network requests it makes.
Find parts of your code that slow down your app. Use profiling in simulations to find issues that only show up on mobile devices.
By following these tips, you can make debugging Node.js mobile apps a lot smoother. Use the right tools, add logging, and test a lot. This will help you write better code and make better apps.
Case Studies
How Big Companies Use Node.js for Their Mobile Apps
Node.js is a favorite tool for many big companies to make their mobile apps work better and handle lots of users. Let's look at how some famous brands use Node.js to make their mobile apps better.
PayPal
PayPal, a big name in online payments, chose Node.js for these reasons:
Handling Lots of Users
Quick Responses
Working Faster
What They Got
Uber
Uber changed how we get rides with its app, and they used Node.js to do it.
Instant Updates
Handling Busy Times
Location Features
What They Got
Netflix
Netflix uses Node.js to make watching shows on your phone better.
Splitting the App into Parts
Dealing with Lots of Users
Quick Changes
What They Got
These stories show why Node.js is so popular for making mobile apps that need to be fast, handle lots of users, and get new features quickly.
Overcoming Key Challenges
While Node.js is great for making mobile apps, there are some hurdles to jump over. Luckily, there are ways to tackle these issues head-on.
Finding Talent
It can be tough to find people who know how to use Node.js for app development. Here are some ideas to help:
Legacy Systems Integration
Mixing new Node.js apps with older systems can be a bit of a headache. You can try:
Fragmented Ecosystem
With so many tools and frameworks out there, it's hard to pick the right one. Here's what you can do:
App Store Policies
Getting your app approved by app stores can be tricky. Here are some tips:
By planning ahead and using the community's knowledge, you can get past these Node.js mobile development challenges. Picking the right tools for your project is crucial.
Conclusion
Node.js: Making Mobile Apps Better and Easier
Node.js is a great tool for creating mobile apps that need to handle lots of users and update in real time. It's good because it can deal with lots of data quickly and lets you use the same code for both the app and the server. This means you can make apps faster and it costs less.
This guide has shown us that Node.js helps make apps that can keep up with lots of users and updates without slowing down. It makes apps run smoothly because it can do many things at once. You can also use lots of ready-made parts to add new features quickly. Node.js is great for apps that need to chat in real time, stream videos, play games, or show lots of moving graphics.
Big companies like PayPal, Uber, and Netflix use Node.js for their mobile apps to make them work better and handle more people using them. For businesses wanting to make cool new mobile apps, Node.js is a smart choice.
But, to really get the most out of Node.js, it's important to make sure your app is safe, handles mistakes well, keeps running fast, and the code is clean and easy to understand. Using popular frameworks like React Native and smart ways to organize your app, like containers and small services, is also a good idea.
As Node.js gets better with new updates that make finding and fixing problems easier, now is a great time to use it for making mobile apps. If you need help, companies that know a lot about Node.js, like Zee Palm, can make top-notch mobile apps that are exciting, smooth, and can grow with your business. They know how to deal with the tricky parts of using Node.js, like finding the right people, making it work with old systems, and following app store rules.
If you're thinking about making your mobile app better with Node.js, talking to experts in Node.js app development is a good start. They have the skills and know-how to make apps that are just right for what you need - innovative, easy to use, and ready to grow.
Further Reading
Here are some helpful resources if you want to dive deeper into making mobile apps with Node.js:
Tutorials
Documentation
Books
These resources can give you a better understanding of how to use Node.js to create mobile apps that work well and can grow with your needs. Let me know if you have any other questions!
Related Questions
Is node JS good for mobile app development?
Yes, Node.js works well for creating mobile apps. Here's why:
Big names like PayPal, Netflix, and Uber use Node.js for their apps because it can handle lots of users and updates smoothly. It's also easier to grow your app with Node.js because of its simple setup and reusable code.
What is node JS a comprehensive guide?
Node.js is a tool that lets you use JavaScript to do server-side programming. Here's what makes it special:
Node.js is popular for building websites, APIs, and real-time services because you can use JavaScript for both the front and back ends of an app. Many companies choose Node.js to make their online services faster and more scalable.
Can I use node JS on mobile phone?
Yes, you can run Node.js on mobile devices, but not directly. Here are some ways to do it:
While you can't run Node.js directly on mobile phones, these methods let you use it for the server-side of mobile apps or bundle it into an app in a roundabout way.
Can we make Android app using node JS?
Yes, you can create Android apps with Node.js in several ways:
These options allow you to use Node.js for backend logic and data management while the front end can be a native or web-based interface. This flexibility makes Node.js a good choice for mobile app development.
Related posts

Mobile App Development for Small Business: A Starter Guide
Thinking about mobile app development for your small business? Here's what you need to know:
Whether you're looking to make your first app or improve an existing one, understanding these fundamentals can guide you towards creating an app that benefits your small business.
What is Mobile App Development?
Making a mobile app is all about creating programs that work on phones and tablets. It includes writing the code, checking if everything works right, and putting the app out there for people to download on their iOS or Android devices.
Here’s what goes into making an app:
In short, making apps lets businesses talk directly to their customers through special programs designed for phones.
Types of Mobile Applications
There are 4 main kinds of apps:
Each type of app has its own pros and cons, like how much they cost, what they can do, and which phones they work on.
Advantages of Mobile Apps for Businesses
Here’s why apps are great for small businesses:
With the right approach, apps can really help small businesses get better at what they do, sell more, and grow.
Planning Your Mobile App
This part talks about how to get ready to make a mobile app for your small business. It covers figuring out what you want the app to do, learning about the people who will use it and what other businesses are doing, and picking the best way to make and launch your app.
Setting Clear Goals
Before anything else, think about what you want your app to achieve. Do you want to sell more products through the app? Help customers help themselves? Get more people to sign up for your emails? Make your business run smoother behind the scenes? Write down specific targets that you can check off as you hit them. This makes sure you're always working towards what's important.
Knowing Your Audience and Competitors
Understand who will use your app and what other similar apps are out there:
Doing your homework here helps you figure out how to make your app stand out.
Choosing the Right Platform and Approach
There are a few ways to go about making your app:
Pick the option that fits your budget, how fast you need the app, and what the app needs to do.
Designing Your App for Success
When it comes to making your app, there are a few key things to keep in mind to make sure it's a hit. Let's dive into the basics of making your app easy to use, why it should match your brand, and what to put in your first version.
Key Principles of Mobile App Design
Creating an app that people enjoy using is all about keeping it simple and focusing on what users need. Here's what to remember:
Keeping these tips in mind will help you make an app that's not only useful but also something people enjoy.
Maintaining Brand Consistency
Your app should feel like it's part of your brand. This means:
Keeping your app consistent with your brand makes everything feel more connected and smoother for your customers.
Features to Include in Your Initial Release
When you first launch your app, focus on the basics that meet a big need. Here's what to aim for:
Start simple and build on that based on what your users tell you. This way, you can make sure your app is really what they need.
The Development Process
Choosing a Development Partner
When you're looking for someone to help make your app, it's key to find a team you can trust to bring your idea to life. Here's what to look for:
Taking the time to find the right partner will help make sure your app development goes well.
Development Tools and Technologies
At Zee Palm, we use a bunch of tools and languages to build apps:
We always stay up-to-date with the latest tools to make sure we can build great apps that do what you need.
Testing and Quality Assurance
Testing your app before it goes out to the world is super important. Here's what we do to make sure your app is ready:
Testing takes time, but it's worth it to make sure your app works well and people enjoy using it. Our team works closely with you to test everything thoroughly before launch.
sbb-itb-8abf120
Launching and Marketing Your App
The Launch Process
Getting your app out there on places like the Apple App Store and Google Play Store is a big deal. Here’s what you need to keep in mind:
Doing things right at each step can help make sure your app starts off strong.
Marketing Your App
With so many apps out there, getting people to notice yours is key. Here’s how you can do that:
Mixing paid and free ways to talk about your app can help more people find and use it. Keep trying different things to see what works best.
Managing and Updating Your App
Monitoring Performance and Feedback
It's important to keep an eye on how your app is doing and what your users think about it. Here's how to do that in simple steps:
Keeping track of these things helps you understand what your users like and don't like, so you can make your app better for them.
Iterative Improvement and New Features
Use the feedback and data you get from users to keep making your app better. Here's a straightforward plan:
Updating your app regularly based on what your users say keeps it useful and makes sure people keep using it.
Conclusion
Making a mobile app can be a big boost for small businesses. It's a way to talk to customers, sell things, show off your brand, and make some tasks easier. If you follow the advice we've talked about, you can make sure your app does well.
Here's a quick summary:
Even if you don't have a lot of resources, taking a smart approach to making a mobile app can really help your small business grow. It's worth the effort because it can lead to more customer interest, more sales, smoother business operations, and lower costs. We hope these tips make the process easier for you.
Related posts
Cost Estimate for App Development: Real-World Examples
Understanding App Development Costs: Real-World Examples
When diving into the world of app development, understanding the cost is crucial. This article presents real-world examples to illustrate the range of expenses involved in creating apps of varying complexity. Here’s a quick overview:
• Simple Utility Apps: $20,000 - $50,000
• Mid-Level E-commerce Apps: $50,000 - $150,000
• Complex Social Media Apps: $150,000 and above
This guide aims to provide a foundational understanding of app development costs, showcasing examples from simple utility apps to complex social media platforms. Each case study breaks down the initial estimates, final costs, challenges encountered, and lessons learned, offering valuable insights for potential app developers.
Factors Influencing App Development Costs
Complexity
How complicated your app is plays a big role in how much it will cost. If your app is simple, with just a few pages and basic functionality, it won’t cost as much as an app that has a lot of advanced features, custom designs, and complex internet connectivity.
Basic Breakdown:
• Simple Apps: $15,000 - $50,000
• Moderately Complex Apps: $50,000 - $100,000
• Highly Complex Apps: $100,000 and above
Platform
Making your app work on both iPhones (iOS) and Android phones can double your work. Developing a separate app for each platform costs more than making one app that works on both using cross-platform technologies.
Cost Expectations:
• Single Platform (iOS or Android): Base cost
• Both Platforms Separately: Approximately double the base cost
• Cross-Platform Development: 1.3 - 1.5 times the base cost
Design
How your app looks and feels can range from using ready-made designs to creating something unique. More custom design work means higher costs.
• Basic Design Templates: Lower cost
• Custom UI/UX Design: Higher cost due to increased design hours
Features
The more things your app can do, the more it will cost. Adding more pages, user interactions, and features increases the work needed.
• Basic Features: Login, simple navigation, basic content display
• Advanced Features: Social media integration, in-app purchases, real-time updates, complex animations
Team Location
Where your app development team is located can change the cost significantly. Rates for developers can vary from $20 an hour to over $150 an hour.
• North America and Western Europe: $80 - $150 per hour
• Eastern Europe and Latin America: $30 - $70 per hour
• Asia and Africa: $20 - $50 per hour
Choosing a team from a place with lower costs can help you save money, but remember to consider quality and communication.
Case Study Overview
We’ll look at some real examples of what it costs to make an app, covering projects from different businesses, with various features, and teams of different sizes. Each example will include:
• Project Description
• Development Process
• Cost Breakdown
• Challenges and Solutions
• Lessons Learned
Case Study 1: Simple Utility App
Project Description:
A straightforward app to help people keep track of daily water intake. Features included logging water intake, setting hydration goals, providing reminders, and displaying progress through charts.
Development Process:
• Discovery: 2 weeks
• UX/UI Design: 3 weeks
• Development: 8 weeks
• Testing: Last 2 weeks alongside development
• Launch: Week 16
Cost Breakdown:
• UX/UI Design: $5,000
• Development: $12,000
• Testing: $3,000
• Total: $20,000
Challenges and Solutions:
• Scope Creep: Additional features were requested mid-development.
• User Experience Issues: Early testers found the app confusing.
• Solutions: Implemented change management and revised UI/UX based on feedback.
Lessons Learned:
• Importance of Clear Requirements
• User Testing is Crucial
Case Study 2: Mid-Level E-commerce App
Project Description:
An online retailer app featuring a product catalog, shopping cart, secure payment integration, user accounts, and push notifications.
Development Process:
• Discovery & Planning: 4 weeks
• UX/UI Design: 6 weeks
• Development: 12 weeks
• Testing: Last 3 weeks
• Launch & Monitoring: Week 26
Cost Breakdown:
• Project Management: $8,000
• UX/UI Design: $12,000
• Development: $68,000
• Testing & QA: $17,000
• Total: $105,000
Challenges and Solutions:
• Data Synchronization: Employed middleware.
• Security Concerns: Integrated secure payment gateways.
Lessons Learned:
• Plan for Integration
• Security is Non-Negotiable
Case Study 3: Complex Social Media App
Project Description:
A social media app for travelers to create profiles, share experiences, follow others, and explore destinations.
Development Process:
• Discovery & Planning: 6 weeks
• UX/UI Design: 10 weeks
• Development: 6 months
• Testing: Last 3 months
• Launch & Monitoring: Month 12
Cost Breakdown:
• Project Management: $12,000
• UX/UI Design: $22,500
• Development: $195,000
• Testing & Maintenance: $42,000
• Total: $271,500
Challenges and Solutions:
• Performance Bottlenecks: Optimized backend.
• Complex Features: Used third-party services for real-time features.
Lessons Learned:
• Plan for Scalability
• Leverage Existing Solutions
Cost Reduction Strategies
1. Prioritize Core Features
2. Choose an Optimal Tech Stack
3. Rightsize the Team
4. Employ Agile Methodology
5. Explore Alternative Pricing Models
Choosing the Right Development Partner
1. Technical Expertise
2. Communication and Collaboration
3. Cost Effectiveness
4. Proven Methodology
Conclusion
1. Allow Flexibility in Initial Cost Estimates
2. Carefully Evaluate Project Complexity
3. Validate Demand Before Over-Investing
4. Choose the Right Development Partner
5. Optimize Technologies to Control Costs
Related Questions:
• What is the average cost of developing an app? $15,000 - over $500,000.
• What is the estimated budget for making an app?
• Simple App: $15,000 - $50,000
• Moderately Complex App: $50,000 - $100,000
• Complex App: $100,000 and above
• What are examples of fixed costs for an app? Initial development, licensing fees, legal fees.
• How much does it cost to develop an AI app?
• Basic AI Features: $50,000 - $100,000
• Advanced AI Functionality: $100,000 - $300,000 or more
By keeping these ideas in mind—being flexible, testing early, picking the right features, finding a good team, and optimizing technology—you can build a great app within budget.

Custom App Development Solutions: A Comprehensive Guide
Custom app development solutions empower businesses to create applications tailored to their unique needs, offering enhanced user experiences, improved work processes, and competitive advantages. Here's a concise guide on why and how to pursue custom app development:
Whether you're aiming to improve customer engagement, streamline operations, or secure a competitive advantage, custom app development offers a pathway to achieving these goals with technology tailored to your specific requirements.
What is Custom App Development?
When we talk about custom app development, we're talking about creating apps from scratch based on what a business wants and needs. This means making an app that does exactly what you want it to do, with the features and looks that match your business perfectly.
Here's what goes into it:
Distinguishing Features of Custom Apps
Custom apps are different from the apps you just download and use because they:
The Custom App Development Process
Making a great custom app doesn't happen overnight. It involves several important steps:
1. Ideation and Goal Setting
This step is all about figuring out what problems the app needs to solve and what it should achieve.
2. Requirements Analysis and Specification
Here, every detail about what the app needs to do is written down. This includes how users will interact with it and what it will look like.
3. Application Architecture and Design
This is where the technical blueprint of the app is created, including how it's structured and how it will connect with other systems.
4. Development and Testing
In this phase, the app is built and tested over and over to make sure it works well and fixes any problems.
5. Deployment and Maintenance
Finally, the app is launched for people to use. But it doesn't stop there; the app will need to be looked after and updated based on user feedback.
By going through these steps, custom apps are made to fit a business perfectly, helping to improve how work gets done and making customers happy. It's a way to make sure you get exactly what you need from your technology.
Why Choose Custom App Development?
Custom app development is a great choice for businesses that want to stand out and serve their customers better. Here are some of the main benefits:
Scalability
Custom apps are made just for your business, so they can grow with you. Here's why they're good for growing businesses:
Custom apps are made to grow with your business, unlike ready-made apps that might not be able to keep up when your business gets bigger.
Personalization
Custom apps give you and your users an experience that's just right for your business.
This kind of personal touch makes things more efficient and keeps users interested because everything feels more relevant.
Competitive Edge
Having a custom app can really help your business stand out.
Custom apps can solve problems right away and also help your business stay ahead in the long run. With the right planning and team, they can bring new ideas, make things run smoother, and grow with your business in ways other apps just can't.
Key Considerations Before Starting
Before jumping into making a custom app for your business, there are some big things to think about. Let's break them down:
Budget
Timeline
Business Objectives
Audience and Personas
Post-launch Plan
Thinking through these points carefully before you start will help you make a custom app that really works for your business.
The Custom App Development Process: A Step-by-Step Guide
1. Ideation and Conceptualization
The journey starts with brainstorming ideas and figuring out what you want your app to do. This step includes:
Getting a clear picture of your app early on helps keep everything on track.
2. Requirement Analysis
Now, it's time to get into the details by talking with everyone involved:
Digging deep into these requirements makes sure everyone's on the same page and saves time later.
3. Choosing the Right Technology Stack
This is about picking the tools and technologies for building your app. Things to think about include:
Choosing wisely here sets a strong foundation for your app.
4. Design and User Experience
With all the planning done, it's time to design how the app will look and work:
A good design means your app is easy and enjoyable to use.
5. Development
Now, the actual building of the app starts:
This step is all about teamwork and making sure the app is built right.
6. Testing and Quality Assurance
Before the app goes live, it needs to be tested thoroughly:
Testing makes sure the app works well and is ready for people to use.
7. Deployment
Once the app is polished and ready, it's time to launch:
This is when your app finally gets into the hands of users.
8. Maintenance and Updates
After the launch, the work isn't over:
Staying on top of maintenance keeps your app running smoothly for a long time.
Choosing the Right Development Partner
Finding the right partner to help build your custom app is super important. They can make your app idea come to life and keep it running well. Here's what to look for when picking a partner:
Technical Capabilities
Communication and Collaboration
Delivery and Post-launch Support
Other Key Questions
Take your time to check these things before picking a partner that fits what you're looking for in making your custom mobile app, whether it's for iOS, Android, or a hybrid app.
Cost Considerations in Custom App Development
When you decide to make a custom app for your business, you need to think about how much it's going to cost. Here's a look at the main things that can make your app more expensive.
Development Complexity
How complicated your app is will affect how much it costs. Here are some things that can make an app more complex:
Simple apps are cheaper and quicker to make. More complex apps need more people and better tech.
Platforms and Devices
If you want your app to work on different devices (like phones and tablets) and systems (like iOS or Android), it will cost more. Making sure the app looks good on all these devices takes extra work.
Team Size and Location
The cost also depends on how many people are working on your app and where they are. More complex apps need bigger teams. If your team is in a place where living costs are high, you'll pay more for their work.
Hosting, Operations and Support
After your app is out, you'll still need to spend money on keeping it running. This includes paying for servers, updating the app, fixing any problems, and helping users.
Tips for Managing Custom App Budgets
Planning carefully from the start can help you make a great app without spending too much. Working with the right people can also help you make smart choices about where to invest in your app.
sbb-itb-8abf120
Case Studies: Success Stories of Custom Apps
Custom mobile app development lets businesses make apps that are just right for what they need. When done well, these apps can help a business grow, work more efficiently, and stand out from the competition. Here are some real stories of companies that did great things with their own custom apps.
Online Retail Company Increased Sales by 20%
A growing online shop needed a better way for customers to buy things on their phones. They decided to make their own app for both iPhone and Android users. This app made it easier to:
After the app started, mobile sales went up by 20% in one year. Customers also became more loyal because the shopping experience was better and more personal.
Field Services Company Improved Productivity by 30%
A small company that provides services out in the field was stuck using paper forms and entering data by hand. They made a custom app for their field workers that allowed them to:
This app saved the field workers about 1.5 hours each day on paperwork. It also made the data more accurate and gave the company a better view of what was happening in the field, improving operations by over 30%.
Nonprofit Increased Donations by 15% With Customized Giving App
A nonprofit that relies on events and donations made a special app for giving. This app was made to:
By making giving easier, the app helped increase donations by 15% in its first year.
These real stories show how custom apps can really change things for the better. When these apps match up with what a business really needs, they can bring in more money, make work easier, and even get more donations.
The Future of Custom App Development
Custom app development is quickly changing to make the most of new technologies and meet the changing needs of businesses. Here are some of the main trends that are shaping what custom mobile apps will look like in the future:
AI and Machine Learning Integration
Artificial intelligence and machine learning are being added to custom apps to make them smarter and more personal for users. Here are some ways they're being used:
By using AI and ML, custom apps can get better over time and offer more to users.
Expanded Use of AR and VR
Augmented and virtual reality are starting to be used in custom apps for more than just fun and games. New uses include:
As AR/VR technology gets better and easier to use, it will create new opportunities for custom mobile apps.
Greater Focus on Security
As online threats grow and privacy rules get stricter, making apps secure is becoming more important. This includes using things like:
Security is now a key part of making custom mobile apps, right from the start.
Migration to the Cloud
Cloud platforms are becoming popular for hosting custom apps because they offer:
Cloud technology lets custom apps grow and change quickly to meet business needs.
Low-Code Solutions Gain Traction
Low-code platforms let people who aren't programmers build custom apps using easy-to-understand visual tools. This makes making apps faster and less dependent on tech experts.
Low-code solutions are making it easier for businesses to quickly create custom mobile apps that fit what they need.
The future of custom app development is exciting, with these tech trends making apps more engaging, secure, scalable, and quicker to build. As these technologies keep getting better, they will help businesses make more complex and useful mobile apps that can change as their needs do.
Conclusion
Making your own app for your business can really help it do better. It's like making a tool that fits perfectly with what your business does and needs. Let's go over the main reasons why making your own app is a smart move:
Better for Users
Your own app can make things really easy and nice for people who use it. It can look and feel just like your brand, and give users exactly what they want. This keeps them happy and coming back.
Makes Work Easier
With a custom app, you can get rid of paper work, connect different parts of your business, and get to important info anywhere, anytime. This means everyone can do their jobs better and faster.
Saves Money and Time
Yes, making an app just for you might cost more at first, but it saves you money in the long run by making everything more efficient. Plus, it can help cut down on unnecessary expenses.
More Sales
A good app can make customers happier and more likely to buy from you. It can also help your team do their jobs better, which can lead to more sales.
Ready for Growth
Your own app can grow with your business. It's built to handle more work or changes down the road, so you don't have to keep starting over with new apps.
Keeps Data Safe
When you make your own app, you can make sure it's really secure. This protects your business and customer info from hackers.
Stand Out from the Crowd
Having your own app shows you're innovative and focused on what customers want. It makes your business look good and different from competitors.
Making your own app, whether it's a custom iOS app development, custom Android app development, or Hybrid App Development, can really help your business in many ways. With the right approach, it can make your operations smoother, keep your data safe, and make both customers and your team happier.
FAQs
Here are some common questions and straightforward answers about making custom apps:
How long does it take to develop a custom mobile app?
The time it takes can vary a lot - from 2 to 9 months. Simple apps might only take 2-3 months, but more complex ones with lots of features could take up to 6-9 months to get right.
What are the main platforms for custom app development?
There are a few different types:
How much does it cost to build a custom mobile app?
The cost can range a lot. Simple apps might cost between $10,000 and $50,000, while more complex ones can go from $100,000 to over $500,000. It all depends on what you need the app to do.
What are some tips for controlling custom app development costs?
Here are a few ideas:
What should I look for when choosing a development company?
Keep an eye out for:
How can I ensure my app idea stays confidential?
A trustworthy company will sign a non-disclosure agreement (NDA) to protect your idea. Also, talk about how they keep data safe and who owns the app code.
I hope these answers help you understand a bit more about making your own app! If you have more questions, just ask.
Related Questions
What are the 5 steps of app development?
When making a custom mobile app, you generally follow these five steps:
What is custom app development?
Custom app development means making a unique app specifically for your business needs. It's different from using pre-made apps because you get to decide exactly how it works and looks. This includes choosing the features, how it connects with other systems, and making sure it fits your brand.
How much does it cost to create an app?
Creating an app can cost anywhere from $10,000 to more than $500,000. It all depends on how complex your app is, whether it's for iOS, Android or both, and where your development team is located. Simple apps are cheaper, while ones with lots of features or that need to work on many devices can get really expensive. Planning ahead can help keep costs under control.
How can I create my own free app?
If you want to try making a simple app without spending money, you can use:
Keep in mind, though, that these free options might not let you do everything you want.
Related posts

Most Popular Cross Platform Mobile Framework: A Comparison
Choosing the most popular cross-platform mobile framework involves comparing top options like Flutter, React Native, Xamarin, Ionic, and Kotlin Multiplatform. Each has its strengths and weaknesses, affecting performance, ease of use, and access to native features. Here's a brief overview:
Quick Comparison
FrameworkPerformanceEase of UseAccess to Native FeaturesFlutterHighModerate (Dart required)GoodReact NativeHighHigh (JavaScript)GoodXamarinHighModerate (C#)ExcellentIonicModerateHigh (Web technologies)GoodKotlin MultiplatformHighHigh (Kotlin)Excellent
This comparison aims to simplify your decision-making process by highlighting the key aspects of each framework, helping you choose the right one for your project based on performance, ease of use, and how well they leverage native device features.
Benefits of Cross-Platform Development
Here are some good things about making apps this way:
Challenges with Cross-Platform Apps
But, there are some downsides:
When to Use Cross-Platform Approach?
This approach is great for apps that don't need super detailed control over the phone's features, like business apps, shopping apps, or simple tools. It's also good when you want to make a basic version of your app quickly.
But for games or apps that need to use a lot of the phone's special features, it's usually better to make a separate app for each platform. So, it really depends on what your app needs to do.
Criteria for Comparison
When looking at different ways to make apps that work on both iPhones and Androids, there are a few things to think about:
Performance and Speed
Speed is super important for apps to work well, especially for games or apps with lots of details.
Access to Native Features and APIs
Being able to use what the phone offers can make apps do more cool stuff. It really depends on what your app needs to do.
Code Reuse and Portability
Using the same code for everything makes things easier and keeps down costs. It means less work in updating and fixing the app.
Ease of Use and Learning Curve
A framework that's easy to pick up and has lots of helpful resources is better. It means faster work and less head-scratching.
Maturity and Stability
Frameworks that have been around for a while and update smoothly are less likely to mess up your app.
Community Backing and Job Market
Having a lot of people who support the framework and can work on it means it's more likely to stick around and keep getting better.
By thinking about what your app needs and looking at these points, you can figure out which way of making apps is best for you. There are trade-offs, so knowing what's most important for your project is key.
Comparative Analysis of Frameworks
1. Flutter
Flutter is a tool made by Google in 2017 to help build apps that work on both iPhones and Android phones. It uses a programming language called Dart. Flutter is known for making apps that run smoothly and look nice.
Performance
Community Support
Ease of Use
Access to Native Features
Real-World Application
Here are some well-known apps made with Flutter:
2. React Native

Performance
React Native works really well and feels almost like apps made just for iPhones or Androids. It uses parts of the actual phone to show things on the screen, which means everything moves smoothly and quickly. But, if an app is very complicated, it might not work perfectly.
In tests, React Native's startup time was a bit slower than apps made just for one type of phone, but not by much. This means it's pretty fast.
React Native also lets developers see changes they make right away without starting over, which helps them work faster.
Community Support
React Native has a lot of people helping out and sharing resources because it's supported by Meta and has been around since 2015. There's a lot of information and tools available for anyone using it.
Many developers are interested in or already using React Native, so it's easy to find help or answers to questions.
Ease of Use
If you already know how to use React and JavaScript, learning React Native is easier. It's set up a lot like React.
But, you'll need to learn some new things specific to making mobile apps, like how to handle touch screens. So, there's a bit of learning to do if you're new to making apps for phones.
Access to Native Features
React Native lets you use many of the phone's built-in features, like the camera and GPS. But, sometimes it might not have the latest updates right away.
For very specific features, developers might need to write some extra code. But generally, React Native tries to make it easy to do what most apps need to do.
Real-World Application
Here are some apps that were made with React Native:
3. Xamarin

Performance
Community Support
Ease of Use
Access to Native Features
Real-world Application
Some apps that were made using Xamarin:
4. Ionic
Performance
Ionic uses web stuff like HTML, CSS, and JavaScript to make apps. Because of this, it might not run as fast as apps made directly for Android or iOS. But, Ionic has some tricks like Capacitor and Cordova that let it talk to the phone's features better, which helps it run smoother. For most kinds of apps, Ionic does a good job, but if your app needs lots of fancy graphics, it might struggle a bit.
Community Support
Ionic has a huge group of developers, with over 5 million people using it. There's a lot of help out there like how-tos, guides, and forums where you can ask questions. It works well with Angular, React, and Vue.js because it started with AngularJS. Plus, there are many extra tools and paid services you can use.
Ease of Use
If you know how to build websites, you'll find Ionic pretty easy to start with. It has tools that set up your project quickly and ready-to-use parts that make your app look good. But, when you need to use the phone's camera or GPS, things can get a bit tricky. Learning about Capacitor, which helps with this, takes some time. Also, making your app run smoothly might need some extra skills.
Access to Native Features
Ionic can use the phone's features like GPS and camera through plugins and APIs from Capacitor. There are many plugins available, but sometimes you might have to wait for new ones or make your own for the latest features. Getting really deep into using the phone's features can be hard.
Real-world Applications
Some apps made with Ionic include:
5. Kotlin Multiplatform
Performance
Community Support
Ease of Use
Access to Native Features
Real-World Applications
Some apps that use Kotlin Multiplatform include:
Pros and Cons
Let's look at the good and bad sides of each cross-platform mobile framework in a simple way:
FrameworkGood PointsNot-so-good PointsFlutter- Super quick and smooth
- Instant updates with hot reload
- Can do everything a phone app should
- Nice looking animations and graphics- Not as many people to help out
- You need to learn Dart languageReact Native- Almost as good as a regular phone app
- Lots of people to help
- Can share code with React
- Smooth animations- Takes a bit longer to start up
- Might need some extra code for phone-specific stuffXamarin- Works almost like a regular phone app
- Good for those who know C# and .NET
- Can use all phone features- Harder to learn
- Need Visual Studio
- Fewer people to ask for helpIonic- Tons of people to help
- Uses easy web languages
- Lots of tools and parts to use- Can be slow
- Needs extra stuff for phone features
- Harder to work with phone's built-in stuffKotlin Multiplatform- Really good performance
- Support from JetBrains and others
- Can use all phone features
- Share code from Android- Mainly for Android right now
- Need to learn Kotlin
Key Takeaways
When picking a framework, think about what your app needs to do, what skills your team has, and how much support you might need. The "best" choice really depends on your app's specific needs and what you're working with.
sbb-itb-8abf120
Case Studies
This part of the article shows examples of how different companies have used cross-platform mobile frameworks to create their mobile apps. It's a good way to see how these tools work in real life and what kind of apps you can make with them.
Flutter in Finance
A company called Hamilton Capital in Toronto chose Flutter to make their mobile app. This app lets their customers see how the market is doing, check their investment values, and more.
Outcomes:
Benefits: Flutter was great for making a secure app that needed to show changing data. The feature that lets developers see changes instantly helped them make the app faster.
React Native at Retail Giant
Walmart used React Native to develop Walmart Grocery, an app with over 20 million downloads.
Outcomes:
Benefits: React Native was a good choice because Walmart already knew how to use React and JavaScript. Also, there's a big community of React developers who could help.
Xamarin for Nonprofits
The Danish Refugee Council made their mobile app with Xamarin and Azure services. This app gives refugees important information during emergencies.
Outcomes:
Benefits: Xamarin let them use the same code for different phones while still getting a native app feel. Using Microsoft tools made it easier to work with cloud services.
Ionic Powers Food Delivery
Talabat, a big food delivery service, built their app using the Ionic Framework. The app is used in 8 countries and handles over 5 million orders a month.
Outcomes:
Benefits: Using Ionic, Talabat was able to quickly put together their mobile app. Ionic's many tools and services helped them build a strong app.
Kotlin Multiplatform at Banking App

Cash App chose Kotlin Multiplatform for their Android and iOS apps. This app is used by over 40 million people to transfer money.
Outcomes:
Benefits: Kotlin Multiplatform helped Cash App use the same architecture for iOS that they used for Android, which made sharing code easier. This made developing the app simpler and helped them update both versions at the same time.
Conclusion
Choosing the right tool to make apps that work on both iPhones and Androids isn't simple because each tool has its own good and bad points. But, we can still figure out some general ideas:
The best choice really depends on what you need your app to do, how fast you need it to run, what kind of things you want your app to have, what your team is good at, and other things like that.
Here's a simple guide to help you pick:

In short, think carefully about what you need and what you're good at. Look at the good and bad sides of each tool to find the best one for your app. If you need more help deciding, you can always ask the team at Zee Palm for advice.
Appendix
: Additional Resources and Further Reading
Flutter
React Native
Xamarin
Ionic
Kotlin Multiplatform
Related Questions
What is the most used cross-platform mobile framework?
As of 2023, the frameworks that most developers choose for building apps that work on both Android and iOS are Flutter and React Native, with others like Cordova, Ionic, Xamarin, and NativeScript also being popular. Flutter is at the top with 36% of developers using it, closely followed by React Native at 34%.
Flutter is loved for its ability to make apps look good and work fast on both Android and iOS. React Native is also a favorite because it has a lot of people using and supporting it, making it easier to find help and resources.
Which framework is commonly used for cross-platform mobile app development?
The top picks for making apps for both Android and iOS are Flutter, React Native, Kotlin Multiplatform, and Ionic. Here's why developers like them:
The best choice really depends on what your app needs to do and what skills your team has.
What is the most performant mobile framework?
React Native is known for being fast and is used a lot for making both iOS and Android apps. It was made by Facebook and is good at making apps that work smoothly and look nice. It also lets you use the same code for web apps, which saves time.
Is Maui better than Flutter?
Flutter is often seen as better than .NET MAUI for a few reasons:
However, .NET MAUI might be a good option if you're already using .NET and C# and want to make apps for desktop as well as mobile. But for most mobile projects, Flutter is the better choice because it can do more and has more people supporting it.
Related posts

Mobile App Development Services Content: A Comprehensive Guide
Creating a mobile app can seem daunting, but it's a journey worth taking for businesses looking to connect with customers on the go. This guide simplifies the process into clear steps, from ideation to launch, and covers key decisions you'll face along the way. Here's what you need to know:
- Mobile App Development: Crafting apps for iOS or Android, focusing on smooth operation on mobile devices.
- Types of Apps: Choose between native, hybrid, or web apps based on your needs and budget.
- Development Process: Involves planning, design, coding, and testing to ensure a quality app.
- Key Technologies: Learn about essential programming languages and tools like Swift, Java, React Native, and Flutter.
- Platform Considerations: The pros and cons of developing for iOS, Android, or using cross-platform solutions.
- Cost Factors: Understand what influences the cost of app development, from features to developer location.
- Latest Trends: Stay updated with AI, AR/VR, IoT, 5G, and enhanced security in app development.
- Common Mistakes: Learn how to avoid typical pitfalls in the app development process.
Whether you're a startup or an established business, knowing these basics will help you navigate the complex world of mobile app development more effectively.
What is Mobile App Development?
Mobile app development is about creating apps that work on mobile devices like phones and tablets. It's about making sure these apps can run smoothly on these smaller gadgets, which have touch screens and can move around with you. The big focus is on apps for the two main systems phones use: Apple's iOS and Google's Android.
When making an app, there are a few main steps:
- Planning - Deciding what the app will do, what it will look like, and its features
- Programming - Writing the app in coding languages like Swift for iOS or Java for Android
- Testing - Checking if the app works well on phones
- Deployment - Putting the app in app stores so people can download it
- Maintenance - Keeping an eye on the app and updating it when needed
Making mobile apps lets businesses and creators reach people directly through their phones, anywhere at any time.
Types of Mobile Apps
Apps come in three main flavors:
TypeDescriptionProsConsNative AppsMade for a specific phone system like iOS or Android. Uses languages like Swift or Java.Quick and smooth, full use of phone features, looks greatCosts more, can't use on all phonesHybrid AppsWeb apps in a phone app wrapper, can use some phone features. Made with web stuff like HTML.Works on many phones, cheaper, quicker to makeMight not run as well, limited by some phone featuresWeb AppsWorks in a phone's browser, made with web tech like HTML. Acts like a website.Works on any device, cheaper, easy to keep upNot as powerful, needs internet to work
Each type has its own good and bad points, depending on your budget, how quickly you need the app, and what it needs to do.
How Mobile Apps Work
Most apps have two main parts: the front-end that you see and use, and the back-end that works in the background. The front-end is what's on your phone, showing you the app and letting you interact with it. It's made with coding languages like Swift for iOS or Java for Android, and web languages for web apps.
The back-end is like the brain behind everything, handling the heavy lifting on servers. It deals with data, making sure everything you do in the app goes smoothly. It uses languages like PHP or Python.
Together, the front-end and back-end make sure the app not only looks good but also works well, connecting what you do on your phone with the broader internet world.
The Mobile App Development Process
Ideation and Conceptualization
The journey of making a mobile app starts with brainstorming. Here’s what you need to do:
- Brainstorming ideas - Think of ways to solve a problem or meet a need. Look at what other apps are doing for some inspiration.
- Defining features - Figure out the main things your app will do. Decide what’s really important and what could be an extra perk.
- Competitor analysis - Check out similar apps. See what they’re good at and where you can do better.
- Validating the concept - Share your app idea with potential users to see if they like it. Use their feedback to make your idea even better.
Getting a clear idea of what you want your app to be is key to making something people will want to use.
Designing the User Experience
Making sure your app is easy and fun to use is super important. Here’s how:
- Sketching wireframes - Draw simple plans for each screen to show how the app will flow.
- Building interactive prototypes - Make a basic version of your app that you can click through to show how it will work.
- Defining visual design - Choose colors, fonts, and symbols to make your app look good.
- Ensuring accessibility - Make sure everyone can use your app, including people with disabilities.
- Testing with users - Let people try your app and listen to their feedback to make it better.
The aim is to make an app that looks good and is easy to use.
Development Phase
Now it’s time to actually build the app. This involves:
- Choosing platforms and tools - Decide if you’re making the app just for iPhones or Androids or both, and pick the tools you’ll use.
- Coding the front and back-end - Write the code that makes the app work, including what users see and the behind-the-scenes stuff.
- Integrating APIs - Add features from other services to make your app do more.
- Building in security - Make sure your app keeps user information safe.
Using the right development practices makes your app ready for more users and future updates.
Testing and Quality Assurance
Before your app goes live, it needs to be tested to make sure it works well:
- Functionality testing - Check that everything in the app works as it should.
- Usability testing - See if there are any parts of the app that are hard to use.
- Compatibility testing - Make sure the app works on all types of devices it’s meant for.
- Performance testing - Test to see if the app runs smoothly, even when a lot of people are using it.
- Security testing - Look for any weaknesses that could let hackers in.
Careful testing means your app will work well and be safe for everyone to use.
Key Technologies in Mobile App Development
When making mobile apps, developers use a bunch of different coding languages, tools, and frameworks. These are like the building blocks for creating apps that work well on your phone or tablet. Here's a look at some of the most common ones used today:
Programming Languages
- Swift - This is what Apple made for making apps on iPhones and iPads. It's new, fast, and makes apps that are safe and look good.
- Java - The go-to language for making Android apps. It lets developers tap into Android's features and make apps that can do a lot.
- JavaScript - A language that works everywhere and is great for making apps that can run on any phone, whether it's an iPhone or an Android.
- C# - Used with a tool called Xamarin, this lets you make apps that can run on different kinds of phones without having to write a bunch of different codes.
Frameworks and Tools
- Flutter - Made by Google, it's a toolkit for building apps that look and run smoothly on both iPhones and Android phones, all from one set of code. It's fast and has lots of ready-made parts you can use.
- React Native - This comes from Facebook and lets you use the same code for apps on different devices. It's good for making apps that feel like they're made just for that phone, without extra work.
- Xcode - Apple's tool for making apps. It has everything you need to make, test, and fix apps for Apple devices.
- Android Studio - Google's tool for Android apps. It's packed with features to help make apps, like designing the look and testing to see if they work right.
Choosing the right tools and languages depends on what kind of app you're making, who will use it, and your budget. But using tools that work for both iPhones and Androids can save time and money.
Developing for Platforms: iOS vs. Android vs. Flutter
ProsConsiOS- Smooth and reliable, works well with Apple products
- Gets the newest features from Apple first
- High-quality look and feelAndroid- Can be used on lots of different devices, not just one brand
- More freedom to make your app the way you want
- Easier to get your app into the Google Play StoreFlutter- You write your app once, and it can work on both iPhones and Android phones
- Quick updates as you make the app
- Lets you make really flexible and creative designs
When choosing where to make your app (iOS, Android, or Flutter), think about a few things:
Who will use your app?
If you're aiming for people who like Apple and might spend more, go for iOS. Android reaches more people all over the world. Flutter lets you make one app for both, saving time and effort.
How much will it cost?
Making separate apps for iOS and Android can be pricey because you need different code for each. Flutter can be more budget-friendly since you use the same code for both platforms.
How quickly do you want to launch your app?
Getting an app into the Apple App Store can take a bit longer because they check apps more carefully. Android is a bit faster. With Flutter, you follow the same steps as with native apps.
What do users expect?
People with iPhones expect apps that look great and work smoothly. Android users like apps that they can customize. Flutter lets you make apps that look and work well on both types of devices.
How well does the app need to work?
Apps made just for iOS or Android can really take advantage of what those devices can do. Flutter is great for most things but might struggle with very detailed stuff on cheaper devices.
Thinking about these points can help you decide the best way to make your app, whether you're working with a dedicated app development team, considering mobile app development outsourcing companies, or planning to hire a mobile app development company. It's all about finding the right balance for your app development project management, especially if you're focusing on mobile app development for startups.
sbb-itb-8abf120
Cost Factors in Mobile App Development
The cost of making a mobile app can change a lot based on a few important things:
Features and Functionality
What your app can do and how complex it is plays a big role in how much it will cost. Simple apps that don't do much are cheaper than ones with lots of cool features.
- Basic apps - $15,000 to $30,000
- Advanced apps - $30,000 to $150,000+
Here are some things that make an app more expensive:
- User profiles and accounts
- Connecting with social media
- Using GPS or showing maps
- Keeping data in sync
- Fancy designs and animations
- A complicated system running things behind the scenes
Platforms
Making your app for both iOS and Android costs more than just picking one.
- Single platform - Cheaper
- Multiple platforms - More expensive
Also, making sure your app works on all kinds of devices and software versions can add to the cost.
Developer Location
Where your app development team is located and how experienced they are affects the price. Teams from places with higher living costs or more experience usually charge more. For instance, developers in North America and Western Europe might charge $100-$150 per hour, while those in Eastern Europe might ask for $25-$50 per hour.
Post-launch Support and Maintenance
After your app is out, you'll need to spend money to keep it updated and working well. Adding new stuff or making big changes will cost extra.
- Fixing bugs and small updates
- Adding new features
- Moving to new platforms
- Handling more users
Thinking about these things can help you figure out how much making your app might cost. Keeping things simple and focused is a good way to keep costs down.
Latest Trends in Mobile App Development
The world of making apps for phones and tablets is always changing. Here are some of the newest things happening right now that are making apps cooler and more useful:
AI and Machine Learning
Apps are getting smarter by learning how you use them. They can offer you things you like or help you faster because they remember what you do. Think of how Siri or Alexa can answer your questions. This smart tech is getting better and will make apps even more helpful.
Augmented and Virtual Reality
Imagine putting digital stuff on top of the real world or jumping into a completely digital place. That's what AR and VR do. They make apps more fun and interactive, like trying clothes on without really wearing them or practicing skills in a game-like setting. As our phones get stronger, we'll see more of these cool apps.
Internet of Things and Wearables
Now, even your fridge or watch can talk to the internet, thanks to the Internet of Things (IoT). This means apps can help you control your house or keep an eye on your health through your watch. It's all about making everything in your life work together smoothly.
Faster Performance with 5G
The new 5G network lets apps do things faster and better, like watching super clear videos or playing games with lots of other people without lagging. For people making apps, this means they can create fancier and more complex apps without worrying about slow internet.
Enhanced Security
As apps know more about us, keeping our information safe is really important. New security tricks, like using your face or fingerprint to unlock things and keeping data safe, are becoming more common in apps. This means you can trust apps more with your personal stuff.
By keeping up with these new trends, app makers can build amazing apps that do things we haven't seen before. It's an exciting time for app development, with lots of new possibilities on the horizon.
Common Mistakes in Mobile App Development and How to Avoid Them
Making a mobile app isn't always straightforward. Knowing what often goes wrong can help you do things right. Here are some usual mistakes in making apps and how to dodge them:
Not Conducting Sufficient Market Research
Skipping the step of really getting to know what users want can lead to making an app nobody uses.
- Do dig deep into who your users are, what they like, and what's already out there. Use surveys, look at what similar apps do, and make sure your idea actually fits what people need.
Choosing the Wrong Monetization Model
Picking a way to make money from your app that doesn't fit can backfire.
- Do choose a way to earn money that matches what your app does and what your users will like. This could be ads, paying for extra features, or a subscription. Try out your pricing ideas early on.
Rushing the Design Process
Moving too fast and not focusing on making the app easy and enjoyable to use means people might not keep it.
- Do spend time planning how your app will work and look. Test your designs with users to make sure everything is easy to use before you start the heavy coding.
Ignoring Accessibility
Forgetting about users with disabilities means your app won't reach as many people.
- Do think about accessibility from the beginning. This means adding features like text descriptions for images, making sure the app works with screen readers, and using colors and designs that everyone can see and use easily.
Not Optimizing for Multiple Devices
Making your app for just one type of phone or tablet limits who can use it.
- Do make sure your app looks good and works well on all kinds of devices. Test it on different screens to catch any issues.
Skipping Security Best Practices
Not protecting your app well enough can lead to serious problems, like stolen data.
- Do use strong security measures like making data scrambled (encryption), adding extra steps for logging in (two-factor authentication), and checking regularly for security risks.
By avoiding these common issues with careful planning, focusing on what users need, including everyone, making sure your app works on all devices, and keeping it secure, you can make an app that's more likely to be successful.
Conclusion
Making apps for phones and tablets might look tough at first, but if you break it down step by step, it's doable. Start by figuring out what your app is all about and who it's for. Then, choose the best way to build it, make sure it's easy to use, test it on different devices, and keep an eye on new trends to keep your app up-to-date.
The team or company you work with to make your app is super important. Look for folks who really get what you're trying to do, offer smart advice, stick to what works best in app making, and help you out even after your app is out there. Finding a team that gets you and your project can make a big difference.
Apps change all the time, but if you lay a solid foundation and pick the right people to work with, you can keep up with changes and make an app that people love to use.
Related posts

Best Multi Platform App Development for Startups
Choosing the right framework for multi-platform app development is crucial for startups aiming to reach a wider audience without breaking the bank. Here's a concise guide to help you make an informed decision:
Quick Comparison
FrameworkProsConsFlutterQuick and smooth apps; Great for making things look nice; Lots of help and how-to guidesLearning Dart can be tricky; Might not work with all phone featuresReact NativeUses JavaScript; A lot of people to help out; Quick updates with fast refreshApps can get big and heavy; Might need extra work to fix bugsKotlin MultiplatformUses Kotlin, nice for Android developers; You can share a lot of the app's main logicIt's pretty new and still catching on; Not as many developers know it yetIonicUses web stuff like HTML/CSS; Lots of plugins to add features; Many people use and support itNot the fastest for app speed; Fancy animations might slow down.NET MAUIUses C#, works well with Microsoft stuff; Quick updates with hot reloadYou need to be into the .NET world; iPhone features might not be as good yetNativeScriptGood with Angular/Vue; Based on JavaScript/TypeScript; Really fast like a native appNot as many people to help out; iPhone parts might not work as well as Android
This guide gives you a snapshot of the best frameworks for multi-platform app development, focusing on the pros and cons to help startups make a smart choice.
Why Startups Should Consider Multi-Platform App Development
When you're starting a company and want to make an app, it's smart to make one that works on all devices like iPhones, Android phones, and computers. This approach saves money, gets your app out there faster, reaches more people, and is flexible. Here's a closer look at why this is a good move:
Cost Efficiency
Making one app that works everywhere means you can use the same code for different devices. This saves you:
Tools like Flutter and React Native help make this possible by letting you reuse code, which cuts down costs.
Faster Time-to-Market
By making your app for all devices at once, you can launch it everywhere quicker. This way, you don't have to wait to make your app separately for iPhone and then Android, which can take a lot of time.
Wider Audience Reach
With a multi-platform app, you can reach people who use iPhones, Android phones, and computers right away. This means more people can find and use your app from the start, which is great for getting noticed.
Flexibility
Startups need to be able to change things fast, and having an app that works on all platforms makes this easier. If you need to update your app or try out new features, you can do it all at once, which saves time.
For startups, making an app that works on all devices is a smart choice because it saves money, speeds up how fast you can get your app to people, and helps you reach a bigger audience. Tools like React Native and Flutter are good options for making these kinds of apps, especially for companies just starting out and looking to make an impact.
Choosing the Right Multi-Platform App Development Framework
When you're picking a tool to make your app work on both iPhones and Androids, it's important to think about a few things. Here's what to look at to make a good choice:
Performance Benchmarks
How fast does the app run with this tool? Some tools make apps that feel smooth and quick, just like they were made for your phone. Others might be a bit slower because they're trying to work on many devices at once.
Flutter and React Native are both pretty good in this area. Flutter makes very smooth apps because it has its own way of drawing pictures on the screen. React Native can also make fast apps, especially if you use it right.
Ease of Use
How hard is it to learn this tool? If it's easy, you can make your app faster.
A lot of people like React Native because it's similar to making websites, which many developers know how to do. Flutter is also not too hard if you've worked with programming languages before.
Code Quality
Is the code clean and organized? Good code means your app can grow and change easily.
Flutter helps you keep things tidy by suggesting ways to organize your app. React Native does something similar by using ideas from web development to keep your app's code neat.
Community & Ecosystem
How many people are using this tool? A big community means more help and more tools to make your app better.
React Native has a lot of fans and lots of resources because it's also used for websites. Flutter is getting more popular and has Google's support, which is a big deal.
Business Continuity
Is this tool going to be around for a while? You want to make sure your effort and money are well spent.
Facebook puts a lot of money into React Native, so it looks like it's here to stay. Flutter is also looking strong, especially since Google uses it for new projects.
Thinking about these things will help you pick the right tool for making your app. Both React Native and Flutter are great choices for startups that want to grow fast without spending too much.
Comparative Analysis of Popular Multi-Platform App Development Frameworks
1. Flutter
Flutter is a tool made by Google that lets you create apps for both iPhones and Android phones using one set of code. Here's a simple breakdown of what Flutter offers for making apps that work on both types of devices:
Ease of Use
Performance
Community Support
Integration Capabilities
Learning Curve
Development Cost
2. React Native
Ease of Use
React Native is great for making apps that work on both iPhones and Androids because it uses JavaScript. This is a language a lot of developers already know. It has a cool feature called hot reloading that lets you see changes right away, making it easier and faster to build your app. Plus, there's a lot of help and guides available if you get stuck.
Performance
React Native makes apps that feel smooth and work well, almost like they were made specifically for your phone. It focuses on making sure things like moving parts and animations run nicely. If you write your code well, your app can work really fast and keep users happy.
Community Support
Facebook supports React Native, so there are a lot of people using it and helping to make it better. You can find lots of extra tools and advice from over 2,000 people who contribute to making React Native great. This means it's easier to find solutions when you face problems.
Integration Capabilities
React Native lets your app do things like take photos or find your location, using special codes called APIs. You need to set some things up, but it's pretty good at letting your app use phone features.
Learning Curve
If you already know how to work with JavaScript, learning React Native is pretty straightforward. It uses ideas from web development, so many things will feel familiar. And there's a ton of resources out there to help you learn.
Development Cost
Using React Native can save you money because you only need to make your app once for it to work on both iPhones and Androids. This means you don't need separate teams for each type of phone, which can be a big cost saver. Plus, there are plenty of developers who know React Native, so finding someone to help build your app is easier.
3. Kotlin Multiplatform
Ease of Use
Performance
Community Support
Integration Capabilities
Learning Curve
Development Cost
4. Ionic

Ease of Use
Ionic is a framework that lets you make mobile apps for different platforms using web skills like HTML, CSS, and JavaScript. If you've made websites before, you'll find Ionic straightforward. It has a feature that lets you see changes as you make them, which is super handy. Plus, there's a big group of people using Ionic who can help if you get stuck.
Performance
Ionic turns website code into real apps that run well most of the time. If you try to do a lot of fancy animations, it might slow down, but generally, it does a good job. There are tricks to keep it running smoothly, like loading things only when needed.
Community Support
Ionic has a huge community with over 5 million developers. You'll find good guides and lots of people on GitHub ready to help out. They also have a forum and Discord where you can chat with others.
Integration Capabilities
Ionic lets your app use the phone's camera, GPS, and more through something called Apache Cordova plugins. There are also plugins for things like Firebase and push notifications. How well these work can vary depending on the device.
Learning Curve
If you're used to making websites, you'll pick up Ionic easily. It's a bit harder to learn how it interacts with phone features, but there are plenty of resources to help you learn faster.
Development Cost
With Ionic, you write your app once and it works on different devices, which saves money. You don't need separate teams for each platform. Since many developers know HTML, CSS, and JavaScript, finding someone to work on your app might be easier. However, sometimes the need for more specific native features can make maintaining the app more costly in the long run.
5. .NET MAUI
Ease of Use
Performance
Community Support
Integration Capabilities
Learning Curve
Development Cost
6. NativeScript
Ease of Use
Performance
Community Support
Integration Capabilities
Learning Curve
Development Cost
sbb-itb-8abf120
Pros and Cons
Let's take a quick look at the good and not-so-good points of some popular tools for making apps that work on both iPhones and Androids:
FrameworkProsConsFlutter- Quick and smooth apps
- Great for making things look nice
- Lots of help and how-to guides
- Quick updates with hot reload- Learning Dart can be tricky
- Might not work with all phone features
- Still growing and adding more toolsReact Native- Uses JavaScript, which many know
- A lot of people to help out
- Quick updates with fast refresh
- Can use the same code for websites too- Apps can get big and heavy
- Might need extra work to fix bugs
- Updating the app can sometimes mean changing a lot of codeKotlin Multiplatform- Uses Kotlin, which is nice for Android developers
- You can share a lot of the app's main logic
- Works well with Java and Swift
- Supported by JetBrains- It's pretty new and still catching on
- Not as many developers know it yet
- Can be hard to fix bugs across different devicesIonic- Uses web stuff like HTML/CSS
- Lots of plugins to add features
- Many people use and support it
- It's free to use- Not the fastest for app speed
- Fancy animations might slow down
- The quality of plugins can vary.NET MAUI- Uses C#, which some developers know well
- Works well with Microsoft stuff
- Quick updates with hot reload
- Keeps getting better at running smoothly- You need to be into the .NET world
- iPhone features might not be as good yet
- Not as much help outside of .NET peopleNativeScript- Good with Angular/Vue
- Based on JavaScript/TypeScript
- Really fast like a native app
- Updates quickly with LiveSync- Not as many people to help out
- iPhone parts might not work as well as Android
- Could use more building blocks
In short, React Native and Flutter are often the top picks for making apps quickly and efficiently, with a lot of support and tools available. But, depending on what technology you already use or the skills your team has, other options like .NET MAUI or Kotlin Multiplatform might be better for you. It's important to think about what each tool offers and how that matches up with what you need for your app.
Key Considerations for Startups When Choosing a Framework
When picking a framework to build an app that works on both iPhones and Androids, startups need to think about a few key things. Here's what matters most:
Vibrant Community & Support Channels
A big group of developers who use the framework means:
Frameworks like React Native and Flutter have lots of users. Kotlin Multiplatform is newer but is getting more popular, especially among global companies and startups.
Beginner-Friendly Learning Curve
If the framework uses programming languages or ideas that developers already know, they can start making apps faster.
React Native is based on JavaScript, a common language, while Flutter uses Dart, which is newer. Both have a feature called hot reload that lets you see changes quickly.
Budget-Friendly Development Cost
Using the same code for iPhones and Androids saves money. The cost also depends on how easy it is to find developers who know the framework.
With cross-platform tools, you don't need separate teams for each type of phone. Popular frameworks have more developers available, which can make hiring less expensive.
Access to Native Features
The framework should let your app use the phone's built-in stuff like the camera, GPS, and notifications. This makes your app do more.
Some frameworks are better at this than others. Sometimes, you might still need a bit of special code for certain features.
Thinking about these points will help startups choose the right framework. Trying out a few options can also give you a good feel for what works best.
Real-World Success Stories of Startups Using Multi-Platform Development
Many startups have grown quickly and saved money by making their apps work on both iPhones and Androids. Here are some stories of startups that did well with this strategy:
Hopper - Savings on Hotel & Flight Bookings
Hopper used React Native to make their travel app quickly and cheaply. They shared 95% of their app's code between iOS and Android, which meant they needed fewer engineers. This helped them get more than 30 million downloads around the world.
Using JavaScript made it easier to find engineers. Also, React Native's quick update feature meant they could make changes faster. This helped Hopper become popular even though they didn't have a lot of money to start with.
"React Native let us launch our app sooner than if we had used native code. We also needed fewer engineers." -
Trulioo - Online Identity Verification
Trulioo helps online businesses check who their customers are. They used Xamarin to make mobile tools that work with apps on different platforms.
By reusing about 90% of their app logic across iOS, Android, and Windows, they saved a lot on development and upkeep. This helped them get their product out faster and grow in different markets.
"Xamarin helped us make our cross-platform tools twice as fast." -
Runtastic - Fitness & Workout Tracking
Runtastic used NativeScript and Angular to share code between their fitness app on iOS and Android. This cut their development work by almost half while still giving users a good experience.
Sharing code, using plugins, and updating features quickly across platforms helped them stay ahead in the market.
"NativeScript made our development time about half as long for mobile." -
These success stories show that making your app work on both iPhones and Androids can help startups grow fast without spending too much money. Using frameworks like React Native, Xamarin, and NativeScript helped these companies save on costs and reach more people quickly. Their experiences show the benefits of sharing code, updating quickly, and keeping development simple - which is especially useful for new companies trying to expand.
Conclusion
Picking the right tool for making your app work on both iPhones and Androids is super important if you're starting a company. You want something that matches what you need, is easy for your team to use, and doesn't break the bank.
Here's what to keep in mind when choosing:
Choosing wisely can save you time and money and help you get your app out to as many people as possible. Learning from companies that have done well, like Hopper and Runtastic, can give you good ideas. If you take your time to pick the best tool, making your app can be a lot smoother and open up great chances for your business.
Related posts

Professional App Developers: Choosing the Right Team
Choosing the right professional app developers is crucial for the success of your app. Here’s a straightforward guide to help you make an informed decision:
Remember to start with a clear goal, check the team's skills, ensure open communication, and be clear about your app's requirements and budget. By carefully choosing your team and working closely with them, you can develop an app that meets your needs and enhances your business.
Define Your App's Goals and Objectives
Determine the Scope and Key Features
When you know what your app should do and what's important for it, you can find a team like Zee Palm. They know a lot about making apps and work well with people to make sure they build exactly what's needed.
The Essential Roles in a Professional App Development Team
Making a great app needs a team with different skills. Here's who you need and what they do:
Project Manager/Product Manager
Project Manager takes care of the app from start to finish. They make sure everything stays on track, including:
Product Manager makes sure the app is something people will want to use. They focus on:
UI/UX Designers
UI/UX designers make sure the app is easy and fun to use. They work on:
App Developers
App developers build the app. They use coding languages to make everything work, focusing on:
QA Test Engineers
QA testers make sure the app works right. They do a lot of testing to find and fix problems, including:
When all these people work together well, you get an app that looks good, works well, and makes users happy.
Evaluating App Development Teams
Review Portfolios and Client References
Assess Technical Expertise and Certifications
Communication and Collaboration Abilities
Understanding of Current App Development Trends
Types of App Development Teams
Let's look at the different kinds of teams you might consider for building your app, along with the good and not-so-good parts of each option.
In-House Developers
ProsConsWork closely with your business goalsMight have a lot to learn at firstMore control over the workMight not know everything neededDon't have to worry about hiring outside helpCan be expensive
Having your own team means they really get what your company wants and you can keep a close eye on the work. But, it can cost a lot to have all the skills you need, and your team might have to learn new things.
Freelance Developers
ProsConsUsually costs lessMight not always communicate wellHave specific skillsWork might not be done on timeYou can adjust the agreement as neededHarder to keep track of their workDon't have to pay for office space
Freelancers can be cheaper and bring special skills to the table. But, talking to them and making sure they finish work on time can be tricky since they're not always around.
Outsourced Dedicated Teams
ProsConsLots of different skillsMight not fully get your company's goalsSomeone else manages themCould run into cultural differencesMore affordableWorking across time zones can be toughEasy to change size as neededYou don't get to watch them as closelyThey're fully responsible for their work
Outsourced teams have a wide range of skills and someone else makes sure they do what they're supposed to. But, they might not be totally in sync with what your company wants, and dealing with time differences can be a hassle.
Picking between these options means thinking about stuff like how much money you have, how much control you want, how big your project is, and if you're okay managing people from afar. Finding a team that's good at talking and working together is key, no matter which type you go with.
Things to keep in mind include:
Checking out a team's past work, their skills, and how well they talk to you is super important to make sure they're the right fit.
sbb-itb-8abf120
Making the Final Decision
When you're ready to move forward with your app project, it's important to lay out what needs to be done, how it should be done, and when it needs to be finished. Also, talking about the cost and making sure you're getting a good deal is key.
Define Deliverables and Milestones
To make sure your app project goes smoothly:
Updating these plans as you go keeps everyone on the same page.
Negotiate Pricing for Optimal Value
Talking about money means balancing what you need with what it costs:
The goal is to agree on a price that's fair for both sides. Being clear about what you're paying for helps build trust.
With a clear plan, good communication skills, and a team that's flexible, you can make an app that does what you need and helps your business.
Conclusion and Key Takeaways
Picking the right team to make your app is really important if you want your app to do well and help your users. We've talked about some steps to help you find a good team.
Here are the main points to remember:
By carefully choosing your team and working closely with them, you can make an app that meets your needs and helps your business.
FAQs on Selecting an App Development Team
When you're looking for a team to create your app, you probably have lots of questions about how to pick the best one. Here are some common questions and straightforward answers:
What is the optimal size for an app development team?
The right team size really depends on how big or complex your app is. For a simple app, you might only need 3-5 people - like a project manager, a couple of developers, and someone to check for bugs (QA tester). For bigger apps with lots of features, you might need up to 15 people or more, including designers, experts who plan the app's structure, and security pros. The key is to look for a team with the right skills, not just a big team.
What are the key roles every app dev team should have?
You'll definitely need a project manager, developers, and a quality assurance (QA) specialist. Other important roles include:
These roles help make sure your app is well-made, safe, and easy to use.
Which regions have the top app development talent?
Big tech cities like Silicon Valley, New York City, Los Angeles, Seattle, Austin, Boston, London, Berlin, Tel Aviv, Bangalore, and Toronto are known for having lots of skilled developers. But remember, it's more important to look at a team's portfolio and skills than just where they're located.
What are the typical cost structures to work with dev teams?
When you're paying a development team, you might come across a few different ways to do it:
Talk about these options to see what works best for your project and budget.
How can I evaluate communication abilities and collaboration readiness?
Try talking to the team leaders to see if you're comfortable with how they communicate. You can also ask to see how they use project management tools and ask other clients about their experiences. Make sure they're okay with your preferred way of talking and working together.
What questions should I ask app dev candidates?
These questions can help you understand a team's experience, skills, how they work, and if they're a good fit for your project.
Related Questions
What team is required for app development?
To make an app, you usually need:
For bigger or more complex apps, you might also need people who are experts in business or technology to help plan and run things smoothly. The main thing is to have a group with different skills to cover all parts of making an app.
How do I find a team to build an app?
Here's how to look for a team to create your app:
The best team will have the technical know-how and be easy to work with.
How big should an app development team be?
A good team size is usually between 3 to 10 people, with 6 being a sweet spot. You'll want:
Having about 6 to 10 people helps you have all the skills you need without the team being too big to handle. The exact number depends on how complicated your app is.
What does an app development team look like?
A typical team for making a mobile app includes:
Having these roles work together from start to finish makes sure all parts of making and launching the app are taken care of.
Related posts

Choosing App Creation Services for Startups
Choosing the right app creation service is crucial for startups looking to balance quality, speed, and budget. Here's a quick guide to help you decide:
- Budget Constraints: Understand the cost implications and explore options like fixed pricing or pay-as-you-go models to keep initial expenses low.
- Time to Market: Ensure the service you choose can deliver quickly without compromising on quality. Agile development and reusable components can speed up the process.
- Scalability: Plan for future growth by discussing scalability early on. Opt for technologies that support easy updates and expansion.
Quick Comparison
ServiceBudget OptionsTime to MarketScalability Planning71ThreeGoodFastExcellentElluminati IncExcellentVery FastOutstandingAppinventivGoodFastExcellentZazz.ioExcellentFastGood
Each service has its strengths and weaknesses. Consider your startup’s specific needs, such as budget limitations, desired launch timeline, and scalability requirements, to make the best choice.
Time-to-Market
- You want a good app, but you also want to launch it quickly, especially if you're trying to grow fast.
- Make sure the team you choose can work fast and meet deadlines. Look at their past work to be sure.
- Using tools that make building apps faster might be a good idea.
- Everyone involved should agree on when the app is ready to launch to avoid delays.
Scalability
- Your app needs to be able to handle more users as your business grows, without crashing or needing a complete redo.
- Talk about how your app can grow with the team making it.
- Using modern tech that makes it easier to grow your app is a smart move.
- Setting up automatic testing and efficient update processes can help your app grow smoothly.
By focusing on these three areas, startups can find an app-building partner that helps them grow without breaking the bank. It's all about balancing good quality, quick work, flexibility, and cost.
Understanding Your Startup's Needs
Before you pick someone to build your app, it's super important to know exactly what you want. Think about who will use your app, what it should do, and where you see your business in the future. This helps make sure you choose a team that really gets what you're looking for.
Here's what you should think about before you start looking:
Identify Target Users
- Who's going to use your app? Think about their age, what they like, what problems they have that your app can solve.
- If you can, ask potential users what they think through surveys or chats.
- Make up profiles for different types of users you're targeting.
Map Required Features
- Write down the must-have features your app needs to start.
- Decide what's absolutely necessary and what can wait until later.
- Think about features that will help your app grow in the future.
Set Business Goals
- What do you want your app to achieve?
- Connect your goals to real numbers, like how many people download your app or how much you sell because of it.
- Make sure these goals fit with your overall business plan.
Determine Budget
- Look into how much building an app usually costs and how you can pay for it.
- Be honest about how much you can spend.
- You could think about adding more complex features later to keep initial costs down.
Outline Timeframes
- Have a clear idea of when you want your app to be ready.
- Remember to consider time for designing, building, and testing the app.
Doing this kind of homework makes it easier to find an app-making team that's just right for your startup. Knowing what you need lets you find a perfect match.
Criteria for Comparison
When looking for app creation services, startups should think about three main things: how much money they have, how quickly they want to launch, and making sure the app can grow with their business. Checking out providers in these areas helps find the right fit.
Budget Constraints
Creating a custom mobile app can cost a lot, from $10,000 to more than $100,000, based on what you want it to do. Startups need to be smart about their money. Here are some ideas:
- Choose fixed prices over paying by the hour. This way, you know exactly how much you'll spend. Set up regular check-ins.
- Start with the most important features, then add more later. This saves money at the beginning.
- Think about working with teams from other countries. They often charge less but still do great work.
- Some developers might accept part payment in company shares or a share of future earnings, making initial costs lower.
- Look into platforms that offer tools for making apps faster for a monthly fee.
Planning your app carefully and looking at different ways to pay can help you find a good balance between cost and quality.
Time to Market
For startups with new ideas, being the first one out there can be really important. You want to launch quickly but still have a good product.
- Check the provider's past work to see if they're good at meeting tight deadlines.
- Agile methods are better than the old ways because they let you make changes faster.
- Make sure the team uses up-to-date tools and reusable parts to save time.
- Regular updates, testing, and feedback help catch problems early.
- Having a team work around the clock can speed things up.
- Starting with a smaller version of your app can get you launched sooner.
Choosing a team that can move fast while keeping your app stable is crucial for startups.
Scalability
Your app should be ready to grow as your business does, handling more users and data smoothly.
- Talk about growth goals early on, like how many users you expect at peak times.
- Use modern tech that makes it easy to grow parts of your app without overhauling everything.
- Use smart ways to handle data and requests to keep things running fast.
- Build your app so you can easily add new features later.
- Cloud services can adjust resources automatically, so you don't have to worry about it.
- Keep an eye on performance and scale up when needed.
Planning for growth from the start means your app can expand without big headaches later.
Looking at app creators in these key areas helps startups find the right partner for making mobile apps that are set up for success. The best choice balances a tight budget with the need to launch quickly and plan for future growth.
Comparative Analysis of Top App Creation Services
1. 71Three
Budget Constraints
71Three lets you choose between a set price or paying by the hour. They're open about their costs, so you can see them on their website. For fixed price projects, they tell you the cost upfront, based on what you need. If you're paying by the hour, you get a dedicated person to help manage your budget.
They're good at making basic apps for startups that don't have a lot of money. They focus on the most important features first to keep the starting costs low. Sometimes, 71Three might agree to take a share of the company or profits instead of some of the payment.
Time to Market
71Three uses a quick way of working called agile development to get your project done faster. They break the work into smaller parts and keep testing as they go to speed things up.
They have a history of getting basic apps done in 4-8 weeks by focusing on the essentials. 71Three makes custom apps but also uses tools and parts that are already out there to make things go quicker.
Scalability
From the beginning, 71Three plans for your app to handle more users and more data over time. They think about using the cloud and making parts of the app that can grow.
They pay close attention to how well the app works and test it with a lot of users. 71Three also keeps working on the app after it's launched, adding new things and making changes so you don't have to start over as your app gets more popular.
2. Elluminati Inc
Budget Constraints
Elluminati Inc is clear about how much things cost from the start. They set a price based on what your app needs and how complex it is. They also let you pay in parts as the work moves along.
For startups watching their wallets, Elluminati builds the most important parts of your app first. You can add more stuff later when you have more money. They're also open to sharing profits instead of getting all their money upfront.
Time to Market
Elluminati uses a step-by-step method to make apps quickly. They check their work often to find and fix problems early, which helps get your app out faster.
They've made simple apps in about 6-10 weeks before. Elluminati uses parts that are already made and the latest tools to save time.
They have teams around the world that work all day and night. This means someone is always working on your project, which can speed things up.
Scalability
Elluminati plans for your app to get bigger from the very start. They think about how to handle more users and more data later on. They make parts of your app so they can be updated easily as more people use it.
They keep an eye on how the app is doing to spot any issues before they get big. Using cloud services, Elluminati can add more power to your app automatically when lots of people are using it.
They also keep making your app better over time. This way, your app can grow with your business without needing to start from scratch.
3. Appinventiv
Budget Constraints
Appinventiv makes it clear how much things will cost right from the start. They offer a choice between a set price or paying by the hour, and they focus on the main features first to keep costs down.
For those watching their budget, Appinventiv can create simple, basic apps first, adding more complex features later. They also suggest using free, open-source options to save money. Sometimes, they might agree to take a share of the profits instead of getting all their money upfront.
Time to Market
Appinventiv uses a quick, step-by-step process to build apps. They check in with the people they're making the app for often, to make sure everything's on track for launch.
They put apps together fast by using parts that are ready to go, getting help from other companies' tools, and reusing bits they've made before. They also have teams working all the time, which means they can get simple apps done in about 5-7 weeks.
Scalability
Appinventiv plans for apps to grow right from the start, making sure they can handle more users and more data without trouble. They use modern tech to make sure the app can grow easily.
They keep an eye on how the app is doing to catch any problems early. They use cloud services, which means the app can support more users without anyone having to manually make changes. They also keep updating the app over time, so it keeps working well as the business gets bigger.
4. Zazz.io
Budget Constraints
Zazz.io is clear about how much it will cost to make your app right from the start. They focus on building the most important parts first to keep your initial spending low.
They recommend using free tools whenever possible to cut down on costs. Zazz.io is also okay with other ways of payment, like taking a share of your earnings instead of you paying everything upfront.
Time to Market
Zazz.io uses a quick way of working to get your app done fast. They break the work into small parts and check for problems often.
They've been able to make simple apps in about 5-8 weeks before by using parts they've already made and tools that help speed things up. They have teams working all the time, which means your app gets made quicker.
Scalability
Zazz.io makes sure your app can handle more people using it without any problems. They plan for times when lots of people might use your app at once.
They keep an eye on how your app is doing and make small changes to keep it running well. If your app needs to grow, they can update parts of it without having to redo everything.
sbb-itb-8abf120
Pros and Cons
Let's look at the good and not-so-good points of each app making service. We've also made a table to help you see how they compare.
71Three
Pros
- Prices are clear (you can pay a set price or by the hour)
- They focus on the most important parts of the app first
- They can make apps quickly, in about 4-8 weeks
- They think about how the app can grow right from the start
Cons
- Not much info on their past work is available
- They have a small team, which might limit how much they can do
Elluminati Inc
Pros
- Different ways to pay, including sharing profits
- They make apps quickly, in about 6-10 weeks
- They have a team working all the time to finish projects faster
- They use cloud services that automatically adjust as more people use your app
Cons
- Complex apps can be pricey
- They're not as experienced with newer tech like Flutter
Appinventiv
Pros
- You can choose to pay a set price or by the hour
- They start with the app's most important features
- They use an agile approach to build apps
- Their code is ready for your app to grow
Cons
- They mostly work on iOS and Android
- They don't show many examples of their work
Zazz.io
Pros
- They make it clear which options are less expensive
- They can make apps quickly, in about 5-8 weeks
- They offer different ways to pay, like sharing profits
- They monitor your app to make sure it can grow
Cons
- They're still working on making a name for themselves
- It's not clear how big a project they need to start working
ServiceBudget OptionsTime to MarketScalability Planning71ThreeGoodFastExcellentElluminati IncExcellentVery FastOutstandingAppinventivGoodFastExcellentZazz.ioExcellentFastGood
Each service has things they're good at and things they're not so good at. You'll need to think about what's most important for your app, like how much you can spend, how quickly you need it, and how it will handle more users over time. The table gives a quick look at how these services compare on those points.
Case Studies
To better understand how picking the right partner for app development can really make a difference, let's look at some real stories from startups and what happened after they chose who would build their apps.
Foodie Favorites - Restaurant Recommendation App
Foodie Favorites had an idea for an app that would help people find local restaurants they might like. They were just starting out and didn't have a lot of money to spend, but they wanted to get their basic app out there quickly to see if people liked it.
They went with Zazz.io because it was affordable and they could build the app fast. Zazz.io focused on the key parts like setting up user profiles, listing restaurants, and a simple way to recommend places. They got a basic version of the app ready in 6 weeks.
This quick start let Foodie Favorites test their idea with real users and improve the app based on feedback. As they grew and had more money, they added new features with Zazz.io's help, like better recommendations and the ability to book tables.
DriveSafe - Driver Monitoring App
DriveSafe was working on an app to keep an eye on how people drive and help make driving safer. For an insurance startup, it was super important that their app worked well and could handle a lot of data.
They chose AppInventiv because they're good at making high-quality apps that can grow. The team built a system that could track driving in real-time and work with lots of drivers. This planning meant DriveSafe's app could handle more users easily without needing big changes later.
AppInventiv helped DriveSafe grow by making sure their app could work with more insurance companies and handle more data smoothly.
ShopLocal - Local Retail App
ShopLocal wanted to create an app that would show users deals from stores in their area. They didn't have much money for marketing, so they needed the app to spread by word of mouth.
They hired Elluminati because they could build the app quickly and work on it any time, day or night. Elluminati made an app that was easy to use, with features focused on showing deals and letting users share them.
ShopLocal got their app out in just 8 weeks, faster than they thought. This quick launch helped them get attention from early users. Elluminati kept improving the app based on what users said, which helped more people find out about it and use it.
Conclusion
Choosing the right team to build your app is a big deal for startups. You've got to watch your budget, you need your app made fast, and you want to make sure it can grow with your business.
Here's what we've learned from comparing different app creation services:
- Know what you need before you pick a service. Write down what your app should do, how much you can spend, how soon you need it, and how you plan for it to grow.
- Look into each provider carefully. Check their skills, how they work, what other people say about them, and what they've made before. It's good if they know a lot about your industry.
- Find a balance between good quality and what you can afford. Think about getting a set price, adding features in stages, and different ways to pay.
- Speed is key. Use quick methods, have teams work at the same time, reuse parts that already exist, and keep checking the progress. This way, you can get a simple version of your app out there sooner.
- Make sure your app can handle more users later. Plan for busy times, build the app in a way that lets it grow, use the cloud, and keep an eye on how it's doing right from the start.
- Compare services on how well they fit your budget, how quickly they can make your app, and how easily your app can be updated. Pick the one that matches what you need the most.
By carefully choosing who makes your app, focusing on these important points, startups can work with a team that helps turn their app idea into a reality. This can lead to your business growing just like the stories we shared about other startups.
Related Questions
How do I choose an app development company?
When picking a company to make your app, think about these points:
- Experience: Go for companies that have made apps like the one you want, and have worked in your business area before. This means they get what you need.
- Portfolio: Look at the apps they've made to see if you like their work and design style.
- Security knowledge: Make sure they know how to keep your app and user info safe.
- Tech expertise: Check if they use the latest tech and tools. This helps your app stay up-to-date.
- Reputation: Look up what others say about them online to see if they're good at meeting deadlines and communicating.
- Pricing model: Understand how they charge (like fixed price or hourly) to see if it fits your budget.
What is the average start up cost for app development?
The cost to make a custom app usually starts from $60,000 and can go over $250,000. It really depends on what features you want, how complex it is, and if it's for iOS, Android, or both.
To save money at first, just add the most important features. You can always put in more stuff later as your startup grows.
How to find the right mobile app development partner for your startup?
Here's how to find a good company to make your app:
- Look at their past work to check their skills and style
- Make sure they've made apps in your field before
- See if they're up to date with the latest tech like React Native or Flutter
- Read reviews and look at case studies to check their reputation
- Talk to them to see if you communicate well together
- Make sure you agree on what's being made, how long it'll take, and how much it'll cost
- Pay them in parts as they hit certain goals
How do startups build apps?
Startups usually follow these steps to make an app:
- Figure out what users need and what problem you're solving
- Check out the competition and make sure your app fits in the market
- Plan out the features you need and map out how users will use the app
- Make simple designs and test them to see how they work
- Create a good-looking design that fits your brand
- Use a step-by-step development process with lots of testing
- Launch quickly to start getting feedback from users
- Keep improving your app based on what users say
Related posts

Framework for Flutter: A Comprehensive Guide
If you're curious about Flutter, Google's UI toolkit for crafting natively compiled applications for mobile, web, and desktop from a single codebase, you've come to the right place. This comprehensive guide covers everything from Flutter's origins and core capabilities to its architecture, UI components, state management, testing, and how to deploy apps. Here's what you need to know:
Whether you're a beginner or an experienced developer, this guide offers valuable insights into making the most of Flutter for your projects.
Origin and History
Google first talked about Flutter in May 2017 at a big event for developers. They released a test version that year, and by 2018, Flutter 1.0 was ready for everyone. Since then, it has gotten better and more popular, with the latest version being Flutter 2.8.
Overview
Think of Flutter as a big box of tools and parts for making apps that look good and work well on different devices. It's special because:
Core Capabilities
Here's what makes Flutter really good for making apps:
Adoption and Community
Flutter is becoming more popular:
Flutter also has a strong community with lots of support, which helps more people learn how to use it.
Why Choose Flutter?
Flutter stands out because it makes creating mobile apps easier, quicker, and more efficient. It's great for making apps that work on both iPhones and Android phones using the same set of instructions. Let's dive into some of the reasons why Flutter is a smart choice.
Single Codebase
The coolest thing about Flutter is that you only need to write your app's code once, and then it can run on different devices. This means you don't have to write separate codes for iOS and Android, saving you a lot of time and effort.
This approach is especially helpful for smaller teams or startups. They can make apps for both major platforms without needing more people or spending more money. Flutter makes it possible to do more with less.
Comparison Table
MetricNative (Java/Kotlin, Swift/Obj-C)FlutterDevelopment TimeHigh (develop twice)Fast (single codebase)Code SharingNone100% sharedPerformanceNative (direct)Near-native (compiled)UI FlexibilityPlatform-dependentHighly customizableTestingPlatform-specificUnified framework
This table shows that Flutter lets you build apps faster, share code, and create custom looks while keeping the app running smoothly.
Customizable UI
Flutter gives you lots of tools to make your app look just the way you want. You can change colors, styles, and layouts to match your brand, and it's easy to make your app look good on all kinds of devices, from phones to tablets to computers.
This means you can get creative with your app's design, making sure it stands out and fits your brand perfectly.
Testing Capabilities
Flutter also has great tools for checking that your app works well. You can test small parts, how the app looks, and even the whole app from start to finish. This helps you catch any problems early and make sure your app is as good as it can be before anyone else sees it.
Testing makes it easier to try new things and update your app without worrying about breaking it. This way, you can keep making your app better and better over time.
Overall, Flutter is a great choice for making mobile apps because it saves time, lets you get creative with your design, and helps you make sure your app works well.
Architecture of Flutter
Flutter is built with a design that separates its parts into layers, making it easier to handle different tasks. Let's break down these layers:
Framework
The core of Flutter that you interact with is made using a programming language called Dart. Here are some key parts of this layer:
Engine
This part deals with the heavy lifting and is written in C++. Here's what it does:
Custom Flutter Engine Embedders
To make a Flutter app work on a device like a phone or computer, the engine uses something called embedders. These help with:
In short, Flutter's design is smart because it separates tasks into different layers. This setup helps developers make apps more easily, allows for customization, and keeps apps running fast. The way Flutter connects with devices also makes sure your app can do what it needs to on whatever device it's on.
Building Blocks of Flutter UI
Widgets
Widgets are like the Lego pieces of a Flutter app's screen. They help you show what you want on the app, like buttons, text, or images. If something changes in the app, like a new message popping up, widgets update themselves to show the new info.
Here are some things to know about widgets:
Widgets connect to each other like a family tree, and changing one can affect others linked to it.
Layout
Flutter lets you arrange your widgets in many ways, like in a line up and down (Column), side to side (Row), stacked on top of each other (Stack), or inside a box (Container) that can have space around it or a border.
There are also special widgets for making lists, grids, and things that scroll.
Navigation and Routing
Flutter uses a map-like system for moving between screens in the app. It uses a Navigator widget that works like a stack of cards, where you can add a new screen on top or remove the top one to go back.
You can also pass info from one screen to another, which is handy for things like opening a detailed view from a list.
Gesture Support
Flutter makes it easy to deal with taps, swipes, and pinches in your app with widgets designed for catching these gestures. This makes your app feel smooth and natural to use.
You can even make your own gestures if you need something special.
In short, Flutter gives you all the tools to make your app look good and work well, from putting things on the screen to making them interactive. It's great for making mobile apps quickly and efficiently.
State Management in Flutter
Managing how your app keeps track of changes and updates its look is key in making a good Flutter app. Here are some ways to handle state management in Flutter:
Local State Management
Flutter lets you manage simple state changes right inside your widgets using StatefulWidgets and a method called setState().
BLoC Pattern
The BLoC (Business Logic Component) pattern helps keep your app's logic separate from its look.
Redux
Redux is a system that helps manage your app's state in a predictable way, following a one-way data flow.
MobX
MobX uses a system of observables and reactions to handle state changes.
In the end, each method has its pros and cons. Think about what your app needs to decide which state management approach is the best fit.
sbb-itb-8abf120
Testing Flutter Apps
Testing is super important when you're making apps with Flutter. It helps make sure your app works well and doesn't have any big problems. Let's look at the different ways you can test your Flutter apps.
Unit Testing
Unit testing is when you check small parts of your app, like a single function or widget, to see if they do what they're supposed to do.
With Flutter, you can use something called flutter_test to do unit tests. This means you can check parts of your app by themselves to make sure they're working right.
Things you might want to test include:
Widget Testing
Widget testing is all about making sure the visual parts of your app look and work the way they should, like making sure a button shows up correctly and can be tapped.
You should use widget tests to check that each piece of your app's design is good to go on its own before you add it to the whole app. Flutter's flutter_test package helps you do this.
Integration Testing
Integration testing is when you test big parts of your app to see if different sections work well together.
Use integration tests to make sure the main things your app is supposed to do work all the way through. Flutter has tools for these kinds of tests, too, so you can run your app and check it automatically.
Doing all these tests helps you find and fix problems early, keep your app running well, and make sure it's as good as it can be before people start using it.
Native Capabilities via Platform Channels
Flutter lets you use features that are specific to iPhones and Android phones through something called platform channels. This is handy for using things that are built into the phone, like the camera or sensor features, or for showing parts of the app that look just right on each type of phone.
Method Channels
Method channels are a way for the Flutter app to talk to the phone's own system and ask it to do something.
Here's a simple way to use the camera:
static const platform = MethodChannel('com.example.app/camera');

String path = await platform.invokeMethod('takePicture');
Method channels are straightforward for tasks that just need to happen once.
Event Channels
Event channels let your app know about ongoing activities from the phone, like moving around or updates from sensors.
This is how you can keep up with where the user is:
EventChannel locationStream = EventChannel('com.example.app/location');

locationStream.receiveBroadcastStream().listen((event) {
  // Change the app based on new location
});
Event channels are your go-to for continuous updates from the phone.
Embedding Native Views
Flutter can also show parts of the app using the phone's own design elements.
Here's how to show a map the Android way:
AndroidView(
  viewType: 'maps',
  onPlatformViewCreated: (viewId) {
    // Work with the native map
  },
);
Using embedded views is a smart choice when you need the app to have parts that look exactly like they do on the phone.
Building and Deploying Flutter Apps
Android Build Process
To make your Flutter app ready for Android users, you can use these simple steps:
This process does a few important things:
Flutter's tools help you get your app ready for Android without much hassle.
iOS Build Process
For getting your Flutter app on iOS devices:
Here's what happens during this:
You need to use Xcode to make sure your iOS app meets all the requirements for the App Store.
Releasing to App Stores
When you're ready to share your Flutter app with the world:
Both the Play Store and App Store have rules about what your app can do and what information you need to provide. Make sure to look at their guidelines to get your app approved.
Conclusion
Flutter is a great tool for making both mobile and web apps quickly and without too much hassle. It comes packed with features that make it easy for anyone to create good-looking and fast apps.
Here's a quick rundown of what makes Flutter special:
Cross-platform development
Rapid iteration
Expressive and flexible UI
Near-native performance
Testing capabilities
Community and ecosystem
Flutter makes it simpler to build apps that look and work great on different devices. As more people start using it, it's likely to become an even more popular choice for creating apps quickly and efficiently.
Related Questions
What is the best framework for Flutter?
When it comes to making Flutter mobile apps, some frameworks stand out because they help manage how your app works and looks. Here are a few:
Choosing the right one depends on what your app needs. GetX and BLoC are good places to start for most apps. Redux is better for big, complex apps, and MobX makes managing changes easy.
Is Flutter framework good?
Yes, Flutter is really good for building apps. Here's why:
Flutter is popular because it's fast and flexible, making it a favorite for app development.
How much does Flutter framework cost?
The cost to make a Flutter app can change a lot based on what you want your app to do. Here are some rough ideas:
The price changes based on how much work is needed. Simple apps with just a few features are cheaper than ones with lots of complicated parts. Remember, after your app is made, you'll also need to spend money to keep it running smoothly.
Is Flutter a GUI framework?
Yes, Flutter is a framework designed to help you make the visual part of your app. It's full of tools and widgets that make designing and building your app's interface easier.
Flutter is great for creating apps that look and work well on both mobile phones and the web. It does a lot of the heavy lifting for you, making it simpler to make apps that feel natural on any device.
Related posts
Mobile UI Design Services: Trends for 2024
As we look ahead to 2024, understanding the latest trends in mobile UI design services is crucial for businesses aiming to make their apps appealing and user-friendly. Here's a quick overview of what to expect:
These trends highlight a shift towards designs that are not only visually attractive but also highly functional and inclusive, ensuring a seamless experience for all users. Whether it's making an app more accessible or integrating cutting-edge styles, staying updated with these trends will be key for success in the mobile app market.
Comparative Analysis of Mobile UI Design Trends
1. Minimalism vs. Neomorphism
User Engagement
Minimalism makes apps simple and easy to use with its clean look, while neomorphism makes apps more interesting with cool designs. Both can make users happy if done right. Minimalism might be too simple sometimes, and neomorphism could make things look too busy.
Accessibility
Minimalism is good for everyone because it's simple, but neomorphism's extra designs can make it hard for some people to use. Both can be made to work for everyone if thought out well. Minimalism might not give enough clues for some users, especially those who need more help.
Aesthetic Appeal
Minimalism is all about being simple and focusing on what's needed, while neomorphism tries to wow users with new and stylish looks. Both can look great depending on what you're going for.
Technological Requirements
Minimalism works on almost any device because it's simple. Neomorphism needs newer gadgets with better screens and graphics. Minimalism might not look as cool on newer devices, and neomorphism might not work well on older ones.
User Satisfaction
Both minimalism and neomorphism can make users happy if they're done well - minimalism with its simplicity and neomorphism with its fun designs. But, if not done right, both can frustrate users.
Battery Efficiency
Minimalism is great for battery life because it doesn't use heavy graphics. Neomorphism's fancy visuals can drain the battery faster. Making neomorphism more battery-friendly is possible with some smart tweaks.
Innovation
Neomorphism brings new ideas to the table with its unique styles and animations. Minimalism changes slowly, adding little by little. Neomorphism might go overboard with flashy stuff, while minimalism could become less interesting over time.
Customization Level
Minimalism doesn't offer much customization, but neomorphism lets users tweak the look with fun animations and designs. Both can be customized if planned well.
Emotional Engagement
Neomorphism can make an app more enjoyable with its lively designs. Minimalism sticks to the basics, focusing more on function. Neomorphism can connect more emotionally if it's also easy to use.
Implementation Challenges
Minimalism is easier and cheaper to make. Neomorphism needs more work because of its complex designs. Both improve with testing and making changes based on feedback.
Performance
Minimalism runs smoothly because it's simpler. Neomorphism needs extra care to keep the app running well, especially on phones. A well-made neomorphism design can close this performance gap.
Development Costs
Making a minimalist app costs less, while neomorphism requires more money for its detailed designs. Focusing on performance can help manage some of the extra costs of neomorphism.
Offline Functionality
Minimalism works well offline with its simple setup. Neomorphism might have trouble offline because it often uses online stuff for its looks. Keeping some data stored on the device can help.
Loading Speed
Minimalism loads quickly thanks to its simple design. Neomorphism needs to be optimized to avoid slow loading times caused by its complex visuals, which can annoy users.
Cross-Platform Compatibility
Minimalism works great across different platforms. Neomorphism might have issues on platforms that can't handle its advanced graphics well. Testing how the app works on different devices is important to make sure it's good enough.
2. Voice User Interfaces (VUI) vs. Gesture-Based Navigation
User Engagement
VUI lets users talk to their apps, making things hands-free. Gesture navigation needs you to touch or swipe the screen. Both can be easy to use if they're designed right. Talking is great when you can't look at your screen, but it might not do everything you need. Gestures give you more control but you need your hands free.
Accessibility
VUI is awesome for people who can't use their hands well because they can just speak. But, it's not good for those who have trouble speaking. Gestures might be hard for people who have difficulty moving. Having both options makes your app more accessible to everyone.
Aesthetic Appeal
VUI doesn't change how an app looks because it's all about talking. Gestures can make an app look cooler with neat animations. VUI is more about being useful, while gestures can make your app look unique.
Technological Requirements
VUI needs technology to understand your voice, like microphones and voice recognition. Gestures need touchscreens or cameras. VUI works better when connected to the internet. Gestures can work without the internet but need the latest tech to work well.
User Satisfaction
Both can be annoying if they don't work well. If VUI doesn't understand you or gestures do something you didn't mean, it's frustrating. But, if they work like they should, they make using the app smooth and fun. Offering both lets users choose what they prefer.
Battery Efficiency
VUI can use up your battery because it's always listening. Gestures use less battery but still need power. Making these features use less battery is possible with some smart design choices.
Innovation
VUI feels like the future, letting you talk to your apps. Gestures offer a new way to interact with your screen. Both can be exciting or confusing. It's important to keep them simple and intuitive.
Customization Level
You can change how VUI works mostly through software updates. Gestures depend on the app's design. Both can be adjusted to fit the app's style, but there's not much room for users to make their own changes.
Emotional Engagement
Talking to your app can make it feel more personal. Gestures with cool animations can be fun. If they don't work right, though, they can be more annoying than engaging.
Implementation Challenges
Getting VUI right means teaching it lots of voice commands. Making gestures work involves complex tech. Both need lots of testing to avoid mistakes and make sure users like them. Teaching people how to use these new features can be tough.
Performance
Both VUI and gestures can be slow if not optimized. Making sure they work well on different devices is important. Gestures depend more on the device's hardware, while VUI needs a good internet connection or enough space on the device for voice processing.
Development Costs
Adding VUI or gestures means more work and testing, which costs more money. Voice stuff is pricey to integrate, and making gestures look good adds to the cost. Planning ahead can help manage these costs.
Offline Functionality
Gestures work fine without the internet. VUI usually needs the internet or some way to process voice commands on the device. Some offline features can work if the app stores data on the device.
Loading Speed
Simple designs load faster. Adding VUI or gestures can slow things down if not done carefully. Keeping the app lean and testing a lot can help keep it speedy.
Cross-Platform Compatibility
Gestures might work differently on different devices, while VUI is more consistent. Making sure gestures work well on all platforms is tricky, but most support voice commands now. Testing on various devices is crucial.
3. Dark Mode vs. Augmented Reality (AR) Integration
User Engagement
Dark mode makes it easier to look at your screen in dim light, helping to avoid eye strain. AR, on the other hand, lets you interact with cool, 3D images and games right in your real-world environment. But, using too much AR might be too much for some users. Having both options means you can choose dark mode for reading or AR for a fun, interactive experience.
Accessibility
Dark mode is great for people sensitive to bright lights. AR might be hard for people with certain disabilities to enjoy fully. Making AR features accessible with text or sound descriptions helps. It's also important to have a regular viewing option along with dark mode.
Aesthetic Appeal
Dark mode looks sleek, especially on newer screens. AR can show off impressive 3D effects that seem to pop out of the screen. But, too much AR can look overwhelming. The key is finding the right balance to keep things looking good.
Technological Requirements
Dark mode is easy to add to any device. AR needs newer phones or tablets with special cameras and sensors. Making AR available on more devices will take some time.
User Satisfaction
Both dark mode and AR can make users happy when done right - dark mode by being easy on the eyes and AR by offering cool, new experiences. But, if they're not done well, like if dark mode makes things hard to read or AR doesn't work right, it can be frustrating. Letting users switch between modes is a good idea.
Battery Efficiency
Dark mode saves battery life, especially on screens that can turn off black pixels. AR uses a lot of battery because it has to process complex images and track where you are. Finding ways to make AR less draining on the battery is important.
Innovation
AR is all about new and exciting ways to interact with apps. Dark mode is more of a small upgrade. Too much AR can get tiring, so mixing in simpler updates like dark mode can keep things fresh.
Customization Level
There's not much you can change with dark mode or AR since they're usually set by the app. But, allowing some personal touches could make users happier.
Emotional Engagement
AR can wow you with its neat tricks, and dark mode can feel comfortable and familiar. Making sure both work well is key to keeping users happy.
Implementation Challenges
Adapting an app for dark mode means making sure everything still looks right. AR is much harder, needing to understand the shapes and sizes of things in the real world. Testing a lot is essential for both.
Performance
Dark mode works smoothly on most devices. AR can make some phones struggle, causing lag. Making sure the app runs well should come before adding AR features.
Development Costs
Adding dark mode is pretty cheap. AR is more expensive because of its complex graphics and the need for extra testing. Planning your budget carefully is important.
Offline Functionality
Dark mode works fine without the internet. Some AR features need a connection, but basic ones can run using just the phone's sensors. Having some AR work offline is a plus.
Loading Speed
Dark mode doesn't really affect how fast an app loads. But, AR can slow things down because it has to load big, 3D images. Using tricks to speed up loading is helpful.
Cross-Platform Compatibility
Dark mode is easy to use on any device. AR is trickier because not all devices can handle it. Working on making AR work well on different types of devices is important.
4. AI-Driven Personalization vs. Emotional Design
User Engagement
AI-driven personalization means the app learns what you like and suggests things based on that. Emotional design is all about using pictures and animations to make you feel something. Personalization is great but might feel weird if it knows too much about you. Emotional design should match what the app is about.
Accessibility
Personalization might not consider everyone's needs, focusing just on what you like. Emotional design could get carried away with fancy visuals. Making sure the app is easy for everyone to use is more important.
Aesthetic Appeal
Personalization changes what content you see but not how it looks. Emotional design can make apps look better if done right but might be too much if overdone.
Technological Requirements
Personalization needs to collect data and use AI to figure out your preferences. Emotional design depends on good visuals. Both need good planning to keep the app running fast.
User Satisfaction
Both can make users happy if done well - personalization by being useful and emotional design by being pretty. But, they can also upset users if not handled carefully.
Battery Efficiency
The AI for personalization and animations in emotional design can use up your battery. Finding ways to use less battery is key.
Innovation
Personalization brings something new with AI, and emotional design introduces new visual styles. But, too much new stuff can confuse users.
Customization Level
Personalization gives you suggestions just for you. Emotional design doesn't let you change much but affects the overall look and feel. Letting users adjust some settings is a good middle ground.
Emotional Engagement
Emotional design directly targets your feelings with visuals. Personalization helps indirectly by making things more useful. A mix of both might work best.
Implementation Challenges
Getting personalization right means teaching AI with good data. Emotional design needs a careful choice of visuals. Testing with users is crucial for both.
Performance
AI for personalization and smooth animations need strong processing. Keeping things simple helps the app run faster.
Development Costs
Adding personalization and emotional design makes things more complicated and expensive. Planning carefully can help manage costs.
Offline Functionality
Personalization might not work well without the internet. Emotional design is fine offline but might not look as good. Some offline features can help.
Loading Speed
Fancy features can slow down the app. Keeping the app light and fast is important.
Cross-Platform Compatibility
Personalization is mostly about software, so it works across different devices. Emotional design might need tweaks for different device types. Testing on various devices is important.
5. Progressive Web Apps (PWAs) vs. Traditional Mobile Apps
User Engagement
Accessibility
Aesthetic Appeal
Technological Requirements
User Satisfaction
Battery Efficiency
Innovation
Customization Level
Emotional Engagement
Implementation Challenges
Performance
Development Costs
Offline Functionality
Loading Speed
Cross-Platform Compatibility
Pros and Cons
TrendProsConsMinimalism<ul><li>Easy to use and works on many devices</li><li>Quick to load</li><li>Good for people with disabilities</li><li>Costs less to make and keep up</li></ul><ul><li>May look too simple</li><li>Not many new features</li><li>Can't change it much</li><li>May not use the latest tech</li></ul>Neomorphism<ul><li>Looks cool and unique</li><li>Brings new design ideas</li><li>Makes the app more fun</li><li>Can change it a lot</li></ul><ul><li>Hard to make work right</li><li>Some people might find it hard to use</li><li>Costs more to make</li><li>Can slow down the app and use more battery</li><li>May not look the same on all devices</li></ul>Voice UI<ul><li>Easy to use without hands</li><li>Feels modern</li><li>Better for people with disabilities</li><li>Gives you a personal experience</li></ul><ul><li>Needs the right tech</li><li>Some people worry about privacy</li><li>May not always work right</li><li>Can be hard to learn</li><li>Tricky to add to the app</li></ul>Gesture Navigation<ul><li>Feels natural and looks cool</li><li>Brings new ways to use the app</li><li>Works the same on most devices</li></ul><ul><li>Not everyone can use it easily</li><li>Needs special tech</li><li>Hard to add to the app</li><li>Can use more battery</li></ul>Dark Mode<ul><li>Makes the screen easier on your eyes</li><li>Better for people with light sensitivity</li><li>Uses less battery</li><li>Easy to add to any device</li><li>Cheaper to add</li></ul><ul><li>Doesn't bring new features</li><li>May not fit every situation</li><li>Can make your app look like others</li></ul>AR Integration<ul><li>Lets you play with 3D images and games in real life</li><li>Makes the app look really cool</li><li>Uses new tech</li><li>Makes your app stand out</li></ul><ul><li>Not everyone can fully enjoy it</li><li>Can be hard to learn</li><li>May not work the same on all devices</li><li>Costs a lot to add</li><li>Needs the right tech</li></ul>AI Personalization<ul><li>Gives you suggestions just for you</li><li>Keeps you interested</li><li>Uses your data to make the app better</li></ul><ul><li>Some people worry about privacy</li><li>May not think about everyone's needs</li><li>Needs the right tech</li><li>Hard to add to the app</li></ul>Emotional Design<ul><li>Makes the app more engaging</li><li>Gives your app a unique look</li><li>Brings new visual styles</li><li>Can change how it looks</li></ul><ul><li>Some people might find it hard to use</li><li>Costs more to make</li><li>Can slow down the app</li><li>Risk of doing too much</li></ul>PWAs<ul><li>Works on any device with a web browser</li><li>Quick and accessible</li><li>Costs less</li><li>Can use it offline</li></ul><ul><li>May not do everything a regular app can</li><li>Less control over how it looks</li><li>May not feel as much like your own app</li><li>Can't do as many things</li></ul>Native Apps<ul><li>Runs really well</li><li>Works closely with your device</li><li>Can do lots of cool things</li><li>Lets you make it your own</li><li>Gives you a full app experience</li></ul><ul><li>Limited to certain devices</li><li>Costs more</li><li>Needs updates</li></ul>
Every trend in mobile UI design has its good and bad sides. Think about what's most important for your app and your users. Trying out different things to see what works best is a smart move. This table shows the main good and bad points of the top trends to think about.
sbb-itb-8abf120
Emerging Technologies in Mobile UI Design
Emerging technologies like artificial intelligence (AI), augmented reality (AR), and biometric authentication are about to change the way we interact with mobile apps. These new technologies make it possible for apps to understand what we like, blend digital stuff with the real world, and check who we are just by looking at us or our fingerprints.
AI and Personalization
AI is like a smart assistant inside your app. It watches how you use the app and learns what you prefer. This means it can:
Apps that adjust to you feel more natural to use. You don’t have to dig through menus as much, and the app seems to know what you need. This makes you want to use the app more.
AI also helps with voice commands. You can talk to the app, and it understands what you need. This is great when you can’t use your hands.
Augmented Reality
AR mixes up real and digital worlds. Using your phone’s camera, AR places digital images into the space around you. You can:
AR makes using apps more fun and can help you understand things better.
Biometric Authentication
Biometrics are all about proving it’s really you using things like your fingerprint or face. This way, you don’t have to remember passwords.
Biometrics make it easier and quicker to get into your apps and keep your stuff safe. You might use your fingerprint and a face scan together for extra security.
Key Takeaways
Adding these technologies to mobile apps makes them better and more fun to use. They’re changing how we think about and interact with our apps.
Conclusion
As we step into 2024, it's super important for anyone making a mobile app to keep up with the latest in mobile UI design. This look into what's new shows us what's going to be big in making apps that people enjoy using.
Key Takeaways
Choosing what trends to follow should be based on what your app is about, what you want to achieve, and what tech you're using. Testing with real people is the best way to find a good balance.
Looking Ahead
With faster internet, more AR, and more voice stuff becoming common, mobile UI design will focus more on experiences that change based on how you use the app and offer different ways to interact. Startups that think carefully about these new techs can really stand out in making apps that people love to use.
Keeping up with new trends while remembering the basic design rules is the best way to make great mobile apps that make users happy and help your business do well now and in the future.
Related Questions
What are the trends for UI design in 2024?
In 2024, UI design is taking a fun twist by bringing back styles from the 70s and 80s, but with a modern touch. This means:
This mix of old and new makes apps and websites stand out and feel special.
Is UI UX in demand in 2024?
Yes, for sure. As we use more digital stuff, companies really need people who are good at UI/UX design. This is because making things easy and enjoyable to use is super important for anything digital.
What's the next UI design trend?
The big new thing is using animated gradients. Instead of simple, flat colors, these gradients move and change, creating a deep, eye-catching look that draws people in.
What is the future of UI design?
UI design has a lot of room to grow. As technology gets better, there'll be even more chances to get creative and find new ways to design. Plus, as making a great user experience becomes more important, there will be a bigger need for skilled UI/UX designers.
Related posts

Most Popular Mobile App Development Framework: A Guide
Looking for the most popular mobile app development framework in 2024? Here's a quick guide to help you choose the right one for your project. Whether you're building for iOS, Android, or both, these frameworks offer powerful features to streamline your development process.
- React Native: Fast, supports both iOS and Android with a large community.
- Flutter: Known for its hot reload feature, customizable UI, and performance.
- Xamarin: Integrates with Microsoft technologies, great for complex apps.
- Ionic: Ideal for web developers transitioning to mobile app development.
- NativeScript: Allows for native app development using JavaScript.
Quick Comparison:
FrameworkProsConsReact NativeQuick updates, large communityMay struggle with complex animationsFlutterCustomizable UI, hot reloadLearning Dart requiredXamarinNative performance, C# and .NET integrationSmaller communityIonicUses web technologies, wide platform supportPerformance issues with heavy graphicsKotlin MultiplatformShare code across platforms, strong performanceiOS support still evolving
Choosing the right framework depends on your project's specific needs, such as performance, development time, and platform compatibility. New tools like Kotlin Multiplatform, Flutter for Web, Blazor, and Capacitor are also emerging, offering innovative approaches to app development.
Criteria for Choosing a Mobile App Development Framework
Picking the right tool to build your mobile app is super important. Here's what to think about when choosing:
Performance
How fast and smooth your app runs is a big deal, especially if your app does a lot of stuff or has fancy graphics.
- Native development frameworks, like Swift for iOS and Kotlin for Android, let your app work directly with the phone for the best speed and look.
- Cross-platform frameworks, like React Native, are pretty good too but might not handle complex apps as well.
Think about what your app needs to do, like moving pictures or 3D stuff, before deciding.
Development Time
- Some frameworks come with lots of help, like guides, ready-to-use parts, and a bunch of people who can answer questions, which can speed up making your app.
- Features like hot reload in Flutter show changes right away, which saves a ton of time.
Consider how much you already know and how much there is to learn.
Platform Support
- Hybrid frameworks, like Ionic, let you make one app that works on both iPhones and Android phones.
- Native frameworks mean you'll have to make separate apps for each kind of phone.
Think about where your app needs to run and how much work that involves.
Community Backing
- Big frameworks like React Native and Flutter have a lot of support, making it easier to build your app and fix any bumps along the way.
Check how much help is out there, like tools, libraries, and people who know their stuff, to make building your app smoother.
Looking at these things carefully and matching them with what your app needs can help you pick the best tool to make your app quickly and without spending too much. It's a good idea to talk to experts in app making to find out which tool fits your project best.
Comparative Analysis of Popular Mobile App Development Frameworks in 2024
1. React Native
Performance
React Native makes apps run really well because it turns JavaScript code into the same kind of code that phones usually understand. This means apps can work almost as fast as if they were built in the phone's original language. If your app has a lot of moving parts or needs to do heavy calculations, it might slow down a bit, but generally, React Native keeps things speedy.
Development Time
If you know how to code in JavaScript, picking up React Native can be quick, usually taking about 1 to 2 weeks to get the hang of it. A cool feature called hot reloading lets you see changes right away without having to start over, which saves a lot of time. Plus, there's a lot of help and instructions available to speed up the learning process.
Platform Compatibility
With React Native, you can make apps for both iPhones and Android phones using the same code. It's designed to work across both platforms, though sometimes you might need to add special bits of code for certain phone features. If you have a complex app idea, you can still use React Native and just set up a few extra things for each type of phone.
Community Support
React Native is really popular, so there's a big community of people who use it. This means you can find lots of tools, libraries, and help from others easily. Facebook, the company behind React Native, keeps it updated and fixes problems regularly. Having so many people and resources available makes it easier to solve any issues you run into.
2. Flutter
Performance
Flutter uses Google's Skia 2D graphics engine, which lets it draw things on the screen quickly and smoothly. This means apps made with Flutter work really fast, almost like apps made specifically for each type of phone. But, Flutter apps can be a bit bigger in size, so developers need to work on keeping them quick and light.
Development Time
With Flutter, developers can see the changes they make in real-time without needing to rebuild the app. This feature, called hot reload, makes it much easier and faster to improve the app. Flutter also has a lot of ready-to-use parts, which means less work in building common things from scratch.
Learning to use Flutter might take a bit more time for those new to its programming language, Dart, or its way of building apps.
Platform Compatibility
Flutter lets you make apps for both iPhones and Android phones with just one set of code. It can also be used for web and desktop apps. Sometimes, you might need to do some extra work to use certain features specific to a platform. Flutter has tools to help with this.
Community Support
Flutter is supported by Google and has a large community around the world. This means there are lots of resources, help, and updates available. Google keeps Flutter up-to-date, and the community also has a say in how Dart, Flutter's programming language, grows.
So, for developers, Flutter is a strong option with lots of support for making mobile apps.
3. Ionic
Performance
Ionic turns web apps into mobile apps using a tool called Apache Cordova. It builds apps with web stuff like HTML, CSS, and JavaScript. Usually, Ionic apps run smoothly, but they might not be as quick as apps made directly for phones, especially if your app has fancy graphics or lots of movement.
Development Time
If you already know how to build websites, you'll find Ionic easy to learn. It has a cool feature that shows your changes right away, which helps make building your app faster. Plus, it comes with lots of ready-made designs that you can use to make your app look nice quickly.
Platform Compatibility
Ionic is great because you can make one app and have it work on Android, iOS, and even the web without starting from scratch each time. You might need to do some extra work to get full access to what phones can do, though.
Community Support
Ionic is free and a lot of people help make it better. You can find guides, extra tools, and help from others easily. Since it's built on top of Cordova, you also get to tap into the Cordova community for even more support.
4. Xamarin
Performance
Xamarin lets you use C# and .NET to make apps that work almost as well as if they were made just for iPhones or Android phones. Even when your app has fancy pictures or animations, it usually runs smoothly. This means people can use your app without it getting slow or stuck.
Development Time
For people who already know how to use Visual Studio and C#, Xamarin makes it easier to start making mobile apps. But if you're new to these tools, there might be a bit to learn at first. The good part is that Xamarin has a lot of ready-made parts you can use, which can make making your app faster.
Platform Compatibility
One of the best things about Xamarin is that you can write your app's code once and then use it on iPhones, Android phones, and Windows phones. This can save you a lot of time because you don't have to make a separate app for each type of phone. But remember, you might still need to write some special code for different phones.
Community Support
Xamarin is supported by Microsoft, so it has a lot of helpful resources and a community of people who use it. While it might not have as many users as some other app-making tools like React Native, Microsoft makes sure Xamarin stays up-to-date and works well.
5. Kotlin Multiplatform
Performance
Kotlin Multiplatform (KMP) helps make apps that work really well on each type of device, just like if they were made using the device's own language. It works nicely with code that's already there, so developers can use the same main logic across different devices while keeping the app running smoothly. This means KMP apps can easily handle complicated tasks and look good doing it.
Development Time
For developers who already use Kotlin for Android apps, learning KMP is pretty straightforward. You can start small and share more code across platforms as you go. The hot reload feature lets you see changes quickly, and using Jetpack Compose to share UI code makes things even faster.
Platform Compatibility
KMP's big plus is that it lets you make apps for iOS, Android, web, desktop, and servers all from one set of code. It gives you full access to each platform's special features when you need them. Sharing code means less repeating work, and the apps still feel right at home on each device.
Community Support
Since JetBrains recently said Kotlin Multiplatform is ready to go, more and more people are starting to use it. There's lots of good info out there, like guides, stories from big companies that use it, and a community that's making tools and libraries. With JetBrains in charge, KMP is getting better all the time, following the plan for Kotlin.
Pros and Cons
This section looks at the good and not-so-good points of the most popular mobile app development frameworks in 2024.
FrameworkProsConsReact Native- Quick updates with fast refresh
- You can use the same pieces in different places
- Lots of people to help out- Struggles with complicated pictures or movements
- Sometimes needs extra code for special featuresFlutter- Instant feedback with hot reload
- Lets you make really custom designs easily
- Very good speed- Apps can end up being bigger
- Learning Dart language takes extra effortXamarin- Works as well as apps made just for one type of phone
- Share code across different phones
- Can use all phone features- Setting it up can be tricky
- Not as many people to helpIonic- Lets you make apps for different phones at once
- Uses web skills you might already have
- Lots of ready-made designs- Not as fast as apps made just for phones
- Hard to use phone's special featuresKotlin Multiplatform- Use the same main code for Android and iOS
- Uses the phone's own design for the best look
- Good for people who already know Kotlin- iOS support is still growing
- Not as many tools yet
React Native
React Native is liked because you can see changes quickly and use parts of your app in different places. It also has a big group of people ready to help with problems.
The downside is that it might not do well with games or apps that need to show complicated images. Sometimes, you have to add extra code to do things the framework can't do on its own.
Flutter
Flutter is great for making apps look exactly how you want quickly. The hot reload feature means you can see what you're changing as you go. Apps also run really smoothly.
However, learning to use Flutter can be hard because it uses Dart, which is different. Also, the apps you make might be bigger than other apps.
Xamarin
Xamarin is good because it lets your app use all the features of a phone, just like if it was made only for that phone. You can also use the same code for different types of phones.
But, it can be hard to set up, and there aren't as many people using it, which means less help when you need it.
Ionic
Ionic is cool because it lets you use what you know about making websites to make mobile apps. It has a lot of designs you can use to make your app look good fast.
The problem is that these apps might not run as fast as others. And it can be tricky to get them to do everything you want with the phone's features.
Kotlin Multiplatform

Kotlin Multiplatform is handy because you can share a lot of your app's code between Android and iOS. It looks and works great on both types of phones. If you're already using Kotlin for Android, this might be easier to learn.
But, the support for iOS is still new and growing. And there aren't as many extra tools and libraries available yet.
sbb-itb-8abf120
Frameworks to Watch in 2024
As the world of making apps for phones and computers keeps changing, there are some new tools out there that look really promising in 2024. These tools are fresh and could change how we make apps.
Kotlin Multiplatform
Kotlin Multiplatform (KMP) uses Kotlin to let you share the same code for apps on Android, iOS, web, and more.
- It lets you use everything the phone offers for top-notch app performance.
- If you know Kotlin, you can use it to make apps for many platforms.
- Jetpack Compose helps you make UIs for desktop and web apps easier.
With Google really getting behind Kotlin, KMP could become a super flexible choice. More tools and support are also making it more appealing.
Flutter for Web
Flutter, which is really popular for making mobile apps, is now also for making websites.
- Create interactive websites using Flutter’s cool features.
- Write your code once and use it for websites, mobile, and desktop apps.
- See changes instantly with hot reload while you work.
- Customize easily with lots of design choices.
As more people start using Flutter, it could be a great option for making apps and websites that work on all devices.
Blazor
Blazor lets you use C# and .NET instead of JavaScript to build web apps.
- Use skills and tools you already know from .NET to make web apps.
- Get fast performance with a familiar way of coding.
- Share code between servers, clients, and native apps.
- Enjoy the solid foundation of .NET and Visual Studio.
For people who already work with .NET, Blazor makes making web apps easier while sticking to what they like.
Capacitor
Capacitor is a simple way to turn web apps into apps for iOS, Android, and desktop.
- Use web tech like JavaScript, HTML, and CSS to make apps for all platforms.
- Get to all the phone’s features across different devices.
- Keep your app running fast and small.
- Update your app easily without big downloads.
For web developers looking to reach mobile users, Capacitor simplifies the process while keeping the good parts of web apps.
Watching these new tools can help you make smart choices for future app projects. Thinking about what you need and what each tool offers will help you pick the right one.
Conclusion
To wrap up, we've looked closely at some of the top tools for making mobile apps in 2024. We compared them based on how well they perform, how quickly you can make an app, if they work on different kinds of phones, and how much help you can get from other people who use them.
React Native is really good because apps run smoothly, you can see changes you make right away, and lots of people are there to help if you get stuck. But, for really fancy moving pictures or effects, you might need to do some extra coding.
Flutter is great for making changes quickly and making your app look just how you want. It's also fast. But, learning its programming language, Dart, can take a bit more time.
Xamarin lets you use the same code for different types of phones and gets the most out of the phone's features. However, not as many people use it, so finding help might be harder.
Ionic is good for people who already know how to make websites because you can use similar skills. But, if your app needs lots of graphics, it might not run as fast.
The new kid, Kotlin Multiplatform, is good for sharing a lot of your app's code across mobile and desktop apps. But, it's still working on making things better for iPhone apps.
There are also some new tools like Flutter for Web, Blazor, and Capacitor that are worth watching. They offer new ways to make apps and websites.
Choosing the right tool depends on what you need for your app. But staying open to new ideas is important because new tools are always coming out.
Related Questions
What is the most used mobile app framework?
The most popular mobile app frameworks based on how many people use them are:
- React Native - This framework lets you use the same code for both iOS and Android apps. It's made by Facebook.
- Flutter - A tool from Google for making apps that look and work great on any device.
- Ionic - Good for making apps with web technologies like HTML and JavaScript.
- Xamarin - Allows you to build apps for iOS, Android, and Windows using C#.
React Native is the most used because it has a big community, provides a smooth experience, and you can use the same code for different platforms. Flutter is also becoming very popular because of its instant update feature and beautiful designs.
Which framework is used for app development?
The top frameworks used for making apps that work on both iOS and Android in 2024 are:
- React Native
- Flutter
- Xamarin
- Ionic
- NativeScript
These tools let you use the same code for iOS and Android. Flutter and React Native are the favorites for making high-quality apps.
What is the top mobile app development framework owned by Microsoft?
The top app-making tool from Microsoft is Xamarin. It lets you create apps for iOS, Android, and Windows using C#. It's great because:
- You can use one C# code for all platforms
- It lets your app use everything the device offers
- You have a lot of .NET libraries to use
- It works well with Visual Studio
So, Xamarin helps you make real native apps with the same code for different devices.
Which methodology is best for mobile application development?
Making apps specifically for each platform, like iOS or Android, is usually the best way to go. This is called native app development.
Why native development is good:
- It gives the best performance
- Your app can use all the features of the device
- The user experience is tailored for each platform
- It's easier to get your app on the app stores
So, building apps this way gives the best experience for users, though it might take more time and work. Tools like React Native that let you use the same code for different platforms are also popular.
Related posts

Hybrid App Development Technologies: An Overview
If you're curious about hybrid app development technologies, here's a quick overview to get you started:
This guide will dive into the benefits, comparisons with native apps, and the future of hybrid app development, providing a comprehensive look at how these technologies are shaping the mobile app landscape.
Quick Comparison
FactorHybrid AppNative AppPerformanceNot as fastFasterDevelopment CostCheaperMore expensiveTime-to-MarketQuickerTakes longerCode ReuseA lotNot muchSpecialist Skills NeededFewerMore
Whether you're a developer looking to pick the right framework or just curious about how hybrid apps work, this overview will give you a solid foundation.
The Rise of Hybrid Apps
More companies are choosing hybrid apps because they work on multiple platforms, are quicker to make, and cost less. The demand for hybrid apps is increasing fast.
Benefits of Hybrid Apps
Hybrid apps let you use the same code across different platforms, need fewer special skills, and make it easier for web developers to create mobile apps. They're also getting closer to native apps in performance.
Comparing Hybrid and Native App Development
Performance
Native apps usually work faster and smoother because they're made just for the specific type of phone or tablet they'll run on. This means they can really make the most of the device's power.
Hybrid apps have gotten a lot better at being speedy, but sometimes they might not be as quick because they use web technology, which doesn't always talk to the phone's hardware as directly. But if someone does a really good job making a hybrid app, it can feel almost as fast as a native one for most things you'd do with it.
Development Cost
Making hybrid apps usually costs less money because you can use the same bunch of code for iPhones, Androids, and other platforms.
For native apps, you need to write different sets of code for each type of device—using Objective C or Swift for iPhones and Java or Kotlin for Android phones. This means more work, which can make things more expensive.
But, how much it costs also depends on what your app needs to do. If your app needs really fancy graphics or needs to work super closely with the phone, you might need to go native to get it just right.
Time-to-Market
Hybrid apps can be ready to go and reach people faster since you don't have to make a separate app for each type of device. If you update or fix something, you only have to do it once.
With native apps, if you want your app on both iPhones and Androids, you have to make it twice, which takes more time. This means it can take longer to get your app out to everyone.
Comparison of Hybrid and Native App Development
FactorHybrid AppNative AppPerformanceNot as fastFasterDevelopment CostCheaperMore expensiveTime-to-MarketQuickerTakes longerCode ReuseA lotNot muchSpecialist Skills NeededFewerMore
Examining Popular Hybrid App Examples
This section looks at real-world hybrid apps like Twitter, Airbnb, and Instagram that have achieved mass adoption and success.
Built with JavaScript and HTML5. Known for its smooth scrolling and transitions.
Twitter is a big social media platform with over 300 million people using it every month. It started as a native mobile app in 2006. But as more and more people started using it, Twitter faced some performance issues and bugs.
In 2011, Twitter decided to use HTML5 and JavaScript to build a progressive web app. This move to hybrid technology brought several benefits:
Twitter's success with a hybrid mobile strategy shows how powerful technologies like HTML5 can be for making responsive consumer apps that perform well.
Airbnb

Created with JavaScript, React Native, and other web tools. Known for its easy-to-use cross-platform UI.
Since its start in 2008, Airbnb has used hybrid technologies to make sure users have a smooth experience no matter what device they're on. Airbnb's mobile app uses:
This hybrid approach lets Airbnb give users a consistent, intuitive UI worldwide. TechCrunch has said, "Airbnb's application is a great example of cross-platform mobile development done right."
Important parts of Airbnb's hybrid mobile app include:
By using web technologies smartly, Airbnb has managed to give users a great experience that feels like using a native app.
Originally hybrid but rebuilt with React Native. Keeps a consistent experience across platforms.
Instagram started in 2010 as a place to share photos and use filters. It was first built using HTML5 but switched to React Native in 2016 to fix some performance issues on Android. Still, the app keeps its hybrid approach to allow:
Code reuse: A big part of the React Native iOS app code is also used in the Android version. This includes things like feeds, stories, and notifications.
Cross-platform consistency: Main screens like the home feed, profiles, and creation flows look the same on iOS and Android.
Feature parity: New features like IGTV, Reels, and Live come out on both platforms at the same time.
By using React Native smartly, Instagram continues to use hybrid techniques for a great user experience. The app is rated over 4 stars on mobile stores for its smoothness, simplicity, and how well it works on both iOS and Android.
The Advantages of Hybrid Apps
Hybrid apps have some big pluses compared to apps made just for one type of phone or computer. Let's look at a few:
Cross-Platform Delivery
Code Reuse
Faster Iteration
In short, hybrid apps let developers save time, reuse code, and update all versions of the app quickly. This is why big names like Twitter, Airbnb, and Instagram have gone the hybrid route to get their apps to as many people as possible.
The Challenges Facing Hybrid Apps
Hybrid apps are great, but they do have some hurdles, like making sure they work well everywhere, look the same on all devices, and can do everything a phone can do.
UI and UX Consistency
Making the app look and feel the same on different devices can be tough. Here's why:
It's important to test a lot and plan carefully to make sure the app feels right, no matter where it's used.
Full Access to Native Features
Hybrid apps can't always use everything a phone has to offer. For instance:
But, there are tools like Apache Cordova, Ionic, and React Native that help hybrid apps do more with phones, with a little work.
App Size and Performance
Hybrid apps can be a bit bulky and sometimes slow down because:
Users expect apps to be fast, with 61% wanting pages to load in 3 seconds. Developers should:
By working hard on these areas, hybrid apps can be just as good as the ones made only for phones, in terms of speed and how well they work.
sbb-itb-8abf120
Core Technologies Behind Hybrid App Development
Hybrid apps mix the best of both web and mobile app worlds. They use web stuff like HTML, CSS, and JavaScript but run like any app on your phone. Let's break down the main parts that help make hybrid apps.
Web Technologies: HTML, CSS, JavaScript
At the heart of hybrid apps are the basic building blocks of any website:
If you've made a website before, you're in luck. You can use what you know to start making apps:
This means if you're good with web stuff, you're already on your way to making an app.
Embedded Webview Containers
Unlike websites that need a browser, hybrid apps run in something called a Webview:
Tools like Apache Cordova and React Native are good at:
This mix lets your app work on iPhones, Androids, and even as a web app, all from the same code.
Review of Leading Hybrid App Frameworks
When looking into making a hybrid app, there are a few main tools or frameworks you might consider. Each one has its own strong points and ideal uses. Let’s take a closer look:
React Native
This tool was made by Facebook and is great for creating the parts of your app that users will interact with, using a popular web technique.
React Native is good for apps that need to run smoothly and look great. It makes it easier to build complex interfaces.
Ionic
Ionic is all about making your app look good and work well, with a focus on using web technologies.
Ionic is perfect for apps that are heavy on content and need to impress users with their design.
Apache Cordova
Cordova lets you build your app with web technologies but still access phone features like the camera.
Cordova is great for apps that need to work closely with the phone’s hardware across many types of devices.
Xamarin
Xamarin uses C# and .NET, and it’s made by Microsoft. It’s good for sharing code across different platforms.
Xamarin is suited for apps that need complex, native-quality features using C#.
Flutter
Flutter is from Google and uses Dart to create high-quality app interfaces.
Flutter is ideal for apps that need to look amazing and run perfectly on both iOS and Android. It’s also great for quickly turning ideas into working apps.
How to Pick the Right Hybrid Framework
Programming Language Preference
When you're choosing a hybrid app development framework, think about what programming language you'd like to use. Here are some options:
Pick a framework that matches what you already know. This way, you can start making your app without having to learn a lot of new stuff. If you're starting from zero, consider which language seems easier for you to learn.
UI/UX Design Complexity
Different frameworks offer different tools for designing your app:
If making your app look awesome with less effort is important, Ionic can help. If you want everything customized, React Native gives you more control but might take more work.
Device Feature Access Needed
To use phone features like the camera or GPS, hybrid apps use special connections. How frameworks handle this varies:
For apps that need to work closely with the phone's hardware, Ionic with Cordova is a solid choice. Check if React Native can do what you need before deciding.
Team Skillsets Available
Think about what your team is good at:
Go with a framework that plays to your team's strengths. This way, you can get your app built using what you know best.
The Future of Hybrid App Development
As our phones and gadgets get more powerful and the engines that run JavaScript (the language a lot of web stuff is made with) get better, hybrid technology will let us create even cooler apps that work the same whether you're on a phone, a computer, or any other gadget.
Closing the Gap with Native Performance
Soon, hybrid apps will work as smoothly as the apps made specifically for your phone. This is because of some smart tech improvements, like:
Tests show that hybrid apps are getting just as quick and responsive as the ones built with phone-specific languages like Swift for iPhones or Java for Androids.
Expanded Platform Support
Hybrid app making will soon cover not just phones but also smartwatches, smart home devices, and even cars. This means:
This is great because developers can create an app once and then make it work everywhere, from your phone to your car, using the same code.
Enabling More Complex Apps
As hybrid app tools get better, they'll be able to handle more complex and powerful apps, such as:
This means that no matter what kind of app you need, from something simple to something very complex, hybrid technology will be able to support it.
Related Questions
What is hybrid technology in app development?
Hybrid mobile apps are a mix of regular apps that you download from the App Store or Google Play and web apps that you use in a browser. They use common web languages like HTML, CSS, and JavaScript but can also do things that normal apps do, like use your camera.
Some key points about hybrid app technology:
Which is the most popular hybrid type mobile app technologies?
Some top picks for making hybrid apps include:
These tools are popular because they let developers use the same code for different platforms and make high-quality apps.
What are some examples of hybrid apps?
Here are some apps made with hybrid technology:
These apps show that hybrid technology can make powerful and popular apps used by lots of people.
What language do hybrid apps use?
Hybrid apps are made with:
They mix these web technologies with special containers to use the phone's features, letting the apps work on both iOS and Android from one set of code.
Related posts

Choosing Dedicated Flutter Developers for Startups
Choosing the right Flutter developers is crucial for startups aiming to launch mobile apps efficiently and affordably. Flutter, a tool by Google, enables the creation of cross-platform apps with a single codebase, offering benefits like rapid development, cost savings, and impressive UI/UX designs. When hiring, consider skills in Dart programming, Flutter frameworks, platform-specific knowledge, REST APIs, databases, and soft skills. You can find skilled developers on LinkedIn, GitHub, dedicated hiring platforms, and community forums. Evaluate candidates through resume screening, technical assessments, work samples, and discussions about project needs. Working with developers can be full-time, freelance, or outsourced, each with its pros and cons. Best practices include regular meetings, detailed documentation, encouraging questions, and providing necessary access for testing. Ultimately, the right Flutter developers blend technical proficiency with a good fit for your team and vision.
- Why Flutter is ideal for startups: Cost-effective, quick development, and cross-platform capabilities.
- Finding Flutter developers: LinkedIn, GitHub, hiring platforms, and community forums are good starting points.
- Hiring considerations: Look for expertise in Dart, Flutter's framework, platform knowledge, and soft skills.
- Engagement models: Full-time, freelance, or outsourcing, each with its unique advantages.
- Best practices: Ensure clear communication, detailed documentation, and regular updates for a smooth development process.
- Cross-platform capabilities
The cool thing about Flutter is that you can make apps for both iPhones and Android phones using the same set of instructions. This means you can get your app to more people faster without having to make two different versions. Plus, the apps you make work really well, just like they were made specifically for each phone.
- Faster time-to-market
With Flutter, you can make changes to your app and see them happen right away. This helps you fix things quickly and get your app ready for people to use sooner. It's especially handy for startups that want to show their new ideas quickly by making Minimum Viable Products.
- Cost efficiency
Using the same instructions for both iPhone and Android apps means you save money. You don't need to spend extra on making separate versions. This is great for startups that need to watch their budget closely.
Flutter also gives you lots of ways to make your app look nice and work smoothly, without losing speed or quality. And since it uses Dart, a programming language that supports quick changes, you can get things done faster.
For startups that need to make good apps without spending a lot of time or money, Flutter is a smart choice. It helps you save on costs, make your app quickly, and still ensure it's something people will enjoy using. With Google's support and a growing community, Flutter is becoming a go-to for startups focusing on Mobile App Development.
Must-Have Skills to Look for When Hiring a Flutter Developer
When you're looking to hire a Flutter developer for your startup, it's not just about finding someone who knows their stuff technically. You also want someone who fits well with your team. Here's what to keep an eye out for:
- Proficiency in Dart programming
Dart is the main language for Flutter, so it's super important. Look for someone who really knows Dart, including its rules, libraries, how to deal with tasks that run in the background, and how to organize code well.
- Experience with Flutter frameworks
It's crucial that they know their way around Flutter, like how to use its different parts to build and manage the app, how to make custom parts if needed, and understanding the basics of how Flutter works.
- Understanding of iOS and Android platforms
Even though Flutter works on both iOS and Android, knowing the specifics of each platform can really help, especially when making parts that need to work closely with the phone's system.
- Knowledge of REST APIs and databases
Apps often need to talk to the internet or save data, so knowing how to connect to web services and work with databases is a big plus.
- Soft skills
Working well with others is key, especially if your team is spread out. Look for someone who can get what you're trying to do, keep everyone updated, work well even when they're on their own, and handle the back-and-forth across different time zones.
Finding someone with the right technical skills and who can also fit into your team can make a big difference. It means you can build your app faster and more affordably, without sacrificing quality. So, when you're ready to hire dedicated Flutter app developers, keep these points in mind to make sure you're getting someone who can really help your startup grow.
Where to Find Skilled Flutter Developers
Looking for good Flutter developers is key for startups wanting to make top-notch apps that work on both iPhones and Androids. Here are some good spots to find these developers:
- Look for people who list "Flutter" as a skill or part of their job history
- Join groups like "Flutter Developers" to meet people who know a lot about Flutter
- Ask your connections if they know any Flutter experts
- GitHub
- Find developers who help out a lot with Flutter projects
- Check out their code to see how good they are
- Look at how much they're involved with Dart and Flutter
- Dedicated hiring platforms
- Use websites like Toptal, Upwork, and others to find people who specialize in Flutter
- Pick candidates based on their Flutter skills, past work, and feedback
- Great for finding people to work on specific projects or to work remotely
- Flutter community forums
- Talk to developers on sites like Flutter Community and Stack Overflow
- Join in on discussions to see how well they communicate and understand technical stuff
- Being active in the Flutter community shows they're really into it
Taking the time to check a developer's skills, past work, and how much they're involved in the Flutter world is worth it. Focusing on places where experienced Flutter folks hang out makes it easier for startups to find the right person. Working with the right developer can help turn an app idea into something people can actually use.
Interview Tips and Candidate Evaluation
When you're looking for the right Flutter developers for your startup, it's super important to check them out carefully. Here's how you can do that:
1. Initial screening of resumes
- Look over resumes and portfolios to see if they've got the skills and experience you need
- Things like Flutter, Dart
- Making apps that work on both iPhones and Androids
- Knowing how to develop for iOS, Android, and even web stuff
- Try to figure out how much they really know by looking at the apps they've built
- How complicated were these apps?
- Did they help out on any open source projects?
- Think about if they'd work well with your team based on their past jobs
2. Technical interview and assessments
- Give them a small Flutter coding test to see how good they are
- Maybe ask them to make a simple app interface that does something cool
- Use phone features like the camera
- Hook it up to a web service or database
- Talk about how they organize their code, design apps, and test them
- Ask them to tell you about apps or features they've made with Flutter
- See if they can explain technical stuff in a way that makes sense
3. Review previous work samples
- Check out apps they've made with Flutter in app stores
- Look at their code on GitHub or their own website
- You're looking for neat and smart coding, use of good practices
- Ask them why they made certain choices and how they solved problems
4. Discuss project needs and expectations
- Tell them about what you need for your app
- Share your plans for developing the app, important milestones, and when you want to launch
- Talk about how you'll work together - full-time, part-time, from home, etc.
- Make sure they know how you'll communicate and work as a team
- Let them ask questions and give their own ideas
Taking your time to really get to know the candidates and what they can do will help you find the best person for your project. The perfect Flutter developer for your startup will not only be great at coding but also good at working with you to make your app a success.
sbb-itb-8abf120
Comparing Ways to Work with Flutter Developers
Here's a simple look at the different ways startups can work with Flutter developers, including the good and the not-so-good parts of each option.
Way to WorkGood PartsNot-So-Good PartsFull-time / In-house- You have full control and direct contact
- Your team's goals are the same as yours- Costs more because of salaries, benefits, and equipment
- Takes a lot of effort to manage and supportFreelance- You can choose experts for specific tasks
- No need to commit long-term
- Often costs less per hour- Might have communication problems
- They might not be as committed
- They might be busy with other clientsExtended teams / Outsourcing- Saves money by sharing resources
- You get a team focused on what you need
- They already have a way of doing things- There might be cultural and time differences
- You depend on another company
When deciding how to work with Flutter developers, it really depends on what your startup needs. Here's a simple explanation:
Full-time / In-house
Hiring developers to work only for you means you can guide them closely and they're really part of your team. But, this means you also have to pay them well, provide what they need to work, and take care of managing them.
Freelance
Using freelancers lets you quickly get help for specific tasks without having to hire someone for good. This can save money, but it might be harder to work smoothly together since they have other clients too.
Extended teams / Outsourcing
Working with another company for your development needs can be cheaper and you get a whole team's help. But, you might face challenges like differences in work culture or time zones, and you'll have to rely on them.
Understanding your budget, how fast you need to move, what features you want, and how your team works together will help you pick the best way to hire dedicated Flutter app developers. Sometimes, you might start with one method and switch to another as your startup grows. The main goal is to find a balance between cost, quality, and control to make your app idea come to life.
Best Practices for Working with Flutter Developers
Have regular meetings and status updates
It's good to check in often, like having a quick chat every day or a longer meeting every week. This helps everyone know what's going on, what needs to be done next, and if there are any problems. A short daily meeting is great for the team to share updates and tackle any issues right away.
Document requirements in detail
When you're working with a team that's not in the same place, it's super important to be clear about what you need. Write down everything - what the app should do, any special cases, and what's most important. This helps make sure everyone understands the goals and can work efficiently.
Encourage questions
Make sure your team feels okay asking questions. This can help catch any misunderstandings or problems early on. Sometimes, a simple question can point out something that wasn't clear in the plans, and fixing it early saves time later.
Provide app access and testing credentials
Give your developers access to the tools and accounts they need to test things properly. Instead of just telling them what you need, let them use the actual tools and accounts the app will need. This way, they can make sure everything works as it should, without waiting for someone else to check for them.
Conclusion
Choosing the Right Flutter Developers for Your Startup
For startups planning to create awesome mobile apps, picking the right Flutter developers is super important. Flutter lets you make apps that work on both iPhones and Androids quickly, which is great for moving fast and not spending too much.
When looking for developers, it's not just about finding people who are good with code. Yes, they need to know Dart (the programming language Flutter uses), how to make the app look good, and how to make sure it runs smoothly. But, it's also important they can work well with others, talk clearly about complicated stuff, and really get what your startup is trying to do.
How you decide to work with these developers depends on what you need right now and what you can afford. Having developers work just for you gives you more control, but it's more expensive. Hiring freelancers or working with a team from another company can save money and might give you more flexibility.
No matter which way you go, there are some smart moves to make things go smoothly. Talk often to keep everyone on the same page, write down exactly what you need the app to do, encourage questions to avoid confusion, and make sure your developers can actually use and test the app.
By choosing the right Flutter developers who really match what your startup needs, you can turn your app idea into something real that people can download and use. The best developers are those who not only know their stuff but also fit in well with your team and believe in what you're trying to build.
By focusing on finding people who are both technically skilled and easy to work with, startups can create a team that helps their app grow from a simple idea to something big and successful.
Related Questions
Is Flutter good for startups?
Yes, Flutter is a great choice for startups working on their first app. It lets you create apps that look great and work smoothly on different devices using just one set of code. This means you can make your app faster and without needing to spend a lot of money.
What is the freelance rate for Flutter developer?
The money you pay a freelance Flutter developer usually ranges from $20-$30 per hour for beginners, $30-$50 for those with a bit more experience, and $50-$100 for the really experienced ones. The exact amount can change depending on how skilled they are and where they are located.
How do I choose a Flutter app development company?
To pick a Flutter app development company, look at these things:
- Do they have experience making Flutter apps?
- How well do they know Flutter and Dart?
- Can they design good-looking apps?
- How do they handle talking and working with you?
- How long do they take to make an app?
- How much do they charge?
- Do they write clean code?
- Will they help fix things after the app is launched?
Looking at these points and checking what other clients have said about them will help you find the right company.
What is the ideal condition for choosing Flutter for web development?
Flutter is a good fit for making web apps when:
- You want to make interactive web pages that feel like apps.
- You already have a Flutter mobile app and want to add a web version.
- You're making web apps that need to work on different devices.
- You need high-quality animations and visuals.
- You want to use the same code for both web and mobile apps.
For websites that are mostly about sharing information, other web technologies might be better. But for more app-like experiences, Flutter is a solid choice.
Related posts

Mobile App Development Services Content: A Primer
Mobile App Development Services: A Quick Guide
- Mobile App Development is about creating user-friendly, visually appealing apps for mobile devices.
- Types of Mobile Apps: Native, Web, and Hybrid.
- Platforms: Mainly iOS and Android, with tools like React Native and Flutter for cross-platform development.
- Development Process: Includes ideation, UX/UI design, development, testing, and launch.
- Choosing the Right Approach: Considerations include the use of low-code/no-code platforms, native development, or cross-platform development based on the app’s needs.
- Why Choose Zee Palm: End-to-end services from idea to post-launch, expertise in various development tools, and a dedicated team.
In short, mobile app development services encompass the entire process of creating an app, from conception and design to development, testing, launch, and ongoing support. The choice between native, web, and hybrid apps, as well as the development approach, depends on the app’s specific requirements and goals.
Types of Mobile Apps
There are three main kinds of mobile apps:
- Native Apps: These are made for a specific type of phone or tablet, like iPhone or Android. They work really well and can use all the features of the device, but making them for different types of devices can be expensive.
- Web Apps: These are made using web technology and work in a web browser. They're cheaper and quicker to make but can't do as much as native apps.
- Hybrid Apps: These are a mix of native and web apps. They put a web app into a native app shell so it can do a bit more than a regular web app. They can be made once and used on different devices, but might not work as smoothly as native apps.
Mobile App Development Platforms
There are two big platforms for mobile apps - iOS and Android:
- iOS: This is what iPhones and iPads use. Apps for iOS can make more money, but you need to know specific programming languages and follow Apple's rules.
- Android: This is used by many different brands of phones and tablets. It's more open than iOS, but there are so many different devices that it can be a challenge to make apps work well on all of them.
There are also cross-platform tools like React Native and Flutter that let you make apps for both iOS and Android at the same time. They're a good middle ground, but there might be some trade-offs in how well the apps work or how much you can do with them.
The Mobile App Development Process
1. Ideation and Goal Setting
The journey starts by figuring out who will use the app and what it should do. This step includes:
- Finding out who the app is for and what problems it needs to solve
- Doing some research to make sure the app idea makes sense
- Making sure the app's goals match up with the bigger business goals
- Deciding on the main features of the app that will help users
- Thinking of ways to make the app's design appealing and easy to use
At Zee Palm, we help our clients turn their ideas into a solid plan that focuses on the people who will use the app and what they need.
2. UX/UI Design
After the goals are set, Zee Palm sketches out how the app will work and look. This includes making simple versions of the app screens to test out the flow and functionality. Feedback helps improve these designs.
The final designs will focus on being:
- Easy to use: The app should be simple to navigate
- Nice to look at: The design should be attractive and match the brand
- Consistent: The app should work well on different screen sizes
Testing these designs helps make sure the app will be good to use before it's built.
3. Development
With the designs ready, Zee Palm's developers start building the app. They use:
- Flutter and React Native for making the app work on both Android and iOS
- Kotlin for Android apps
- Swift for iOS apps
They focus on writing clean code that makes the app stable, fast, and easy to update. They also use tools that help check on the app's performance and fix any problems.
4. Testing
Testing is crucial to make sure the app works well. This includes checking:
- UI/UX Testing to see if the app looks right
- Functionality Testing to make sure everything works
- Performance Testing to check if the app is fast and responsive
- Security Testing to find any security issues
- Compliance Testing to ensure the app meets all required standards
Any problems found are fixed to make sure the app is ready to go.
5. Launch and Post-Launch Support
When it's time to launch, Zee Palm helps with:
- Making the app easy to find in app stores
- Planning how to release the app
- Keeping the app running smoothly after it's out
After the app is launched, they keep an eye on how it's doing and make updates to:
- Keep the app working well
- Add new features based on user feedback
- Track how well the app is keeping users interested
Zee Palm stays involved from start to finish, helping clients launch successful apps and grow them over time.
Choosing the Right Approach
When you're thinking about making a mobile app, there are a couple of ways to go about it. You could use platforms that make app building easy for anyone, or you could build the app from scratch for specific phone types. Here's a quick look at what these choices mean.
Low-Code and No-Code Platforms
These platforms let you create apps without needing to know a lot about coding. Some well-known ones include:
- Appy Pie - A simple tool for making Android and iOS apps. It even has a free option.
- Zoho Creator - Helps you build apps that work with databases, good for both web and mobile apps.
Pros
- Quick to make apps
- You don't need to be a coder
- Good for straightforward apps
Cons
- Not much room for customizing
- Not great for complex apps
- You might get stuck with one provider
PlatformProsConsAppy PieUser-friendly, has a free versionFeatures are limitedZoho CreatorWorks well with other Zoho tools, can grow with your needsMight be hard to learn
Native App Development
This is when you make an app specifically for one type of phone, like iPhones or Android phones. This way, the app can use everything the phone offers.
Pros
- The app works really smoothly
- It can use all the phone's features
- Very fast
Cons
- Costs more to make
- You need different versions for different phones
This method is best for apps that need to be top-notch in how they work and look.
Cross-platform Mobile Development
Tools like Flutter let you write your app once and then put it on different kinds of phones.
Pros
- Use one set of code for many phones
- Saves time in making the app
- Easier to keep the app updated
Cons
- Might not use phone features as well
- The app might not look perfect on all phones
This way is good for apps where you want to reach as many users as possible without spending a lot of time on development. It's about finding the right balance between how the app works and making it available on different devices.
sbb-itb-8abf120
Why Choose Zee Palm?
Zee Palm is a top choice for making apps because we handle everything from start to finish. Here’s a quick look at what we’re good at:
Our Capabilities
We can do it all when it comes to making apps for phones and tablets:
- UX/UI Design: We make sure your app looks good and is easy to use.
- App Development: We build strong apps using tools like Flutter, React Native, Swift, and Kotlin.
- Testing & QA: We check the app carefully to make sure it works well and is safe to use.
- Launch Support: We help you get your app out there in the app stores.
- Post-Launch Support: We keep your app running smoothly, adding new stuff and fixing any issues.
We’re here to turn your idea into a real app.
Our Team
We have a bunch of smart people who know a lot about making apps:
- Solutions Architects: They figure out the best way to build your app.
- Developers: They write the code that makes your app work.
- UI/UX Designers: They make sure your app looks nice and is easy for people to use.
- Project Managers: They make sure everything gets done on time and keeps you in the loop.
We put together the right team for your project.
Our Work
We’ve made some really cool apps for different kinds of businesses, like:
- On-demand Delivery App: We connected restaurants and couriers with apps for drivers and customers.
- Custom POS System: We made a special iPad system for a retail business.
- Social Media App: We launched an app for sharing videos that helps get more users.
Check out more of our work here.
Get a Free Quote
We give you a price based on what you need. We can work with any budget and timeline. Talk to us to find out how much your app might cost and how long it might take.
Related Questions
What is content in mobile application development?
In mobile app development, content is everything you see or interact with in an app. This includes text, pictures, videos, and even the music or sounds you hear. Good content keeps users interested and makes them want to use the app more. But if the content isn't good or doesn't fit well on your phone screen, it can make the app less enjoyable to use.
What are the key areas of mobile app development services?
Mobile app development covers several steps:
- Coming up with the app idea and what it will do
- Designing how the app looks and feels
- Writing the code to make the app work
- Checking the app to fix any mistakes
- Putting the app in the App Store or Google Play
- Keeping the app updated and fixing any new problems
Each step is about making sure the app is useful, looks nice, and works well.
What is mobile app development service?
A mobile app development service is a company that helps you build your app. Instead of doing everything yourself, you can work with experts who know how to make apps for iPhones, Android phones, or both. These services can do everything needed to make an app, or they can help out with just some parts of the process.
What does mobile app development include?
Mobile app development involves:
- Planning what the app will do and how it will look
- Writing the code that makes the app run
- Testing to make sure the app works right on different devices
- Creating pictures and descriptions for the app stores
- Putting the app in the Apple App Store or Google Play Store
- Updating the app to fix problems or add new features
The aim is to create an app that people find easy and enjoyable to use, that also meets the goals of the business.
Related posts

Most Popular Cross Platform Mobile Framework: A Comprehensive Guide
Choosing the most popular cross platform mobile framework is crucial for developing apps that work on both iOS and Android, using a single codebase. This guide provides a comprehensive overview of the top frameworks available, focusing on key criteria like performance, development experience, community support, UI/UX capabilities, cost, and licensing. Here's a quick rundown to help you decide:
- Flutter: Known for excellent performance and a wide range of UI flexibility.
- React Native: Utilizes JavaScript, great for shared codebase between web and mobile.
- Ionic: Good for web developers, uses web technologies.
- NativeScript: Leverages web skills for mobile development, with a focus on performance.
- .NET MAUI: Ideal for .NET developers, integrates well with Microsoft's ecosystem.
Quick Comparison
FrameworkIdeal ForLearning CurvePerformanceUI FlexibilityFlutterUnique UI designsModerate (Dart)HighHighReact NativeJavaScript developersLowHighModerateIonicWeb developersLowModerateModerateNativeScriptWeb developers seeking native performanceModerateHighModerate.NET MAUI.NET developersModerateHighModerate
This guide aims to simplify the selection process by comparing these frameworks based on their strengths and weaknesses, helping you pick the right tool for your mobile app development project.
Criteria for Choosing a Cross-Platform Framework
When picking a tool for making apps that work on both iPhones and Androids, there are a few important things to think about to make sure you choose the right one:
Performance
How well the tool works is key. You want your app to look good, load quickly, and be easy to use. Here’s what to check:
- How fast it shows things on the screen
- How quickly the app starts
- How smooth animations are
- How well it scrolls
- How much memory it uses
Tools like Flutter and React Native are usually really good at these things.
Community Support
Having a lot of people who use the tool can be super helpful. They can help you solve problems and give advice. Big groups of users can be found for Flutter, React Native, and Xamarin.
Development Speed
The tool you pick can change how fast you can make and update your app. Look for features like hot reload, ready-to-use components, and easy-to-understand guides to speed things up. Flutter is known for letting developers build apps quickly.
UI/UX Capabilities
Think about how well the tool lets you make nice-looking apps. Important features include being able to change layouts easily, use the phone’s own UI elements, have a lot of widgets to choose from, and use animation. Flutter is great for giving developers lots of options for designing the app’s look.
Code Reuse
Being able to use the same code for iOS, Android, and web apps can save a lot of time. Kotlin Multiplatform and React Native are good for this.
By considering these points based on what you need and what you have to work with, you can find the best tool for making your app.
Overview of Leading Cross-Platform Mobile Development Frameworks
1. Flutter
Performance
Flutter works really well because it uses Dart to turn into native code, which means apps run smoothly and look good. It can handle fast animations and makes everything on the screen move smoothly. Apps start up quickly, too.
Development Experience
Flutter lets developers see changes almost instantly with its super quick hot reload feature. It's all about using widgets, which are like building blocks, to make coding easier and faster. Flutter has a lot of these widgets ready to go, but learning Dart might take some time.
Community and Support
Flutter is made by Google and is free for everyone to use. It has a big group of users and lots of resources, like over 150,000 Flutter packages, to help solve problems. There's also a lot of help and guides available online.
UI/UX Capabilities
With Flutter, you can make your app look exactly how you want. It has lots of design options, including Material Design and Cupertino styles, to keep things consistent on Android and iOS. Making custom animations is also pretty straightforward.
Cost and Licensing
Flutter doesn't cost anything to use. It's open-source, which means there are no fees or rules about how you use it. The only time you might have to share earnings is if you're using Google Play's payment system.
2. React Native
Performance
React Native makes apps run smoothly most of the time. It uses parts from the actual phone to draw on the screen, which helps animations and screen changes look nice. Apps open up quickly and respond well when you touch them. But, if the app is really complicated or has a lot going on visually, it might not be as quick as apps made just for one type of phone.
Development Experience
React Native is great if you already know how to use JavaScript and React because you can use what you know to make mobile apps. This means you can make apps for both iPhones and Android phones without having to start from scratch. It has a cool feature that lets you see changes you make right away, without having to wait. But, fixing problems can be tough, especially on Android. There are lots of extra tools and bits of code out there to help speed things up.
Community and Support
React Native is supported by a big group of people who use and improve it. It's a project started by Meta (the Facebook company) and has a lot of followers online. This means there are lots of extra pieces of code and tools you can use to do more with your app. Plus, there's plenty of help and how-tos available on the internet.
UI/UX Capabilities
With React Native, you can make your app look and feel like it belongs on both iPhones and Android phones. You can change how things look and move around, but if you want something really unique, it might take more work. Sometimes, making everything look the same on both types of phones can be a bit of a challenge.
Cost and Licensing
React Native is free. You won't have to pay to use it, and you get to keep what you make with it. If you put your app in app stores, you'll follow the usual rules about giving them a cut of your sales. The main costs come from making and keeping the app up to date, which depends on what you need for your project.
3. Ionic
Performance
Ionic makes apps that usually run smoothly. It uses web stuff like HTML, CSS, and JavaScript to make apps feel like they're made for your phone. This means things like moving between pages or animations usually work well without much delay. But, if an app is really big or complicated, it might slow down a bit.
Development Experience
If you know Angular, Ionic is a breeze because it builds on it. This means everything fits together nicely if you're already familiar with Angular. For newbies, there might be a bit more to learn at first. Ionic also has hot reloading, which lets you see changes right away without restarting everything.
Community and Support
Ionic is open-source, meaning lots of people help make it better by adding plugins or helping others figure things out. There's a ton of help available, from detailed guides to community forums. For bigger teams or more help, there are also paid support options.
UI/UX Capabilities
Ionic comes with a bunch of ready-to-use design pieces that look good on both iPhones and Android phones. You can make pretty detailed and native-feeling designs. If you want to tweak the designs more, you can do that too by changing some settings.
Cost and Licensing
Using Ionic won't cost you anything; it's free under the MIT license. There are paid plans starting at $99 a month that offer more features like better components and tools for keeping your app updated. You only share revenue if you use Ionic's services to distribute your app.
4. NativeScript
Performance
NativeScript makes apps run smoothly by using smart ways to turn code into a language your phone understands, both while you're building the app and when it's finished. This means your app will work quickly, with nice animations and without taking forever to load.
It lets you use all the phone's features without slowing your app down, so you can create apps that do a lot but still feel quick and easy to use.
In short, NativeScript helps you make apps that work well and fast on any device.
Development Experience
With NativeScript, you can use languages like JavaScript or TypeScript and even CSS to make apps that work on both Android and iOS. If you've made websites before, you'll find it pretty familiar. Plus, it works well with Angular and Vue, which are tools for making websites and apps.
Here's what's cool about developing with NativeScript:
- It has a hot reload feature, so you can see changes right away without restarting everything.
- It comes with a bunch of tools to help you build and send out your app.
- There's a big selection of plugins for adding extra features to your app.
- You can check how your app looks on real devices with the Sidekick app.
Starting to make apps with NativeScript is fairly easy, especially if you've worked on web projects before.
Community and Support
NativeScript is free and has a bunch of people helping to make it better. You can find:
- Guides and help online
- Forums for asking questions
- A place to find plugins
- Events and meetups around the world
For businesses, there are also paid plans that offer more help and resources.
The community makes it easier to get started and find help when you need it.
UI/UX Capabilities
NativeScript lets you make apps that look and feel like they were made just for Android or iOS, or you can make one app that works well on both. You can use CSS or JSON to design your app, and there are lots of built-in designs to start with.
You can:
- Make your app look native to each platform
- Use common designs across both Android and iOS
- Work with native controls and components
- Use web design tools
This means you can create apps that look great and offer a good experience to everyone.
Cost and Licensing
NativeScript doesn't cost anything to use. It's open-source, so you can use it for free and even change it if you need to.
For businesses, there are paid support plans starting at $1,490 a year for a small team. This can be helpful if you need extra help or faster support.
Overall, NativeScript is a cost-effective way to make apps, with options for extra support if you need it.
5. NET MAUI (Xamarin)
Performance
.NET MAUI uses the same setup as Xamarin to turn C# code into something the phone can understand directly. This makes apps run smoothly, with animations that look good and don't lag. Even though it's a newer tool, it doesn't waste much phone memory and starts up fast, just like apps made specifically for one type of phone.
Development Experience
If you're already good with .NET, using .NET MAUI to make apps that work on different phones using C# and XAML will feel comfortable. It has features like hot reload, which lets you see changes quickly without restarting everything. But, if you're not used to .NET, there might be a bit to learn. The number of ready-to-use parts and add-ons is growing.
Community and Support
.NET MAUI comes from Xamarin Forms, so it has a strong support group thanks to Microsoft. There are places like Microsoft Q&A and Stack Overflow where people help each other out. The basic how-tos are well-covered, but finding help for more tricky stuff might take some time. There are also paid plans for help if you need it.
UI/UX Capabilities
.NET MAUI is more about making apps that work the same across all phones than making them look unique. It has standard controls that aim to keep things consistent rather than looking different on iOS or Android. If you want a custom look, you'll need to work a bit harder and maybe use some special coding tricks.
Cost and Licensing
Using .NET MAUI doesn't cost anything; it's free. When you put your app in app stores, the usual fees apply. For big companies, there are plans you can pay for to get help faster. Overall, because you can use the same code for different phones, it's cheaper than making separate apps for each one.
Detailed Comparison
When picking a tool to make apps for both Android and iOS, it's smart to look at a few key areas: how well it performs, what it's like to use, if there's a lot of help available, how good the app can look, and how much it might cost. Here's a quick rundown:
Performance
- Flutter - Really quick and smooth. Makes apps that feel fast and look great.
- React Native - Mostly fast, but can get slow if the app is really complicated.
- Ionic - Works well for simple apps but might struggle with bigger ones.
- NativeScript - Turns code into the phone's language for speedy apps.
- .NET MAUI - Also turns code into the phone's own language, making apps run well.
Development Experience
- Flutter - Changes show up fast with hot reload. Uses widgets to build the app, but learning Dart is a bit tough.
- React Native - Good if you already know JavaScript. Debugging can be tricky.
- Ionic - If you're into web development, you'll find Ionic familiar. Angular knowledge is a plus.
- NativeScript - Friendly for web developers, thanks to common web languages. Has hot reload.
- .NET MAUI - If you're used to .NET, you'll like using C# and XAML here. Hot reload is handy.
Community and Support
- Flutter - Big community. Lots of guides and tools.
- React Native - Backed by a big community. Many resources available.
- Ionic - Strong open-source support. Paid help if you need it.
- NativeScript - Free help from the community. Business plans for more support.
- .NET MAUI - Support is growing, coming from Xamarin. Paid help available.
UI/UX Capabilities
- Flutter - Lets you control how the app looks. Great for animations.
- React Native - Can look like a native app, but unique designs need extra work.
- Ionic - Has lots of ready-made components. You can tweak designs too.
- NativeScript - You can go for a native look or keep it the same across platforms.
- .NET MAUI - Focuses on consistency rather than unique looks for each platform.
Cost and Licensing
- All frameworks are free to use.
- Some offer paid plans for extra help.
- Usual fees for app stores apply.
Pros and Cons
When picking the best tool for making apps that work on both iPhones and Androids, it's smart to look at what's good and what's not so good about each option. Here's a simple breakdown:
FrameworkProsConsFlutter- Super quick
- Lets you see changes as you make them (hot reload)
- You can make the app look just how you want
- A lot of people use and support it- You need to learn Dart, a different programming language
- Not as many extra tools or libraries yetReact Native- Use one set of code for both iOS and Android
- Good if you already know React
- Lots of people use it- Might run slow with really complex apps
- Can be tough to fix problemsIonic- Good for people who make websites
- Lots of ready-made parts to use
- You can pay for extra help- Might not work as well on big, complicated apps
- Doesn't do everything a phone app does nativelyNativeScript- Works almost as well as apps made just for one type of phone
- Supports Angular and Vue.js
- Free for everyone- Not as many people to help out compared to other options
- Fewer ways to make your app look unique.NET MAUI- Runs really well, almost like native apps
- Good for people who use .NET
- Has Microsoft's support- It's pretty new, so not a lot of support yet
- Focuses more on making apps work the same on all devices rather than looking unique
Some things to think about:
- Flutter is great all around but you'll need to learn something new.
- React Native is perfect if you're already into JavaScript and want to make apps easily.
- Ionic is awesome for web developers but might not be the best for very complex apps.
- NativeScript gives you great performance but doesn't have as many design options.
- .NET MAUI is ideal for .NET folks but is still growing its support network.
Think about what your team is good at, what you need the app to do, how you want it to look, and how much help you can get. Each option has its own set of trade-offs.
sbb-itb-8abf120
Case Studies or Success Stories
Cross-platform mobile frameworks have made it easier for businesses to create apps that work on both iPhones and Android phones. Here are some examples of apps that have done really well using these tools:
Flutter
Flutter has been used by both small companies and big names to create apps that look good and work smoothly:
- Alibaba - They made their Xianyu app with Flutter. It lets over 300 million people buy and sell used items easily on both Android and iOS.
- Google Ads - The Google Ads app for iOS and Android was made better with Flutter. This helped improve how the app works and made it easier to update.
- Reflectly - A small team used Flutter to quickly make their journaling app. They focused on cool animations and a simple design, which helped them get over 500,000 downloads fast.
React Native
React Native has been great for both big brands and startups in making mobile apps:
- Facebook - They used React Native for their Community Help app. This app helps people get support across Facebook's apps on both major mobile platforms.
- Uber Eats - This food delivery app remade their iOS app with React Native. This cut down on development time and made the app better.
- Gyroscope - A startup focusing on health tracking used React Native to make their app. It lets iPhone and Android users see their health data in a sleek, easy-to-use app.
Ionic
Ionic has helped make user-friendly apps across different areas:
- Dow Jones - They used Ionic to bring their news apps together into one codebase that works well on iOS and Android.
- Pacific Life - This insurance company made a sales app with Ionic. It works smoothly on different platforms and is engaging for their mobile workforce.
- Untappd - A social app for beer ratings used Ionic to grow their mobile presence. They've had over 8 million installs while keeping the app running smoothly.
NativeScript
NativeScript has been good for making more complex apps for businesses:
- Raiffeisen Bank - A leading retail bank in Europe made their mobile banking app with NativeScript. It has an easy-to-use interface, biometric login, and works offline on both major mobile OSs.
- Progress - This app development company used NativeScript for their mobile testing app. It has advanced features for QA teams to check mobile apps efficiently.
- GrocerKey - A provider of mobile apps for grocery stores used NativeScript. They made apps for big chains like Food Lion and Harris Teeter that work well and have lots of features.
.NET MAUI (Xamarin)
.NET MAUI, which comes from Xamarin, has been used to make advanced mobile apps using .NET skills:
- ** Alaska Airlines** - They used Xamarin for their mobile app. It links with their website and makes it easy for flyers to book flights, check in, and get flight info on both platforms.
- Insider - A mobile growth platform used Xamarin. Their iOS and Android apps can offer personalized experiences by working well with their advanced .NET backend.
- Clear Measure - A software provider for construction used Xamarin. They made their Oasis app suite to help field crews digitize tasks like time tracking and reporting incidents, ensuring reliable sync across devices.
These examples show how businesses can rely on cross-platform frameworks like Flutter, React Native, Ionic, NativeScript, or .NET MAUI to make high-quality mobile apps. They can reuse code and save on development costs.
How to Pick the Right Framework for Your App
When you're deciding which cross-platform mobile development framework to use, think about a few key things:
Your Team's Skills
- What programming languages do your developers know already?
- Choosing a framework that fits what they already know will make things go faster.
For example:
- React Native - Great if your team knows JavaScript.
- Flutter - They'll have to learn Dart.
- Ionic - If they're good with web stuff like HTML/CSS, this is a plus.
- .NET MAUI - Knowing C# and .NET is helpful here.
Performance Needs
- Does your app need to handle a lot of fancy visuals or data?
- Some options are better at dealing with heavy stuff than others.
For instance:
- Flutter and .NET MAUI are really smooth.
- React Native might get slow if your app is very detailed.
- Ionic is best for simpler apps.
Timeline and Budget
- Getting your app built faster can save money.
- Think about how complex your app is and how much you can reuse code.
Examples:
- Flutter lets you use the same code for different parts, which speeds things up.
- React Native helps web developers make apps quicker.
- Ionic has things ready to go that make building faster.
How Custom Your App Will Look
- Do you need your app to have a unique design?
- Or do you want it to look the same on all devices?
- Flutter gives you a lot of freedom to design.
- .NET MAUI keeps things more uniform across different devices.
Support Available
- Different frameworks have different levels of help and resources available.
- You can also pay for extra support if you need it.
For instance:
- Flutter and React Native have lots of free help.
- NativeScript has options to pay for more support.
- .NET MAUI is still building up its support network.
By looking at what you need and what each framework offers, you can figure out the best one for your app. Think about what your team is good at and what your app needs to do.
Conclusion
Picking the right tool for making apps that work on both iPhones and Androids is super important. Here are some things to think about when choosing:
Team Skills and Existing Code
- If you want to use Flutter, you'll need to learn Dart. React Native is good if you know JavaScript.
- .NET MAUI is for those who are familiar with C# and .NET.
- Ionic is great if you're into web stuff like HTML/CSS.
Performance Needs
- Flutter and .NET MAUI are the best choices for apps that need to look good and work fast.
- React Native might get a bit slow if your app is really fancy.
- Ionic is perfect for simpler apps.
Development Speed
- Flutter has lots of ready-made parts that make building apps fast. React Native and Ionic also help you speed up because they use languages and components you might already know.
- The hot reload feature in Flutter, React Native, NativeScript, and .NET MAUI lets you see changes quickly without restarting everything.
UI/UX Customization
- Flutter lets you make your app look exactly how you want.
- .NET MAUI is more about making sure your app works the same way on all devices.
Support Resources
- Flutter and React Native have a lot of free help and guides.
- NativeScript and .NET MAUI offer special paid plans for businesses.
Recommendation
For most projects, Flutter and React Native are your best bets. They offer a good mix of speed, the ability to make the app look how you want, and lots of help.
Flutter is really fast and lets you control the design completely, but you'll have to learn Dart. React Native uses JavaScript, which is handy, but very complex apps might need some extra work to run smoothly.
Ionic is a good choice for simpler apps using web languages. NativeScript and .NET MAUI are also good but don't have as much support. Think about what your team is good at, what your app needs to do, how quickly you need to build it, and your budget.
Making apps for both iPhones and Androids is a smart move. By choosing the best tool for the job, you can make great apps for both platforms without wasting time or money.
Related Questions
What is the most used cross-platform mobile framework?
A 2022 survey by Statista found that Flutter is the top choice for developers making apps that work on both iPhones and Androids, with 46% using it. Other popular ones include React Native, Cordova, Ionic, Xamarin, and NativeScript. Flutter is especially popular for building apps that can run on different devices with just one set of code.
What are the best cross-platform frameworks for 2024?
Looking ahead to 2024, the frameworks you might want to consider are:
- Flutter: Known for quick and smooth apps, lets you make the app look just how you want, and has a lot of people supporting it.
- React Native: Good if you're already familiar with React, and has a large community.
- Kotlin Multiplatform: Lets you share code between iOS, Android, and web apps. Works well with native app features.
- Xamarin/.NET MAUI: Offers smooth app performance and is a good choice for those who know .NET.
- Ionic: Uses web skills like HTML/CSS and is suited for simpler apps.
- NativeScript: Good for using web development skills for mobile apps, and offers paid support for businesses.
What is a cross-platform framework?
A cross-platform framework is a tool that lets developers create apps for more than one operating system, like iOS and Android, using the same code. Instead of making a separate app for each system, these frameworks help save time and reach more users. Some examples include Flutter, React Native, Xamarin, Ionic, and NativeScript.
Is Maui better than Flutter?
Flutter is the most popular with developers, used by 46%. But, .NET MAUI has its advantages, like making Linux desktop apps. Flutter is great for making apps that look unique and work fast, and it has lots of support from developers. .NET MAUI is good for those who prefer using C#. Depending on what your team is comfortable with and what you need the app to do, Flutter generally offers more, but .NET MAUI is a solid choice for C# developers.
Related posts

Flutter Mobile App to Web: A Seamless Transition Guide
Transforming your Flutter mobile app for the web is a strategic move to increase its reach and functionality. Here's a quick guide to simplify the process:
- Ensure Required Tools and Knowledge: Update to the latest Flutter and Dart SDKs, and enable web support in Flutter.
- Web Setup and Responsive Design: Create a web directory in your project and adjust your app's design to look great on larger screens.
- Navigation and Interactions: Implement web-friendly navigation and adapt your app for desktop-specific interactions.
- Testing and Debugging: Thoroughly test your app on different devices and browsers, and use debugging tools to iron out any issues.
- Deployment: Choose a hosting platform like Firebase Hosting and optimize your app for performance and SEO.
By following these steps, you can create a seamless web version of your Flutter mobile app, reaching more users and enhancing their experience across devices.
Prerequisites for Transition
Before you can move your Flutter mobile app to the web, there are a few things you need to have ready:
Flutter SDK
First up, make sure you have the latest version of the Flutter SDK. This is the toolkit that lets you build apps for different platforms, including the web.
Dart SDK
Flutter apps are made using Dart, so you'll also need the Dart SDK. Check that you're using the newest version.
Web Support
You need to turn on web support in your Flutter setup. Open up your project in the terminal and type this in:
flutter config --enable-web
This step makes sure you have the tools needed to make your app work on the web.
IDE and Plugins
Choose an editor like Visual Studio Code or IntelliJ and install the Flutter and Dart plugins. These tools help you write, test, and fix your code.
Flutter and Dart Knowledge
It's important to know the basics of Flutter and Dart. Understanding how Flutter's widgets work, how to move around in the app, and how to manage data will help you adapt your mobile app for the web. Make sure you're comfortable with:
- How Flutter organizes its components
- Navigating through the app
- Keeping track of information across the app
- Dart's types of data and functions
With these steps covered, you're all set to start turning your Flutter mobile app into a web app!
Step 1: Preparing Your Flutter App for the Web
Creating a Web Directory
To start making your Flutter mobile app work on the web, first go to your project's main folder in the terminal and type:
flutter create .
This command sets up everything you need to build your app for web use.
Verifying Plugin Support
Now, make sure all the extra tools or plugins you added to your app are okay to use on the web. Here's how to do it:
- Look at your
pubspec.yamlfile to see your app's plugins. - Check each plugin on the pub.dev website to see if it's web-friendly.
- If a plugin doesn't work on the web, try to find a different one that does.
- For any code that's specific to mobile or web, use an
if-elseblock to separate them like this:
if (kIsWeb) {
  // web-only code
} else {
  // mobile-only code
}
Doing this helps avoid problems when your app runs in different environments.
With your app's setup and plugins ready for the web, you're all set to tweak your app so it looks good and works well on bigger screens.
Step 2: Making Your App Responsive
To make your Flutter mobile app look good on both web browsers and larger screens, you need to adjust how it appears so it can change size and layout smoothly. Here's how to do it in simple steps:
Use LayoutBuilder
Think of LayoutBuilder as a tool that helps your app figure out how much space it has. Depending on the screen size, you can decide how your app should look. For example, for smaller screens, you might want a simple layout, but for bigger screens, you could go for something more spread out:
LayoutBuilder(
  builder: (context, constraints) {
    if (constraints.maxWidth < 600) {
      // Use a simple layout
    } else if (constraints.maxWidth < 900) {
      // Use a bit more complex layout
    } else {
      // Go all out with a complex layout
    }
  }
)
Use GridView.builder for Lists
When you have lists or grids, GridView.builder helps them adjust to the screen size. You can control how they scroll and how much space they take up.
Try Out Responsive Packages
There are tools made by other developers that can help you make your app adjust to different screens. These tools handle the tricky parts for you and give you widgets that work well on any device.
Design for Every Screen
Make different versions of your app's layout for phones, tablets, and computers. Use tools like Expanded and Flexible to make your widgets fit the screen nicely. And, use things like SizedBox and Container to make sure everything is the right size.
Test on Different Devices
Always check how your app looks on different devices while you're building it. This way, you can make sure it looks great whether it's on a phone, a tablet, or a computer screen.
By keeping these points in mind, you can make sure your app is enjoyable for everyone, no matter what device they're using.
Step 3: Handling Navigation and Platform-Specific Interactions
Navigation Adjustments
To make sure your app knows where to go on the web, you can use something called the beamer package. Here's how to set it up:
- First, add beamer to your app's pubspec.yaml file:
dependencies:
  beamer: ^0.8.4
- Next, make sure your app uses a
Beamerwidget:
void main() {
  runApp(MyApp());
}

class MyApp extends StatelessWidget {
  @override
  Widget build(BuildContext context) {
    return MaterialApp.router(
      routeInformationParser: BeamerRouteInformationParser(),
      routerDelegate: BeamerDelegate(
        locationBuilder: SimpleLocationBuilder(
          routes: {
            '/': (context) => HomeScreen(),
            '/settings': (context) => SettingsScreen(),
          },
        ),
      ),
    );
  }
}
- Instead of regular pages, use
BeamPagefor animations and moving between pages. - Use
BeamerRouteInformationParserto make sure it works well with Flutter's way of moving around in the app.
This setup helps your app know where to go, show animations when changing pages, and work well with web links.
Browser- and Desktop-Specific Interactions
To make your app nicer to use on computers and web browsers, you can add things like:
- Scrollbars - Add scrollbars to show where you are on a page with the
Scrollbarwidget. - Hover Effects - Use
MouseRegionto make things happen when you hover over them. - Keyboard Shortcuts - Make it easy to do things like go back or open menus with keyboard keys.
- Context Menus - Right-click menus can be added with
ContextMenu.
You can also check if the app is being used on the web or a phone to only show these features when needed, like this:
if (kIsWeb) {
  // Web-only code
} else {
  // Mobile-only code
}
By doing these things, your app will feel right at home whether it's being used on a phone, a computer, or a tablet. Everyone gets a smooth experience no matter the device.
sbb-itb-8abf120
Step 4: Testing and Debugging
Before you share your Flutter web app with the world, it's important to check it works well on different web browsers and devices. Here's how to make sure your app is ready for everyone:
Set Up Emulators and Simulators
Flutter lets you use tools like Chrome and Edge to see how your web app looks on different browsers. For checking on phones, you can use the iOS Simulator and Android Emulator. This helps you spot and fix any weird behaviors or issues.
Use DevTools for Diagnostics
Tools like Chrome and Edge DevTools are super helpful for finding and fixing problems. They let you:
- See how your app looks on different screen sizes
- Check how fast your app runs
- Find and solve errors in your code
- Look at network requests
These tools work well with Flutter, making it easier to spot where things might be going wrong.
Try on Actual Devices
Testing on real devices is key. This way, you catch issues that might not show up on simulators or emulators. Connecting your phone or computer to your coding setup can help you test more efficiently.
Automated Testing
Automated tests help make sure your app works right. You can write tests that check if small parts of your app (like buttons) work as they should. Bigger tests can check if whole parts of your app (like signing up) work smoothly.
Beta Testing and User Feedback
Letting a small group of people try your app before it's fully out can give you a lot of useful feedback. Ask them to tell you what they think, and use their suggestions to make your app better.
Testing your app in all these ways helps you make sure it's as good as it can be. Using tools like emulators, real devices, and feedback from real users, you can fix problems and make your app great for everyone.
Step 5: Deploying Your Flutter Web App
Putting your Flutter web app online means people can use it in their web browsers. Here are some ways to do that.
Firebase Hosting
Firebase Hosting is a common choice for Flutter apps. Here's how to put your app on Firebase:
- Check if your Flutter project is set up for the web.
- Add
firebase_coreandfirebase_hostingpackages. - Use
flutter build webto prepare your app for the web. - Set up Firebase Hosting with your project folder.
- Tell Firebase Hosting to use the
build/webfolder. - Put your app online with
firebase deploy.
Your app is now live on a Firebase URL. You can update and redeploy your app as needed.
Other Hosting Options
Besides Firebase, you can also use:
- Azure Web Apps
- Amazon S3
- Google Cloud Platform
- Heroku
- Netlify
These services usually have steps just for Flutter web apps. Remember to build your web app first.
Optimization and Maintenance
After your app is online, keep it running well by:
- Making sure it loads fast and isn't too big.
- Watching for downtime, traffic, and errors.
- Using HTTPS for security.
- Backing up your data regularly.
- Updating your app and testing new changes.
These steps keep your app fast, safe, and available.
SEO Considerations
To help people find your app through search engines:
- Find and use the right keywords.
- Create useful content.
- Add descriptions and other metadata for search engines.
- Use clear HTML like headers and lists.
- Describe images well.
- Fix any errors that stop search engines from seeing your site.
Good SEO makes your app easier to find.
Choosing a reliable hosting service and following these tips can help your app reach more people.
Performance Optimization
Making your Flutter web app run smoothly is super important for a good user experience. Here are some steps to check and boost your app's performance:
Use Lighthouse
Lighthouse is a handy tool for checking how well your web app is doing. Here's how to use it:
- Open your web app in Chrome and open the DevTools (right-click and select 'Inspect').
- Click on the 'Lighthouse' tab.
- Click 'Generate report'.
It'll tell you how fast your app loads, how well your images and code are optimized, if your app is easy to use for everyone, and how it does in search engines.
Analyze Build Output
When you build your Flutter web app, look at the details it gives you:
flutter build web --release --verbose
This tells you about:
- How big your app is
- If it got rid of unused code
- How long the build took
Profile with DevTools
Chrome's DevTools has a 'Performance' tab that helps you find slow parts. Look for things like slow frame rates, too much memory use, or code that runs too often.
Optimize Images
Pictures can make your app slow. To fix this:
- Choose the right file type (like WebP).
- Only load pictures when they're needed.
- Make pictures smaller or lower quality if they're too big.
- Keep pictures saved on the device if you can.
Minify JavaScript
Making your JavaScript files smaller helps your app load faster. You can turn this on with:
web:
  minify: true
in your flutter.yaml file.
Use Code Splitting
Break your code into smaller parts that can load when needed, instead of all at once. This makes your app start faster.
Enable Tree Shaking
This feature gets rid of code you're not using to make your app smaller. Turn it on with:
web:
  assume-no-unused-code: true
By checking your app with tools like Lighthouse, fixing slow spots, and making your resources like images and code more efficient, you can make your app faster and more fun to use.
Common Challenges and Solutions
Moving your Flutter mobile app to the web might not always be smooth. Here are some typical problems you might run into and some tips on how to deal with them.
Handling Platform-Specific Code
Sometimes, code that works great on mobile doesn't play nice with the web. This can be because:
- Some tools and plugins don't work on the web.
- Certain mobile features, like the camera, might not have direct web equivalents.
- Parts of your code might rely on mobile-only libraries.
Solutions:
- Look for plugins that also work on the web.
- Use
kIsWebto check if your app is running on the web and adjust the code accordingly. - Find different ways to offer the same features across platforms.
- Use abstraction layers to manage differences between platforms more easily.
Responsive Design Difficulties
Making sure your app looks good on any screen size can be hard. You might run into issues like:
- Layouts that don't fit well on different screens.
- Images that don't scale properly.
- Large screens having too much empty space.
- Small screens looking too crowded.
Solutions:
- Use
LayoutBuilderandMediaQueryto adjust layouts based on screen size. - Consider using responsive design tools or frameworks.
- Design layouts that scroll, so they work on any screen size.
- Tailor your UI to fit different screens by adjusting constraints and using flexible spacing widgets.
App Navigation and Routing
Web apps handle moving between pages differently, which can cause problems like:
- The back and refresh buttons not working as expected.
- Losing app state when moving between pages.
- Missing smooth transitions between pages.
Solutions:
- Use Flutter's routing tools like Beam or AutoRoute for better page transitions.
- Make sure your routing setup works with the web browser's history.
- Keep track of app state across different pages with tools like scoped models or provider.
Testing and Debugging Shortfalls
Adding web to your app testing can make things more complex, leading to issues like:
- Problems that show up on the web but not on mobile.
- Not enough tests covering both mobile and web.
- Overlooking problems that only happen in certain browsers.
Solutions:
- Use simulators and emulators to test on iOS, Android, and different web browsers.
- Take advantage of desktop browsers' DevTools for debugging.
- Make sure you have tests that specifically cover web functionality.
- Plan your tests to include checks for mobile, web, and specific browser issues.
By preparing for these common issues, you can make the transition from Flutter mobile to web much smoother.
Conclusion
Making your Flutter mobile app work on the web is a great way to let more people use it. This guide showed you how to do it step by step.
Here's a quick review of the main points:
- First, make sure your Flutter project is ready for the web and check that everything you need is up to date.
- Use tools like LayoutBuilder and GridView.builder to make sure your app looks good on any screen size.
- Change how your app moves from page to page with help from packages like beamer, and remember to add things like scrollbars for web users.
- Test your app a lot, using things like DevTools to find any problems. Try it on different devices and browsers.
- Pick where to put your app online, like Firebase or Azure, and make your app run faster by doing things like making files smaller and getting rid of code you don't need.
Moving your app to the web means more people can use it, and using Flutter helps you save time and money because you can use the same code for mobile and web. You might run into some tricky spots, like making sure your app looks good on all devices or dealing with code that only works on mobile. But, there are ways to solve these problems.
Keep making your app better by listening to what users say and trying new things. Flutter lets you do a lot across both mobile and web. With some hard work, your app can be great for everyone, no matter how they choose to use it.
Related posts

Flutter Multi Platform: A Comprehensive Guide
Flutter is a versatile tool by Google for building apps across multiple platforms using a single codebase. It's known for its efficiency, customizable UI, and high performance. Here's a quick guide to what makes Flutter a great choice for developers:
- Unified Codebase: Write once, run everywhere - iOS, Android, web, and desktop.
- Rapid Development: Thanks to Hot Reload, see changes instantly.
- Expressive UIs: Easily create beautiful, natively compiled applications.
- High Performance: Direct compilation means your app runs fast.
- Community and Support: A growing ecosystem with lots of resources.
Despite its advantages, there are challenges like the learning curve with Dart (its programming language), larger app sizes, and fewer third-party libraries compared to more mature frameworks. However, its benefits for cross-platform development often outweigh these drawbacks. Whether you're building for mobile, desktop, or web, Flutter offers a compelling set of features to streamline the development process and ensure your apps look great across all devices.
What is Flutter?
Flutter is a free tool made by Google that lets you create apps that work on lots of devices like phones, computers, and the web, all using the same set of instructions. This is great because it means you don’t have to write separate apps for each device.
Here are some important things about Flutter:
- It’s for making apps that can run on different devices like iPhones, Android phones, and computers without having to change your code.
- It uses a programming language called Dart, which is pretty straightforward and focuses on making apps look good.
- Flutter gives you lots of options to design your app, making it possible to create really nice-looking apps.
- It updates your app instantly as you make changes, which saves a lot of time.
- You can use Flutter to work with the stuff that phones and computers do, like showing notifications or storing data.
In short, Flutter is all about making it easier to create apps that look good and work well on many devices.
Flutter Architecture
Flutter is built in layers:
- Engine - This part is in charge of drawing stuff on the screen and figuring out how everything fits together.
- Framework - This is where Flutter keeps everything organized, making sure the app works smoothly and looks right.
- Widgets - These are like the building blocks for your app’s look. Flutter has a bunch of these for different styles, like Android’s Material Design or iOS’s Cupertino.
This setup means Flutter can make your app look the same on any device, which is really handy.
Dart Programming Language
Flutter uses a programming language called Dart to make apps. Here’s why Dart is cool:
- It’s similar to languages many programmers already know, so it’s easy to get started.
- It makes your app run really fast on all kinds of devices.
- Dart is great for making apps because it helps your app react to changes quickly and smoothly.
- You can also use Dart to make your app do specific things on Android or iOS, like sending messages.
Dart helps you build apps quickly that look good and run smoothly, making it a great choice for app development.
Key Features of Flutter
Single Codebase
Flutter lets you use the same set of instructions for making apps that work on different devices like iPhones, Android phones, computers, and the web. This means you don't have to write separate codes for each platform, saving you a lot of time and effort. With just one codebase, app development becomes much simpler and you don’t have to keep up with multiple sets of code.
Hot Reload
Hot Reload is a cool feature that shows you the changes you make to your app's code right away, without having to restart the whole app. It’s like seeing your edits come to life instantly, which helps you make improvements quickly and try out new ideas without waiting around.
Expressive and Customizable UI
Flutter gives you lots of tools to make your app look great. It has a big collection of widgets that you can tweak to get the exact look you want. Plus, these widgets help make sure your app looks good on any device, whether it’s a phone, a tablet, or a computer.
High Performance
Flutter turns your code into the language that devices understand right away, which makes your app run really smoothly. This is different from some other ways of making apps that might not run as well because they have to translate the code in a roundabout way. Flutter’s direct approach means you get snappy, responsive apps.
Setting Up Flutter Development Environment
Getting started with building apps using Flutter is straightforward. Let's go through the steps to get everything ready for Flutter app development:
Install Flutter SDK
- Get the Flutter SDK: First, head over to the official website and download the latest version of the Flutter SDK.
- Unzip the file: Once downloaded, unzip the file in a place you can easily find, like
C:\src\flutterfor Windows users. - Make Flutter commands available: Add Flutter to your system's PATH so you can use Flutter commands in the terminal. Simply type:
export PATH=\"$PATH:`pwd`/flutter/bin\"
Install an IDE
For writing and editing your code, you can choose any editor, but some have special features for Flutter:
- Android Studio
- VS Code with Flutter and Dart plugins
- IntelliJ IDEA with Flutter and Dart plugins
Set Up Device Emulators
To see how your app looks and works, you'll need emulators:
- iOS: Get Xcode for the iOS simulator.
- Android: Use Android Studio to set up the Android emulator or try Genymotion.
Configure Platforms
Before you start building, make sure each platform is ready to go:
- iOS: Use
flutter config --ios-sdk <path-to-ios-sdk>to set up. - Android: Use
flutter config --android-sdk <path-to-android-sdk>for Android.
Now, with your development environment ready, you can dive into creating Flutter apps by using flutter create to make a new project and flutter run to see it in action!
Flutter for Mobile Development
Advantages
Flutter is great for making apps for phones because:
- Quick to see changes: With something called hot reload, you can see the updates you make right away. This makes making apps faster.
- Works really well: Flutter changes your app's code into a special code that phones understand, so it runs smoothly.
- Beautiful apps: You can make really nice-looking apps with Flutter because it has lots of options for designing.
- One code for two phones: You write your app once, and it can work on both iPhones and Android phones. This saves a lot of time.
Disadvantages
But, there are a few things to watch out for:
- Bigger app size: Apps made with Flutter might take up more space on your phone.
- Not all tools available: Flutter is still new, so some extra tools you might want to use aren't ready yet.
- Takes time to learn: You need to spend some time learning how to use Flutter and Dart (the programming language it uses).
Comparison of Pros and Cons
Mobile PlatformProsConsFlutterQuick updates, Great for making nice apps, Use one code for both iOS and AndroidMight make bigger appsNative AndroidYou can use everything Android offersYou have to write your app twice if you also want it on iOSNative iOSWorks really well on iPhonesYou have to write your app twice if you also want it on Android
Flutter for Desktop
Flutter lets you create apps for desktop computers, including Windows, macOS, and Linux. This means you can make apps that look good and work fast on computers using Flutter.
Considerations for Desktop Development
When making desktop apps with Flutter, keep these points in mind:
- System Integrations: You might need to work with things specific to computers, like menus or notifications. Flutter has tools to help with that.
- Input Methods: Make sure your app works with keyboards, mice, and touchscreens.
- Window Management: Handle how your app's windows look and work. Flutter can help manage this across different computer systems.
- File System Access: Your app can work with files on the computer using special plugins.
- Distribution: You'll need to figure out how to get your app to people, whether through app stores or as downloadable files.
The main parts of Flutter stay the same; you just need to add the bits that computers need.
Setting Up
To get your computer ready for Flutter apps:
flutter config --enable-windows-desktop
flutter config --enable-macos-desktop
flutter config --enable-linux-desktop
Creating a Desktop App
Start a new project with:
flutter create my_app
cd my_app
Then, get your app running on a computer:
flutter run -d windows
flutter run -d macos
flutter run -d linux
Key Capabilities
With Flutter, your desktop apps can:
- UI Framework: Use Flutter's tools to make your app look great.
- 2D GPU Acceleration: Have smooth animations and sharp graphics.
- Platform Interop: Work with native code and libraries.
- Hot Reload: Quickly see changes you make to your app.
You can also use device features, add special code for computers, and give your app to users.
Conclusion
Flutter's support for desktop means you can make apps for any computer. It gives you all the tools to create awesome apps for desktop platforms.
Flutter for Web
Making web apps with Flutter lets you reach more people across different devices. But, building for the web is a bit different from making apps for phones or computers.
Considerations for Web
When you're working on web apps with Flutter, here are some things to think about:
- Browser Compatibility - Make sure your app works well on all the big browsers like Chrome, Firefox, and Safari. Flutter helps by providing alternatives if something doesn't work.
- Page Navigation - Use Flutter's tools to move around in your app. The first page the user sees should match the browser's URL.
- State Management - Instead of using setState() which rebuilds your app, try using other methods like provider or BLoC to manage your app's data.
- Hosting - You can put your app online with services like Firebase or AWS. Think about how to handle lots of visitors at once.
- SEO - To help people find your app, use meta tags and server-side rendering. Make sure each page has its own URL.
- Security - Be careful with user input. Check the data and protect against web attacks.
These web-specific tips can help you make better Flutter web apps.
Setting up Flutter Web
To start using Flutter for web:
flutter channel beta
flutter upgrade
flutter config --enable-web
To make a new app, use flutter create my_app.
To add web support:
flutter create .
To see your app in action, run:
flutter run -d chrome
Building Web Apps
Flutter has special tools and widgets for the web like InteractiveViewer for interactive content. You can also use web APIs to get browser details.
You can do cool stuff like drawing, animations, and using browser features. There are also plugins for linking to web pages and working with the browser's history.
Comparison to Mobile/Desktop
Mobile/DesktopWebNavigationUse navigatorsUse browser URL and routersState mgmt.Use setState()Use BLoC, providers, etc.HostingPut on app storesUse services like FirebaseDistributionThrough app storesShare with URLsTestingUse emulators or devicesTest in browsers
Even though you can reuse a lot of code, making web apps requires some adjustments.
Conclusion
Using Flutter for web means you can make your app available on more devices. Flutter helps you create good-looking, fast web apps with the same tools you use for other platforms.
Cross-Platform Development Strategies
Code Sharing Best Practices
When you're making apps for different devices like phones, computers, and the web, you want to use the same code as much as possible. This saves time and effort. Here's how to do it well:
- Dependency injection - This means using specific parts of code for certain devices only when needed. It helps keep your main code clean and reusable.
- Separate business logic - Keep the core parts of your app, like rules and data handling, in one place. This way, you can use them across all devices but still make each app look unique.
- Conditional imports - Sometimes, you only need certain code for one type of device. You can set conditions to use this code only when necessary, keeping your main code more general.
- Maintain common interfaces - Make sure the basic structure of your code is the same across devices. This makes it easier to use the same code everywhere.
- Asynchronous execution - Run device-specific code separately so it doesn't slow down the rest of your app.
Following these tips can help you use the same code for apps on different devices, making app development faster and easier.
Platform-Specific Functionality
Even though you're sharing code, sometimes you still need to use features that are only available on certain devices:
- Conditional imports - Use this to include code for specific devices only where it's needed.
- Platform channels - This is a way to use device-specific features in your app without messing up your shared code.
- Asynchronous execution - Keep your app running smoothly by handling device-specific tasks in the background.
- Feature flags - Turn on or off certain features depending on which device your app is running on.
- Dependency injection - Use this to add device-specific features to your app without changing the core code.
These strategies let you make one app that works well on all devices, while still being able to use the special features of each device.
Building Your First Flutter App
Building your first Flutter app is straightforward and doesn't take much time. Let's go through the process of creating a simple app from the beginning and see how to run it.
Set Up Your Flutter Project
To start, you'll need to make a new project. Type this into your command line:
flutter create my_first_app
This command makes a new folder called my_first_app with everything you need to get started.
Review Main Files
Here are the main files you'll be working with:
main.dart- This is where you'll write most of your app's code.pubspec.yaml- This file is for managing your app's assets and external packages.lib/- The place where your app's code will mostly live.
Take a moment to open and look through these files to see the starting setup.
Design the UI
Now, let's make the user interface. Open main.dart and change its content to:
import 'package:flutter/material.dart';

void main() {
  runApp(
    MaterialApp(
      home: Scaffold(
        appBar: AppBar(
          title: Text('My First App'),
        ),
        body: Center(
          child: Text('Hello World!'),
        ),
      ),
    ),
  );
}
This code creates a basic screen with a top bar saying "My First App" and a center text saying "Hello World!".
Run the App
It's time to see your app in action:
- Make sure an emulator or a device is connected to your computer.
- Run this command in your terminal:
flutter run - Wait for your app to build and appear on the screen!
You can use hot reload to see the changes you make in real-time.
Recap
In this guide, you:
- Started a new Flutter project
- Checked out the main files you'll use
- Made a simple user interface
- Ran your app to see it live
With these steps, you're well on your way to creating more complex Flutter apps!
sbb-itb-8abf120
Advanced Flutter Topics
State Management
Managing how your app keeps track of changes and updates its look can get tricky as it gets bigger. Here are some common ways to do it:
setState()
- A basic way Flutter lets you update your app.
- Use
setState()to refresh parts of your app. - Good for simple apps, but can be hard to manage in bigger ones.
BLoC
- Keeps the app's logic separate from its appearance.
- Uses streams to send data back and forth.
- Great for large apps but might be hard to learn at first.
Redux
- Data moves in one direction, making it easier to track.
- One place stores all your app's data.
- Good for apps that run on the web but requires a lot of extra code.
Provider
- A straightforward way to share data across your app.
- It's flexible and good for both simple and complex apps.
- Can get messy if you have too many.
Pick a method that fits the size of your app. Start simple, and as your app grows, consider switching to a more scalable option.
Integrations
Flutter lets you add features from other services easily:
Firebase
- Helps with user accounts, data syncing, storing files, and sending notifications.
- It's user-friendly and well-documented.
REST APIs
- Use the
httppackage to connect with web services. - Fetch and show data from the web in your app.
- Remember to handle errors and loading times.
Local Databases
- Use plugins like
sqfliteto keep data on the device. - Good for apps that need to work without the internet.
Payment Gateways
- Take payments within your app.
- Use plugins for secure transactions.
- Good for apps with subscriptions or in-app purchases.
Maps
- Display maps with
google_maps_flutter. - Customize the look and add markers.
- Useful for apps that show locations or directions.
Machine Learning
- Use
tflitefor smart features like image recognition. - Works directly on the device.
Using Flutter means you can add these features without worrying about different coding languages for iOS or Android. The Flutter community also offers a lot of help and resources for making your app better.
Real-World Flutter Apps
Flutter is being used to create awesome apps in many different areas. Let's look at some examples of Flutter apps that are out there.
E-Commerce
Online shopping apps need to work smoothly and handle payments well. Flutter helps developers make apps that do just that.
Myntra - A big fashion store in India, Myntra, used Flutter to make their iOS app better. The new app works faster, responds better, and lets users customize more.
eBay Motors - eBay Motors remade their app with Flutter. This made the app 20% smaller and improved the animation quality. Flutter made it easy to use the same UI code across different platforms.
Ride Sharing
Apps for sharing rides need to be accurate, reliable, and quick. Flutter is great for making strong apps for this purpose.
Uber - Uber uses Flutter for their driver apps on both Android and iOS. Flutter makes these apps run faster and smoother, especially for maps and live updates.
Careem - A top ride-hailing app in the Middle East, Careem, rebuilt their app with Flutter. The new apps load faster and have smoother animations.
Media and Entertainment
Flutter is good for making apps that need to be interactive and fun, like those for watching videos or listening to music.
Alibaba Video - Alibaba Video, with 150 million users every day, remade their Android app with Flutter. This change made more people use the app and improved its rating.
Tencent Video - A big video platform in China, Tencent Video, chose Flutter to make their UI more flexible and to cut down on costs.
Music Player - SoundCloud used Flutter to create a new music player for mobile and web. This let them update the app faster and reuse a lot of their UI code.
Finance
Apps that deal with money need to be secure, fast, and reliable. Flutter helps developers meet these needs.
Reflectly - A journaling app, Reflectly, used Flutter to remake their app for iOS and Android in just 4 months with a small team.
Square - Square, a company that offers financial services, used Flutter for their app that helps merchants manage their business. Flutter's quick update feature made it easier to improve the app.
These examples show that Flutter is flexible and can be used for making all kinds of apps, from shopping to finance, that are easy to use and look great.
Common Challenges and Recommended Solutions
Flutter is really helpful for making apps that work on different devices, but sometimes developers run into problems. Here are some common issues and how to fix them:
Learning Curve with Dart
- Learning Dart, the programming language for Flutter, can be tough if you're used to other languages like Java or JavaScript.
- Solution: Spend some time getting to know Dart. Look at the official documentation and try out some small projects to get comfortable.
Dealing with Flaky Tests
- Sometimes tests don't work the same way every time, which can be frustrating.
- Solution: Make your tests more reliable by waiting for certain things to happen before moving on. This can help avoid timing issues.
Long Build Times
- Bigger apps take longer to build, which can slow you down.
- Solution: Organize your code into different parts for development and production. Use faster computers if you can. Clean up your code by removing stuff you don't need.
Difficulty with Debugging
- Finding and fixing bugs can be hard because Flutter apps do a lot of things at once.
- Solution: Use tools to go through your code step by step. Keep track of changes and problems as they happen to find out what's going wrong.
Maintaining Cross-Platform Compatibility
- Even though Flutter works on many devices, sometimes things don't work the same on all of them.
- Solution: Test your app on different devices early and often. This helps catch problems before they get big.
App Size Overhead
- Flutter apps can be big, which might make them slower.
- Solution: Use tools to make your app smaller by getting rid of code and files you don't need. Make sure images and videos are as small as possible.
By using these tips and keeping up with new ways to solve problems, you can make great apps with Flutter. Don't forget to ask for help from the Flutter community if you get stuck.
The Future of Flutter
Since it came out in 2017, Flutter has become a go-to choice for making apps that look good and work well on different devices like phones, computers, and the web. Google, the company behind Flutter, plans to keep making it better.
Long-Term Commitment from Google
Google has promised to keep supporting Flutter for a long time. This means Flutter will keep getting better, with improvements like:
- Making apps run faster and smoother
- Letting Flutter work on even more types of devices
- Easier access to device features no matter the platform
- Better tools for finding and fixing problems in your apps
- Making sure Flutter is stable and ready for making real apps
With Google's support, we can expect Flutter to keep improving.
Growth in Popularity and Adoption
More and more developers are choosing Flutter because it makes app development faster, the apps look great, and there's a lot of help available from the community and online resources.
Surveys show that many developers are either using Flutter now or thinking about using it for their next project. As more people start using Flutter, its community and the number of tools available for it will grow.
Expansion Across Platforms
Flutter is not just for mobile phones anymore. It's starting to be used for making apps for computers, the web, and even things like cars and smartwatches.
While Flutter is still getting better at some of these things, its ability to work on so many different devices shows how flexible it is. Google is working on making Flutter even better for all these platforms.
In the future, Flutter might be the one tool you need to make apps for any device, from your wristwatch to your car.
Conclusion
Thanks to Google's ongoing support, Flutter is likely to keep getting more popular. It's good at making apps quickly, the apps can look really nice, and you can use the same app code for different devices.
As more people start using Flutter, we'll see even more tools and resources for it. Looking ahead, Flutter's ability to work on many different platforms and devices makes it a very useful tool for making apps today and in the future.
Conclusion
Flutter is a popular tool for making apps that work on many different devices, like phones, computers, and the web, using just one set of instructions. It comes with a lot of ready-to-use parts that help you make your app look good and work well, no matter where it’s used.
Here’s a quick rundown of why Flutter is great for making apps for more than one device:
Unified Codebase
- You can write your app once and then use it on iOS, Android, web, Windows, Linux, and macOS.
- This means you don’t have to keep up with different versions of your app, which saves a lot of time.
- Flutter has a big collection of tools that let you create really nice-looking apps easily.
- These tools make sure your app looks right on screens of all sizes.
Rapid Development
- The hot reload feature lets you see changes you make right away, which makes building your app faster.
- You get to try out new ideas quickly and see what works best.
High Performance
- Flutter turns your app into a form that works really smoothly, making it great for apps that need to look good and run well.
- It’s especially good for apps with a lot of moving parts.
Extensive Ecosystem
- There’s a big community of Flutter users who share tools, help, and advice.
- This makes it easier to add cool features to your app, like smart technology or payment options.
Future Readiness
- Flutter is made to last, so you can keep using it even as things change.
- It’s a smart choice if you want to make sure your app can grow over time.
Google is really behind Flutter, making sure it keeps getting better. This means Flutter is a solid choice for anyone wanting to make apps that can be used in lots of different ways. To learn more about what you can do with Flutter, check out the official documentation and talk to other people using it. With Flutter, you can turn your ideas into apps that everyone can use!
Related Questions
Is Flutter good for cross-platform?
Yes, Flutter is a great tool if you want to make an app that works on different devices like phones, computers, and the web. Here's why it's a good choice:
- You can use the same set of instructions for making apps on iOS, Android, web, and even desktop. This saves a lot of time and effort.
- It makes apps run smoothly and look good.
- With Hot Reload, you can see changes you make to your app right away, without having to start over.
- Flutter has a lot of ready-made parts (widgets) that help you build beautiful apps for any platform.
Overall, Flutter helps you make good-looking, fast apps for many devices, which saves you a lot of work.
What are the criticism of Flutter?
Some people point out a few downsides:
- It's newer compared to other ways of making apps, so there might not be as many resources or help available.
- Dart, the programming language used in Flutter, isn't as well-known as some others.
- Apps made with Flutter might take up more space on your device.
- There might not be as many extra tools or libraries to add to your app.
But, Flutter is growing fast. Google is putting a lot of effort into it, and more and more people are starting to use it.
What are the disadvantages of Flutter?
Some drawbacks of using Flutter include:
- Flutter apps can be bigger, which might slow them down a bit.
- Dart isn't as popular as some other programming languages.
- There aren't as many extra tools and resources available yet.
- It might take some time to learn how to use Flutter, especially if you're used to other ways of making apps.
- Because Flutter keeps getting updates, sometimes things change and you have to adjust.
Even with these challenges, Flutter is focused on making it easier and faster to build high-quality apps that work on many devices.
How many platforms does Flutter support?
Flutter lets you make apps for:
- Mobile: iOS and Android
- Web: It works on most internet browsers like Chrome, Safari, and Firefox.
- Desktop: You can make apps for Windows, macOS, and Linux computers.
This means you can make an app once and have it work on phones, computers, and the web. Flutter is also starting to be used for other things like cars and TVs.
Related posts
24 Tools to use in 2024
As time passes by, more and more tools are coming to ease our daily lives, changing the way we work, create, and connect. These tools are not only helping us stay productive but also keeping us efficient and effective. But with hundreds of tools already available to assist us, choosing the right ones is equally important.
So, here are 24 famous tools you can use in 2024 to stay productive and streamline your workflow:
- ChatGPT
- Notion
- Canva
- Grammarly
- Slack
- Otter.ai
- Capcut
- Todoist
- Lucidchart
- Quillbot
- Duolingo
- Loom
- Asana
- Codemagic
- Midjourney
- GitHub Copilot
- Storyblocks
- Sentry
- Toggl Track
- Jasper
- Calendly
- Trello
- Zapier
- Webflow
1. ChatGPT
ChatGPT AI-powered chatbot that has gained popularity for its ability to help us with various tasks to improve productivity. This tool has changed the whole dynamic of working and productivity. This versatile tool saves us time and helps with various tasks such as assignments, projects, idea generation, blog writing, coding, and more. Studies have shown that it can increase productivity by 40% for professionals engaged in common writing tasks. In January 2024, according to NerdyNav, ChatGPT received 2.3 billion website visits, and 2 million developers are using its API.
Top Features:
- Generate content, Automate tasks, and brainstorm ideas
- Allow visual input
- Boost productivity and Help in coding
2. Notion

Notion is an all-in-one tool AI platform for productivity that allows users to collaborate, organize, take notes, and manage tasks efficiently. This tool has maximized our efficiency and decreased our workload clutter. This powerful and flexible AI-integrated tool enhances project and content management by engaging machine learning integration and natural language processing. It also helps in various managerial processes like content creation, summarization, and collaborative editing, among others. According to recent statistics by ToolFinder, Notion has over 35 million users worldwide as of November 2023.
Top Features:
- Manage tasks, notes, and projects
- Real-time Collaboration
- Flexible & Customizable
3. Canva
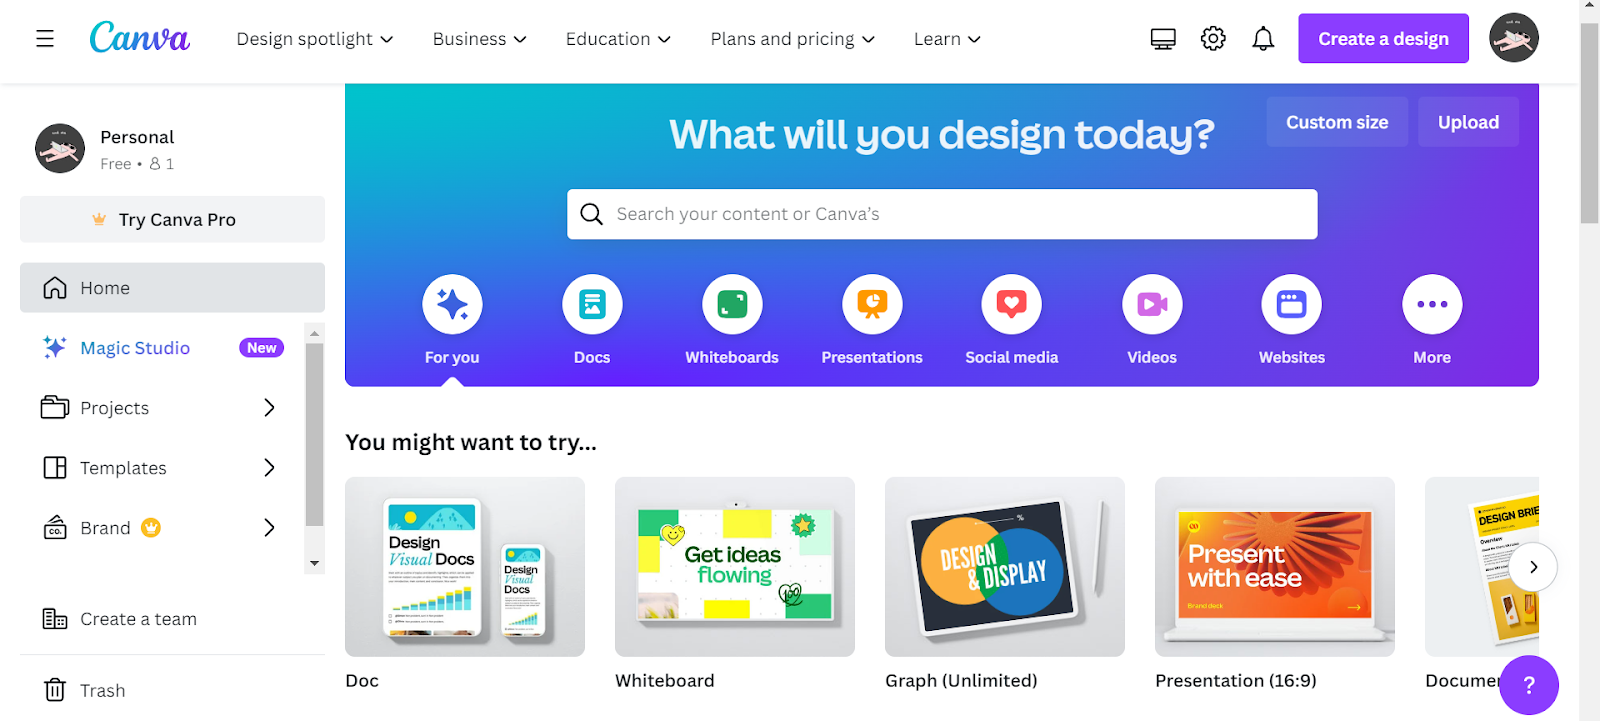
Canva is a famous free online graphic design platform that allows users to create visuals, and designs without any design experience. It offers a user-friendly interface, a vast library of templates and elements, and tools for editing, presentation making, and customizing designs. According to Style Factory Productions, Canva has over 170 million users as of January 2024. Its paid version Canva Pro offers more features such as unlimited storage, magic resizing tools, and Premium Element Library which includes over 100 million photos, videos, audio, graphics, and more.
Top Features:
- Create stunning visuals
- Extensive Resource Library
- Real-time Collaboration
4. Grammarly

It is an AI-powered popular writing assistant that helps us improve our writing skills and enhance the quality of our written content. It is a digital writing tool that goes beyond basic rule-based spell-checking and grammar correction. It provides real-time suggestions to enhance vocabulary and clarity. Moreover, Its advanced version includes features like plagiarism checking, sentence rewrites, tone, and vocabulary suggestions saving us tons of time and work. Whether you're experienced in English or new to it, Grammarly aids in proofreading written content, enhancing productivity and efficiency compared to manual draft checks. According to NutMeg Education, it has more than 30 million active users as of 2024.
Top Features:
- Grammar and Clarity Enhancement
- Plagiarism Detection
- Customizable Settings
5. Slack
It is a team communication and collaboration platform that has changed the way how teams interact and share information. It allows real-time messaging among team members through direct messages, group chats, and project-specific channels. Moreover, it provides seamless sharing and integration with various tools like Google Drive, GitHub, and Zoom, streamlining workflows and enhancing productivity. Additionally, it simplifies file sharing by enabling easy uploading, previewing, and collaborative editing of documents and images. According to Colorlib, As of January 2024, Slack has an estimated 35 million daily active users.
Top Features:
- Chat, share files, and collaborate in real-time
- Seamless Integration
- Secure & Scalable
6. Otter AI
This tool is famous for its speech-to-text transcription using artificial intelligence and machine learning. It takes notes, provides real-time summaries, transcribes audio, and offers seamless real-time collaboration features. It automatically transcribes conversations, meetings, lectures, interviews, and even podcasts in real time, allowing users to focus on active listening and engagement. Moreover, it automatically creates notes, saving significant time and eliminating the need for repetitive clarifications. It provides features like annotation, highlighting, sharing, and editing. Otter.ai is compatible with Zoom, Google Meet, Teams, and in-person meetings. According to a recent article by Finance Yahoo, Otter.ai has over 14 million registered users as of December 2023.
Top Features:
- Real-time Transcription
- Automated Summaries
- Team Collaboration (Workspaces)
7. Capcut
CapCut is a famous platform for editing and creating videos on mobile devices and laptops CapCut offers a variety of features, including Drag-and-drop editing, video trimming, cutting, merging, adjusting speed, rearranging clips, adding filters, effects, transitions, and more. Users can easily enhance their videos with professional-looking edits. The tool supports multi-layer editing, allowing users to overlay text, stickers, images, and audio tracks on their videos for a great final product. Users can also export their videos in various resolutions suitable for various platforms like TikTok, YouTube, and Instagram. According to Influencer Marketing Hub, Capcut has more than 200 million monthly active users.
Top Features:
- Fast & Efficient Editing
- Export for Multiple Platforms and Multi-platform Support
- AI-powered Enhancements
8. Todoist
Todoist is a versatile task management tool that allows you to take control of your productivity and achieve your goals. It is more than just a simple to-do list tool. This tool will allow you to easily add tasks and organize your notes by automatically sorting tasks into categories like Today, Upcoming, and custom filters. It utilizes features like priority levels, labels, and filters to organize your tasks based on importance and urgency. It allows you to set deadlines and schedules for tasks, keeping you on track. Moreover, it allows you to collaborate seamlessly, sharing tasks and projects, while tracking progress to stay motivated. With its AI Assistant, it provides innovative features like Suggest tasks, Tips for completing tasks, and Making tasks more actionable, which helps enhance productivity and change the way we work. According to Todoist, more than 30 million people rely on them to manage work and life.
Top Features:
- Set, Prioritize, and Organize Tasks
- Set Reminders and Deadlines
- Allow collaboration with others and integration with tools
9. Lucidchart
Lucidchart is a cloud-based diagramming and visualization tool designed to help individuals and teams create various diagrams efficiently and collaboratively. Visualizing complex ideas and system architectures is a common challenge, but this tool allows teams to visually collaborate on drawing, revising, and sharing charts and diagrams to improve processes, systems, and organizational structure. Moreover, this cloud-based diagramming tool allows user flows, and design mockups with ease, making it a valuable tool for team meetings. It provides real-time collaboration features and extensive integrations, making it perfect for brainstorming and sharing ideas within your team. It integrates with popular tools like Google Drive, Microsoft Office, and Slack for enhanced productivity. According to Lucidchart's official website, it has gained over 15 million users across more than 180 countries.
Top Features:
- Create flowcharts, mind maps, and more
- Real-time Collaboration
- Provide a Wide Range of Templates and Seamless Integration
10 .Quillbot

QuillBot is a popular online paraphrasing tool that utilizes AI to rephrase and reword your writing. It helps its users generate alternative versions of sentences or paragraphs refining your vocabulary and sentence structure while retaining the original meaning. It is often used for content rewriting and academic writing, leveraging advanced natural language processing algorithms to assist writers, students, and professionals in enhancing the originality and clarity of their written content. It offers multiple modes of paraphrasing which include Standard, Fluency, Creative, and Suggestive, allowing users to tailor the output based on their specific needs. It integrates with popular writing platforms like Microsoft Word, Google Docs, and more This platform also includes a built-in plagiarism checker to ensure the originality of the rewritten content. According to Semrush, the monthly user visits are 92.88 million.
Top Features:
- Powerful Paraphrasing by Writing Sentences While Maintaining the Original Meaning
- Grammar and Plagiarism Checking
- Provide Multiple Tones and Modes to Write
11. Duolingo
Duolingo is an online language-learning platform that offers a diverse range of courses to help users master new languages. It gamifies the learning approach with lessons structured as bite-sized exercises, quizzes, and challenges that keep users motivated and engaged. The platform offers courses in over 40 languages, allowing users to choose from popular languages like Spanish, French, German, English, and many more. This tool can track its user learning progress through personalized dashboards that display achievements and streaks. Moreover, it incorporates speaking and listening exercises using speech recognition technology to enhance pronunciation and comprehension skills. According to CoolJugator, Duolingo has over 500 million users globally and this platform has more than 74 million monthly active users.
Top Features
- Learn Languages in Short, Manageable Activities and in a Personalized Way
- Gamified Learning
- Learn Multiple Languages
12. Loom
Loom is a video conferencing platform designed to help individuals and teams communicate easily. It allows us to record our screens, quickly capturing thought processes, explaining bugs, or demonstrating features. We use Loom to create brief video messages for code explanations, sharing ideas, or providing feedback. Loom then generates a shareable link for these recordings, promoting asynchronous communication and reducing the need for extensive meetings. This also enables seamless integration with development tools such as Slack, Trello, and Jira, enhancing team collaboration. Loom also permits us to add annotations and drawings to screen captures. Overall, Loom is an excellent tool for facilitating effective communication within our team, especially when demonstrating concepts or providing visual explanations. According to MK’s Guide, Loom has over 21 million users as of 2023.
Top Features:
- Screen and camera recording and visual feedback
- Share recordings with a link
- Allow annotations and drawings within recordings
13. Asana
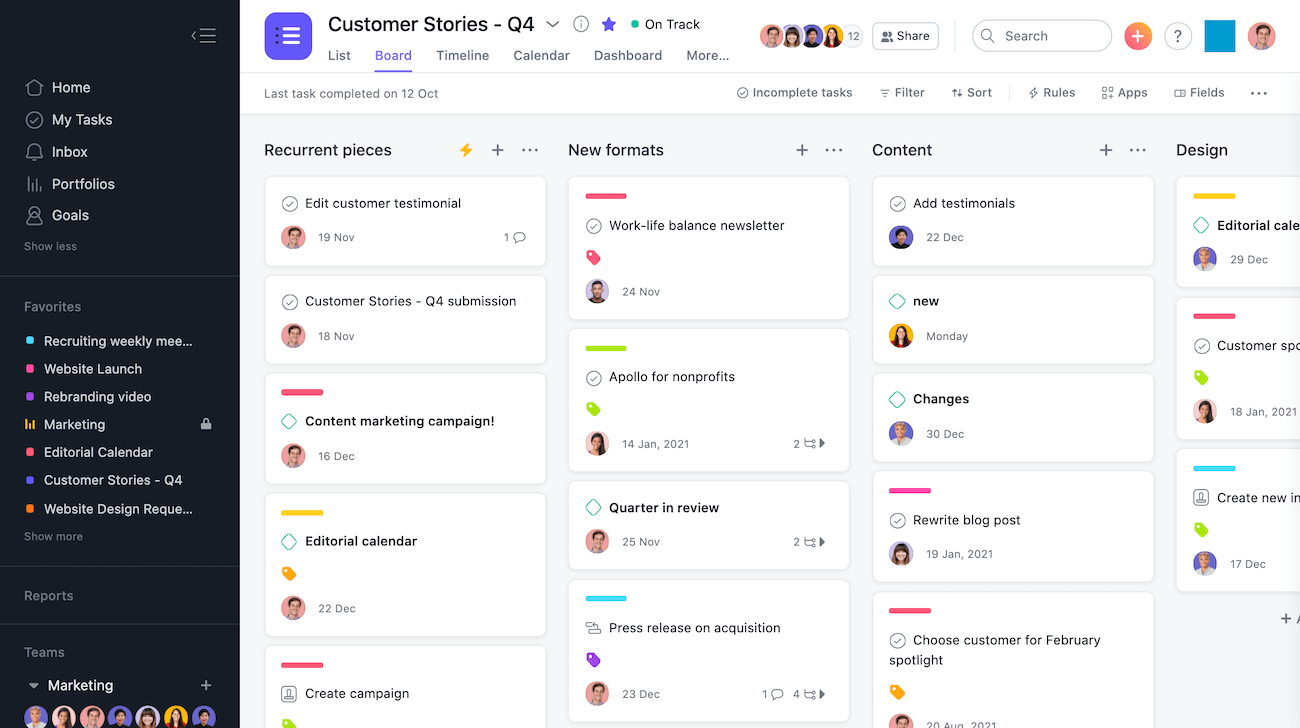
Asana is a popular project management and collaboration tool designed to help teams organize and manage their work more efficiently. The tool offers a centralized platform for teams to coordinate tasks, projects, and workflows. Asana allows users to create projects, break them down into manageable tasks, set due dates, assign responsibilities, and track progress. It uses boards, lists, and timelines for visual representation of project status, milestones, and deadlines. Asana supports prioritization, due dates, and dependency settings with which users can automate routine tasks through custom rules and triggers. Additionally, it seamlessly integrates with various popular tools and services like Slack, G Suite, Microsoft Teams, Adobe Creative Cloud, Jira, and Trello. Overall, Asana is widely used to enhance productivity, transparency, and accountability in work processes. According to Asana, it has more than 139,000 paying customers and millions of free organizations in over 200 countries and territories.
Top Features:
- Collaborative Project and Task Management
- Real-time Work Tracking and Customizable Workflow
- Deadline and Goal Setting
14. Codemagic
Codemagic is a cloud-based Continuous Integration and Continuous Delivery (CI/CD) platform specifically designed for mobile app development. This platform acts as the one-stop shop for streamlining the development process. This tool not only helps us automate the entire app development cycle but also streamlines the workflow by testing, building, and deploying apps to app stores like Google Play and the Apple App Store. Codemagic allows to automate the entire release pipeline, reducing manual errors and speeding up the deployment process. It also supports various mobile frameworks like Flutter, React Native, native iOS and Android, Unity, and Kotlin Multiplatform Mobile. Moreover, it helps catch bugs early with automated testing on real devices. Codemagic comes with predefined integrations that can be automated with various testing tools and is frequently updated with upcoming and the latest development tools. This tool is easy to use and offers 24/7 free onboarding assistance for queries. According to Codemagic, it is trusted by over 150,000 developers.
Top Features:
- Automate Building, Testing, and Delivering Apps
- Supports Multiple Frameworks
- Scalability & Security
15. Midjourney
MidJourney is an AI-powered image generation platform that creates visual art based on user-generated text prompts. To use Midjourney you have to register at Discord a communication tool then you can write the “/imagine” command and enter your prompt describing what you want the generated image to look like. The platform generates images in various artistic styles, including surrealism, hyperrealism, abstract expressionism, 2D, 3D, and more. This tool then generates four different images based on your prompt each according to the description you provided. You can also select any one of these four images, create more variations, upscale your image, or zoom in and out. It's a powerful tool for artists, designers, and anyone looking for a great tool that helps them generate their ideas without the need for traditional artistic skills. According to ContentDetector.AI, Midjourney has more than 1 million active users.
Top Features:
- AI-powered Image Generation
- Community-driven Platform
- Refine your Image through Multiple Variations
16. Github Copilot
GitHub Copilot is a cloud-based tool developed by GitHub in collaboration with OpenAI. This AI-powered tool assists developers with writing code, suggesting code completions, functions, and entire lines of code as you type. It works in the background, reading what is being written and suggesting what you might want to write next, increasing productivity and maintaining code quality.
Copilot supports a variety of programming languages, including Python, JavaScript, Java, and more, facilitating coding across different languages. When writing test cases, you only need to write the test's name, and Copilot fills out the rest. In case of code issues, it performs a proper analysis and explains how to fix the problem. It provides context-aware suggestions to minimize typos and syntax errors, leading to cleaner and more maintainable code. According to a study, GitHub Copilot helps developers code up to 55% faster, writing about 46% of the code. With Copilot as your coding partner, there's no need for Googling correct syntax or struggling with repetitive tasks, saving time and mental energy. According to a recent study by CNBC, GitHub Copilot had accumulated 1 million paid users.
Top Features:
- AI Code Completion, Get Suggestions as You Type, Accelerating Development
- Multilingual Support
- Context-aware Suggestions
17. StoryBlocks
Storyblocks is a popular subscription-based tool that provides access to a vast library of stock footage, audio, music, and images for creative projects. It offers a wide range of over 1.5 million digital assets that can be used by filmmakers, video editors, YouTubers, social media influencers, and other content creators. This diverse range of assets not only allows users to have multiple options when working on their media-related projects but also provides customizable video templates for easy editing and customization, enabling users to create professional-looking videos with ease. Users can also create shared folders to collaborate with team members and organize assets effectively within the platform.
Top Features:
- Access millions of stock videos, images, and audio
- Diverse Library
- Easy-to-Use Platform
18. Sentry

Sentry is a self-hosted and cloud-based real-time error-tracking and performance-monitoring platform. It helps developers identify, understand, and fix errors during app development. Sentry analyzes errors in the code, pinpointing the exact issue, code culprit, and user impact. It captures errors in detail, including code context, user information, and environment details. It also provides real-time alerts, notifying users instantly when new errors occur. Additionally, it identifies slow requests and helps optimize our app's performance. Sentry integrates with popular tools like GitHub, Slack, and Jira for a smooth workflow and supports various programming languages and frameworks. It also aids us in quickly identifying, debugging, and resolving issues hence boosting our development efficiency. According to Sentry, it is loved by 4 million developers and 90,000 organizations across 146 countries spanning over 6 continents.
Top Features:
- Error Tracking and Monitoring
- Detailed Error Reports
- Real-time Alerts
19. Toggl Track
Toggl Track is a popular time-tracking and productivity tool that helps individuals and teams monitor the time spent on their tasks and projects. It is a great tool for anyone looking to optimize their time management, project tracking, and enhance productivity.
It allows project management users to organize projects into small tasks, collaborate, set budgets, and track progress in real-time. Moreover, this tool provides a detailed report and analysis on time spent, progress, and timelines making decisions more informed. The platform integrates with popular tools like Asana, Trello, Slack, Google Calendar, and more allowing seamless workflow management. This tool allows users to create charts, pie charts, group lists, and more to help with time management. It also provides reminders to ensure that you won't forget important tasks.
Top Features:
- Detailed Time Tracking
- Reporting & Analytics
- Simple & User-friendly
20. Jasper AI
Jasper AI is an AI-powered writing assistant and content creation tool. This tool assists users, content creators, marketers, and businesses in creating various types of high-quality content with ease such as writing blogs, ads, emails, and product descriptions. It helps you generate ideas, improving content quality and efficiency. Jasper doesn't generate generic information and it allows users to infuse their unique brand voice into AI-generated content. It writes factually about your business and knows up-to-date information. It provides AI chatbot functionality where you can engage in conversations with the AI, ask questions, and make suggestions. Jasper offers Chrome extension for added convenience, allowing users to access its features directly from their browser for seamless content generation. Moreover, it includes tools for SEO optimization, plagiarism checking, image generation, collaboration features, and more to enhance content creation capabilities. According to an article by NerdNav, this tool has around 70,000 paying customers.
Top Features:
- Generate Diverse Content Formats like Blog Posts, Emails, and Marketing Copy
- Multilingual Support
- Integrations & Extensions
21. Calendly

Calendly is a scheduling automation tool designed to streamline the process of finding meetings and appointment times. It eliminates the back-and-forth emails and phone calls by finding a mutually convenient time, saving time and frustration for both you and your invitees. It allows users to connect their calendars and share a link that brings people to their Calendly page. From there, individuals can choose the type and duration of the meeting they want to schedule, and it will check the user's calendar to present available days and times. Users can easily set up their availability preferences and let Calendly do the work for them. It seamlessly integrates with popular platforms like Google, Outlook, iCloud, and more. According to Mkguides, Calendly has over 10 million users worldwide.
Top Features:
- Effortless Scheduling
- Set your Availability and let Others Choose their Time
- Customization Options
22. Trello

Trello is a widely recognized cloud-based project management tool that uses a visual, kanban-style interface to help individuals and teams organize their work and collaborate effectively. This tool allows them to manage and organize their projects, providing a flexible platform for teams to plan, track, and collaborate on tasks. Trello organizes tasks using boards, lists, and cards, providing a clear workflow of project progress that enables smooth collaboration among team members. It also provides a drag-and-drop interface that makes it easy to move tasks between columns, reassign them to teammates, and add comments, attachments, labels, and checklists. Moreover, This tool seamlessly integrates with Slack, Google Drive, GitHub, and Twitter. According to Simplilearn, Trello's simplicity has attracted over 40 million users worldwide.
Top Features:
- Kanban-style Boards
- Collaborative Workflows
- Flexible & Customizable
23. Zapier

Zapier is a popular web no-code automation tool that allows you to connect and automate workflows between different apps and services. It acts as a bridge, enabling seamless integration and communication between over 6,000 apps, including Slack, Shopify, Trello, and more, allowing users to focus on more critical aspects of their work. It offers a wide range of features and benefits that streamline processes and enhance productivity. With Zapier, users can create automated workflows called Zaps, which consist of a trigger event in one app and an action in another app. When the trigger event occurs, it automatically performs the specified action, saving time and effort. According to Zapier, their customers have created over 25 million Zaps on their platform.
Top Features:
- Integrate over 6,000 Apps to Automate Tasks
- Streamline Repetitive Tasks and Boost Productivity
- Team Collaboration Share and Manage Zaps with your Team
24. Webflow

Webflow is a famous no-code website creation platform that allows users to design, build, and launch websites visually, without any coding knowledge. This tool bridges the gap by introducing a no-code way to build a website, using a visual drag-and-drop interface for design and development. This allows users to create a responsive website in real time as they make changes, reducing development time and cost. This tool also integrates a built-in content management system that allows users to easily manage website content, including text, images, and other elements, without worrying about coding. According to MyCodelessWebsite blog, Webflow has more than 3.5 million users worldwide and over 45,000 paying customers.
Top Features:
- Design, develop, and launch fully functional websites without coding
- Create responsive websites, landing pages, and prototypes
- Scalability & Security
There are many other great tools make sure to explore more and find the perfect tools to help you.
If you want to see similar blogs like this, you can visit our website at Zee Palm.
Here are some links to our blogs:
- 5 Paid Subscriptions We Use in 2024 as App Developers
- 5 AI Productivity Apps that Will Change the Way You Work

iOS Apps Swift Development Guide
Quick Guide to Developing iOS Apps with Swift
- Swift Language: The primary tool for creating apps on Apple devices, emphasizing safety, performance, and easy-to-understand syntax.
- Prerequisites: You need a Mac, Xcode, and an Apple Developer account to start building iOS apps.
- Setting Up Xcode: Install Xcode from the Mac App Store, then set up your development environment to start coding.
- Your First Project: Begin with a simple "Hello, World" app to understand project creation and running your app.
- SwiftUI for UI Design: Use SwiftUI to design intuitive user interfaces with less code and see changes in real-time.
- Networking: Learn to make HTTP requests and parse JSON for working with remote data.
- Testing and Debugging: Employ XCTest for unit and UI testing, and use Xcode tools for debugging and performance optimization.
- Releasing Your App: Prepare app store assets, handle user feedback, and plan ongoing enhancements.
This guide offers a comprehensive overview for beginners looking to start developing iOS apps using Swift. From setting up your environment with Xcode to releasing your app on the App Store, it covers the essential steps and best practices in iOS app development.
Prerequisites for iOS Development
To make iOS apps with Swift, you'll need:
- A Mac computer, because Xcode only works on macOS.
- Xcode, which is the tool Apple provides for writing and testing your apps.
- To sign up for Apple's Developer program if you want to put your app on the App Store.
Other helpful tools include things for keeping track of changes in your code, making designs for your app, and writing notes.
Setting Up Your Development Environment
Installing Xcode
To kick off iOS app development, you'll need Xcode. It's the toolbox Apple provides for making apps for iPhone, iPad, and more. Here's how to get it set up:
- Open the Mac App Store on your computer and look up "Xcode"
- Find the Xcode app, then click "Get" to download and install it
- After installing, open Xcode. It might install some more stuff it needs
- Accept the terms and conditions to finish setting it up
Xcode packs everything you need to start making iOS apps:
- The latest tools and simulators for iOS
- Swift and Objective-C programming tools
- Interface Builder to design how your app looks
- Tools for checking how well your app runs
- Git for managing your code
- Guides and examples to help you learn
Creating Your First Project
Let's make a simple app that says "Hello, World":
- Start Xcode
- Choose "Create a new Xcode project"
- Pick "App" under iOS, then select the "Single View App" template
- Name your project "HelloWorld" and make sure Swift is selected as the language
- Choose where to save your project and click "Create"
You'll now have a new project ready. Let's add some code to show a "Hello, World" message:
- Find
ViewController.swiftin the Project Navigator - In the
viewDidLoad()method, add code to display the message:
override func viewDidLoad() {
  super.viewDidLoad()
  label.text = "Hello, World!"
}
- Hit the Play button or press Cmd+R to build and run your app
You should see "Hello, World!" on the iOS simulator.
Configuring Devices and Simulators
To check your app while you work on it, you can use:
- The iOS simulator in Xcode
- An actual iPhone or iPad connected to your computer
Testing on real devices is crucial before launching your app because it helps spot any issues with how it looks or works on different screens.
To use a real iOS device:
- Plug the device into your computer with a USB cable
- In Xcode, go to the Window menu and pick Devices and Simulators
- Choose your device to set it up for testing
To use different simulators:
- In Xcode, go to Window > Devices and Simulators
- Click the + button under Simulators and pick a device type
- In the Settings tab, select an iOS version
- Click Create to add the simulator
Trying your app on various simulators helps you find any display issues early, without needing every type of device.
Swift Programming Fundamentals
Variables and Constants
In Swift, you use variables for things that can change and constants for things that stay the same.
To make a variable, you write var like this:
var myVariable = 42
For a constant, use let like this:
let myConstant = 3.14159
When naming variables and constants, start with a small letter and don't use spaces. Use names that tell you what they do, which makes your code easier to follow.
Variables and constants inside a function can only be used there. But if you put them outside, you can use them anywhere in your code. It's a good idea to use constants when you can to avoid mistakes.
Data Types
Swift knows about different kinds of data like numbers, text, lists, and more:
- Int - For whole numbers:
let age = 30 - Double - For numbers with decimals:
let price = 9.99 - Bool - For true or false:
var isAuthenticated = true - String - For text:
let name = "John Doe" - Array - For a list of things:
let shoppingList = ["Bread", "Milk"] - Dictionary - For matching things together:
let ages = ["John": 30, "Mary": 28]
Choosing the right type helps Swift work better and find mistakes early.
Operators
Swift uses symbols for math like +, -, *, /, and for comparing things like ==, !=, >, <. It also has &&, ||, ! for combining true or false conditions.
You can even change what these symbols do for your own types of data.
Control Flow
Control flow is how you tell your code to do different things based on conditions:
if,else if,else- Do something if a condition is trueswitch- Choose between many optionsfor-in- Repeat something for each item in a listwhile- Keep doing something as long as a condition is true
You can make your code smarter by using these to check different conditions.
Object Oriented Programming
In Swift, you can group data and actions together in classes. Classes can be based on other classes to get more specific.
You can control who sees what in your classes with things like private or public. And you can make classes promise to do certain things using protocols. This helps you use the same code in different ways.
Classes can be made up of other classes, get special tasks from helper classes, or inherit stuff from parent classes. Using these ideas helps keep your code organized and easy to manage.
Building Intuitive User Interfaces with SwiftUI
Overview of SwiftUI
SwiftUI is a tool introduced by Apple that makes creating app screens much easier than before. Here are some reasons why it's great:
- Simple code - With SwiftUI, you write less code that's easier to read. This means you can make screens faster and with less hassle.
- Automatically updates - When your app data changes, SwiftUI updates your screen for you. No need to do it by hand.
- Works everywhere - Whether you're making an app for iPhones, iPads, or Macs, SwiftUI lets you use the same code across all devices.
- See changes instantly - With SwiftUI, you can see how your design changes as you code, without having to run your app every time.
- Multi-platform - You can use the same SwiftUI code on different Apple platforms, saving you the trouble of writing separate codes for each.
Using SwiftUI instead of the older UIKit means you can create apps more quickly and with cleaner code. And if you need to, mixing SwiftUI with UIKit is easy.
Layout Using Stacks, Frames and Containers
Here are some basic tools for making layouts in SwiftUI:
Stacks
Stacks help you line up views either up and down (VStack) or side by side (HStack). You can also put stacks inside other stacks for more complex designs. Here's how you might use them:
VStack {
  Text("Title")
  Text("Subtitle")
}

HStack {
  Image(systemName: "star")
  Text("5.0 rating")
}
Spacer
Using Spacer() in a stack makes the items spread out. You can control the spacing with different minLength values.
Frames
Frame lets you set up a box to control the size and position of elements. It's useful for placing things precisely.
Containers
Containers like List or ScrollView let you put other views inside them and scroll through if there's too much content. This is great for making lists or pages you can scroll.
By mixing these tools, you can create detailed and flexible designs in SwiftUI.
Displaying Data with Lists and Scroll Views
When you have data to show, here's how you can do it in SwiftUI:
Lists
List shows your data in a scrollable column. You use ForEach to turn each piece of data into a row in the list.
Lazy Stacks
LazyVStack & LazyHStack only draw the parts of your UI that are currently visible. This is great for showing a lot of data without slowing down your app.
Scroll Views
ScrollView makes anything inside it scrollable. This is useful for long lists or text.
Here are some examples:
List {
  ForEach(todoItems) { item in
    Text(item.description)
  }
}

ScrollView {
  LazyVStack {
    ForEach(0..<100) {
      Text("Item \($0)")
    }
  }
}
Using these views, you can easily show and manage a bunch of data.
Integrating Animations, Transitions and Gestures
Here are some ways to make your app more fun and interactive:
Animations
Adding little animations can make your app feel more lively. SwiftUI lets you do this easily with things like .animation(.easeInOut).
View Transitions
When moving between screens, you can make things slide or fade in with .transition(.slide).
Gesture Recognition
SwiftUI can recognize taps, swipes, and more with built-in gestures. This lets users interact with your app in natural ways.
Haptics
Adding a physical response to taps with haptics makes your app feel more real.
Adding these interactive bits to your SwiftUI app can make it more engaging and fun for users.
Networking and Working with Remote Data
Making HTTP Requests
To talk to the internet from your app, you use something called URLSession. Think of it like making a phone call to a website to ask for some data. Here's how to do it step-by-step:
- First, you need to tell your app which website (URL) you want to talk to.
- Then, you set up a
URLRequestwhere you can say what kind of data you're looking for. - Use
dataTask(with:)to send your request and wait for an answer. - Make sure to check the response to see if everything went okay. If you get a 200, that means "all good"!
- If you get the data back, you can turn it into something your app can use, like a list or a message.
- Don't forget to handle any errors just in case things don't go as planned.
Here's a simple example of asking a website for data:
let url = URL(string: "https://api.example.com/data")!
var request = URLRequest(url: url)
request.httpMethod = "GET"

let task = URLSession.shared.dataTask(with: request) { data, response, error in
  if let error = error {
    print(error)
    return
  }

  if let data = data,
     let response = response as? HTTPURLResponse,
     response.statusCode == 200 {
    let json = try? JSONSerialization.jsonObject(with: data)
    print(json)
  }
}

task.resume()
Parsing JSON Data
When websites send data, they often use a format called JSON. It's like the language of the internet for data. Here's how to understand it in Swift:
- You can use Swift's
Codableto automatically turn JSON into something your app can use, like a user's profile. - Create a
structthat matches the data you're expecting. - Use
JSONDecoder()to turn the JSON into yourstruct.
Here's a quick example:
let json = """
{"name": "John", "age": 30}
"""

struct User: Codable {
  let name: String
  let age: Int
}

let user = try! JSONDecoder().decode(User.self, from: json.data(using: .utf8)!)

print(user.name) // John
Integrating External Data and APIs
Connecting your app to the outside world, like databases or other services, is super important. Here's how to do it well:
- Keep the heavy lifting, like making network calls, away from the parts of your app that users see.
- Save some data on the user's device so you don't have to ask for it over and over again.
- Show users something interesting while they wait for data to load.
- Use something called Combine to make sure your app's display updates when new data comes in.
By following these steps, you can make your app work smoothly and keep it organized.
sbb-itb-8abf120
App Testing, Debugging and Performance Optimization
Writing Unit and UI Tests with XCTest
XCTest is a tool in Xcode that helps check if your app works the way it should. It lets you:
- Create automated tests to make sure your app does what you expect
- Run these tests right in Xcode or as part of your project's automated checks
- Group tests together for better organization
- Use fake data or conditions to test different scenarios
When making XCTest cases, remember to:
- Focus on testing one thing at a time
- Check for unusual or incorrect inputs
- Keep tests simple and direct
- Name your tests clearly so you know what they do
- Explain why a test failed to make fixing problems easier
Here's a simple test example for checking a login feature:
def testLoginWithValidCredentials() {

  // 1. Prepare your test setup
  let loginViewModel = LoginViewModel()

  // 2. Test the login function
  loginViewModel.loginUser(username: "test", password: "123456")

  // 3. Check if the login was successful
  XCTAssertTrue(loginViewModel.isUserLoggedIn, "Login should succeed with correct details")
}
Debugging Common Issues
Here are some tips for fixing bugs in Xcode:
- Catch all errors - Stop when any error happens
- Look at data closely - Check values during the app's run
- Use breakpoints wisely - Pause only under certain conditions
- Log information - Keep track of what happens as the app runs
- Check device logs - Find more clues on why something went wrong
Finding where a problem starts is crucial. Try to figure out what's happening and follow the trail from there. Setting up tests around areas you think might break can help too.
Performance Optimization and Profiling
Xcode's Instruments tool helps you make your app run better by:
- Checking CPU use - Find and fix operations that take too long
- Monitoring memory - Look for and solve memory issues
- Improving UI speed - Make sure your app looks and feels smooth
Good habits for a faster app:
- Check your app's performance early on
- Focus on fixing the slowest parts first
- Group tasks to minimize processing time
- Do heavy tasks in the background
- Load data only when needed
- Test your app on different devices, including older ones
Keeping an eye on how well your app runs and making improvements is important for a great user experience.
Releasing and Maintaining Your App
Preparing App Store Assets and Listing
When you're ready to put your app on the App Store, you'll need to get a few things ready:
- App Previews - Make short videos that show off what's cool about your app. Do this for all the different types of devices people might use.
- Screenshots - Take clear pictures of the main parts of your app. Highlight what makes your app special.
- App Description - Write a few short paragraphs that tell people what your app does and why it's useful.
- Keywords - Think of words people might use to find an app like yours and include them. This helps your app show up in search results.
- Categorization - Pick the right categories for your app so it shows up when people are looking for apps like yours.
Getting these parts right can help more people find and get interested in your app.
Handling User Feedback and App Updates
Listening to what users say about your app is important:
- Respond quickly to any complaints by explaining how you'll fix problems. This shows you care.
- Update your app by fixing bugs and adding new stuff that users want. Try to do this often.
- Email users about big updates if they're okay with it. This keeps them in the loop.
Getting feedback from users is super helpful for making your app better.
Ongoing Enhancements and Roadmap
Keep working on your app to keep it fresh:
- Look out for new tech like the latest iOS updates to add cool new features.
- Pay attention to what features users ask for by reading reviews and support messages. This can help you decide what to work on next.
- Think about how to make the app easier and nicer to use.
- Tell people what you're planning with a public roadmap. This gets them excited about what's coming and gives you early feedback.
Keeping your app up-to-date and planning for the future helps it stay popular and useful.
Additional Resources for Mastering iOS Development
Apple has a lot of great stuff to help you get better at making apps with Swift and iOS. Here are some of the best places to learn more:
Swift developer portal and resources from Apple
This is Apple's official site for Swift developers. It's packed with tutorials, examples, and updates about Swift.
What you'll find here:
- A blog with the latest Swift news from the people who make it
- Examples of how to use Swift for different kinds of apps
- Videos about new stuff in iOS and Swift
- A forum where you can ask questions and talk to other developers
This is the best place to start if you're looking for official guides and updates.
Popular blog with various iOS programming tutorials

Hacking with Swift is a free site with lots of Swift tutorials and examples for all skill levels.
Here's what it offers:
- Guides for making real iOS apps
- Quick Swift lessons that take only a minute
- Updates on the newest iOS features
- A community forum for getting help
If you like learning by reading articles and trying challenges, this website is a great choice.
These are just a few examples of where you can learn more about Swift and iOS app development. There are also books, podcasts, and videos out there that can help you. Diving into these resources will really speed up your learning.
Conclusion
Making apps for iPhones and iPads with Swift is a great way to turn your ideas into something real. Starting with setting up Xcode, getting the hang of Swift basics, using tools like SwiftUI, and sticking to good habits for testing and sharing your app, you can create awesome apps for iPhone and iPad.
Here's what to remember:
- Xcode and Swift make a strong team for building iOS apps. Getting good at the basics is your first step to making apps.
- Understanding Swift's main ideas like variables, types of data, how to use operators, and the basics of object-oriented programming helps you write clear and safe code.
- SwiftUI makes it easier and faster to design user-friendly screens with its straightforward way of working, instant previews, and ability to work across different Apple devices.
- It's important to check your app for problems early by writing tests and keeping an eye on how well it performs. This helps make your app better.
- Listening to what users say about your app and keeping it updated in the App Store helps keep your app up-to-date. Planning for new features keeps users interested.
Finishing this guide is just the beginning. Next, you might explore more complex topics like saving data with Core Data, adding augmented reality features, and sending notifications. More advanced topics include graphics, using machine learning, and making apps for the Apple Watch.
With hard work and continuous learning, there's no limit to what you can create with iOS app development. This guide is here to start you off and inspire you to create something amazing!
Related Questions
Can you make iOS apps with Swift?
Yes, you can definitely use Swift to make iOS apps. It's the go-to language for building anything from simple to complex apps on Apple devices. Swift is designed to help you create high-quality apps in a more efficient way.
How to learn Swift app development?
To get started with Swift for making apps, you can:
- Try out Swift Playgrounds to get a hands-on feel for Swift in a fun way
- Sign up for online courses that teach you how to make apps using Swift
- Watch videos from Apple's WWDC to catch up on the latest Swift updates and tips
- Read through a book like "App Development with Swift" to build actual apps
- Practice by making small apps and playing around with Swift's features
- Join online communities of Apple developers to learn from others
What percentage of iOS apps are written in Swift?
As of the latest update from Apple, more than 18% of all iOS apps on the App Store were made using Swift. And with the introduction of SwiftUI, over 12% of apps now use it for their interfaces. As Swift continues to get better with each iOS update, more developers are starting to use it.
Should I learn Python or Swift?
If you're into general programming like web development or data analysis, Python might be more up your alley. But if you're interested in making apps specifically for Apple devices, then Swift is the way to go. You can also use Python for server-side stuff for your apps.
Related posts
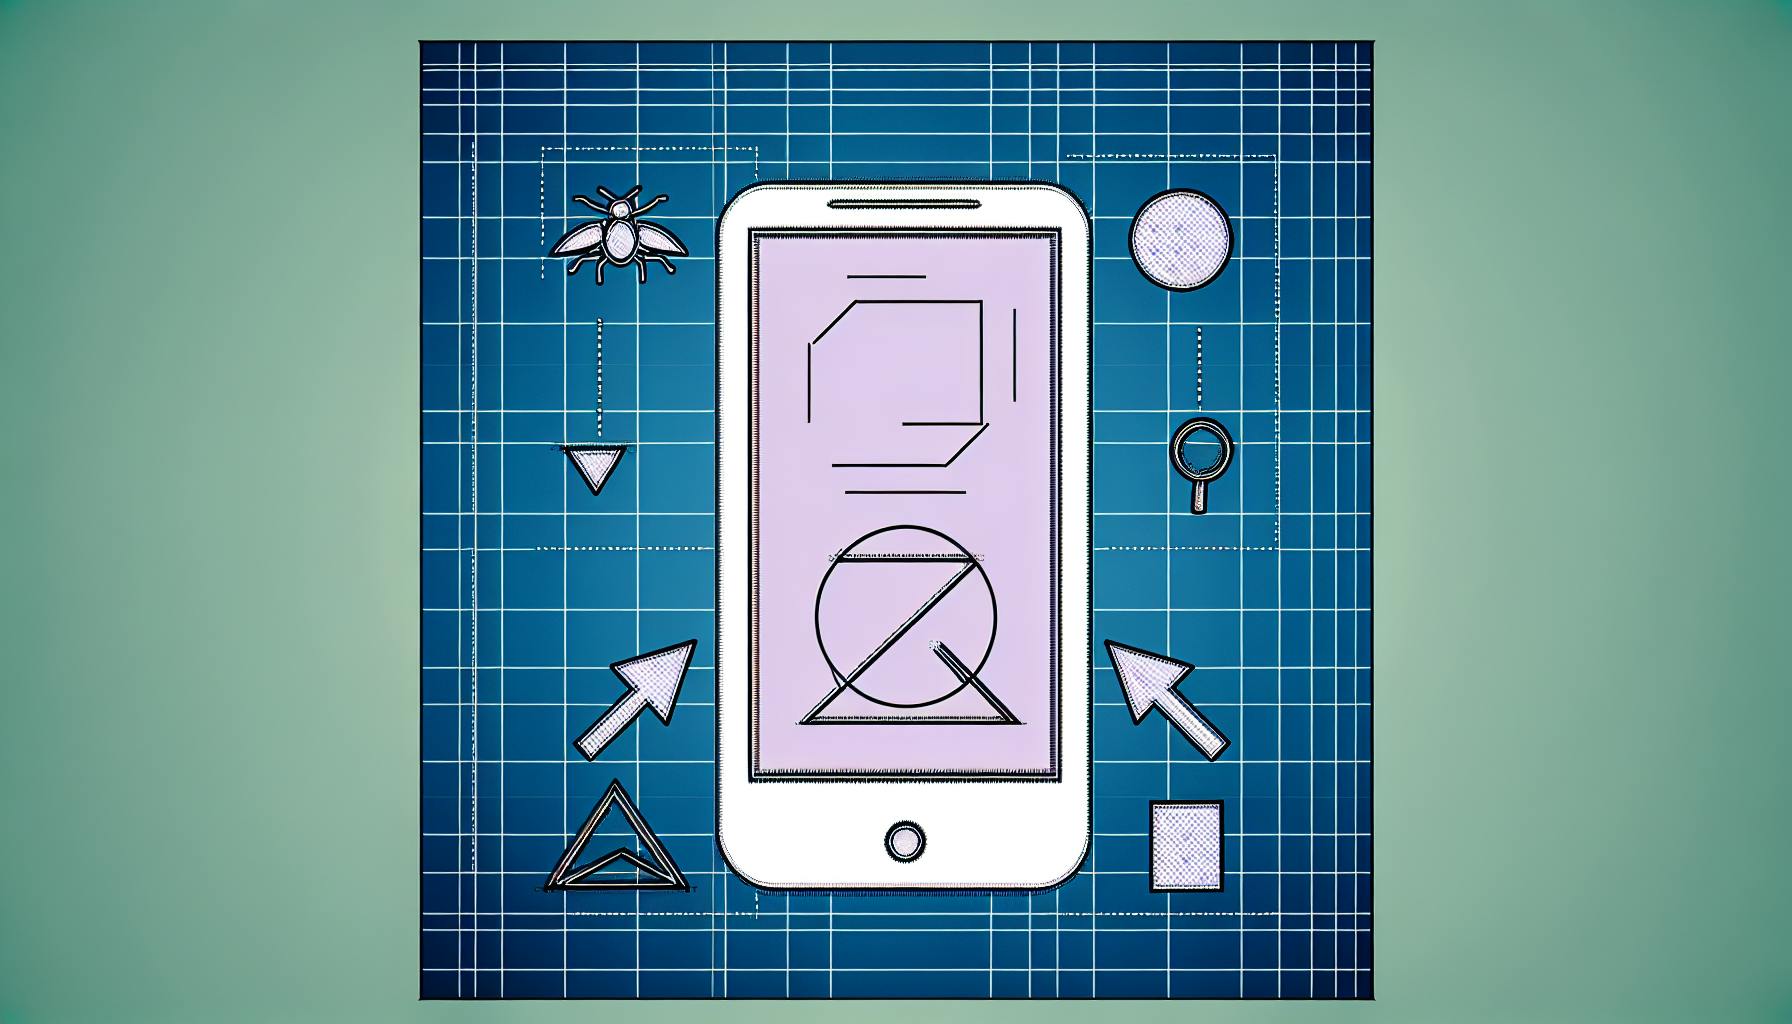
Build Flutter App from Scratch: A Beginner's Guide
Starting from scratch to build a Flutter app might seem daunting, but it's an exciting journey into app development. Flutter, developed by Google, allows you to create beautiful, natively compiled applications for mobile, web, and desktop from a single codebase. This beginner's guide will walk you through the basics of Flutter and Dart, setting up your development environment, crafting your first Flutter project, and understanding the structure of a Flutter app. Here's what you need to know in simple terms:
- Flutter is a versatile toolkit for building apps across multiple platforms with one codebase, known for its hot reload feature that speeds up development.
- Dart is the programming language used in Flutter, designed to be easy for beginners but powerful enough for complex projects.
- Setting Up: Install the Flutter SDK and set up an IDE (like Android Studio or VS Code) with Flutter and Dart plugins.
- Building Your First App: Learn how to create a project, understand basic app structure with widgets, and design a user interface.
- Interactivity: Add interactive elements using Stateful Widgets and manage app state.
- Testing and Debugging: Test your app on emulators or real devices and troubleshoot common issues.
- Releasing Your App: Prepare your code, build app bundles, and release your app on platforms like the Play Store or App Store.
By the end of this guide, you'll have a fundamental understanding of how to build a Flutter app from scratch, making this an ideal starting point for beginners eager to dive into app development.
What is Flutter?
Flutter is a toolkit that's free for anyone to use. It helps you make apps for different devices using one set of instructions. Here's what makes Flutter special:
- You can write one app that works on both iPhones and Android phones, as well as on the web and computers.
- It uses a programming language called Dart, which is pretty straightforward and made for making apps.
- Apps made with Flutter run really fast because they turn into the kind of code that devices understand directly.
- The Hot Reload feature lets you see changes you make to your app right away, without having to restart it.
- Flutter has a huge collection of ready-made parts you can use to build your app, making it easier to design how it looks.
- Since it's open-source, lots of people contribute to making it better, and you can find plenty of help and resources online.
In short, Flutter makes it easier to create good-looking, fast apps for many platforms all at once.
Introduction to Dart
Dart is a programming language made by Google, mainly for making apps with Flutter. It's like a simpler version of Java or JavaScript. Here's why Dart is cool:
- It's easy to pick up, especially if you know a bit about programming already.
- It lets you write instructions for your app, like how it should look and work.
- Dart is great for making apps that need to update info quickly, like chat apps.
- When you're ready, Dart can turn your app into the kind of code that runs really fast on devices.
- It comes with a lot of built-in tools for doing common tasks, so you don't have to start from scratch.
Dart is designed to work well with Flutter, making it a good choice for building apps that need to work on different devices without a lot of extra effort. It's made to be easy for beginners but powerful enough for bigger projects.
Setting Up the Development Environment
Getting your computer ready for making apps with Flutter is pretty straightforward. You'll need to install some software and make sure everything's set up right. Here's a simple guide to follow:
Installing the Flutter SDK
First, you need to get the Flutter SDK, which is the main tool you'll use to create your apps:
- Visit the Flutter download page and pick the installer for your computer (Windows, macOS, or Linux).
- Follow the steps it tells you to do. Check the system requirements to make sure your computer can handle it.
- After installing, open your terminal and type
flutter doctor. This checks if Flutter is ready to go and tells you if anything else needs to be set up. Just follow any steps it suggests to fix issues.
Note: Remember to add Flutter to your system's PATH, so you can easily run Flutter commands from anywhere.
Setting up an IDE
While you can write Flutter apps in any text editor, using an IDE like Android Studio, VS Code, or IntelliJ IDEA gives you extra helpful tools:
- Helps with writing code
- Highlights errors
- Lets you see your app's structure visually
- Quick updates with hot reload
- Test apps right in the IDE
- Easy version control with Git
To get your IDE ready:
- If you don't have an IDE yet, download and install one.
- Add the Flutter and Dart plugins to your IDE. This makes sure your IDE can work with Flutter.
- Open your Flutter project in the IDE, and you're all set to start coding.
Some handy tools for Flutter in your IDE are Flutter Inspector and Dart DevTools.
With the Flutter SDK and your IDE ready, you've got everything you need to start making apps with Flutter. For more help, Flutter's documentation is a great resource.
Creating Your First Flutter Project
To kick off your journey with Flutter, you can either use the command line or your IDE (like Android Studio or VS Code) to create a new project. Here's how to do it, step by step.
Creating a Project via the Command Line
If you prefer using the command line, follow these steps:
- Open your terminal or command prompt and go to the folder where you want your new Flutter project to be.
- Type in this command and hit enter:
flutter create my_app
Replace my_app with whatever you want to name your project.
- This command sets up all the basic files and folders you need for a Flutter app, naming the project
my_app.
The main things it creates include:
lib/main.dart- This is where your app starts and runs from. It has amain()function.test/- A place for your app's test files.pubspec.yaml- A file that keeps track of your app's assets (like images) and other project dependencies.- Now, move into your project's folder by typing:
cd my_app
- To start your app, type:
flutter run
This will open up your new Flutter app on a device or an emulator.
Creating a Project via the IDE
If you're more comfortable using an IDE, here's the simple way to create a new project:
- Open your IDE (such as Android Studio or VS Code).
- Look for the option to create a new Flutter project. It's usually found under:
- Android Studio: File > New Flutter Project
- VS Code: View > Command Palette > Flutter: New Project
- You'll be asked to fill in some details like the project name and where you want to save it.
- The IDE will then set up a new project for you, ready for you to start coding.
And there you have it! You've now got a basic Flutter project set up and are ready to start building your app.
Understanding the Basic App Structure
Think of a Flutter app like a tree made of building blocks, called widgets. These widgets stack together to make up the whole app. At the very start, there's a file named main.dart. This is where everything begins.
The main.dart file has a special job: it starts the app. It does this with a function called main(). Inside this function, there's a command that wakes up the app and gets it going.
The first thing the app does is run a widget called MaterialApp. This widget is like the boss of your app. It manages important stuff like the app's theme (which is like the app's outfit), the app's title, and where the app starts when you open it.
A typical starting point for an app is a widget called Scaffold. Scaffold is super handy because it gives you a basic layout to work with. It includes things like:
- AppBar, which is the top bar of the app
- Body, which is where you put the main stuff your app shows
- BottomNavigationBar, if your app has buttons at the bottom
Here's a peek at what a simple main.dart file might look like:
void main() {
  runApp(MyApp());
}

class MyApp extends StatelessWidget {

  @override
  Widget build(BuildContext context) {
    return MaterialApp(
      title: 'My App',
      theme: ThemeData(
        primarySwatch: Colors.blue,
      ),
      home: HomePage(),
    );
  }
}

class HomePage extends StatelessWidget {
  @override
  Widget build(BuildContext context) {
    return Scaffold(
      appBar: AppBar(title: Text("My App")),
      body: Container(),
    );
  }
}
So, what did we learn here?
- The main.dart file kicks things off with the main() function.
- MaterialApp is the big boss that handles the app's main settings.
- Scaffold gives you a simple layout to start building your app.
- The whole app is built using widgets, stacking them together like blocks.
Getting the hang of this setup is your first step to making apps with Flutter. You can mix and match widgets to create all kinds of screens and features.
Designing the User Interface
When you're making an app with Flutter, you're basically putting together a bunch of pieces called widgets to build what users see and touch. Think of widgets as the building blocks of your app's look and feel. Here's a quick rundown on how to start piecing together a simple user interface using these widgets:
Basic Widgets
Here are some of the basic pieces you'll often use to build your app's interface:
- Text: This is for showing words on the screen. You can change how the text looks with different colors and sizes.
- Container: Think of this like a box where you can put other pieces. It's great for making parts of your screen look a certain way.
- Column: This helps you stack things up vertically.
- Row: This is for lining up items side by side.
- Image: Use this to show pictures, either from your app's resources or from the internet.
- Button: This makes parts of your screen you can tap on, like for actions or moving around in the app.
Here's an example of putting some of these together:
Container(
  color: Colors.blue,
  padding: EdgeInsets.all(20.0),
  child: Column(
    children: [
      Text("Hello World", style: TextStyle(fontSize: 20)),
      Image.asset("images/my_image.png"),
      ElevatedButton(
        onPressed: () {},
        child: Text("Press Me"),
      ),
    ],
  ),
)
Common Properties
When you're making these pieces look right, here are some things you'll often adjust:
- color: This changes the background color of boxes.
- padding: This adds space inside the boxes so things aren't squished together.
- alignment: This helps you position items inside the boxes (like in the center, or to the side).
- width/height: This lets you specify how big or small something should be.
For example, a box might be set up like this:
Container(
  padding: EdgeInsets.all(10.0),
  color: Colors.grey[300],
  alignment: Alignment.center,
  child: ...
)
Composing Widgets
The trick is to start with simple pieces and then put them together to make more complex parts of your screen.
For instance, you might use:
- A Scaffold for the main screen layout
- The AppBar for the top part of the app
- A ListView for things that scroll
- Rows and columns filled with other widgets for content
By putting widgets inside of other widgets, you can build up the whole interface of your app piece by piece.
Adding Interactivity
Making your app respond to user actions like taps and swipes is crucial for a good app. Flutter makes this easy by providing tools to add these interactive features.
Here's how to make your app interactive:
Using Stateful Widgets
When you need parts of your app to change based on user actions, StatefulWidgets are your go-to. They can keep track of changes and update the screen accordingly.
Imagine a button that changes when you tap it:
class FavoriteButton extends StatefulWidget {

  @override
  _FavoriteButtonState createState() => _FavoriteButtonState();
}

class _FavoriteButtonState extends State<FavoriteButton> {
  bool _isFavorited = false;

  void _toggleFavorite() {
    setState(() {
      _isFavorited = !_isFavorited;
    });
  }

  @override
  Widget build(BuildContext context) {
    return GestureDetector(
      onTap: _toggleFavorite,
      child: Icon(
        _isFavorited ? Icons.star : Icons.star_border,
        color: _isFavorited ? Colors.red : null,
      ),
    );
  }
}
Here, the _isFavorited variable changes with each tap, and the screen updates to show the new state.
Calling setState()
To update the screen when something changes, you use the setState() method. This tells Flutter to redraw that part of the screen with the new information.
For instance:
setState(() {
  // Update variables here
});
This will refresh the screen with the updated details.
Adding Gesture Detectors
To make your app react to taps and other gestures, use a GestureDetector. It lets you specify what happens when the user performs different actions.
Here's how to detect a tap:
GestureDetector(
  onTap: () {
    // Do something when tapped
  },
  child: Container(
    // Your widget here
  )
)
GestureDetector can also pick up on other gestures, like dragging or pinching.
By combining these elements, you can make your app respond to user actions in many ways, like changing icons, moving to another screen, or starting animations. Flutter's tools for adding interactivity are powerful and flexible, helping you create an engaging user experience.
sbb-itb-8abf120
Testing Your App
Making sure your app works well is super important. Here's how you can test your Flutter app on both emulators (which are like pretend devices on your computer) and real devices using the flutter run command:
Setting Up the Test Environment
Before testing, pick where you want to run your app. You can choose between:
1. Emulators
Emulators let you pretend you're using a phone or tablet right on your computer. They're handy for quick checks. For Flutter apps, you can use:
- Android: Comes with Android Studio.
- iOS: Comes with Xcode.
2. Physical Devices
Nothing beats testing on a real device. You can connect:
- An Android device with a USB cable. Just make sure USB debugging is on.
- An iOS device also with a USB cable. Turn on developer mode first.
Running the App
After setting up your device, open your project in the terminal.
To start your app, type:
flutter run
This command builds and installs your app on the device or emulator you're using.
If you want to use a specific device, add -d followed by the device ID:
flutter run -d <deviceId>
Find your device ID by typing flutter devices.
Testing Functionality
While you're building your app, make sure to check that:
- Everything looks right on different screen sizes
- You can tap, swipe, and do other interactions without issues
- The app updates and handles data correctly
- It can deal with mistakes or wrong inputs smoothly
Fix any problems you find before you think about releasing your app. Good testing is key to making an app people will like!
Debugging Common Issues
When you're making apps with Flutter, you might run into some bumps along the way. Here's a look at common problems beginners face and some simple ways to fix them:
Hot Reload Not Working
If you're not seeing changes after you update your code, try these steps:
- Make sure your device or emulator is still connected and try reloading it.
- Clear out old cache and temporary files.
- Double-check your code for any mistakes.
- Restart your IDE or simulator.
Sometimes, a small issue can stop hot reload from working right.
White Screen on Launch
Seeing just a white screen means there's likely an error. Here's what you can do:
- Look for error messages in your IDE or terminal.
- Make sure the main method doesn't have any issues.
- Check if hot reload works. If not, it might hint at the problem.
- Go over any code you recently changed to find mistakes.
Finding where the error is happening can help you fix it.
App Crashes or Freezes
If your app stops working suddenly or keeps freezing, here are some tips:
- See if there are issues with it working on different devices.
- Use the debugger's stack trace to find clues.
- Try running your app in release mode, not just debug mode.
- Look out for things like infinite loops, tasks taking too long, or using too much memory.
Figuring out when and where the issue occurs can help you solve it.
Emulator Too Slow
If your emulator is running slow, you can:
- Restart it.
- Use hardware acceleration if it's an option.
- Try a simpler emulator setup or switch to a real device connected via USB.
Sometimes, improving your computer's hardware can also make emulators run faster.
By carefully checking when and where problems happen, you can solve most issues you run into while creating Flutter apps, even if you're just starting.
Building and Releasing
When you're ready to share your Flutter app with the world, there are a few steps to get it out there for people to download. Here's a simple breakdown of what to do:
Preparing the Code
First things first, make sure your app is in tip-top shape:
- Run tests: Check your app works well on both phones and computers. This helps catch any sneaky bugs.
- Obfuscate code: This is a fancy way of saying make your code hard to peek into. Tools like flutter_obfuscate can help scramble the code so others can't easily copy it.
- Minify code: This step shrinks your code by taking out the parts that aren't needed, like extra spaces or notes to yourself. The flutter_minify package is good for this.
- Split code: For big apps, you can break your code into smaller pieces that only load when they're needed. This can make your app smaller to download.
Cleaning up your code like this can make your app run smoother and safer.
Building App Bundles
Next, you need to package your app for phones:
- Android app bundle: This is your app all wrapped up for Android phones. You make it by typing:
flutter build appbundle
- iOS app bundle: This is everything your app needs for iPhones. Make it by typing:
flutter build ios --release --no-codesign
These steps create the final versions of your app ready for the app stores.
Uploading and Releasing
Now, you're ready to put your app out there:
- For Android, upload your app bundle to the Play Store.
- For iOS, send your app bundle to App Store Connect and wait for it to be checked.
And that's all! By cleaning up your code, packing your app just right, and uploading it, you're ready to let everyone try your Flutter app.
Conclusion
Starting to build an app with Flutter might look tough at the beginning, especially if you're new to it. But if you follow this guide step by step, you'll understand the basics of how to create a simple Flutter app.
Here's what you should remember:
- Flutter is a tool that lets you make apps that work on many devices. Its hot reload feature helps you see changes quickly, which makes building apps faster.
- Dart is the programming language you use with Flutter. It's designed to be easy to learn and helps you write the instructions for your app.
- In Flutter, everything you see on the screen is a widget. You build your app by putting these widgets together, like building blocks.
- Using programs like Android Studio or VS Code makes coding, testing, and fixing your app easier.
- Stateful widgets make your app interactive. They change what's on the screen based on what the user does or new data.
- There's a lot of helpful resources for Flutter, from official guides to community advice, that can make learning faster.
This guide showed you how to go from setting up Flutter to getting your app ready for others to use. You now know the basics to start making your own apps. There's a lot you can create, from simple tools to fun games.
Next, try making some small projects to practice, like a calculator or a game. Learn more about how to navigate between screens, manage the app's state, and add animations. The more you practice, the better you'll get. And remember, building apps should be fun, so enjoy the process as you get better at using Flutter.
Related Questions
How do you make a Flutter app from scratch?
To create a Flutter app from the beginning, here are the steps to follow:
- Install the Flutter and Dart plugins in Android Studio.
- Start a new Flutter project in Android Studio.
- Run
flutter doctorin the terminal to make sure everything is set up correctly. - Begin designing your app's interface using Flutter widgets like
Container,Column, andText. - Make your app interactive by using
StatefulWidgetandGestureDetector. - Add extra features by including external packages.
- Test how your app works on both emulators and real devices.
This process covers setting up, designing the user interface, adding functionality, using additional packages, and testing. With some practice, you can create fully-functional apps using Flutter.
Can a beginner start with Flutter?
Absolutely, Flutter is an excellent choice for beginners who want to make mobile apps. Its hot reload feature lets you see changes instantly, which is really helpful for learning. Flutter uses Dart, which is straightforward to learn, and it has lots of resources and examples to help beginners. Flutter's fast development and ability to work across multiple platforms make it ideal for new developers to quickly start building real apps.
How do I start learning Flutter from scratch?
Here are some good ways to begin learning Flutter:
- Read through the Flutter documentation to grasp the basics.
- Practice with code examples from the Flutter gallery.
- Learn Dart's syntax and features.
- Follow Flutter and Dart blogs for updates.
- Use Stack Overflow for solutions to common problems.
- Watch Flutter tutorials on YouTube, like "Widget of the Week."
By mixing documentation, practice, blogs, community help, and videos, you can start learning how to build apps with Flutter.
Does the 1st build of Flutter app take a long time why?
Yes, the first time you build a Flutter app, it takes longer. This is because the build process creates special files for iOS (IPA) and Android (APK). Tools like Xcode and Gradle work on assembling these files. After the first build, these files are saved, so later builds are much quicker. The initial wait is just part of setting up the necessary files for your app.
Related posts

Mobile App Framework Essentials
Choosing the right mobile app framework is crucial for developing a successful app. This guide simplifies the complex world of app frameworks, making it easier for you to decide. Here's a quick summary:
- Mobile app frameworks provide essential tools for building apps efficiently.
- They support the creation of native, web, and hybrid apps, each with unique advantages.
- Popular frameworks include React Native, Flutter, Xamarin, Ionic, and more, each suited for different needs.
- Key considerations when selecting a framework include target platform, performance, development speed, team skills, budget, and app features.
This article will guide you through understanding mobile app frameworks, their importance, types, top frameworks in 2024, and how to select the right one for your project, ensuring you're well-equipped to make an informed decision.
The Importance of Choosing the Right Framework
Picking the right toolbox is super important because it affects how fast you can make the app, how well it works, and how much you can do with it. Here are some things to think about when choosing one:
- Productivity - It should be easy to use and help you make things fast.
- Performance - The app should run smoothly and quickly.
- Stability - A good framework means fewer problems.
- Support - Bigger, older frameworks have more help and guides.
- Scalability - It should be able to handle more users or features over time.
- Integration - It should work well with other tools and libraries.
At Zee Palm, our developers always look at new frameworks to see which ones are the best fit for our projects. We focus on what's actually useful, not just what's new or popular, to make sure we build great apps.
Types of Mobile App Frameworks
When we talk about making apps, we can group the tools and methods into three big buckets: native apps, web apps, and hybrid apps. Each type has its own good and bad points.
Native Apps
- Made just for one system, like iPhones or Android phones
- They work the best and feel the smoothest
- Can use everything the phone offers, like the camera and GPS
- For iPhones, you use Swift or Objective-C. For Android, it's Java or Kotlin
- They take more time and money to make
- Only work on the system they're made for
Web Apps
- These run on a web browser and use basic web stuff like HTML, CSS, and JavaScript
- They can work on any device that has a web browser
- Making them is quicker and simpler
- They can't do as much with the phone's own features
- Might not run as smoothly as native apps
Hybrid Apps
- A mix of native and web. It's like putting a web app inside a native app shell
- Uses web technology but can still get to some of the phone's features
- You can make one app for all platforms, which saves time
- Doesn't feel exactly like a native app but gets pretty close
- Tools like Apache Cordova and Ionic are popular for making these
Each choice has its own trade-offs. Native apps give you the best experience but can only work on one type of device. Web apps can run anywhere but might not feel as integrated. Hybrid apps try to offer a middle ground between these two.
Top Mobile App Development Frameworks in 2024
React Native
React Native is a tool made by Facebook that lets you build apps for both iPhones and Android phones using React and JavaScript. Here's what's cool about React Native:
- You write your code once, and it works great on both types of phones.
- There's a big community and lots of extra tools you can use.
- You can see changes you make right away without starting over.
- It lets you use parts from both React and the phone's own system.
- It's great for apps that need to show new information or updates quickly.
React Native is good for apps like social media, news, or chat apps.
Flutter
Flutter is a tool from Google that helps you make really nice looking apps for both iPhones and Android phones with just one set of code. Here's why Flutter is a favorite:
- The apps look amazing and run smoothly.
- It's quick to make changes and see them right away.
- There's a lot of help and ready-to-use parts.
- You can use the same code for mobile, web, and even desktop apps.
- You can mix in special code for each platform if you need to.
- It saves a lot of time compared to making separate apps for each phone type.
MetricNative iOSNative AndroidFlutterLines of Code100%100%36% lessDevelopment Time100%100%50% less
Flutter is especially good for apps that want to stand out with a custom look and feel.
Xamarin
Xamarin is a tool based on .NET that lets you make apps for iPhones, Android, and Windows phones using C# code. Here's what makes Xamarin special:
- You can use C# for all platforms.
- It works with .NET code you might already have.
- You can talk to the phone's system directly.
- The apps run really well and can use the phone's full power.
- You can test and fix bugs on different devices easily.
Xamarin is a good choice if you're already using .NET and want to make apps that need to work closely with the phone.
Swiftic
Swiftic lets you update iOS apps easily with new content or features without having to change the code. What it does:
- Change how the app looks and what it does from anywhere.
- Test different versions to see what works best.
- Keep track of how people use your app.
- Manage ads and make money.
- Quickly adjust features for different groups of users.
- Update your app without having to send out a new version.
Swiftic is great for keeping your app fresh without a lot of hassle.
Ionic
Ionic is a tool for making web apps, hybrid apps, and mobile apps using web stuff like HTML, CSS, and JavaScript. Why it's cool:
- Make apps for Android, iOS, and desktop with one code set.
- It has lots of parts like slides and popups you can use.
- You can add plugins for things like the camera or GPS.
- You can make your app work offline or send push notifications.
- It works with Angular, React, Vue, and JavaScript.
Ionic is good for reaching lots of people on different devices.
Apache Cordova
Apache Cordova turns web apps into mobile apps that can use the phone's features. What it offers:
- Works on Android, iOS, Windows, and macOS.
- Use plugins to do things like take pictures or find your location.
- You write your app once and it works everywhere.
- Uses web languages like HTML and JavaScript.
- There's a big community and lots of plugins.
Cordova is for making mobile apps with web skills.
jQuery Mobile
jQuery Mobile is for making web apps that work well on all phones. What's great about it:
- Your app works on any device.
- It's made for touch screens.
- You can make it look how you want with ThemeRoller.
- It's light and based on jQuery.
- It supports the latest web stuff.
- Easy to add more jQuery stuff.
jQuery Mobile makes it simple to build web apps that feel good on phones.
NativeScript
NativeScript lets you use JavaScript and CSS to make real apps for iPhones and Android without using web views. What it does:
- Talk directly to the phone with JavaScript.
- Animations run smoothly.
- See changes right away with LiveSync.
- Use plugins for phone features.
- Works with Angular and Vue.js.
- Share code between web and mobile.
NativeScript is for web developers who want to make fast, native apps.
Sencha Ext JS
Sencha Ext JS is for making big, complex web and mobile apps. It has:
- Lots of parts for making your app work.
- Fancy charts and data stuff.
- Ready-to-use designs.
- Special packaging for iOS and Android.
- Tools for managing your app.
- Works with Vue, React, Angular, and plain JavaScript.
Sencha Ext JS helps make big web apps quickly.
Onsen UI
Onsen UI is for making hybrid mobile apps that feel like native apps. Why it's good:
- Use one code set for Android and iOS.
- It has parts like menus and alerts.
- Works with AngularJS and React.
- Easy to start without tricky setup.
- There's a helpful community.
- Guides and ways to make it your own.
Onsen UI is for making apps that work well and look native with less effort.
Selecting the Right Framework
Picking the right mobile app framework is super important for making a good app. At Zee Palm, we help our clients choose the best one for what they need. Here’s what we look at:
Compatibility and Portability
- Do you want your app to work on iPhones, Androids, and computers, or just one of those?
- Will your app use special features from the phone, like the camera or maps? Or is a simpler app okay?
- What coding languages does your team know or want to learn?
Performance
- Does your app need to look super smooth and fancy?
- Will you have lots of pictures or charts?
- Does your app need to share data right away across devices?
Development Speed
- Do you need a basic version of your app quickly to test it out?
- Is getting your app out there fast the most important thing?
- Or, do you want to spend more time making sure it’s really solid and can grow later?
Scalability
- How many people do you think will use your app at the same time?
- Can your app handle a lot of users all of a sudden?
- How often do you want to add new things to your app?
Testing and Deployment
- Do you want to try new versions of your app with users before making it official?
- How much control do you want over releasing new updates?
Ownership and Control
- Do you want to be in charge of every part of your app?
- Or is it okay to use some ready-made parts if it makes building the app faster?
Budget
- How much can you spend on making your app and keeping it running?
- Can you be flexible with your timeline if it means saving money?
At Zee Palm, we walk through these questions with our clients to find the best framework for their app. We want to make sure you’re set up for success right from the start.
Framework Comparison: Pros and Cons
When picking a mobile app framework, it's smart to look at the good and bad points of each option. Here's a simple comparison of some of the top choices:
FrameworkProsConsReact Native- Works on both iOS and Android with one code
- Lots of helpful tools and people to ask for advice
- You can see changes right away
- Lets you use phone features- Sometimes the app might not feel super smooth
- It can be hard to fix problems
- Updating the app might need a lot of changesFlutter- You can make really nice looking apps
- Quick to make changes and see them
- Lots of help and ready-to-use parts
- Use the same code for phones, computers, and web- Not as many ready-to-use parts
- Not many people use Dart, the programming language
- Mixing with phone's own code can be toughXamarin- Fast like a native app with C# code
- You can use code you already have
- Good tools for checking and fixing problems- Needs time to learn
- Making apps for iPhones needs a Mac
- Apps might be big in sizeIonic- Use web tech for apps on different devices
- Lots of features and parts to use
- Can make apps work offline- Not as fast as native apps
- Depends a lot on JavaScript
- Hard to make it do specific phone thingsCordova- Make web apps work like mobile apps
- Use plugins to access phone features
- Lots of people to help- It's more like a web page in an app
- Might not work well for big projects
- Can feel slow or not fit well
Each framework has its own set of strengths and weaknesses. Things like what devices you're targeting, how fast the app needs to run, what the app does, and what your team knows how to do are important when deciding which is the best choice.
At Zee Palm, our team looks closely at what you need to pick the best framework. We think about what you can do, how much money you have, and how soon you need the app. With experience in React Native, Flutter, Xamarin, and more, we help make picking a framework simple.
sbb-itb-8abf120
Essential Features and Benefits
Mobile app frameworks come with a bunch of helpful features that make it easier for developers to build apps quickly and make sure those apps work well for users. Here's a look at some of the key benefits:
User Experience and UI/UX Design
Frameworks give developers tools to make apps that are easy and fun to use:
- They provide ready-made elements like tabs and menus to speed up the design process
- They make sure your app looks good on any screen size
- You can customize the look of your app with different styles and themes
- Adding smooth animations can make the app feel faster and more lively
This means developers can focus more on what the app does, rather than spending all their time on how it looks.
Cross-Platform Support
With many frameworks, you can create an app once and have it work on both iPhones and Android phones:
- This saves time and money since you don't have to make separate versions for each platform
- You can still use special features from each type of phone when needed
This approach is much simpler than building separate apps for iOS and Android.
Offline Access and Data Caching
Frameworks help your app work even when there's no internet connection:
- They can store important data on the phone to use later
- Any actions the user takes can be saved and then updated online once there's a connection again
- They can keep images and other files ready on the phone so they load quickly
This makes the app more reliable and faster for users.
Responsiveness and Adaptivity
Frameworks make sure your app looks great on any device, big or small:
- The app's layout changes smoothly to fit different screen sizes
- Images and other elements scale up nicely, so everything remains clear and sharp
This ensures that users have a good experience no matter what device they're using.
Social Media and Cloud Service Integration
Frameworks often include easy ways to connect your app with social media and cloud services:
- Users can share content directly to social media
- You can add sign-in options using accounts from Google or Facebook
- Your app can work with cloud services for storing data or sending notifications
This makes it easy to add popular features to your app without a lot of extra work.
By offering these features right from the start, frameworks allow developers to concentrate on creating unique app features. This leads to quicker development times and better apps for users.
Conclusion
Choosing the right mobile app framework is super important because it's the starting point for your app. It's like picking the right foundation for a house. Here's how we at Zee Palm help you figure out which one is the best for your project:
- Target devices and platforms: Are you making your app just for iPhones, just for Android phones, or for both? Do you need your app to do special things with the phone, like use the camera?
- Performance requirements: Do you want your app to look really smooth and work super fast, or is it okay if it's a bit simpler?
- Development timeline: Do you need to show something basic soon, or do you have more time to make it perfect?
- Team skills: What programming languages does your team know? Or are you open to learning new ones?
- Budget: How much money can you spend on making your app?
- Scalability: Do you think a lot of people will start using your app all at once, or will it grow slowly?
- App features: Are there special things your app needs to do, like work without internet or use the phone's GPS?
At Zee Palm, we know a lot about different frameworks like React Native, Flutter, Xamarin, and Ionic. We help you pick the best one for what you want your app to do. We ask you the right questions so we can understand what you need and make sure your app starts off on the right foot.
Let Zee Palm find the best framework for your next app. We take the guesswork out of big decisions, making it easier for you to focus on making a great app.
Frequently Asked Questions
Here are some common questions about making apps with frameworks, what they do, and how to pick and use them right:
What are some key things app frameworks do and why are they good?
Some big pluses include:
- Quicker app making
- Build once for both iPhones and Android phones
- Ready-to-use pieces like drop-down menus
- Tools for making the app look smooth and fit all screen sizes
- Keeping app data ready to use offline
- Simple ways to connect with online services and social media
What should I look at when choosing an app framework?
Important things to think about:
- Which phones and systems you want your app to work on
- How fast and smooth you want the app to be
- How quickly you need the app ready
- What coding languages you or your team know
- Your budget
- How many people you expect to use your app at once
- What special things your app needs to do
How do I know which framework is best for my app?
Think about:
- Who will use your app - What phones do they have?
- How important is speed?
- When do you need the app ready by?
- What languages can your team code in?
- How much money can you spend on making the app?
- Do you think a lot of people will use the app right away or will it grow slowly?
- What features must your app have?
Matching what you need with what each framework offers is key.
What steps are involved in making an app with a framework?
Typically, you would:
- Decide what your app needs to do and how it should look
- Pick a framework
- Plan out the app's structure
- Start coding the look and feel of the app
- Add the main features and connect to the internet if needed
- Test the app on different devices
- Fix any issues and make the app run better
- Release the app for people to download and keep it updated
How can I make sure my app is nice to use?
Keep in mind:
- Make navigating your app easy and clear
- Choose designs that look good and fit your brand
- Make sure the app runs fast and shows when something is loading
- Write helpful messages for users
- Make errors easy to fix
- Be consistent with how your app looks on different devices
Always think about the people using your app from start to finish.
Related Questions
What framework to use for mobile app?
Choosing the right tool for making a mobile app depends on a few things like whether you want your app to work on both iPhones and Android phones, how fast you need it to run, and what coding languages your team is comfortable with. Some good choices include:
- React Native: Good for both iOS and Android. Has a lot of people using and supporting it. Uses JavaScript.
- Flutter: Works on multiple platforms and makes really nice-looking apps. Uses a language called Dart.
- Xamarin: Good if you know C#. Lets you use a lot of phone features directly.
- Ionic: Great if you're familiar with web technologies like HTML and JavaScript. Has a strong support community.
The best choice really depends on what your app needs to do and what your team is good at.
What is required for mobile app development?

To make a mobile app, you need:
- Good coding skills in languages relevant to mobile platforms like Swift for iOS or Java for Android
- An understanding of how to design apps that are easy to use
- Experience with development tools specific to mobile platforms, such as Android Studio for Android apps
- Testing your app on different devices and operating systems
- Knowing how to publish your app on app stores
- Regular updates and maintenance for your app
Having a solid base in development plus specific knowledge for mobile platforms is key.
What is the easiest mobile framework to learn?
Framework7 is pretty easy to pick up for beginners. Here's why:
- It uses familiar web languages like HTML, CSS, and JavaScript
- You can make apps for both iOS and Android, and even desktop
- It comes with a bunch of ready-to-use components to help build your app's interface
- Supports popular frameworks like Vue.js, React, and Svelte
- Has a helpful community for support
Its reliance on web technologies and lots of pre-made components make Framework7 a friendly choice for those new to mobile app development.
How do I choose a mobile app development framework?
When picking a framework for your mobile app, think about:
- What devices you want your app to run on (like iPhones, Android phones, or web browsers)
- How fast and smooth you need the app to be
- How quickly you need to finish the app
- What coding languages you or your team are good at
- Your budget for the project
- How many people you expect to use your app
- If you need the app to use any special features from the phone
Matching what you need with what each framework is good at will help you pick the best one. React Native or Flutter are often good choices for making high-quality apps for both iOS and Android quickly.
Related posts

Flutter Development Company: Choosing the Right Partner
Choosing the right Flutter development company is crucial for your app's success. Flutter allows the creation of apps for both iOS and Android platforms with a single codebase, offering benefits like faster development, native performance, cost savings, and beautiful UIs. When deciding on a Flutter development company, consider their technical expertise, portfolio, communication skills, pricing models, and client feedback. This article compares two hypothetical companies, Company A and Company B, based on these criteria to help you make an informed decision.
Quick Comparison
CriteriaCompany ACompany BExperience with FlutterOver 5 yearsOver 7 yearsTeam SizeMore than 15 developers12 developersPortfolioDiverse projects across sectorsDetailed success storiesClient Reviews4.8/5 from 20+ reviews4.7/5 from 30+ reviewsCommunicationDaily updates, quick responseUses Jira for project trackingPricingFlexible monthly plansFixed project pricingTechnical SkillsLatest tech, including machine learningCustom features and enhanced functionalityPost-Launch SupportComprehensive maintenance plansFree bug fixes for 6 months
Choosing between Company A and Company B depends on your project's specific needs, such as budget, technical requirements, and desired level of ongoing support. Both companies have proven track records, but their approaches and offerings differ, offering options tailored to various preferences and project scopes.
Criteria for Comparison
When picking a Flutter development company, think about these important points to help you decide:
Technical Expertise and Experience
- How long they've been making apps with Flutter
- How well they know Flutter and Dart, the programming language used
- Their skills in all steps of making an app, from the start to keeping it running
- Their experience in connecting Flutter apps with other systems and services
- A look at their past work, especially apps similar to what you want
Quality and Reliability
- Their history of making good, problem-free apps
- Strong testing and checking to make sure the app works well
- Following the best ways to write and organize code
- Being able to finish the app on time and within your budget
- Help and updates for your app after it launches
Communication and Collaboration
- How quickly and clearly they respond to you
- Tools and methods they use to work together, like sharing files and meeting online
- How they manage the project, including regular updates and meetings
- Making sure they understand and share your goals
Cost and Value
- How they charge - by the project, by the hour, or a regular fee
- Willingness to work within your budget
- Making sure the quality of the app is worth what you pay
Client References and Reviews
- Feedback from other clients
- Reviews on websites like Clutch or GoodFirms
- Examples of successful projects
- How often clients come back for more work
Focus on what's most important for your app project. Make sure the company meets your main needs.
Comparison of Flutter Development Companies
1. Company A
Experience and Expertise
Company A has been making apps with Flutter for over 5 years. They have a team of more than 15 developers who know a lot about Flutter. They've made more than 50 apps. They always keep up with new updates and ways to do things better in Flutter.
Portfolio and Case Studies
Here are some apps they've made:
- A shopping app for a new company that helped sell 40% more.
- A social app where people can chat and share pictures and videos in real time.
- A health app that tracks your fitness and works with Apple Health.
They show examples of their work and share how successful these projects were.
Client Reviews and Testimonials
Based on feedback from over 20 clients, Company A has a rating of 4.8 out of 5. People say they work fast, talk clearly, and make strong apps without going over budget. They've worked with all kinds of businesses, from small startups to big companies.
Communication and Collaboration
Company A uses tools like Slack, Trello, and GitHub to work together well. They share all the steps they take and let you see how the project is going. They check in every day to make sure everyone agrees on what's happening.
Cost and Pricing Models
They have set prices for complete app projects starting at $25,000. They also let you hire a developer or a team for $5,000-$10,000 a month, depending on how many people you need.
Technical Skills and Innovation
They're really good at using Flutter, Dart, Firebase, REST APIs, CI/CD, Git, and testing. They make custom parts for apps and make sure everything runs smoothly. They can also add machine learning to apps.
Post-Development Support and Maintenance
After your app is out, they offer help and upkeep plans. This includes promised response times, updates to keep the app fresh, and help with any new changes or updates needed.
2. Company B
Experience and Expertise
Company B has been around for more than 7 years, making apps using Flutter. They have a team of 12 people who really know their stuff when it comes to Flutter. They've created over 40 apps for different kinds of businesses, like online stores, banks, and health services.
Portfolio and Case Studies
Here are a couple of apps they've made:
- A banking app that makes it super easy to pay bills, move money around, and keep track of your finances. It's been downloaded over 500,000 times.
- A food ordering app that lets you buy food from local restaurants and track your delivery.
They share detailed stories about these projects, including what they aimed to do, how they did it, the results, and some numbers to show how successful the apps were.
Client Reviews and Testimonials
Company B has a score of 4.7 out of 5 based on feedback from more than 30 clients. People really like their tech skills, how they manage projects, and the way they talk with clients. A lot of clients stick with them for updates or new apps.
Communication and Collaboration
They use a tool called Jira to plan and keep track of projects. They have a quick meeting every day to update everyone. They also make sure there's lots of clear info about what they're doing.
Cost and Pricing Models
Their prices start at $30,000 for making a whole app. They also have a monthly plan starting at $8,000 for adding new things and fixing up apps. They give a clear list of what you'll get for your money.
Technical Skills and Innovation
They're really good with Flutter, Dart, Firebase, and other tools needed to make an app. They can add cool features like fingerprint checks and alerts to make the app better.
Post-Development Support and Maintenance
After they finish your app, they'll help fix any issues and make improvements for 6 months for free. If you want more help, they offer plans starting at $2,000 a month.
Experience and Expertise
When you're trying to decide between Company A and Company B for making your Flutter app, here's what you should look at:
How Long They've Been Doing This and Their Focus on Flutter
- Company A has been all about Flutter apps for over 5 years and has made more than 50 of them.
- Company B has been around for more than 7 years, with a good chunk of that time spent on Flutter, making over 40 apps.
The Team
- Company A's team includes more than 15 people who are really into Flutter.
- Company B has 12 folks who know a lot about Flutter.
What They Know and Can Do
- Both teams are pretty savvy with Flutter, Dart, Firebase, APIs, and how to test everything to make sure it works.
- Company A also knows how to add cool stuff like machine learning to apps.
Learning and Certs
- We don't have much info on whether they've got special Flutter training or certificates. It's a good idea to ask them about this.
The Work They've Done
- Both have a bunch of apps they've built that show they know what they're doing. Company B gives more details on how successful some of their apps have been.
Keeping Up-to-Date
- Company A makes it clear they always stay on top of the latest Flutter updates and ways of doing things.
In short, both companies have a solid history with Flutter and know their stuff. They've got teams that are focused on making Flutter apps. You might want to ask about any special Flutter training they've done. Also, think about if the detailed success stories from Company B help you understand what they can do for you.
Portfolio and Case Studies
Both Company A and Company B have shown they're good at making high-quality apps with Flutter, covering a wide range of needs and industries.
Company A
Company A has worked on three big app projects recently:
Shopping App
- They made a shopping app for a new business using Flutter.
- They added features like payment options, a catalog of products, and user accounts.
- This app helped the business sell 40% more stuff.
Social Media App
- They created a social media app with Flutter where people can share pictures and videos and chat in real time.
- They also added things like notifications, ways to control content, and groups.
- This app won an award for being really creative.
Fitness Tracking App
- They built a health and fitness app using Flutter.
- It works with Apple Health to show all your fitness info in one place.
- It became the top app in its category with over 100,000 people downloading it.
These stories give more details about what the company wanted to do, how they did it, and the results. Overall, Company A shows they can make apps with Flutter that work well for different businesses.
Company B
Company B shares these apps in their portfolio:
Banking App
- They made an easy-to-use banking app with Flutter.
- It has features for making payments, managing your account, and planning your budget.
- Over 500,000 people have downloaded it, and they really like it.
Food Ordering App
- They built a Flutter app for ordering food from local restaurants.
- It lets you pay online, track your delivery, and get personalized suggestions.
- In just 6 months, it became one of the top money-making food apps in its area.
The stories behind these apps explain the whole process and how successful the apps were. Company B shows they can make creative Flutter apps that help businesses do well.
Both companies have great portfolios with examples that show they know how to use Flutter to make apps for different needs. Company A gives more details about how well their apps did, while Company B focuses on the big impact their apps had. Look closely at what each company has done to see if their apps are like what you need.
Client Reviews and Testimonials
When picking a company to help build your Flutter app, it's smart to see what other people say about them. Let's compare what clients have said about Company A and Company B:
Review Platform Analysis
Company A got a score of 4.8 out of 5 from more than 20 people, and Company B got 4.7 out of 5 from over 30 people. They both have good scores on websites like Clutch and GoodFirms.
People said Company A is:
- Quick at making apps
- Easy to talk to
- Good at sticking to the budget
For Company B, people liked their:
- Tech skills
- Way of handling projects
- Quick answers
Both companies make their clients happy, but Company A has a tiny bit better score.
Direct Client Testimonials
Talking to people who have worked with them before is also a good idea. Here are some things they said:
"Company A got what we wanted right away. They made a great app and were always there to answer our questions." - Jane, eCommerce Company Founder
"Company B turned our idea into a real app. You can tell they know Flutter well because our app works great and looks good." - Tom, FinTech Startup CEO
These comments show that both companies do a good job and know their stuff. But, people really like how Company A talks and works with them.
Repeat Business Rates
How often people come back for more help also matters. Company A says 85% of their clients return, and Company B says 75% do. This means both companies are good at keeping clients.
In the end, Company A and Company B are both liked by their clients for making good apps and being skilled. Company A gets a little more love for how they communicate, stick to the budget, and keep clients coming back. Looking at reviews and talking to past clients can help you pick the right company.
Communication and Collaboration
When we talk about making apps together, both Company A and Company B do a good job of keeping things organized and talking to their clients. But, they have their own ways of doing things.
Responsiveness and Accessibility
Company A makes sure they're easy to reach. They use Slack, email, and phone calls and promise to get back to you within 2 hours during the workday. They also make it simple to set up video chats if you need them.
Company B uses a tool called Jira to manage their projects. They haven't said how fast they respond, but their clients say they're quick to get back to questions.
So, Company A seems to be more about making sure they're always there to talk. Company B uses their project tool to communicate.
Project Tracking and Updates
- Company A likes to check in every day with a short video call to keep everyone updated.
- They also track what needs to be done using a tool called Trello.
- Company B meets every day too, but they use Jira to keep track of progress.
Company A's daily video calls help make sure everyone knows what's going on. Company B uses their online tool to track everything.
Documentation and Reporting
- Company A writes down everything they do in GitHub.
- Company B does the same.
- Both companies keep good records, but Company A talks more about making sure you can see these records too.
You can expect detailed updates from both, but Company A makes a point of sharing this info with you.
Understanding Goals and Needs
- Neither Company A nor Company B talks much about how they figure out what you need from your app.
- It's a good idea to ask them how they plan to understand your app's goals.
Make sure they know exactly what you want your app to do.
In short, Company A and Company B both work well with their clients:
- Company A is all about being there when you need them, giving frequent updates, and being open about what they're doing.
- Company B uses their online tool to keep things organized.
Think about which approach you like better.
sbb-itb-8abf120
Cost and Pricing Models
When you're thinking about how much it will cost to make a Flutter app, it's good to look at how Company A and Company B set their prices. Here's a simple breakdown:
Company A Pricing
Company A has clear prices for making an app:
- A basic app with just the main features costs $25,000.
- If you want an app with more bells and whistles, it could be between $40,000 and $60,000.
They also have a monthly plan if you need more work done after the app is built:
- Just one developer: $5,000 a month
- A small team of developers: $8,000 a month
- A big team for bigger projects: Starts at $10,000 a month
This way, you can choose what fits your needs and budget.
Company B Pricing
Company B also has set starting prices for their apps:
- A simple app starts at $30,000.
- A more complex app with lots of features starts at $45,000.
And for help after your app is out there:
- Small updates and fixes: $2,000 a month
- Bigger changes and new features: Starts at $5,000 a month
They focus on giving you a total price upfront for the project.
Comparing Value
When thinking about the price, it's important to see what you're getting:
- Both companies make quality apps that should do what you need.
- Company A lets you pick from different monthly plans, which could be good if you're not sure how much help you'll need later.
- Company B gives you a total price from the start, which might be easier if you prefer knowing the full cost upfront.
Check out their past work and what other clients have said to figure out which company gives you the best deal for your money.
In short, Company A has more flexible payment options, while Company B prefers to tell you the whole cost at the beginning. Think about what's best for your situation and budget.
Technical Skills and Innovation
When looking at what Company A and Company B are good at, especially with Flutter and coming up with new ideas, both show they know their stuff. But, they do things a bit differently.
Core Competencies
- Flutter, Dart, and Related Skills: Both companies are really good at using Flutter and Dart, and they know about things like Firebase, REST APIs, testing, CI/CD, and how to use Git for keeping track of changes.
- Integration and Connectivity: Company A talks about how they can connect Flutter apps with other systems and services. Company B doesn't say much about this.
- Innovation and Problem Solving: Company A makes a point of staying up-to-date with the newest Flutter features. Company B doesn't talk much about being innovative or solving problems in new ways.
Unique Offerings and Solutions
- Machine Learning: Company A says they can add machine learning to Flutter apps. This means apps can have cool features like suggesting things you might like.
- Custom Components: Company B mentions they can make custom parts for apps. This means your app can have unique features just for you.
- Enhanced Functionality: Company B also talks about adding special features like fingerprint checks and alerts, which make apps safer and more useful.
Assessing Technical Prowess
Both companies are really good at the main Flutter development skills. When thinking about technical creativity:
- Company A is all about keeping up with the newest stuff in Flutter.
- Company B is great at making apps with special features or parts just for your needs.
Think about what skills are most important for your app. Considering both the basic skills and the extra cool stuff can help you pick the right team.
Post-Development Support and Maintenance
After your app is made, both Company A and Company B help keep it running smoothly. Let's look at what they offer:
Availability and Responsiveness
- Company A gets back to you within 2 hours if there's a problem. You can also talk directly to the people who made your app.
- Company B doesn't say how fast they'll respond, but people who have worked with them say they're quick to help.
Scope of Ongoing Services
- Company A has plans starting at $2,000 a month for fixing bugs, making your app better, and adding some new stuff. They can do more if you need it.
- Company B fixes bugs for free for the first 6 months. After that, you can pay starting at $2,000 a month for small updates or $5,000 a month for big changes.
Quality and Reliability
- Both companies are known for being reliable. Company A talks a lot about how they keep your app in good shape, while Company B focuses on adding new features.
- Company A tells you how they do things. Company B doesn't give as much detail.
Customer Feedback
- People like the support from both companies.
- Company A is especially praised for letting you talk to the developers.
Assessing Support & Maintenance Needs
Think about what you need after your app is out there, like:
- How long and what kind of help you want
- If you need to ask developers questions
- How they check your app to make sure it's working right
- How fast they promise to sort out problems
Figure out what's worth it for you and choose the best plan for keeping your app running well.
Pros and Cons
Choosing between Company A and Company B for making your Flutter app can be a bit tricky. Let's break down what's good and not so good about each company in simple terms:
CategoryCompany ACompany BExperience with FlutterThey've been doing it for over 5 yearsThey've got 7 years under their beltTeam SizeThey have more than 15 developersThey have a team of 12Portfolio and Case StudiesThey have a bunch of projects across different areasThey give you the nitty-gritty on how their apps have helped businessesClient ReviewsPeople really like them (4.8/5 stars from 20+ reviews)Also well-liked (4.7/5 stars from 30+ reviews)CommunicationSuper quick to reply and like to check in every dayThey use a special online tool to keep things on trackPricing ApproachThey let you pick from different plans each monthThey tell you the total cost right from the startTechnical SkillsThey're all about the latest tech, even adding smart features to appsThey make apps with special bits just for youPost-Launch SupportQuick to fix any issues, and you can talk directly to the people who built your appThey help out for free for the first 6 months
Good Stuff about Company A:
- They're really good at keeping in touch
- Always up-to-date with the newest Flutter stuff
- You can choose how much you want to spend on keeping the app up-to-date
Not So Good Stuff about Company A:
- They don't share much about how their projects have helped businesses
Good Stuff about Company B:
- More people have shared their good experiences
- They're open about how their apps make a difference
- They're great at adding unique features to apps
Not So Good Stuff about Company B:
- They don't talk much about how they keep in touch during the project
- They're not as open about how they make the app
Both companies are really good at making apps with Flutter and have lots of happy customers. Think about what's most important for you, like how they handle the project, what you'll pay, how they help after the app is done, and other special things they offer. This list of good and not so good points for Company A and Company B should help you choose.
Conclusion
Picking the right company to help build your Flutter app is super important. After looking at what's important in companies, here's a quick guide on how to choose:
Key Takeaways
- Look for a company with a lot of experience. You want a company that has been making great Flutter apps for a long time. This shows they really know what they're doing.
- Make sure they're good at talking and working together. It's important that they can manage the project well, are open about what they're doing, respond quickly, and understand what you want.
- Check out their past work and what other people say about them. Seeing a variety of apps they've made and hearing good things from others means they're likely to do a good job.
- Think about the help they offer after the app is done. Being able to fix problems fast and improve the app over time is really helpful.
- Compare how they charge for the project. Some companies give you a set price, which is easy to plan for, but others charge based on how long it takes, which can change as the project goes on.
Final Recommendation
With all this in mind, Company A looks like the best choice. They've been all about Flutter for over 5 years, which shows they're experts. They're also really focused on keeping in touch and supporting the project. While Company B is also good, Company A's special focus on Flutter and their way of working with clients stands out.
But remember, every project is different. Think about what's most important for your app, like how much you can spend, how quickly you need it done, and what features you want. Then, pick the company that fits your needs the best. With the right team that gets your vision and has the skills to make it happen, your app has a great chance of success.
FAQs
What is the importance of choosing a Flutter development company with deep expertise in the technology?
Picking a company that really knows Flutter inside and out is super important. Flutter is pretty new and keeps changing. A team that knows a lot about Flutter will:
- Understand Flutter really well, including the Dart language and how to make apps look and work great.
- Keep up with the latest Flutter updates and tools.
- Avoid common mistakes and know how to solve problems.
- Write code that makes your app run smoothly and quickly.
- Create apps that look amazing and are easy to use.
- Make sure your app is built well from the start and can be easily updated.
- Help you make the most of Flutter to get your app done faster.
- Give you good advice all through the process of making your app.
Knowing Flutter well is key to making an app that works well and can grow over time.
How can I evaluate the portfolio and case studies of Flutter app development companies?
Looking at what a company has made before can tell you a lot about what they can do. Here's what to check:
Types of apps built: Look at the different kinds of apps they've made. Are they simple or complex? Do they cover various industries?
UI/UX design: Are the apps easy and fun to use? Do they look good on both iPhones and Android phones?
Features and functionality: What kinds of things can the apps do? The more complex, the better.
Code quality: If you can, look at some of the code to see if it's clean and well-organized.
Performance benchmarks: Ask for specific numbers that show how well the apps run.
User adoption and retention: Find out how many people use the apps and what they think about them.
Case study details: Good case studies will tell you about the challenges faced and how they were solved.
Use these points to really understand a company's skills and how they handle app projects.
What kind of post-development support and maintenance can I expect?
After your app is out, good companies will help keep it running well. They usually offer:
Bug fixes and troubleshooting: Quick help with fixing any problems.
Technical support: Help with using or changing the app and advice on making it better.
Performance monitoring: Keeping an eye on how the app is doing and fixing any slowdowns.
Updates and upgrades: Making sure the app works with new phone updates and the latest Flutter versions.
New feature development: Adding new things to your app to make it do more.
Regulatory compliance updates: Making sure your app follows the latest rules.
UAT and testing: Making sure everything works well before making changes public.
Talk about what kind of help you'll need after the app is launched so the company is ready to support you.
Related Questions
How do I choose a Flutter app development company?
When looking for a company to help you build a Flutter app, think about these things:
- Expertise with Flutter: Make sure they have a lot of experience making apps with Flutter. This means they know how to use it well.
- Portfolio and case studies: Look at the apps they've built before to see if you like them and if they're good.
- Development process: Find out how they make apps. You want to make sure they can work the way you need them to, like meeting deadlines and testing the app to make sure it works right.
- Cost transparency: Ask them to clearly tell you how much the project will cost before you start, so there are no surprises.
- Reviews and references: Check what other people say about working with them and talk to some of their past clients if you can.
Spending time to check these things will help you find the best team to make your app.
Why don't more companies use Flutter?
Here are some reasons why not all companies use Flutter yet:
- Flutter is pretty new, so some companies might not want to try something they're not used to.
- If a company already has apps made the old way, switching everything to Flutter means starting over, which can be a lot of work.
- Flutter is still getting better at making apps for the web and computers, so some companies might wait until it's better.
- There aren't as many Flutter developers compared to developers for other types of apps, so finding the right people can be hard.
- Some companies might not know much about Flutter or think it's not as good as it actually is.
As more people learn about Flutter and it keeps getting better, we'll probably see more companies start using it.
Which top companies use Flutter?
Some big companies that use Flutter for their apps include:
- BMW: They use Flutter for apps that help customers with their cars.
- Google Pay: They chose Flutter to make their app work on different devices more easily.
- Nubank: This bank in Brazil made their credit card app with Flutter.
- Kijiji: This online marketplace updated their app with Flutter to add new features faster.
Other well-known brands like eBay, Square, Yahoo, Ikea, and Volkswagen also use Flutter. It's popular for making shopping, banking, news, and utility apps that need to work on more than one type of device.
How much does it cost to publish a Flutter app?
To put a Flutter app on the big app stores, you'll usually pay between $25-$99:
- Apple App Store: You pay $99 every year plus $25 just once to add your app.
- Google Play Store: You pay $25 just once to add your app.
So, to get your app out there for both iPhone and Android users, it'll cost you between $50-$125 at the start. Remember, you'll also have ongoing costs for keeping your developer accounts.
Related posts

React Native Mobile App Developer Essentials
If you're diving into the world of React Native for mobile app development, you're in the right place. Whether you're aiming to build apps for both iOS and Android with a single codebase, enhance app performance, or navigate the rich ecosystem of tools and libraries available, this guide has got you covered. Here's a quick rundown to get you started:
- React Native enables cross-platform development, allowing you to write your app once and deploy it on both iOS and Android.
- Essential tools like Expo CLI streamline your development process, while libraries like React Navigation and Redux help in managing navigation and state.
- Understanding how to set up your development environment with Node.js, Watchman, JDK, Android Studio, and Xcode is crucial.
- Adopt best practices for optimizing performance, writing clean code, and debugging effectively to enhance your app's quality.
- Be prepared to tackle common challenges such as integrating with native code and optimizing app performance.
With React Native, you're equipped to craft high-performance, visually appealing apps that provide a native-like user experience across multiple platforms. Let's dive into the essentials to kickstart your journey as a React Native mobile app developer.
What is React Native?
React Native is a free tool for making mobile apps on both iPhones and Android phones using JavaScript and React. Think of it as a way to write your app once and have it work on two different types of phones. This saves a lot of time and money compared to making a separate app for each phone.
It combines web app development with mobile app development, using parts that match the phone's own UI elements. This means the apps you build will not only work well but also look and feel like they were made specifically for that phone, using languages like Swift for iOS or Java for Android.
How React Native Works
React Native uses a simple three-part system:
- JavaScript Layer: This is where you write your app's logic and design its look using components.
- Bridge: This acts as a messenger between the JavaScript layer and the phone's own system, translating between the two.
- Native Layer: This is where the phone's system lives, handling how your app looks on the screen and interacts with the phone's features.
Here's what happens:
- You write the app using JavaScript.
- When the app starts, the JavaScript code runs.
- The bridge sends messages between the JavaScript and the phone's system.
- The phone's system shows your app on the screen and uses its features.
- When you update something in JavaScript, the app's look on the screen can change.
This setup lets React Native apps use the phone's own system for a smooth experience while being made with web development methods.
Components of React Native
Here are some important parts of React Native:
- React: This part deals with showing the app on the screen and managing data.
- Native Modules: These let your app use the phone's features, like storing data or finding your location.
- Native UI Components: Basic building blocks like View, Text, Image that turn into the phone's UI elements.
- JavaScript Runtime: This runs the JavaScript code and talks to the phone's system. For example, JSC runs on iPhones and Chrome V8 on Android phones.
So, React Native lets you use JavaScript to make mobile apps that look and feel like they were made for the phone, using the phone's own UI elements and features.
Setting Up the Development Environment
Installing Requirements
To get ready for making React Native apps, you need to install a few things:
- Node.js: This is the engine that runs the JavaScript code for React Native. Get the latest stable version from nodejs.org.
- Watchman: Helps React Native notice when you make changes to your files, which makes things faster. You can install it with
brew install watchmanon macOS or check the Watchman docs for other systems. - Java SE Development Kit (JDK): Needed for making and running Android apps. Make sure to get version 8 or newer from AdoptOpenJDK.
- Android Studio: The main program for creating Android apps. Download it here.
- Xcode: Used for making apps for iPhones and Macs. Get it from the Mac App Store or Apple Developer site.
Creating Your First App
After setting everything up, you can make your first React Native app:
- Put Expo CLI on your computer:
npm install -g expo-cli
- Start a new project:
expo init my-first-app
- Go into your new app's folder and open it:
cd my-first-app
expo start
- Use a device or an emulator to look at the default welcome screen of React Native.
This shows that Expo and React Native are ready for you to start making apps.
Installing Expo CLI
Expo CLI is a tool that makes working with React Native easier. It helps you create projects, run your apps, and update them easily.
To install, just type:
npm install -g expo-cli
Now, you can use expo commands in your terminal to work on React Native apps.
Must-Have Tools and Libraries
When making mobile apps with React Native, using the right tools and libraries can make your job a lot easier. Here, we'll talk about some key tools you should know about. These help with fixing mistakes, setting up your project, moving around in your app, and managing data.
React Native Debugger
React Native Debugger is super useful for finding and fixing problems in your React Native apps. It lets you:
- Look at and change your app's data while it's running
- Check network requests to see what your app is sending and receiving
- Debug state management tools like Redux
It's like having a magnifying glass for your app, making it easier to spot and solve issues.
Expo
Expo is a tool that makes working with React Native a lot smoother by providing:
- A quick way to start new projects
- Easy access to phone features like the camera or location
- The ability to update your app without going through the app store
Expo helps you test and share your app more easily. It's like a Swiss Army knife for React Native app developers.
React Navigation
This library helps you move between screens in your app. It offers:
- Different ways to organize your app's screens
- Smooth animations when switching screens
- Tools for passing data between screens
React Navigation makes it easier to manage how users move through your app.
Redux
Redux is a tool for managing your app's data. It helps by:
- Keeping all your data in one place
- Using actions to change data
- Using reducers to control how actions change data
Redux is great for making sure your app's data is handled in a predictable way, especially as your app grows.
These tools are just the beginning, but they're a good starting point for making your React Native app development smoother and more efficient.
Following Best Practices
Optimizing Performance
When making React Native apps, it's key to make sure they run smoothly. Here's how:
- Avoid unnecessary re-renders: Only update parts of your app when needed. This stops the app from redoing work it doesn't have to. Tools like
React.memoanduseMemocan help. - Implement list virtualization: For long lists, show only the parts users can see to make scrolling smoother. Instead of using basic
VieworScrollView, go forFlatListorSectionList. - Leverage native functionality: Use built-in components instead of making your own for better speed.
- Minify code: This means making your code smaller by removing parts you don't use. Tools like the Metro bundler or Expo build service can do this.
- Test performance: Use tools like React Native Debugger or App Center to find and fix slow spots.
Writing Clean Code
Good code makes your app better:
- Adhere to style guides: Follow rules, like Airbnb's, to keep your code looking the same. Tools like ESLint and Prettier can help.
- Modularize code: Break your code into small, focused parts that you can use again.
- Type check: Use TypeScript to catch mistakes early.
- Peer review code: Have someone else look at your code before it goes live.
- Document thoroughly: Write comments for parts of your code that might confuse others.
Debugging Effectively
Finding and fixing problems is crucial:
- React Native Debugger: Lets you look at your app's UI and data as it runs.
- Expo Dev Tools: Comes with tools for checking logs and performance.
- Flipper: A tool by Facebook to help you look at layouts, network calls, and more.
- Reactotron: A desktop app for tracking and fixing issues in React Native apps.
By sticking to these best practices, you'll make your app better and your life easier in the long run.
sbb-itb-8abf120
Common Challenges and Solutions
Integration with Native Code
Sometimes, you might need to use the specific features of iPhones or Android phones in your app. This can be tricky because it involves using the languages and tools those phones understand, like Java for Android or Swift for iOS.
Here's how to handle it:
- If you need to use phone-specific features not already available in React Native, you might have to create custom parts using the phone's coding languages.
- Make sure you set up your project correctly in Android Studio for Android phones or Xcode for iPhones.
- When your app and the phone's system need to talk to each other, they use a common language, like JSON, to understand each other.
Tips:
- Look for ready-made components that do what you need, so you don't have to start from scratch.
- Check the React Native guides for making custom parts for Android and iOS.
- Stick to common data formats like JSON for easier communication between your app and the phone.
Dealing with Bugs
Bugs can pop up, but here's how to manage them:
- Prevent: Use good coding practices, review code with your team, and test your app.
- Identify: Use tools to find where bugs are happening. Keep an eye on how your app is doing with tools like App Center.
- Resolve: Figure out why the bug is happening, whether it's in your code or something else. Use guides and ask for help if you're stuck.
- Improve: Learn from bugs to make your app better. Add tests to make sure fixes work.
Dealing with bugs carefully can make your app more reliable.
Optimization and Performance
If your app is slow, users might not like it. Here are some ways to make your app run better:
- Check your app's speed with tools to find slow spots.
- Make images smaller and use formats that don't take up much space.
- Only show what's needed for long lists, so your app doesn't slow down.
- Be smart about updates to avoid doing the same work over and over.
- Save data so your app doesn't ask for the same information multiple times.
- Spread out work so the app doesn't get bogged down all at once.
- Watch for parts of your app that update too often and adjust them.
Keeping an eye on performance from the start can help your app stay fast and enjoyable for users.
Conclusion
As we finish our guide on making mobile apps with React Native, let's go over some important points:
Cross-Platform Capabilities Unlock Efficiency
React Native lets us write apps in JavaScript that work on both iPhones and Androids. This means we can use the same code for both, which saves a lot of time compared to making two different apps.
Vibrant Community and Robust Tooling
React Native has a big community that helps out with plugins, guides, and support. Tools like Expo, React Native Debugger, and AppCenter make our work smoother.
Write Once, Render Natively
React Native mixes web and mobile app making. Our apps look and work great on phones using web code, which means they're fast and can use the phone's features.
Scalable Apps Through Reusable Components
We build apps with parts that we can use again. This makes it easier to handle big apps and keep them organized.
Rapid Development With Hot Reloading
React Native's hot reloading lets us see changes right away without starting over. This quick feedback helps us make better apps faster.
React Native is always getting better, with new features for easier app making and cloud support. Keeping up with the latest updates means we can make even better apps.
By learning the basics of React Native, we're ready to make great mobile apps for both Android and iOS.
Related Questions
Is React Native good for mobile app development?
Yes, React Native is a great choice for making mobile apps. Here's why:
- Cross-platform: You can make one app that works on both iPhones and Android phones. This saves a lot of time and effort.
- Native performance: The apps run smoothly and look good, just like apps made specifically for those phones.
- Reusable components: You can use the same pieces of your app in different places, making app building faster.
- Live reloading: You can see changes you make right away, which helps you work faster.
- Community: There's a big group of people using React Native, so it's easy to find help and resources.
React Native is a smart pick for making quality apps without spending too much time or money.
What are the requirements for React Native mobile?
You'll need a few things to start making apps with React Native:
- Node.js 10 or newer
- Watchman for keeping track of file changes
- Java SE Development Kit (JDK) 8 or newer
- Android Studio and Android SDK 6.0 or newer for Android apps
- Xcode 11 or newer and CocoaPods for iOS apps
- A physical device or an emulator to test your app
- A text editor like Visual Studio Code
- Git and command line skills
It's important to set up your environment correctly. Check out the React Native official development environment setup guide for detailed steps. Keeping everything up to date is also a good idea.
What are the prerequisites for React Native app development?
Before you start, you should know:
- JavaScript ES6 or newer
- Basic React ideas like components and state
- Some knowledge of Android and iOS platforms
- How to use tools like Babel and Webpack
- Basic design knowledge for mobile apps
You don't need to be an expert in mobile app development, but understanding both web and mobile basics will help a lot.
What tool and skill set do you need to develop a mobile app in React Native?
To make a mobile app in React Native, you should be good at:
- JavaScript and ES6
- React basics
- Using React Native for mobile-specific features
- Debugging with tools like React Native Debugger
- Managing app data with things like Redux or React Query
- Using React Navigation for moving around the app
- Designing with UI libraries
- Connecting your app to the internet
- Basic Git skills
- Understanding iOS and Android basics
These skills will help you build most types of apps. If you want to make something more specialized, like a game or a shopping app, you might need to learn a few more things.
Related posts
Affordable Mobile App Developers: Key Benefits
Hiring affordable mobile app developers offers several key benefits for businesses looking to enter or expand in the mobile market without breaking the bank. Here's a quick overview:
- Significant Cost Savings: You can cut development costs substantially, with rates starting as low as $25 per hour in some regions.
- Access to Global Talent: Tap into a worldwide pool of developers with specialized skills.
- Flexibility and Scalability: Adjust your development efforts according to business needs and budget constraints.
- Speed and Efficiency: Benefit from lean methodologies and faster project completion times.
- Innovation and Quality: Affordable doesn't mean low quality. Many developers stay on top of the latest technologies and trends.
These benefits make affordable mobile app development a strategic choice for businesses of all sizes, enabling innovation and quality without the hefty price tag.
Exponential Demand for Mobile Apps
In the last ten years, mobile apps have become super popular. Almost every business wants an app to connect with customers anytime, anywhere. With over 5 million apps in big app stores like the iOS App Store and Google Play, there's a huge need for people who can make these apps.
Shortage of Skilled Developers
But, finding really good mobile app developers is tough. There aren't enough of them, and the ones that are there often work for big companies that can pay a lot. This means smaller businesses have a hard time finding and affording the talent they need. It's like there's not enough to go around, which makes it hard for the app world to grow.
High Development and Maintenance Costs
Making a custom mobile app from scratch costs a lot. On average, you might spend between $100,000 and $500,000 for a fancy app with lots of features. And it doesn't stop there. Keeping the app running smoothly and adding new things costs more money over time. For a lot of small businesses, these high costs mean making their own app just isn't possible.
With so many businesses wanting apps but not enough developers to go around, prices have gone way up. This leaves many companies without the chance to make their own app. However, businesses that find affordable mobile app developers from all over the world can save a lot of money and still get great apps.
The Solution: Hiring Affordable Mobile App Developers
Choosing affordable mobile app developers is a smart move for businesses that want to create good apps without spending too much money. This way, you can get expert help for less, and enjoy a bunch of benefits:
Cost Savings
The biggest plus is you save a lot of money. Here’s how:
- You only pay for the work that’s done. No need to worry about extra costs like salaries and benefits for full-time employees.
- These teams are often in places where living costs are lower, like Eastern Europe and Latin America, so their rates are cheaper than in the US or Western Europe.
- You can start small with a basic version of your app and add more features later based on what your users say.
- For updates and new stuff, you pay as you go, which lets you manage your budget better.
By keeping initial costs low, you can do more with your money. This is especially helpful for small businesses or startups that are watching their spending.
Access to Specialized Talent
The internet lets you find skilled developers from all over the world. This means you can find people who are really good at specific things that might be hard to find where you are.
For instance, you might find a team in Ukraine that’s great at behind-the-scenes tech stuff, or developers in Argentina who make really user-friendly apps. This way, you can put together a team that has exactly the skills you need.
Having access to these talented folks from around the globe opens up new chances to create something cool without breaking the bank.
Flexibility and Scalability
Working with outsourced teams also gives you more wiggle room. You can change your plans, add or drop features, and adjust your spending based on what’s happening with your business.
Many agencies let you start small and change how much you’re working with them as needed. This is great for new apps when you’re still figuring things out.
As your app gets more popular and you make more money, you can easily increase your development efforts to keep up. By mixing set prices and pay-as-you-go rates, you can find a good balance between keeping costs in check and growing your app.
Key Takeaways
In short, affordable app developers help you get past the big hurdles of high costs and not enough skilled people. You’re not stuck with just the folks nearby; you can pick the best team for your project from anywhere in the world. Use their specific skills, the ability to change plans as needed, and smart budgeting to make your app idea come to life.
Key Benefits
Hiring affordable mobile app developers can really help businesses save money, find great talent from all over the world, change plans as needed, get things done faster, and create cool apps without spending too much.
Significant Cost Savings
Choosing budget-friendly developers can cut your costs by more than half compared to pricier options. You pay only for the work that gets done, which means you don't have to worry about extra costs like office space or employee benefits. Teams from places with lower living costs can charge as low as $25 per hour.
You can start with just the basic parts of your app and add more features later based on what your users say. This keeps your ongoing costs manageable, paying more only as your app grows.
Access to Global Talent Pool
Thanks to the internet, you're not limited to just the developers near you. You can find people with exactly the skills you need, whether that's in artificial intelligence, blockchain, or Internet of Things. This means you can get the best people for your project without having to look far.
You might find a team in Europe that's really good at making apps easy to use, or developers in Latin America who are great at the technical side of things. Being able to afford this wide range of talent lets you pick and choose the right people for your project.
Flexibility and Scalability
Affordable developers can work in short bursts, which makes it easy to change your plans if you need to. Start with a simple version of your app, and then make it bigger or adjust things as your business grows or changes.
You can mix different ways of paying, like a set price for some parts and hourly rates for others, to keep your budget under control while still being able to make changes easily.
Speed and Efficiency
Teams spread out in different places can work faster because they use lean methods and focus on what they're good at. They can work on different parts of your app at the same time, which means your app is ready sooner. Keeping communication and project management straightforward helps make sure everyone works well together.
Having developers focused on just your project means they don't get distracted by other things. Being skilled in specific areas like iOS and Android helps them work faster and test things more thoroughly.
Innovation and Quality
Just because the developers are affordable doesn't mean the quality of your app will be low. There's a lot of competition, which pushes teams to keep up with the latest technology and best practices.
Working for clients from different places means developers understand how to make apps that a lot of people will like and use. Being able to do great work without charging a lot attracts talented people who care about making something new and useful, not just making money.
sbb-itb-8abf120
Finding the Right Affordable Developer
Choosing a good, budget-friendly developer is crucial for making a great app without spending too much. Here's how to pick the right one:
Assess Technical Expertise
You need a developer with the right tech skills. To figure this out:
- Look at apps they've made before. Are they well done?
- Ask about their knowledge of specific tech stuff like Swift for iOS, Java for Android, or React Native for cross-platform apps.
- Check if they know the latest on keeping apps safe, testing them properly, and using the best tech methods.
Developers who are always learning and have a wide range of tech skills can create better apps.
Evaluate Communication Ability
Talking well is key, especially when working with someone far away. Good signs include:
- They reply quickly and clearly.
- You can talk easily over the phone or on video calls.
- They use tools to keep track of the project and what everyone's doing.
- They keep you updated with regular calls or reports.
Developers who talk to you often and clearly will make it easier to know how your app is coming along and to work through any ideas or problems.
Ensure Cultural Fit
It's important that you and your developer see things in a similar way. Look for:
- Agreement on how fast to work, the importance of quality, and being open.
- Being comfortable talking about plans, feedback, and any issues.
- Both wanting the same things for your app.
When you and your developer work well together, everything goes more smoothly.
Key Takeaways
Checking a developer's tech skills, how well they talk, and if you work well together takes time but is worth it. It helps you pick a developer who can make the app you want, on time and within your budget. Spend some time looking into your options before you decide.
Conclusion
Hiring affordable mobile app developers is a smart move for any business wanting to get into the mobile world without spending too much. It's a way to make sure you can still do cool things with apps, even if you're not a big company with a lot of money to spend.
Key Takeaways
Here are the main good points about finding developers who won't break the bank:
- Substantial cost savings - You only pay for the work that's actually done, and because some teams are in places where it's cheaper to live, their rates can start at $25 an hour.
- Access to global talent - You can find people with the right skills from all over the world, ready to work on your project.
- Flexibility and scalability - You can change your plans or grow your app as needed, and mix different ways of paying to stay within your budget.
- Speed and efficiency - Teams that are spread out can get things done faster by focusing on what they're good at and using smart ways to work.
- Innovation and quality - Just because it's affordable doesn't mean it's low quality. There are many skilled developers out there who are up-to-date with the latest in app development and want to make great apps.
Conclusion
To wrap it up, hiring affordable mobile app developers makes it possible for any business to enjoy the benefits of mobile apps. Whether you're just starting out or you're already established, you can make or improve your app without spending too much. The world is full of talented developers who can help you make exactly what you need. By choosing an affordable option, you're opening the door to all kinds of possibilities for your business in the mobile world.
Related Questions
What are 5 key benefits of mobile app development?

Here are 5 key benefits of making mobile apps:
- More user interaction: Apps can send users updates and special offers directly, making it easier to keep them interested.
- Better customer loyalty: Apps can offer special deals and rewards to users, encouraging them to keep coming back.
- Closer connections: Apps help brands and users get closer. They make users feel special with personalized experiences.
- Wider audience: Apps let brands reach users anytime, anywhere, helping to grow their customer base.
- Useful insights: Apps gather data on how users behave, which helps brands make better marketing and product decisions.
What is the benefit of an app developer?
Working with an app developer has several advantages:
- Custom fit: They can make an app that perfectly fits your business needs.
- Safety: They can add strong security features to keep your data safe.
- Grows with you: They can make sure your app can handle more users as your business grows.
- Expert skills: They know the latest tech and how to make apps that are easy and fun to use.
What are the benefits of outsourcing mobile app development?
Outsourcing app making can give you:
- Cost savings
- A wide talent pool
- Quicker launch times
- More time to focus on your main business
- Less risk
- Easy to scale up or down
- Round-the-clock work and support
Outsourcing means you can hire skilled people from around the world at good prices, speeding up development while cutting costs and risk.
What is the budget breakdown for app development?
Here's a rough guide to how much app making can cost:
- Design: $3,000 - $30,000
- Making the app: $40,000 - $300,000
- Testing: $5,000 or less
Costs can vary a lot based on how complex the app is, where the developers are, and other factors. But these ranges give a general idea of what to expect. Making the app is usually the biggest cost, but testing is important and more affordable.
Related posts
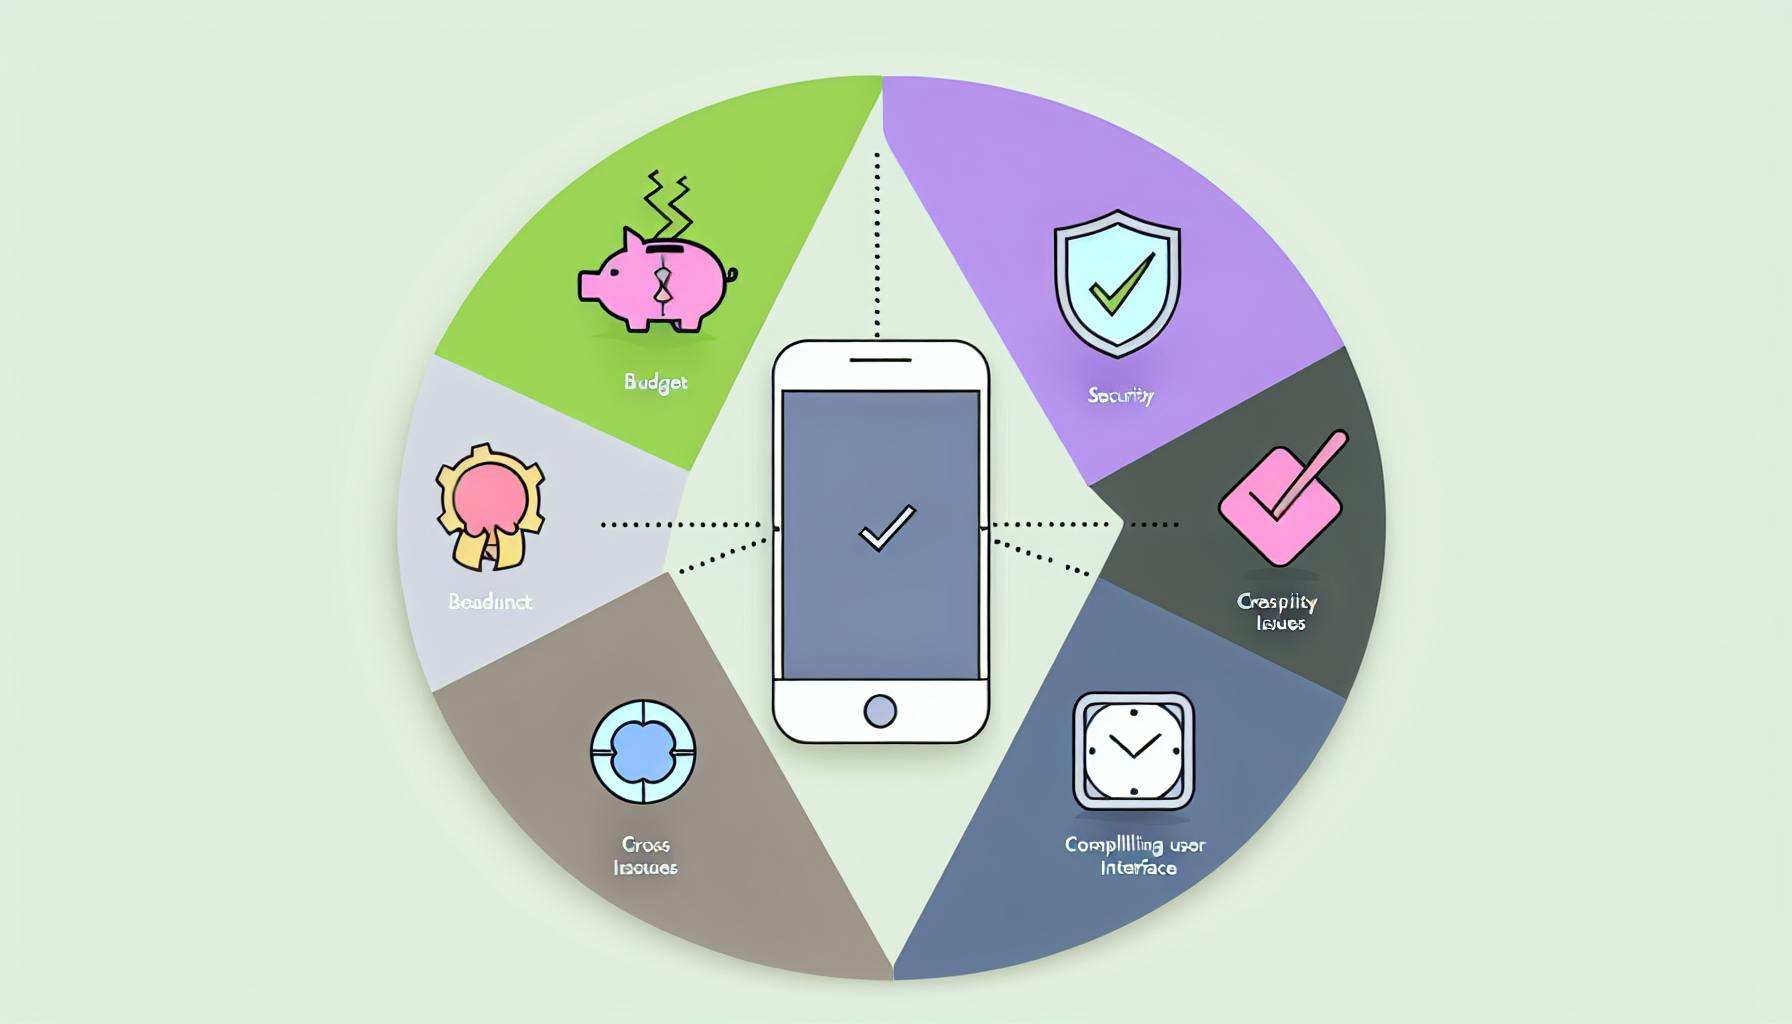
Professional Mobile App Development: Overcoming Challenges
Professional mobile app development is full of challenges, but with the right strategies, these can be overcome. Whether it's dealing with budget constraints, meeting tight deadlines, ensuring cross-platform compatibility, creating a compelling user interface, or addressing security concerns, smart planning and the use of effective tools can lead to successful app development. Here's a quick overview:
- Budget Constraints: Prioritize features and use agile development to keep costs down.
- Meeting Deadlines: Outsource non-core tasks and automate testing to speed up the process.
- Cross-Platform Compatibility: Choose between native and cross-platform development based on your needs.
- User Interface: Follow platform guidelines and ensure consistency across your app.
- Security Concerns: Implement data encryption and regular penetration testing to protect user information.
By focusing on these key areas, developers can create apps that stand out in the competitive mobile market.
Common Development Challenges
Developers run into a few big problems, like:
- Budget constraints - Making a top-notch app costs a lot of money. This can be a big problem for small teams or startups with little cash.
- Meeting deadlines - Developers are always in a rush to get new features out. This can lead to messy coding and future headaches.
- Cross-platform compatibility - Making an app work well on all kinds of iOS and Android devices is tricky. This can cause bugs and app crashes.
- UI/UX design - It's hard to make an app that's both easy to use and packed with features.
- Security - Keeping user data safe and avoiding security risks takes a lot of careful work.
Getting past these issues takes good planning, smart work, and the right tools.
Navigating Budget Constraints
Making a great mobile app without spending too much money can be tough, but it's definitely possible with some smart planning. Here's how you can keep costs down while still making an app that does what it needs to:
Prioritizing Features
- Think about what your app really needs to do and what's most important for your business and your users.
- Start by building only the must-have features that are essential for your app's main purpose.
- Save the less critical features for later updates after your app is out.
- Kicking things off with a basic version of your app, also known as a minimum viable product (MVP), helps you test out your ideas and see what users think before adding more to it.
Agile Development Methodology
- Using short, focused work periods called development sprints can help keep things flexible and costs under control.
- Aim to finish a small part of the app in each sprint, which should last about 1-2 weeks.
- This approach helps keep the team on track and makes spending easier to predict.
- Regularly checking in with users and adjusting your plans based on their feedback is a smart move.
Leveraging Cost-Effective Tools
- Tools like React Native and Apache Cordova can make it cheaper to build and take care of your app.
- Using free, ready-made pieces of code from open source libraries can save time and money.
- Cloud services and not having to run your own servers can also cut costs.
- Using third-party tools for keeping an eye on app performance and fixing crashes is a cost-effective strategy.
By focusing on what's truly important, using an agile approach, and choosing the right tools, you can make a great app without breaking the bank. The main goal is to invest wisely in features that will make the biggest difference for your users right from the start.
Meeting Stringent Timelines
Meeting tight deadlines while ensuring your app is top-notch can be tough in professional mobile app development. But, there are smart ways to speed up the process without cutting corners.
Outsourcing Non-Core Tasks
- Hand off tasks like testing, making your code run smoother, and writing up instructions to teams that specialize in these areas. This lets your main developers focus on the big stuff.
- Having a team just for testing means they can quickly check new features and find any glitches day or night.
- Hiring freelancers can help get things like graphics, writing, or making your app work in different languages done faster.
Automated Testing
- Tools like Selenium and Appium can quickly check if your app works right on different devices.
- These tools can run through all the ways users might interact with your app way faster than a person could.
- They give quick updates on how new changes are doing, helping things move along faster.
- Setting these tests to run automatically whenever someone adds new code helps catch problems early.
Code Reuse
- Make parts of your app that can be used again for things like logging in, storing data, or user interfaces.
- Use ready-made parts from open source libraries and frameworks like React Native to save time.
- Reusing code means less work building the same things from scratch and fewer mistakes.
- Keep a well-organized collection of these reusable parts so your team can easily find and use them.
By making your workflow smarter, automating the routine stuff, and using what's already out there, mobile app teams can deliver great apps quickly. Projects stay on track, quality stays high, and you get to the finish line faster.
Ensuring App Store Approval
Getting your app approved by the app store can be a big challenge for app developers. To make this process smoother, it's important to closely follow app store rules, support different languages, and make sure your app's listing looks good.
Following Guidelines
It's really important to know and follow the app store's rules:
- Test your app on actual devices to make sure it works well.
- Make sure your app works with the latest versions of operating systems.
- Let the app store reviewers easily try out all parts of your app.
- If your app needs a login, provide a test account.
- Get all the right permissions and set up privacy policies properly.
Checking these rules often during development helps you avoid surprises. One of the main reasons apps get rejected is because they don't follow these guidelines.
Localization
Making your app available in several languages can help more people use it and can also help it get approved:
- Translate your app into at least 5 major languages.
- Make sure your design works when translations make text longer.
- Let users pick their language or set it based on their device's settings.
- Consider using professional translation services for better quality.
Supporting more languages makes your app more user-friendly around the world.
Optimizing Metadata
The information about your app in the app store needs to be clear and appealing:
- Descriptions: Keep it short and sweet, explaining what your app does and why it's great.
- Icons: Use clear, attractive icons that look good on all devices.
- Screenshots: Show off the main features and how your app looks on a device.
- Previews: Make a quick video that shows what your app is all about.
Making sure your app's listing is well-done can make a big difference in getting it approved and attracting users.
By sticking to the app store's rules, making your app available in multiple languages, and making sure your app's listing is the best it can be, you can make the approval process much easier. This also helps more people find and use your app.
Achieving Cross-Platform Compatibility
Making apps that work well on both iPhones and Android phones is tricky. Let's look at two main ways to build apps and see their good and bad points.
ApproachProsConsNative app development- Best performance
- Uses special features of each platform- Needs separate apps for iOS and Android
- Costs moreCross-platform app development- Write your code once, use it on both iOS and Android
- Costs less
- Easier to keep updated- Might run slower
- Can't use some special features
- Might look or feel different on different devices
React Native
React Native is a tool that lets you make apps for both iPhones and Android phones using the same code. It's like writing one set of instructions that works in two languages.
Benefits
- Works almost as well as apps made just for one kind of phone
- You can make your app for both iOS and Android at the same time
- You can use the same bits of code again in different parts of your app
- Lets you see changes as you make them
- Lots of people use and support it
By using React Native, app makers can focus on making their apps great without worrying too much about the differences between phones. This means they can make better apps faster, without being held back by technical stuff.
sbb-itb-8abf120
Creating a Compelling User Interface
Platform Guidelines
When making a mobile app, it's smart to follow the rules each phone system has for how apps should look and work.
For iPhone apps, stick to Apple's rules. They tell you about things like how your app should look, how to set up menus, and how to make sure people can use your app easily. Following these rules makes your app feel right at home on an iPhone.
For Android apps, follow Google's Material Design. This is a set of rules about how your app should be laid out, how things should look, and how to make sure your app is easy to use on Android phones.
Consistency
Making sure your app looks and feels the same everywhere is super important. Things like how your app is laid out, the symbols you use, the way text looks, the colors, and how things move should be the same no matter where someone is in your app.
Keeping things consistent makes it easier for users to know what to do next. They won't get lost or confused as they move around your app.
Expert Evaluation
It's a great idea to let experts check your app to find any tricky spots or things that could be better. They look at how easy it is to start using your app, understand what it does, and get things done.
Experts also check if your app makes sense and is easy to use, just by looking at it and trying it out. They make sure your app follows the rules for iPhone or Android apps.
Listening to what these experts say and making changes based on their advice can make your app much better. This means more people will enjoy using it.
Addressing Security Concerns
Keeping your mobile app safe is super important. It helps keep user information safe and makes sure people can trust your app. Here are some simple ways to make your app secure and keep it safe from hackers.
Data Encryption
- Use special tools like SQLCipher and OpenSSL to scramble sensitive data so only authorized people can read it.
- Pick strong scrambling methods like AES-256 because they're tougher to crack.
- Keep secret keys safe - don't leave them in places where others can find them easily.
- Check certificates carefully to stop sneaky attacks when your app talks to the internet.
Penetration Testing
- Get security pros to test your app for weak spots, especially in places where the app talks to other services, checks user inputs, or handles permissions.
- Do these tests often, especially after you make big changes, to find and fix new problems.
- Sort out the issues by how serious they are, so you can fix the biggest risks first.
- Always check again after you fix something to make sure it's really fixed.
Access Controls
- Use a system that gives people access based on their job or role to make sure they only see what they're supposed to.
- Decide who can see or use parts of your app based on their role.
- Make the rules detailed but not so much that they mess up how the app works.
- Keep an eye on who's trying to get in and what changes are being made.
By taking steps to find and fix security issues before your app goes live, you can avoid problems that might let hackers in or lead to a leak of user info. This keeps your app safe and maintains the trust of your users.
Conclusion
Making apps can be tough. You have to think about money, time, making the app work on all phones, and making it easy and fun to use. But, if you plan well, work smart, and use the right tools, you can get past these problems.
Key Takeaways
Here are some simple tips:
- Focus on what's most important. Start with the basics that your app really needs.
- Work in small steps. Break your work into short periods and check how things are going often.
- Use tools to check your app. This helps find problems faster and on different phones.
- Share code. Keep pieces of code that you can use again to save time.
- Stick to the rules. Make sure your app looks right on both iPhones and Android phones.
- Ask experts. Get advice to make your app better.
- Keep data safe. Use strong methods to protect user information.
- Check for weak spots. Always look for and fix security problems.
- Manage who gets access. Make sure only the right people can see or do certain things in your app.
Making apps is definitely challenging, but it's also a chance to be creative. By focusing on the users, using the newest tech, and working together, you can make apps that really stand out. Keep trying new things and learning, and you'll keep getting better at making apps.
Related Questions
What is the challenge of mobile app development?
Making sure an app is easy and enjoyable to use is really important. Things like how quickly it works and if it's simple to navigate matter a lot. If an app doesn't do well in these areas, people might stop using it and switch to another one.
What management challenges need to be addressed when building a mobile application?
Some big challenges in making an app include:
- Finding the right developers
- Agreeing on what the app should do
- Deciding if the app should work the same on all devices or just certain ones
- Keeping up with changes in phone systems
- Picking the best technology
- Making the app look good on all kinds of screens
- Keeping the app safe from hackers
- Making sure the app is quick and doesn't lag
How can I improve my mobile app development?
Here are some tips to make your app better:
- Find out what users like
- Pick the right features and platforms
- Let users use the app without internet
- Keep the design simple
- Don't put too many ads
- Make the look unique
- Organize content neatly
- Make sure your app shows up in app store searches
Why is mobile app development difficult?
Making apps is tough because there are so many different Android phones out there. Developers need to make sure their app works well and looks good on a huge variety of devices, each with its own screen size and specifications.
Related posts

Mobile App Development Challenges: Navigating User Expectations
Developing mobile apps comes with a set of challenges that developers need to navigate to meet user expectations. Here’s what you need to know in simple terms:
- Understanding User Expectations: Mobile users demand personalized experiences, intuitive UI/UX, robust security, and privacy. Meeting these expectations is crucial for app success.
- Evolving User Expectations: User wants change over time, influenced by new technologies and trends. Continuous market research and user feedback are vital.
- Security and Privacy Concerns: Protecting user data against breaches is paramount. Encryption, regular security checks, and clear data use policies are essential.
- Seamless User Experience Across Devices: Apps must offer a consistent experience on different devices and screen sizes, which requires responsive design and extensive testing.
- Integration with Emerging Technologies: Incorporating technologies like AI and AR/VR presents challenges due to their evolving nature but can set an app apart.
- Continuous Updates and Compatibility: Keeping up with OS updates and new devices is necessary to avoid app obsolescence.
Working with a seasoned mobile app development company can help navigate these challenges effectively, leveraging their expertise across platforms and devices, focusing on user experience, and employing the latest technologies. The goal is to stay ahead by continuously improving the app in response to user feedback and technological advancements.
Personalized Experiences
Users like apps that know what they want. To do this, app makers can:
- Use smart suggestions to show users things they might like
- Let users set up alerts that matter to them
- Keep track of how users interact with the app to offer more of what they like
Putting in the extra work to make these things happen can make users more likely to stick around.
Intuitive UI/UX
The app should be easy to use and look good. This means:
- Keeping the design simple and familiar
- Making sure the app looks and works the same on all devices
- Organizing information so it’s easy to find
- Helping users with tips when they need it
Finding out what works best involves asking users, looking at data, and testing different ideas.
Security
Users want to know their personal information is safe. This means:
- Keeping data secure when it’s sent or stored
- Using passwords or fingerprints to check who’s using the app
- Checking the app for security problems and fixing them fast
- Being ready to fix any security issues that come up
Gaining users' trust by keeping their data safe is crucial.
Privacy
Users want to feel in control of their information. App makers can help by:
- Being clear about what data they’re collecting and why
- Letting users choose what information they share
- Explaining how data is used
- Making it easy for users to say no to data collection
Respecting users' privacy makes them more likely to use the app happily.
Understanding what users expect helps app makers create apps that people enjoy using. Keeping up with what users like and don’t like by asking them and looking at how they use the app is important. This way, app developers can keep improving the app and keep users interested.
Challenge 1: Evolving User Expectations
Problem
It's tough for those who make apps to keep up with what users want because these wants keep changing. As new technology comes out and what people like changes, developers have to make sure their apps stay up-to-date. If they don't, users get upset, and they might stop using the app.
Here are a few reasons why keeping up is hard:
- Frequent platform updates - Systems like iOS and Android often bring out big updates. Developers have to make sure their apps work with these changes and use any new features.
- Competitive innovation - The world of apps is always changing. Other apps might add cool new features, and then users start expecting these from all apps.
- Changing user habits - How people use their phones changes a lot. For example, more people like using messages and stories now, so they want apps to offer similar things.
All of this means that what users want from apps keeps changing. If developers only focus on what users want right now, their apps will quickly feel old.
Solution
To keep up with what users want, developers need to constantly watch and react to these changes.
Conduct ongoing market research
- Ask users what they think and what they want more of
- Look at app store reviews and online comments to find out what users don't like
- Keep an eye on what other apps are doing
Build in feedback mechanisms
- Add ways for users to tell you what they think, like polls or ratings inside the app
- Talk to groups of users to get deeper insights
- Make it easy for users to send feedback
Take an iterative approach
- Update the app often to try out and improve new features
- Start with a basic version of new features to see how users react, then make them better
- Use a design that lets you easily change parts of the app
This mix of keeping an eye on the market, listening to users, and making frequent updates will help make sure your app stays interesting. As what users want changes, you'll be ready to update your app to match. This way, you're always ahead, not just trying to catch up.
Challenge 2: Security and Privacy Concerns
Problem
When mobile apps gather lots of user info, people start worrying more about hackers and their privacy. Developers need to make sure they protect this data well to keep users' trust. If they don't, bad things can happen like:
- People could have their money or identity stolen
- Important personal details might be lost forever
- If there's a data leak, it could scare away users and look really bad
- Not following the rules could mean big fines and legal trouble
Users also want to know how their info is used by apps. If developers don't make this clear and ask users' permission, they could upset a lot of people.
Solution
To keep data safe and respect users' privacy, developers should:
Use encryption and check who's logging in
- Make sure data sent or stored can't be read by others by using encryption
- Check who's using the app with passwords or fingerprints
- Change encryption keys often to keep things secure
Check for security risks often
- Always watch for any strange activity in the system or with data
- Review the app's code to find possible weak spots
- Test the app to find any security issues
Be clear about data use and ask for permission
- Tell users exactly how their data will be used
- Let users say no to data collection and delete their info
- Always get a clear yes before gathering sensitive data
Have a plan for when things go wrong
- Be ready with a quick way to find, stop, and tell users about any data leaks
- Know how to fix the problem, get data back, and stop it from happening again
Making sure security and privacy are top priorities from the start is the best way to build trust with users and avoid big problems with data.
Challenge 3: Ensuring a Seamless User Experience Across Devices
Problem
Making a mobile app that looks and works great on all kinds of devices, like phones and tablets of different sizes, is really hard. People expect to use an app on their phone one minute and on their tablet the next without any issues.
Here's why this is tough:
- Varying screen dimensions - Phones come in all sorts of sizes now. Creating an app that looks good on both small and big screens isn't easy.
- Different device capabilities - Devices like tablets, phones, and even smartwatches all do different things. Making an app that works well on all of them can get pretty complicated.
- Cross-platform support - People want to use their app on both iOS and Android devices without missing out on anything. It's hard to make sure the app works the same on both.
If an app wasn't made to adapt to different screens from the beginning, fixing it later can be really hard. This can make users unhappy if they expect their apps to work perfectly on any device.
Solution
To fix this problem, developers should:
Prioritize responsive design
- Make layouts that adjust to any screen size
- Ensure text, buttons, and other parts change size smoothly
- Design screens to be easy to use with touch, not just with a mouse or keyboard
Design for the smallest screen first
- Start with making the app work on phones before thinking about bigger screens
- As you move to larger devices, add more content instead of taking things away
Conduct extensive cross-device testing
- Test the app on lots of different devices while it's being made
- Fix any problems that show up on certain devices
- Try to make sure the app can do the same things across all devices and platforms
Enable seamless state syncing
- Use online storage so users can switch devices without losing their place
- Make sure users can pick up where they left off, even on a different device
- Keep users logged in and remember their settings across devices
Starting with a design that works on any device and testing a lot during development can help solve this problem. It means more work at the beginning but results in users being happier because they can use the app easily on any device.
Challenge 4: Integration with Emerging Technologies
Problem
Adding new tech like AI, AR/VR, into mobile apps is tough. These technologies are always changing, making it hard for developers to keep up.
Here’s what makes it difficult:
- Quickly changing APIs and SDKs - The tools developers use to add new tech into apps change a lot, causing lots of rework.
- Lack of stability and maturity - New tech often has problems like bugs or missing features.
- High development costs - Using advanced tech needs special skills and lots of testing, which costs more.
- Questions around user adoption - It’s not always clear if people will like or understand the new tech.
With all these changes and unknowns, it’s hard for developers to add the latest tech into apps. If they don’t, though, their app might seem old-fashioned.
Solution
Instead of guessing which new tech will work out, developers should take small steps:
Start with minimum viable products (MVPs)
- Try out small parts of the new tech first
- Use these tests to see how people react
- Be ready to remove these parts if they don’t work out
Work closely with tech partners
- Join forces with companies that make the new tech
- Get help to fix problems quickly
- Share your thoughts to help improve their products
Analyze user feedback and behavior
- Use data to see how people use the new features
- Ask users for their opinions
- Look for signs that the new tech isn’t useful to them
Improve integrations gradually
- Use what you learn to make the new tech better
- As the tech gets more stable, add more features
- Slowly build up to more complete and polished experiences
This careful approach lets mobile developers add new tech without feeling overwhelmed. By starting with small tests and learning as they go, they can make the new tech better over time.
sbb-itb-8abf120
Challenge 5: Keeping Up with Continuous Updates and Compatibility
Problem
Making sure a mobile app works well with the newest operating systems (like iOS and Android) and devices is a big task. Every time a new version of an operating system or a new device comes out, developers have to update their apps. But things change so fast, it's hard to keep up.
Here's what makes it tough:
- Frequent OS updates - iOS and Android often release new versions, sometimes more than once a year. These updates can change things and cause apps to break.
- Variations in devices - Every year, new iPhones and Android devices come out, leading to thousands of different combinations of hardware. Making an app work well on all these different setups is really hard.
- Short update timelines - Apple and Google don't give developers much time to get their apps ready for new updates. If apps aren't updated in time, they could be removed from app stores.
- Development bottlenecks - Keeping up with updates requires a lot of coordination between developers, testers, and those who release the apps. When updates keep coming, it's easy for these teams to get bogged down.
If developers don't regularly update their apps to work with new OS versions and devices, the apps can start having problems, which frustrates users and can lead to the apps being taken off app stores.
Solution
To manage constant updates, developers should be flexible and prepared:
Set up a dedicated compatibility team
- Have a special team that focuses only on making sure the app works with new updates and devices.
Build basic compatibility early
- From the beginning, make your app in a way that it can easily adjust to new operating systems.
- Use a design that makes it simple to update the app.
Test on beta OS versions
- Try your app on early versions of new operating systems.
- Find and fix any issues before everyone else starts using the new version.
Automate testing across devices
- Use tools that let you quickly check how your app works on many different devices.
- Find bugs that might not be obvious right away.
Plan update timelines around releases
- Keep track of when new operating systems and devices are coming out.
- Schedule your updates based on these dates to make sure your app is always ready.
By staying organized and ready for changes, developers can make sure their apps keep working well, no matter what new updates come out. This keeps users happy and the app in good standing.
Implementing Solutions: Partnering with a Mobile App Development Company
Working with a company that knows a lot about making mobile apps can help solve many of the problems we've talked about. A company like Zee Palm can be really helpful because:
Expertise Across Platforms and Devices
Zee Palm has been making apps for iOS, Android, and the web for over 20 years. They know all about the latest updates, different devices, and how to make sure an app works well no matter where it's used.
Focus on User Experience
Zee Palm always checks in with users to see what they like and what could be better. They use this info to make quick updates, making sure their apps are easy and fun to use.
End-to-End Services
Zee Palm takes care of everything:
- Figuring out what you need
- Sketching out the app's design
- Making the app look good
- Building and testing the app
- Getting the app ready to launch
- Helping out after the app is out there
They walk you through each step, making sure you always know what's going on.
Use of New Technologies
Zee Palm uses the latest tech to build apps. This means they can add cool features using AI, AR, or blockchain, making your app stand out.
Affordable Pricing
Zee Palm has different pricing plans that can fit any budget. This makes it possible for even new businesses to get a custom app without spending too much.
By working with Zee Palm, you can get past the tough parts of making a mobile app and end up with something users will really enjoy. They make the whole process easier, so you can focus on your business.
Conclusion
Staying Ahead of Evolving User Expectations
Making sure your app keeps up with what users want and need is really important but can be tough. This article has shown that the world of apps is always changing, and developers need to keep their apps up to date, easy to use, and full of the features people want.
But, there are ways to handle these challenges:
- Conduct ongoing market research to keep an eye on what users like and don’t like.
- Build in feedback channels so you can hear directly from users about what works and what doesn’t.
- Take an iterative approach by constantly updating your app with improvements and new stuff.
- Prioritize security and privacy by protecting user data and being clear about how it’s used.
- Design for consistency so your app works well on all devices, whether it’s an iPhone or an Android tablet.
- Gradually integrate emerging technologies by testing out new features in small steps.
- Create robust compatibility practices to make sure your app works with the latest updates of iOS and Android.
Working with a company that knows a lot about making apps, like Zee Palm, can also help a lot. They’re experts in making apps for different platforms, they focus on what users want, they cover everything from planning to launching your app, they use the latest tech, and they have pricing that works for different budgets.
In the end, the companies that do well in the app world are the ones that are always ready for change, listen to their users, and keep making their apps better. With the right approach and help, developers can stay on top of what users want and keep their apps popular. The world of mobile apps is always moving, but if you focus on your users and keep improving, your app can stay ahead.
Related Questions
What are the common problems encountered in mobile application development?
When making mobile apps, some usual troubles include:
- Not knowing who will use the app and what they need
- Teams not talking well enough with each other or with the people they're making the app for
- Apps not working well on all phones and tablets
- Not planning properly for what the app should do, how long it will take, and how much it will cost
- Worrying about keeping the app and user information safe
To dodge these issues, teams should really understand who will use the app and what they want, talk clearly with everyone involved, test the app on many devices, plan carefully, and always think about security first.
Which one is the challenge of mobile application development?
A big challenge is making sure the app works on lots of different phones and tablets. It's tricky because iOS (like iPhones) and Android phones and tablets all have screens that look different. Developers have to make sure the app looks good and works well no matter the screen size or device type.
Testing a lot on actual devices and using design tricks that make the app adjust to any screen size are important. Starting with a mobile-first design can also help manage this challenge.
What are the weaknesses of mobile app development?
Weak points in making mobile apps include:
- It can cost a lot and take a lot of work
- Apps need regular updates and care
- There are costs to put apps on app stores
- It can be hard to make money from the app
- There are risks of hackers and privacy leaks
- The app needs people to download and keep using it
Making an app takes a big investment, and to be successful in the long run, the app must be really useful and well-made.
Why mobile app development is difficult?
Making apps is especially hard because there are so many different phones and tablets out there. This is called device fragmentation. For example, Android phones and tablets come in all shapes and sizes, and even iPhones have different screen sizes.
Developers have to think about:
- Different screen sizes and qualities
- Different hardware like processors and cameras
- Different versions of the operating systems
- How people use their phones and tablets
- Making sure the app works well on both cheaper and more expensive devices
Handling all these differences during making and testing the app is important for a good app experience.
Related posts

UX Designer Services for Mobile App Success
Creating a successful mobile app hinges on exceptional UX design. At Zee Palm, we prioritize understanding our users, iterating based on feedback, and maintaining simplicity and engagement throughout the design process. Here's what you need to know:
- UX Design Essentials: Focus on user needs, create straightforward navigation, and ensure the app is visually appealing and functional.
- Evolution of Mobile UX: From basic interfaces to sophisticated, interactive experiences.
- Roles & Skills of UX Designers: In-depth user research, wireframing, prototyping, and usability testing are key.
- Design Process: Begins with user research, followed by wireframing, prototyping, and rigorous testing.
- Key Principles: Simplicity, consistency, responsiveness, and mobile-centric design.
- Enhancing UX: Leverage new technologies like AI and AR, and prioritize accessibility.
- Common Pitfalls: Overloaded screens, complex navigation, and ignoring platform guidelines.
- Future Trends: Spatial interfaces, predictive experiences, and extended reality.
Remember: Good UX design is about making apps that are not just easy to use but also engaging and enjoyable, keeping user needs at the forefront.
What is UX Design?
UX design is all about making sure that when someone uses a mobile app, they find it easy, accessible, and enjoyable. For mobile apps, this means creating screens and steps that let users do what they want without any hassle.
Here's what UX designers do for mobile apps:
- They get to know the app's users and what those users need.
- They create profiles and stories for these users.
- They plan out how the app will flow and how information will be laid out.
- They sketch out and test how users will interact with the app.
- They see how real people use their designs and make changes based on what they learn.
The main goal is to smooth out any rough spots and make using the app a positive experience that keeps users coming back. UX design isn't just about making the app look nice; it's about the whole experience of using the app from start to finish.
The Evolution of UX Design in Mobile
As mobile phones have gotten better, UX design has had to change too:
Early Mobile UX
- Small screens with low quality
- Few ways to input (like buttons)
- Simple screens that took you step by step
- The main focus was on making it easy to get things done
Modern Mobile UX
- Big, clear touchscreens
- Swiping and tapping
- Attractive, interactive screens
- It's still about making things easy, but also fun and engaging
Now, UX designers work on making apps that are not only easy to use but also look great and feel right for people using them on the go. They have to think about how people use their phones in different situations and use features like GPS and cameras. As new tech like AI and virtual reality comes into play, mobile UX design keeps evolving. UX designers need to keep up with the latest trends and tools to create top-notch mobile experiences.
The Role of UX Designers
UX Designer Responsibilities
UX designers are super important when making a mobile app. Here's what they do:
- They talk to and learn about the people who will use the app to find out what they need and what bugs them.
- They make up profiles and stories for these users.
- They plan how the app will work and how to organize the information.
- They draw early versions of the app screens to show how the app might look.
- They test these designs with real people to see if they work well.
- They work with the app builders and project leaders to make sure the designs are used correctly.
Their main job is to make sure the app is easy and fun for people to use.
Essential UX Designer Skills
To be good at designing for mobile apps, UX designers need some key skills:
User Research: They need to be great at asking users questions and using surveys to figure out what users need.
Information Architecture: They organize information so it's easy for users to find what they're looking for.
Interaction Design: They plan how users will move through the app and interact with it.
Wireframing: They make simple drawings that show the basic layout of the app's screens.
Prototyping: They build a working model of the app that people can try out to see how it works.
Usability Testing: They watch people use the app to find problems and fix them.
Visual Design: They make the app look good with colors, fonts, and pictures.
Tools of the Trade
UX designers use a bunch of tools to help them do their job:
- Wireframing & Prototyping: Tools like Figma, Sketch, and Adobe XD help them draw up plans for the app.
- Usability Testing: Tools like UserTesting and Lookback let them see how people use the app.
- User Research: Tools like Google Forms help them ask questions and gather info from users.
- Analytics: Tools like Google Analytics help them see how people are using the app and where they might be having trouble.
They also follow good design practices to make sure the app is consistent and works well on different devices.
UX Design Process for Mobile
The way we make mobile apps is pretty straightforward but thorough. We start by really getting to know who will use the app. Then, we draw up simple plans, test them out, and keep improving until everything feels just right.
Initial User Research
First off, we chat with users, send out surveys, and watch how they use apps. Creating user personas helps us understand what users want, what bugs them, and what could make their lives easier. This step is crucial because it guides everything we do next.
For example, users might tell us they:
- Need a quick way to keep track of spending on business trips
- Find it annoying to split bills using current apps
- Really like a scanning feature in another app
These insights shape our design from the ground up.
Mobile Design Constraints and Opportunities
Making apps for phones comes with its own set of challenges and cool possibilities.
Challenges include:
- Small screens
- Using fingers instead of a mouse
- Internet that can be slow or spotty
- Calls or messages popping up
Cool stuff we can use:
- Phone features like the camera and GPS
- Touch actions like swiping and tapping
- Making sure the app looks good whether you hold your phone upright or sideways
We think about all these things from the start as we plan out the app.
Wireframing and Prototyping
Next, we sketch out our ideas for the main parts of the app. These sketches, called wireframes, are all about planning where things go and how the app will work, without worrying about colors or style yet.
Then, we use tools like Figma and Adobe XD to make these sketches clickable. This lets us and others test if the app's flow makes sense. Watching how real people use our prototype helps us fix any confusing spots.
This step involves a lot of teamwork, with designers, developers, and project managers all working together.
Usability Testing

We test our designs with real users at different stages. If someone looks puzzled or says, "I don't get this," we know we have more work to do.
Testing early ideas lets us experiment easily. Checking the designs later ensures the app is easy and fun to use in the end.
We keep tweaking based on feedback until new users can use our app smoothly. This focus on what users need leads to apps that are simple and enjoyable to use.
Key UX Design Principles for Mobile
When making apps for phones and tablets, there are a few important rules to keep in mind. These help make sure the app is easy and fun to use.
Simplicity
With small screens, you've got to keep things simple. This means only showing what's really important and getting rid of anything that's not needed. This helps people find what they want fast and without any hassle.
Here's how to do it:
- Make sure everything is organized and easy to find.
- Make screens that are easy to understand right away.
- Stick to just the basics for pictures and text.
- Try to make tasks as short and straightforward as possible.
Consistency
Apps should feel like everything fits together well. This means things look and work the same throughout the app.
To keep things consistent, designers should:
- Use the same symbols, buttons, and menus everywhere.
- Make sure moving through the app feels logical.
- Keep the look and feel the same from start to finish.
- Make common actions, like swiping, work the same way throughout.
This makes the app feel more put together and easy to use.
Responsiveness
Apps need to work well no matter what. This means they should look good on all kinds of devices and work fine even if the internet is slow.
Here are some things to think about:
Different devices: Can people use the app on various phones and tablets?
Internet speed: Does the app still work well if the internet is slow?
Using the app: Does the app work well for people on the move and those sitting down?
Making sure the app can handle these situations means it's more reliable.
Focus on Mobile Users
Remember, people use their phones differently than computers. So, apps need to be made with mobile users in mind. This means:
- Learning how people use their phones.
- Designing for tapping and swiping instead of clicking.
- Making apps for quick, short uses.
- Thinking about the challenges of small screens.
By focusing on these rules - keeping things simple, consistent, responsive, and tailored for mobile users - designers can make apps that people really enjoy using.
Strategies for Enhancing Mobile UX
Leveraging Latest Technologies
New tech like AI (Artificial Intelligence), AR (Augmented Reality), and VR (Virtual Reality) can make mobile apps more fun and easier to use. Here's how:
- AI-powered personalization - AI can help apps learn what you like and don't like, making the app more suited to you.
- Immersive AR/VR - These let you see digital things in the real world or dive into 3D worlds. For instance, an app might let you see how a new couch would look in your living room.
- Conversational interfaces - Talking to apps through chatbots or voice helps make using them feel more natural.
- Contextual awareness - Apps can now understand where you are and what you're doing, offering info or features that fit the situation.
But remember, these cool features should make the app better, not just be there for the sake of it. They need to be added in a way that makes sense for the users.
Accessibility and Inclusiveness
Making sure everyone can use an app, including people with disabilities, is super important. Here are some tips:
- Follow accessibility guidelines - Stick to the rules that make apps easier for everyone to use.
- Support assistive technologies - Make sure your app works well with tools like screen readers.
- Test with real users - Check how people with different needs use your app and make changes based on what you find.
- Provide multiple interaction modes - Let users choose how they interact with your app, whether it's touching, speaking, or using special devices.
- Deliver flexible content - Give users options to change how the app looks to them, like adjusting text size or changing the layout.
Thinking about all users from the start means making apps that are better for everyone. By paying attention to different needs and abilities, we can make mobile experiences that more people can enjoy.
Case Studies
Here are some examples of mobile apps that are really good at making things easy and enjoyable for their users, and what we can learn from them:
Taxi Booking App
This app lets you book a taxi really quickly.
Key UX wins:
- The booking process is super simple - just type in where you want to go and your payment info. You can get a ride in less than a minute.
- The map is easy to use. You can pick your location, see taxis nearby, and watch your driver coming to you.
- You can save your frequent locations to make booking even quicker next time.
- The app updates you without needing to check it constantly.
- The design is clean and easy to understand.
This app shows how making things simple and using features like GPS can make using an app feel effortless.
Takeaways:
- Make the most important tasks really easy to do.
- Use features that phones already have to make things more convenient.
- Let the app handle updates and notifications for the user.
Mobile Banking App
This app makes it easy to handle your money from your phone.
Key UX hits:
- The main page shows your spending, income, and balances right away.
- Sending money to your own accounts or friends is easy.
- You can quickly find past transactions.
- Logging in is secure and can be done with your fingerprint or face.
- It gives you helpful tips on how to save or spend smarter.
The app is great at making banking simple and user-friendly on a mobile device.
Learnings:
- Put the features people use the most front and center.
- Quick and secure login is a must.
- Use the data you have to offer helpful insights to the user.
Fitness Tracker App
This app is all about making it easy to keep track of your workouts and what you eat.
UX wins:
- Logging exercises is quick and has shortcuts.
- You can log food in different ways, making it flexible.
- There are lots of workout plans and recipes to try out.
- It shows your progress in a clear and simple way.
- There are social features like joining groups or taking on challenges.
The app keeps things straightforward while still letting you customize it to your needs.
Key takeaways:
- Make entering information quick and easy.
- Offer customization but keep the app simple to use.
- Show progress clearly and simply.
- Add more value by including ways to connect with others.
By looking at what makes these apps work so well, we can learn how to make our own apps better. Understanding why people enjoy using these apps can help us create more enjoyable mobile experiences.
sbb-itb-8abf120
Common UX Pitfalls
When making mobile apps, it's easy to slip up in a few common areas that can make the app hard or annoying to use. Here’s what to watch out for to keep your app smooth and user-friendly.
Overloading the Home Screen
Putting too much stuff on the main screen is a mistake many make. It can make the app feel messy and confusing.
Best practices:
- Focus on the 3-5 most important things
- Use simple bottom menus
- Allow swiping to see more options
A clean main screen makes the app welcoming and easy to start using.
Complex Navigation
Making users tap or swipe too much just to find what they need adds unnecessary hassle. Yet, it’s common to see apps with complicated menus.
Tips to simplify:
- Keep menus simple, ideally just one or two steps
- Use easy-to-read menu names
- Add a search feature to help users find things quickly
Easy navigation means getting around the app with just a few taps.
Overloaded Forms
Asking for too much information all at once can scare users away, especially on a small screen.
Better approaches:
- Only ask for the basics at first
- Split forms into smaller parts
- Give hints or examples for filling in details
Short, simple forms encourage users to keep going.
Ignoring Platform Guidelines
Both iOS and Android have their own look and feel that users are used to. Ignoring these can make your app feel out of place.
Getting it right:
- Stick to the usual ways of moving around the app
- Use icons and actions that users recognize
- Follow the usual rules for things like swiping
Using familiar designs makes the app feel natural to use right from the start.
Lacking Visual Hierarchy
If everything on the screen looks the same, users won’t know where to look first. This is an easy thing to miss on mobile.
Fixes include:
- Use space, size, and color to highlight important parts
- Make the main action stand out
- Keep the layout consistent across the app
A clear layout helps users understand and use the app without getting lost. Keeping an eye on these common mistakes helps make sure your app is easy and enjoyable to use. Starting with these tips in mind can lead to a more successful app.
The Future of Mobile UX Design
Emerging Trends
As phones and apps get smarter, there are new ways we can expect to use them. Here are some trends that are changing how we interact with our apps:
Spatial Interfaces
Phones can now use their cameras and sensors to let us control apps by moving the device or using gestures. This feels more natural than just tapping.
Predictive Experiences
Thanks to AI, apps can guess what we might want to do next, offering suggestions that feel tailor-made for us.
Multimodal Interactions
We can now use different ways to interact with apps, like talking, typing, or even pointing. This makes apps easier for everyone to use.
Assistants and Bots
Smart helpers in apps can do tasks for us or chat, making things simpler so we can focus on what's important.
Extended Reality
AR and VR mix digital things with the real world or create new worlds for us to explore. This can make apps more fun and engaging.
As these trends grow, designing apps will be more about guessing what users need, making things simpler, and creating fun experiences.
Preparing for the Future
For designers, staying up-to-date with new tech is key to making cool app experiences. Here's how they can keep learning:
- Learn new design tools and methods like how to design for gestures or use AI to make apps smarter.
- Explore emerging tech by trying out new gadgets, taking online courses, or making your own projects.
- Collaborate across disciplines to bring new features into designs.
- Observe people using new interfaces to see what works and what doesn't.
- Make concepts tangible quickly by building prototypes to test out ideas.
The future of mobile is full of opportunities to make using apps easier, more personal, and fun. Designers who keep learning about new tech can create amazing things that tap into these opportunities.
Conclusion
Making a mobile app that people really like is all about focusing on the user experience, or UX. This means we work hard to understand what users need, make changes based on their feedback, keep the app simple to use, and make sure it's fun too.
At Zee Palm, our UX team is part of the app-making process from the beginning to the end. We start by talking to users to figure out what they need and what problems they have. We plan how the app should work and draw early versions of it. We then make these early versions into something we can test with real users to find any issues. And we always keep an eye on how the app is doing, looking for ways to make it better.
This approach lets us make more than just good-looking apps. We create apps that are easy to use, make sense, and are enjoyable, which are built just for our clients' users. This results in custom apps that not only look great but also really connect with users.
As new things like AI, virtual reality, and other tech become more common, we're always learning and trying out new ideas to make our apps even better. But, no matter what new tech we use, we always focus on the people using the app. By keeping user needs as our main guide, we make apps that people enjoy using now and will continue to enjoy in the future.
FAQs
Here are some common questions about making apps easy and fun to use:
What are some key things to focus on when designing mobile app UX?
When making apps for phones, it's important to:
- Keep the screen clean and simple
- Make sure people can do what they need quickly and easily
- Arrange things in a way that makes sense
- Make buttons big enough to tap easily
- Make filling out forms easy on a phone
How is designing for mobile different than designing for web or desktop?
Making apps for phones is special because:
- The screens are smaller, so you need to be really clear about what's most important
- People tap and swipe instead of clicking with a mouse
- People use their phones in all sorts of places, so the app needs to be easy to use everywhere
- You can use the phone's camera, location, and other cool features
What are some common mobile UX pitfalls to avoid?
Some mistakes to watch out for include:
- Making the screen too busy
- Making it hard to find things or move around the app
- Asking for too much info all at once
- Not making it clear what's most important on the screen
- Not making the app feel right on either iPhones or Android phones
How can you make sure a mobile app is accessible?
To make apps everyone can use:
- Make sure the app works with tools like screen readers
- Let people change the text size and colors
- Use colors that are easy to see together
- Describe pictures and buttons so everyone knows what they are
- Follow the rules that make websites easy for everyone to use
What emerging trends are shaping the future of mobile UX design?
Some cool new things in app design include:
- Using gestures or moving the phone to control the app
- Apps that guess what you want to do next
- Talking to apps or using chat
- Mixing digital things with the real world or creating new worlds in apps
- Making apps more personal and aware of where you are and what you're doing
Related Questions
How much does app UX design cost?
The price for designing the user experience (UX) of an app can be anywhere between $3,000 and $30,000. It really depends on how complex your app is, where your design team is located, and if you're hiring a specialized UX team or a full development team that includes UX design. Generally, simpler apps and local teams will cost less, while more complex apps and teams from other countries might cost more.
How can I improve my UX design of my mobile app?
To make your mobile app's UX better, follow these steps:
- Use a tool that shows you how people use your app.
- Look for parts of your app where users seem to have trouble.
- Ask users what they think by using surveys and tests.
- Focus on fixing the big issues first.
- See if your changes help keep users around longer.
Keep making changes and checking if they work. Use what you learn from data and what users tell you to keep improving.
What do UX designers need to consider when designing for mobile devices?
When designing for mobile, UX designers should think about:
- Making pages load quickly
- Keeping things simple for users
- Designing for holding the phone upright
- Using small images
- Making it clear what's most important on the screen
- Using colors that stand out
- Using big text
- Keeping the screen uncluttered
Sticking to these basics makes the app easy and fun to use.
How to design UI UX for mobile apps?
Designing the UI (user interface) and UX for mobile apps involves these steps:
- Come up with app ideas.
- Find out what users need.
- Organize what you learn.
- Plan how users will use the app.
- Make early versions of your designs.
- Test these designs with users.
- Create a design system.
Testing and improving your designs based on feedback is key to making a great mobile UI and UX.
Related posts
Ready to Build Your Product, the Fast, AI-Optimized Way?
Let’s turn your idea into a high-performance product that launches faster and grows stronger.