Insights from Zee Palm's Team
We talk about products, app development, and next-generation apps.
How to Build an AI Chatbot With Flutter
Remember the days when customers had to wait anxiously for support responses from businesses often enduring frustrating delays? Well, those days are becoming a relic of the past, thanks to the transformative power of AI chatbots. Nowadays, businesses can deliver instantaneous support around the clock, enhancing customer satisfaction. Find more about How Chatbots Benefit Your Business
AI chatbots are software applications powered by artificial intelligence technologies that simulate human-like conversations with users. They can understand natural language inputs, interpret user intents, and generate appropriate responses, providing a seamless and efficient way for users to interact with software systems.
Why Build an AI chatbot with Flutter?
Flutter offers a versatile and efficient framework for building cross-platform mobile apps. By leveraging Flutter for AI chatbot development, developers can benefit from
- Faster development because of its hot reload feature enabling rapid iterations.
- Native performance and smooth user experience, as it translates to native code.
- Attractive UI as it provides customizable widgets and animations.
Designing the Chat Interface
First, you need to set up your Flutter project, then you can start designing the chat interface. When designing the chat interface, consider the following aspects:
- Design a user-friendly interface using Flutter widgets such as ListView, TextField, and GestureDetector. Implement features like message bubble, input text field, and send button.
- Customize the appearance of incoming and outgoing messages to distinguish user input and chatbot responses using different colors, visual clarity, etc.
Choosing Your Approach
There are two main approaches to building an AI Chatbot.
i- Using Pre-built Services
To use a pre-built service you can follow the steps below
- Choose the right service based on factors such as price, features, scalability, and ease of integration. Sign up for the selected service
- Define intents based on common queries and actions. Create entities to extract relevant information from user messages, and response templates for each intent to provide meaningful and contextually appropriate replies.
- Train the model using sample conversations and test its accuracy and performance. Monitor training metrics such as accuracy, precision, etc.
- Use the service’s API or SDK to send user messages and receive chatbot responses.
- Implement authentication and error-handling mechanisms.
- Use asynchronous programming techniques in Flutter to make API calls without blocking the main UI thread. Handle network requests and responses using packages like http or dio. Update the UI dynamically as new messages are sent and received.
Pros
- Pre-built services offer ready-to-use solutions with minimum setup and configuration required.
- They often come with advanced NLP capabilities, including entity recognition, sentiment analysis, and multi-language support.
- Cloud-based services can handle high volumes of data and scale dynamically to meet the growing demand.
Cons
- There’s limited customization and flexibility, restricting the ability to tailor to specific use cases.
- It can be expensive for high-traffic applications.
ii- Building Your Own Models
To design your own model, you can adhere to the following steps
- Identify sources of data relevant to your chatbot’s domain and use case. Collect data from public datasets, online forums, or synthetic data generation tools.
- Clean the data by removing irrelevant information, and errors, standardizing the text formats. Tokenize sentences into individual words or tokens for further processing.
- Define intents and label data samples with corresponding intents, entities, or slots. Create training, validation, and test datasets to train and evaluate your AI model.
- Select a machine learning algorithm or model architecture suitable for your requirements. Train the model using labeled training data. Evaluate its performance on the validation dataset and fine-tune it.
- Choose a deployment option based on factors such as scalability, latency, and cost. Deploy the trained model to a cloud platform such as Google Cloud Platform, AWS. or Azure, using containerization or serverless computing. Or, you can deploy it to local server or edge device for offline or low-latency inference.
- Expose the deployed model through a RESTful API or GraphQL endpoint for interaction with client application.
- Implement methods for sending user messages and receiving chatbot responses over HTTP or WebSocket protocols. Secure the API endpoints with authentication mechanisms such as API keys or OAuth tokens.
- Use Flutter's http or dio package to make HTTP requests to your API endpoint. Implement error handling and retry strategies for network requests to handle connectivity issues gracefully.
- Parse the JSON response from your API endpoint to extract the chatbot's reply and any additional metadata. Update the UI to display the chatbot's response in the chat interface, scrolling to the latest message as needed.
Pros
- You have complete control over the model's architecture, training data, and behavior. This allows you to tailor it to your specific domain, needs, and target audience. Providing higher accuracy and unique features.
- You retain complete ownership and control over your data. This is crucial if you're dealing with sensitive data or have strict privacy regulations to adhere to.
- You can build and scale your model to handle larger datasets and a growing user base.
Cons
- Building a custom model requires expertise in machine learning and NLP. This can lead to a longer development time compared to using pre-built services.
- Compared to pre-built solutions, you'll need to invest in computational resources, training data, and personnel.
- Unlike pre-built services that handle updates and bug fixes, you're responsible for continuously improving your model, addressing bugs, and adapting it to evolving trends and technologies
When choosing your approach you need to consider the following questions
- Does your team have the necessary skills to build and maintain a custom model?
- Do you require a quick solution or have time for development?
- How crucial is the customization and accuracy specific to the project’s domain?
- Is data security and control a major concern?
Whether utilizing pre-built services or building custom models, integrating AI chatbots with Flutter can revolutionize your business operations and drive customer satisfaction to new heights.
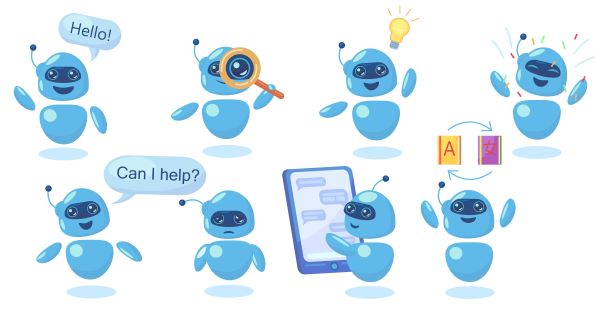
Case Study: Eve Assist AI- A Flutter-Powered AI Assistant
Eve Assist AI, developed by Zee Palm, is a versatile virtual assistant app leveraging Flutter for its mobile experience. It showcases the power of AI chatbots in various domains:
- Assistant Mode: Answer questions, and provide information, recommendations, and insights.
- Consultant Mode: Offer valuable guidance and expertise in specific domains.
- Business Planner Mode: Assist with strategic planning, market analysis, and financial projections.
- Friend Mode: Engage in conversations, provide emotional support, and keep the user company.
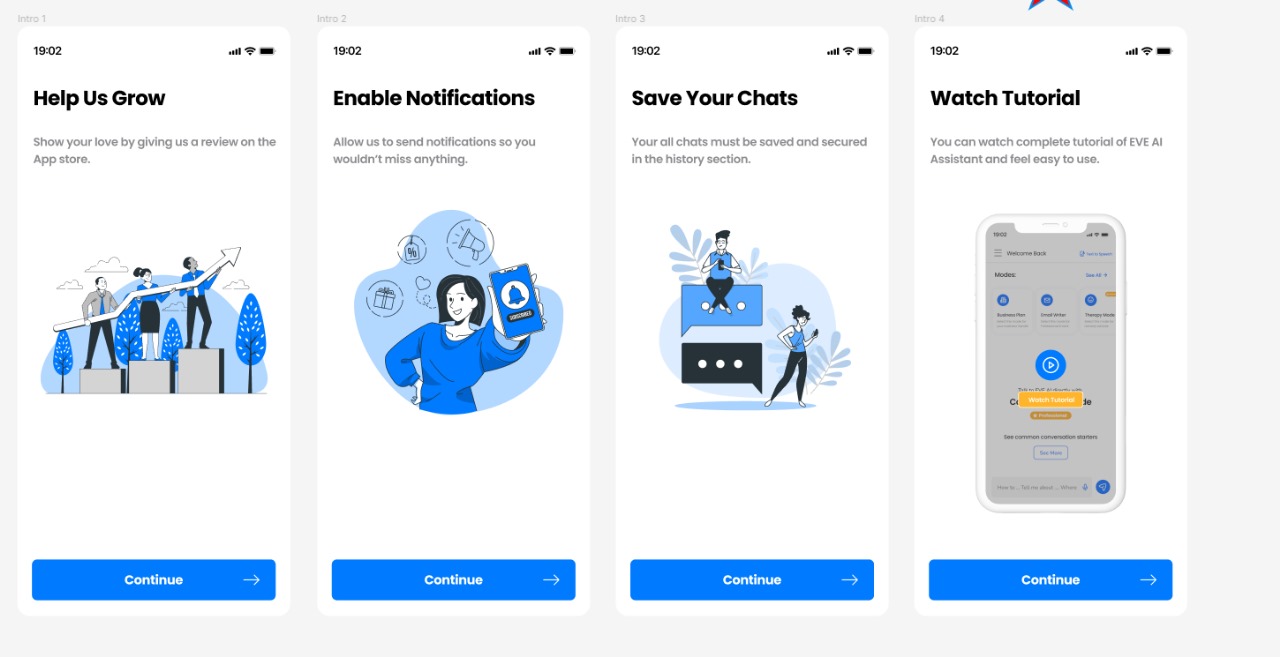
User Interface and Technical Details:
.jpeg)
Eve Assist AI's user interface (UI) plays a crucial role in delivering a seamless and intuitive user experience. Built entirely with Flutter widgets, the UI boasts several key features:
Custom chat interface: The app utilizes a visually appealing and user-friendly chat interface, allowing users to interact with the AI assistant through text messages and voice commands
Custom widgets: To achieve the desired functionality and user experience, the development team built several custom widgets using Flutter. These include:
- A text field specifically designed for voice commands, optimized for speech recognition and accessibility.
- Onboarding screens utilizing PageView to provide a smooth and informative introduction to the app's features.
- A drawer implemented using flutter_zoom_drawer, offering easy access to app settings and functionalities.
Implementation Details:
Beyond the visually appealing UI, Eve Assist AI leverages various technical components to deliver its functionalities:
- State management and localization: GetX is used for state management, ensuring data consistency across the app while enabling localization for different languages.
- Subscription management: purchases_flutter handles subscriptions within the app, allowing users to unlock premium features.
- Chat history: Firebase services provide a scalable and secure solution for storing and retrieving chat history.
- User feedback: flutter_rating_bar enables users to provide feedback on their experience with the app, helping the development team continuously improve.

- External API integration: GPT API integration empowers Eve Assist AI to generate more comprehensive and informative responses, enhancing the overall user experience.
- Notifications: Awesome_Notifications allows the app to send users timely notifications and reminders.
By combining a well-designed user interface with robust technical components, Eve Assist AI provides users with a versatile and intelligent virtual assistant experience.
Takeaway
Building chatbots with Flutter provides a versatile and efficient framework for creating cross-platform mobile apps. The customizable UI widgets and animations in Flutter allow for attractive and user-friendly chat interfaces. When considering the approach to building chatbots, businesses should evaluate the benefits and drawbacks of using pre-built services versus building custom models. Pre-built services offer ready-to-use solutions with advanced natural language processing capabilities but may lack customization and flexibility. On the other hand, building custom models allows for tailored solutions with higher accuracy and unique features but requires expertise and resources. A case study like Eve Assist AI demonstrates how Flutter can be leveraged to create a seamless and intuitive user experience in a versatile virtual assistant app. By leveraging Flutter's features and capabilities, businesses can build chatbots that meet their specific requirements and drive customer satisfaction.
If you want to see similar blogs like this, you can visit our website at Zee Palm.
Here is a link to one of our blogs discussing Onboarding with No-code Automation.

No-Code is Going to be The Next Big Thing, Here's How
Have you ever had an idea of developing something but lacked the coding skills to bring it to life? If so you are not the only one!
Developing software is complex and it requires you to be an experienced developer to achieve good results. But fear not! there is a term called “no-code” development that has been gaining significant popularity in the tech industry lately. Promising to revolutionize the way we create digital solutions by empowering individuals with little to no coding experience to develop functional digital solutions. While being extremely prominent and talked about in the industry, the question that arises the most is whether no code is truly the "next big thing"? And how will this be possible?
So in this blog, let's try to find the answer to this question while also finding out what is it and how is it possible.
What is No-Code?
No-Code is a revolutionary concept that is transforming the way people create software without the need for traditional programming. The term No-Code refers to a set of tools and platforms that enable individuals to build applications visually through a graphical user interface, eliminating the need for traditional programming. These platforms offer a range of pre-built components, templates, and drag-and-drop features that simplify the development process for non-technical users eliminating the skill barrier between people.
The Rise of the No-Code
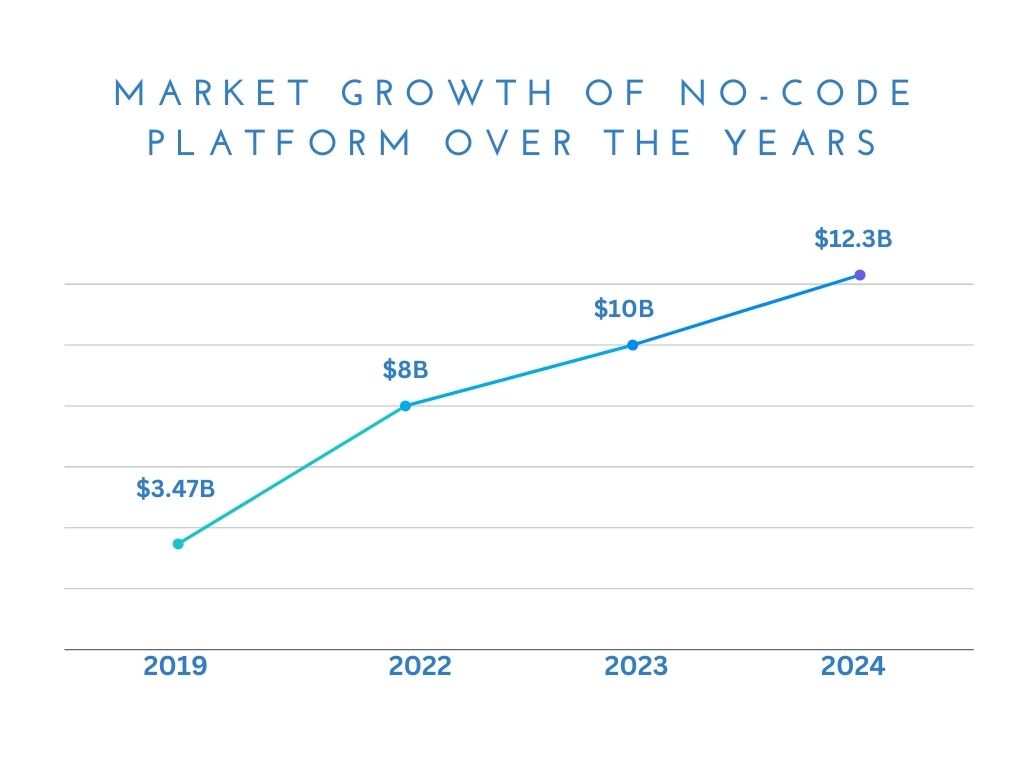
The rise of no-code has been significantly greater over the past few years. According to Forbes, the no-code and low-code platform market grew from $3.47 billion in 2019 to $8 billion in 2022, with a forecasted increase to $10 billion in 2023 and $12.3 billion in 2024 (a 20% growth).
The market growth is expected to reach $182 billion by 2030, signifying its continued dominance in the tech industry. The market size is anticipated to expand further, and the forecasted growth indicates a strong trend toward the adoption of no-code and low-code platforms. Furthermore, a study reveals that 66% of businesses are expected to use low-code/no-code development by 2024, Microsoft anticipates that out of the 500 million apps expected to be created in the next five years, around 450 million will be designed using no-code or low-code platforms. These compelling statistics offer a clear perspective on the rapid and sustained growth of the no-code industry. Visit this article at Quixy for more no-code-related facts.
Why is No-Code Gaining Popularity?
With all the hype surrounding No-Code domination, let's delve into the main reasons why No-Code is gaining popularity.
Accessibility
The number one reason for its popularity is that no-code eliminates the technical barrier by making software development accessible to a wider audience. While there is still a place for coding, no-code development gives individuals a way to build applications more productively and efficiently. No-code platforms allow individuals without coding expertise to create applications using a visual interface and drag-and-drop blocks. This accessibility opens up app development to a wider range of people, including entrepreneurs, different businesses, and citizen developers. One notable platform that exemplifies the accessibility of no-code development is Webflow.
Speed and Efficiency
Traditional development can be time-consuming and resource-intensive. However, no-code platforms offer pre-built components and functionalities, allowing users to build quickly without the lengthy coding process. This enables rapid development cycles. Moreover, no-code platforms facilitate rapid prototyping, enabling teams to quickly test and iterate ideas. No-code platforms increase speed and efficiency during development, accelerating innovation and adaptation to changing market demands. According to studies, no-code and low-code solutions have the potential to reduce development time by up to 90%.
Addressing the skill gap
Another significant reason for its popularity is that it reduces the skill gap between individuals. No-code development is addressing the IT skills gap by empowering non-technical users to create software using a visual development approach, reducing the reliance on expert coding skills. This not only broadens the talent pool but also promotes cross-functional collaboration. According to ColorWhistle, by 2024, 80% of non-IT professionals will develop IT products and services, with over 65% using no-code tools.
Business Focus
No-code development enables businesses to focus on the core functionality of their application rather than delving into the complexities of coding. This frees up valuable resources and enables business users to participate in the development process. No-code development puts the spotlight on solving business challenges directly. With a visual interface and simplified workflows, teams can concentrate on addressing core business needs, fostering a more strategic approach to application development.
Complements Traditional Coding
No-Code does not aim to replace traditional coding practices but rather complements them. By offering visual interfaces, it allows users to create custom solutions without extensive coding knowledge. This approach integrates seamlessly with existing technologies, such as using Flutter plugins for WordPress, enhancing efficiency and flexibility in development processes.
Enhanced User Engagement and Customization
By streamlining the development process and providing pre-built templates and customizable options, no-code platforms enable increased user engagement. No-code platforms offer a wide range of customization options, allowing users to create applications that align precisely with their unique requirements. This emphasis on UI/UX design leads to more user-friendly and customized applications.
Democratization of Technology
No-code platforms democratize technology by empowering non-technical users to participate in the app development process. This shift allows businesses to involve a broader range of employees in the development process, reducing dependency on tech experts. With over 80% of enterprises turning towards no-code/low-code solutions, this trend highlights the importance of involving business users in app development.
Scalability and Cost Efficiency
One of the primary advantages of no-code platforms is their high scalability. The scalability of no-code solutions allows applications to grow seamlessly alongside user demands, ensuring their continued functionality. These platforms enable rapid development and deployment of applications, reducing time-to-market significantly. Moreover, no-code development offers a significantly lower cost barrier compared to traditional development methods. By eliminating the need for extensive coding, these platforms lower the cost barrier associated with software development, making it more accessible to businesses of all sizes.
Sustainability and Future Prospects
No-code platforms often leverage cloud-based infrastructure and efficient resource allocation, potentially contributing to a more sustainable future for technology development. The simplicity of no-code usage allows for broader employee involvement in the development process, fostering collaboration across different departments within organizations.
No-Code vs. Traditional Development
Here is a comparison between no-code and traditional development so you can have a better idea:
Comparison
No-code Development
Traditional Development
Speed of Development
Rapid prototyping and deployment with visual interfaces
Time-consuming coding processes often requiring deep understanding
Accessibility
Accessible to non-technical users; no coding skills required
Requires expertise in programming languages and frameworks
Cost
Cost-effective; eliminates the need for dedicated coding resources
Often entails higher costs due to hiring specialized developers
Flexibility
Offers scalability and flexibility without coding constraints
May face limitations in scalability and flexibility, especially in complex projects.
Learning curve
Minimal learning curve; visual interfaces streamline development
Steeper learning curve; requires proficiency in programming languages.
Customization
Limited customization options; rely on pre-built components
Offers extensive customization options for tailored solutions
Maintenance and Updates
Easier maintenance and updates; changes can be made through visual interfaces
Maintenance and updates may be complex, requiring extensive coding changes
Collaboration
Encourages collaboration among diverse teams and stakeholders.
Collaboration is often limited to technical experts and developers.
Agility
Supports agile development with quick iteration and experimentation
Development cycles may be slower, hindering agility and responsiveness.
Popular No-code Development Platforms
Platform
Description
A leading Website builder for No-code Development
Building Web and mobile apps without coding
Creating Mobile Apps with a Drag-and-Drop interface
Designing Responsive Websites with no coding required
Wix: A Leading Website Builder for No-Code Development
- User-friendly interface with powerful features.
- Drag-and-drop editor for creating stunning websites.
- Templates and customization options for various needs.
Bubble: Building Web and Mobile Apps Without Coding
- Intuitive drag-and-drop interface for designing apps.
- Visual workflow builder for complex logic and functionality.
- Suitable for building various types of applications.
Adalo: Creating Mobile Apps with a Drag-and-Drop Interface
- Specifically designed for building mobile apps.
- Simple drag-and-drop interface for app creation.
- Wide range of pre-built components and templates available.
Webflow: Designing Responsive Websites with No Coding Required
- Visual interface for building responsive websites.
- Powerful design tools for creating interactive experiences.
- Templates and customization options for diverse projects.
Examples of Successful No-Code Development Projects
Projects
Description
Popular automation tool connecting web applications.
Enables custom workflows without coding knowledge.
Flexible and collaborative database tool.
Combines spreadsheet ease with database power.
Allows the creation of mobile apps from Google Sheets data.
Simple and intuitive interface for app development.
Interesting Fact!
Zee Palm’s Website is also built on a no-code platform, webflow.
Limitations Of No-Code Development
Despite the potential of no-code development, acknowledging its limitations is crucial for making informed decisions and choosing the right approach according to your project’s needs. Let’s have a closer look at the challenges of no-code development.
Template Dependence
No-code platforms often offer a range of templates and pre-built components to facilitate rapid development. However, reliance on these templates can limit the design flexibility and uniqueness of the end product.
For instance, While you can build a visually appealing website with Webflow using their templates, creating a unique and non-templated e-commerce platform like Shopify might be significantly more challenging due to limitations in building custom functionalities like complex product filtering, advanced shopping carts, and integrated payment gateways.
Security Concerns
Security is a critical consideration in any software development process. No-code platforms, while convenient, may introduce security vulnerabilities if not properly managed.
In 2021, a security breach in a popular no-code platform Bubble exposed user data. While the platform addressed the issue promptly, it highlights the importance of understanding the security measures and practices of any no-code platform you choose.
Scalability Trade-offs
While some no-code platforms are capable of handling significant traffic and data volume, they might not be suitable for applications with extreme scalability needs. Evaluate the scalability requirements of your project and choose a platform that can accommodate future growth and demands.
a social media platform like Facebook that needs to handle millions of users and massive data volume might not be feasible using a no-code platform due to potential limitations in handling such high demands.
Limited Support and Maintainance
While some no-code platforms provide robust support and maintenance options, others may offer limited assistance or require additional fees for extended support. Research the platform's support options and consider the cost and availability of additional maintenance services if needed.
Time to Market Compromises
While no-code platforms can be faster than traditional coding, achieving a feature-rich and complex application might still require significant time and effort.
Building a complex mobile game with advanced graphics and intricate gameplay mechanics might take longer to develop even with a no-code platform like Adalo compared to building it with native coding tools due to potential limitations in replicating specific functionalities and performance requirements.
Creative Limitations
No-code platforms may present some limitations in terms of achieving highly creative and unique functionalities compared to custom coding.
Building a music streaming platform with features like personalized recommendations based on emotional state or real-time music generation might be challenging with a no-code platform due to limitations in building such complex algorithms and functionalities.
It's important to remember that these limitations are not deal-breakers for everyone. By carefully considering your specific needs and priorities, you can determine if no-code development is the right solution for your project and leverage its benefits while mitigating potential challenges.
Resources and Learning Material
The no-code landscape is constantly evolving, with new platforms, tools, and resources emerging regularly. Here's a comprehensive guide to equip you with the knowledge and skills to navigate through your No-code journey.
Online Courses and Tutorials
- No Code MBA offers a variety of in-depth courses on popular no-code platforms like Webflow, Bubble, and Airtable. These courses are well-structured, beginner-friendly, and taught by industry experts.
- Buildspace creates educational content on various no-code platforms, including Webflow, Bubble, and Adalo. They offer tutorials, project walkthroughs, and tips for beginners through their YouTube channel and other online platforms.
- Nocodify Academy offers a range of tutorials, articles, and community resources designed to help individuals learn no-code development. They also have a forum where you can connect with other no-code developers and ask questions.
Community Forums
- NoCode Reddit a vibrant community where you can ask questions, share ideas, and learn from other no-code developers. Join discussions, find inspiration, and stay updated on the latest trends in the no-code space.
- Bubble Forum the official forum for the Bubble platform. Get support from the Bubble community, access troubleshooting guides, and learn from experienced Bubble developers.
Books and Articles
- “No Code: The Power of Without Code" by Chris Benson explores the potential of no-code development and offers practical advice for building applications without coding.
- "Low-Code/No-Code Revolution: Leverage Citizen Developers to Drive Innovation" by Bernard Broy examines the impact of low-code/no-code on businesses and how organizations can leverage these tools to innovate.
Future of No-Code
The future of no-code development is bright, poised to revolutionize software creation and democratize access to technology. As the technology matures, we can expect:
- Enhanced user experiences and capabilities within no-code platforms.
- Deeper integration with advanced technologies like AI and ML.
- Democratization of development, enabling businesses of all sizes to innovate without large development teams.
- Heightened focus on security and governance to ensure responsible development.
In summary, no-code development holds tremendous potential to empower individuals and businesses, reshaping the future of software development across industries while complementing traditional development methodologies. Will it completely replace traditional development? That’s debatable, Only time will tell what the future holds for us.
If you want to see similar blogs like this, you can visit our website at Zee Palm.
Here is a link to one of our blogs discussing Onboarding with No-code Automation.

iOS Build in Flutter: Step-by-Step Guide
Building an iOS app with Flutter is a straightforward process that opens up the power of cross-platform development, using a single codebase for both iOS and Android platforms. Flutter, developed by Google, utilizes the Dart programming language, offering a range of benefits for iOS development including rapid development cycles, cross-platform capabilities, and expressive UIs. Here's a quick guide to get you started:
- Install Flutter SDK and Xcode: Essential tools for iOS app development.
- Set Up a New Flutter Project: Initialize your project specifically for iOS.
- Design Your App's UI: Use Flutter's widgets to create a native iOS look and feel.
- Integrate iOS-Specific Features: Enhance your app with iOS-specific functionalities like push notifications.
- Test on iOS Devices: Ensure your app performs well on both simulators and real devices.
- Prepare and Publish to the App Store: Finalize your app, manage App Store requirements, and release your app to the world.
This guide also covers troubleshooting common issues, ensuring a smooth development and deployment process. Whether you're new to Flutter or looking to expand your app to the iOS platform, these steps provide a comprehensive path to creating a high-quality iOS app with Flutter.
Faster Development
With Flutter, you can see changes to your app as soon as you make them, without having to wait. This means you can work faster because you don't have to stop and compile the app again every time you tweak something. It's like being able to instantly see the paint dry when you're painting a room.
Cross-Platform Capabilities
Flutter lets you use the same code for both iPhone and Android apps. This is a big time-saver because you only have to write your app once, instead of doing it all over again for a different platform.
Expressive UI Widgets
Flutter comes with a bunch of built-in tools that make it easy to design your app. These tools help you make your app look and feel exactly how you want, with smooth animations and a native feel on iPhones. Plus, you can easily add fancy effects without a lot of extra work.
In short, Flutter makes it quicker and easier to create iPhone apps. It lets you work faster, use the same code for different platforms, and design beautiful apps with less hassle. That's why it's a good choice for people making iPhone apps.
Prerequisites
Before you dive into building an iOS app with Flutter, there are a couple of things you need to set up first to make sure everything goes smoothly.
Install Flutter SDK
To kick things off, you need to get the Flutter SDK on your computer. Head over to the official Flutter website and grab the latest version. Follow the steps for your operating system to get it installed.
After you've got it, run this command to check if everything's alright:
flutter doctor
This command helps you spot any problems. Make sure you fix any issues it finds before moving on.
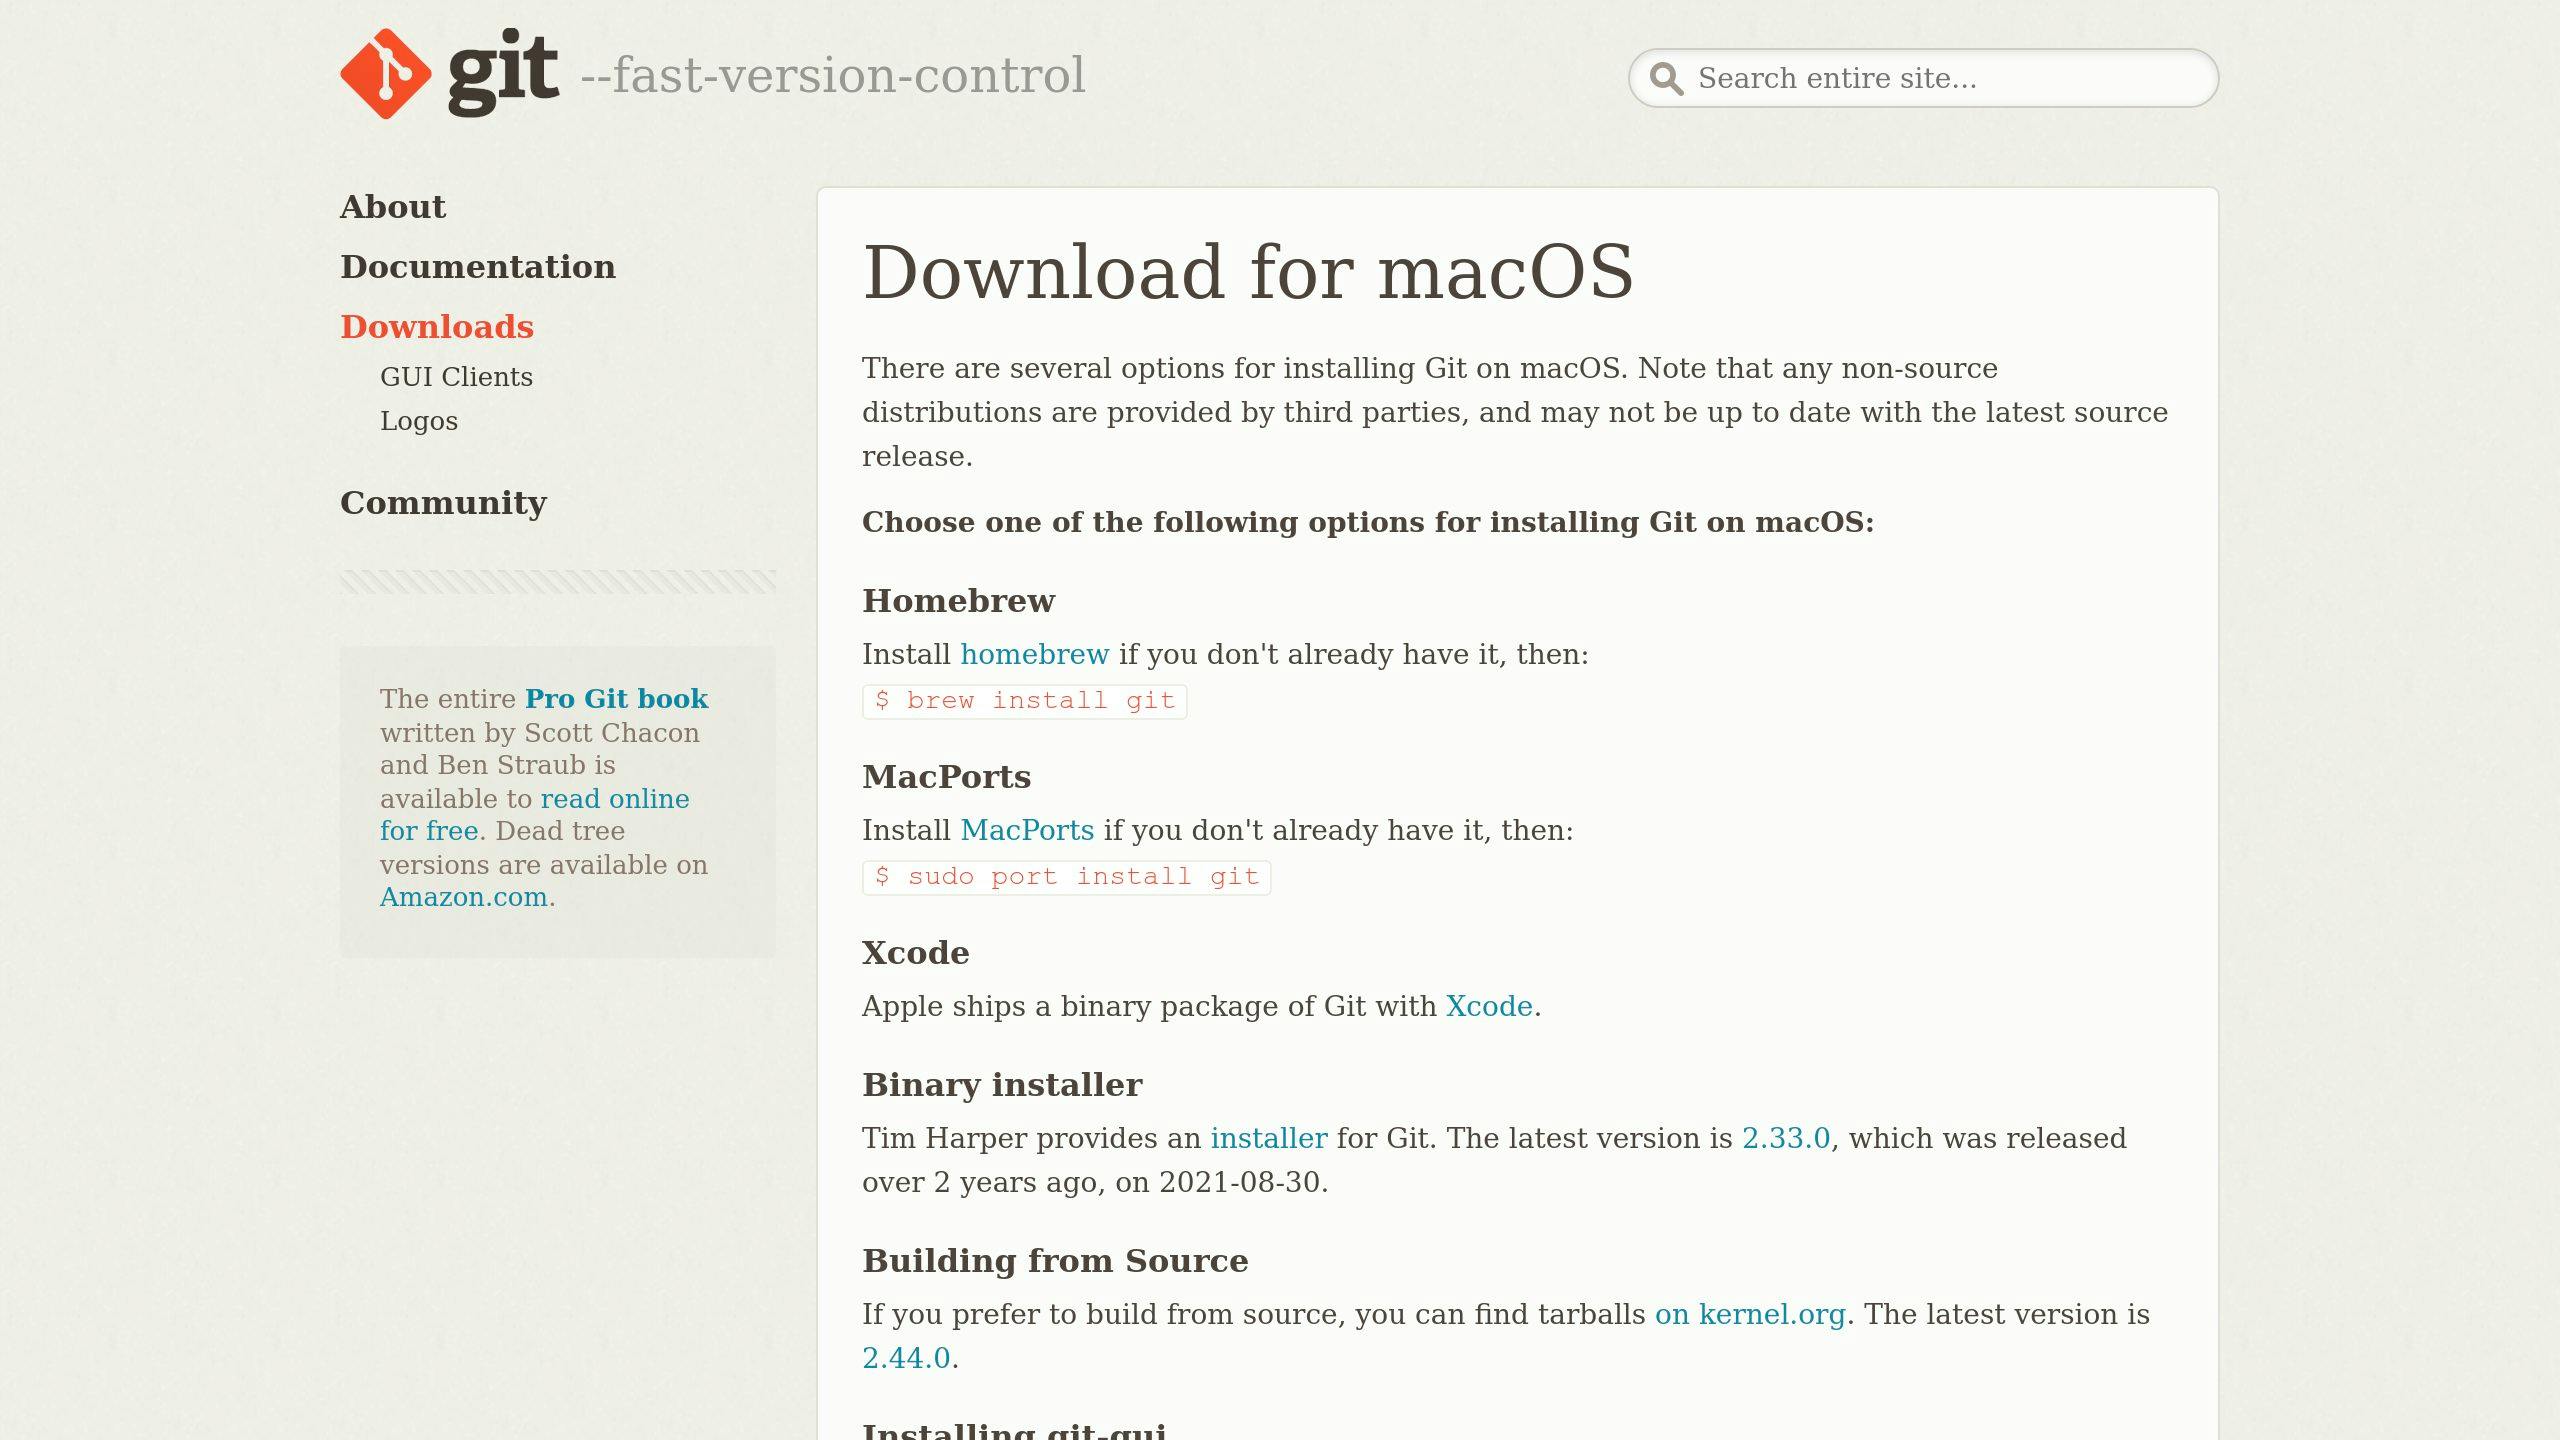
Set Up Xcode and iOS Simulator

For iOS app development with Flutter, you'll need Xcode for the iOS tools and to test your app. You can download Xcode from the Mac App Store or the Apple Developer website.
Once Xcode is set up, create a simulator for different iOS devices to test your app on.
Acquire Apple Developer Account
To put your app on real devices or in the App Store, you'll need to join the Apple Developer Program. This gives you access to important stuff like code signing and certificates, and it costs $99 a year. They also offer programs for businesses and schools.
Review App Store Guidelines

It's a good idea to read through Apple's App Store Review Guidelines before you start. This will help you understand what Apple allows in the App Store and avoid any problems when you submit your app.
Getting these prerequisites in order means you're all set with the tools and accounts you need to start building your Flutter app for iOS. Now, let's get to the fun part - creating your app!
Step 1: Set Up the Development Environment
Getting your computer ready to build an iOS app with Flutter is the first thing you need to do. This means installing the Flutter SDK, setting up Xcode, and getting your simulators or devices ready.
Install Flutter SDK
The Flutter SDK has everything you need to start making apps. Here’s how to install it:
- Go to https://flutter.dev/docs/development/tools/sdk/releases and download the latest version of the Flutter SDK.
- Unzip the file in a place you can remember, like
~/development. - To make sure your computer can find Flutter, add it to your path with this command:
export PATH="$PATH:`pwd`/flutter/bin"
- Check if everything’s set up right by running
flutter doctor.
Install Xcode
You’ll need Xcode for building and testing your iOS app.
- Get Xcode from the Mac App Store or developer.apple.com.
- When you first open Xcode, it might ask you to install some extra stuff like simulators. Go ahead and do that.
Set Up Simulators/Devices
Before you can see your app in action, you need to set up where it will run.
- Simulators: In Xcode, you can create simulators for different types of iPhones and iOS versions.
- Physical Devices: If you have an iPhone, you can connect it to your computer and choose it as the place to run your app in Xcode.
With the Flutter SDK and Xcode ready, you have all the tools to start making your iOS app with Flutter.
Step 2: Create a New Flutter Project for iOS
This part will show you how to start a new project in Flutter, focusing on making an app for iOS.
To kick off your iOS build in Flutter, you need to set up a new project. This gives you everything you need to begin, like the basic code and settings.
Follow these steps to get started:
- Open your terminal or command prompt.
- Go to the folder where you want your project to be. For example, to move to your documents folder, type:
cd Documents
- Create a new project by typing:
flutter create my_ios_app
Change "my_ios_app" to whatever name you prefer for your app.
- Wait for Flutter to set up the project. When it says "All done!", you're ready to move on.
- Go into your new project folder with:
cd my_ios_app
- Now, open the
ios/Runner.xcworkspacefile in Xcode. This is where the iOS-specific code lives. - Pick a simulator (like "iPhone 13") in Xcode and hit the Play button to start your app.
You'll see a basic app open up in the simulator. It has a button that counts when you tap it. This means everything's working, and you're all set to make your iOS app with Flutter!
Next, you can change the Dart code in lib/main.dart to design your app's look and how it works. Whenever you update your code, just press Play in Xcode to see the latest version of your app.
Here's what happens when you create a new project in Flutter:
- It makes the basic code structure and folders for your app.
- It gets your app ready for both iOS and Android.
- It grabs any initial tools and files you need.
- It sets up the basic settings for building your app.
With everything prepared for Flutter iOS development, you can focus on creating your app without worrying about setup details.
Step 3: Design the iOS App UI
When you're making the look and feel of your app for iPhones using Flutter, you want to make sure it's easy and nice for people to use. Here's how to make a user interface that feels just right on iOS.
Use Platform-Specific Widgets
Flutter has special tools called widgets that help your app look like it belongs on an iPhone. Some of these include:
- CupertinoApp - This is the starting point for an app that looks like it's made for iOS.
- CupertinoNavigationBar - A top bar that looks like what you see on iPhone apps.
- CupertinoTabBar - A bottom bar for switching between different parts of your app.
Follow Apple's Interface Guidelines
It's good to make your app's design fit what iPhone users expect. Here are a few tips:
- Make things clear and easy to understand.
- Make sure your app works well for everyone, including people who need accessibility features like bigger text.
- Your app should look good in both light and dark mode.
Craft a Seamless User Flow
Your app should guide users smoothly from one thing to the next:
- Put things where users expect them to be.
- Use smooth transitions when moving between different screens.
- Show loading indicators when your app is busy.
- Keep how users do things in your app consistent.
Add Platform-Specific Touches
Making your app feel like it really fits on an iPhone involves some extra touches:
- Use the fonts and styles that are typical for iOS.
- Add some iOS-style effects, like things that move slightly as you tilt your phone.
- Stick to the usual sizes and spaces for things on iOS.
- Make sure things like scrolling feel just like they do on other iPhone apps.
By using Flutter's tools made for iOS and sticking to Apple's design rules, you can make an app that looks and feels like it was meant for the iPhone. Paying attention to the little details and making everything flow smoothly will make your app a pleasure to use.
Step 4: Add iOS-Specific Features
When building your app with Flutter, adding features that work especially well on iPhones can make your app more useful and enjoyable. Here are a few key things you might want to include:
Push Notifications
Push notifications are messages that pop up on a user's phone, keeping them updated. Here's how to add them to your Flutter app:
- In Xcode, set up everything needed for push notifications, like certificates.
- Use the
firebase_messagingplugin to connect your app with Firebase, a service that sends the notifications. - Ask users if they're okay with getting notifications from your app.
- Make sure your app can handle messages when they arrive by setting up a way to listen for them.
Swift Integration
Sometimes, you might need to use Swift, the programming language for iOS, to do things Flutter can't on its own:
- Write a Swift class that can talk to Flutter.
- Make sure Flutter knows about this class by adding it to a special file (
GeneratedPluginRegistrant.swift). - Now, you can use Swift code in your Flutter app when you need to.
This is great for adding bits of iOS-specific functionality.
Accessing Native APIs
Flutter can also use iOS's built-in features, like location services, camera, and more:
- Look for a plugin on pub.dev that does what you need. There's a plugin for almost everything.
- If there's no plugin for what you want, you can make your own in Swift to use more of iOS's features.
By adding these iOS-specific features to your Flutter app, you're making sure it works well on iPhones, taking full advantage of what the device offers. This approach helps you create a richer experience for users.
sbb-itb-8abf120
Step 5: Testing on iOS Devices
Making sure your Flutter app works well on iPhones and iPads is super important before you share it with the world. Here's a simple guide to testing your app, both on computer simulations of iOS devices and on the actual devices themselves.
Set Up Testing on Simulators
Xcode, the tool we use to build iOS apps, has a feature that lets you pretend you're using different types of iPhones and iPads right on your computer. Here's how to use it:
- Open Xcode and find
Window > Devices and Simulatorsto see the list of available simulations. - Click the
+to add new device types and iOS versions you want to check your app on. - Choose the simulation you want to test with and hit the Play button to start your app.
- Go through your app to see how it looks and works on these simulated devices.
Simulators are quick and easy for checking your app, but it's also crucial to test on real devices before you launch.
Testing on Physical Devices
To try your Flutter app on an actual iPhone or iPad, do this:
- Connect your device to your computer using a USB cable.
- In Xcode, pick your device from the list instead of a simulator.
- Press Play, and Xcode will put your app on your device and start it.
- Use your app, checking everything from how fast it runs to whether all the buttons work.
Here's what you should look out for when testing on a real device:
- How quick and smooth your app feels
- Make sure it doesn't crash when you open and close it a lot
- See what happens when you get calls or texts while using the app
- Check every feature, like tapping buttons and swiping
- Test how it connects to the internet, both on WiFi and cellular data
Testing on real devices can show you problems that simulators can't, like if your app crashes or runs slowly.
Using Firebase Test Lab
If you want to test your app on lots of different iOS devices without having to buy them all, you can use something called Firebase Test Lab. It lets you run tests on many devices at once and tells you how it went.
While it's still good to try your app on a device you have, Firebase Test Lab can help by checking your app in many different situations.
Testing your app thoroughly on both simulators and real devices makes sure it's ready to go live. This way, you can fix any problems and make sure your app is as good as it can be for your users.
Step 6: Prepare for App Store Deployment
Getting your Flutter app ready for the iOS App Store means doing a few important things before you can share it with everyone. Here's a simple guide to help you through this process.
Set Up App Store Connect
App Store Connect is the place where you'll handle all the details about your app for the App Store.
- Sign in to App Store Connect using your Apple ID.
- Check that your app's name and Bundle ID are the same as what you've set in Xcode.
- Fill in all the details about your app like what it does, the categories it fits into, and the keywords people might use to find it.
- Upload your app's icon and screenshots that will appear in the App Store.
- Turn on any special features your app uses, such as push notifications.
Manage Versions and Builds
When you're getting your app ready to submit, keeping track of your build versions is key:
- Increase your build number in Xcode before you make a build archive.
- Ensure the build version number is the same as what you've listed in App Store Connect.
- Write down what's new in each version of your app for the release notes.
Acquire Signing Certificates
Code signing is how your app gets linked to your Apple developer account, proving you're allowed to release it:
- Use Keychain Access to create a Certificate Signing Request (CSR) file.
- Upload the CSR to App Store Connect under Certificates and download the signed certificate.
- In Xcode, under Signing & Capabilities, add your certificate to the project.
Generate and Upload a Build
When your app is all set to be released, you need to upload it to App Store Connect:
- In Xcode, make an archive of your app by selecting Product > Archive.
- Use Xcode Organizer to check and send your archive.
- After App Store Connect gets your upload, it'll process the build and show it.
With all the necessary details, certificates, and build uploaded, your Flutter app is ready to be launched on the iOS App Store!
Step 7: Publish to the App Store
Once Apple says your app is good to go, it's time to put it out there on the App Store. This lets people download and use what you've made. Here's how to get your Flutter app out to the world:
1. Release Your App
In App Store Connect, you'll need to:
- Pick when you want your app to go live, or just release it right away
- Choose where in the world it should be available
- Decide if you want to release it slowly to see how it does
When you're ready, just hit the button to make your app live on the App Store.
2. Monitor Performance
Keep an eye on how your app is doing with App Store Connect's tools:
- See how many times it's been downloaded, how much money it's making, and what people think of it
- Check out how people are finding your app
- Learn about the types of phones and iOS versions people are using it on
- Notice when more people are downloading or using your app
This info can help you make your app better over time.
3. Submit Updates
When you've fixed issues or added new stuff, you'll need to update your app:
- Change your build number in Xcode
- Write down what's new in the update
- Go through the process to submit your app again
- Users will get a message to download the latest version
Updating your app regularly shows users you're invested in making it better.
Getting your app out there is a big deal after all the hard work you've put into creating it with Flutter! Watching how it does and making it better keeps your app fresh and enjoyable for iOS users.
Troubleshooting Common Issues
When you're working on making an iOS build in Flutter, sometimes things don't go as planned. Here's how to deal with some common problems you might run into.
App Crashes on Launch
If your app stops working right when you start it, here's what you can do:
- Make sure Xcode is up to date - Using the latest version helps avoid problems.
- Clean and rebuild your project in Xcode - Go to Product > Clean Build Folder in the menu.
- Check the iOS simulator - If it's acting up, try restarting it.
- Look at crash logs - These can give you clues about what went wrong.
App Rejections from App Store
Getting your app rejected is a bummer, but here are some tips to get through it:
- Read the guidelines carefully - Double-check that your app follows all the rules.
- Test your app well before sending it in - Catch any bugs that might cause a rejection.
- Explain things clearly - If Apple asks for more information, give them clear, detailed answers.
Slow App Performance
If your Flutter app is running slowly, here are some ways to speed it up:
- Profile your app's performance - This helps you find and fix slow parts of your code.
- Reduce redraws - Only update your app's look when necessary.
- Test on older versions of iOS - Sometimes, updates can make apps slower on older devices.
- Streamline your app's design - Too many nested widgets can make your app slow.
Issues Connecting Native Code
If you're having trouble adding your own code to Flutter:
- Make sure you've set up your classes right - Your Swift or Objective-C classes need to be properly linked to your Dart code.
- Be careful with threading - Make sure your native and Dart code are not stepping on each other's toes when they share data.
- Check your platform channels - Your data needs to move smoothly between your native code and Dart.
We hope these simple fixes help you get past some of the hurdles in Flutter App Development for iOS. If you're stuck on something else, just ask!
Conclusion
Flutter makes it easy and efficient to create high-quality apps for iPhones. This guide walked you through setting everything up, making an iOS project, designing a user-friendly interface, adding special iOS features, testing your app thoroughly, and getting it ready for the App Store.
Here's what you should remember:
- Flutter's quick update feature lets you see changes instantly, making app development faster.
- Flutter has a bunch of tools specifically for making apps look and feel right at home on iOS.
- You can make your apps do more by adding notifications and writing some parts in Swift.
- Testing your app on both simulators and real iPhones or iPads is important to make sure it works well.
- Using App Store Connect to handle your app's details and versions helps smooth out the process of getting your app on the App Store.
Beyond the basics, there's a lot more you can do with Flutter:
- Make your app more interactive with animations and gestures.
- Use Flutter's tools to manage how your app changes over time.
- Set up automatic testing and updates.
- Make your app run smoother with Flutter's tools for checking performance.
- Try using Flutter for other kinds of apps, like those for computers.
We hope this guide has made it easier to understand how to create iOS apps with Flutter and helped you get started on making great apps! If you have more questions, just ask.
Related Questions
Can you build an iOS app with Flutter?
Yes, you can use Flutter to make apps for iPhones using the same code you use for Android apps. Flutter turns this code into something iPhones can run really well. It has a bunch of ready-made pieces (widgets) that make it easy to design how the app looks. Plus, you can use Flutter to work with iPhone's own features like the camera.
How do you write iOS code in Flutter?
To add iOS-specific features in a Flutter app:
- Make a new Swift or Objective-C file for the iOS part
- Let Flutter know about this file so it can work with Dart code
- Set up a way for the iOS code and Flutter to talk to each other
- Use this setup to call the iOS code from your Flutter app
This way, you can include features in your app that are just for iPhones.
How do I start Flutter iOS?
To begin making iOS apps with Flutter:
- Get the Flutter SDK on your computer
- Install Xcode to work on iOS apps
- Use a simulator or connect an iPhone to test your app
- Run
flutter doctorto make sure everything's set up right - Start a new Flutter project and open it in Xcode
- Choose where you want to run your app and press Run
This will build and start your app on an iPhone or simulator.
How do I use iOS framework in Flutter?
To use iOS frameworks in Flutter:
- Wrap the iOS framework in a Flutter plugin
- Make the framework's features available through a communication channel
- Write Swift or Objective-C code to use the framework
- Access these features from your Flutter app through the channel
This lets your Flutter app use special iOS features that aren't part of Flutter's standard tools.
Related posts

Xamarin Mobile Developer Essentials
If you're curious about becoming a Xamarin mobile developer or improving your skills, this guide walks you through the essentials. Xamarin allows you to create mobile apps for different platforms using C# and .NET. Here's a quick summary to get you started:
- Introduction to Xamarin: Xamarin lets you create apps for iOS, Android, and Windows using C# and .NET, offering a single-codebase approach.
- Getting Started: Install Visual Studio and set up your development environment for Xamarin projects. Learn about Xamarin.Forms, Xamarin.Essentials, and platform-specific tools.
- Xamarin.Forms Deep Dive: Understand how Xamarin.Forms works, allowing for shared UI code across platforms, and start building your first app.
- Cross-Platform Development Best Practices: Explore code sharing strategies, performance optimization, and testing and debugging techniques.
- Real-World Application Development: Integrate with cloud services, implement advanced features, and check out case studies for inspiration.
- Conclusion: Xamarin is ideal for developing cross-platform apps with shared code. As Xamarin will be phased out by 2024 in favor of .NET MAUI, starting new projects in .NET MAUI is recommended.
This guide is meant for informational purposes, providing a comprehensive overview of Xamarin mobile development essentials.
Setting Up the Development Environment
To begin with Xamarin, you first need to install something called Visual Studio. It's available for both Windows and Mac computers.
Here's a simple guide to get Visual Studio ready for Xamarin:
- First, download and install the latest version of Visual Studio. During the installation, choose the option for Mobile development with .NET.
- Once installed, open Visual Studio and update Xamarin to the latest version using something called the NuGet package manager.
- Start a new project with the Xamarin.Forms template. This helps set up everything for Android and iOS, plus a shared library.
- If you're using a Mac, you'll need to connect Visual Studio to a Mac Build Host to work on iOS apps.
The main tools you'll work with in Xamarin include:
- Xamarin.Forms - This helps you make the user interface of your app work on different devices using C# and XAML.
- Xamarin.Essentials - Gives you tools to access features on the phone like the camera or location.
- Xamarin.Android and Xamarin.iOS - These are special tools for making apps specifically for Android or iOS.
Visual Studio makes it easy to build apps with Xamarin by handling the complicated parts for you.
Xamarin.Essentials: A Primer

Xamarin.Essentials is a set of tools that let you use phone features in your app without needing to know the details of each platform.
Here's why Xamarin.Essentials is helpful:
- Cross-Platform APIs - You can use the same code for Android, iOS, and UWP, making your job easier.
- Abstraction - You don't have to worry about the different ways things work on each platform.
- Frequent Updates - It keeps up with new updates, so you don't have to.
Getting started with Xamarin.Essentials is straightforward:
- Add the Xamarin.Essentials package to all your projects.
- Put
Xamarin.Essentials.Init()early in your app's starting code. - Use features like
Geolocation,Preferences, orText-to-Speechin your app.
Some cool features of Xamarin.Essentials include things like checking what type of device you're on, using the accelerometer, getting app info, copying and pasting, and opening web pages or maps directly from your app.
In short, Xamarin.Essentials makes it a lot easier to build apps by letting you do more with less code.
Chapter 2: Xamarin.Forms Deep Dive

Understanding Xamarin.Forms

Xamarin.Forms is a tool that lets you create mobile apps for different devices like iPhones, Android phones, and Windows computers using just one language, C#, and a special kind of code called XAML. The cool part? You can use the same code for most of your app on all these devices, which saves a ton of time.
Here’s the simple version:
- Xamarin.Forms acts like a middleman, taking your XAML code and turning it into the right kind of stuff that each device understands.
- You make your app’s design in XAML, and then it shows up as the real deal on each device when you run the app.
- Most of your app’s brain and how it talks to the internet or stores information can be the same for all devices.
- And if there’s something special you need to do on just one type of device, you can still do that too.
This way, your app feels right at home on each device, but you don’t have to write everything three times over.
Building Your First Xamarin.Forms App
Let’s make a simple app together:
- Create the project - Start a new Xamarin.Forms app in Visual Studio, picking both iOS and Android.
- Define UI in XAML - Use XAML to lay out your app, adding things like text boxes and buttons.
- Add shared app logic - Put the parts of your app that think and remember things in a shared project.
- Test on emulators - Use Visual Studio’s pretend iPhones and Androids to see how your app looks.
- Deploy to devices - Try your app on real phones to make sure it works outside the pretend world too.
That’s the start. You can dive deeper into making your app do more things as you get comfortable.
Some basics to get cozy with are:
- How to arrange things on the screen using XAML
- Making your app and its design talk to each other
- Using the MVVM pattern to keep things tidy
- Changing things up for different devices when you need to
Check out the official Xamarin.Forms tutorials to get the hang of it.
Advanced Xamarin.Forms Concepts
When you’re ready to level up your app, here are some fancy things to try:
Navigation - Xamarin.Forms lets you move between different parts of your app smoothly. You can have a menu or tabs to switch between screens.
Data Access - You can store information in your app in different ways, like using a database or talking to a website.
Platform-specific code - If you need to do something special on just one type of device, Xamarin.Forms has a way to handle that without messing up the rest of your app.
Performance - Use tools to make sure your app runs fast and doesn’t waste phone battery or space.
UI customization - If you want a button or menu that looks just right, you can tweak how things look on each device.
Keep exploring and trying new things with Xamarin.Forms to make your app better and better.
Chapter 3: Best Practices for Cross-Platform Development
Code Sharing Strategies
When making apps for different devices like Android and iOS, sharing code is super important. It makes things faster and easier. Let's look at two ways to share code:
ApproachGood StuffNot-So-Good Stuff.NET Standard Libraries- Fully supported and safe
- Clear and organized- Limited access to tools
- Need separate projects for each platformShared Projects- Use the same code everywhere
- Very flexible- No separate file created
- Not as many tools
So, in simple terms:
- .NET Standard Libraries are safe and organized but can't do everything.
- Shared Projects let you use the same code for everything but are a bit trickier to handle.
.NET Standard Libraries are usually the way to go for safety and organization. But if you need to mix things up more, Shared Projects are your friend.
Performance Optimization
To make your app run smoothly, here are some tips:
- Understand lifecycles - Know when your app is starting or stopping to manage it better.
- Limit allocations - Try to reuse stuff instead of making new ones all the time.
- Async await - This helps your app do many things at once without getting stuck.
- Fast renderers - These are special tools that make your app run faster on phones.
- Profile regularly - Check how your app is doing to catch and fix problems early.
Learning how your app works under the hood can help you make it faster and more efficient.
Testing and Debugging
Xamarin has some cool tools to help you make sure your app works well:
- Xamarin Inspector - Lets you see and play with your app while it's running.
- Xamarin Test Cloud - Test your app on lots of different phones at once.
- Xamarin.UITest - Helps you check if your app's screens and buttons work right.
Use these tools to test everything about your app:
- How it works (logic)
- How different parts work together (integration)
- How it looks and feels (UI)
- How users will use it (user interaction)
- How well it performs over time (performance)
Testing early and often is key, especially for the main things your app does and for any parts that might break easily.
Chapter 4: Real-World Application Development
Integrating with Cloud Services
When you're making a Xamarin app, you can connect it to cloud services. This means your app can do things like check who's using it, store data online, send messages even when the app isn't open, and keep info available even without an internet connection. Some good options for this are:
- Azure Mobile Apps - This is like a ready-made online space for your app. It helps with:
- Checking user logins
- Keeping data online
- Sending notifications
- Making sure the app works offline too
- Using REST APIs - Your Xamarin.Forms app can ask for data from the web using something called HttpClient. This is great for:
- Working with your own web services
- Getting data from other services like social media or the weather
To get data from the web:
- Add the
System.Net.Httppackage - Set up HttpClient
- Ask for data with GET/POST requests
- Turn the web data (usually JSON) into something your app can use
Implementing Advanced Features
Here are some cool things you can add to make your app more interesting:
- Push Notifications - These are messages that pop up even when the app isn't open. You might need different setups for Android and iOS.
- Camera Access - Let users take photos or videos directly in the app with Xamarin.Essentials MediaPicker.
- Geolocation - Find out where the user is with Xamarin.Essentials Geolocation.
And for making the app look nice:
- Effects - Add visual touches like blurs or animations. This might need some specific coding for Android or iOS.
- Custom Renderers - Change how standard buttons or menus look with your own code for each platform.
Case Studies
Company App - An app for employees to handle tasks, track expenses, and work together. Made with Xamarin.Forms and uses Azure for logging in, storing info, and sending notifications.
Field Services App - An app for technicians in the field to keep track of jobs, customer details, bills, and scan barcodes. Uses Azure Maps for directions and GPS to show where they are. It has a special screen for signing.
Retail App - An app for shopping, where users can look at products, save favorites, and buy things. Connects to an online store using REST APIs. Includes cool features like paying with Apple Pay and seeing products in augmented reality.
sbb-itb-8abf120
Conclusion
Xamarin is a great tool for making mobile apps that work on different devices, like Android and iOS phones, using the same code. Here are some important points for Xamarin developers:
- Xamarin.Forms helps you create an app's look with XAML that runs on many devices. It makes sure your app looks right on each device.
- Xamarin.Essentials offers a simple way to use phone features like location, sensors, and more, without needing to write different code for each platform.
- Visual Studio and other Xamarin tools make building apps easier. They come with tools to test and fix your app.
- Code sharing strategies, like using .NET Standard libraries and shared projects, let you use the same code for different parts of your app.
- Platform-specific APIs help when you need to use features that are unique to Android or iOS. Custom renderers let you change how things look on different devices.
There's a lot more to learn about making apps with Xamarin. Here are some things to look into next:
- Different ways to move around in your app
- Keeping track of your app's data
- Using special features for Android or iOS
- Making your own controls
- Making your app easy for everyone to use
- Adding more to your app
- Automating how you release your app
For more help with Xamarin, check out these resources:
Start with the basics and slowly add more features. Use good design patterns and focus on sharing code. Keep learning, and you'll be making professional apps for different devices in no time!
Appendix: Additional Resources
Official Xamarin Resources

If you're diving into making apps with Xamarin, Microsoft has a bunch of guides and tutorials to help you out:
- Xamarin Documentation - This is where you'll find all the official stuff about how to use Xamarin.
- Xamarin Tutorials - These are step-by-step guides to help you build your first Xamarin apps.
- Xamarin Samples - Here, you can download examples to see how certain features are used.
- Xamarin Forums - A place to chat with other developers and get your questions answered.
Recommended Books
Want to deepen your Xamarin knowledge? Check out these books:
- Xamarin Mobile Application Development, by Dan Hermes
- Creating Mobile Apps with Xamarin.Forms, by Charles Petzold
- Xamarin Cross-Platform Application Development, by Jonathan Peppers
- Xamarin in Action, by Jim Bennett
Online Courses
Prefer learning by watching? These courses might be up your alley:
- Building Apps with Xamarin.Forms on Pluralsight
- Xamarin Forms Fundamentals on Udemy
- Xamarin and Firebase Projects on Udemy
Other Helpful Resources
Here are a few more spots to find help with Xamarin:
- Xamarin University - Free learning content straight from the Xamarin team.
- Xamarin Developer YouTube Channel - Watch tutorials and talks about Xamarin.
- Xamarin Forums - Another place to get help and share what you know with the Xamarin community.
There's a lot of support out there for learning Xamarin, from official guides to community forums. Take your time, start with the basics, and you'll be building apps in no time.
Related Questions
What is Xamarin essentials?
Xamarin.Essentials gives developers tools to access common features on Android, iOS, and Windows devices from one place. This includes stuff like finding your location, using the phone's sensors, storing data securely, and connecting to the internet. You can use these tools in Xamarin.Forms, which means you don't have to write separate code for each type of device.
Some important tools in Xamarin.Essentials include:
- Finding your location with Geolocation
- Using the Accelerometer to detect motion
- Securely storing data
- Changing text to speech
- Checking screen size and orientation
Xamarin.Essentials makes it easier to use device features in your Xamarin apps by putting everything in one package.
What do I need for Xamarin?
To make Xamarin apps, you'll need:
- Windows - Visual Studio with Xamarin
- Mac - Xcode and Visual Studio for Mac
These tools let you create apps for iOS, Android, and Windows using C#. On Windows, you can work on all three types of apps. On Mac, you can work on iOS and Android apps.
So, you need a Windows or Mac computer to start. If you're using Linux, you can only make Android apps for now.
Is Xamarin end of life?
Yes, Microsoft has said that Xamarin will no longer be supported after May 1, 2024. This includes Xamarin.Forms.
Microsoft suggests moving to .NET MAUI for making apps that work on different devices. .NET MAUI is the new version that will take over from Xamarin.Forms.
If you're starting a new project, it's better to use .NET MAUI because Xamarin won't have support after 2024. But you can still use Xamarin for existing apps until then.
What is the minimum Android version for Xamarin essentials?
The oldest version of Android that Xamarin.Essentials works with is Android 4.4, also known as KitKat.
When you're making your app, you should aim for Android 9.0 Pie or newer. This is because you get to use the newest Android features and it meets Google's requirements.
So, to sum up:
- You need at least Android 4.4 to run the app.
- You should target Android 9.0 or newer when building your app.
Related posts

Navigating iPhone Development Services for Startups
Exploring iPhone development services is a crucial step for startups aiming to make a significant impact in the digital world. With over a billion active iOS devices globally, the potential to reach a vast audience and generate substantial revenue through a well-crafted iPhone app is immense. This guide simplifies the journey, covering essential aspects such as choosing the right development team, budgeting wisely, and employing effective strategies for launch and growth. Here's a quick overview to get started:
- Understand the iOS ecosystem: Over 1 billion active devices, with iOS users known for spending more on apps.
- Choose the right development approach: Decide between custom or platform-based, and native vs. cross-platform development.
- Select an experienced development team: Look for relevant experience, technical expertise, and positive client testimonials.
- Plan and budget realistically: Include costs for ongoing support and updates post-launch.
- Prioritize user-centric design: Adhere to Apple's design guidelines for the best user experience.
- Support and scale your app post-launch: Prepare for app maintenance, user feedback incorporation, and scalability to accommodate growth.
Whether you're enhancing your business or starting fresh, a strategically developed iPhone app can significantly boost your startup's visibility, user engagement, and revenue.
The iOS Ecosystem
The world of iPhones, iPads, and iPod touches is huge, reaching all corners of the globe. Here are some quick facts:
- There are over 1 billion active iOS devices out there
- The App Store is open in 175 countries and gets over half a billion visitors every week
- Developers have made $85 billion since the App Store started
- 72% of mobile app business is from iOS users
For startups wanting to reach more people and make more money through mobile apps, this is a golden opportunity. When you make an app for iOS, you're getting in front of a big group of users who love smooth, easy-to-use apps and don't mind paying for good ones. The App Store also helps people find your app with things like special collections and recommendations just for them.
As a developer, you get to use top-notch tools and features to make your app really cool and useful. In short, iOS gives your app a great chance to do well.
The Benefits of Developing for iOS
Let's talk about why making an iPhone app is a smart move for startups:
- More money-making potential: iOS users are known to spend more on apps and things inside apps. If making money is your goal, iOS is a good choice.
- Users are more engaged: iPhone users tend to use their phones a lot throughout the day. This means your app can become a part of their daily routine.
- Focus on quality: Apple checks every app to make sure it's good and safe, which means users expect and like high-quality apps.
- Access to cool tools: Apple gives you all the tools you need, like Xcode and other developer tools, to add the latest features to your app.
- Smooth user experience: If you follow Apple's design rules, your app will be easy to use and look great, which users really enjoy.
By focusing on these benefits, your startup can make an app that really stands out and connects with iPhone users.
The Importance of iPhone App Development for Startups
Creating an iPhone app can really help startups grow and connect with more people. Let's look at the main benefits:
Increased Brand Visibility
- With over 1 billion iPhones being used, your app can reach a lot of people.
- Just being in the iOS App Store can make your startup look more professional.
- Seeing your app icon on their phones helps people remember your brand.
Higher Sales and Revenue
- People with iPhones often spend more on apps and stuff inside apps.
- You can make money in different ways, like charging for your app, offering things to buy inside your app, or subscriptions.
- Using Apple Pay in your app makes it easy for people to buy things.
Improved Customer Engagement
- You can send messages through your app to get people interested, like showing them new products.
- It's easy to talk with your customers directly in the app.
- You can learn what your users like and don't like to make your app better.
Competitive Edge
- By making an app for iPhones, you can use the latest tech stuff like ARKit for augmented reality, CoreML for smart features, and more.
- Having an iPhone app makes your startup look modern and attractive to good workers.
- Apple's app store makes it easy for people to find and use your app.
In short, having a simple, easy-to-use iPhone app can really help your startup by making it more visible, earning more money, keeping customers interested, and standing out from others. Working with a team that knows how to build iPhone apps can make sure you get all these benefits.
Evaluating Your Startup's Needs
Identifying Your Target Audience
Figuring out who will use your app is super important. You need to know:
- Who is your app for?
- What problems does it solve for them?
- How will it make their lives better?
Think about who these people are, including:
- Where they live
- How old they are
- Whether they're male or female
- How much schooling they've had
- How much money they make
- What kind of phones they use
This info helps you decide what your app should do and look like to make these users happy.
Analyzing Competitors
Looking at what other apps are doing can help your app shine. Here's how:
- Try out other apps that are like yours
- Read what people say about them to find out what's not working
- Keep track of cool features you might want to add to your app
Stay on top of what competitors are doing to make sure your app stays fresh and interesting.
Understanding Market Trends
Keeping up with what's new in app development can give your app an edge. Keep an eye on:
- New tech like augmented reality, AI, 5G, and edge computing
- Design trends like simple looks and dark mode
- How to make money with your app, like subscriptions or selling things inside the app
- Getting more people to find your app with tools like App Store Connect
Staying updated and testing with real users can help you build an app that people will want to use.
Choosing How to Build Your iPhone App
Custom vs Platform-Based Development
ProsConsFull control over how your app looks and worksCosts moreMade just for your startup's needsTakes longer to makePlatform-basedEasier on your wallet
When picking between making your app from scratch or using a ready-made platform, think about what's more important for your app:
- Custom development means you can make your app exactly how you want it, but it'll cost more and take more time.
- Platform-based is a quicker, cheaper way if you're okay with some limitations and don't need anything too fancy.
Your budget, how quickly you need your app, and how special you want it to be will help you decide which path is right for you. Going custom offers more uniqueness.
Native vs Cross-Platform Development
ProsConsNativeBetter performanceCross-platformSaves money
Here's how to choose between making your app just for iOS or for multiple platforms at once:
- Native apps work best on iOS, giving you the best performance and letting you use all the cool iOS features, but they're pricier.
- Cross-platform apps can be made once and work on both iOS and other systems, saving you money and time, but they might not feel as smooth.
Think about your budget and when you need your app ready. If you want the best for iOS users and can afford it, go native. If you need to save money and time, cross-platform might be your best bet.
Planning Your iPhone App Development Project
When you start making an iPhone app, planning is super important. It helps you set clear goals, spot problems early, and make sure the app does what your users need. Let's look at the main parts of planning:
Defining Project Goals and Requirements
- Be clear about what you want your app to do from the start
- Write down all the features and things your app needs to have
- Decide which features are must-haves and which ones would be nice to have
- Think about any technical stuff that might limit what you can do
Getting everyone on the same page about what you're aiming for is key.
Researching Your Target Audience
- Find out who will use your app
- Learn what they need and what bothers them
- Figure out the main things they'll do with your app
- Create user personas, which are like imaginary users that represent your real users
This research makes sure your app fits your users perfectly.
Creating Wireframes and Prototypes
- Use wireframes to sketch out each screen and how users move between them
- Make a prototype that feels like the real app to test out ideas
- Check your designs with real users to see if they work well
This step lets you test and improve your app's design without coding it all first.
Choosing the Right Technical Approach
- Decide if your app should be made just for iOS (native) or for several platforms (cross-platform)
- Think about whether a custom solution or a ready-made platform is better for you
- Pick the programming languages, tools, and frameworks you'll use, like Swift, SwiftUI, or UIKit
Choosing the right tech makes building your app smoother.
Employing Agile Methodologies
- Break the work into short periods (sprints) for quicker feedback
- Keep a list of features to add, and tackle them one by one
- Show your app to users often to see what they think
- Be ready to change your plans based on new info
Using Agile means you can adjust as you go, making sure your app turns out great.
Good planning means faster building, less time fixing mistakes, and a better app for your users in the end.
Choosing Between Outsourcing and In-House Development
When you're thinking about getting your iPhone app made, you might wonder whether it's better to hire an outside company (outsourcing) or make your own team (in-house). Both choices have good and bad points, depending on what your startup needs.
Pros and Cons
ApproachProsConsOutsourcing- Access to experts
- Saves money
- Can adjust team size easily- Might be hard to talk with them
- You don't get to oversee everything
- Risk of sharing your ideasIn-House- You're in control
- Easy to talk with your team
- Keeps your project going long term- Costs a lot to start
- Limited to your team's skills
- Takes longer to get going
Outsourcing lets you use experts from anywhere, which can be cheaper and quicker, but might make talking and keeping an eye on your project harder. Having your own team means better communication and control but costs more and limits you to the skills of your team.
Factors to Consider
Here are some things to think about when deciding if you should outsource or build an in-house team:
Budget
- Outsourcing can be cheaper because you don't have to pay for an office or full-time salaries.
- Having your own team means paying for everything, which can get expensive.
Timelines
- Companies you outsource to might work faster because they're used to it.
- Setting up your own team takes time.
Communication Needs
- Working with a team in another country might make talking hard.
- Your own team is right there with you, making it easier to work together.
Control and IP Protection
- With outsourcing, it's harder to keep an eye on your project and keep your ideas safe.
- Your own team gives you more control and keeps your ideas in-house.
Expertise and Capabilities
- Outsourcing gives you access to people who specialize in what you need.
- Your in-house team might not know how to do everything, especially new or complex things.
Thinking about these points can help you decide which way to go. Remember, what works best might change as your startup grows.
sbb-itb-8abf120
Budgeting and Cost Estimation
Cost Influencing Factors
When planning how much money you'll need for making an iPhone app, several things can change the total cost:
Complexity and Scope
- The more complicated and wide-ranging your app is, the more it will cost. Features like 3D graphics or needing a lot of data storage make things more complex.
- If your app needs to work on different devices or has many parts, it will need more work and money.
Custom vs Out-of-the-Box Features
- Making special features just for your app takes more time and skill than using things that already exist.
Development Team's Experience
- Teams that have been making apps for a long time usually charge more but can get things done faster and better. Newer teams might be cheaper but slower.
Location
- Where your development team is based can affect costs. Teams in some countries charge less than those in others.
Post-Launch Support Needs
- Don't forget to set aside money for fixing bugs, adding new features, and other updates after your app is out. Think about saving roughly 20% of your starting budget for each year after launch.
Testing and Quality Assurance
- Spending more on testing your app before it launches can save you from big headaches later. This part of the process needs extra money too.
Creating a Realistic Budget
Here's how to figure out a good budget for your app:
Define Exact Feature Requirements
- List everything your app needs to do and have. This helps you know how much work is involved. Decide what you must have and what would be nice to have.
Research Average Market Rates
- Look up how much developers usually get paid for their work. This helps you understand what to expect in terms of costs.
Get Quotes from Multiple Teams
- Ask different companies how much they think your project will cost. This gives you a range to work with.
Pad Estimates by 20-30%
- Add an extra 20-30% to your budget just in case things end up costing more than expected.
Plan for Post-Launch Expenses
- Remember, you'll need to keep spending money on your app even after it's launched, for things like updates and new features. Plan to spend about 15-20% of your initial budget on this each year.
Setting up a budget means knowing exactly what you need, checking out how much it usually costs, getting different price ideas, adding a buffer for surprises, and remembering future costs. This way, you can make a budget that's close to what you'll really need.
The Development Process
Discovery and Planning
Starting an iPhone app begins with figuring out what you want the app to do. This step includes:
- Thinking of app ideas and deciding what the app will focus on
- Choosing the most important features to keep things manageable
- Making up profiles for your typical users
- Laying out all the technical details and what you need to build the app
- Checking if your plan makes sense with your budget and how long you have to build it
Getting all your ducks in a row before you start helps make sure you can build your app the way you want, without going over budget or time.
Design and User Experience (UX/UI)
Once you've got a plan, it's time to design the app:
- UI design: Making the look of your app, including screens and buttons, that follows Apple's design rules. This helps your app feel right at home on an iPhone.
- UX design: Focusing on making the app easy and pleasant to use.
- Prototyping: Creating a basic version of your app to show how it will work.
- User testing: Letting real people try out your app to see what they think and how you can make it better.
Sticking to Apple's design guidelines ensures your app is user-friendly.
Development and Programming
When building an iPhone app, you mostly use two languages:
- Swift: Apple's newer language that's made just for iOS. It's fast and lets you use the latest features.
- Objective-C: An older language that's only needed for working with some old parts of iOS.
During development, coders:
- Write the code to make the app work
- Connect to other services if needed
- Make sure the app is safe and secure
- Test a lot to catch any bugs
Apple gives developers tools like SwiftUI and UIKit to help build apps.
Testing and Quality Assurance (QA)
Before the app goes live, it goes through a lot of testing to make sure everything works right:
- Functionality testing: Checking that the app does what it's supposed to do under different conditions
- UX testing: Making sure the app is easy to use
- Performance testing: Making sure the app runs smoothly on different iPhones
- Security testing: Looking for any security risks
Testing thoroughly means your app works well and is ready for users.
Launch and Post-Launch Support
After your app is out in the world:
- Making your app easy to find in the App Store
- Keep telling people about your app to get new users
- Regularly update the app to fix bugs and add new stuff
- Adding new features to keep the app interesting
Planning for what comes after launch helps your app stay popular and keep users happy.
Maintaining and Scaling Your iPhone App
Keeping your iPhone app in good shape and ready for more users is key after you launch it. This means fixing any problems, making your users happy, and getting ready for more people to use it.
Importance of Ongoing App Support
After your app is out, it's important to:
- Fix bugs and issues: Every new app has some kinks. Make sure to quickly fix any crashes, problems, or weird things in the app.
- Releasing updates: Keep your app fresh by fixing issues and adding new stuff often. This lets users know you're paying attention.
- Monitoring performance: Watch how your app is doing, like how fast it loads and if it crashes, to catch any issues early.
- Improving stability: Always work on making your app and its background systems stronger and more reliable.
- Adding new features: Listen to what your users want and add new things to your app to keep them interested.
- Ensuring compatibility: Make sure your app works well with new versions of iOS and new devices.
Keeping your app updated and running smoothly shows users you care and keeps them coming back.
Strategies for Scaling Up
When more people start using your app, make sure it can handle the growth by:
- Optimizing performance: Make your app run faster by finding and fixing any slow parts.
- Strengthening infrastructure: Make sure your servers and databases can handle more users and data.
- Streamlining workflows: Make your app's code better so it can support more users at the same time.
- Enhancing analytics: Use better tools to understand how people are using your app and what you can improve.
- Expanding platform availability: Make your app available on more iOS devices to reach more users.
- Refining monetization: Find new ways to make money from your app based on what works and what users like.
By keeping your app updated and ready for more users, you can make sure it stays successful for a long time.
Choosing the Right iPhone Development Partner
Finding the right team to make your iPhone app is super important. With so many options out there, it might feel a bit overwhelming to pick the best one. This part talks about what to think about when looking for the right people to build your app.
Relevant Experience and Portfolio
Start by checking if they've made apps like yours before. Look at their past work to see if their apps are easy to use and work well. It's a good idea to choose someone who has made apps for startups and helped them succeed.
Team Expertise
Find out what the team knows how to do. You want people who are good with:
- iOS devices (like iPhones and iPads)
- Programming languages like Swift and Objective-C
- Tools Apple provides, like Xcode
- New ways of making apps, like using the SwiftUI framework
- How to make apps look good and easy to use
Go for a team that knows a lot about making apps from start to finish.
Communication Habits
It's important to work with a team that talks to you clearly. Ask how often they'll update you and how they plan to keep in touch. Good teams make sure you know what's happening with your app by using regular meetings and project tools.
Cost Structure
Understand how they charge for making your app. This could be a set price for the whole project, an hourly rate, or a fixed monthly fee for a dedicated team. Make sure their prices fit your budget. Don't forget to ask about costs after your app is launched.
Reviews and Testimonials
Lastly, see what other people say about them. Look for a team with happy clients over many projects. This shows they can deliver what they promise.
By looking at these five things, you can find the right team to make your startup's app a hit on iOS devices. Don't be shy to ask lots of questions to make sure they're the right fit.
Conclusion
Key Takeaways for Navigating iPhone App Development
Making an iPhone app can be a big win for startups. It can help you get noticed, make more money, and keep your customers happy. But, it's not always easy. You have to make lots of choices about money, time, and what your app should do.
Here's a quick guide to help you through making an iPhone app for your startup:
Choose the Right Development Approach
- Think about whether you need a custom app or if a pre-made one works. This depends on your budget, how quickly you need it, and if you want something unique.
- If you want the best performance, go for native iOS development with Swift or Objective-C. If you're trying to save money, consider making your app work on more than just iOS.
- Use Agile methods to keep everyone working together and to make changes easily.
Select an Experienced Development Team
- Look at their past work to see if they're good with iOS, Xcode, and designing nice-looking apps.
- Make sure they talk to you clearly about how much it will cost and what you're getting.
- Read what other people say about them to make sure they're reliable.
Plan Realistically
- List all the things your app should do and check out the competition.
- Make a simple version of your app and see what people think.
- Remember, you'll also need to spend money on keeping the app running after it launches.
Prioritize User-Centric Design
- Stick to Apple's design rules to make sure your app fits in on an iPhone.
- Make sure your app is easy to use and check with your target audience to keep improving it.
Support Post-Launch Growth
- Fix any problems fast and keep updating your app.
- Watch how your app is doing and make it better over time.
- Get ready for more users by making your app and its support systems stronger.
By keeping these points in mind and working with someone who knows iPhone app development, startups can create, launch, and grow successful apps.
Frequently Asked Questions
Here are some common questions and straightforward answers about making, launching, and spreading the word about iPhone apps for startups:
What programming language is best for building an iPhone app?
Swift is the go-to language for creating apps on iOS these days. It's quick, not too hard to learn, and lets you use all the newest features on iOS. Objective-C is still around for dealing with older projects.
Should my iPhone app be native or cross-platform?
If you build a native iOS app using Swift or Objective-C, it'll run smoothly and can take full advantage of iOS's capabilities. This route costs more, though. Cross-platform apps can run on both iOS and Android, which saves money, but they might not run as smoothly.
How can I make sure my iPhone app is user-friendly?
Stick to Apple's Human Interface Guidelines to make sure your app fits well with iOS. Also, try out your app with real people early on to find any issues. Keep improving your app based on what users tell you.
What tools do iOS developers use to build apps?
Developers mainly use Xcode for building apps, SwiftUI or UIKit for the app's layout and design, and Git for tracking changes in code. Tools like Jira help manage the project.
How much should I budget for ongoing support after launch?
Set aside about 15-20% of your initial app development budget every year for updates, fixing bugs, and adding new features to keep your app up-to-date and working well.
What are some promo ideas to get more people using my app?
Try using social media ads, teaming up with influencers, making your app look good in the App Store, setting competitive prices, emailing current users, and having sales or promotions to encourage people to talk about your app.
How can I scale up my iPhone app if it gets very popular?
Work on making your app run faster, beef up your servers and databases, make sure your app works well on all iOS devices, get better at understanding your app's data, clean up your code, and think of new ways to make money from your app.
What signs indicate it's time to rebuild my aging iPhone app?
If your app crashes a lot, is slow, gets bad reviews for tech issues, isn't gaining new users, doesn't work well with new iOS versions, is hard to update, or lacks new iOS features, it might be time for a rebuild.
Let me know if you have any other questions!
Related posts

How to Choose a Mobile App Development Company: A Guide
Choosing the right mobile app development company is crucial for the success of your app. Here's a straightforward guide to help you make an informed decision:
- Understand Your Needs: Know your app's purpose, target audience, and key features.
- Evaluate Expertise: Look for experience in relevant programming languages, platform experience, and industry knowledge.
- Review Past Work: Check their portfolio for types of apps developed, industry experience, and project complexity.
- Examine the Development Process: Understand their project management tools, development methodology, and how they handle updates and communication.
- Verify Client Testimonials: Read reviews from various sources and prioritize recent feedback.
- Analyze Pricing Models: Understand their pricing structure and ensure it fits your budget.
- Consider Post-Launch Support: Ensure they offer comprehensive post-launch services to maintain and update your app.
- Schedule Initial Consultation: Assess their understanding of your project, communication fit, and responsiveness.
This guide focuses on the key aspects to consider, ensuring you choose a company that can turn your app idea into reality, fit your budget, and provide ongoing support.
Determine Your App's Purpose
First, figure out the main goal of your app.
- What problem is it going to solve?
- Who's going to use it and how will it help them?
- What special features or functions should it have?
Knowing what you want helps you explain your idea better to the people who might build it.
Research Your Target Audience
Then, learn as much as you can about the people who will use your app.
- How old are they, where do they live, and how much money do they make?
- What kind of phones or tablets do they use the most?
- Why would they want to keep using your app?
This info helps decide how the app should look and work. Share these details with potential app builders so they know who they're making the app for.
Map Out Key Features
Lastly, decide on the most important features your app needs to have.
Think about:
- Essentials - The must-have features
- Enhancers - Extra features that make the app better
- Future - Cool ideas for updates after the app launches
Telling your app builders what's most important helps them know what to focus on.
Taking these steps before you start looking for someone to build your app makes sure you pick the right team for the job.
1. Evaluate Company Expertise and Technical Skills
Programming Languages and Tools
It's key to check if the company you're considering is good at the main computer languages and tools used to make apps. These include:
- Swift - Used for making apps for iPhones and iPads
- Java - The main language for making Android apps
- Dart - Used for making apps that work on both iPhones and Android phones
- JavaScript - Often used for apps that need to work on both types of phones too
A company that knows these languages well can make high-quality apps that work great on your phone.
Platform Experience
You'll want a company that's good at making apps for:
- iOS - The system for iPhones and iPads
- Android - The system for many other kinds of smartphones
- Cross-platform - Making an app once so it works on both iPhones and Android phones
If they're experienced with both iOS and Android, they can make apps that run smoothly on either. Knowing how to make cross-platform apps is a plus because it can save time and money.
Industry Knowledge
It's great if the company has made apps for businesses like yours before. For example, if you need an app for a bank, it's important they know about banking rules. Check their past work to see if they've made apps that are similar to what you need.
This helps them make an app that feels right for your customers and fits your business well.
2. Review Portfolio and Past Projects
Looking at what a mobile app development company has done before is a really good way to see if they’re a good fit for your project. You get to see the kind of apps they’ve made, the industries they’ve worked in, and how complex their projects have been.
When you’re checking out their past work, here’s what to keep an eye on:
Types of Apps Developed
- Have they made apps like the one you’re thinking of? This could be about what the app does or who it’s for.
- How many of their apps have made it into app stores? More apps out there means they’ve got more experience.
Industry Experience
- Have they made apps for businesses like yours? That can be really helpful.
- Even if they haven’t worked in your exact field, do they know enough about similar areas?
Project Complexity
- Look at how complicated the apps they’ve made are. Do they match what you need?
- Check if they’ve worked with outside services or APIs (which lets apps talk to other software).
- What do their apps look like and feel like to use? Are they easy and nice to use?
Clientele
- Who have they made apps for? Working with well-known companies could mean they’re trusted.
Case Studies
- Detailed stories about how they made an app, what problems they faced, and what they achieved can tell you a lot.
- Good case studies show they know their stuff, work well with others, and make a real difference.
Taking a close look at their previous projects helps you make sure you’re choosing a company that knows how to turn your app idea into something real. Talking to people they’ve worked with before can also give you a better idea of what to expect.
3. Examine the Development Process
Project Management Tools
When looking for an app development company, it's a good idea to ask about the tools they use to plan, track, and talk about the app they're building for you. Many teams use tools like Jira, Trello, or Asana. These tools help everyone know what's going on, let you give your thoughts, and keep things running smoothly. You should ask:
- Which tool they use to keep track of tasks
- If you can see this tool to check on progress
- How they make sure everything is current
Choosing a company that uses good project management tools means you'll always know what's happening with your app.
Development Methodology
It's also smart to check if the team uses an agile way of making apps. This means they do a little bit at a time, letting you see and try out parts of the app as they go. This is good because:
- You can change things even if they've started building
- They can find and fix problems early
- The app gets better as they keep working on it
An agile process also means you'll have regular meetings to see what they've done. Make sure the company you pick works in these short cycles, especially if you're looking to hire app developers in India or are curious about how much it costs to develop a mobile app in India.
Reporting and Updates
Lastly, you want to make sure the team will keep you in the loop. Ask about:
- How often they'll send you updates (once a week is usual)
- If they plan meetings to show you what they've done
- How you can ask questions or give feedback
Having regular updates and being able to talk to the team means you'll always know how your mobile app is coming along.
Picking the right mobile app development company means really looking into how they work, the tools they use, and how they talk to you. Knowing these things helps you find a team that can bring your app idea to life.
4. Verify Client Testimonials
Checking what other people say about a mobile app development company is super important. You get to learn from their experiences and see if this company is reliable.
Read Multiple Review Sources
Don't just stick to the company's own website for reviews because they might only show the good stuff. Look at other websites like Clutch, GoodFirms, and Glassdoor too. These sites give you a mix of opinions from different clients.
- Clutch - This site is all about tech services, including app developers. Here, clients rate companies on how good the work was, if it was done on time, and if it was worth the money.
- GoodFirms - Gathers client thoughts on how reliable and quality-focused companies are.
- Glassdoor - Offers views from people who work or worked there, shedding light on the company culture.
Looking at different sites helps you get the full picture.
Watch for Warning Signs
While reading through reviews, be wary of:
- Praise that doesn't give specifics about the project
- Very brief reviews that don't say much
- Only new reviews, nothing older
Good, detailed reviews are what you're after.
Prioritize Recent Feedback
Focus on reviews from the last year or two. The world of mobile apps changes fast, so you want to know how the company does things now, not years ago.
Be cautious of a company that only shows you old feedback. If possible, talk to some of their recent clients yourself to get the scoop.
Confirm Review Authors
Some review sites let clients share their names with their feedback. Ask the company if they can put you in touch with past clients. Talking to them directly is the best way to get honest insights.
Hearing from people who've already worked with the company gives you a clear idea of what to expect. Keep their opinions in mind when making your choice.
sbb-itb-8abf120
5. Analyze Pricing Models
When you're picking a company to make your mobile app, understanding how they charge and if it fits your budget is super important. Here's how to make sense of their pricing:
Development Cost Breakdown
A trustworthy team will tell you exactly what you're paying for, like:
- Project scoping and planning - Figuring out what needs to be done, drawing up plans
- UI/UX design - Making the app look good and easy to use
- Development and testing - Writing the code, fixing bugs, making sure everything works
- Publication and maintenance - Getting your app into app stores, keeping it updated
This way, you know what each part of the process costs.
Pricing Models
Companies might charge you in different ways:
- Time and Materials - You pay based on how much time they spend on your project. This can change as they work.
- Fixed Price - They tell you a price at the start, and it doesn't change. This is simpler but less flexible.
- Dedicated Teams - You pay a monthly fee for a team that works just on your project. Good for big projects that take a while.
Pick the one that matches how you want to manage your money.
Average Costs
How much it usually costs to make an app in India:
- Simple app - $5,000 to $15,000
- Complex enterprise app - $25,000 to $70,000+
But remember, things like how complex your app is can change the price.
Payment Plans
Most companies will let you pay in ways like:
- Paying in parts as they hit certain goals
- Half now, half when they're done
- Paying every month if you have a team dedicated to your project
Choose a way to pay that makes sense for you.
By really getting into the nitty-gritty of how much your app will cost and how you can pay for it, you make sure you find a developer that fits your budget. Always talk about money stuff upfront to avoid any surprises later.
6. Consider Post-Launch Support
After your app is out in the world, it's going to need some ongoing care to keep it running smoothly. This is where post-launch support comes in. It's important to choose a development company that won't just build your app and disappear. Here's what you should look for:
Types of Post-Launch Services
A good development team should help with things like:
- Bug fixes and troubleshooting - Fixing any problems that pop up
- Performance monitoring and optimization - Making sure your app stays fast and reliable
- Feature additions and enhancements - Updating your app with new stuff to keep users interested
- Regulatory compliance and security updates - Keeping your app safe and following the rules
- Assistance with app store submissions - Helping with any changes or updates needed by app stores
Reasons Post-Launch Support Is Essential
Here's why you need to keep taking care of your app after it launches:
- Apps need to be updated often - As technology changes, your app will need tweaks to stay current and work well on all devices.
- Users like apps that get better over time - If your app doesn't improve or fix issues quickly, people might stop using it.
- Your app can grow and get better - The launch is just the start. With ongoing support, you can keep adding new features.
Questions to Ask Potential Partners
When talking to development teams, ask things like:
- What kind of help do you offer after the app launches?
- How do you handle urgent problems?
- How fast do you respond to big issues?
- Do you suggest new features or updates for the app?
Choosing a partner that offers solid post-launch support means your app has a better chance of staying relevant and loved by users for a long time.
7. Schedule Initial Consultation
Before you decide to work with a mobile app development company, it's a good idea to have a chat or a meeting with them first. This talk is not just a formality – it does a bunch of important things:
Get on the Same Page
This is your chance to make sure you and the developers understand each other. You'll want to talk about:
- What you hope your app will do
- The features it needs to have those things happen
- How long it might take to build the app
- How much it’s going to cost
Getting these things clear from the start helps avoid surprises later on.
Assess Team Expertise
You also get to see if the team knows their stuff. Consider asking:
- Have you built similar apps before?
- Do you know how to use the tech my app needs?
- What's your usual way of making apps?
Their answers will show if they have the skills you need.
Evaluate Communication Fit
The first talk also lets you see if you get along in terms of communication. Pay attention to how they:
- Ask questions to understand your app better
- Explain how they make apps
- Are clear about what they can do
Good communication now suggests they'll be easy to work with later.
Confirm Responsiveness
Notice how quickly they get back to you to set up this chat. Teams that reply fast show they're reliable.
If it takes them a long time to respond, you might have trouble reaching them when you need something important for your app.
Talking things through before you start working together helps make sure you pick the right team for your app – one that knows their tech, talks clearly, and gets back to you quickly.
Conclusion
Picking the right company to make your app is super important. It's all about finding a team that can turn your app idea into something real and awesome. Let's quickly go over what you should look for in a good app-making team:
Expertise and Experience
- They should be really good at using computer languages like Swift, Java, Dart, and JavaScript.
- They need to know how to make apps for iPhones, Android phones, and both at the same time.
- It's great if they've made apps for businesses like yours before.
Portfolio and Past Projects
- Check out the types of apps they've built.
- See how complex their previous apps were.
- Look at stories of how they've solved problems in the past.
Development Process
- They should use tools like Jira or Trello to keep everything organized.
- They work in small steps and let you see and try parts of the app as they make it.
- You should get regular updates on how the app is coming along.
Client Testimonials
- Read recent reviews from different places.
- Try to talk to people who have worked with them before.
Pricing Models
- They should explain clearly how much everything will cost.
- There should be different ways you can pay.
- Knowing the average cost can help you figure out if it fits your budget.
Post-Launch Support
- They should help fix any problems after the app is out.
- You want them to be quick to respond if something goes wrong.
- They should keep making the app better over time.
By looking at these things, you can find a team that fits what you need and what you can spend. Having a chat with them before you decide is a smart move. It helps you see if they understand your idea and if you'll work well together.
Taking the time to choose the right team means your app is more likely to be made just how you want it, launch smoothly, and get good care after it's out.
Frequently Asked Questions
Here are some common questions about choosing a mobile app development partner:
How do I evaluate a potential partner's technical expertise?
When checking their tech skills, look for:
- Their know-how with coding languages like Swift, Java, Dart, JavaScript
- Their experience with making apps for iOS, Android, and both
- If they've worked on projects similar to yours before
- The complexity of the apps they've previously created
What are some best practices when selecting an app development partner?
Some good steps to follow are:
- Be clear about what you want your app to do from the start
- Take a close look at how they plan and build apps
- Read reviews from different places and talk to past clients
- Understand how they charge for their work
- Ask a lot of questions when you first talk to them
Should I hire someone locally or consider offshore/nearshore options?
It really depends on what you need. Hiring locally might make talking easier, but companies in other countries might offer more tech skills and better prices. Focus on their skills, past work, and how they communicate.
What questions should I ask during a first consultation?
Some key questions are:
- Have you made an app like mine before?
- How do you test and make sure the app works well?
- How will you keep me in the loop?
- What kind of help do you offer after the app is launched?
- What do we do if there are problems or delays?
How can I check the quality of a potential partner's work?
Check out their past work for examples. Read what other clients have said and talk to them if you can. Ask about how they test the app to make sure it's good. Make sure your contract spells out what you expect in terms of how fast, secure, and good-looking the app should be.
Related posts

Flutter Mobile App Development Services Explained
Exploring the world of Flutter Mobile App Development Services offers a gateway to building versatile, high-performance apps with a single codebase for iOS and Android platforms. Here's a quick rundown of what you need to know:
- What is Flutter? A powerful, Google-backed UI toolkit for crafting beautiful, natively compiled applications for mobile, web, and desktop from a single codebase.
- Benefits of Flutter: Fast development with 'hot reload', cross-platform efficiency, customizable UI for distinctive app designs, native-like performance, and a supportive community.
- Services Offered: From consultation, UI/UX design, app development, testing, to deployment and maintenance, Flutter development teams offer comprehensive services to bring your app idea to life.
- Why Choose Flutter Teams? Their deep expertise in Flutter and Dart, end-to-end service capability, access to top talent, and effective collaboration techniques ensure high-quality app delivery.
- Overcoming Challenges: Expert Flutter teams navigate through integrating Flutter with native code, managing large projects, optimizing performance, and keeping up with new iOS/Android updates.
Whether you're a business looking to develop a mobile app or curious about the potential of Flutter, understanding these services and the value they offer can pave the way for successful app projects.
Benefits of Flutter for App Development
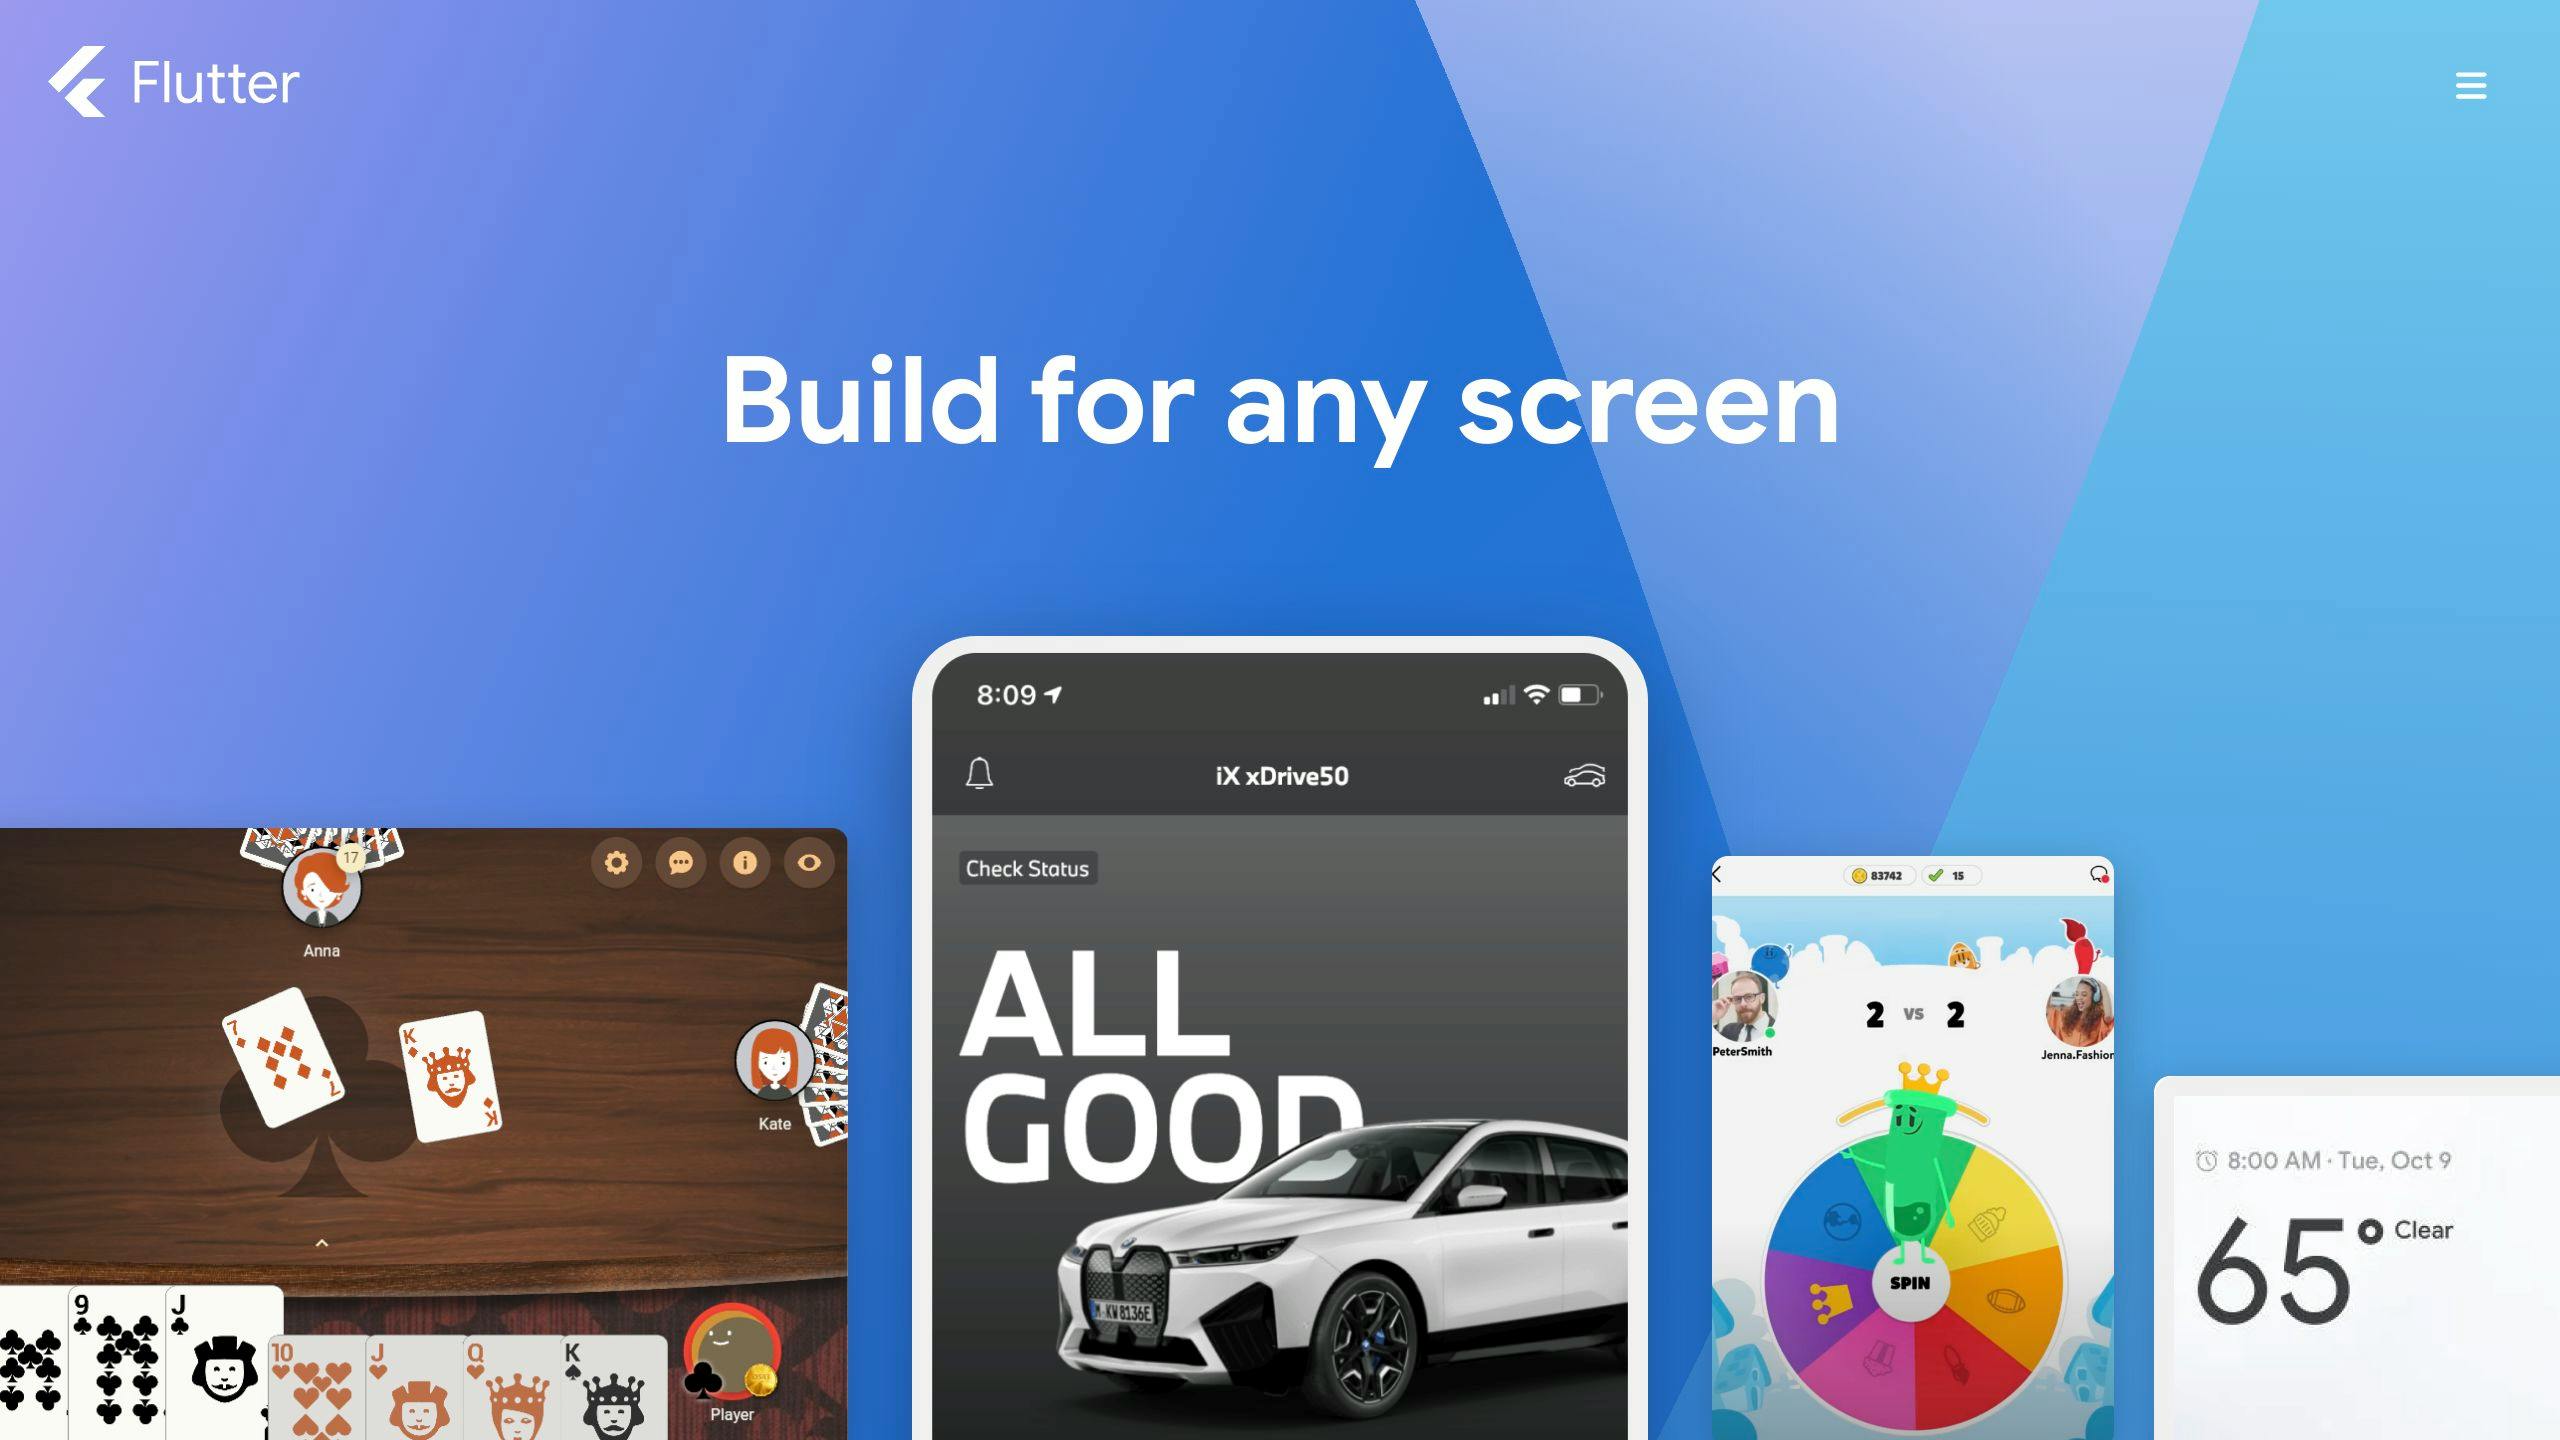
Here are some reasons why Flutter is good for making apps:
- Fast Development - Flutter has a cool feature that lets you see changes instantly without having to rebuild the whole app. This saves a lot of time.
- Cross-platform - You can make apps for iPhones, Android, web, and desktop with just one set of code. This means less work and more apps.
- Customizable UI - With Flutter, you can easily make your app look exactly how you want with its wide range of design options.
- Native Performance - Apps made with Flutter work really fast, almost like they were made specifically for each platform.
- Strong Community - Since Google supports Flutter and it's open-source, there's a lot of help and guidance available.
With benefits like being able to use the same code for different platforms, quick development times, and fast app performance, it's clear why Flutter is becoming a go-to choice for making mobile apps.
Flutter Development Services Explained
Flutter development teams help you make, launch, and keep up great mobile apps using Flutter. Here's a look at what they do:
Consultation and Requirements Analysis
- Talk about what you want your app to do, who it's for, what features it should have, and any tech stuff that's important.
- Look at different options for adding special features, animations, and designs.
- Choose the best tech path that fits what you want your app to achieve.
User Interface and Experience Design
- Make clickable prototypes and detailed app designs.
- Plan out how users will move through the app and turn those plans into Flutter code that looks good.
- Use Flutter's big selection of customizable parts to make your app look just right.
Flutter App Development
- Handle everything from building the app's structure to adding features.
- Use Flutter and Dart to make the app work and flow nicely.
- Check the code for problems and add in extra services if needed.
Testing and Quality Assurance
- Test the app on different devices and versions of operating systems.
- Use automatic testing to find bugs.
- Fix any speed, bug, or user experience problems before the app goes live.
Deployment and Maintenance
- Help get your app into app stores and through approval processes.
- Keep helping after launch to fix any issues and keep the app running smoothly.
- Update the app regularly to use the newest features from Flutter.
With these services, development teams can quickly bring apps that work well and look great on any platform to the market.
Why Businesses Trust Flutter Development Teams
Businesses often go for Flutter development teams when they need mobile apps because these teams know their stuff, can do everything from start to finish, bring in the best people for the job, are great at working together, and know how to avoid problems.
Deep Flutter and Dart Experience
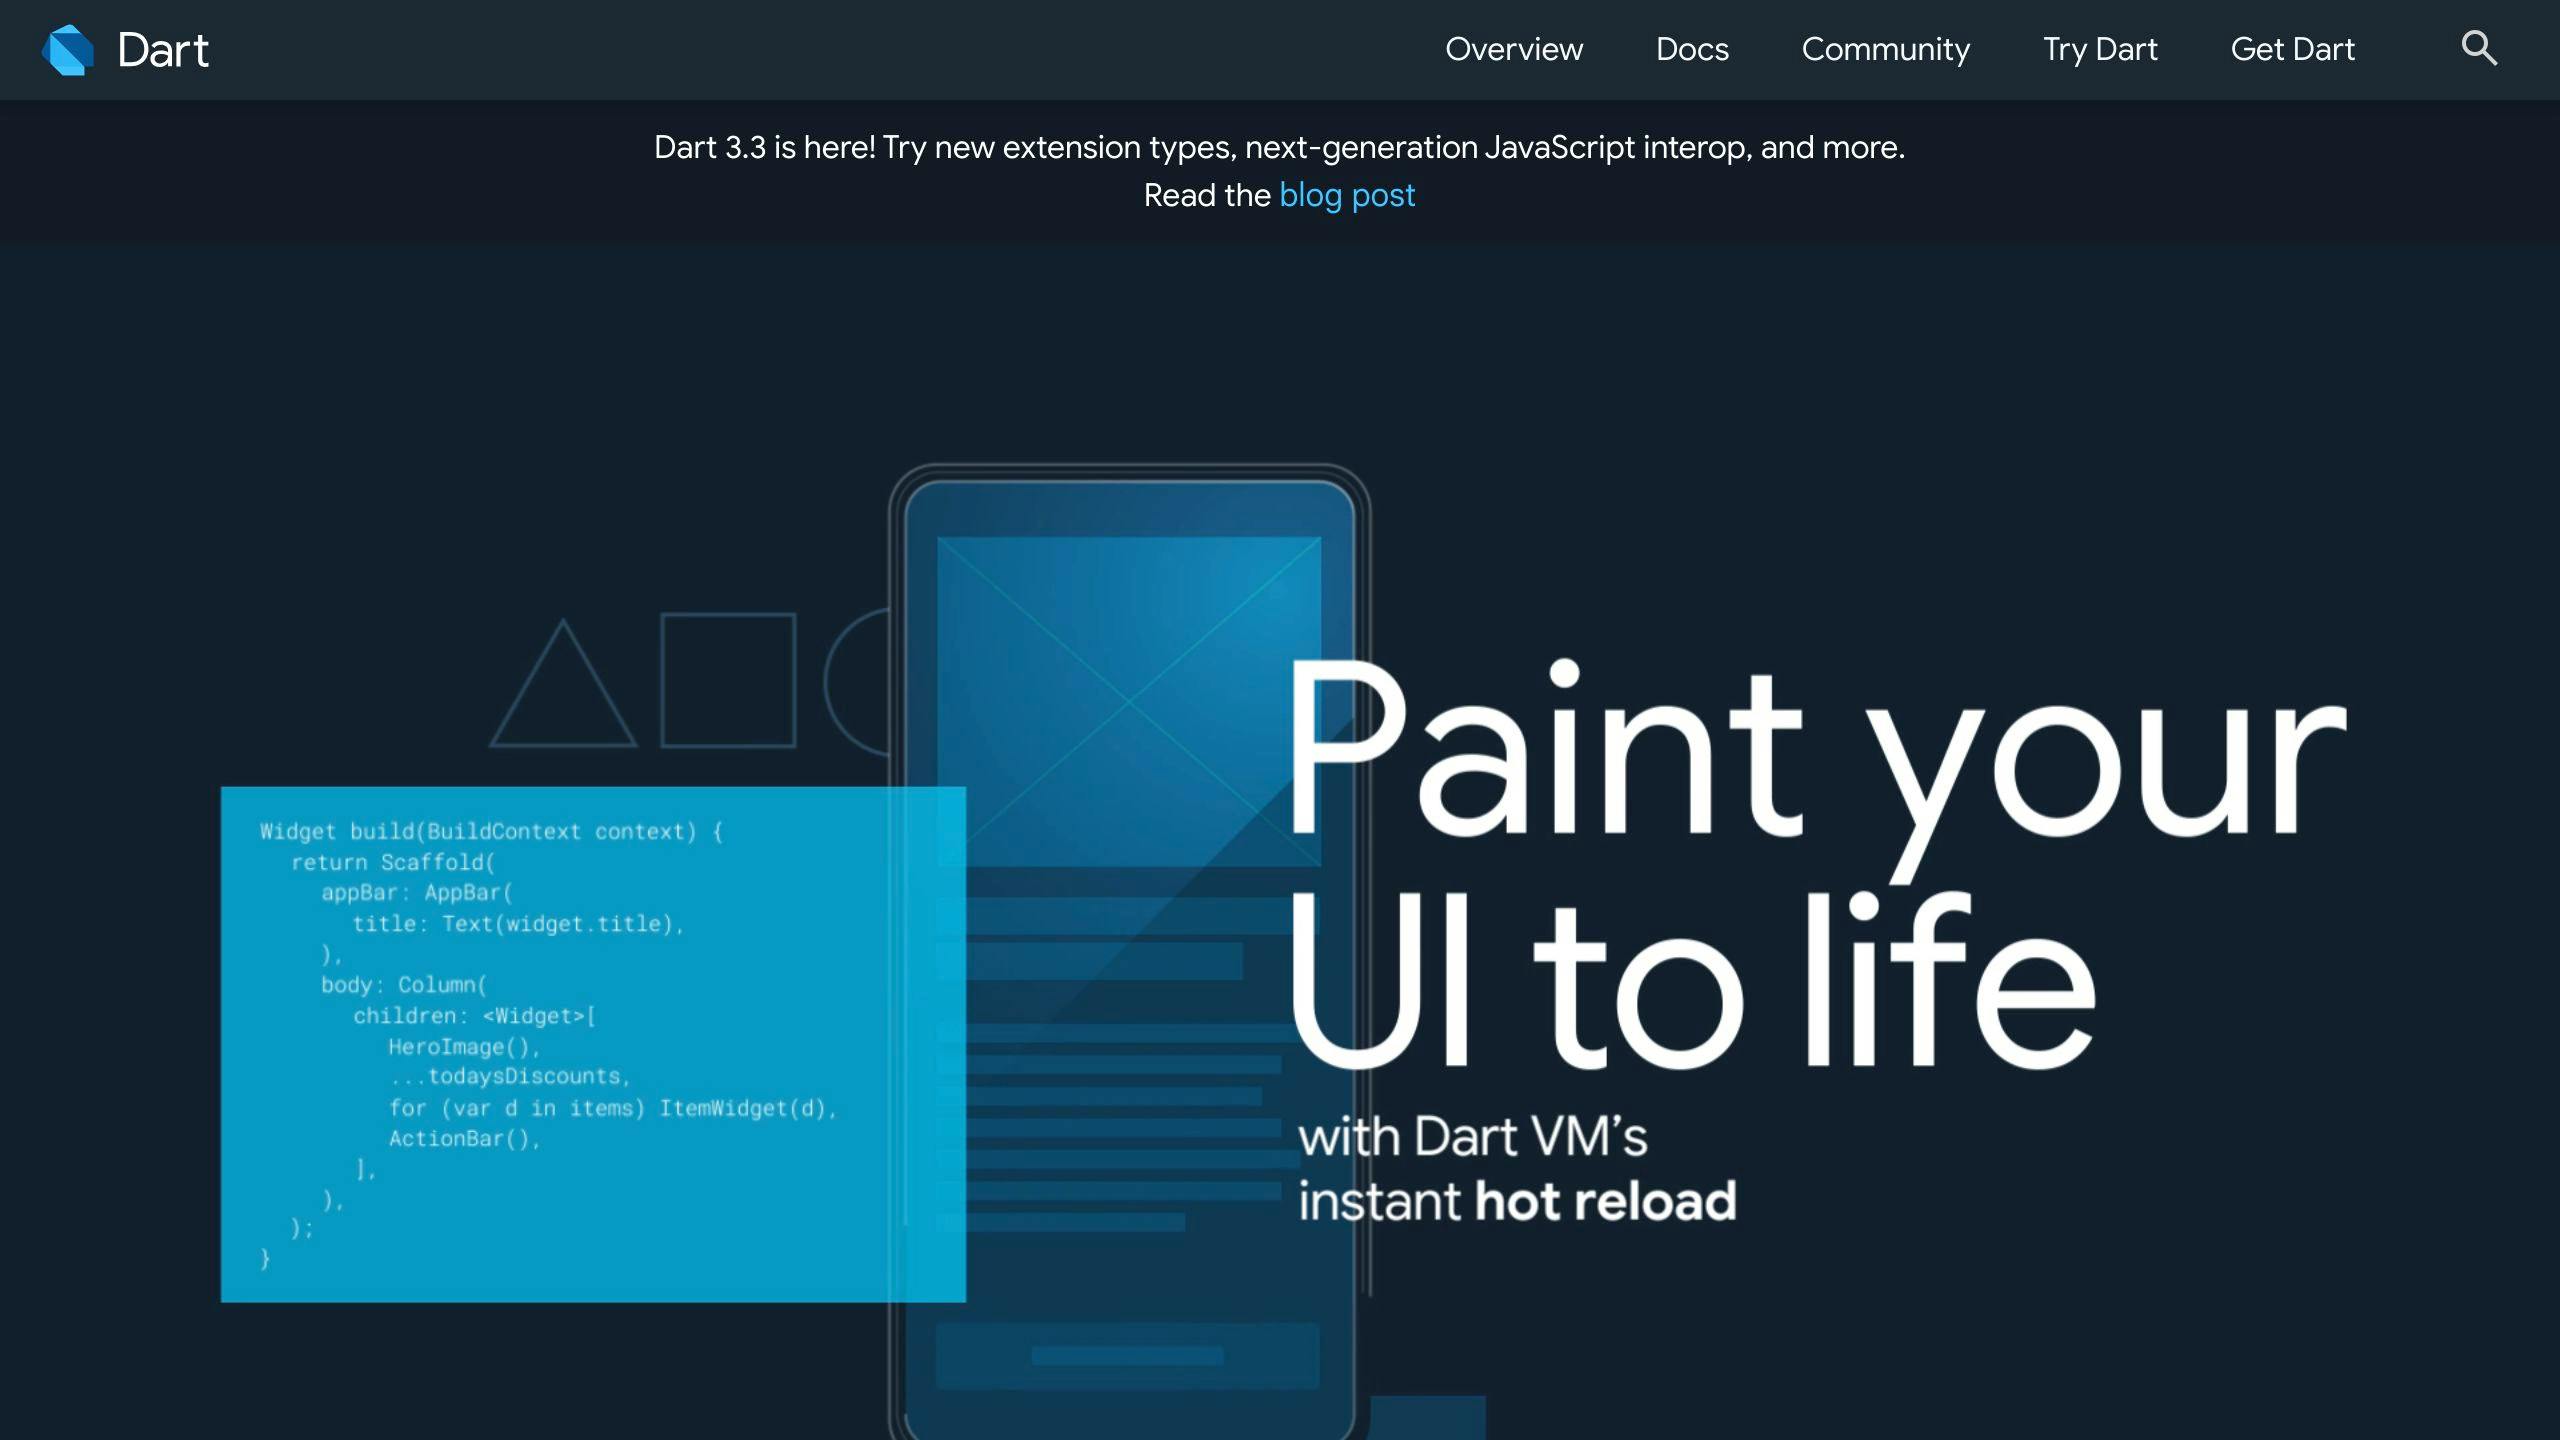
Flutter teams use Flutter and Dart every day, so they're really good at dealing with tricky parts of making apps. They can make apps that look great and work smoothly.
End-to-End Development Services
With Flutter teams, businesses can get all they need for their app from one place. This includes designing how the app looks and works, building it, and making sure it keeps running well after it's launched.
Top 1% Talent and Specialists
Flutter teams are picky about who they hire, making sure only the very best people work on your app. This means better quality and safer, faster apps.
Effective Collaboration and Communication
These teams make sure everyone's on the same page by using tools that help track the project, having regular meetings to update everyone, and sharing how things are going. This makes working together smooth and straightforward.
sbb-itb-8abf120
Overcoming Key Challenges in Flutter Projects
Flutter is great for making mobile apps, but sometimes it can be tricky. Here's how a good Flutter team can help solve some common problems when working on Flutter projects.
Integrating Flutter with Native Code
Sometimes, Flutter apps need a little extra help from the phone's own system, like when you want to use the camera or get info about the device. Flutter has special tools for this, but using them right needs someone who knows both Flutter and the phone's system well.
A skilled Flutter team will:
- Figure out when to use these tools and set them up correctly
- Mix Flutter with the phone's system smoothly
- Make sure Flutter and the phone's system can talk to each other without problems
This helps Flutter apps do more things and work better.
Building Large, Complex Applications
When apps get big, managing all the code can get tough. You have to make sure everything works together, even when lots of people are working on it.
Here's what a Flutter team does:
- Modular Architecture: Break the app into smaller parts that are easier to handle
- Code Reuse: Use the same bits of code in different places to save time
- Automated Testing: Check automatically if everything works as it should
- CI/CD Pipelines: Use tools to automatically build and update the app, making things faster and reducing mistakes
This makes it easier to keep big projects under control.
Ensuring Peak Application Performance
Flutter apps usually run smoothly, but sometimes they can slow down, especially if there's a lot going on in the app.
A Flutter team would:
- Optimize Rendering: Make sure the app doesn't redo work it doesn't need to
- Image Handling: Load and show images efficiently
- Lists/Scrolls: Make lists that scroll smoothly
- Isolate Workloads: Do heavy tasks separately so they don't slow down the app
- Profiling: Find and fix parts of the app that are slow
- Memory Leaks: Find and fix issues that cause the app to crash
These steps help make sure the app runs smoothly.
Supporting Newer iOS/Android Versions
Phones get new updates every year, so Flutter apps need to keep up to work right and use the latest features.
A good Flutter team will:
- Keep the app updated with new phone updates
- Use the latest Flutter tools
- Make sure all parts of the app work with new updates
- Test the app on new phone systems while they're still being developed
This makes sure the app stays fresh and can do the newest things phones can do.
By tackling these Flutter challenges, a good team can make sure your app works well and takes advantage of everything Flutter has to offer.
Conclusion - Why Flutter is Great for Making Apps
Flutter makes it easier and faster to build really good mobile apps. It has this cool feature that lets you see changes right away, lots of ways to make your app look just how you want, and it makes apps that work really well on both iPhones and Android phones.
Flutter Gives You the Best of Everything
With Flutter, you can make apps for phones, computers, and the web all at once. Here are some key things it's great for:
- Works like a charm: Apps made with Flutter work really smoothly, whether you're swiping through pages or watching animations.
- Make it yours: Flutter has lots of tools to help you design your app just the way you like.
- Saves time: The hot reload feature lets you see the changes you make to your app instantly, without having to start over. This means you can make your app faster.
- Use it everywhere: The same Flutter app can go on iPhones, Android phones, web browsers, and computers. This means more people can use your app.
Google and Lots of Developers Have Got Your Back
Google supports Flutter, and there's a huge community around it. This means:
- You get new tools and designs from Google.
- There's always someone to help with questions or problems because so many people use Flutter.
- There are over 150,000 people making stuff with Flutter, and the number is growing.
This big community makes working on your app easier because you can find help and ideas from other people.
Flutter really has everything you need to make a great app in 2023 and beyond. Working with a team that knows Flutter well can help you make the most of what Flutter offers.
Related posts

Flutter for Entrepreneurs: A Business Perspective
Choosing Flutter for your startup's mobile app development offers significant benefits:
- Cost-efficient: Write once, deploy on both iOS and Android.
- Rapid development: Hot Reload and reusable widgets speed up the process.
- Quick time-to-market: Launch your app faster than competitors.
- Scalability: Easily expand your app to other platforms.
- High-quality UI: Create visually appealing apps with ease.
Compared to native development, Flutter stands out for its cross-platform capabilities, reduced development effort, and easier long-term maintenance. Real-world successes from companies like Poshmark, Uber, and eBay illustrate Flutter's potential for cost savings, improved user experiences, and scalability. However, consider app complexity, target platforms, and your team's capabilities when deciding. Flutter is on a promising trajectory, with expanding support for web and desktop applications and integration with Google's upcoming Fuchsia OS.
Comparison of Native vs Flutter Cross-platform Development
CriteriaNativeFlutterPerformanceReally goodAlmost as good, with its own way of drawing thingsDevelopment EffortA lot – you need different teams for iOS and AndroidLess – one team can handle bothUser ExperienceWhat you expect, with full access to the phone's featuresConsistent, with special tools to make it feel right on each phoneTime-to-marketTakes longer – you have to make everything twiceQuicker – one version works for all phonesLong Term MaintenanceHarder – each phone type needs its own updatesEasier – one update reaches all phones
Flutter's cross-platform approach offers a compelling alternative to traditional native development, particularly for startups looking to maximize efficiency and impact.
The Business Case for Flutter: Key Advantages for Entrepreneurs
Cost Efficiency
Using Flutter, startups can cut down on how much they spend making their app because they only have to write their app once for it to work on both iPhones and Android phones. This way, they don't have to make two different apps, saving a lot of effort and money.
Also, when it's time to fix bugs or add new things to the app, they only have to do it once. This makes things simpler and lets them focus on other important parts of their business.
Speed to Market
Flutter helps entrepreneurs get their apps out there quicker because of a few cool features:
- Hot Reload - Lets you see changes right away, making it faster to test and build.
- Extensive widgets - You can quickly put together a good-looking app using pre-made design pieces.
- Single codebase - Since you write your app just once, you don't have to spend time making it work on different devices.
Getting your app to users faster means you can jump on opportunities and get ahead of the competition.
Scalability
With Flutter, it's easier to grow your app. You can start with mobile and then add it to websites, computers, and other devices without needing a lot of extra work.
This means if your business grows or changes direction, Flutter can keep up without slowing you down. It's built in a way that makes it easy to add more features or handle more users over time.
Rich Ecosystem and Community Support
Flutter is supported by Google and has a lot of tools and packages to help you build your app. It also works well with other Google services, making it easier to manage your app's data and services.
There's also a big community of Flutter users. This is great because you can find a lot of help and advice online, whether you're just starting or running into problems.
High-Quality User Experience
Flutter lets you make really nice apps that look and feel great, without needing a big design team. You can use its tools to create unique and engaging apps that stand out.
This means even small teams can make apps that look professional and keep users coming back.
Comparative Analysis: Cross-platform Development with Flutter vs Native Approaches
When we look at Flutter and compare it to the traditional way of making apps (which is called native development), we can see differences in how they perform, how much work it takes to build them, how the apps feel to use, how quickly you can get them to users, and how easy they are to keep up with over time. Here's a simple table to show these differences:
Comparison of Native vs Flutter Cross-platform Development
CriteriaNativeFlutterPerformanceReally goodAlmost as good, with its own way of drawing thingsDevelopment EffortA lot – you need different teams for iOS and AndroidLess – one team can handle bothUser ExperienceWhat you expect, with full access to the phone's featuresConsistent, with special tools to make it feel right on each phoneTime-to-marketTakes longer – you have to make everything twiceQuicker – one version works for all phonesLong Term MaintenanceHarder – each phone type needs its own updatesEasier – one update reaches all phones
Making apps the native way means you have to create separate versions for iPhones and Android phones. This needs more people, takes more time, and every time you update, you have to do it twice.
Flutter, on the other hand, lets you write your app once and it'll work on both types of phones. This makes the whole process quicker and less of a headache. Flutter's special tools also let you make your app look and feel like it was made just for that type of phone, even though it wasn't.
While apps made the native way might run a bit smoother in some cases, Flutter is fast enough for most things businesses need. For startups and small businesses, Flutter makes it possible to get your app out there on both iPhones and Android phones without spending a fortune. It also makes looking after your app simpler since you only have one version to worry about.
So, if you're not making a super complex game or something that needs every bit of the phone's power, Flutter is a smart choice. It's cheaper, faster, and you can reach everyone, no matter what kind of phone they have.
Flutter in the Real World: Success Stories
Flutter is being used by all sorts of businesses to make really good mobile apps without spending too much money or time. It's great for making apps that work on both iPhones and Android phones with just one set of instructions. Here are some real-life examples of how it's helping businesses do better.
Cost and Time Savings Through Cross-Platform Development
Some companies have saved a lot of money by using Flutter to make their apps. This is because they only had to write their app once to have it work on both iOS and Android.
For instance, the shopping app Poshmark cut their starting costs by about half and ongoing costs by 30-40% by choosing Flutter. They got their app out in 9 months with just 6 developers working on it.
Another app, Finance App, managed to make their app in just 7 months instead of 18, which let them start doing business sooner.
Enhanced User Experience Driving Growth
Flutter helps make apps look and work really well, which makes people want to use them more.
The car ride app Uber made their driver app with Flutter in 2018 and saw more drivers using the app each week by 20% thanks to the better experience. The online shop eBay also used Flutter and saw people listing 10% more items.
Scalability Enabling Global Expansion
Flutter makes it easy to grow your app to work on the web, computers, and more without spending a lot of extra money. This helps businesses reach more people in different places.
For example, the bank app Nubank grew from 5 million to 15 million customers after using Flutter in 2018 to make their app work on more than just phones. They quickly moved into new countries like Mexico and Colombia.
The game app Dream11 went from 10 million to 80 million users after switching to Flutter in 2019, and they didn't even have to hire more people.
These stories show that Flutter is really useful for businesses looking to save money, get to the market faster, make their apps better for users, and grow without huge costs. For startups and businesses wanting to expand, Flutter is a smart choice.
sbb-itb-8abf120
Strategic Considerations and Challenges
When thinking about using Flutter for your startup's app, it's important to look at a few big-picture things:
App Category and Complexity
- Flutter might not be the best for really graphic-heavy apps like 3D games. Sometimes, building it the old-fashioned way for each phone type can be faster.
- For most business apps, Flutter does the job well. Think about what your app needs to do.
- If your app needs to use very specific phone features that Flutter doesn't have, you might need to go with the traditional approach.
Target Platforms
- Flutter turns your code into something that works great on both iOS and Android.
- For websites, Flutter turns into JavaScript/HTML but might miss a few small things. Check if that's a problem for you.
- Flutter isn't quite ready for making desktop apps yet, but it's getting there.
In-House Capabilities
- If you already have developers who know how to make traditional mobile apps, they'll likely pick up Flutter easily.
- There are plenty of Flutter developers out there if you need to hire.
Learning Curve
- Developers who've worked with similar tools like React will get the hang of Flutter quicker.
- It might take a bit for those used to a different way of making apps to adjust.
- Web developers might need to get used to how Flutter does things.
Common Limitations
Flutter is great for making apps work on different devices, but there are a few downsides like:
- Larger app size: The smallest Flutter app starts at about 7MB. You can make it smaller, but it's something to keep in mind.
- Plugin dependence: For some phone features, you'll need extra bits of code, which can make your app bigger.
- Recompilation required: If you want to change how something looks, you often have to rebuild the whole app.
Overall, Flutter is a good choice for startups wanting to make apps quickly for both iPhones and Android phones. Just make sure none of the small issues are deal-breakers for what you want to do. Using good practices in how you write and organize your code can also help make everything smoother.
The Road Ahead: Flutter's Future Trajectory
Flutter is growing fast and looks like it's going to keep on growing. Here's what's coming up that's pretty exciting:
Expanding Desktop and Web Support
Right now, Flutter is all about making apps for phones. But Google's got plans to make it great for creating websites and desktop apps too. They're working on making it easier to use Flutter for web stuff, like adding more web-friendly features. And they're also making it possible to use the same Flutter code to make apps for computers, whether they run Windows, macOS, or Linux.
Integration with Fuchsia OS
Google's working on a new operating system called Fuchsia, and Flutter is a big part of it. If Fuchsia takes off, it could make Flutter even more popular. The good news is, if you're making something with Flutter now, it should work on Fuchsia when it comes out.
Growth as a Preferred Cross-platform Framework
Flutter is getting a lot of love for making really nice-looking apps quickly and for being able to use the same code for apps on different devices. As Flutter gets better and starts to work for websites and desktop apps too, more people are going to want to use it. It's becoming a top choice for making apps more efficiently.
While there might be some bumps in the road, Flutter is looking like a smart choice for the future. For anyone starting a business and focusing on mobile apps, betting on Flutter could be a really good move.
Related posts

Dedicated Mobile App Developers: Key Benefits
Hiring dedicated mobile app developers brings multiple advantages to your project, making it a smart choice for businesses looking to launch successful mobile applications. Here's a quick rundown of what you gain:
- Expertise and Specialization: Access to a team with deep knowledge in mobile app development across various platforms.
- Focused Efforts: A team solely dedicated to your project, ensuring high-quality outcomes.
- Cost Efficiency: Saves money on hiring, training, and infrastructure.
- Risk Mitigation: Experienced developers know how to avoid common pitfalls.
- Scalability: Easily adjust team size and resources as your project evolves.
- Ongoing Support: Continuous assistance even after your app goes live.
By choosing dedicated developers, you're not just building an app; you're investing in a team that’s committed to making your mobile app a success from conception to launch and beyond. They bring expertise, focus, and flexibility to the table, ensuring your app meets its goals while staying on budget and on schedule.
Expertise and Specialization
Dedicated mobile app developers know a lot about making apps for different systems like iOS, Android, and others. They're good with all the tools and rules needed to make your app work well and use the newest tech.
They're experts in everything from designing the app to making sure it works right. They can also add cool features that make your app stand out.
Laser Focus on Your Project
Since these developers only work on your app, they really focus on making it the best. They quickly get what your business needs and turn your ideas into a real app.
This focus means they work efficiently and understand your business well, making sure the app fits perfectly with what you need.
Access to Top-Notch Resources
Good app development companies give their teams the best tools and technology. This means they can make apps that work really well and can keep getting better over time.
You get to use really good tools and technology without having to buy them yourself. This helps make your app faster and saves money.
Risk Mitigation
Experienced developers know how to spot and fix problems before they become big issues. They follow strict rules and test the app a lot to make sure it works smoothly.
They think about potential problems early on, which helps avoid surprises that could make the app less enjoyable for users.
Scalability on Demand
It's important to be able to make your app bigger or add new features as needed. Dedicated teams can adjust how many people are working on your app based on what you need.
If you need extra experts for security or making the app easier to use, you can add them to your team. This flexibility lets your app grow and improve without limits.
By working with dedicated mobile app developers, you get a team that really knows their stuff, focuses on your project, and can change as needed. They help make sure your app is a success.
Key Benefits of Hiring Dedicated Mobile App Developers
1. Expertise and Specialization
When you hire dedicated mobile app developers, you're getting a team that really knows their stuff. They've spent a lot of time making apps and have gotten really good at it. They work on apps all day, every day, so they know the best ways to build, test, and make apps better.
Here's what they bring to the table:
- Up-to-date skills: These developers keep learning about new ways to make apps. They use the latest methods to make sure your app is modern and works well.
- Knowing the platforms: Whether it's for iPhones, Android phones, or both, these teams know exactly how to make your app run smoothly on each.
- Thorough testing: They check your app over and over to find and fix any small problems. This means less trouble for your users.
- Organized work: They plan their work carefully, using schedules and meetings to make sure everything is going as it should.
- Thinking about security: They're always learning about how to keep your app safe from hackers.
- Making your app fast: They know tricks to help your app load quickly and run smoothly.
By focusing on what they do best, dedicated mobile developers can make better apps that work well and are safe to use. They're good at avoiding problems and can make the app-making process faster because of their skills and focus.
2. Flexibility and Scalability
When you choose dedicated mobile app developers, you get a lot of room to change things and grow your app as needed. Here's why that's great:
- Changing team size: You can easily make your team bigger or smaller depending on what your app needs. If more people start using your app and you want to add new stuff, you can bring in extra help fast.
- Switching what they work on: If you decide you need to focus more on making your Android app better for a while, your team can do that. Then, they can switch back to working on the iOS app when it's time.
- Adding new skills: If you need someone who's really good at something specific, like artificial intelligence, keeping your app safe, or making it easy to use, you can add those experts to your team.
- Getting the latest tools: As new tools and technology come out, your developers can start using them. This means your app keeps getting better with the newest tech.
- Making your app work on more devices: Your team can make sure your app works well on both iPhones and Android phones. And if you want to reach people on tablets, smart watches, or other gadgets, they can do that too.
- Handling more users: If suddenly a lot more people start using your app, your team can quickly make sure your app's servers and other behind-the-scenes tech can handle it. This way, your app works smoothly, even when lots of people are using it at the same time.
The ability to change your team size and use new tools and technology as your app grows is really useful. It lets you quickly respond to what your users need without losing quality.
3. Cost Efficiency
Hiring people who are really good at making apps but don't work directly for your company can help you save money. Here's why:
- No extra office costs: You don't have to worry about finding them a place to sit or buying them computers. They've got all that covered.
- Pay for what you need: You usually pay these teams based on the work they do or when they hit certain goals. This means you're not wasting money when there's nothing for them to do.
- Use fancy tools without buying them: These teams have access to a lot of expensive software and technology that you would have to buy if you were doing it yourself. It's like you're borrowing their tools, which can save you a lot of money.
- Let your team do what they're best at: While the app developers focus on the app, your own team can concentrate on other important business stuff. This way, everyone is doing what they do best, which can save you money and make your business run smoother.
- Skip the hassle of hiring and training: Finding the right people and teaching them what they need to know can be expensive and time-consuming. With a ready-to-go team, you avoid these costs.
- Less chance of expensive mistakes: Because these developers know what they're doing, they're less likely to mess up in a way that costs you a lot of money to fix later.
Even though it might seem like a lot to pay at first, hiring a dedicated team can actually be cheaper over time. You get the benefit of their knowledge and resources without the extra costs that come with having more employees.
4. Improved Project Management
When you hire dedicated mobile app developers, one big plus is how they manage the project. Here's a breakdown of what this means:
- Structured development process: These teams use clear steps and rules (like agile or waterfall methods) to organize their work. It helps everyone know what's happening and when.
- Project tracking tools: They use special software (like Jira, Asana, or Trello) to plan who does what and keep an eye on progress. Spotting problems early is easier this way.
- Scheduled meetings and reports: Having regular updates and meetings means you're always in the loop. You won't be left wondering what's going on.
- Specialized project managers: Some teams have a project manager whose job is to make sure everything runs smoothly. They handle scheduling, keeping track of issues, and talking to everyone involved. Their focus on keeping things organized really helps.
- Emphasis on documentation: Writing down important details like design plans, technical requirements, and test results makes it easier for new people to join or for anyone to understand what's been done.
By sticking to a solid project management plan, dedicated teams make sure everything is organized and clear. Their expertise in managing projects, using the right tools, and keeping everyone updated reduces risks and pushes the project towards success.
5. Seamless User Experience
When you bring in dedicated mobile app developers, they help make sure your app is easy and enjoyable for people to use. They have the know-how to design an app that works smoothly and feels right to the user.
Straightforward Design Process
These teams follow a step-by-step approach, like agile development, to build and improve the app bit by bit. This means they can quickly make changes based on feedback. Because they're only working on your app, they can focus on making these adjustments fast.
Focus on Usability
For these developers, making the app easy to use is a top priority. They think about things like:
- Is the layout simple to understand?
- Can users easily figure out what to do next?
- Is moving through the app smooth?
They really put themselves in the user's shoes to make sure the app feels natural to use.
Thorough Testing
Testing the app on many different devices helps catch any weird issues before users do. Dedicated teams also use automatic tests to check how the app handles different situations.
Keeping Up with Latest Trends
These developers stay up-to-date with the newest design rules for phones and tablets. This means your app will look and work in ways that users already like and understand.
Continuous Improvement
By looking at app usage data and listening to user feedback, the team can keep making the app better. They might try out new designs, make tasks easier, or speed things up. This ongoing effort helps keep users happy and engaged.
By focusing just on making your app's design and performance top-notch, dedicated developers make sure it's something users will love. This leads to happier users who use the app more and help your app grow.
6. Ongoing Support and Maintenance
When you choose dedicated mobile app developers, you're not just getting an app. You're also getting a team that sticks around to make sure your app stays in tip-top shape. Here's what that means in simple terms:
Continued Development
- They'll add new stuff users want.
- They can make your app work on other gadgets like tablets or smartwatches.
- They can make your app work better with other apps or services.
- They're always on the lookout to fix any glitches and make your app run smoother.
The cool thing is, since they've been with your app from the start, they know it like the back of their hand. This makes adding new features or making changes much faster.
Help with Deployment
- They help get your app into app stores without a hitch.
- They keep your app updated.
- They guide you through any new rules from the app stores.
Getting your app out there and keeping it updated can be tricky. But your developers have got this covered, so you don't have to worry.
Security Upgrades
- They regularly check for weak spots.
- They make sure your app meets the latest safety standards.
- They keep an eye out for new threats and protect your app from them.
Security threats are always changing, but your team is on it, making sure your app and its users stay safe.
Technical Support
- They watch for any crashes or problems.
- They figure out what's wrong and fix it.
- They update your app to prevent future issues.
If something goes wrong or if users run into problems, your developers are right there to fix things fast.
Having a team of app experts by your side for the long haul means you don't have to sweat the small stuff. They take care of the technical details, so you can focus on your business.
7. Access to Latest Technologies and Tools
Hiring dedicated mobile app developers means you get to use the newest tech and tools for building your app without having to buy all that stuff yourself. Here's what you get:
Use the Newest Ways to Build Apps
These teams know all about the latest ways to make apps, like using new programming languages and tools. This means your app can do more things, work better, and be ready for future changes.
You Don't Have to Buy Expensive Equipment
They've got all the fancy computers and software they need to make your app. This saves you from spending a lot of money on things you might only use once.
Faster and Smarter Testing
They use special programs that automatically check your app to find problems early. This makes fixing things faster and less of a headache.
Ready for New Devices and Updates
When new phones or updates come out, your app can quickly adapt. This keeps your app working well on all devices.
Easy to Add Cool Features
These teams have access to special tools and services that can make your app do more, like connecting with other apps or adding new features, without starting from scratch.
Working with a team that already has the best tech means your app can be top-notch without the extra cost of buying and learning to use new tools yourself. They keep your app modern and ready for whatever comes next in the tech world.
8. Quality Assurance and Testing
When dedicated mobile app developers work on your app, they really focus on making sure it works well and doesn't have any big problems. Here's how they check everything to keep your app running smoothly:
Automated Testing
- They use special tests to make sure each part of your app works on its own.
- They also check to see if all the parts of your app work together properly.
- If they update your app, they run tests to find any new problems that might have popped up.
Manual Testing
- They look at how easy it is to use your app and get around in it.
- They also try out your app in ways you might not expect to find any hidden issues.
Device Testing
- They use computer programs that act like different phones and tablets to make sure your app works on all kinds of devices.
- They also try your app on real devices under different conditions to catch any issues.
Beta Testing
- They let a small group of real users try out your app before it's fully released to find any problems in the real world.
Performance Testing
- They test to see if your app can handle a lot of users at the same time without crashing.
- They check how your app works with different internet speeds and connections.
By doing all these tests, dedicated app developers make sure your app is reliable and fun for everyone to use, no matter what phone or tablet they have.
9. Keeping Your App Ideas Safe
When you bring dedicated mobile app developers on board, one of your top priorities is to make sure your unique app ideas and information don't fall into the wrong hands. Here's how these professionals make sure everything stays under wraps:
Signing a Promise Not to Tell
They sign a legal promise, known as a non-disclosure agreement, that stops them from spilling any secrets about your app or business. This means your innovative ideas are safe from competitors' ears.
Locking Up the App's Code
The special code that makes your app work is kept under tight security, with encryption and strict rules about who can see or change it. This ensures that only the people you trust have access to the heart of your app.
You Own the Finished App
At the end of the day, the app and everything that makes it work belong to you. This is important if you ever need to switch teams or take over the app's development yourself.
Regular Security Checks
They regularly check to make sure all data and the app's code are locked up tight and safe from hackers. Making security a regular task helps catch any issues before they become big problems.
Backup Plans
They have backup systems and plans to get data back in case something goes wrong, like a security breach or data loss. This means you're prepared, even for the unexpected.
By focusing on security from the start, dedicated app developers help keep your app's unique ideas and information safe. With legal agreements and strong security measures in place, you can rest easy knowing your app and its secrets are protected.
10. Customized Solutions
When you work with dedicated mobile app developers, they make sure your app fits your business like a glove. Here's how they do it:
- Making your app do exactly what you need: They sit down with you, listen to what you want your app to achieve, and then create features that hit those targets.
- Connecting your app with other tools you use: If you use other systems for things like your website, taking payments, or keeping track of stock, they can link your app to these. It makes everything work together better.
- Making your app look like your brand: They use your brand's colors, logo, and style to design your app. This way, your app looks like part of your family.
- Making your app work worldwide: If your customers are all over the world, they can adjust your app for different languages, money types, and more.
- Building an app that fits how you work: They look at how your team gets things done and make an app that makes those tasks easier.
- Tackling unique challenges in your field: If there are special things your business needs because of the industry you're in, they've got the know-how to handle it.
- Preparing your app for more users and features later on: They plan so that as your business grows, your app can easily grow with it, adding new features when needed.
By really getting what your business and your customers need, dedicated developers can make an app that not only saves you time but also gives your customers a great experience.
sbb-itb-8abf120
Conclusion
Choosing dedicated mobile app developers brings a lot of good stuff to the table for your app. It's like having a team that's all in on making your mobile app the best it can be, giving you some serious perks.
Here's what you get:
- Real know-how in making mobile apps: These teams know the ins and outs of app making. They're up to speed with the latest tech and know how to make apps that people love to use. They tailor-make your app with cool features just for your business.
- They're all about your project: Since they're only working on your app, they get really good at understanding what you want. This means they can do their job better and faster, without getting sidetracked.
- Saves you money: Going with a dedicated team means you don't have to spend on hiring your own folks or setting up a workspace for them. You only pay for the work you need.
- Easy to change size: If you need more hands on deck or fewer, you can adjust your team size easily. This is great for when your app's needs change over time.
- Help even after launch: They don't just disappear once your app is out. They stick around to fix any bugs, add new features, and make sure your app stays up-to-date.
- Latest tech at your fingertips: These teams always know about the newest tools and tricks to make your app even better.
- Quicker to get your app out there: With a team that's fully focused and knows their stuff, your app can be ready for the world faster and still be top-notch.
By choosing experts who are all in on your project, you're setting your app up for success. You get a great app that can grow with your business, made by people who really know what they're doing.
Related Questions
What are 5 key benefits of mobile app development?
Mobile apps help in many ways, like:
- Keeping users interested with reminders and content just for them
- Building stronger connections and loyalty with customers
- Creating new ways to make money
- Making team communication and work better
- Providing better help and service to customers
What are the benefits of custom mobile app development services?
Custom mobile app development is great because it:
- Grows with your business
- Matches your brand look and feel
- Works well with other systems you use
- Has special features just for what you need
- Offers stronger protection against hackers
What are the benefits of outsourcing mobile app development?
Outsourcing your app making can give you:
- Savings on costs
- A chance to work with experts from around the world
- A quicker way to get your app to users
- More time to focus on your main business
- Lower risk of things going wrong
- The ability to easily make changes or grow
- Support and work on your app anytime, day or night
What are the benefits of hiring a mobile app developer?
Getting a professional mobile app developer means:
- They know a lot about making apps
- They can make an app just for your needs
- They focus on making the app easy and fun for users
- They can connect your app with other tools and systems
- They can make your app work on different devices
- They make sure your app works right and fixes any bugs
Related posts

Swift App Development Services: An Overview
Swift app development services offer a streamlined and efficient way to create apps for Apple devices, including iPhones, Macs, and more. Swift, a programming language designed by Apple, is known for its simplicity, speed, and safety, making it an excellent choice for both beginners and experienced developers. Here's a quick overview of what Swift brings to the table:
- Simplicity: Easy to understand and write, reducing the likelihood of errors.
- Speed: Facilitates faster app development and smooth app performance.
- Safety: Designed to avoid common coding errors that can lead to crashes.
- Interoperability: Allows for the use of older Objective-C code within Swift projects.
- Open Source: Can be improved by the community and used on Linux.
Swift app development services can help with everything from custom app creation to ensuring your app works seamlessly and looks great. Whether you're updating an old app or starting a new project, Swift's integration with Apple's platforms and third-party libraries, along with its support for backend connectivity, makes it a robust tool for developers. Learning Swift is highly recommended for those looking to specialize in iOS app development, given its growing demand and the advantages it offers in app creation.
Key Capabilities of Swift
Swift is great for several reasons, including:
- Safety: It's designed to avoid common mistakes that can cause crashes.
- Speed: It helps you write code fast, and the apps run smoothly.
- Expressiveness: Swift lets you do a lot with a little code, making your job easier.
- Interoperability: You can mix old Objective-C code with Swift, which is handy for updating old apps.
- Open Source: Anyone can help make Swift better, and it works on Linux too.
Basically, Swift makes creating apps for Apple devices a smoother experience.
Swift App Development Services
When you use Swift to make apps, you can do a lot of cool things, like:
- Make custom apps for iPhones and other Apple devices.
- Get advice on how to make your app work best.
- Design the look and feel of your app so it's easy to use.
- Connect your app to other services.
- Check your app to make sure it works right.
- Keep your app updated and running smoothly.
Using Swift means you can make really good apps that work well and look great. It's all about making sure your app does exactly what you need it to do, from start to finish.
Benefits of Swift App Development
Swift is really good for making iOS apps because it has some big advantages over other ways of making apps, like Objective-C:
Faster App Development
- Swift is easier and quicker to write because it's simpler. This means you can make apps faster.
- You can quickly test small parts of your app to see if they work, which saves time.
Improved Performance
- Apps made with Swift work faster and better than those made with Objective-C.
- Swift does a lot of the heavy lifting for you, so you don't have to spend time making your app run smoothly.
- It uses less memory, which makes everything run better.
Enhanced Stability
- Swift helps avoid mistakes that can make apps crash.
- It automatically manages memory for you, so there are fewer problems.
- Swift has a smart way to deal with errors, which means fewer bugs when people use your app.
Easy Scaling & Maintenance
- Swift code is easy to read and take care of, making it simpler to update your app or add new things.
- Because Swift is Apple's focus for the future, using it means your app is more likely to keep working well as time goes on.
In short, Swift makes the whole process of creating iOS apps quicker and easier, makes apps run better, helps avoid crashes, and makes it simpler to keep your app up-to-date. This makes Swift a great choice for making new and exciting iOS apps.
Swift Integrations Offered
Let's talk about how Swift makes apps work well with other tools and services.
Apple Platforms and Frameworks
Swift is like a best friend to Apple's products - iPhones, iPads, Macs, Apple Watches, and Apple TV. It uses special tools from Apple to make apps look good and work smoothly.
Here are some examples:
- iOS and iPadOS - Swift uses the latest tools for making iPhone and iPad apps. This includes things for showing maps, storing data, and even augmented reality.
- macOS - For Mac apps, Swift uses tools for storing data and more.
- watchOS - This lets you make apps for the Apple Watch.
- tvOS - For creating apps on Apple TV, using tools for videos and more.
- Cocoa Touch - This helps make the apps look good and easy to use on iPhones and iPads.
Third-party Libraries
Swift also works with other tools not made by Apple to add more features to your apps, like:
- AFNetworking - Helps your app talk to the internet
- Realm - Stores data inside your app
- Charts - Lets you add cool charts and graphs
- Google Maps SDK - Adds maps to your app
- IQKeyboardManager - Makes using the keyboard easier
These tools help make your apps better and build them faster.
Data and Backend Connectivity
Swift helps your app connect to the internet, store data, and use other services. This makes your app do more things, like:
- REST APIs - Connects to custom services
- Cloud platforms - Uses online storage and services like Firebase or AWS
- Databases - Stores data using MySQL, MongoDB, and others
- Third-party APIs - Adds extra features like payment or weather info
Connecting to these services makes your app more powerful and useful.
sbb-itb-8abf120
Conclusion
Swift app development is a smart choice for anyone wanting to make apps for Apple devices. It's a modern tool that makes building apps faster, the apps themselves run better, and it's easier to keep them up to date. Plus, it's less likely for things to go wrong compared to older methods like using Objective-C.
If you're a business looking to get an app out quickly and efficiently, working with Swift experts can really help. They know all the shortcuts and best practices to get your app from an idea to being live on the App Store. Developers love Swift because it has a lot of built-in tools and support for adding extra features easily.
Here are some key services you might use:
- Help with planning and designing - Experts can guide you on how to build your app in a way that's ready for more features later on.
- Building and testing the app - Using Swift's own tools like Xcode and SwiftUI makes the whole process smoother and lets you check for problems early on.
- Adding more features - You can easily include other tools and services to make your app do more things.
- Looking after your app - Once your app is out there, you'll need to keep it running well, which includes updates and fixes.
For businesses wanting to create something special with their iOS apps, Swift offers a mix of quick development, reliable performance, and the flexibility to grow. It's a solid choice for making sure your app can do what you need it to, both now and in the future.
Related Questions
What is Swift app development?
Swift is the programming language made by Apple for creating apps on iPhones, Macs, and other Apple devices. It's designed to be straightforward and fast, making it easier and quicker to build apps than with older languages like Objective-C. Here’s what makes Swift good for making apps:
- It’s simple for beginners to pick up.
- You can mix it with older Objective-C code without problems.
- It has modern features that make coding safer and apps run faster.
- You can test bits of code on the fly with something called playgrounds.
- It works well for all Apple devices.
In short, Swift makes building apps for Apple gadgets more straightforward and efficient.
What is the Swift language overview?
Swift is a modern programming language from Apple, here to make app creation easier and safer. Here’s the lowdown:
- Its simple language helps new coders get going fast.
- It’s designed to avoid mistakes that can cause app crashes.
- Swift blends different coding styles, like object-oriented and functional programming, making it versatile.
- It’s quicker to work with than Objective-C, especially when you’re testing and fixing bugs.
- You can use Swift alongside older Objective-C code.
- It’s not just for Apple gadgets; you can use Swift on Linux too.
Swift is about making coding cleaner, faster, and more reliable for app developers.
What is Swift What is it used for?
Swift is Apple’s go-to language for making apps. It’s used for:
- Creating apps that work on iPhones, Macs, and other Apple devices.
- Making the brains and looks of apps for the Apple Watch.
- Developing TV apps for Apple TV.
- Writing server-side code for Linux servers.
- Playing around with code in a fun, interactive way with playgrounds.
Swift is key for anyone wanting to make apps in the Apple world.
Is Swift development worth it?
Absolutely, learning Swift is a smart move if you want to make apps for Apple devices because:
- It’s what Apple will use going forward, and lots of people are already on board.
- There’s a big demand for Swift developers in both small and big companies.
- It’s the main language for new apps on iOS, macOS, watchOS, and tvOS.
- Swift works closely with Apple’s existing frameworks, making app development smoother.
- Coding in Swift is faster and leads to fewer mistakes and crashes.
- You can use Swift for both the front end (what users see) and the back end (the server side) of apps.
For those looking into iOS app creation or becoming an Apple Developer, diving into Swift is definitely worth the effort.
Related posts

Integrating Swift App Development Services into Your Business
Integrating Swift app development services into your business can significantly enhance your mobile app offerings, making them faster, more reliable, and easier to maintain. Swift, Apple's powerful programming language, is designed for creating feature-rich applications for iOS, macOS, watchOS, and tvOS. Here's a quick rundown of why Swift is a smart choice for your business:
- Faster Apps: Swift's performance is superior to Objective-C, leading to quicker, more responsive apps.
- More Reliable: Enhanced error handling and type safety reduce the likelihood of crashes.
- Easier Maintenance: Cleaner code and easier updates keep your apps fresh and functional.
- Scalability: Swift apps can easily grow with your business needs, handling more users and data smoothly.
- Access to Latest Features: Swift updates allow you to incorporate the newest iOS features and technologies into your apps.
By embracing Swift for your app development, you position your business at the forefront of innovation, ready to deliver top-notch mobile experiences to your users.
Understanding Swift Development
Swift is a programming language that Apple created. It's used to make apps for iPhones, iPads, Mac computers, Apple Watches, and Apple TVs. Swift is designed to be easy to read and write, making app development quicker and less prone to errors. This means you can create powerful apps for Apple devices more efficiently.
What is Swift?
Swift is a type of programming language that works well for creating apps on Apple's platforms, including iOS, macOS, watchOS, and tvOS. Here's a simple breakdown:
- General-purpose: Swift is versatile and can be used for many different kinds of projects.
- Multi-paradigm: It supports different ways of programming, giving developers the flexibility to solve problems in various ways.
- Compiled: Swift translates your code into a form that the device can run, making apps fast and responsive.
By using Swift, developers can build apps that are not just fast and reliable but also keep up with the latest technology trends. This can improve your business operations by boosting productivity and fostering innovation. Plus, integrating Swift into your product development process can help you stay ahead in the technology platform race. It's also a step towards embracing cloud services, data & analytics, and ensuring your apps meet compliance and shared services standards.
Evaluating Business Needs
Figuring out if Swift app development is right for your business means looking at what you already do and seeing where you could do better. This bit will guide you through checking how well your business can grow and change by possibly adding Swift to your toolkit.
Scalability Assessment
When thinking about scalability, consider these points:
- How your current apps or systems might struggle if more people use them or if there's more data to handle
- If your business gets bigger, can your systems keep up?
- Where do your apps start to slow down when more people use them?
- Is it better to improve what you have or start fresh with Swift?
Questions to ask include:
- Can our systems handle a lot more users without trouble?
- At what point do our systems start to slow down?
- What are our plans for growth in the near future?
- Are our systems set up to make changes easily?
You'll want to figure out:
- How many more users you expect to support
- How much more data or requests your systems need to handle
- How much more storage or online space you'll need
Swift is great for apps that need to handle a lot of users or data because it's built to grow and change easily.
Flexibility Analysis
When looking at flexibility, think about:
- How easy it is to keep your apps up-to-date and add new things
- If your systems are set up in a way that makes it easy to make changes
- How hard it is to update your apps as your business needs change
- Can you easily connect with new tools, data sources, or services?
Questions to ask include:
- How quickly can we add new features our users want?
- Can we adapt our apps quickly if we need to?
- What new tools or services do we want to connect with?
You'll want to consider:
- How much time and effort it takes to add or change features
- Being able to quickly respond to new business needs
- Being able to use outside data and analytics more effectively
Swift makes it easier to update and improve your apps over time because it's designed to be flexible.
By looking at what you're already doing and where you want to go, you can see where using Swift might help your business grow and adapt more easily.
Setting Up Swift Development
Xcode
Xcode is the tool that Apple makes for people who want to create apps for iPhones and Macs. Think of it as a big toolbox that has everything you need to build an app from scratch. Here’s what Xcode does for you when you’re making a Swift app:
- It has a special design tool that lets you see what your app will look like as you build it.
- The editor helps you write code by suggesting completions and highlighting mistakes.
- You can test your app on a simulated iPhone or iPad without needing the actual device.
- There’s a tool to check if your app is running smoothly or if it’s too slow.
- It works with Git and GitHub, so you can keep track of changes to your code.
- Testing tools help you find problems before your users do.
- With just one click, you can send your app to TestFlight for others to try out.
Using Xcode means you can focus more on creating a great app because it handles a lot of the technical stuff for you.
Swift Package Manager
The Swift Package Manager is a way to handle extra bits of code your app needs, called dependencies, by packaging them up. It’s like getting ingredients ready for a recipe. Here’s what it does:
- You tell it what your app needs, and it figures out where to get these pieces from.
- It makes sure you’re using the right versions of these packages.
- It can grab these packages from the internet.
- Automatically takes care of building these packages with your app.
- Makes it easy to use the same code in different parts of your app or in other apps.
It’s a big help because it organizes and manages the code your app depends on, making things less complicated.
SwiftUI
SwiftUI is a way to design your app’s look with less code. It’s like telling the app what you want it to look like, and it does most of the work for you. Here’s why it’s handy:
- You write less code to create the user interface.
- It automatically works with Dark Mode.
- You can see changes to your design right away without having to run the app every time.
- Your app will look good on iPhones, iPads, and Macs without extra work.
- Changes you make show up instantly, so you can try out new ideas quickly.
Using SwiftUI means making your app look good is faster and easier, and it works well everywhere without extra effort.
Hiring Swift Developers
When you're looking to bring Swift developers onto your team, there are two main things to keep an eye on - what they know how to do and how well they work with others.
Core Competencies
Make sure the team knows their stuff when it comes to building apps for iPhones and Macs with Swift. This includes:
- Knowing how to design easy-to-use and attractive interfaces
- Being really good at using Swift and its tools like UIKit and SwiftUI
- Making sure the app can do things like take pictures, find your location, and send notifications
- Handling app data, connecting to the internet, and storing information
- Understanding Apple's rules and how to make apps that fit them
- Fixing bugs, checking app speed, and sorting out crashes
- Getting the app onto TestFlight or the App Store and updating it later
Look at apps they've made before to see how complex and user-friendly they are. This helps you figure out if they're right for your project.
Communication & Collaboration
It's important they're good at talking and working together. This means using tools like Slack or video calls to stay in touch and:
- Making sure everyone agrees on what the app should do and how
- Showing designs early on and trying out ideas
- Keeping you updated on how things are going
- Writing down how things are supposed to work
- Using tools to keep track of the project
Being open and clear like this helps make sure the app turns out the way you want it to.
By finding a team that's both skilled and easy to work with, you can turn your ideas into a great app that fits your business needs.
Integrating with Project Management
Transitioning Workflows
When we start using Swift for app development, we need to mix it into how we already do things. Here's how to do that smoothly:
- Figure out who needs what - Look at how Swift apps will affect other parts of the business. This helps us get ready for how things will need to connect.
- Pick point people - Choose someone to keep an eye on the Swift app plans. Have team leaders manage who does what. Let analysts keep track of how things are going.
- Write down the steps - Make clear instructions for how to design, build, test, and launch Swift apps. Explain how everyone works together at each step. Share these instructions with everyone involved.
- Talk about the changes - Have a meeting to tell everyone about moving to Swift. Keep everyone updated and listen to their input. Good communication keeps everyone on the same page.
- Try, learn, repeat - Keep checking how things are going and ask for ways to do better. Be ready to change things to work better.
Adapting Roadmaps
To make sure our Swift app projects line up with what the business needs, we should:
- Decide what's most important - Figure out where Swift apps fit among all our projects. Move resources around to focus on the top priorities.
- Guess how long things will take - Work with the tech folks to get a good idea of how long it will take to get Swift apps ready.
- Set goals - Plan when we want to have the apps ready and when to update them. Add extra time just in case things don't go as planned.
- Plan for the old stuff - If we're replacing old systems, decide if the Swift apps will start before or after we stop using the old ones.
- Plan to make updates - Expect to release new versions after the first launch to fix any problems. Think about having a few updates before everything's just right.
Keeping an eye on our plans helps make sure our Swift apps do what we want them to.
sbb-itb-8abf120
Leveraging the Swift Ecosystem
Swift has a bunch of helpful tools and libraries that make building business apps faster and more powerful. Let's dive into how using these Swift features can speed up app development and make your apps do more.
Core Data
Core Data is a part of Swift that makes it easier to manage and save app data. It's really useful because it:
- Lets your app share data across different devices like iPhones and Macs
- Automatically keeps track of changes to your data, so you can undo mistakes
- Helps update your data smoothly when your app changes
- Makes it easy to get specific data with set rules
Core Data takes care of the tricky parts of handling data, so developers can spend more time making the app better.
Natural Language API
Swift also has tools for understanding and working with human language, such as NaturalLanguage. This includes:
- Changing spoken words into text
- Figuring out the main points or feelings in text
- Translating text from one language to another
- Breaking down text into smaller parts like words or sentences
Adding these language features can make apps that understand voice commands, analyze feelings in text, and support different languages.
Swift also offers other cool tools like SwiftUI for making the app's look with less code, Combine for managing data flow, RealityKit for creating augmented reality, and more. Using these Swift tools helps businesses create advanced, flexible apps that keep up with new technology.
Overcoming Key Challenges
When you're working on Swift apps, you might run into some tricky spots, especially when it comes to testing and fixing bugs. Luckily, Xcode, which is the main tool for making these apps, has some neat features to help out. There are also other tools like Appium and XCUITest that can give you a hand with testing.
App Testing and Debugging
Xcode helps you by:
- Letting you test your app on both simulators and real devices
- Allowing you to pause your code at certain points to see what's happening
- Helping you check how much memory your app is using and how fast it runs
This makes it easier to check if everything's working right and to find problems.
If you want to test your app in more ways, tools like Appium and XCUITest let you write tests that you can use again and again. Adding these tests to your app's development process means you can check for issues every time you make changes to your app.
Good things about Xcode testing:
- It's made to work well with Xcode
- It uses parts of the app that help people with disabilities, which is a plus
- You don't need to set up anything extra
Not-so-good things:
- It only works for Apple products
- You need to know how to use Swift
- Sometimes the tests don't work as expected
Comparison of Testing Frameworks
FrameworkProsConsXCUITest- Comes with Xcode- Works closely with Apple's stuff- Uses features that help people with disabilities- Only for iOS and macOS- You need to know Swift well- Tests can break easilyAppium- Works on different types of devices- You can use the same test code for different apps- Supports many programming languages- You have to set it up first- Might have problems with iOS tests- Takes time to learn
Using a tool like Appium along with Xcode can help you test your app in more ways, but it also means you'll have to deal with a bit more complexity. It's worth thinking about what your app needs.
Measuring Success
When you start using Swift for creating apps in your business, it's smart to keep an eye on certain things to see if it's really helping. This way, you can tell if it's making things better, showing the value of your investment, and finding areas to improve.
Productivity Metrics
- Time to complete tasks: Ask users how long it takes them to do their usual tasks with the new Swift apps. If they're getting things done faster, that's a good sign.
- Output per employee: Look at how much work each person is getting done, like how many problems they solve or how many products they help create, before and after Swift apps are used. More work done means the apps are helping.
- App usage rates: Keep track of how many people are using the Swift apps regularly, if they keep coming back, and which parts of the app they use the most. More use means the apps are useful.
- Error/defect reduction: Since Swift is good at avoiding mistakes in code, watch for fewer errors or crashes in your apps over time.
Business KPIs
- Customer acquisition cost: See if the cost to get new customers changes with Swift app development. Lower costs mean you're spending money more wisely.
- Sales cycle length: Check if having new app features and quick fixes helps you make sales faster.
- Feature release velocity: Keep an eye on how many new features you can add to your apps regularly. More features in less time mean you're able to innovate quicker.
- Revenue per employee: Find out how much money the company makes divided by the number of employees, and see if this number goes up over time. An increase means your team is doing more with what they have, thanks to Swift apps.
By watching these things closely, you can really understand how much Swift apps are helping your business and make a strong case for keeping them in your toolkit.
Conclusion
Adding Swift app development to your business can really help make things better, like making work faster, coming up with new ideas, and keeping up with changes in technology. But, you need to plan well and do things step by step to get all these benefits.
Here's what you should keep in mind when starting with Swift:
- First, look carefully at your current setup to see if it's ready for Swift. Think about how well it can handle more work or changes, how it will fit with other systems, and what needs to be updated.
- Make sure you have a good plan for managing the project and that everyone knows how to work together. Choose people to lead the project and write down all the steps so everyone's on the same page.
- Find developers who are really good at making apps with Swift. You want people who know how to make apps that are easy to use and do what your business needs.
- Use all the tools that come with Swift, like Xcode, to make app development quicker and to add cool features to your apps.
- Start testing your apps early to find any problems. Use tools like Xcode for checking your app and fixing bugs. This helps make sure your app works well before people start using it.
- Keep an eye on how things are going both before and after your Swift app is out. Look at how fast work gets done, how the app is helping your business, and if there are fewer mistakes. This helps you see how much Swift is improving things.
By carefully planning and taking things one step at a time, bringing Swift into your business can really help you keep up with technology changes. It's important to stay focused and keep improving as you go. The effort will pay off in making your business better prepared for the future.
FAQs
How much does it cost to make an app with Swift?
The price of making an app using Swift varies based on how complex the app is, what special features you want, and if you need unique designs. Swift helps in creating strong and flexible apps more quickly and for less money than some other options like Objective-C. It's a good idea to sit down with skilled Swift developers to plan a basic version of your app that fits your budget and business needs.
Can Swift work with other systems?
Absolutely, Swift is great at working together with existing data sources, APIs, libraries, and other platforms. Swift has special tools and ways to ensure it can connect smoothly with other systems. If you have a team experienced in Swift, they can use these tools to link your Swift apps with different parts of your business, like data storage or online services.
Related posts

iPhone Mobile App Development Company: Choosing the Right Partner
Choosing the right iPhone mobile app development company is crucial for bringing your app idea to life. Here's a quick guide to help you make an informed decision:
- Understand Your App's Needs: Clarify your app's purpose, target audience, desired features, and budget.
- Search for Experienced Companies: Utilize online directories, professional networks, and referrals to find reputable developers.
- Evaluate Their Expertise: Review portfolios, client testimonials, and technical skills.
- Assess Their Development Process: Understand their methodologies, communication standards, and project management flexibility.
- Compare Costs Against Value: Analyze the balance between the cost of development and the expected quality and benefits.
By focusing on these key aspects, you'll be better equipped to choose a partner that aligns with your vision, budget, and goals.
Figuring Out What Your App Needs
Before you start looking for someone to help build your iPhone app, it's super important to know exactly what you want from your app. Think of this like making a shopping list before you go to the store. It helps you pick the right team for the job.
Here's what you should think about:
- Purpose - Ask yourself, what's the big reason behind your app? How will it make life better or easier for the people using it?
- Who's it for - Picture the perfect person who would use your app. What do they like? What problems do they have that your app can solve?
- Where it lives - Is this app just for iPhone users, or do you want it to work on Android phones and maybe even as a web app?
- What it does - Make a list of everything you want your app to do. Start with the most important features.
- How it looks - Do you already have ideas or rules about how your app should look to match your brand?
- Money talk - Be honest about how much you can spend on making your app.
When you share this info with potential app makers, they can give you a better plan and price. Plus, they can show you where they've done similar work before.
Teams that really listen and get what you're after are more likely to make an app you'll love. They might also give you some great advice on making your app even better.
So, take your time to figure out all the details about your app before you start talking to developers. It's the best way to find the right team to bring your app idea to life.
Finding Experienced iPhone App Development Companies
Looking for a company to help make your iPhone app? Here are some good spots to start your search:
Online Directories and Marketplaces
- Clutch.co - A place where you can find reviews and info about app developers. You can search based on where they are, what they're good at, and the type of apps they make.
- GoodFirms - Similar to Clutch, this site has lists of app development companies with reviews and examples of their work.
- Upwork - A website where you can find freelancers and companies that make mobile apps. You can post your project and get offers from them.
Professional Networks
- LinkedIn - A site where you can look up iOS developers or companies and see their past work. You can message the ones you think are a good fit.
- GitHub - Check out the code that developers have shared. This is a good way to see how skilled they are.
Referrals and Recommendations Getting advice from people you know can lead you to trusted developers.
- Friends
- Work buddies
- Events and meet-ups about mobile apps
When you're checking out potential companies, really look at the apps they've made before, especially if they're similar to what you want. Pick companies that have a good track record with making iOS apps, especially in your area of interest. They should know the technical bits and what users like.
Make sure they're good at talking with you, clear about costs, and offer help even after your app is out there. Picking a company that's focused on helping you for the long-term will make the whole process smoother and ensure your app is great.
Evaluating Expertise Through Portfolios and Testimonials
When you're looking for the right company to help build your mobile app, it's super important to check out their past work and what other clients have said about them. Here's how to do it right:
Portfolio Review Guidelines
FactorDescriptionPlatform ExperienceLook at apps they've made for both iOS and Android to see if they can work with different systemsDesign QualityCheck out how the apps look and feel, and if they're easy to useFeature ImplementationSee how complex or simple the features in their apps areIndustry ExperienceIt's a plus if they've made apps in your field beforeCode QualityIf you can, take a peek at the code to see if it's neat and follows good practicesApp PerformanceTry using some of their apps to see if they run smoothly
Going through a company's past projects can show you how skilled they are. Trying out their apps yourself lets you see if they're good at making apps that are nice to look at and easy to use.
Client Testimonials and Case Studies
What people say about working with the company can tell you a lot, too. Look for feedback that talks about:
- How well they planned the project and explained things
- If they're good at talking and working together
- Whether they finished the project on time and within the budget
- How they helped after the app was launched
Case studies that show numbers, like how much more money the app made or how many more users it got, can prove that the company doesn't just make good apps but also helps businesses succeed.
Checking both the apps they've made and what clients say about them helps you figure out if they're the right team to bring your app idea to life.
Assessing Technical Proficiency and Capabilities
When you're looking around for a company to help build your mobile app, it's really important to check if they have the technical skills and know-how. Here's what to look out for:
Technical Expertise
- Knowing how to use programming languages like Swift for iOS, Kotlin for Android, and JavaScript for web apps.
- Experience with making apps for both iPhones (iOS) and Android phones.
- Skills in working with the server-side of things using tech like Node.js or Python.
- How well they work with APIs (which let apps talk to other services) and manage data.
- They should follow good coding practices and keep up with new tech trends.
Design and UX Capabilities
- Ability to create good-looking designs and easy-to-use layouts.
- Know-how in making the app easy and enjoyable for users.
- Using research and tests to improve the app's design.
- Making sure the app is accessible to everyone.
- Keeping the app's navigation simple and consistent.
Development Processes
- The steps they follow to build an app from start to finish.
- How they plan, track, and manage their work.
- Their approach to checking code quality and fixing bugs.
- Making sure the app is secure and runs smoothly.
- Using tools to manage different versions of the app code.
Post-launch Support
- Keeping the app updated and fixing any issues.
- Help with technical problems and performance checks.
- Adding new features over time.
Technical Proficiency Comparison
FactorPotential Partner 1Potential Partner 2Potential Partner 3iOS/Android SkillsHighly ProficientProficientBasicJavaScript FrameworksExpert-level React NativeStrong React NativeSome Flutter experienceBackend TechNode.js, FirebasePHP, MySQLPython, MongoDBUI/UX Design4+ years experience2 years experienceOutsource design
Comparing the tech skills of different companies like this helps you figure out who's the best match for making your app. This table is a simple way to see who's good at what.
sbb-itb-8abf120
Understanding the Development Process and Practices
When you're thinking about teaming up with an iPhone mobile app development company, it's really important to get how they do their work. This helps you see if they're a good fit for what you need and if they work in a way that matches your expectations.
Here are some things you should look into:
Development Methodologies
- What kind of plan do they follow (like Agile or Scrum)?
- How do they organize their work, like planning sessions, daily check-ins, and reviews?
- Are they flexible enough to change things up if your project needs it?
Communication Standards
- How and when will they talk to you about the project?
- Will you get regular updates through calls, messages, or online tools?
- Can you see what they're working on and give your input?
Project Management Flexibility
- Can they tweak the project's details, timeline, or way of working to suit you better?
- Do they provide ways for you to see how the project is going, like reports or online dashboards?
- Will you be involved in all the steps of the project?
Ability to Collaborate
- Do they really listen to what you want and give helpful feedback?
- Will they give you advice on making your app better, considering your budget and goals?
- Are they good at working together and making sure everyone's on the same page?
Looking at these things will show you if a potential partner is on the same wavelength as you, can change things up as needed, is open about what they're doing, and is good at working with you. Make sure to ask direct questions about how they handle projects and compare it to what you're looking for. This will help you pick the best company to make your app.
Comparing Costs Against Expected Value and Quality
When you're picking a company to help make your iPhone app, it's really important to think about how much it's going to cost versus what you're getting for your money. Here's a simple way to look at it:
Cost-Benefit Analysis
PartnerEstimated CostKey BenefitsAcme Developers$15,000
- 5+ years iOS experience
- Swift and React Native skills
- 4.5 star client ratings
|| Zen Mobile | $20,000 |
- 8+ years iOS experience
- Swift, Objective-C and React Native skills
- Dedicated project manager
- 5 star client ratings
|| App Builders | $10,000 |
- 3 years iOS experience
- Swift skills
- No project manager
- 3.5 star client ratings
|
- Acme Developers seems like a smart choice if you're looking for a good mix of price and skills. They also have pretty good reviews from people they've worked with.
- Zen Mobile costs more but they've got a lot of experience, top-notch skills, and really great reviews. Plus, you get someone to manage your project. This could mean better results for your app in the long run.
- App Builders is the cheapest option but they don't have as much experience. Also, they don't offer a project manager and their reviews aren't as strong. This might lead to some issues with the quality of your app.
The key is to find the best match between how much you can spend, the skills needed for your app, and the quality you're looking for. Just because a company charges more doesn't mean you're getting better value, especially if you don't need all the extra services. But, picking the cheapest option can sometimes mean you'll end up paying more later to fix problems.
Take a close look at what your app really needs to be successful. Then, compare the companies you're considering to see who offers the best deal. This way, you can make sure you're getting good work that fits your app's needs and your budget. It's worth taking the time to choose the right team for your project.
Conclusion: Key Aspects for Choosing the Right Partner
Picking the best team to make your iPhone app is super important. Let's recap the main things to think about:
Technical Expertise and Experience
- Know-how in Swift, Objective-C, React Native
- Background in making apps for both iOS and Android
- At least 3 years of experience in app making
- A portfolio that shows they can handle complex apps
Design and UX Capabilities
- Skills in making the app easy and fun to use
- They know how to test the app with users to make it better
- The app should be easy to navigate for everyone
Development Process
- They use a step-by-step plan like Agile or Scrum
- Regular meetings to check on progress
- They can adjust their plan to fit your needs
- They work well with you and your team
Quality and Security
- They check the app carefully for any problems
- They use the latest ways to keep the app safe
- They make sure the app works smoothly
Cost Analysis
- Their prices are fair
- You get good value for what you pay
- They help even after the app is made
Looking at these areas helps you find the best team for your app. You want someone who knows their stuff, makes the app easy and fun to use, has a clear plan, makes sure the app is top-notch, and charges fairly.
The best partner gets what you want to do, brings new ideas, and turns your app idea into something that works well and people enjoy using. By checking these things carefully, you can feel good about the team you choose to make your app.
Related Questions
How to choose iOS app development company?
Here's how to pick a company to make your iPhone app:
- Check Experience. Look for teams that have been making iOS apps for at least 3-5 years. They should have a lot of different apps they've worked on.
- Look at Their Past Work. See how good their previous apps are, especially how they look and work. It's even better if they've made apps like yours before.
- Ask About App Security. They should know how to keep your app and its users' information safe.
- Find Out About New Tech. Make sure they're up-to-date with the latest in app making, like Swift, React Native, and machine learning.
- Check Their Reputation. Read reviews from their past clients and see how well they're rated on sites like Clutch and GoodFirms.
- Understand Their Prices. Make sure their prices make sense for what you're getting.
- Ask About After-Launch Help. You'll want their help even after your app is out in the world.
How to find the right mobile app development partner for your startup?
Here are 8 steps to find your app-making partner:
- Know what you want your app to do, look like, and how much you can spend.
- Compare different app makers based on what they're good at, their prices, and how well they've done in the past.
- Look at their previous projects to see if they've worked on something similar to your idea.
- Make sure their design process fits with your plan.
- Make sure they know how to use the right tools and technology for your app.
- Think about how much you can spend and see if it matches their prices.
- Find out if they'll help you improve and maintain your app after it's launched.
- Make sure you can work well together, communicate easily, and that they understand your goals.
How do I find an app developer partner?
To find someone to help make your app, follow these steps:
- Be clear about what you want your app to do, how soon you need it, and how much you can pay.
- Decide if you want to work with someone in your office, someone from another company, or a mix of both.
- Look for people with the right skills and make sure they're available when you need them.
- Talk about the work details and make sure everything's ready to start.
- Be clear about what you want to achieve with your app, beyond just making it.
- Plan for what comes after making the app, like testing, launching, and making it better over time.
How to hire the best mobile app development company?
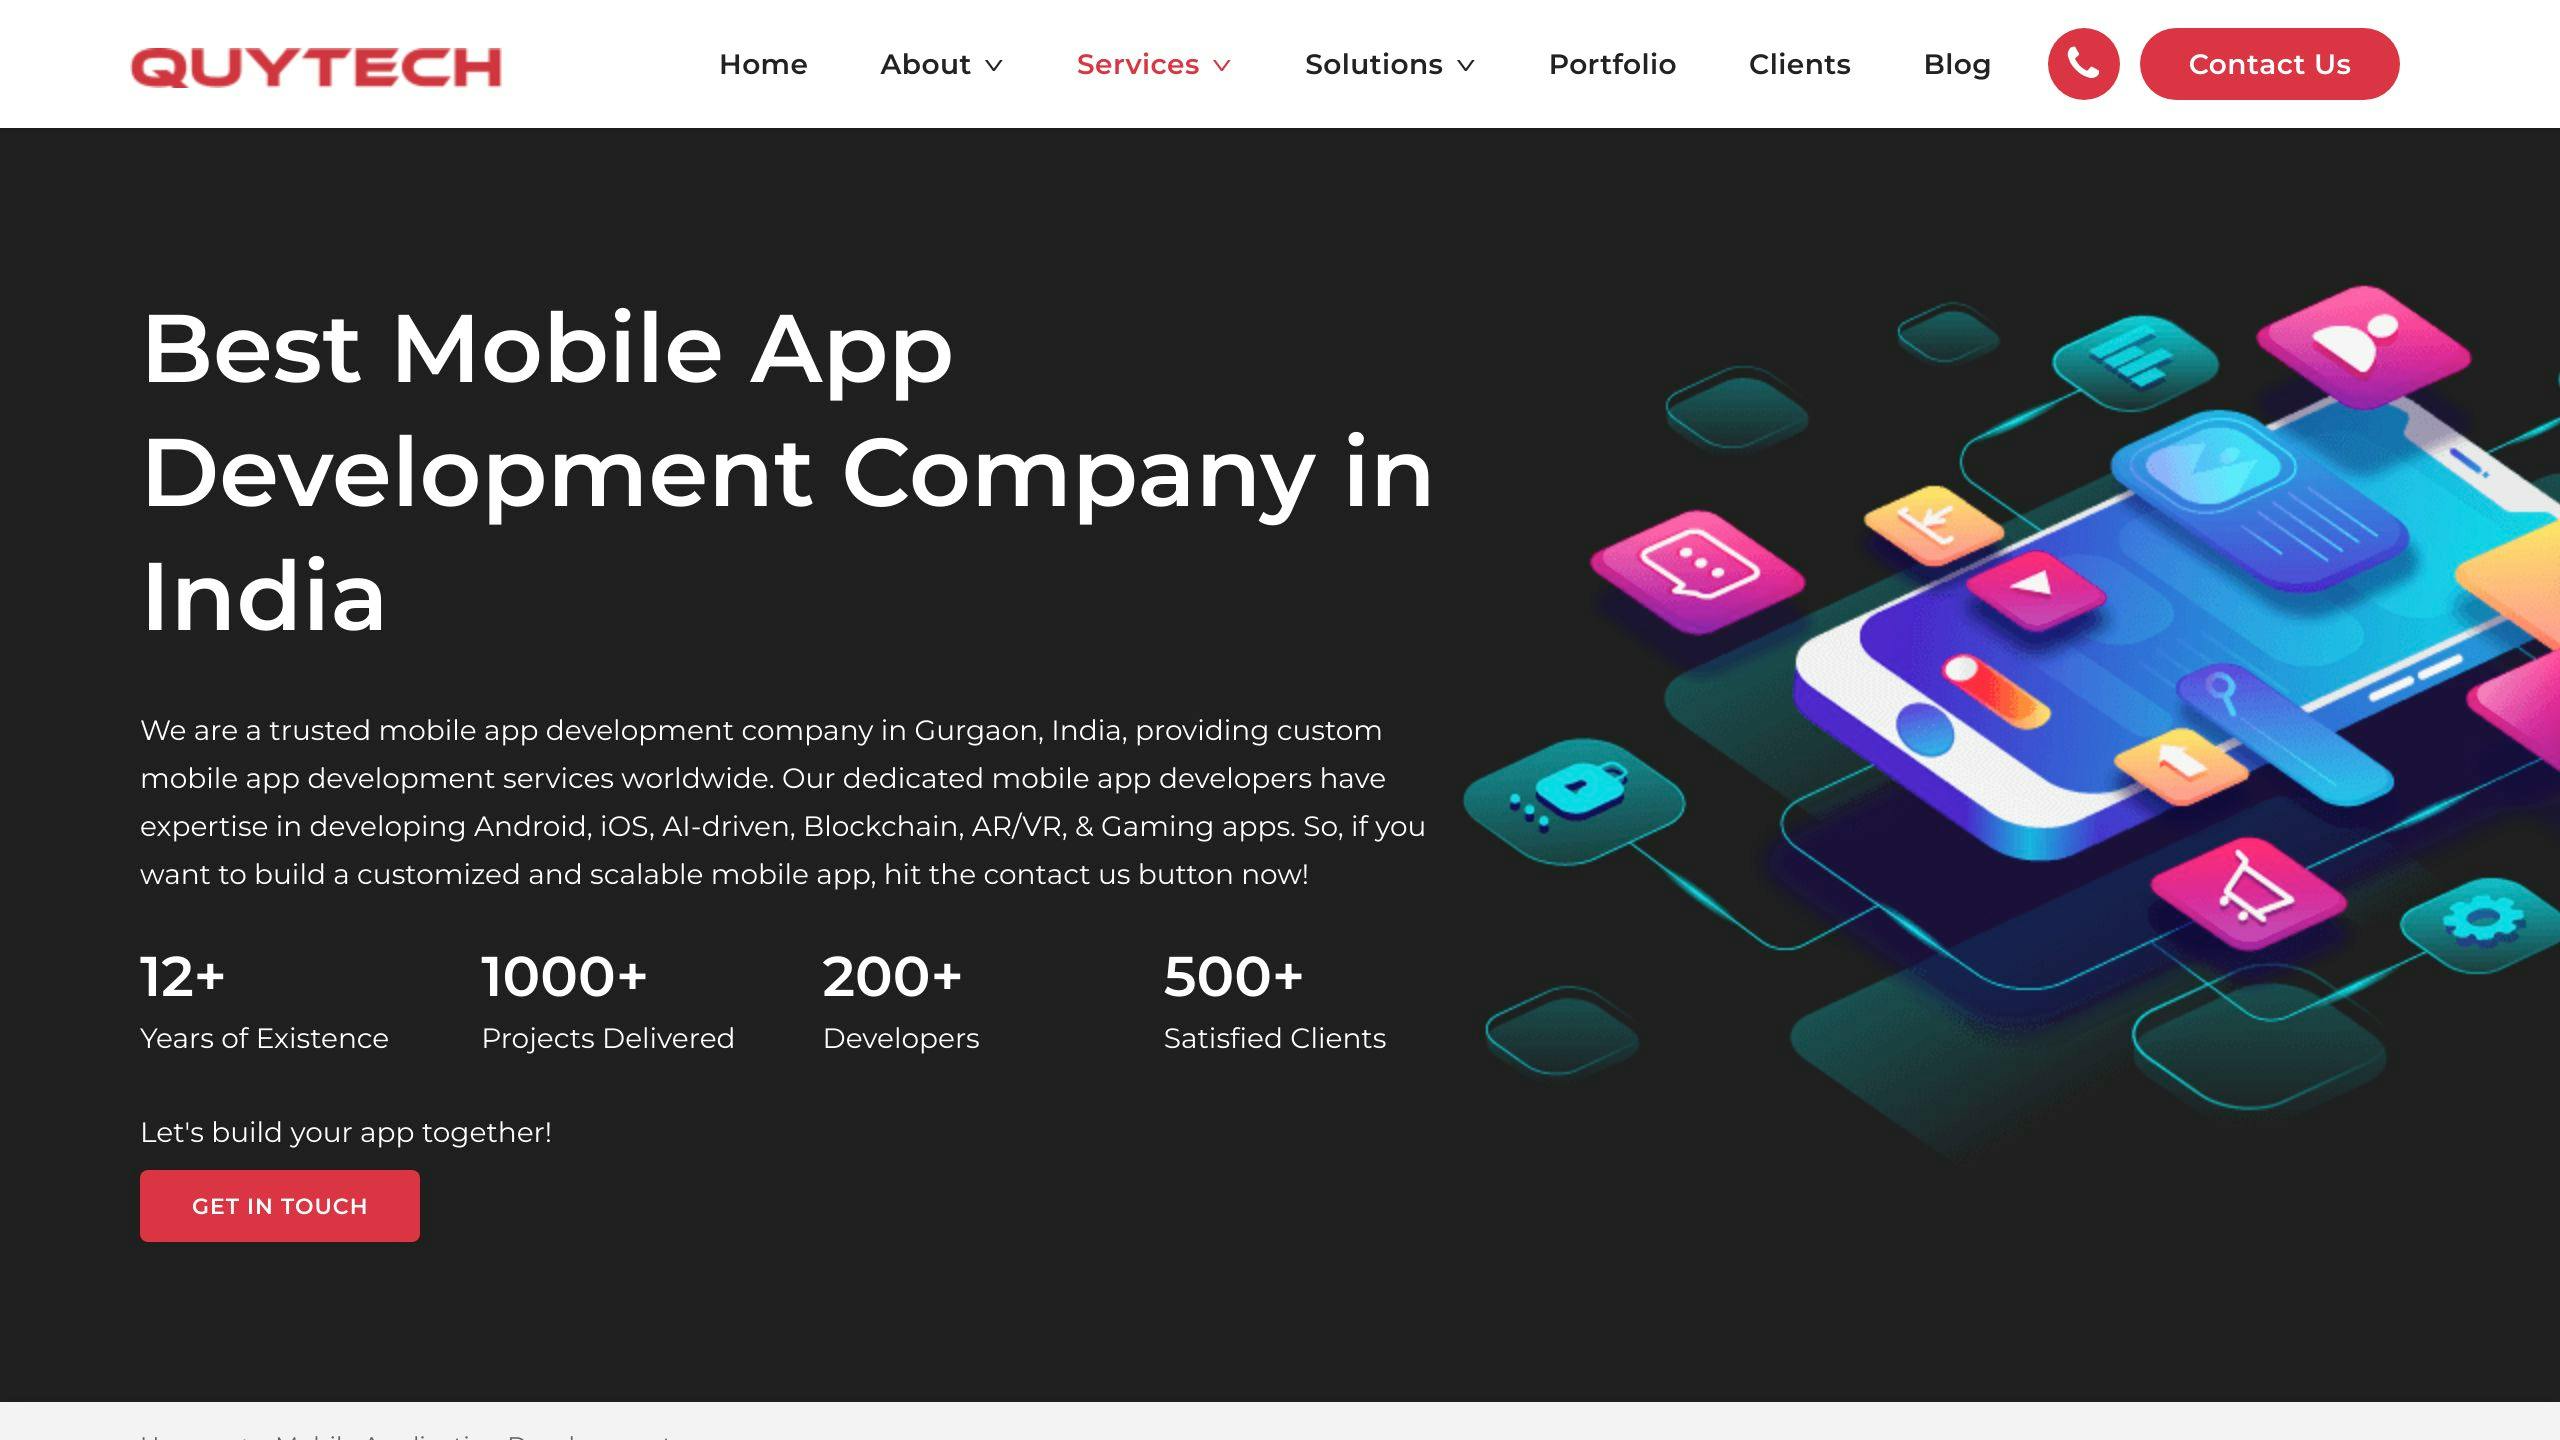
Here's how to pick the best team to make your app:
- Know exactly what you want your app to do, which phones it should work on, and how much you can spend.
- Look up reviews and see how skilled they are.
- Choose a few companies and check out the apps they've made before.
- Make sure they have the right skills for your project.
- Think about how much it costs, how good their work is, and if they help you after the app is made.
- Talk to the people who will be working on your project.
- Agree on how the work will be done, including how to make sure the app is safe and works well.
Finding the right team is about making sure they understand your vision, can do the work well, and fit within your budget. Taking the time to choose carefully will help make sure your app turns out great.
Related posts
.png)
Understanding the Impact of Blockchain Technology on Cloud Computing
Imagine a world where two cutting-edge technologies, blockchain and cloud computing, come together to shake up industries. Blockchain ensures secure and transparent transactions, while cloud computing offers flexible data storage and processing. Combining them means businesses can have super secure and scalable systems. We'll show you how this combo can save money, boost privacy, and make things run smoother. Along the way, we'll share stories of real companies using blockchain in the cloud. Get ready for a journey into the future where technology transforms the way we do business. Let's dive in and discover the power of blockchain and cloud computing working hand in hand!
How Blockchain Technology Works
Blockchain technology, the backbone of cryptocurrencies like Bitcoin, is a distributed ledger system that enables secure and transparent transactions. At its core, a blockchain is a chain of blocks, each containing a list of transactions. These blocks are linked together using cryptographic hashes, creating an immutable record of all transactions. Unlike traditional databases stored on centralized servers, a blockchain is decentralized, meaning that no single entity has control over the entire network. Instead, multiple participants, known as nodes, validate and store copies of the blockchain, ensuring its integrity.
The key to blockchain's security lies in consensus algorithms, such as Proof of Work (PoW) or Proof of Stake (PoS). In PoW, miners compete to solve complex mathematical problems, with the first to find a solution adding a new block to the chain. This process requires significant computing power, making it difficult for any malicious actor to alter past transactions. In PoS, validators are selected based on the number of tokens they hold, reducing the energy consumption associated with PoW. These consensus algorithms, combined with encryption techniques, make blockchain highly resistant to tampering and fraud.

The Benefits of Blockchain Technology in Cloud Computing
Integrating blockchain technology into cloud computing brings a myriad of benefits, revolutionizing the way businesses operate. One of the key advantages is enhanced security. By leveraging blockchain's immutability and decentralized nature, cloud providers can ensure the integrity of data stored in their systems. With traditional cloud storage, data breaches and unauthorized access are constant concerns. However, with blockchain, data is encrypted and distributed across multiple nodes, making it nearly impossible for hackers to compromise the entire network.
Another benefit of blockchain in cloud computing is improved transparency. Traditional cloud systems often lack transparency, leaving users in the dark about how their data is being handled. Blockchain technology enables users to trace the entire lifecycle of their data, providing an auditable trail of transactions. This transparency builds trust between users and cloud providers, as they can verify that their data is being stored and processed securely.
Furthermore, blockchain technology offers cost savings and efficiency gains. By eliminating intermediaries and automating processes through smart contracts, businesses can streamline operations and reduce costs. Smart contracts are self-executing agreements that are stored on the blockchain. They automatically execute when predefined conditions are met, eliminating the need for manual intervention. This automation not only saves time but also reduces the potential for human error.
Challenges and Limitations of Implementing Blockchain in Cloud Computing
While the benefits of blockchain technology in cloud computing are immense, several challenges and limitations must be considered before implementation. One of the main challenges is scalability. Blockchain networks, especially those utilizing PoW consensus, can be slow and resource-intensive. As the number of transactions increases, the network can become congested, resulting in slower transaction times. This scalability issue must be addressed to ensure that blockchain-based cloud systems can handle the demands of large-scale applications.
Another challenge is the regulatory and legal implications of blockchain technology. As blockchain enables the creation of decentralized applications and smart contracts, traditional legal frameworks may struggle to keep up. Issues such as jurisdiction, liability, and dispute resolution need to be carefully considered and adapted to this new paradigm. Additionally, privacy concerns arise when storing sensitive data on a public blockchain. While encryption techniques can protect the data, ensuring compliance with data protection regulations is crucial.
Real-World Examples of Blockchain Technology in Cloud Computing
Numerous real-world examples demonstrate the transformative power of blockchain technology in cloud computing. One notable example is supply chain management. By utilizing blockchain, companies can track and verify the entire journey of a product, from raw materials to the end consumer. This transparency reduces the risk of counterfeit products, ensures ethical sourcing, and improves overall supply chain efficiency. Additionally, blockchain-based cloud systems can enable real-time inventory management, reducing stockouts and optimizing logistics.
Another example is the financial industry. Blockchain technology has disrupted traditional banking and payment systems, enabling faster and more secure transactions. Blockchain-based cloud platforms provide a foundation for peer-to-peer lending, decentralized exchanges, and cross-border remittances. These applications not only reduce costs but also increase financial inclusion, as individuals without access to traditional banking services can participate in the global economy.
The Future of Blockchain Technology in Cloud Computing
As blockchain technology continues to evolve, its impact on cloud computing is set to deepen. One of the key advancements is the emergence of private and consortium blockchains. Unlike public blockchains, which are open to anyone, private and consortium blockchains are permissioned networks that restrict access to selected participants. These networks offer increased scalability, privacy, and control, making them suitable for enterprise use cases.
Another promising development is the integration of blockchain with other emerging technologies, such as artificial intelligence (AI) and the Internet of Things (IoT). By combining these technologies, businesses can create decentralized and autonomous systems that enable secure and intelligent data exchange. For example, blockchain can ensure the integrity and traceability of AI algorithms, while IoT devices can securely transmit data to the blockchain for analysis and automation.
Security and Privacy Considerations in Blockchain-Based Cloud Computing

While blockchain technology enhances security in cloud computing, it also introduces new security and privacy considerations. One such consideration is the vulnerability of smart contracts to exploitation. Smart contracts are code-based agreements, and any flaw or vulnerability in the code can be exploited by malicious actors. It is crucial to perform thorough code audits and implement best practices to minimize the risk of smart contract vulnerabilities.
Privacy is another concern in blockchain-based cloud computing. While blockchain provides pseudonymity, meaning that transactions are linked to addresses rather than real-world identities, it is not entirely anonymous. With advances in data analysis and blockchain forensics, it is possible to trace transactions back to individuals. To address this, privacy-focused blockchains, such as zero-knowledge proof-based systems, are being developed to enhance privacy without compromising security.
How to Integrate Blockchain Technology into Your Cloud Computing Strategy
Integrating blockchain technology into your cloud computing strategy requires careful planning and consideration. First, identify the areas of your business that can benefit from blockchain's characteristics, such as enhanced security, transparency, and automation. Evaluate the feasibility and potential impact of implementing blockchain solutions in those areas. Consider factors such as scalability, regulatory compliance, and the availability of skilled resources.
Next, choose the appropriate blockchain platform for your needs. There are various blockchain platforms available, each with its own strengths and weaknesses. Consider factors such as performance, consensus mechanism, governance model, and community support when selecting a platform. Additionally, evaluate the interoperability of the chosen blockchain platform with existing cloud infrastructure and systems.
Once the blockchain platform is selected, design and develop the necessary smart contracts and applications. Collaborate with experienced blockchain developers and security experts to ensure the integrity and security of the code. Thoroughly test the applications and conduct audits to identify and mitigate any vulnerabilities. Finally, deploy the blockchain-based cloud systems and continuously monitor and update them to adapt to evolving threats and technological advancements.
Training and Certification Programs for Blockchain in Cloud Computing
As the demand for blockchain technology in cloud computing grows, so does the need for skilled professionals who can design, develop, and manage blockchain-based cloud systems. Various training and certification programs are available to help individuals and organizations acquire the necessary skills and knowledge in this domain.
The Blockchain Training Alliance offers comprehensive training programs that cover various aspects of blockchain technology, including its application in cloud computing. These programs provide a deep understanding of blockchain fundamentals, smart contract development, and the integration of blockchain with cloud platforms. Additionally, industry-recognized certifications, such as the Certified Blockchain Professional (CBP) and Certified Blockchain Solutions Architect (CBSA), validate the expertise and competency of individuals in blockchain and cloud computing.
Other organizations, such as Udemy and Coursera, also offer online courses and certifications in blockchain and cloud computing. These courses cover a wide range of topics, from blockchain basics to advanced blockchain development and deployment in cloud environments. These training programs and certifications equip individuals with the skills and credentials needed to excel in the rapidly evolving field of blockchain technology in cloud computing.
Conclusion: Embracing the Potential of Blockchain Technology in the Cloud
The fusion of blockchain technology and cloud computing holds immense potential for transforming industries and revolutionizing the way businesses operate. By leveraging blockchain's security, transparency, and automation capabilities, businesses can enhance data integrity, streamline operations, and reduce costs. However, challenges such as scalability, regulatory compliance, and privacy must be addressed to fully harness the power of this symbiotic relationship.
As blockchain technology continues to evolve and mature, its integration with cloud computing will become increasingly seamless and impactful. Private and consortium blockchains, coupled with other emerging technologies, will unlock new possibilities for secure and intelligent data exchange. By embracing the potential of blockchain technology in the cloud, businesses can stay ahead of the curve and seize the opportunities of the digital age. So, let us embark on this exhilarating journey together and shape the future, one blockchain-powered cloud at a time.
For custom software development, visit us at Zee Palm
Check out free Flutter Components, visit Flutter Components Library

Webflow Development: Master the Art of Web Development for Seamless and Responsive Websites
For businesses to stay ahead of their competition, they need a seamless and responsive website. Webflow development can help here. Developers can create stunning websites easily and precisely with Webflow, a popular web design platform. You can increase your website's visitor count and convert them into loyal customers by mastering Webflow development.
With its user-friendly interface and powerful design tools, Webflow empowers developers to build custom websites without the need for complex coding. From creating visually appealing layouts to implementing interactive elements, Webflow offers a range of features that make web development a breeze.
In this article, we will explore the key aspects of Webflow development and how you can leverage this platform to create truly remarkable websites. Whether you're a seasoned developer looking to expand your skill set or a business owner seeking to enhance your online presence, this guide will provide you with the insights and strategies you need to succeed in the world of Webflow development. Let's dive in and unlock the limitless possibilities of Webflow.
The Benefits of Using Webflow for Website Development
Webflow is a great choice for website development due to its wide range of benefits. Firstly, it provides a visual interface that allows developers to design and prototype websites in real-time, eliminating the need for manual coding. This saves time and effort, enabling developers to focus on the creative aspects of web design.
Additionally, Webflow provides a responsive design feature, which ensures that websites look great and function properly across different devices and screen sizes. This is crucial in today's mobile-first world, where a majority of internet users access websites on their smartphones or tablets.
Another benefit of Webflow is its extensive collection of ready-to-use templates and components. These templates not only save developers time, but they also serve as a starting point for creating unique and visually stunning websites. With Webflow, you have the flexibility to customise these templates to match your branding and design preferences.
Understanding the Basics of Webflow
Before diving into Webflow development, it's important to have a basic understanding of how the platform works. Webflow follows a visual development approach, where you design websites by visually arranging elements on the screen.
At the core of Webflow is the Webflow Designer, a powerful tool that allows you to create and customise the layout, typography, colours, and other design elements of your website. With the Designer, you can easily drag and drop elements onto the canvas, adjust their properties, and see the changes in real-time.
Webflow also utilises a concept called "div blocks," which are containers that hold the content of your website. These div blocks can be nested within each other, allowing for complex and dynamic layouts. Understanding how to effectively use div blocks is essential for creating visually appealing and functional websites in Webflow.
Webflow vs. Traditional Web Development
Webflow offers a unique approach to web development compared to traditional methods. In traditional web development, developers typically code websites from scratch using HTML, CSS, and JavaScript. This requires a deep understanding of coding languages and can be time-consuming, especially for complex projects.
On the other hand, Webflow simplifies the development process by providing a visual interface and pre-built design elements. This allows developers to focus more on the creative aspects of web design rather than spending hours writing code.
However, it's worth noting that while Webflow is a powerful tool for building websites, it may not be suitable for all types of projects. Complex web applications or websites with specific functionality requirements may still require custom coding. It's important to assess the needs of your project and determine if Webflow is the right solution for you.
Getting Started with Webflow: Setting Up Your Account and Workspace
To get started with Webflow, you'll need to create an account on the Webflow website. Once you've signed up, you'll have access to your Webflow dashboard where you can manage your projects and settings.
Before diving into the design process, it's important to set up your workspace. Webflow provides a clean and intuitive interface that allows you to easily navigate through your project and access the various design tools. Familiarise yourself with the layout of the Webflow Designer and explore the different panels and settings available.
Exploring the Webflow Designer: An Overview of its Features and Functionality
The Webflow Designer is the heart of the Webflow platform. It offers a wide range of features and functionality that enable you to design beautiful and responsive websites.
One of the key features of the Webflow Designer is the visual editor, which allows you to make changes to your website in real-time. With the visual editor, you can easily adjust the layout, typography, colours, and other design elements of your website. The changes you make are immediately reflected on the canvas, providing instant feedback on your design choices.
In addition to the visual editor, the Webflow Designer also offers a range of advanced features. These include the ability to create animations and interactions, add custom code, and integrate with third-party services. These features allow you to add dynamic and interactive elements to your website, enhancing the user experience and making your website truly stand out.
Building a Responsive Website in Webflow: Best Practices and Tips
When it comes to web development, responsiveness is key. With the increasing use of mobile devices, it's important to ensure that your website looks and functions properly across different screen sizes.
Webflow makes it easy to create responsive websites through its responsive design feature. This feature allows you to define how your website's layout and content should adapt to different screen sizes. By using Webflow's responsive design tools, you can create fluid and flexible layouts that automatically adjust to fit the screen.
To ensure a seamless responsive experience, it's important to follow best practices when building a responsive website in Webflow. This includes using breakpoints to define different layout configurations, optimising images for different devices, and testing your website on various screen sizes. By following these best practices, you can ensure that your website looks great and functions properly on any device.
Advanced Webflow Techniques: Interactions, Animations, and Custom Code
While Webflow provides a range of built-in design tools, there may be instances where you want to take your website to the next level with advanced techniques. Webflow allows you to add interactions and animations to your website, bringing it to life and creating a more engaging user experience.
With Webflow's interactions feature, you can create animations and transitions that respond to user interactions. This could include elements that fade in or out, slide in from the side, or change colour when clicked. By adding these interactive elements, you can create a more dynamic and engaging website that keeps visitors coming back for more.
In addition to interactions, Webflow also allows you to add custom code to your website. This gives you the flexibility to implement advanced functionality or integrate with third-party services. Whether you want to add a custom form, embed a video player, or integrate with an e-commerce platform, Webflow's custom code feature allows you to do so without limitations.
Webflow Hosting and Deployment: Publishing Your Website to the Web
Once you've designed and developed your website in Webflow, it's time to make it live on the internet. Webflow provides its own hosting service, which allows you to publish your website directly from the Webflow platform.
To publish your website, you'll need to connect a custom domain or use a Webflow subdomain. Webflow offers a seamless domain management system, allowing you to easily connect your domain and manage DNS settings.
Once your website is published, Webflow also provides a range of hosting options to optimise the performance and security of your website. From content delivery networks (CDNs) to SSL certificates, Webflow ensures that your website is fast and secure for your visitors.
Conclusion: Embracing the Power of Webflow Development for Modern Websites
In conclusion, Webflow development offers a powerful and user-friendly solution for creating seamless and responsive websites. With its visual interface, extensive design tools, and advanced features, Webflow empowers developers to bring their creative visions to life.
By mastering the art of Webflow development, you can take your website to the next level, attracting more visitors and converting them into loyal customers. Whether you're a seasoned developer or a business owner, Webflow provides the tools and resources you need to succeed in the world of web development.
So, embrace the power of Webflow and unlock the limitless possibilities of modern website creation. With Webflow, you can build websites that not only look great but also deliver an exceptional user experience. Start your journey into the world of Webflow development today and see how it can transform your online presence.
For custom software development, visit us at Zee Palm
Check out free Flutter Components, visit Flutter Components Library

Creating a Food Delivery App: A Comprehensive Guide to Development, Maintenance, and Budgeting
Are you a food enthusiast with an entrepreneurial streak? Imagine revolutionizing how people order their favorite meals! If that resonates, it's time to delve into the world of food delivery app development. Our comprehensive guide offers an enticing journey through the intricacies of creating a food delivery app. From initial planning to ongoing maintenance and budgeting, we've got you covered. Crafting a successful food delivery app requires careful planning and execution. You'll need to grasp your target audience, select the right features, and ensure a seamless user experience. Our guide walks you through each step, providing practical tips and industry insights to navigate the app development landscape. Whether you're a seasoned developer or new to the app world, this guide equips you with the knowledge and tools to bring your food delivery app idea to life. Get ready for an exciting journey to app success!
Benefits of creating a food delivery app
In today's fast-paced world, convenience is key. A food delivery app offers immense benefits for both customers and restaurant owners. For customers, the convenience of ordering their favorite meals with a few taps on their smartphones is unbeatable. They can enjoy a wide variety of cuisines, browse through menus, and track their deliveries in real-time. On the other hand, restaurant owners can expand their customer reach, streamline their operations, and increase their revenue by partnering with a food delivery app. Additionally, a food delivery app allows restaurants to gather valuable data on customer preferences, enabling them to tailor their offerings and marketing strategies. Overall, a food delivery app opens up a world of opportunities for both customers and restaurant owners, making it a lucrative venture.
A food delivery app not only benefits customers and restaurant owners but also creates employment opportunities. With the increasing demand for food delivery services, more delivery drivers are needed to meet the growing orders. This opens up a new avenue for individuals looking for flexible work options. They can sign up as delivery partners with the food delivery app and earn income at their convenience. This gig economy model offers flexibility and freedom to individuals, making it an attractive option for those seeking additional income or a flexible work schedule. By creating a food delivery app, you contribute to job creation and empower individuals to earn a living on their terms.
Developing a food delivery app also allows you to tap into the growing trend of online food ordering. With people becoming more accustomed to online shopping and digital transactions, the demand for food delivery apps is on the rise. By creating an app that provides a seamless ordering experience, you can cater to this growing customer base and establish a strong presence in the market. The potential for growth and scalability is substantial, making it an exciting venture for aspiring entrepreneurs.
Market analysis and competitor research
Before diving into food delivery app development, it's crucial to conduct thorough market analysis and competitor research. Understanding the current landscape and identifying your competitors will help you position your app effectively and differentiate it from the rest. Start by

researching the popular food delivery apps in your target market. Analyze their features, user experience, pricing models, and marketing strategies. This will give you insights into what works well and what can be improved upon.
In addition to studying your competitors, it's essential to analyze the market demand and trends. Look for gaps and opportunities that you can leverage to create a unique selling proposition for your app. Consider factors such as the size of the target market, customer preferences, and any emerging trends. Are there specific cuisines or dietary preferences that are in high demand? Is there a need for a niche food delivery app catering to a specific audience? By conducting market analysis, you can identify untapped opportunities and tailor your app to meet the needs of your target audience effectively.
Another aspect to consider during market analysis is the regulatory landscape. Familiarize yourself with any local or national regulations related to food delivery services. Ensure that your app complies with these regulations to avoid any legal issues down the line. Understanding the market and your competition will provide a solid foundation for the development and success of your food delivery app.
Understanding the target audience
To create a successful food delivery app, you need to have a deep understanding of your target audience. Who are they? What are their preferences and pain points? By understanding your audience, you can tailor your app to meet their specific needs and deliver a user experience that exceeds their expectations.
Start by creating user personas that represent your target audience segments. Consider factors such as age, location, income, and lifestyle. This will help you gain insights into their preferences and behaviors. Conduct surveys or interviews to gather feedback directly from your potential users. This feedback will provide valuable insights into their expectations from a food delivery app and help you prioritize features and functionalities.
Another important aspect of understanding your target audience is identifying their pain points. What are the challenges they face when ordering food? Is it difficult finding specific cuisines or dietary options? Is it the lack of transparency in delivery times? By addressing these pain points, you can create a user-centric app that solves real problems and delivers a delightful experience.
Once you have a clear understanding of your target audience, you can design and develop your food delivery app to cater to their specific needs. By focusing on user experience and providing personalized recommendations, you can create a loyal customer base and differentiate yourself from the competition.
Features and functionality of a food delivery app
To create a successful food delivery app, you need to carefully select the features and functionalities that will enhance the user experience. While the core feature of any food delivery app is the ability to order food, there are several other features that can make your app stand out. Let's explore some essential features that you should consider incorporating into your app.
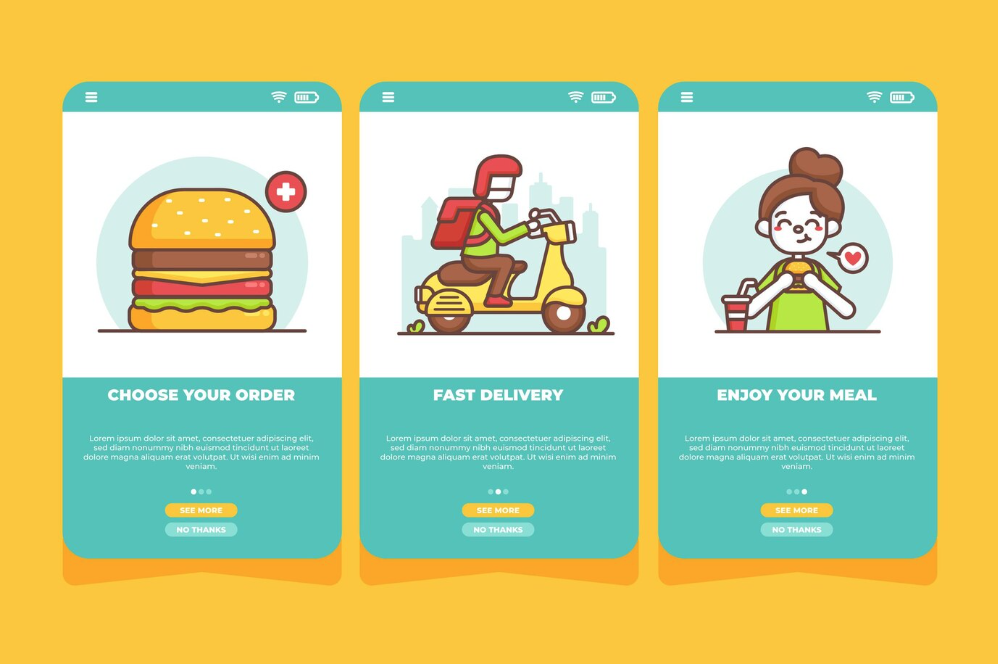
1. User registration and profile management: Allow users to create accounts, save their preferences, and easily manage their orders.
2. Restaurant listings and menus: Provide users with a comprehensive list of restaurants, along with their menus, cuisines, and pricing information. Make it easy for users to filter and search for their favorite restaurants.
3. Real-time order tracking: Keep users informed about the status of their orders. Provide them with real-time updates on the preparation, dispatch, and delivery of their meals.
4. Secure payment gateway: Ensure that your app supports secure and hassle-free payment options. Integrate popular payment gateways to offer convenience and trust to your users.
5. Ratings and reviews: Enable users to rate and review restaurants and delivery drivers. This helps in building trust and credibility within the app.
6. In-app chat and customer support: Provide users with a seamless way to communicate with customer support or restaurant staff. This can help resolve any issues or queries quickly.
7. Push notifications: Keep users engaged and informed about new offers, discounts, or order updates through push notifications. Personalize the notifications based on user preferences to increase engagement.
8. Social sharing and referrals: Encourage users to share their experiences on social media and refer friends to earn rewards or discounts. This helps in organic marketing and word-of-mouth promotion of your app.
By carefully selecting and implementing these features, you can create a food delivery app that provides a seamless and delightful experience for your users.
Choosing a technology stack for app development

Choosing the right technology stack is crucial for the successful development of your food delivery app. The technology stack refers to the combination of programming languages, frameworks, libraries, and tools that you choose to build your app. Consider factors such as scalability, security, and ease of development when selecting your technology stack.
For the backend development of your app, popular options include Node.js, Ruby on Rails, or Django. These frameworks offer scalability and ease of development, making it easier to handle a large number of concurrent users. For the frontend development, you can choose between React Native, Flutter, or native development for iOS and Android platforms. React Native and Flutter are cross-platform frameworks that allow you to build your app once and deploy it on multiple platforms, saving development time and effort.
When it comes to the database, you can choose between SQL or NoSQL databases based on your specific requirements. SQL databases like MySQL or PostgreSQL offer robustness and reliability, while NoSQL databases like MongoDB provide flexibility and scalability for handling large amounts of data.
Additionally, consider integrating third-party APIs for features like payment gateways, location tracking, or social media login. This can save development time and provide a seamless integration of essential functionalities.
By carefully selecting your technology stack, you can ensure that your food delivery app is built on a solid foundation and is scalable for future growth.
Developing the app: step-by-step process
The development process of a food delivery app can be divided into several steps. Let's walk through each step to give you a clear understanding of the development process.
1. Requirements gathering and planning: Define the scope, features, and functionalities of your app. Create wireframes and prototypes to visualize the user flow and interactions.
2. UI/UX design: Design the user interface and user experience of your app. Ensure that the design is intuitive, visually appealing, and aligns with your brand identity.
3. Backend development: Develop the server-side logic, APIs, and database architecture. Implement the features and functionalities defined in the planning phase.
4. Frontend development: Implement the user interface design and integrate it with the backend. Develop the app for iOS and Android platforms using the selected technology stack.
5. Testing and quality assurance: Conduct thorough testing to identify and fix any bugs or issues. Perform functional testing, usability testing, and performance testing to ensure a seamless user experience.
6. Deployment and launch: Deploy your app to the app stores, following the guidelines and requirements of Apple App Store and Google Play Store. Implement app store optimization techniques to increase visibility and downloads.
7. Post-launch monitoring and updates: Monitor the app performance, user feedback, and analytics. Continuously update and improve your app based on user feedback and market trends.
By following a systematic and well-defined development process, you can ensure the successful creation and launch of your food delivery app.
Testing and quality assurance
Testing and quality assurance are critical aspects of app development. Before launching your food delivery app, it's essential to conduct thorough testing to identify and fix any bugs or issues. Let's explore the different types of testing that should be performed during the development process.
1. Functional testing: Ensure that all the features and functionalities of your app are working as expected. Test different user scenarios and edge cases to identify any issues.
2. Usability testing: Test the user interface and user experience of your app. Gather feedback from real users to understand any usability issues and make improvements.
3. Performance testing: Test the performance of your app under different load conditions. Ensure that your app can handle a large number of concurrent users without any slowdowns or crashes.
4. Security testing: Test the security of your app to identify any vulnerabilities or potential security breaches. Implement proper encryption and authentication mechanisms to protect user data.
5. Compatibility testing: Test your app on different devices, operating systems, and screen sizes to ensure compatibility across a wide range of devices.
6. Localization testing: If you plan to launch your app in multiple countries or regions, perform localization testing to ensure that your app is properly translated and adapted to different languages and cultures.
By conducting thorough testing and quality assurance, you can deliver a high-quality app that provides a seamless and delightful experience for your users.
Maintenance and updates for a food delivery app
Once your food delivery app is launched, the work doesn't stop there. Ongoing maintenance and updates are crucial to ensure the smooth operation of your app and keep it up-to-date with the latest trends and technologies. Let's explore the different aspects of app maintenance and updates.
1. Bug fixes and performance improvements: Continuously monitor your app for any bugs or performance issues. Regularly release updates to fix these issues and improve the overall user experience.
2. Security updates: Stay updated with the latest security threats and vulnerabilities. Implement regular security updates to protect user data and ensure the integrity of your app.
3. Feature enhancements: Gather user feedback and analyze market trends to identify opportunities for feature enhancements. Continuously add new features and functionalities to keep your app competitive and engaging.
4. Server maintenance: Ensure that your server infrastructure is robust and scalable. Regularly monitor server performance and optimize it to handle increasing user loads.
5. App store optimization: Regularly update your app store listings with relevant keywords, screenshots, and descriptions. Implement app store optimization techniques to increase visibility and downloads.
By regularly maintaining and updating your food delivery app, you can ensure that it remains competitive, secure, and delivers a delightful user experience.
Budgeting for app development and ongoing expenses
Budgeting is a crucial aspect of app development. It's essential to plan and allocate your resources effectively to ensure the success of your food delivery app. Let's explore the different components of app development and ongoing expenses that you need to consider when budgeting.
1. Development costs: This includes the cost of hiring developers, designers, and testers. Depending on your location and the complexity of your app, development costs can vary significantly.
2. Technology stack: Some technology stacks may have licensing or subscription costs associated with them. Consider these costs when choosing your technology stack.
3. Infrastructure costs: If you choose to host your app on cloud servers, consider the costs associated with server hosting and maintenance. Cloud hosting platforms like AWS or Azure offer flexible pricing options.
4. Marketing and promotion: Allocate a budget for marketing and promoting your app. This can include social media advertising, influencer collaborations, or app store optimization services.
5. Ongoing maintenance and updates: Consider the costs associated with bug fixes, security updates, and feature enhancements. Depending on the complexity of your app, ongoing maintenance costs can vary.
6. Customer support: Allocate a budget for providing customer support to your app users. This can include hiring support staff or outsourcing customer support services.
7. App store fees: Both Apple App Store and Google Play Store charge fees for app submissions and updates. Consider these fees when budgeting for your app.
By carefully budgeting and allocating your resources, you can ensure that your food delivery app development stays within your financial limits and sets you up for success.
Creating a food delivery app is an exciting and rewarding venture. By following this comprehensive guide, you have gained valuable insights into the development, maintenance, and budgeting aspects of building a successful food delivery app. Remember to continuously adapt and improve your app based on user feedback and market trends. With careful planning and execution, your food delivery app can revolutionize the way people order their favorite meals. Happy app development!
For custom software development, visit us at Zee Palm
Check out free Flutter Components, visit Flutter Components Library

Agile in 2024
Agile methodologies have been in the spotlight for quite a time now, and it has become a popular project management approach in software development. Agile's iterative and collaborative nature has proven to be extremely effective in delivering high-quality software while adapting to changing requirements. For those who are new to Agile, it is a project management and product development strategy that is centered around iterative progress, team collaboration, and customer feedback.
To delve further into the understanding of Agile and its applications, you can visit our website at Zee Palm.
Here is a link to one of our blogs discussing how Agile and DevOps fuel rapid product development: How Agile and DevOps Fuel Rapid Product Development
As we stand at the beginning of 2024, it's natural to wonder what the future holds for Agile methodologies. Questions like these arise for businesses striving to stay competitive and ahead. Will this approach continue to evolve and shape the landscape of project management in the coming year? What new challenges and opportunities will emerge? What does 2024 have in store for Agile, and how will it adapt to meet the ever-growing demands of the industry?
So let's explore what exactly 2024 holds for Agile and delve into some of the key trends and insights for Agile in the upcoming year.
Artificial Intelligence and Machine Learning Integration
One of the trends that has been arising is the integration of Artificial Intelligence (AI) and Machine Learning (ML) in Agile project management. Companies are now increasingly recognizing the value of streamlining automation in the Agile development cycle, especially in scenarios where frequent requirement changes and numerous iterations are involved. Agile frameworks like Scrum and Kanban are highly suited for the data-driven nature of AI and ML integration projects.
These frameworks not only offer flexibility and adaptability to rapid changes but also enhance project outcomes by integrating with AI and ML. Integrating these technologies into the development cycle will assist teams in automating planning, monitoring, testing, and deploying cycles. AI and ML bring efficiency to teams by automating repetitive tasks, allowing members to focus on other important tasks. Analyzing vast datasets becomes seamless, which can be hard and time-consuming with manual efforts. Moreover, predictive analytics can be made based on previous data which can help us make more informed decisions. Overall, these integrations ensure continuous improvement, effective time management, and enhanced project quality.
Major companies like Google, Netflix, Microsoft, Amazon, and IBM are using AI/ML in their Agile projects allowing adaptability to changing requirements. Google, for instance,
uses search engines to employ complex AI and ML algorithms to rank search results and provide the most relevant information to users. These algorithms are constantly refined through iterative testing and data analysis with Agile.
Additionally, other innovative technologies such as the Internet of Things (IoT), quantum computing, and robotic process automation (RPA) are being explored for their potential impact on Agile methodologies.
Scaled Agile and Scrum Dominance
Scaled Agile and Scrum are two prominent frameworks dominating the organizational landscape. Scaled Agile is now widely adopted by organizations to extend Agile practices across their teams and departments. These Agile practices are implemented by large organizations for managing complex large-scale projects and multiple teams. Scaled Agile frameworks, such as SAFe (Scaled Agile Framework) and LeSS (Large Scale Scrum), are increasingly adopted in larger organizations. These frameworks are dominating for providing us with various advantages such as enabling efficient collaboration, coordination, and monitoring of progress across multiple teams and complex projects.
Scrum, is another dominating agile framework. It is famous for its effectiveness in managing complex projects through an iterative and incremental approach. In Scrum, teams work collaboratively to deliver a functional product at the end of each iteration or sprint. One of the reasons Scrum is dominating is its suitability for cross-functional collaboration among teams promoting transparency, flexibility, adaptability, and customer satisfaction. The framework's commitment to regular inspection and adaptation allows teams to respond promptly to changing requirements, contributing to overall project success.
Cloud Agility
Agile teams are taking advantage of cloud-based solutions to maintain competitiveness in the marketplace. The adoption of serverless architecture eliminates the need for traditional server resources, reducing both infrastructure and operational costs. This eliminates the lengthy setup times associated with traditional infrastructure, enabling teams to deploy new environments and start development much faster.
Companies embracing cloud agility gain advantages such as flexibility, scalability, and efficiency, allowing them to adapt to rapid changes in the marketplace. The synergy between Agile practices and cloud technology accelerates development cycles, leading to faster time-to-market and improved adaptability to changing customer needs, resulting in an overall enhancement of customer service.
Furthermore, cloud-based environments facilitate seamless collaboration and streamline CI/CD pipelines, aligning perfectly with Agile's communication principles and rapid iterations.
Expansion Into Non-IT Domains
Agile practices, which were originally designed for IT projects, are now expanding into non-IT domains. The core principles of Agile, focusing on flexibility, collaboration, and iterative development are expanding across various industries beyond the software industry. It has found its way into departments such as marketing, finance, advertising, medicine, architecture, and more.
Different Frameworks like Scrum and Kanban can play a key role in aligning with the objectives of streamlining iterative development and incremental approach. Scrum's structured sprints and Kanban's visual management will help non-IT teams organize their work efficiently, allowing for adaptability and improved collaboration.
Challenges In Agile Adoption
While Agile methodologies have become the go-to approach for software development. Many different challenges are emerging. Here are some challenges that can occur:
Scaling Agile:
As agile practices are growing beyond software developments. Companies are struggling with scaling Agile methodologies for Large projects because it requires careful planning and ongoing adjustments which can be extremely hard to deal with.
Budget Constraints:
Balancing Agile's project which includes iterative development and rapid delivery can be challenging for limited budgets. Organizations need to prioritize features effectively and strategically manage project scope by exploring cost-saving measures like leveraging cloud platforms and open-source tools.
Poor Communication and Collaboration:
Agile project management relies heavily on effective communication and collaboration among team members. Lack of proper communication and collaboration can lead to misunderstandings, delays, and reduced productivity
To overcome this challenge, organizations should establish an effective communication plan for their Agile teams. This involves leveraging collaboration tools and fostering a strong team bond to understand the needs and preferences of each team member.
Conclusion
In conclusion, Agile methodologies are going to remain prominent in the marketplace. These practices are continuously striving to address the dynamic landscape of customer demands and market trends. While challenges such as scaling for large enterprises and budget constraints may exist, companies are innovatively navigating these hurdles. Moreover, the integration of AI/ML in Agile practices, dominant frameworks like SAFe and Scrum, and the utilization of cloud agility showcases the adaptability of Agile across various industries. Agile methodologies are empowering teams to respond swiftly to changing circumstances. According to a study, Agile practices increase 25% productivity in your projects. So as long as businesses prioritize collaboration, flexibility, and efficiency, Agile is likely to stay a significant force in project management.
For custom software development, visit us at Zee Palm
Check out free Flutter Components, visit Flutter Components Library

Software Development With Generative AI
The software development process is undergoing a paradigm shift, it’s no longer just about writing lines of code but also about surpassing creative boundaries. Generative AI, with its ability to create new content based on existing data, is revolutionizing how we write code, test applications, and design experiences. This article aims to be your one-stop shop for understanding and harnessing the power of generative AI in your development journey.
Generative AI in Software Development
Generative AI involves diverse techniques and algorithms capable of generating new content, such as text, images, and code, based on learned patterns from existing data. In software development, generative AI offers several compelling applications such as:
Code Generation
Generative AI models such as GitHub Copilot, Tabnine, and DeepCode can generate code snippets based on your prompts and existing code, allowing you to focus on the bigger picture.
Visit GitHub Blog and Tabnine Blog to learn the prompt structure and get better code predictions.
Testing and Quality Assurance
You can now create test cases using Generative AI tools and identify edge cases, predict potential bugs, and improve the efficiency and effectiveness of software testing. DeepCode and IntelliCode leverage AI to automate test generation, ensuring comprehensive coverage and saving your time.
Documentation
NLP-powered AI tools facilitate documentation, requirement analysis, and code summarization tasks. Tools like NaturalDocs, jsDoc Toolkit, and Google AI platform for Natural Language Processing automatically generate documentation and technical reports ensuring clarity and consistency.
UI/UX Design
Tools such as Figma, Adobe XD, and Dream by WOMBO enable the creation of visual assets, such as UI designs and multimedia content by suggesting layouts and generating mockups, accelerating the design process.
Development Process
To effectively leverage generative AI in software development, developers can follow a systematic process:
1. Identify Your Needs:
Before integrating generative AI into your development workflow, you must identify the aspects that would benefit the most from AI augmentation. Evaluate areas that involve repetitive tasks, specific development stages, or creative challenges where AI could provide valuable assistance. Implement AI solutions where they will have the greatest impact.
2. Tool Selection
After understanding your needs, explore available AI tools. From open-source frameworks to commercial platforms, there are plenty of options. Consider factors such as your budget, technical preferences, and the specific requirements of your projects when selecting AI tools. Whether you opt for established frameworks like TensorFlow and PyTorch or models like OpenAI’s GPT or Google Gemini, choose tools that align with your objectives.
3. Crafting Clear Instructions
Prompt writing is essential for utilizing the full potential of generative AI tools. The structure and format of your prompts directly impact the generated output. Each platform/tool has its own criteria for a well-structured prompt. Below is a curated list of courses and guides that will help you master prompt engineering.
- Prompt Engineering for Software Engineers by Andrew Ng
- ChatGPT Masterclass for Programmers and Software Engineers by Mary-Brenda Acoda and Isa Fulford
- A Developer’s Guide to Prompt Engineering and LLMs by John Berryman and Albert Ziegler
Experiment with different prompts and fine-tune your skills to optimize the performance of AI tools and achieve the desired results.
4. Experimentation and Evaluation
As you begin integrating generative AI into your workflow, start small and experiment with different tools, prompts, and workflows to gauge their effectiveness in enhancing production quality. Measure the impact of AI augmentation on key metrics such as development time, code readability, and user satisfaction. Evaluate and iterate your approach continuously, identify areas for improvement, and refine the use of AI over time.
5. Continuous Learning
AI models are continuously evolving, with new tools, techniques, and research advancements at a rapid pace. To stay ahead of the curve, you must commit to continuous learning and professional development. Stay updated with the latest trends, participate in workshops and conferences, and engage with the community to exchange ideas and insights. You can look up for forums and community discussions on Reddit and GitHub Discussions. By staying curious and adaptive, you can leverage the latest innovations in generative AI and elevate your development practices.
Navigating Challenges
Incorporating generative AI into software development processes presents numerous opportunities, but it also raises important concerns and considerations that need to be addressed to ensure responsible use.
1. Data Biases
AI models may inadvertently amplify existing biases present in the training data. It’s important to choose AI tools developed with responsible practices that prioritize inclusivity and equity.
2. Explainability
It’s essential to use tools that offer transparency and allow for human oversight, enabling developers to understand how AI models make their conclusions and intervene when needed. This not only enhances trust but also facilitates collaboration between human and AI systems.
3. Security Risks
Robust security measures are essential to protect sensitive data and against potential risks associated with AI systems such as data breaches. This can be achieved by using trusted tools and implementing stringent security protocols.
4. Ethical Implications
Ethical implications such as job displacements and automation bias must be addressed carefully. Companies must consider the societal impacts of automation and strive to create solutions that benefit both businesses and employees.
Conclusion
Generative AI presents exciting opportunities for transforming the software development process, offering automation, creativity, and efficiency. However, it’s crucial to approach its integration thoughtfully. Consider concerns such as data bias, security risk, ethical implications, etc. By adopting responsible practices and leveraging the strength of human intelligence and AI, developers can capture the full potential of generative AI and create impactful solutions.
For custom software development, visit us at Zee Palm
Check out free Flutter Components, visit Flutter Components Library

5 AI Productivity Apps that Will Change the Way You Work
In a world full of distractions, staying productive is extremely challenging. With limited time on our hands and millions of tasks to complete, it is important to find ways to stay consistent and focused. However, here is the catch: we expect to stay productive while also aiming for efficiency and quick results. That's where Artificial Intelligence comes in as a game-changer in the world of productivity. Not only does it provide innovative solutions to our problems, but it also enhances efficiency with its ability to process vast amounts of data and learn from patterns.
In this blog, we will learn about 5 AI productivity apps that will change how you work.
1. Grammarly

The first and most widely used AI-powered app is Grammarly. It is a popular writing assistant that helps us to improve our writing skills and enhance the quality of our written content. It is a digital writing tool that not only provides grammar and spell-checking but also goes beyond basic rule-based spell-checking and grammar correction. Grammarly changes the way we work by saving our time and acting as a cover for the language barrier you don't have to have specific or professional writing skills because Grammarly has it covered for you.
When talking about this AI productive app, whether you're experienced in English or new to it, Grammarly aids in proofreading emails and blogs, enhancing productivity and efficiency compared to manual draft checks. Even now I am using Grammarly to help me write this blog and it is helping me with its advanced algorithms for analyzing and providing real-time suggestions to enhance vocabulary and clarity.
This app checks for the correctness, clarity, engagement, and delivery of your text.
Its advanced version includes features like plagiarism checking, sentence rewrites, and vocabulary suggestions saving us tons of time and work. Grammarly Go will also change the way we work by enabling us to choose the writing tone and suggests adding a feature to select different dialects like British English, American English, Canadian English, and Indian English. It also allows us to choose the tone and writing style, whether to be confident, personal, formal, or informal. With this, we don’t have to stress about many things. We just let Grammarly know what tone and writing style we want and get things done more quickly.
2. ChatGPT

The next one is ChatGPT. It is an AI-powered chatbot that has gained popularity for its ability to help us with various tasks and improve productivity. This tool has changed the whole dynamic of working and productivity.
ChatGPT enhances our efficiency with its fast research capabilities. This versatile tool saves us time and helps with various tasks such as assignments, projects, idea generation, blog writing, coding, and more. Studies have shown that it can increase productivity by 40% for professionals engaged in common writing tasks. It can now interact with images and voice input. You can show it a picture and ask for it to provide code or have a voice conversation on a specific topic.
Not only will this tool help bridge the skill gap, but it will also empower individuals who may not have the same level of expertise. If your presentation and data utilization skills are strong, you will be able to effectively communicate accurate statistics and information. Its ability to identify and correct errors in writing and data will minimize mistakes and rework, ensuring accuracy and efficiency.
With all these features, you can complete your tasks more efficiently and stay productive. However, this tool can also lead to laziness, as people might start relying on it entirely without caring about proofreading or adding their original thoughts. While this AI is powerful, it is essential not to fully depend on it and to continue to engage actively in tasks, to ensure quality and personal input.
3. Otter.ai

Otter.ai is famous for its speech-to-text transcription using artificial intelligence and machine learning. The app takes notes, provides real-time summaries, transcribes audio, and offers seamless real-time collaboration features. It automatically transcribes conversations, meetings, lectures, interviews, and even podcasts in real time, allowing users to focus on active listening and engagement. It provides features like annotation, highlighting, sharing, and editing. Otter.ai is compatible with Zoom, Google Meet, Teams, and in-person meetings.
This app will revolutionize the way people work, especially those who frequently take notes, whether they are teachers, students, employers, or individuals in various roles. Users can concentrate on the content as Otter.ai automatically creates notes, saving significant time and eliminating the need for repetitive clarifications. For employers, during interviews, it can reduce evaluation time significantly
Studies suggest that Otter's accuracy ranges from 75% to 90%. This app will not only save you time and effort by eliminating manual note-taking and transcription but also improve your focus even in noisy environments. With its high accuracy level, it will reduce the chances of mistakes and provide incorrect transcriptions.
4. Todoist

Todoist is a versatile task management app that empowers you to take control of your productivity and achieve your goals. It is more than just a simple to-do list app. This app will allow you to easily add tasks and organize your notes. It utilizes features like priority levels, labels, and filters to organize your tasks based on importance and urgency. It allows you to set deadlines and schedules for tasks, keeping you on track. Moreover, it allows you to collaborate seamlessly, sharing tasks and projects, while tracking progress to stay motivated.
With its AI Assistant, it provides innovative features like Suggest tasks, Tips for completing tasks, and Making tasks more actionable, which helps enhance productivity and change the way we work. It helps us by breaking down large and overwhelming tasks into smaller, more manageable chunks. The Suggest Tasks feature generates task suggestions based on the user input, providing us with a structured map for progress. Moreover, the Tips for Completing Tasks feature offers insights for handling complex assignments, making the completion of tasks more achievable. The Break Tasks Down feature is very good for handling large projects by breaking down the tasks into smaller chunks.
Overall this app allows its users to stay productive by providing reminders, and guidance, helping users to overcome hurdles and stay on track, and ensuring a more streamlined and efficient work process.
5. Notion

Notion is an all-in-one AI platform for productivity and collaboration enhancement that has maximized our efficiency and decreased our workload clutter. This powerful and flexible AI-integrated app enhances project and content management by engaging machine learning integration and natural language processing. It helps in various managerial processes like content creation, summarization, and collaborative editing, among others.
The key features of Notion AI align with an individual or collaborative workflow, boasting and streamlining the data. The main aspects include effortless content creation, sub-divisions of text generation, insights extraction, and improved writing. It also provides permission controls and cross-platform accessibility. Its kanban boards and customization of the workspace provide a personalized touch for users, making it more relatable.
Notion AI is still in its earlier stages, and it has limitations. For example, it might not always generate perfect text, and it may not be able to handle complex tasks without human interaction. However, Notion AI is constantly improving, and its capabilities are expected to be improved in the future
Overall, Notion AI helps you work smarter by providing everything from information extraction to workspace and brainstorming boards to cross-collaborative editing.

How Flutter Boosted Our App Development Skills
Flutter is an open-source UI-SDK developed by Google. It allows developers to build high-performance, cross-platform mobile apps using a single codebase. Flutter has gained significant popularity over the ears due to its hot reload feature, rich widget library, and ease of use. Are you tired of juggling multiple codebases for iOS and Android apps? Keep reading to explore its features, benefits, and why it might be the perfect choice for your next mobile app project.
Enhanced Performance with Dart
Flutteremploys Dart as its programming language, known for its high-performance characteristics. Dart’s Just-in-time (JIT) compilation accelerates the iterative process. While, Ahead-Of-Time (AOT) compilation translates your code into native machine code specific to the target platform, resulting in fast startup times, smooth performance, and efficient resource utilization.
Dart’s strong typing and garbage collection system makes it highly efficient for handling complex logic and data structures providing optimized app performance.
Widget-Based Architecture:
Flutter follows a widget-based architecture, widgets are building blocks of UI elements. They are composable and reusable units. They can manage their own state simplifying dataflow while libraries like Provider and Bloc offer advanced solutions for complex apps. Widgets facilitate rapid UI prototyping, lead to readable and cleaner code, and they render consistently across all platforms.
Single Codebase
Flutter reduces the development time by half by eliminating the need for maintaining separate code bases. Grab, the South Asian super app, built its platform with Flutter, which significantly reduced development time and effort.
It allows you to deliver a consistent application to users across iOS and Android without having to worry about platform-specific inconsistencies or design compromises.
Hot Reload
You can see the impact of your code changes on the running app instantly, without having to restart the entire process. This feature drastically enhances productivity by allowing rapid debugging and fast iterations of your designs. You can focus on writing code and building features rather than waiting for builds, this feedback loop keeps you in the flow and boosts overall productivity.
According to a 2023 Flutter Developer Survey, 48% of the Flutter developers consider hot reload to be the most valuable feature. Hot reload isn’t just about speed; it fosters creativity. Experimenting with UI layouts, trying different color schemes, and testing ode variations becomes effortless, resulting in more engaging user experiences.
Platform Channels
While Flutter provides a rich set of cross-platform widgets, it also seamlessly integrates with platform-specific code when necessary. This is where Flutter’s platform channels come into play, bridging the Flutter code and native functionalities. You can send requests from your Dart code to access features like device sensors, location services, third-party SDKs, and device-specific hardware.
Platform channels offer flexibility by allowing you to access native features and lets you leverage native code execution for tasks requiring optimal performance.
However, try to prioritize cross-platform communication whenever possible. Ensure proper data conversion between Dart and native types and thoroughly test your integration with both Android and iOS.
Third-Party Libraries
Leveraging third-party solutions is the key to efficiency. Flutters boasts a multitude of third-party packages and libraries. These packages offer ready-to-use functionalities, ranging from handling HTTP requests to implementing complex features.
For instance, Firebase provides a comprehensive suite of services, from user authentication and cloud storage to real-time databases. Swiggy, a leading food delivery app, utilizes Firebase for user authentication, push notifications, and real-time order tracking.
Integrating these libraries is straightforward, typically involving importing relevant plugins and utilizing their provided methods within your Flutter code. This significantly reduces development time and effort compared to building everything from scratch, allowing you to focus on your app's core functionalities and deliver value to users faster.
Performance Benchmark
When it comes to performance, Flutter has proven its mettle, showcasing its ability to deliver high-performance mobile apps. One such example is the official app for the Broadway musical "Hamilton." Developed using Flutter, the app achieved an impressive 60 frames per second (fps) on both iOS and Android platforms. This level of performance is comparable to native app development, demonstrating Flutter's capability to provide smooth and responsive user experiences.
This highlights Flutter's ability to deliver exceptional performance, rivaling that of native apps. Flutter's compilation of native machine code, utilization of the Skia graphics engine, and efficient UI rendering ensure smooth animations, reduced CPU usage, and optimized memory consumption. You can trust Flutter to provide the performance necessary to create engaging and responsive user experiences.
Testing and Debugging
Flutter provides a robust testing framework that allows developers to write unit tests, integration tests, and widget tests. The unit tests utilize the test package that isolates and tests individual components of your app, ensuring functionality and preventing regressions. similarly, widget tests leverage flutter_test to test the behaviors of widgets and so on.
You can implement Logging statements to track app execution flow, pinpoint errors, and analyze behaviors. Flutter Inspector can be used to visualize and inspect widget trees, examine widget properties, and identify layout issues. These are good practices because well-tested code is easier to understand, modify, and maintain in the long run.
Conclusion
In conclusion, Flutter has transformed mobile app development by offering a comprehensive and efficient framework. Whether it's performance benchmarks, development productivity, or ease of testing and debugging, Flutter provides the necessary tools and features to build high-quality, cross-platform mobile apps. As Flutter continues to evolve and gain popularity, it remains an excellent choice for developers looking to create engaging and innovative mobile experiences. Share
For custom software development, visit us at Zee Palm
Check out free Flutter Components, visit Flutter Components Library

The 5 paid subscriptions we use in 2024 as app developers
When it comes to app development, having the right tools at your disposal can make a big difference. In the fast-paced world of coding, where innovation is constant, developers need resources to stay ahead in the changing technical landscape. There is a wide range of subscriptions to assist developers in faster coding, deployment, and debugging. Developers are using these subscriptions, whether paid or free to work efficiently and effectively. So, here are 5 paid subscriptions that we use as app developers in 2024 and a general idea about their pricing plan.
1. Github Copilot
The first paid subscription that we use is GitHub Copilot. It is a cloud-based artificial intelligence tool developed by GitHub in collaboration with OpenAI. This AI-powered tool assists developers with writing code, helping them write code faster and more efficiently. Copilot acts as a pair programmer by suggesting code completions, functions, and even entire lines of code as you type. It works in the background, reading what is being written and suggesting what you might want to write next. It is a great tool that not only increases your productivity but also helps maintain quality. Copilot works with a variety of programming languages, including Python, JavaScript, Java, and many more. When writing test cases, most of the time, you only need to write the name of the test, and it fills out the rest. No more Googling for correct syntax or struggling with repetitive tasks. Copilot becomes your coding partner, saving you time and mental energy.
Pricing
Here is a general idea of their pricing plan:
- Individual: Starts at $10/month, providing limited features and 10k lines of code. Perfect for personal projects.
- Team: jumps to $49/user/month for the full Copilot experience. Provides powerful features, and access to private repositories
- Business: Available at $19/user/month, it is tailored according to your company's needs, with enhanced security, compliance settings, and dedicated support.
- Enterprise: At $39/user/month provides private repositories, priority support, and more
2. Codemagic
Codemagic is a cloud-based Continuous Integration and Continuous Delivery (CI/CD) platform specifically designed for mobile app development. This paid subscription not only helps us automate the entire app development cycle but also streamlines the workflow by testing, building, and deploying apps to app stores like Google Play and the Apple App Store. Codemagic allows developers to automate their entire release pipeline, reducing manual errors and speeding up the deployment process. It also supports various mobile frameworks like Flutter, React Native, native iOS and Android, Unity, and Kotlin Multiplatform Mobile. Moreover, it catches bugs early with automated testing on real devices. Codemagic comes with predefined integrations that can be automated with various testing tools and is frequently updated with upcoming and the latest development tools. It is easy to use and offers 24/7 free onboarding assistance for queries. Codemagic's pricing is based on per-minute build and concurrency.
Pricing:
- Free Plan: Available for open-source projects and personal use, with limited build minutes and private repository support.
- Standard Plan: Starts at $49/month, includes 500 build minutes, 2 concurrent builds, and support for private repositories.
- Pro Plan: Starts at $99/month, increases build minutes, and concurrent builds, added features like custom domains and environment variables.
3. Sentry:
Sentry is a self-hosted and cloud-based application real-time error-tracking and performance-monitoring platform. It is designed to help developers identify, understand, and fix errors in their applications. Sentry analyzes errors in your app, pinpointing the exact issue, code culprit, and user impact. It captures errors in detail, including their code context, user information, and environment details. It provides real-time alerts, notifying you instantly when new errors occur. Additionally, it identifies slow requests and helps optimize your app's performance. Sentry integrates with popular tools like GitHub, Slack, and Jira for a smooth workflow and supports various programming languages and frameworks. It aids in quickly identifying, debugging, and resolving issues hence boosting development efficiency.
Pricing:
- Free plan: Basic error monitoring for solo devs.
- Team plan: Starts at $26/month (annual), and includes core features for small teams.
- Business plan: Starts at $80/month (annual), and expands features for larger teams and enterprises.
- Optional Codecov add-on: Free for 1 dev, $29/month for 5 Pro seats.
These are the starting prices. Check Sentry's website for full details and current pricing.
4. Lucidchart
Lucidchart is a web-based diagramming and visualization tool designed to help individuals and teams create various diagrams efficiently and collaboratively. Visualizing complex ideas and system architectures is a common challenge in app development. It allows users to visually collaborate on drawing, revising, and sharing charts and diagrams, and improve processes, systems, and organizational structure. This cloud-based diagramming tool allows you to visualize your app's architecture, and user flows, and design mockups with ease. It provides real-time collaboration features and extensive integrations making it perfect for brainstorming and sharing ideas within your team.
Pricing:
Free: Perfect for personal use, but limited to 3 editable documents and basic features.
Individual: starting at $7.95/month provides unlimited documents, advanced shapes, and basic integrations.
Team: $27/user/month provides seamless collaboration, real-time editing, secure environment.
Enterprise: starting at $36.5/user/month but also includes custom pricing, advanced security, and dedicated support for large organizations.
5. Loom
Loom is a video conferencing platform designed to help individuals and teams communicate easily. It allows users to record their screens, providing a quick way to capture thought processes, explain bugs, or demonstrate features. Developers can use Loom to create brief video messages for code explanations, sharing ideas, or providing feedback. Loom then generates a shareable link for these recordings, promoting asynchronous communication and reducing the need for extensive meetings. This also allows seamless integration with development tools such as Slack, Trello, and Jira enhancing collaboration within teams. Loom also allows users to add annotations and drawings to their screen captures, making it a good tool for effective communication.
Overall, Loom proves to be an excellent tool for effective communication within a team, especially when demonstrating concepts or providing visual explanations.
Pricing:
- Free Plan: Allows basic recording and sharing features, with a 5-minute recording limit and Loom branding.
- Business Plan: Starts at $15/user/month, unlimited videos and recording length, includes advanced sharing options, and offers team management features.
- Enterprise Plan: Custom pricing for large organizations, with custom branding, priority support, and advanced security controls.
Please note that these are starting prices; it's advised to check the current pricing on their respective websites for any updates or changes.
For custom software development, visit us at Zee Palm
Check out free Flutter Components, visit Flutter Components Library

Why is Microsoft Not a Part of FAANG
The tech world often revolves around acronyms, and one of the most popular is FAANG, representing Facebook(now Meta), Amazon, Apple, Netflix, and Google (now Alphabet). But another tech giant is missing: Microsoft. Microsoft has been a constant pioneer in the world of technology. It has created some of the most widely used software products and even ventured into the gaming market with incredible success.
So, why is Microsoft not included in the FAANG crowd? Let’s have a closer look at the reasons.
Different Origins, Different Journeys
FAANG emerged as a disruptor in the 2010s, representing high-growth companies in flourishing sectors like social media, e-commerce, and streaming. Meanwhile, Microsoft, with its inception dating back to 1975, had already solidified its position as a software giant. While FAANG pursued explosive growth, Microsoft prioritized the development of reliable products and services for consumers and businesses. This disjunction highlights the divergent paths and strategic focuses of these tech giants, with FAANG embodying innovation and Microsoft embodying steadfast reliability.
FAANG’s criteria for inclusion
FAANG, comprising Facebook, Amazon, Apple, Netflix, and Google, distinguishes itself not only through market capitalization but also through a focused approach to specific industries like social media, online retail, and streaming. This specialization contrasts with Microsoft's diverse portfolio spanning gaming, personal computing, and cloud services, potentially hindering its inclusion. While Microsoft has achieved success across multiple technology sectors, its broad range of products and services may be perceived as a lack of specialization, contributing to its exclusion from the elite FAANG group.
Industry Focus vs Diversification
FAANG companies thrive in specific niches. In contrast, Microsoft boasts a diverse portfolio spanning operating systems, cloud computing, and productivity tools. While FAANG's focused approach solidifies their dominance within their sectors, Microsoft's diversification enables it to cater to a broad range of consumer and enterprise needs. However, this breadth makes it harder to categorize Microsoft within a specific industry focus, blurring the lines between industry boundaries and highlighting the contrasting strategies of specialization and diversification within the tech landscape.
Evolving Landscapes and New Acronyms
The world of technology is everchanging, and the FAANG acronym itself might be evolving. Some financial analysts and Tech publications suggest including Microsoft (forming MAANG), reflecting its immense capital and influence. Others propose MAMAA (Microsoft, Alphabet, Meta, Amazon, and Apple ), adding Meta after its rebranding.
Conclusion
Microsoft's lack of a FAANG badge doesn't tell the whole story. While absent from the iconic group, its commitment to innovation with groundbreaking products like Xbox, HoloLens, Teams, and Surface showcases its persistent drive to stay relevant. Azure, its cloud computing platform, has emerged as a major player, challenging giants like AWS and GCP. The strategic acquisition of LinkedIn strengthened its enterprise offerings, and its consistent market cap performance speaks volumes about its financial stability. As the tech landscape evolves, with alternative acronyms like MAANG and MAMAA gaining traction, Microsoft's influence cannot be ignored. Its distinct approach, coupled with its innovative spirit and strategic direction, solidifies its position as a leading tech powerhouse, shaping the future of the industry in its unique way.
For custom software development, visit us at Zee Palm
Check out free Flutter Components, visit Flutter Components Library

Guide to Hiring Offshore Talent
In today's world, businesses are constantly trying to grow and stay ahead in the competitive market. They are striving to find ways that are cost-effective and meet the rapidly changing demands of the market. Employing offshore talent is one of the best strategies to involve. As the business landscape continues to evolve, the decision to hire offshore talent is not just a cost-saving measure but a strategic move towards accessing diverse skill sets, promoting innovation, and cultivating a global mindset within your organization.
So in this blog, we are going to explore a guide to hiring offshore talent. However, before diving into it, we must understand what hiring offshore talent is.
What is Hiring Offshore Talent?
Hiring offshore talent refers to the process of employing individuals who work remotely from different countries than locally. This means your team members could be located anywhere in the world, offering a wider talent pool, cost-effectiveness, and the ability to utilize 24/7 time availability.
Here are some steps to follow before hiring:
Step 1:Define Your Project Vision and Requirements
Before diving into the offshore hiring process, it's crucial to define your project's vision, needs, and objectives. Clearly outline your required skill set, budget limitations, and project timeline. Identify what specific expertise your project demands, whether it's skilled developers, creative designers, or other professionals. Moreover, decide whether your project is better suited for individual freelancers or an offshore team. Defining these important things is crucial for setting a successful foundation for offshore collaboration.
Step 2: Choose the Right Destinations:
When it comes to hiring individuals, different countries offer various advantages and challenges. Properly consider the time zone difference, cultural nuances, and language barriers. In some countries, you can get the job done at a lesser cost than in others, and in some, there are more skilled people than in others. Some popular destinations for outsourcing include India, the Philippines, Eastern Europe, Poland, and China. India controls 56% of the global outsourcing market, especially in IT and software development. China is known for cost-effective manufacturing, the Philippines excels in customer service, and other countries offer diverse expertise. This evaluation ensures you choose a location that aligns with your project requirements and time availability for a successful offshore partnership.
Step 3: Explore Options and Select the Right Offshore Model:
The next step is to dive into various methods to connect with offshore talent, including specialized job boards, famous agencies experienced in managing offshore teams, and freelance platforms such as Upwork or Fiverr. Additionally, consider direct outreach through industry events or tech hubs in your target region.
When it comes to offshore models, there are multiple options, such as project-based, dedicated teams, and staff augmentation. You have to assess your project's unique requirements, considering factors like duration, complexity, and budget constraints. Then, select the offshore model that best aligns with your goals, ensuring a planned approach that maximizes efficiency and effectiveness in achieving project success.
Step 4: Conduct Proper Interviews :
Once you've shortlisted possible candidates or teams, conduct thorough interviews to evaluate their technical skills, communication abilities, and cultural fit. Utilize video or voice calls as a medium to ensure effective communication such as tools like Zoom or Google Meet to conduct face-to-face interviews despite the distance. Use various assessment methods to check their abilities. Ask questions beyond technical skills during the evaluation process. Ask questions about the specific role, their views on it, and the candidate's location. Research common cultural norms and communication styles in the region to avoid misunderstandings.
This will help you in the selection of candidates or teams that not only possess the necessary technical expertise but also align with your company's culture and values.
Step 5: Be Clear about the Job Description and Communicate properly
The last step is to create a proper job description where you clearly outline the role, responsibilities, tasks, cost limitations, and time constraints, and emphasize your company culture and values to attract suitable candidates. Communicate with them that this is what we are going to do, this is the timeframe, cost, and other considerations.
Moreover, establish transparent communication channels using collaboration tools, project management platforms, and video conferencing such as Slack, Trello, and Asana. Conduct regular meetings so that you can create transparent communication and prevent misunderstandings and delays.
Create a strong relationship with your team. Provide them with regular feedback so they can improve. Regularly check in and build trust in the team so you all can work successfully toward a goal.
Discovering and employing offshore talent can be challenging, but it is beneficial at the same time. You can hire the best talent that aligns with your company's requirements in a cost-effective and time-efficient way. By following these steps, you can have a good idea of how to hire offshore talent.
For custom software development, visit us at Zee Palm
Check out free Flutter Components, visit Flutter Components Library

FlutterFlow? What it Brings to The Table
What is FlutterFlow?
It’s a visual interface builder that allows developers to create stunning UI with unmatched ease. FlutterFlow leverages the power of Flutter, Google’s UI toolkit for building natively compiled apps across various mediums. FlutterFlow streamlines the development workflow and accelerates the development process by providing a visual canvas for UI designing.
FlutterFlow isn't just a mere addition to the developer’s toolkit- it has shifted the development paradigms. It’s an online low-code visual builder, that empowers developers to create native mobile applications with unprecedented ease and efficiency. In this article, we will discover its key features and advantages.
Key Features
1. Visual Interface Builder
Flutter Flow simplifies UI design by providing a drag-and-drop interface builder, allowing developers to assemble widgets and define their properties visually. This approach eliminates manual coding, enabling rapid prototyping and iteration.
2. Code Generation
Behind the scenes, Flutter Flow generates clean, production-ready code based on the visual design created by developers. This eliminates the need to write boilerplate code, reducing errors and speeding up development.
3. Component Reusability
Flutter Flow promotes component-based development, allowing developers to create reusable UI components that can be easily incorporated into multiple projects, enhancing code maintainability and scalability.
Advantages
1. Accelerated Development Process
With its visual interface builder and code generation capabilities, Flutter Flow significantly accelerates the app development process. Developers can iterate quickly on design concepts, leading to faster time-to-market for applications.
2. Streamlined Workflow
By eliminating the complexities of manual coding, Flutter Flow streamlines the development workflow. Allowing developers to focus more on design and functionality, rather than getting bogged down by implementation details.
3. Enhanced Collaboration
The real-time collaboration features of Flutter Flow foster teamwork and communication among developers, designers, and other stakeholders. This collaborative environment promotes creativity and ensures that everyone's input is valued.
4. Platform Independent
Flutter Flow can target multiple platforms from a single codebase. Whether it's iOS, Android, or the web, Flutter Flow ensures consistent UI experiences across different devices and platforms.
Conclusion
In closing, Flutter Flow isn't merely a tool—it's a revolution in app development. By seamlessly integrating visual design with powerful code generation, it empowers developers to create native mobile applications faster and more collaboratively than ever before. With its streamlined workflow and platform-independent capabilities, Flutter Flow indicates a new era of efficiency and innovation in the world of app development. Embrace Flutter Flow, and unlock the full potential of your creative vision.
For custom software development, visit us at Zee Palm
Check out free Flutter Components, visit Flutter Components Library

Deploying Flutter Apps Across Different Platforms
Flutter, Google’s toolkit for building natively compiled mobile, web, and desktop applications from a single codebase, has gained immense popularity due to its flexibility and efficiency. However, deploying Flutter apps to different platforms comes with its own set of challenges and considerations. This article will explore the steps in deploying your Flutter app to Android, iOS, web, and desktop platforms.
1.Understanding Flutter’s Cross-Platform Nature
Flutter's key strength lies in its ability to create applications that run seamlessly across multiple platforms using a single codebase. The Dart programming language, on which Flutter is based, allows developers to write expressive and concise code that can be compiled into native code for various platforms.
2. Preparing Your Flutter Apps for Deployment
Before deploying your app, it's crucial to ensure it's well-structured, optimized, and thoroughly tested on different devices and screen sizes. Utilize Flutter's widget system to create responsive layouts that adapt to different screen resolutions and orientations. Lastly, optimize performance by minimizing unnecessary renders, optimizing assets, and leveraging Flutter's hot reload feature during development.
3. Deploying Your App
To Android
Begin with configuring your Flutter project’s Android-specific settings within the Android manifest file. Define details such as package name, version code, and permissions required by your application.
Once your project is properly configured, the next step is to generate a release APK (Android Package) using Flutter’s build tools. This involves compiling your Flutter code into a package that can be installed and run on Android devices. Additionally, it’s important to sign the APK with a suitable digital certificate to ensure its authenticity and security. Finally, you can publish your app on the Google Play Store.
To iOS
The deployment process for iOS devices is similar to Android deployment but there is some additional configuration specific to the iOS platform. First, you need to configure your project’s iOS-specific settings within the Xcode project file and define essential details such as bundle identifier, version number, and application requirements.
After proper configuration, you need to generate an iOS release build using Flutter’s build tools. Compile your Flutter code into a package that can be installed and run on iOS devices. You need to ensure that the app compiles with Apple’s strict App Store guidelines and interface design principles to guarantee its acceptance in the platform. Following these steps, you can successfully deploy your Flutter app to iOS devices.
To Web
To begin the web deployment, configure your Flutter project specifically for web deployment. It involves enabling the necessary web plugins and dependencies within your project setup, this ensures that your app has access to the required resources and functionalities to run smoothly on the web.
After configuration, leverage Flutter’s web-specific widgets and APIs to optimize the UX for web environments. Now that your Flutter app is polished and ready to go, it’s ready for deployment, you have several options for deploying your app, such as web-hosting providers and cloud platforms. Standard techniques like uploading files via FTP or utilizing CI pipelines to streamline the deployment process, making it efficient and hassle-free.
To Desktop
Configure the Flutter project specifically for desktop deployment, and activate essential desktop platform plugins and dependencies. Flutter’s desktop-specific APIs will enable you to access native features seamlessly, enabling you to provide users with responsive experiences tailored to the desktop environment.
Use Flutter’s build tools to generate platform-specific executable files for Windows (.exe), macOS (.app), and native Linux packages.
Choosing the right distribution channel is crucial for ensuring that your desktop application reaches its intended audience effectively. Whether through traditional distribution channels like your website or package managers for Linux distributions, you must carefully consider the best approach to distribute their executable files and make your app accessible to users on desktop platforms.
Takeaway
In the ever-evolving world of software development where new frameworks and libraries are released frequently, Flutter has emerged as a game-changer for cross-platform development.
Thorough preparation is essential for successful deployment to Android, iOS, web, or desktop platforms. Configuring platform-specific settings and leveraging Flutter’s capabilities are crucial steps in ensuring your app's success.
At Zee Palm, we specialize in crafting user-centric applications and empowering businesses of all sizes to turn their ideas into reality using Flutter. Whether you're envisioning a sophisticated user interface or a seamless e-commerce experience, our experienced team is ready to tackle the challenge head-on.
For custom software development, visit us at Zee Palm
Check out free Flutter Components, visit Flutter Components Library

How to manage your project when working with a remote team or dev shop
Working remotely has become increasingly common, especially since the global rise of COVID-19. Companies nowadays routinely collaborate with offshore developers, and teams often work across different time zones, outsourcing development tasks to specialized teams.
While this approach saves time, offers flexibility, and provides access to global talent, managing projects with remote teams or dev shops can become quite challenging. Therefore, effectively managing the project becomes crucial to ensure good collaboration, work productivity, and successful outcomes. So, here are some ways to manage your project when working with a remote team or dev shop.
1. Establish a Good Platform for Clear Communication
When it comes to managing a successful project, the number one priority is to establish good communication within the team. This can be achieved by utilizing various communication tools, such as video conferencing, chat platforms, and project management software, to keep everyone on the same page. Platforms like Slack, Asana, and Trello can be used for this purpose. Regularly schedule meetings to foster a strong workplace communication bond and ensure transparency by keeping everyone informed about ongoing developments.
2. Define Clear Project Goals
The next and most important step is to set clear project goals before diving into the actual project. Define the project's objectives, outcomes, and timelines. This will help create a roadmap for the team, ensuring everyone is aligned with the project's purpose and direction. Additionally, break down the project into manageable chunks of tasks, outline the roles and responsibilities of everyone, and establish milestones to track progress. This approach will help the team understand the expectations and the work required to complete the job.
3. Set Realistic Expectations and Deadlines
Setting realistic expectations and deadlines is crucial when working with a remote team. Understand that everyone has different time zones and working hours, which might require extensions or delays. However, you can utilize these time zone differences to your advantage. As your team members in different time zones wrap up their day, others are just starting. When setting deadlines, involve your remote team members in the planning process. This allows them to voice their concerns and offer their estimates of individual workloads and schedules. Then, you can set goals and deadlines to align with each other, creating a continuous workflow that can lead to faster work completion. Be transparent about project timelines and communicate any adjustments needed to manage expectations effectively.
4. Promote knowledge sharing
Promote knowledge sharing within the team. Create an environment for learning and knowledge sharing. Cultivate a strong team culture so that even after the project ends, you can collaborate with them again. Encourage team members to help each other and share their experiences and insights on things. This will not only enhance the overall dynamics of the team but will also contribute to a culture of continuous learning and improvement.
5. Regularly Monitor Progress
Regularly monitor your team's progress by establishing a daily check-in system and providing status updates. Use project management tools for this purpose to track tasks and identify any issues that may arise. This approach will not only help you ensure that everything aligns with the project timeline and goals but also allow you to timely resolve any issues that may occur during the project.
6. Provide Feedback
When working with a remote team, regularly monitoring and providing feedback is crucial. Offering constructive feedback to the team will help them understand expectations and identify areas where improvement is needed in their performance. Communicate with the team on what is working well and where improvements can be made. Encourage them to ask questions and provide their feedback on things, making them feel involved in the project. This collaborative approach will foster a sense of engagement and continuous improvement within the team.
7. Trust your Team
Another important thing is to trust your team. Managing a remote team can be a challenging task due to factors such as time differences and geographical distances, but be patient with your team and trust the process. Trust your team members in making decisions regarding the tasks they are working on. Allow them to manage their work independently in their respective areas of expertise. If you don't trust your team, it can create delays in productivity and create a less helpful working environment.
8. Evaluate the project
The final step is to evaluate the project when it is complete. Conduct a thorough evaluation and perform various tests to check if everything is working according to the plan. If any issues arise, provide feedback and guide the team on necessary adjustments. This post-project evaluation is crucial for identifying successes, and areas for improvement, and determining what not to do in the future.
In conclusion, managing a project with a remote team or dev shop requires effective communication with your team, setting clear goals, establishing realistic expectations, continuous monitoring, implementing feedback mechanisms, and conducting a thorough evaluation of the project.
For custom software development, visit us at Zee Palm
Check out free Flutter Components, visit Flutter Components Library

The Essentials of Successful Social Media App Development: A Step-by-Step Guide
In this digital era, social media apps have become an indispensable part of our lives. From connecting with friends and family to engaging with brands and businesses, these platforms offer endless opportunities. However, developing a successful social media app is no easy feat. It requires careful planning, strategic execution, and a user-centric approach.
In this comprehensive guide, we will walk you through the essential steps of social media app development, ensuring that your app stands out from the competition and attracts a loyal user base. We will explore everything from defining your target audience and setting clear objectives to designing an intuitive user interface and implementing robust backend functionality.
Our step-by-step approach will provide you with practical insights, expert tips, and real-world examples to guide you at every stage of the app development process. Whether you're a seasoned developer looking to enhance your skills or a budding entrepreneur with a groundbreaking app idea, this guide will equip you with the knowledge you need to create a social media app that captivates users and drives meaningful engagement. So, let's dive in and unlock the secrets of successful social media app development.
Understanding the market for social media apps
Developing a successful social media app starts with a thorough understanding of the market. With millions of apps available today, it's crucial to identify the gaps and opportunities that exist. Conducting market research will help you analyse the competition, identify trends, and determine the unique value proposition of your app.
To begin, study the top social media apps in the market and analyse their features, functionalities, and user experience. Look for gaps or areas where you can offer something different or better. Additionally, consider the demographics and preferences of your target audience. This will help you tailor your app to their needs and preferences.
Once you have a clear understanding of the market and target audience, you can start developing a solid foundation for your app. This includes defining your app's mission, vision, and core values. These elements will shape your app's identity and guide the decision-making process throughout development.
Identifying the target audience for your app

Identifying your target audience is crucial for the success of your social media app. Understanding who your app is designed for will help you create a user experience that resonates with them.
Start by creating user personas that represent your ideal users. Consider factors such as age, gender, location, interests, and behaviours. This will help you empathise with your target audience and design features that cater to their needs.
Additionally, conduct user interviews and surveys to gather insights directly from your target audience. This will help you understand their pain points, motivations, and expectations. Use this information to refine your app's features and prioritise the most important functionalities.
Remember, your target audience should be at the forefront of every decision you make during the app development process. By understanding their needs and preferences, you can create an app that truly resonates with them.
Defining the features and functionality of your social media app
Defining the features and functionality of your social media app is a critical step in the development process. This involves mapping out the user journey, identifying the core features, and prioritising functionalities based on user needs.
Start by creating a user flow diagram that outlines the different screens and actions users will encounter in your app. This will help you visualise the user experience and identify any potential bottlenecks or usability issues.
Next, identify the core features that are essential for your app's success. These could include features such as user profiles, news feeds, messaging, notifications, and social sharing. Prioritise these features based on their importance and feasibility within your development timeline.
Once you have a clear understanding of the core features, you can start building wireframes and prototypes. These visual representations will help you refine the user interface and gather feedback from stakeholders and potential users. Iterate on these designs until you have a solid foundation for your app's interface.
Creating a wireframe and prototype for your app
Creating a wireframe and prototype is an essential step in the social media app development process. It allows you to visualise the user interface, test the user experience, and gather feedback before moving on to development.

Start by creating low-fidelity wireframes that outline the layout and structure of your app's screens. This can be done using specialised software or even pen and paper. Focus on the overall flow and organisation of the app, rather than the visual design.
Once you have a solid wireframe, you can create a high-fidelity prototype that simulates the app's functionality and interaction. Use interactive prototyping tools to create a realistic user experience that closely resembles the final product. This will allow you to gather feedback from stakeholders and potential users, and make any necessary adjustments before development begins.
Remember, the wireframe and prototype are not set in stone. They serve as a starting point for the development process and should be continuously refined and improved based on user feedback and evolving requirements.
Choosing the right technology stack for social media app development
Choosing the right technology stack is crucial for the success of your social media app. It will determine the performance, scalability, and security of your app, as well as the ease of development and maintenance.
Start by considering the platform(s) on which you want to build your app. Will it be a native app for iOS and Android, or a cross-platform app using frameworks like React Native or Flutter? Each platform has its own advantages and considerations, so choose based on your target audience and development capabilities.
Next, consider the backend technologies that will power your app. This includes the programming languages, frameworks, and databases that will handle data storage, user authentication, and server-side logic. Popular choices include Node.js, Ruby on Rails, and Django.
Lastly, consider the frontend technologies that will be used to create the user interface and enhance the user experience. This includes HTML, CSS, and JavaScript frameworks like React or Angular.
Remember, choosing the right technology stack is a balancing act between functionality, performance, and development resources. Take the time to research and evaluate each option before making a decision.
Developing the backend and frontend of your app
Developing the backend and frontend of your social media app is a complex process that requires careful planning and execution. It involves writing code, integrating APIs, and building the necessary infrastructure to support your app's functionality.
Start by setting up your development environment and organising your codebase. Use version control systems like Git to track changes and collaborate with other developers. This will ensure a smooth development process and make it easier to roll back changes if needed.
Next, focus on developing the backend of your app. This includes setting up servers, databases, and APIs that will handle data storage, user authentication, and server-side logic. Utilise frameworks and libraries to streamline development and ensure efficient performance.
Simultaneously, work on developing the frontend of your app. This involves writing code, designing user interfaces, and implementing the desired features and functionalities. Utilise responsive design principles to ensure your app looks and works well across different devices and screen sizes.
Throughout the development process, conduct regular testing and debugging to identify and fix any issues or bugs. Use automated testing tools and manual testing methods to ensure the app performs as expected and delivers a seamless user experience.
Testing and debugging your social media app
Testing and debugging are crucial steps in the social media app development process. They help identify and fix any issues or bugs, ensuring that your app delivers a seamless user experience.

Start by conducting functional testing to ensure that all the features and functionalities of your app are working correctly. Test each screen, button, and action to ensure they behave as expected and deliver the desired outcome.
Next, conduct usability testing to gather feedback from real users. Ask them to perform specific tasks and observe their interactions with the app. This will help you identify any usability issues, confusing user flows, or areas for improvement.
Additionally, conduct performance testing to ensure that your app can handle a large number of users and data without slowing down or crashing. Test the app's response time, loading speed, and resource usage to identify any performance bottlenecks.
Lastly, conduct security testing to identify and fix any vulnerabilities or potential risks. This includes testing for data breaches, unauthorized access, and potential attacks. Implement security measures such as encryption, user authentication, and secure APIs to protect user data.
Launching and marketing your social media app
Launching and marketing your social media app is a crucial step in attracting users and driving engagement. A well-planned launch and marketing strategy can significantly impact the success of your app.
Start by creating a pre-launch buzz by generating anticipation and excitement among your target audience. Utilise social media, email marketing, and influencer partnerships to create awareness and build a community around your app.
Next, optimise your app's listing on app stores to improve its visibility and discoverability. This includes optimising your app's name, description, screenshots, and keywords. Additionally, gather positive reviews and ratings to boost your app's credibility and ranking.
Utilise social media marketing to reach and engage with your target audience. Create engaging content, run targeted ads, and leverage user-generated content to promote your app. Additionally, collaborate with influencers and industry experts to expand your reach and credibility.
Lastly, track and analyse the performance of your app using analytics tools. Monitor user engagement, retention rates, and feedback to identify areas for improvement and inform future updates. Continuously iterate and enhance your app based on user feedback and changing market trends.
Monitoring and improving the performance of your app
Monitoring and improving the performance of your social media app is an ongoing process that requires continuous attention and optimization. Regularly analysing app performance and user feedback will help you identify areas for improvement and deliver a better user experience.
Utilise analytics tools to track key performance indicators (KPIs) such as user engagement, retention rates, and conversion rates. Monitor these metrics regularly to identify any trends or patterns that may indicate areas for improvement.

Additionally, gather user feedback through surveys, ratings, and reviews. Pay close attention to recurring complaints or suggestions. Use this feedback to prioritise feature enhancements and bug fixes
Regularly release updates and new features to keep your app fresh and relevant. Use A/B testing to experiment with different features or design elements and gather data on user preferences. Continuously iterate and improve your app based on user feedback and changing market trends.
Remember, the success of your social media app relies on delivering a seamless user experience and continuously evolving to meet the needs and expectations of your target
audience. Stay proactive, listen to your users, and strive for continuous improvement.
In conclusion, developing a successful social media app requires careful planning, strategic execution, and a user-centric approach. By understanding the market, identifying your target audience, defining your app's features and functionality, and choosing the right technology stack, you can create an app that captivates users and drives meaningful engagement. Through thorough testing, effective launch and marketing strategies, and ongoing performance monitoring, you can continuously improve your app and stay ahead of the competition. So, take these essential steps, unlock the secrets of successful social media app development, and create an app that revolutionizes the way we connect and engage in the digital world.
For custom software development, visit us at Zee Palm
Check out free Flutter Components, visit Flutter Components Library
Pros and Cons of Cross-Platform Development
Want to reach millions on both iPhones and Androids with just one app?
Cross Platform app development has become a major player in the mobile app world, they are designed to work across multiple operating systems using a single codebase. This codebase is translated to function on different devices, saving time, resources, and potentially reaching a wider audience. However, like technological advancement, there are complexities to navigate.
In this article we will have a closer look at cross-platform development, unveiling its advantages and limitations.
The Pros of Cross-Platform Development:
1. Cost-Efficiency
Cross-platform app development significantly reduces development costs by allowing developers to write a single codebase that can be deployed across multiple platforms. Eliminating the need for separate development teams and reducing the time and resources required to maintain multiple codebases.
2. Wider Market Reach
Gone are the days of choosing between Apple and Android users. With a single codebase, you tap into both sides of the mobile market, maximizing your potential user base. Businesses can maximize their audience reach and potential revenue streams
3. Accelerate to Market
By leveraging cross-platform frameworks such as Flutter or Xamarin, developers can accelerate the development process and bring their products to market more quickly. These frameworks offer features like hot reload, allowing developers to instantly view changes without recompiling the entire app. This provides businesses with a competitive edge by releasing their products ahead of time.
4. Consistent UI
Cross-platform development ensures a consistent user experience across different devices and operating systems. By maintaining a unified codebase, developers can ensure that users receive the same level of functionality, design, and performance, regardless of the platform they are using. This consistency enhances user satisfaction and loyalty, leading to increased engagement and retention rates
5. Streamlined Maintenance
Cross-platform development simplifies the maintenance process by enabling developers to apply updates and bug fixes universally across all platforms. Additionally, cross-platform frameworks often provide robust tools and libraries for monitoring and debugging, further streamlining the maintenance workflow.
The Success Story of Duolingo
Duolingo, the gamified language learning app, started small. Using React Native significantly reduced the development costs, allowing them to focus on their core strength.
Just with a single codebase, Duolingo instantly reached millions of users. React Native’s focus on platform-neutral UI components helped Duolingo maintain a consistent look and feel across both iOS and Android, boosting user satisfaction and loyalty.
Limitations of Cross-Platform Development
While cross-platform development offers a compelling solution for reaching a diverse audience, it’s crucial to acknowledge its potential limitations before taking the plunge.
1. Performance Trade-offs
While efficient, cross-platform apps might not always match the native performance of apps built specifically for each platform. This can lead to slower response times, lower frame rates, and a slightly less optimal user experience.
2. Limited Access to Native Features
Cross-platform frameworks might not always have complete access to the latest features and functionalities offered by each platform. This can restrict your app's potential and prevent it from utilizing cutting-edge technology.
3. Customization Constraints
Achieving a truly "native" look and feel on both platforms can be challenging. Some design elements or interactions might feel slightly off on one platform, potentially impacting user experience
4. Dependency on Third-Party Tools
Cross-platform development often relies on third-party frameworks and libraries, introducing dependencies. If a framework becomes obsolete or no longer supported, it may introduce compatibility issues and vulnerabilities.
Netflix and Quest for Native Perfection
Netflix initially embraced cross-platform development for it’s mobile app. However, they later decided to transition to native development for both iOS and Android. Why? While a single codebase initially saved resources, Netflix recognized the need for uncompromised performance and seamless integration with device-specific features like offline downloads and push notifications.
Conclusion
Cross-platform app development offers a compelling solution for businesses seeking efficiency and broad market reach. But as we have seen, it’s not without its limitations. So, Is cross-platform development a risky shortcut? There’s no one-size-fits-all answer. It depends on your app’s specific needs and goals.
For simpler apps, tight budgets, or MVP launches, cross-platform shines. However, performance-critical apps, reliant on cutting-edge features, or requiring deep platform integration might find native development a better fit. Ultimately, the choice is yours. Weigh the pros and cons carefully, considering your resources, target audience, and desired user experience.
For custom software development, visit us at Zee Palm
Check out free Flutter Components, visit Flutter Components Library
.png)
Hybrid Application Development
In today's digital age, businesses are constantly seeking innovative ways to engage with their target audience and stay ahead of the competition. One game-changing solution that has emerged is hybrid app development. This groundbreaking approach combines the best features of native and web-based apps, offering businesses a cost-effective and efficient way to reach their customers.
Unlike native apps that are built specifically for a single platform, hybrid apps are designed to work across multiple operating systems such as iOS and Android. This universality not only saves businesses valuable time and resources, but it also allows them to reach a wider audience with a single app.
One of the key advantages of hybrid app development is its ability to seamlessly integrate with existing web technologies. By leveraging HTML, CSS, and JavaScript, developers can create dynamic and engaging mobile experiences without sacrificing performance or user experience.
As businesses continue to embrace the digital landscape, hybrid app development has become an essential tool for staying competitive. With its ability to reach a wider audience, reduce development costs, and streamline operations, businesses can't afford to ignore the game-changing potential of hybrid app development.
Understanding the difference between native and hybrid apps
Native apps are built specifically for a single platform, such as iOS or Android. They provide a seamless user experience and access to the device's native features. However, developing native apps for multiple platforms can be time-consuming and expensive. On the other hand, hybrid apps are designed to work across different operating systems. They are built using web technologies like HTML, CSS, and JavaScript, wrapped in a native container. This universality not only saves businesses valuable time and resources, but it also allows them to reach a wider audience with a single app.
Benefits of hybrid app development for businesses
1. Cost-Effectiveness: Developing a hybrid app is more cost-effective than building separate native apps for each platform. With a single codebase, businesses can save on development costs and maintenance expenses.
2. Wider Reach: Hybrid apps can be deployed on both iOS and Android platforms, enabling businesses to reach a larger audience. This broader reach opens up new opportunities for customer acquisition and revenue generation.
3. Faster Time-to-Market: Hybrid app development allows businesses to streamline the development process, as they only need to build and maintain a single codebase. This significantly reduces the time required to launch the app and stay ahead of the competition.
4. Seamless Integration: Hybrid apps can seamlessly integrate with existing web technologies, making it easier to leverage existing web assets and technologies. This integration enables businesses to enhance their mobile experiences without starting from scratch.
5. Offline Functionality: Hybrid apps have the ability to function offline, allowing users to access certain features and content even without an internet connection. This is particularly useful for businesses with users who may have limited or intermittent internet access.
Factors to consider before choosing hybrid app development
Before embarking on hybrid app development, businesses need to consider several factors to ensure its suitability for their specific needs. These factors include:
1. App Complexity: The complexity of the app's features and functionality plays a crucial role in determining whether hybrid app development is the right choice. Complex apps with advanced graphics or resource-intensive processes may benefit more from native development.
2. Performance Requirements: Depending on the app's performance requirements, businesses need to assess whether hybrid app development can deliver the desired level of performance. While hybrid apps have improved significantly in recent years, they may still not match the performance of native apps in certain scenarios.
3. Target Audience: Understanding the target audience is essential in determining whether hybrid app development is the best approach. If the majority of the target audience uses a specific platform, it may be more beneficial to develop a native app for that platform.
4. Budget and Resources: Businesses need to evaluate their budget and available resources to determine whether hybrid app development is financially viable. While hybrid app development can be more cost-effective, it still requires skilled developers and ongoing maintenance.
Tools and technologies for hybrid app development
To develop hybrid apps, businesses can leverage a variety of tools and technologies. Some popular options include:

1. Apache Cordova: Formerly known as PhoneGap, Apache Cordova is an open-source framework that allows developers to build hybrid apps using web technologies. It provides access to device features through a set of JavaScript APIs.
2. React Native: React Native is a JavaScript framework developed by Facebook that allows developers to build native-like mobile apps using React. It combines the power of JavaScript with native performance, enabling businesses to create high-quality hybrid apps.
3. Ionic: Ionic is a popular open-source framework for building hybrid mobile apps using web technologies. It offers a library of pre-built UI components and a command-line interface for easy development and deployment.
4. Xamarin: Xamarin is a Microsoft-owned framework that allows developers to build hybrid apps using C#. It provides a single codebase that can be shared across multiple platforms, resulting in faster development cycles.
Steps to develop a hybrid app
The process of developing a hybrid app typically involves the following steps:
1. Planning and Design: Define the app's objectives, target audience, and features. Create wireframes and design mockups to visualise the app's user interface and user experience.
2. Development Environment Setup: Install the necessary development tools and frameworks. Set up the development environment to ensure a smooth workflow.
3. Coding and Implementation: Write the app's code using the chosen hybrid app development framework. Implement the app's features, functionality, and user interface.
4. Testing and Debugging: Thoroughly test the app on different devices and platforms to ensure its functionality and compatibility. Identify and fix any bugs or issues that arise during the testing phase.
5. Deployment and Distribution: Package the app for distribution on app stores like Google Play and the Apple App Store. Follow the respective app store guidelines and requirements to ensure a successful submission.
6. Maintenance and Updates: Continuously monitor and maintain the app to ensure its optimal performance. Regularly release updates to address bugs, improve features, and enhance the user experience.
Testing and debugging your hybrid app
Testing and debugging are crucial steps in ensuring the quality and reliability of a hybrid app. Here are some best practices for testing and debugging hybrid apps:

1. Device Testing: Test the app on various devices and screen sizes to ensure it works well across different platforms. Pay attention to performance, user interface, and functionality.
2. Automated Testing: Utilise automated testing frameworks and tools to streamline the testing process. Automated tests can help identify bugs and issues more efficiently, saving time and effort.
3. User Acceptance Testing: Involve real users in the testing process to gather feedback and identify potential usability issues. User acceptance testing helps ensure that the app meets the needs and expectations of the target audience.
4. Continuous Integration: Implement continuous integration practices to ensure that changes to the app are tested regularly and integrated smoothly. This helps catch issues early on and ensures the stability of the app.
Optimising hybrid app performance
Optimising the performance of a hybrid app is crucial for providing a smooth and responsive user experience. Here are some optimization techniques to consider:
1. Minify and Compress Code: Minify and compress JavaScript, CSS, and HTML files to reduce their size and improve loading times.
2. Image Optimization: Optimise images by compressing them without sacrificing quality. Use appropriate image formats and sizes to minimise file sizes.
3. Caching: Implement caching mechanisms to store frequently accessed data locally, reducing the need for repeated server requests.
4. Lazy Loading: Load only the necessary resources and content when needed, improving initial load times and overall performance.
5. Code Optimization: Identify and optimise any performance bottlenecks in the app's code. Use efficient algorithms and data structures to improve speed and efficiency.
Popular hybrid app development frameworks
There are several popular hybrid app development frameworks available today. These frameworks provide developers with the tools and resources needed to build high-quality hybrid apps. Some of the most popular frameworks include:
1. Ionic: Ionic is an open-source framework that offers a library of pre-built UI components and tools for building hybrid apps. It has a large and active community of developers, making it easy to find support and resources.
2. React Native: React Native is a JavaScript framework developed by Facebook. It allows developers to build native-like mobile apps using React. React Native provides a rich set of components and APIs that enable developers to create high-performance hybrid apps.
3. Flutter: Flutter is a UI toolkit developed by Google for building natively compiled hybrid apps. It uses a single codebase to create apps for multiple platforms, including iOS, Android, and the web. Flutter offers a fast and expressive development experience.
4. Xamarin: Xamarin is a Microsoft-owned framework that allows developers to build hybrid apps using C#. It provides a rich set of tools and libraries for building cross-platform apps with native performance.
Conclusion: Embracing the future of app development
As businesses continue to embrace the digital landscape, hybrid app development has become an essential tool for staying competitive. With its ability to reach a wider audience, reduce development costs, and streamline operations, businesses can't afford to ignore the game-changing potential of hybrid app development. By understanding the difference between native and hybrid apps, considering key factors before choosing hybrid app development, and leveraging the right tools and technologies, businesses can embark on a successful journey towards creating innovative and engaging mobile experiences. The future of app development lies in the hands of businesses willing to embrace the power of hybrid apps in the digital age.
For custom software development, visit us at Zee Palm
Check out free Flutter Components, visit Flutter Components Library

What does it take to build a software development agency?
Are you looking to dive into the world of app development agencies and unlock the secrets to success? Look no further! In this article, we will uncover the key strategies that will help your agency thrive and grow in this highly competitive industry.
Building a successful app development agency takes more than just technical know-how. It requires a deep understanding of the market, a clear vision, and the ability to deliver high-quality products that meet the needs of your clients.
From attracting top talent to leveraging the latest technologies, we will explore the best practices that successful app development agencies employ to stay ahead of the game. We will also delve into the importance of effective project management, client communication, and staying adaptable in a rapidly evolving landscape.
Whether you are a seasoned app development agency or just getting started, this article will provide you with actionable insights and proven strategies for driving growth and success. So, let's unveil the secrets together and take your app development agency to new heights!
Key qualities of successful app development agencies
In order to thrive in the competitive world of app development agencies, it is important to possess certain key qualities that set you apart from the rest. Successful app development agencies have a clear vision, a deep understanding of the market, and the ability to deliver high-quality products that meet the needs of their clients.
First and foremost, having a clear vision is crucial. A successful app development agency knows what it wants to achieve and has a roadmap to get there. This vision serves as a guiding light for the agency and helps in making informed decisions.
Secondly, understanding the market is essential. Keeping up with the latest trends and consumer demands allows successful agencies to stay ahead of the competition. By conducting market research and analyzing user behavior, app development agencies can identify gaps in the market and create solutions that meet the needs of their target audience.
Lastly, delivering high-quality products is the cornerstone of success for any app development agency. This requires a skilled and experienced team that is dedicated to excellence. Quality assurance processes, regular testing, and continuous improvement are all critical components of delivering top-notch products.
Understanding the app development process
Before diving into the strategies and best practices, it is important to have a solid understanding of the app development process. The app development process typically consists of several stages, including ideation, design, development, testing, and deployment.
The first stage, ideation, involves brainstorming and conceptualizing the app idea. This is where the vision for the app is established and the goals and objectives are defined. It is important to involve stakeholders and gather feedback during this stage to ensure the idea is
viable and aligns with the needs of the target audience.
Once the idea is finalized, the design stage begins. This involves creating wireframes, user interface designs, and user experience flows. Design plays a crucial role in the success of an app as it determines how users interact with the app and how intuitive and visually appealing it is.
After the design is complete, the development stage kicks off. This is where the app is actually built and the code is written. It is important to follow best practices and coding standards to ensure the app is scalable, efficient, and maintainable.
Once the development is complete, thorough testing is conducted to identify any bugs or issues. This includes functional testing, performance testing, and user acceptance testing. It is crucial to fix any identified issues before deploying the app to ensure a smooth user experience.
Finally, the app is deployed to the app stores or distributed to clients. It is important to have a well-thought-out deployment strategy to ensure a seamless launch and to maximize user adoption.
Importance of user experience in app development

User experience (UX) plays a critical role in the success of any app. It determines how users interact with the app, how easy it is to navigate, and how satisfied users are with their overall experience. A positive user experience can lead to higher user engagement, increased retention, and positive reviews, while a poor user experience can result in low user adoption and negative feedback.
To ensure a great user experience, app development agencies should prioritize user-centered design. This involves understanding the needs and expectations of the target audience and designing the app accordingly. Conducting user research, creating user personas, and testing the app with real users can provide valuable insights and help refine the user experience.
Navigation and usability are also key factors in creating a great user experience. The app should be intuitive and easy to navigate, with clear and concise menus and buttons. Users should be able to accomplish their tasks quickly and effortlessly, without confusion or frustration.
Visual design is another important aspect of user experience. The app should have a visually appealing and cohesive design that aligns with the brand and target audience. Consistency in colors, typography, and overall aesthetics helps create a seamless and enjoyable user experience.
Regular testing and feedback gathering are essential to continuously improve the user experience. App development agencies should conduct usability tests, gather user feedback, and analyze app analytics to identify areas for improvement and make data-driven decisions.
Effective project management for app development agencies
Effective project management is crucial for the success of app development agencies. It ensures that projects are delivered on time, within budget, and meet the expectations of clients. A well-managed project can lead to satisfied clients, repeat business, and positive referrals.
One key aspect of project management is establishing clear project goals and objectives. This involves understanding the client's requirements, defining the scope of work, and setting realistic timelines and budgets. A clear project plan helps keep everyone on the same page and ensures that the project stays on track.
Communication is another vital component of effective project management. Regular and open communication with clients helps manage expectations, address any concerns or issues, and keep the client informed about the progress of the project. It is important to establish a communication plan and use project management tools to facilitate collaboration and transparency.
Managing resources effectively is also critical for successful project management. App development agencies should have a clear understanding of their team's capabilities and availability. Assigning tasks and responsibilities based on individual strengths and expertise ensures efficient utilisation of resources and prevents bottlenecks.
Risk management is another important aspect of project management. App development projects often come with risks and uncertainties. Identifying potential risks, developing contingency plans, and regularly monitoring and mitigating risks can help minimise disruptions and keep the project on track.
Finally, continuous monitoring and evaluation are essential for effective project management. Regularly tracking progress, reviewing milestones, and conducting post-project evaluations can provide valuable insights and help identify areas for improvement in future projects.
Building a strong development team
A strong and talented development team is the backbone of any successful app development agency. Hiring and retaining top talent is crucial for delivering high-quality products, meeting client expectations, and staying ahead of the competition.

When building a development team, it is important to define the roles and responsibilities clearly. This ensures that each team member knows their role and contributes effectively to the project. It is also important to consider a diverse set of skills and expertise to cover all aspects of app development, including design, front-end development, back-end development, and quality assurance.
Recruiting the right talent is a critical step in building a strong development team. App development agencies should leverage various channels, such as job boards, professional networks, and industry events, to attract top talent. It is important to thoroughly assess candidates' technical skills, experience, and cultural fit to ensure a good match.
Once the team is in place, it is crucial to foster a positive and collaborative work environment. Encouraging open communication, providing opportunities for professional growth, and recognizing and rewarding achievements can help motivate and retain talented team members.
Continuous learning and skill development are also important for a strong development team. Technology is constantly evolving, and staying up to date with the latest trends and advancements is crucial. App development agencies should provide resources and opportunities for team members to enhance their skills and knowledge through training, workshops, and industry events.
Marketing and promoting your app development agency
In a highly competitive industry, marketing and promoting your app development agency is essential for attracting clients and driving growth. Effective marketing strategies can help position your agency as a trusted and reliable partner, increase brand visibility, and generate leads.

One of the key marketing strategies for app development agencies is showcasing your portfolio. Highlighting successful projects and client testimonials can build credibility and demonstrate your expertise. Creating a visually appealing and user-friendly website that showcases your agency's capabilities and showcases your past work can make a strong impression on potential clients.
Content marketing is another powerful tool for promoting your app development agency. Creating informative and valuable content, such as blog articles, white papers, and case studies, can position your agency as a thought leader in the industry. Sharing this content on your website, social media platforms, and industry forums can help attract organic traffic and generate leads.
Networking and building relationships with industry influencers and potential clients are also important for marketing your app development agency. Attending industry events, participating in webinars, and engaging in online communities can help you establish connections and gain exposure. Building a strong network can lead to referrals and collaborations, which can contribute to the growth of your agency.
Paid advertising can also be an effective marketing strategy for app development agencies. Platforms like Google Ads and social media advertising allow you to target specific audiences and generate leads. It is important to carefully plan and optimise your advertising campaigns to ensure a good return on investment.
Client management and relationship building

Client management and relationship building are crucial for the success and growth of any app development agency. Satisfied clients not only lead to repeat business but also become advocates for your agency and refer you to others.
Effective client management starts with understanding the client's needs and expectations. Regular communication and active listening help build trust and ensure that the client feels
heard and understood. It is important to establish a clear channel of communication and provide regular updates on the progress of the project.
Setting realistic expectations is also important for client management. App development projects can be complex and time-consuming, and it is important to manage the client's expectations regarding timelines, budgets, and scope. Being transparent about potential challenges and risks helps build trust and prevents misunderstandings.
Providing exceptional customer service is another key aspect of client management. Being responsive, addressing concerns promptly, and going above and beyond to exceed client expectations can help build strong and long-lasting relationships. Regularly seeking feedback and conducting post-project evaluations can also provide valuable insights for improving client satisfaction.
Building strong relationships with clients goes beyond project delivery. Staying in touch with past clients, providing ongoing support and maintenance, and offering additional services can help foster loyalty and lead to repeat business. It is important to nurture these relationships and maintain open lines of communication even after the project is completed.
Keeping up with industry trends and technological advancements
The world of app development is constantly evolving, with new technologies and trends emerging regularly. Staying up to date with these advancements is crucial for app development agencies to stay relevant, provide cutting-edge solutions, and drive growth.
One way to keep up with industry trends is by actively participating in industry events and conferences. These events often feature keynote speakers, workshops, and networking opportunities that provide valuable insights and help you stay ahead of the curve. Attending these events allows you to learn from industry experts, connect with peers, and gain exposure to the latest technologies.

Networking and engaging with industry communities is also important for staying up to date. Online forums, social media groups, and professional networks provide platforms for discussing industry trends, sharing insights, and learning from others. Actively participating in these communities allows you to tap into the collective knowledge and stay informed about the latest developments.
Continuous learning and skill development are also important for keeping up with industry trends. App development agencies should encourage their team members to enhance their skills and knowledge through training programs, workshops, and certifications. By investing in continuous learning, you ensure that your agency remains at the forefront of technological advancements.
Regularly conducting market research and competitor analysis is another strategy for staying updated. Monitoring the activities of your competitors, analyzing industry reports, and keeping an eye on emerging technologies allows you to identify new opportunities and make informed business decisions.
Conclusion and key takeaways
Building a successful app development agency requires a combination of technical expertise, market understanding, and effective project management. By focusing on the key qualities of successful agencies, understanding the app development process, prioritizing user experience, and implementing effective project management strategies, you can set your agency up for growth and success.
Building a strong development team, marketing and promoting your agency, and fostering strong client relationships are also critical for driving growth. Finally, staying up to date with industry trends and technological advancements ensures that your agency remains competitive and provides cutting-edge solutions to clients.
Remember, success in the app development industry comes with continuous learning, adaptability, and a commitment to delivering high-quality products. By applying the strategies and best practices outlined in this article, you can unlock the secrets to success and take your app development agency to new heights. So, get ready to dive in, embrace the challenges, and thrive in this exciting and rapidly evolving industry!
For custom software development, visit us at Zee Palm
Check out free Flutter Components, visit Flutter Components Library

App Development Costs: Budgeting and Maximising ROI
Are you considering developing an app for your business but unsure about the costs involved? Understanding app development costs is essential for budgeting effectively and maximising your return on investment (ROI). In this article, we will explore the key factors that influence app development costs and provide you with practical tips on how to budget for your project.
Developing an app involves various components, including design, development, testing, and deployment. Each of these stages contributes to the overall cost of the project. Factors such as the complexity of your app, the features you want to incorporate, the platform(s) you plan to target, and the level of customization required all impact the cost.
By gaining a deeper understanding of these factors and how they influence app development costs, you can make informed decisions and create a realistic budget. This will enable you to allocate resources effectively and maximise the return on your investment.
So, if you're ready to take the next step in app development and want to ensure you budget effectively, keep reading for valuable insights and practical tips to guide you along the way.
Factors that influence app development cost
The cost of app development can vary significantly based on several factors. Understanding these factors will help you anticipate and plan for the expenses involved. Here are the key factors that influence app development cost:
1. Complexity of the App
The complexity of your app plays a crucial role in determining the overall cost. Simple apps with basic functionality will generally cost less to develop compared to complex apps that require advanced features, integration with external systems, and customised user interfaces. The more complex the app, the more time and expertise it will require, resulting in higher development costs.
2. Features and Functionality
The features and functionality you want to incorporate into your app will have a direct impact on the development cost. Apps with basic features such as user registration, content display, and basic interactions will be less expensive to develop. However, if you require advanced features like real-time notifications, social media integration, payment gateways, or complex algorithms, the development cost will increase accordingly.
3. Platform(s) and Devices
The platform(s) and devices you choose to target also influence app development costs. Developing an app for a single platform, such as iOS or Android, will generally cost less compared to developing for multiple platforms. Additionally, the cost may vary depending on the devices you plan to support, such as smartphones, tablets, or wearables. Each platform and device requires specific programming languages, frameworks, and testing, which can increase the development cost.
4. UI/UX Design
The user interface (UI) and user experience (UX) design of your app are crucial for its success. Investing in intuitive and visually appealing designs can enhance user engagement and satisfaction. However, high-quality UI/UX design comes at a cost. The complexity of the design, the number of screens, custom animations, and interactions all contribute to the overall development cost.
5. Customization Requirements
If you require extensive customization of your app to align with your brand identity or specific business needs, it will impact the development cost. Customizing app elements such as colors, fonts, layouts, and branding elements requires additional time and effort from designers and developers, resulting in higher costs.
6. Integration with Third-Party Systems
If your app needs to integrate with external systems or APIs, such as payment gateways, social media platforms, or analytics tools, it will add to the overall development cost. Integrations require additional development and testing to ensure seamless data exchange and functionality between the app and the third-party systems.
By considering these factors and discussing them with your development team, you can estimate the app development cost more accurately and plan your budget accordingly. Next, let's delve into the different types of app development costs to gain a comprehensive understanding of the expenses involved.
Understanding the different types of app development costs
When it comes to app development costs, it's important to have a clear understanding of the different types of expenses involved. This will help you allocate your budget effectively and avoid any surprises along the way. Here are the major types of app development costs:
1. Development Cost
The development cost includes the expenses associated with designing, coding, and testing your app. This typically accounts for the largest portion of the overall app development budget. The complexity of your app, the number of features, and the platforms you choose to target will determine the development cost.
2. Design Cost
The design cost covers the expenses related to creating the UI/UX design for your app. This includes wireframing, prototyping, visual design, and user testing. Investing in high-quality design is crucial to creating an engaging and user-friendly app. The design cost may vary

depending on the complexity of the design and the number of screens involved.
3. Infrastructure Cost
The infrastructure cost includes expenses related to hosting, server setup, and maintenance. If your app requires a backend infrastructure to store data, handle user accounts, or manage transactions, you need to consider the infrastructure cost in your budget. Cloud hosting services like Amazon Web Services (AWS) or Microsoft Azure are popular choices for app infrastructure.
4. Testing and Quality Assurance Cost
Testing and quality assurance are essential to ensure your app functions correctly and provides a seamless user experience. The cost associated with testing varies depending on the complexity of your app and the number of devices and platforms you target. It includes activities such as functional testing, compatibility testing, performance testing, and security testing.

5. Deployment and App Store Cost
Once your app is ready, you need to deploy it to the respective app stores, such as the Apple App Store or Google Play Store. Each app store charges a fee for publishing and maintaining your app. You should consider these costs in your budget, along with any additional expenses for app updates, bug fixes, and ongoing maintenance.
Understanding these different types of app development costs will help you create a comprehensive budget and avoid any financial surprises during
the development process. In the next section, we will explore how to effectively budget for your app development project.
Budgeting for app development
Budgeting for app development requires careful planning and consideration of various factors. Here are some key steps to help you create a realistic budget for your app development project:
1. Define Your App's Scope
Before allocating a budget, clearly define the scope of your app. Determine the key features, functionality, and platforms you want to target. This will help you estimate the development cost and allocate resources accordingly.
2. Research Development Costs
Research the average development costs for apps similar to yours. Look for case studies, industry benchmarks, or consult with experienced app developers to get a better understanding of the potential costs involved. This will help you set realistic expectations and avoid over or under-budgeting.
3. Prioritize Features and Functionality
If you have a limited budget, prioritize the must-have features and functionality for your app. Consider what is essential for launch and what can be added in future updates. This will help you allocate your budget effectively and ensure you deliver a minimum viable product (MVP) within your budget constraints.
4. Obtain Quotes from Multiple Development Agencies
Reach out to multiple app development agencies and request quotes for your project. Provide them with a detailed brief outlining your app's requirements, features, and design preferences. Comparing quotes from different agencies will give you an idea of the average cost and help you choose the right development partner.
5. Consider Ongoing Maintenance and Updates
Don't forget to allocate a budget for ongoing maintenance and updates. App development is not a one-time cost; it requires continuous improvement, bug fixes, and updates to keep up with evolving technologies and user expectations. Allocating a portion of your budget for ongoing maintenance will ensure the long-term success of your app.
By following these steps and considering the various factors involved, you can create a realistic budget for your app development project. Next, let's explore strategies for maximizing ROI in app development.
Maximizing ROI in app development

Developing an app is a significant investment, and maximizing your return on investment (ROI) is crucial for the success of your business. Here are some strategies to help you maximize ROI in app development:
1. Validate Your App Idea
Before diving into development, validate your app idea. Conduct market research, gather feedback from potential users, and assess the demand for your app. This will help you ensure there is a market need for your app and increase the chances of success.
2. Focus on Core Functionality
While it's tempting to include numerous features in your app, focusing on core functionality is key to maximizing ROI. Identify the key value proposition of your app and ensure it is well-implemented and user-friendly. This will help you deliver a focused and impactful app that resonates with your target audience.
3. Implement Analytics and Tracking
Integrate analytics and tracking tools into your app to gather data on user behavior, engagement, and conversion rates. Analyzing this data will provide valuable insights into user preferences and help you make data-driven decisions for future updates and improvements. By understanding your users better, you can further optimize your app and maximize ROI.
4. Plan for Monetization
If your app is intended to generate revenue, plan for monetization from the beginning. Consider various monetization models such as in-app purchases, subscriptions, advertising, or a combination thereof. By aligning your app's functionality with your monetization strategy, you can maximize revenue potential and ROI.
5. Continuously Improve and Update
To maximize ROI, it's essential to continuously improve and update your app based on user feedback and market trends. Monitor user reviews, conduct usability testing, and gather feedback to identify areas for improvement. Regularly releasing updates and new features will keep users engaged and increase the chances of app success.
By implementing these strategies, you can increase the ROI of your app development project and achieve long-term success. However, it's also important to consider cost-effective app development strategies to ensure you stay within your budget. Let's explore some cost-effective app development strategies in the next section.
Strategies for cost-effective app development

While app development can be a significant investment, there are several strategies you can implement to keep costs under control without compromising on quality. Here are some cost-effective app development strategies:
1. Minimum Viable Product (MVP)
Developing an MVP allows you to launch your app with essential features and gather user feedback early on. By focusing on core functionality and releasing a scaled-down version of your app, you can save development time and costs. Based on user feedback, you can then prioritize and add features in future updates.
2. Cross-Platform Development
Consider cross-platform development frameworks like React Native or Flutter to build your app for multiple platforms using a single codebase. This approach can significantly reduce development time and costs compared to developing separate native apps for each platform.
3. Agile Development Methodology
Adopting an agile development methodology allows for iterative development and frequent feedback cycles. This helps identify and address issues early on, reducing the likelihood of costly rework. Agile development also allows for flexibility in adapting to changing requirements and priorities.
4. Open-Source Libraries and Tools
Utilize open-source libraries and tools to speed up development and reduce costs. There are numerous free and open-source resources available for various app development tasks, such as UI components, data management, and analytics integration.
5. Outsource Non-Core Tasks
Consider outsourcing non-core tasks, such as UI/UX design or backend development, to specialized agencies or freelancers. This can help you tap into expertise while reducing the overall development cost. However, ensure effective communication and collaboration with the outsourcing partners to ensure the desired outcomes.
Implementing these cost-effective strategies can help you optimise your app development budget and achieve a balance between quality and cost. To further manage app development costs effectively, here are some additional tips to consider.
Tips for managing app development costs
Managing app development costs requires careful planning, monitoring, and control. Here are some tips to help you effectively manage app development costs:
1. Set a Realistic Budget
Start by setting a realistic budget based on your app's requirements and market research. Ensure the budget accounts for all the different types of app development costs we discussed earlier. Having a clear budget will help you allocate resources effectively and avoid overspending.
2. Track and Monitor Expenses
Regularly track and monitor your app development expenses to stay on top of your budget. Use project management tools or spreadsheets to record and analyze expenditure. This will allow you to identify any cost overruns or areas where you can optimize spending.
3. Prioritize Features and Phases
If you have budget constraints, prioritize the features and development phases based on their importance and potential impact. By adopting an incremental development approach, you can release a functional app with essential features first and gradually add more features in subsequent updates.
4. Communicate and Collaborate Effectively
Maintain open and transparent communication with your development team throughout the project. Regularly discuss progress, challenges, and budget-related matters. Ensure everyone is aligned with the budgetary goals and work together to find cost-effective solutions.
5. Plan for Contingencies
App development projects can encounter unexpected challenges or changes that may impact the budget. Plan for contingencies by allocating a portion of your budget for unforeseen expenses. This will provide a safety net and help you address any unexpected situations without derailing the project.
By implementing these tips, you can effectively manage app development costs and ensure your project stays within budget. To gain further insights, let's explore some case studies of successful app development within budget.
Case studies: Successful app development within budget
Examining successful app development case studies can provide valuable insights into how organizations managed to develop high-quality apps while staying within budget constraints. Here are a few examples of successful app development projects that achieved their objectives without exceeding the allocated budget:
1. Case Study: XYZ Fitness App
XYZ Fitness, a fitness startup, wanted to develop a mobile app that would provide personalized workout plans, track progress, and offer real-time coaching. With a limited budget, they opted to build an MVP focusing on core functionality first. They utilised
Outsourcing vs in-house app development: Pros and cons
When it comes to app development, one of the first decisions you'll need to make is whether to outsource the project or handle it in-house. Both options have their pros and cons, and it's crucial to consider them before making a decision.
Conclusion: Key takeaways for budgeting and maximising ROI in app development
Developing an app is an investment that requires careful budgeting and planning. To maximize your return on investment (ROI), keep the following key takeaways in mind:
1. Understand the Factors: Gain a deep understanding of the factors that influence app development costs. Consider the complexity of your app, the features you want to incorporate, the platforms you plan to target, and the level of customization required.
2. Research and Compare: Take the time to research and compare different app development companies if you decide to outsource. Look for reputable companies with a track record of delivering successful projects within budget and on time.
3. Define Clear Requirements: Clearly define your app's requirements and objectives to ensure effective communication with your development team. This will minimize misunderstandings and delays during the development process.
4. Create a Realistic Budget: Based on your research and understanding of the factors influencing app development costs, create a realistic budget. Account for both the initial development costs and ongoing maintenance and updates.
5. Consider Long-term ROI: Look beyond the initial development costs and consider the long-term return on investment. A well-developed app can provide ongoing value to your business, increase customer engagement, and generate revenue.
By following these key takeaways, you can budget effectively and maximize your ROI in app development. Remember, app development is not just about the cost; it's about creating a valuable and engaging experience for your users while achieving your business goals.
So, take the leap and turn your app idea into a reality. With the right budgeting and planning, you can unlock the potential of app development and propel your business to new heights.
For custom software development, visit us at Zee Palm
Check out free Flutter Components, visit Flutter Components Library
Ready to Build Your Product, the Fast, AI-Optimized Way?
Let’s turn your idea into a high-performance product that launches faster and grows stronger.